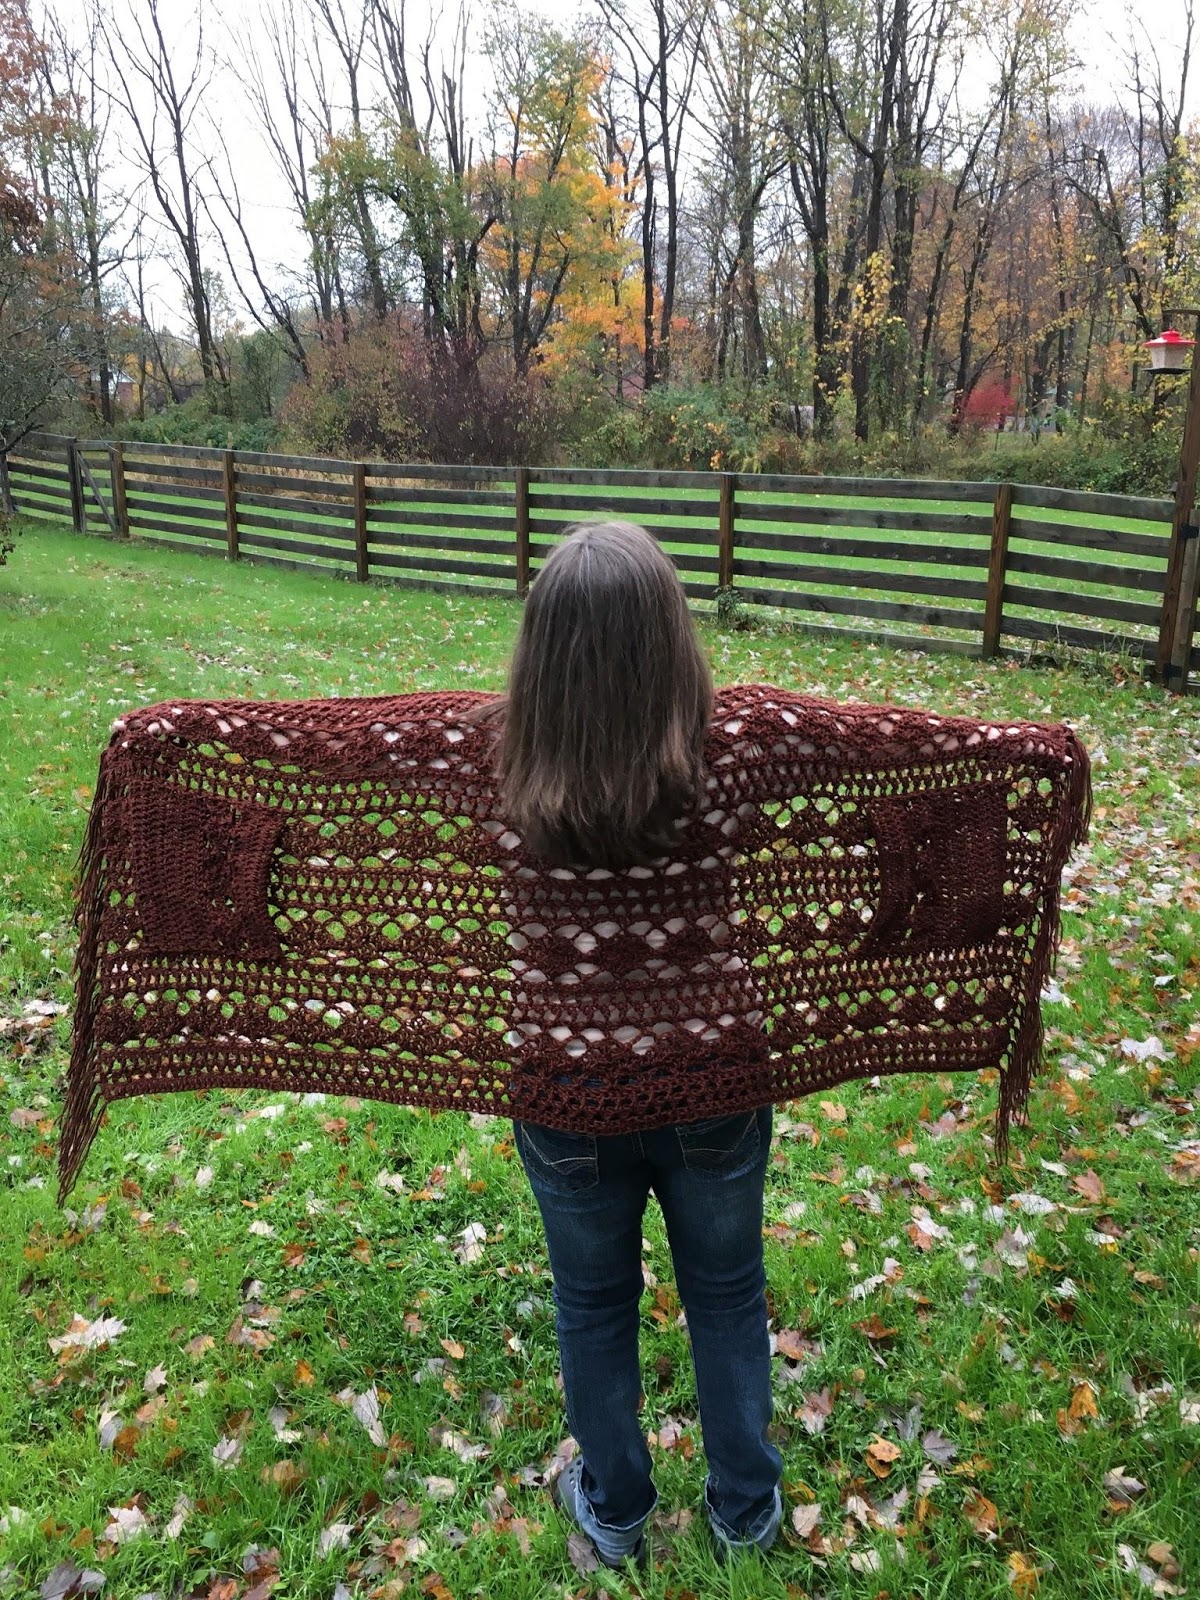
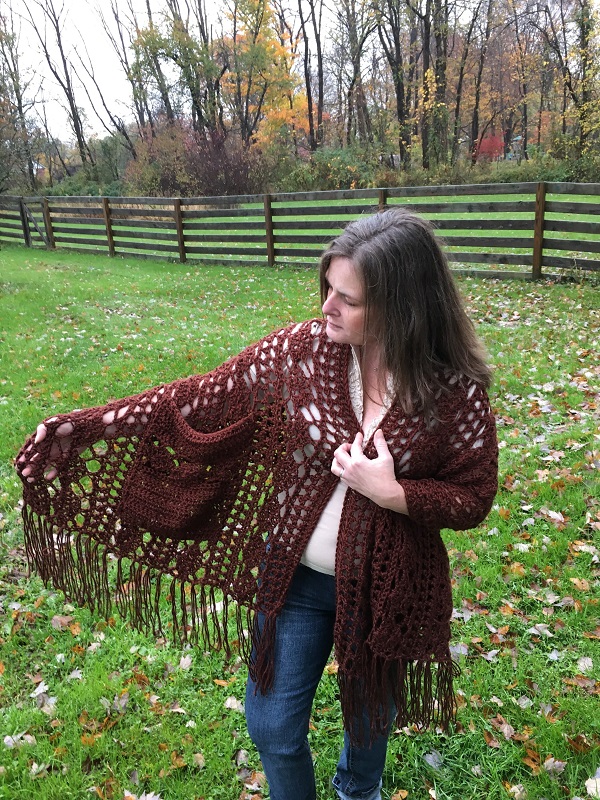
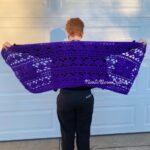
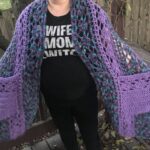
I am happy to introduce to you a brand new crochet design of mine, the Pocket Full of Diamonds Shawl! This is the perfect accessory for those cool days and cool nights no matter the weather. You can crochet this beautiful shawl for you or any woman in your life!
This page contains affiliate links. You can make a purchase using these links that I provide where I may receive compensation (at no added cost to you.) Purchases you make will help keep my website, Etsy Shop, and my Ravelry Store going and provide quality designs just for you!
Don’t forget to sign up for my Newsletter. I have SO many great things scheduled already for 2021! Giveaways, CALs, new FREE crochet patterns, and more!
[yikes-mailchimp form=”1″]
The sizes you will find here on my website are Large, XLarge and 1XLarge. In this pattern you will find Picture and Video Tutorials. If you prefer to crochet a different size, you can find all 8 sizes to choose from. You can find all sizes of the Pocket Full of Diamonds Shawl crochet pattern at Ravelry, LoveCraft and Etsy for a small fee of $6.
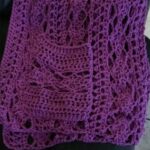
The Pocket Full of Diamonds uses the Argyle Shell Stitch that you can find in most of my recent crochet patterns such as the Diamond Summer Tee, the Diamonds Poncho, and the Wrapped in Diamonds Wrap. You can find these crochet patterns at Ravelry, LoveCraft, and Etsy using the links at the bottom of this post.


I am currently working on 3 more new designs and an eBook that feature the Argyle Shell Stitch. My new designs I am working on are a child size crochet pattern for the Pocket Full of Diamonds Shawl and the Diamond Arches Shawl, the adult version of the Diamond Arches Shawl, Diamonds Square, and the Diamond Arches Tee. The eBook will also feature a Diamond Square that will be used in a afghan CAL in February 2021. So be on the look out for some of these designs in 2021!

As I stated above I posted the Pocket Full of Diamonds Shawl as a free crochet pattern for sizes Large, XLarge, and 1XLarge. Scroll down and you will find all the information you need to crochet the Pocket Full of Diamonds Shawl. If you prefer to crochet a different size, you can find all 8 sizes to choose from. You can find all sizes of the Pocket Full of Diamonds Shawl crochet pattern at Ravelry, LoveCraft and Etsy for a small fee of $6.
Materials:
#4 Medium Weight Yarn
US L Hook or 8mm Hook
US M Hook or 9 mm Hook
Alternate Chain 2 here
Video Tutorials:
Argyle Shell Stitch here
Wrapped Double Crochet here
Foundation Double Crochet here
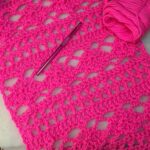
Argyle Shell Stitch
dc, ch 1, dc, ch 1, dc all in the same stitch
Notes:
Stitch count is 8 + 1
Sizes are XS, S, M, L, XL, 1X, 2X, 3X
ch 1 does NOT counts as a stitch
alt ch 2 does count as a Double Crochet
Stitches Used/Abbreviations:
ch = chain
wdc = wrapped double crochet
sl st = slip stitch
fdc = foundation double crochet
sc = single crochet
st = stitch(es)
dc = double crochet
alt ch 2 = alternate chain 2
shell = argyle shell stitch
Gauge:
US L Hook or 8 mm
6 Wrapped DC x 7 Rows = 4.5”
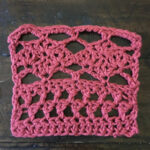
Gauge Swatch Example
Using the M Hook (9 mm)
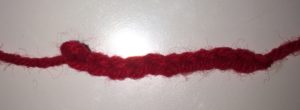
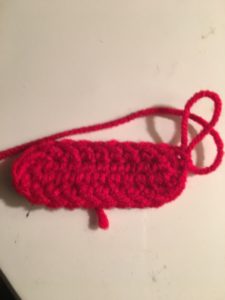
R1 (RS): FDC 17 turn
Optional: ch 19, dc in 4th st from hook, and dc in remaining st. (17 dc) turn
Switch to L Hook (8 mm)
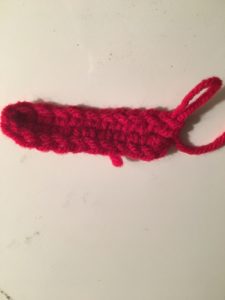
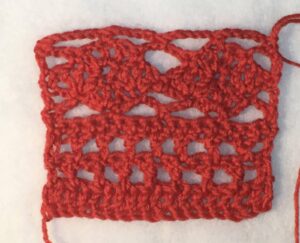
R2: alt ch 2, *sk 1 st, dc in the next st, wdc around the post of the dc just made* Repeat from * to * until the last 2 st. sk 1 st and dc in last st. (2 dc & 7 wdc)
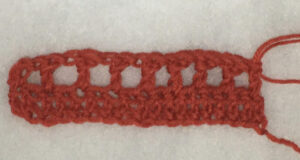
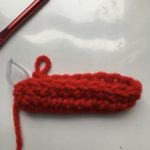
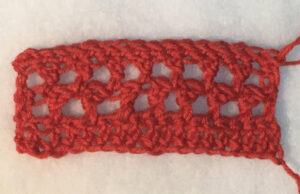
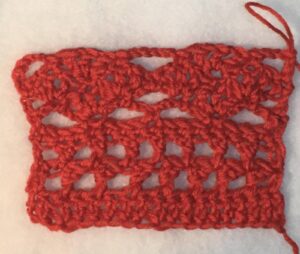
Row 2
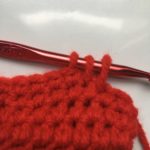
R3: alt ch 2, *sk 1 st, dc in the next st, wdc around the post of the dc just made* Repeat from * to * until last st. dc in the last st. (2 dc & 7 wdc)
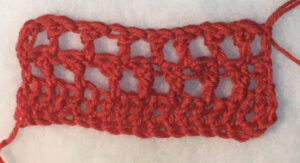
Row 3
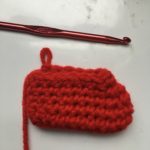
R4: ch 1 and turn. 2 sc in 1st st and sc in each st remaining. (17 sc)
Row 4
R5: ch 1 and turn. sc in 1st st *Ch 5, skip 3 sc, sc in the next st*. Repeat from * to * to the end. (4 ch 5 & 5 sc)
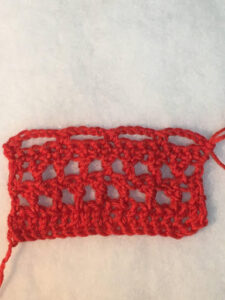
Row 5
R6: ch 5 and turn. sc in ch 5 sp, shell in next sc, sc in next ch 5 sp. (this uses the 1st 2 ch 5 spaces) *ch 5, sc in next ch 5 sp, shell in next sc, sc in next ch 5 sp. (this uses the last 2 ch spaces) then ch 2 and dc in the last sc. (4 sc, 2 shells, & 1 dc)
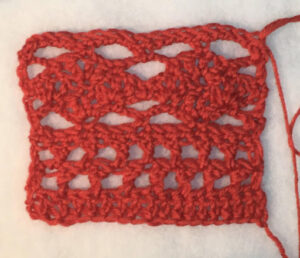
Row 6
R7: ch 1 and turn. sc in 1st st, shell in next sc, sc in center dc of shell, shell in next sc. *sc in next ch 5 sp, shell in next sc, sc in center dc of shell, shell in next sc* sc in 3rd ch of last ch 5 space. (5 sc & 4 shells)
Row 7
R8: ch 5 and turn. sc in center dc of shell, shell in next sc, sc in center dc of shell, *ch 5, sc in center dc of shell, shell in next sc, sc in dc of shell.* then ch 2 and dc in last sc. (2 ch 5 spaces, 4 sc, 1 ch 2 space, & 1 dc)
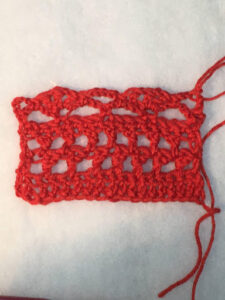
Row 8
R9: ch 1, turn, sc in 1st st. Ch 5, sc in center dc of shell, ch 5, sc in ch 5 sp, ch 5, sc in center dc of shell, ch 5, sc in 3rd ch of last ch 5 space. (5 sc & 4 ch 5 spaces)
Row 9
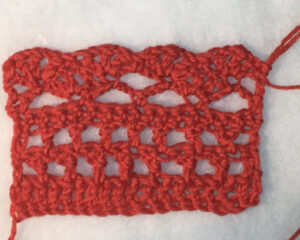
R10: ch 1 and turn. sc in 1st st, *3 sc in ch 5 space, sc in sc.* Repeat from * to * to last sc. (17 sc)
Row 10
………………………………………………………………………………………………………………
|
Size |
Short Side |
Long Side |
Number of Diamonds |
Estimated Yardage |
|
Large |
28.5” |
73.5” |
21 |
950-1025 |
|
XLarge |
33” |
77” |
22 |
1100-1200 |
|
1XLarge |
33” |
80.5” |
23 |
1200-1350 |
………………………………………………………………………………………………………………..
Pocket Full of Diamonds Shawl before Pockets
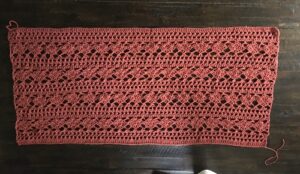
Large – XLarge – 1XLarge
Using M Hook (9 mm)
R1 (RS): fdc 169 (177, 185) turn
Optional: ch 171 (179, 187) dc in 4th st from hook and dc in each remaining st. turn 169 (177, 185) dc
Switch to L Hook (8 mm)
R2: alt ch 2, *sk 1 st, dc in next st, wdc around body of dc just made,* Repeat from * to * until the last 2 st. sk 1 st and dc in last st. turn 2 dc & 83 (87) wdc
R3: alt ch 2, *sk 1 st, dc in the next st, wdc around the post of the dc just made* Repeat from * to * until last st. dc in the last st. 2 dc & 83 (87) wdc
R4: ch 1 and turn. 2 sc in 1st st and sc in each st remaining. 169 (177, 185) sc
R5: ch 1 and turn. sc in 1st st *Ch 5, skip 3 sc, sc in the next st* Repeat from * to * to the end. 43 (45, 47) sc & 42 (44, 46) ch 5 sp
R6: ch 5 and turn. sc in ch 5 sp, shell in next sc, sc in next ch 5 sp. *ch 5, sc in next ch 5 sp, shell in next sc, sc in next ch 5 sp.* Repeat then ch 2 and dc in last sc. 42 (44, 46) sc, 21 (22, 23) ch 5 sp, 1 ch 2 & 1 dc, 21 (22, 23) shells
R7: ch 1 and turn. sc in 1st st, shell in next sc, sc in center dc of shell, shell in next sc. *sc in next ch 5 sp, shell in next sc, sc in center dc of shell, shell in next sc* Repeat from * to * then sc in 3rd ch of last ch 5 space. 43 (45, 47) sc, 42 (44, 46) shells.
R8: ch 5 and turn. sc in center dc of shell, shell in next sc, sc in center dc of shell, *ch 5, sc in center dc of shell, shell in next sc, sc in dc of shell.* Repeat. Ch 2 and dc in last sc. 42 (44, 46) sc, 24 (26, 28) ch 5 sp, 1 ch 2, & 1 dc
R9: ch 1, turn, sc in 1st st. Ch 5, *sc in center dc of shell, ch 5, sc in ch 5 sp, ch 5* Repeat from * to * sc in center dc of last shell, ch 5, sc in 3rd ch of last ch 5 space. 43 (45, 47) sc & 42 (44, 46) ch 5 sp
R10: ch 1 and turn. sc in 1st st, *3 sc in ch 5 space, sc in sc* Repeat from * to * until the end. 169 (177, 185) sc
R11-R20: Repeat R2-R10
R21-R30: Repeat R2-R10
R31-R40: Repeat R2-R10
R41-R42: Repeat R2-R3
R43: alt ch 2 and dc in each remaining st. turn 168 (176, 184) dc
R44: ch 1 and turn. sl st loosely in 1st st and each st across. 168 (176, 184) sl st
Fasten off and weave in the ends
………………………………………………………………………………………………………………

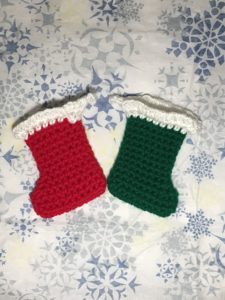
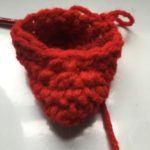
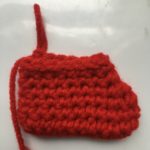
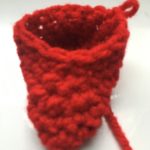
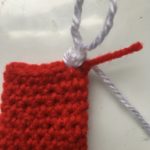
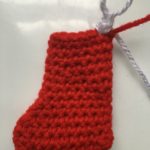
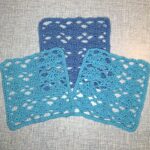
Pocket
Pockets (make 2)
ALL SIZES
**If you would like bigger pockets, add the stitch count of 8. You can also add more rows to R2-R5. If you would like smaller pockets subtract 2 rows from the top (R2-R5)**
Using M Hook (9 mm)
R1 (RS): fdc 17 turn
Optional: ch 19, dc in 4th st from hook, and dc in each remaining st. turn (17 dc)
Switch to L Hook (8 mm)
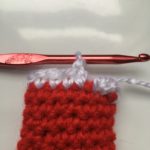
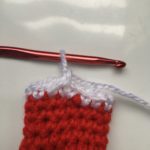
R2-R5: alt ch 2 and dc in each st across. (17 dc)
R6: ch 1 and turn. sc in the same st and each st across. (17 sc)
R7: ch 1 and turn. sc in 1st st *Ch 5, skip 3 sc, sc in the next st*. Repeat from * to * to the end. 5 sc & 4 ch 5 sp
R8: ch 5 and turn. sc in ch 5 sp, shell in next sc, sc in next ch 5 sp. *ch 5, sc in next ch 5 sp, shell in next sc, sc in next ch 5 sp.* Repeat then ch 2 and dc in sc. 4 sc, 3 ch 5 sp, 1 ch 2 sp & 1 dc
R9: ch 1 and turn. sc in 1st st, shell in next sc, sc in center dc of shell, shell in next sc. *sc in next ch 5 sp, shell in next sc, sc in center dc of shell, shell in next sc* sc in 3rd ch of last ch 5 space. 5 sc & 4 shell
R10: ch 5 and turn. sc in center dc of shell, shell in next sc, sc in center dc of shell, *ch 5, sc in center dc of shell, shell in next sc, sc in dc of shell.* Repeat. Ch 2 and dc in last sc. 4 sc, 2 shell, 2 ch 5 sp, 1 ch 2 sp & 1 dc
R11: ch 1, turn, sc in 1st st. Ch 5, *sc in center dc of shell, ch 5, sc in ch 5 sp, ch 5* Repeat. sc in center dc of shell, ch 5, sc in 3rd ch. 5 sc & 4 ch 5 sp
R12: ch 1 and turn. sc in 1st st, *3 sc in ch 5 space, sc in sc* Repeat from * to * to the end. (17 sc)
R13-R14: alt ch 2 and dc in each st across. turn (17 dc)
R15: ch 1 and turn. sl st loosely in 1st st and each st across. (17 sl st)
Leave a long tail of yarn for sewing your pockets on. Fasten off.
………………………………………………………………………………………………………………..
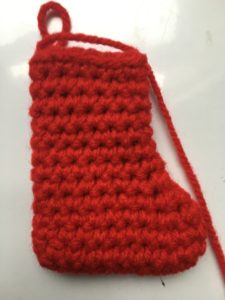
Attaching the Pockets
With the right side of your shawl facing you and the right side of your pockets facing you, center each pocket near the bottom of your shawl’s short sides.
I used a Diamond as a reference and center over 1 Diamond with the Diamond rows centered in the Pocket. If your Shawl is too big, center your pocket over your middle rows.
Sew the pockets onto your shawl using the whipstitch or whichever stitch you prefer to sew on pockets.
……………………………………………………………………………………………………………

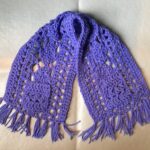
Fringe
Optional
Step 1: For each space you are going to place your fringe, cut three 14” pieces of yarn. I place mine 2” apart.
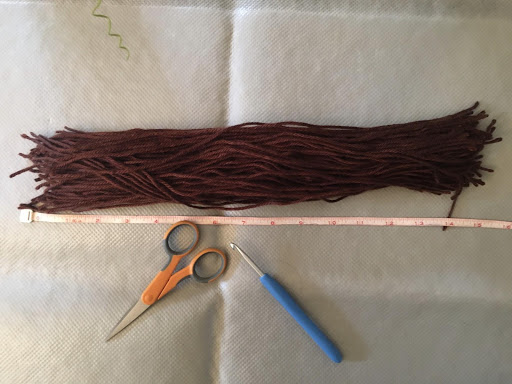
Step 2: With the right side of your shawl facing you, line up the short end in front of you on a flat surface.
Step 3: Fold 3 pieces of yarn in half and line up their ends. Use your hook to pull their center down into a space at the very bottom of your shawl’s short side.
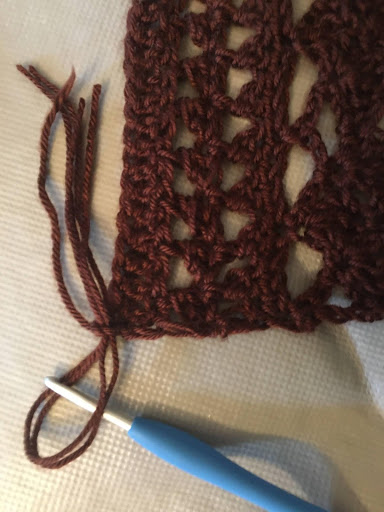
Step 4: With the pieces still on your hook, loop all the ends over your hook, and pull them through.
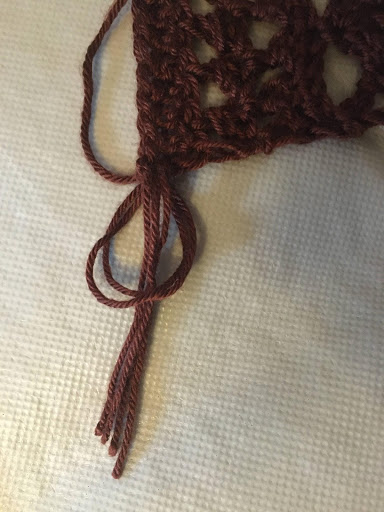
Repeat Steps 1-4 on both short ends of your shawl.
Trim your fringe so tassels are even across the bottom of your shawl.
That’s it!
………………………………………………………………………………………………………………
I would ❤️ to see your version of my Pocket Full of Diamonds Shawl!! You can use the hashtag #pocketfullofdiamondsshawl or #pocketfullofdiamonds or @joscraftyhook or @jo_bear38 on IG! You can also find me, Joey Lea Baird on Facebook!
Thank you for your interest in my Pocket Full of Diamonds Shawl! I hope you enjoy crocheting this as much as I did! If you have ANY questions please email me at jo@joscraftyhook.com. Happy Crocheting!
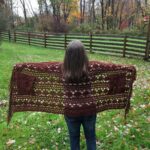


I appreciate the time and effort my pattern testers put into this pattern. Below you will see their version of the Pocket Full of Diamonds Shawl.


………………………………………………………………………………………………………………
Don’t forget to sign up for my Newsletter. I have SO many great things scheduled already for 2021! Giveaways, CALs, new FREE crochet patterns, and more!
[yikes-mailchimp form=”1″]
Find me, Jo of Jo’s Crafty Hook Designs at any one of these places listed below!
Website: www.joscraftyhook.com
Ravelry: https://www.ravelry.com/designers/jos-crafty-hook
LoveCraft: https://www.lovecrafts.com/en-gb/user/maker/1bee78ea-a464-4c9b-b781-59cfc74b1a6c
Etsy Shop: www.etsy.com/shop/JosCraftyHook
Facebook: www.facebook.com/JosCraftyHook
Facebook: www.facebook.com/JosCraftyHookDesigns
Instagram: www.instagram.com/joscraftyhook
Pinterest: www.pinterest.com/baird0095
Twitter: www.twitter.com/joscraftyhook
YouTube: https://www.youtube.com/channel/UCk-6IB36bg4gkvaawn3xfdg