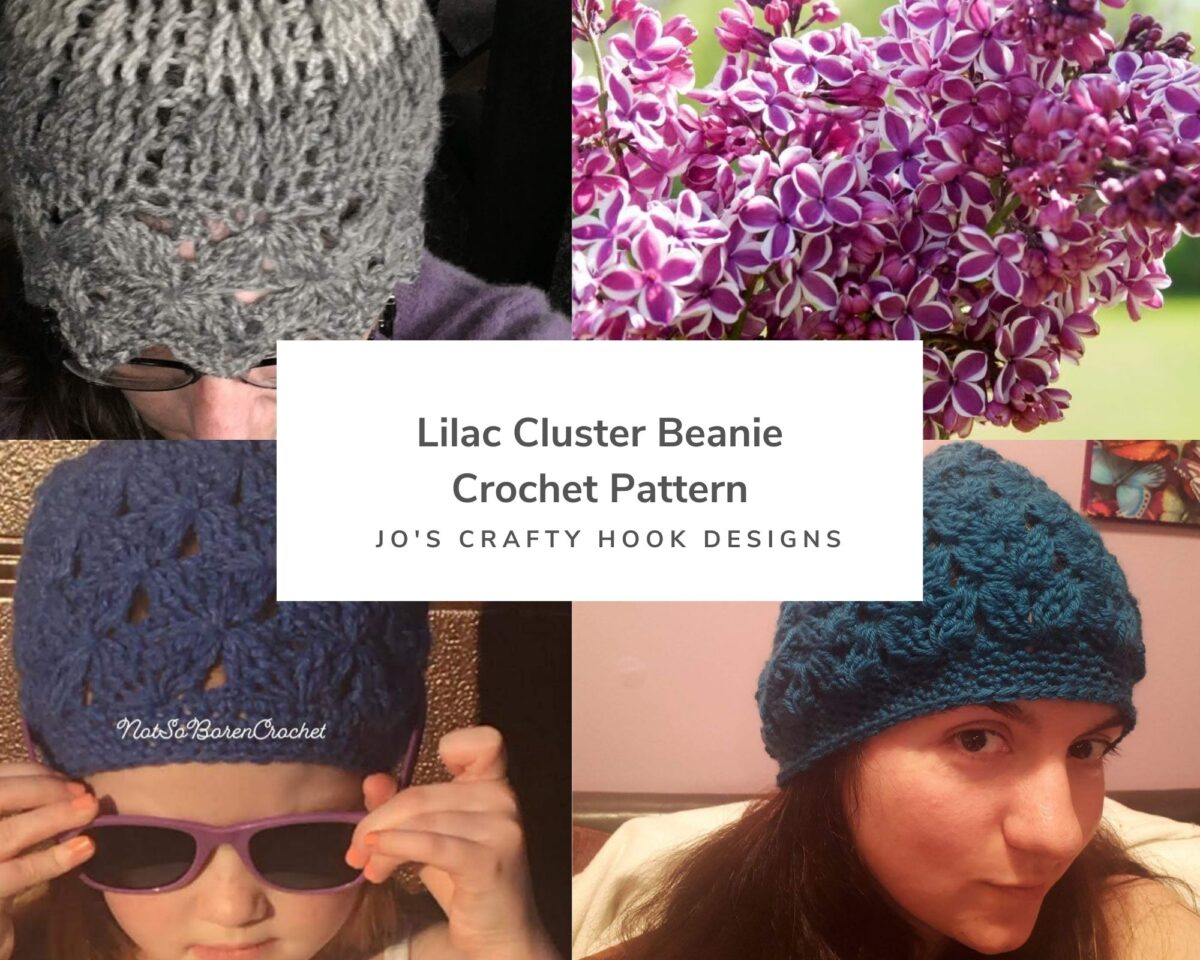
In today’s post I will be sharing the Lilac Cluster Beanie FREE Crochet Pattern. I am so excited to be sharing this free crochet pattern with you for a number of reasons. The main one is that I looked at a store bought hat and was able to create a crochet pattern from it! Another reason is that it is a Beautiful design and a Great Beanie! lol The last reason is the flower clusters look like Lilacs, which is my ALL time favorite flower. I just LOVE their smell!
This post contains affiliate links. You can make a purchase using these links that I provide where I may receive compensation (at no added cost to you.) Purchases you make will help keep my website, Etsy Shop, and my Ravelry Store going and provide quality designs just for you!
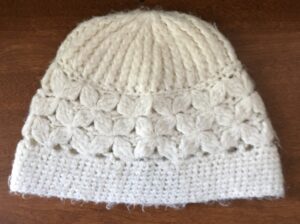
My son found a hat and gave it to me last year. When it was taken out of storage this past winter I was like “I NEED to copy this pattern!” I took a real good look at it and wanted to see if I could crochet it because it said on the label “Crocheted.” Well I finally worked out a pattern and I hope you love it as much as I do!
You can get an Ad Free PDF Version with Step-by-Step pictures and Video Tutorials. The crochet pattern contains 8 sizes. You can find the ad free pdf crochet pattern at the places listed below.
https://www.ravelry.com/patterns/library/lilac-cluster-beanie https://designers.lovecrafts.com/#/design/5edeac395faf9e5915586eba https://www.etsy.com/listing/691010744/crochet-pattern-lilac-cluster-beanie
If you liked what you have seen here at my website, be sure to sign up for my Newsletter. You will be notified when I release a new pattern, have a giveaway, have a sale and more.
[yikes-mailchimp form=”1″]
************************************************
Information about Lilac Cluster Beanie:
Skill Level:
Advanced Beginner/Intermediate
US Terms
Yarn Used:
**I used Lion Brand Mandala Yarn 3 ply light weight yarn or DK weight yarn. (5.3 oz/590 yds)**
Materials:
US Hook K or 6.5 mm
200-500 yds of 3 ply Light Weight or DK Weight Yarn
Scissors
Tapestry Needle
Gauge:
US K Hook or 6.5 mm
16 fpdc x 12 rows = 4”
Gauge Swatch:
R1: Chain 10, dc in 4th st from hook and remaining 7 st. Turn.
R2: Ch 3, fpdc in the next 7 st. Turn
R3-R12: Repeat R2
Abbreviations:
ch = Chain
sl st = Slip Stitch
mc = Magic Circle
dc = Double Crochet
sp = Space
fpdc = Front Post Double Crochet
fpdc3tog = Front Post Double Crochet 3 Together-Decrease
fpdc6tog = Front Post Double Crochet 6 Together-Decrease
Notes:
ch 2 does NOT count as a stitch
ch 3 counts as a dc
Stitch count is multiples of 6, so if your brim is too tight or too loose try going up or down in hook size before you adjust the stitch count.
Pattern written for: 0-6mth (6-12 mth, 12-24 mth, 2-5 yrs, 5-10 yrs, Teen/Sm Adult, Med Adult, Lg Adult)
The Crown will Increase every other Row as the Sizes increase every other Row. The Increase will be done every other Row.
24 (36, 48, 60, 72, 84) will be your ending row count after you complete the increases for your size.
This Beanie can be made into a Slouchy Hat. You can add more Rows during the Shells & Clusters by doing R3-R4 and ending with R3 . You can also add more Rows to the Brim, that will work too to make a Slouchy Hat.
Special Stitches:
Front Post Double Crochet – Double Crochet going around the Front Post of the DC in the Previous Row.
Cluster Stitch or Front Post Double Crochet 6 Together – when you front post double crochet 6 dc together, you are taking what were six double crochet stitches and turning them into just one front post double crochet stitch or one cluster stitch by using the first 3dc, skip (ch2, sc, ch2) then using the following 3 dc.
Beginning Shell Stitch – when you (ch 3, 2 dc, ch 2, 3 dc) all in the same stitch.
Shell Stitch – when you crochet (3 dc, ch 2, 3 dc) all in the same stitch.
Left Handed Video Tutorials:
Video Tutorial Part 1: fpdc
Video Tutorial Part 2: fpdc3tog
Video Tutorial Part 3: fpdc6tog
********************************************************
Lilac Beanie Pattern
Crown
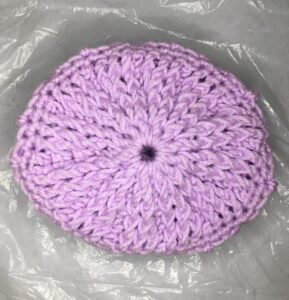
R1: Make a Magic Circle. Ch 2 and add 24 dc to the circle. Ss into 1st dc to join. (24 dc)
**Or you can chain 5 sl s in the 1st stitch to join. Ch 3, dc 23 into the hole. (24 dc)**
R2: Ch 2 and dc in same space. *2 fpdc in the next dc, dc in the next dc.* Repeat * around ending with 2 fpdc in the last st. Ss into to join. (36 dc)
R3: Ch 2 and dc in the same space. *fpdc around the next 2 st, dc in the next dc.* Repeat * around. Ending with fpdc around the last 2 stitches. Ss into 1st dc to join. (36 dc) 0-6 mths STOP here and go to Shells & Clusters
You can get an Ad Free PDF Version with Step-by-Step pictures and Video Tutorials. The crochet pattern contains 8 sizes. You can find the ad free pdf crochet pattern at the places listed below.
https://www.ravelry.com/patterns/library/lilac-cluster-beanie https://designers.lovecrafts.com/#/design/5edeac395faf9e5915586eba https://www.etsy.com/listing/691010744/crochet-pattern-lilac-cluster-beanie
Flower Shells & Clusters
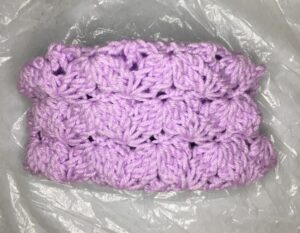
R1: Ch 1, sc in the same sp, and each stitch around. sl st into 1st sc to join. 36
R2: Beg Shell (ch 3, 2 dc, ch 2, 3 dc all in the same stitch) *ch 2, skip 2 st, sc in the next st, ch 2, sk 2, Shell (3 dc, ch 2, 3 dc all in the same stitch)*. Repeat * around ending with ch 2, sk 2, sc in the next st, ch 2, sk 2. sl st in top of Ch 3 of the Beg Shell to Join. 6 Shells
R3: ch 2, fpdc3tog around the next 3 st, *ch 1 ( be sure to chain loosely. In the next row you will add a Shell in that ch 1), sc in ch 2 sp of Shell in previous row, ch 1, fpdc6tog around the next 6 st.* Repeat * around. End with fpdc3tog, sl st loosely into fpdc3tog. 6 Clusters
R4: Beg Shell in the ss of the fpdc3tog just made in the last row. *ch 2, sc in the sc, ch 2, Shell in the ch 1 sp of Cluster.* Repeat * around. End with ch 2. sl st in top of ch 3 of the Beg Shell. 6 Shells.
Ages 0-6 mth
R5-R7: Repeat R3-R4 once, then add R3 once more. (Since you are using #3 yarn, you may need to add R3-R4 once more.) Go to the Brim
Brim:
**If Brim is too tight, try going Up a hook size. If the Brim is too loose, try going Down a hook size.**
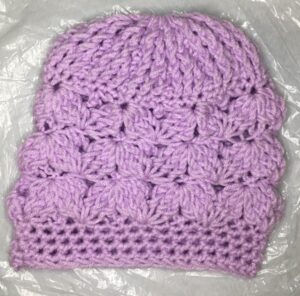
R1: Ch1, sc in same space. *Sc in sc, sc in ch 1, 2 sc in side of fpdc3tog/fpdc6tog, sc in ch 1.* Repeat around.
R2-R5: Ch 1, sc in same space. Sc in each sc around. **If you would like your Brim to be longer, repeat this row until you are satisfied.**
Fasten off and weave in ends with Tapestry Needle.
**************************************************
You can find more of my crochet patterns at the links below.
**************************************************
If you liked what you have seen here at my website, be sure to sign up for my Newsletter. You will be notified when I release a new pattern, have a giveaway, have a sale and more.
[yikes-mailchimp form=”1″]
Find me, Jo of Jo’s Crafty Hook, at the places listed below.
Website: www.joscraftyhook.com
Ravelry: https://www.ravelry.com/designers/jos-crafty-hook
LoveCraft: https://www.lovecrafts.com/en-gb/user/maker/1bee78ea-a464-4c9b-b781-59cfc74b1a6c
Etsy Shop: www.etsy.com/shop/JosCraftyHook
Facebook: www.facebook.com/JosCraftyHook
Facebook: www.facebook.com/JosCraftyHookDesigns
Instagram: www.instagram.com/joscraftyhook
Pinterest: www.pinterest.com/baird0095
Twitter: www.twitter.com/joscraftyhook
YouTube: https://www.youtube.com/channel/UCk-6IB36bg4gkvaawn3xfdg
Donations Accepted: https://paypal.me/joscraftyhook
********************************************************

