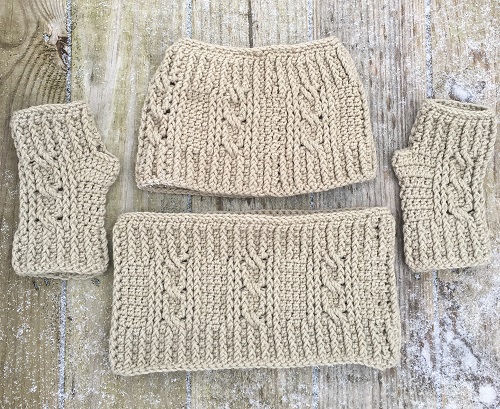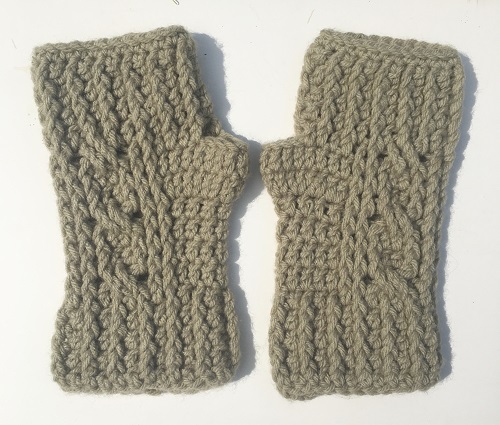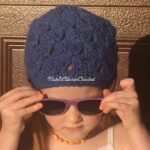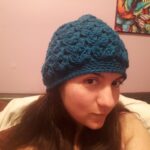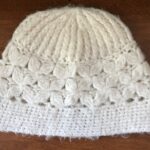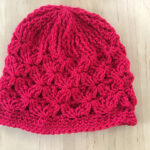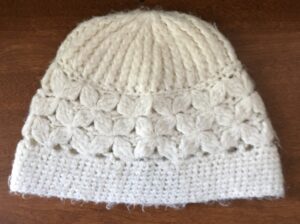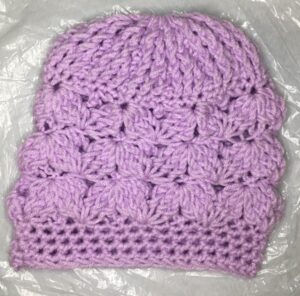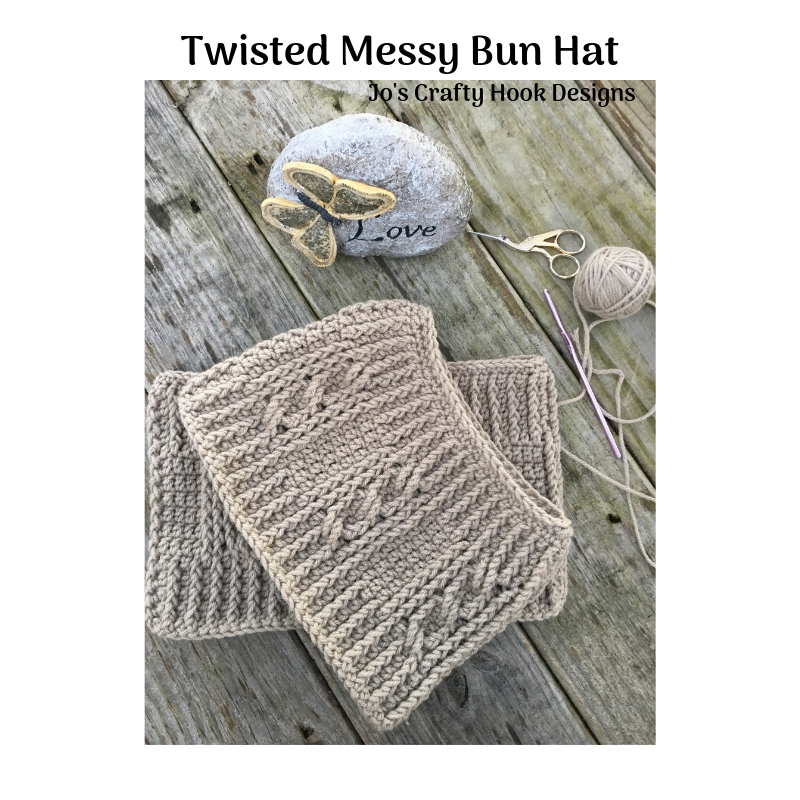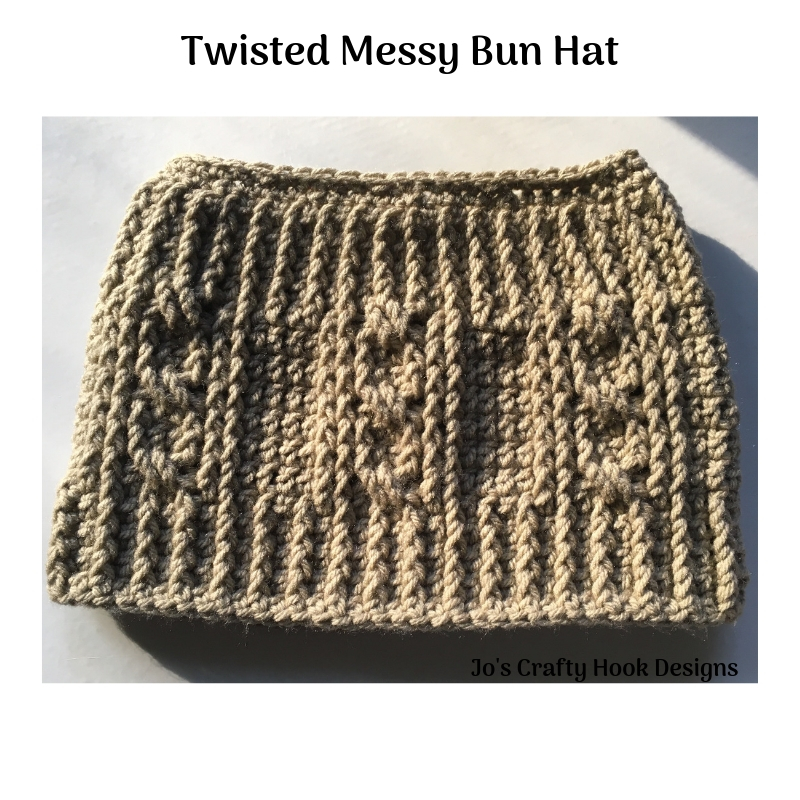
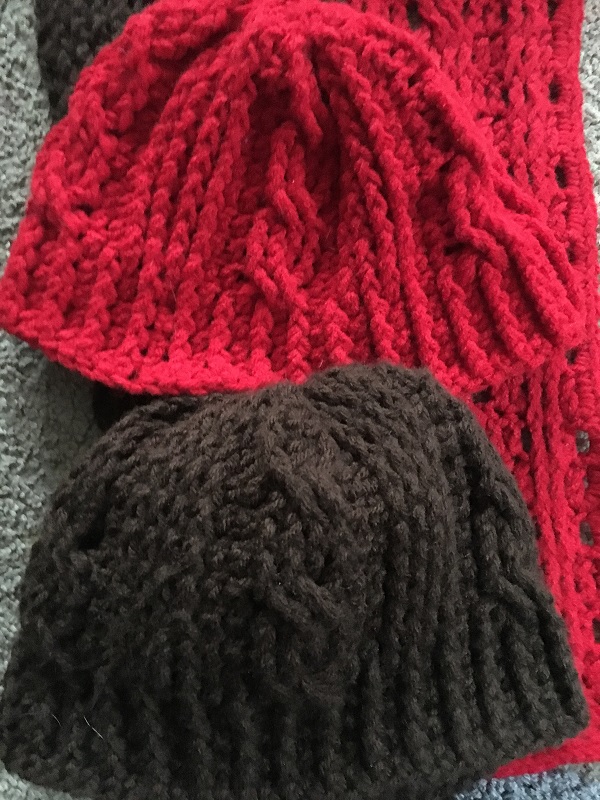
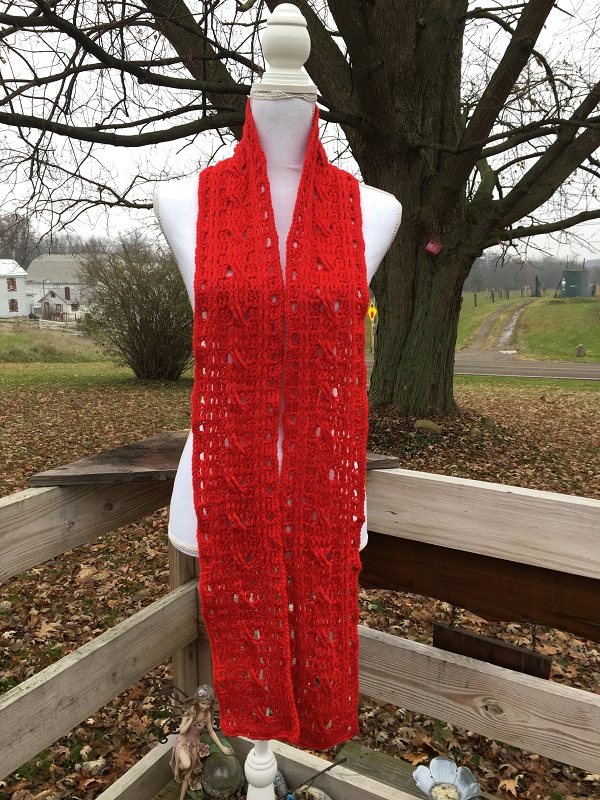
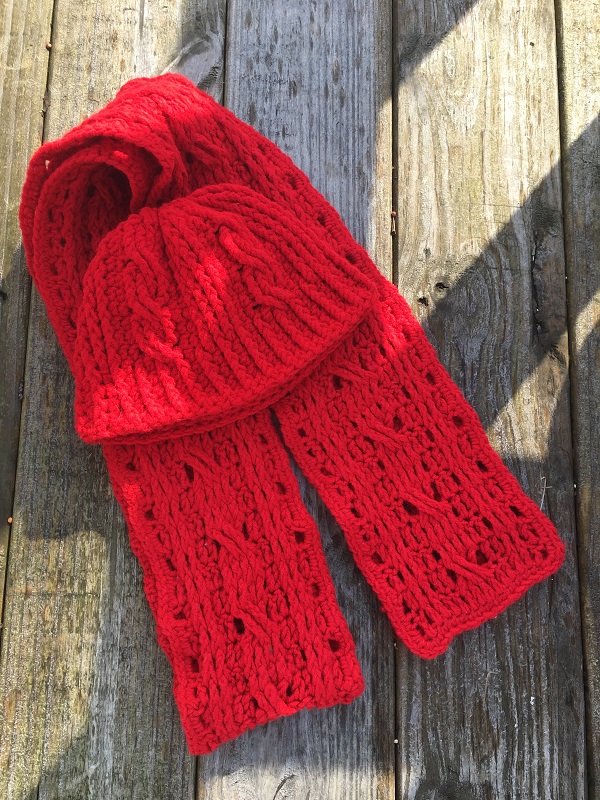
The Twisted Twizzler Set crochet pattern is a great crochet pattern if you LOVE doing Cables/Braids like I do. If you do then this set is perfect for you! If you haven’t had much practice with Cables, that’s ok too! I have supplied Video Tutorials to help you crochet the stitches used in this set!
In this post the Twisted Twizzler Set contains a hat and a scarf crochet pattern. The crochet patterns for the hat and scarf have multiple sizes, so you can do one for each member of your family and friends. The hat and scarf sizes range from newborn to adult large. This crochet pattern is part of my Twisted Line of Head Gear, where all the crochet patterns are unisex, which means that the finished items can be worn by men and women.
You can find all of the crochet patterns in my Twisted Line of Head Gear at any of the locations below:
**Crochet Pattern below**
Beanie Materials:
US Hook H or 5 mm
300-500 yds of #4 Worsted Weight Yarn
Scissors
Tapestry Needle
Gauge:
US Hook H or 5mm
16 FPDC x 10 rows = 4″
Abbreviations:
CH = Chain
DC = Double Crochet
SS = Slip Stitch
FPTRC = Front Post Triple Crochet
FDC = Foundation Double Crochet
FPDC2TOG = Front Post Double Crochet 2 Together
Notes:
Ch 1 does NOT count as a stitch
Ch 3 counts as a double crochet
Video Tutorials:
FDC Video Tutorial here
FPDC Video Tutorial here
FPTRC Video Tutorial here
Special Stitches:
Front Post Double Crochet – Double Crochet going around the Front Post of the DC in the Previous Row.
Front Post Triple Crochet – Front Post Triple or Treble Crochet–Yarn over (YO) hook two times. Insert hook behind post of stitch (st). YO hook, pull up a loop, four loops on hook. YO hook, pull through 2 loops, 3 loops on hook. YO hook, pull through 2 loops, 2 loops on hook. YO hook, pull through last two loops.
Special Notes:
- Stitch multiple after the band is 12, so if your band is too tight or too loose try going up or down in hook size instead of adjusting stitch count.
- Pattern written for: NB-6mth (6-12 mth, 12-24 mth, 2-5 yrs, 5-10 yrs, Small Adult & Large Adult)
- Hat Band Lengths: 12” (14, 16, 16, 19, 19, 21)
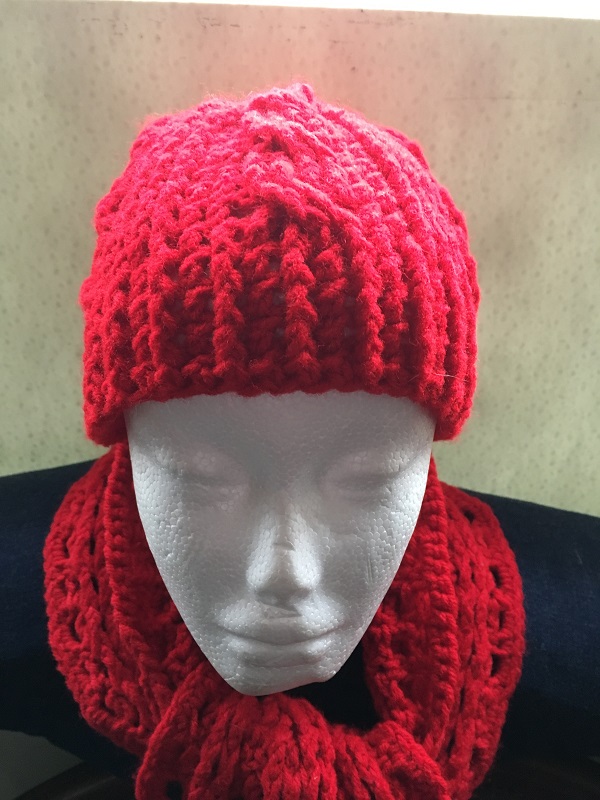
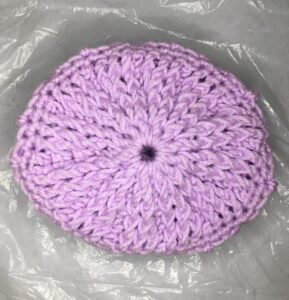
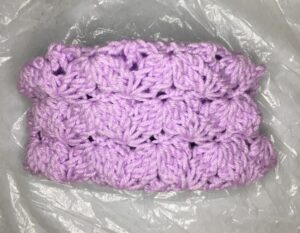
Twisted Twizzler Beanie
Band for NB-6 mth, 6 mth-12 mth, 12-24 mth, & 2-5 yrs:
**Larger Sizes Below**
Using H Hook
R1: Fdc 36 (48, 60, 60) join.
R2: Ch 3, fpdc in the next st *dc in the next st, fpdc in the next st* Repeat from * to * around. ss to join. (36, 48, 60, 60) st
R3-R4: Repeat the last round (dc in dc and fpdc in fpdc). Ss to join. (36, 48, 60, 60)
Hat for NB-6 mth, 6 mth-12 mth, 12-24 mth, & 2-5 yrs
R5: Ch 2, fpdc in the same st, fpdc in next st, dc in next 2 st, skip 2 st, fptrc in the next 2 st, fptrc in each of the previous 2 skipped st, dc in next 2 st, fpdc in the next 2 st. *fpdc in the next 2 st, dc in next 2 st, skip 2 st, fptrc in the next 2 st, fptrc in each of the previous 2 skipped st, dc in next 2 st, fpdc in the next 2 st.* Repeat from * to * around. ss in fpdc to join. (36, 48, 60, 60) st
R6-R7: Ch 2 and fpdc in the same st, fpdc in the next st, dc in next 2 st, fpdc in next 4 st, dc in next 2 st, fpdc in next 2 st, *fpdc in next 2 st. dc in next 2 st, fpdc in next 4 st, dc in next 2 st, fpdc in next 2 st,* Repeat from * to * around. ss fpdc to join (36, 48, 60, 60) st
For Sizes NB-6 mth, 6 mth-12 mth, 12-24 mth
Stop here and go to Decrease Rows
For Sizes 2-5 yrs
R8-R9: Repeat R6-R7 once and go to Decrease Rows.
Decrease Row
R1: Ch 2 and fpdc in the same st, fpdc in the next st, dc2tog in next 2 st, skip 2 st, fptrc in the next 2 st, fptrc in each of the previous 2 skipped st, dc2tog in next 2 st, fpdc in next 2 st. *fpdc in next 2 st, dc2tog in next 2 st, skip 2 st, fptrc in the next 2 st, fptrc in each of the previous 2 skipped st, dc2tog in next 2 st, fpdc in next 2 st.* Repeat from * to * around. ss fpdc to join
R2: Ch 2 and fpdc in the same st, *fpdc in the next st, dc in next st, fpdc in next 4 st, dc in the next st, fpdc in the next st, fpdc2tog,* Repeat from * to * around. ss in fpdc to join. (36, 48, 60, 72) st
R3: Ch 2 and fpdc2tog in the same and next st, *dc in the next st, fpdc in the next 4, dc in the next st, fpdc3tog across the next 3 st,* Repeat from * to * around. Ss fpdc2tog to join.
Leave a long tail to weave through the stitches to close the hat.
**If you are wanting a Messy Bun Hat instead of a Beanie, do NOT use a long tail to weave in the ends. The beanie can be left open here to make a Messy Bun Hat.**
Fasten off and weave in ends.
Band for: 5-10 yr, Teen, Sm & Large Adult:
**Smaller Sizes Above**
Band: Using H Hook
R1: Fdc 60 (60, 72, 84) join.
R2: Ch 3, fpdc in the next st *dc in the next st, fpdc in the next st* Repeat from * to * around. ss to join. (60, 60, 72, 84) st
R3-R5: Repeat the last round (dc in dc and fpdc in fpdc). Ss to join. (60, 60, 72, 84)
Hat for: 5-10 yr, Teen, Sm & Large Adult
R6: Ch 2, fpdc in the same st, fpdc in next st, dc in next 2 st, skip 2 st, fptrc in the next 2 st, fptrc in each of the previous 2 skipped st, dc in next 2 st, fpdc in the next 2 st. *fpdc in the next 2 st, dc in next 2 st, skip 2 st, fptrc in the next 2 st, fptrc in each of the previous 2 skipped st, dc in next 2 st, fpdc in the next 2 st.* Repeat from * to * around. ss in fpdc to join. (60, 72, 84) st
R7-R8: Ch 2 and fpdc in the same st, fpdc in the next st, dc in next 2 st, fpdc in next 4 st, dc in next 2 st, fpdc in next 2 st, *fpdc in next 2 st. dc in next 2 st, fpdc in next 4 st, dc in next 2 st, fpdc in next 2 st,* Repeat from * to * around. ss fpdc to join (60, 72, 84) st
R9-R14: Repeat R6-R8 ending with R8
For 5-10yrs old Stop Here and go to Decrease Rows
R15-R17: Repeat R6-R8 ending with R8
For remaining sizes Stop Here and go to Decrease Rows
Decrease Rows
R1: Ch 2 and fpdc in the same st, fpdc in the next st, dc2tog in next 2 st, skip 2 st, fptrc in the next 2 st, fptrc in each of the previous 2 skipped st, dc2tog in next 2 st, fpdc in next 2 st. *fpdc in next 2 st, dc2tog in next 2 st, skip 2 st, fptrc in the next 2 st, fptrc in each of the previous 2 skipped st, dc2tog in next 2 st, fpdc in next 2 st.* Repeat from * to * around. ss fpdc to join
R2: Ch 2 and fpdc in the same st, *fpdc in the next st, dc in next st, fpdc in next 4 st, dc in the next st, fpdc in the next st, fpdc2tog,* Repeat from * to * around. ss in fpdc to join. (36, 48, 60, 72) st
R3: Ch 2 and fpdc2tog in the same and next st, *dc in the next st, fpdc in the next 4, dc in the next st, fpdc3tog across the next 3 st,* Repeat from * to * around. Ss fpdc2tog to join.
Leave a long tail to weave through the stitches to close the hat.
**If you are wanting a Messy Bun Hat instead of a Beanie, do NOT use a long tail to close the Beanie. The beanie can be left open here to make a Messy Bun Hat.**
Fasten off and weave in ends.
Scarf Materials:
US Hook I or 5.50 mm
450-600 yds of #4 Worsted Weight Yarn
Scissors
Tapestry Needle
Gauge:
US Hook I or 5.5mm
4 HDC x 2 rows = 1 inch
Size:
35-72” Length
7-9” Width
Abbreviations:
CH = Chain
SS = Slip Stitch
SC = Single Crochet
HDC = Half Double Crochet
FPDC = Front Post Double Crochet
BPDC = Back Post Double Crochet
Notes:
Ch 1 does not count
Ch 2 counts as a double crochet
Chain 3 counts as a DC-Double Crochet in the stitch count at the end of a Row.
Video Tutorials:
FPTRC instructions on YouTube here
FPDC & BPDC instructions on YouTube here.
Special Stitches:
Front Post Double Crochet – Double Crochet going around the Front Post of the DC in the Previous Row.
Back Post Double Crochet – Double Crochet going around the Back of the DC in the Previous Row.
Front Post Triple Crochet – Front Post Triple or Treble Crochet–Yarn over (YO) hook two times. Insert hook behind post of stitch (st). YO hook, pull up a loop, four loops on hook. YO hook, pull through 2 loops, 3 loops on hook. YO hook, pull through 2 loops, 2 loops on hook. YO hook, pull through last two loops.
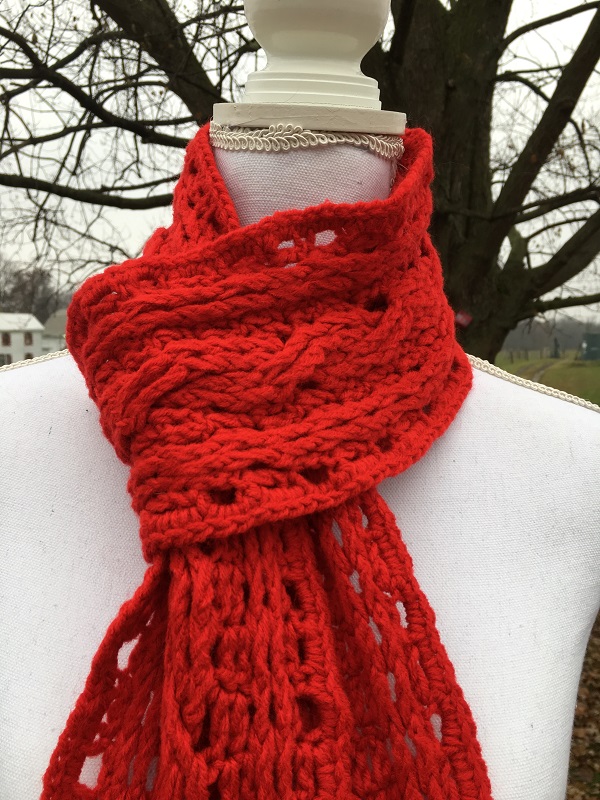
Twisted Twizzler Scarf
R1: Chain 26, dc in 4th ch from hook, dc in the next 22 ch. Turn (24 dc)
R2: Ch 3, dc in the next 23 st. Turn (24 dc)
R3: Ch 3, dc in the next 3 st, fpdc in the next 2 st, dc in the next 4 st, skip 2 st, fptrc in the next 2 st, fptrc in each of the previous 2 skipped stitches, dc in the next 4 st, fpdc in the next 2 st, and dc in the last 4 st. Turn (16 dc + 4 fpdc + 4 fptrc)
R4: Ch 3, dc in the next 3 st, bpdc in the next 2 st, dc in the next 4 st, bpdc in the next 4 st, dc in the next 4 st, bpdc in the 2 st, and dc in the last 4 st. Turn (16 dc + 8 bpdc)
R5: Ch 3, dc in the next 3 st, fpdc in the next 2 st, dc in the next 4 st, fpdc in the next 4 st, dc in the next 4 st, 2 fpdc in the next 2 st, and dc in the last 4 st. (16 dc + 8 fpdc)
R6: Ch 3, dc in the next 3 st, bpdc in the next 2 st, dc in the next 4 st, bpdc in the next 4 st, dc in the next 4 st, bpdc in the 2 st, and dc in the last 4 st. Turn (16 dc + 8 bpdc)
R7: Ch 3, dc in the next 3 st, fpdc in the next 2 st, dc in the next 4 st, skip 2 st, fptrc in the next 2 st, fptrc in each of the previous 2 skipped st, dc in the next 4 st, fpdc in the next 2 st, and dc in the last 4 st. Turn (16 dc + 4 fpdc + 4 fptrc)
R8: Ch 3, dc in the next 3 st, bpdc in the next 2 st, dc in the next 4 st, bpdc in the next 4 st, dc in the next 4 st, bpdc in the next 2 st, and dc in the last 4 st. Turn (16 dc + 8 bpdc)
R9: Ch 3, dc in the next 3 st, fpdc in the next 2 st, dc in the next 4 st, fpdc in the next 4 st, dc in the next 4 st, fpdc in the next 2 st, and dc in the last 4 st. Turn (16 dc + 8 fpdc)
R10: Ch 3, dc in the next 3 st, bpdc in the next 2 st, dc in the next 4 st, bpdc in the next 4 st, dc in the next 4 st, bpdc in the next 2 st, and dc in the last 4 st. Turn (16 dc + 8 bpdc)
Do NOT fasten off!
For Ages 2-3
Repeat R7-R10 until the Scarf measures 33” then add Border
For Ages 4-10
Repeat R7-R10 until the Scarf measures 45” then add Border
For Ages Teen
Repeat R7-R10 until the Scarf measures 57” then add Border
For Small Adult
Repeat R7-R10 until the Scarf measures 67” then add Border
For Large Adult
Repeat R7-R10 until the Scarf measures 70” then add Border
Border:
R1-R2: Ch 3 and dc in each st across. Turn 24 dc After R2 do not turn.
At the end of your last Row, chain 1 and put 2 sc in the end post of the last row you crocheted.
Add 1 sc in the dc space and 2 sc in the end posts until you get to a corner.
Once you are at the corner (you will have just added 2 sc in the last end post) chain 1 then add 2 sc in the corner space.
Sc evenly across the beginning chain row until you come to the next corner. Chain 1, sc in same st, and then repeat 2 sc in end posts and 1 sc in dc space until you get at the next corner.
Once you are at the corner (you will have just added 2 sc in the last end post) chain 1 then add 2 sc in the corner space.
Sc in each dc until you come to the last corner and add 2 sc in the last dc.
Fasten off and weave in ends with Tapestry Needle.
You can find my crochet patterns at these locations listed below.
Ravelry
Lovecraft
Etsy
I would LOVE to see YOUR version of the Twisted Twizzler Hat and Scarf! You can post it on Instagram @joscraftyhook, @jo_bear38, #twistedtwizzlerset, #twistedtwizzlerhatandscarf, or #jostwisted.
Find me, Jo of Jo’s Crafty Hook and Jo’s Crafty Hook Designs at any one of these places listed below!
Website: www.joscraftyhook.com
Facebook: www.facebook.com/JosCraftyHook
Facebook: www.facebook.com/JosCraftyHookDesigns
Instagram: www.instagram.com/joscraftyhook
Pinterest: www.pinterest.com/baird0095
Twitter: www.twitter.com/joscraftyhook
YouTube: www.youtube.com/channel/UCk-6IB36bg4gkvaawn3xfdg
From the Designer:
- Thank you for interest in my Twisted Twizzler Set Crochet Pattern! Check out the other FREE crochet patterns on my website. While you are at my website be sure to subscribe to my Newsletter. This way you will be notified when I release another pattern, giveaways, blog hops, sales and more!
[yikes-mailchimp form=”1″]
- If you have any questions or concerns about this pattern or any other pattern please find me at Jo’s Crafty Hook Designs on Facebook or email me at jo@joscraftyhook.com
- You are free to sell or gift the Twisted Twizzler Set. Please forward anyone who would like to do the Twisted Twizzler Set crochet pattern or any of my patterns to the Ravelry Store, my Etsy shop, or LoveCraft. The web addresses for any place to connect with me are listed above.
- Every purchase of my patterns helps! It allows me to buy more yarn so I can create and design more Handmade Crocheted Creations for you to enjoy.
- I would LOVE to see your version of my Twisted Twizzler Set! You can “Hook It” at my Ravelry Jo’s Crafty Hook Designs OR add a pic at anyone of the places above that allows you to connect with me! Please use the hashtags: #jostwisted #twistedtwizzlerset or #twistedtwizzlerscarf and #twistedtwizzlerhat.
- Comments, Feedback, etc. are ALWAYS welcome at my website www.joscraftyhook.com!