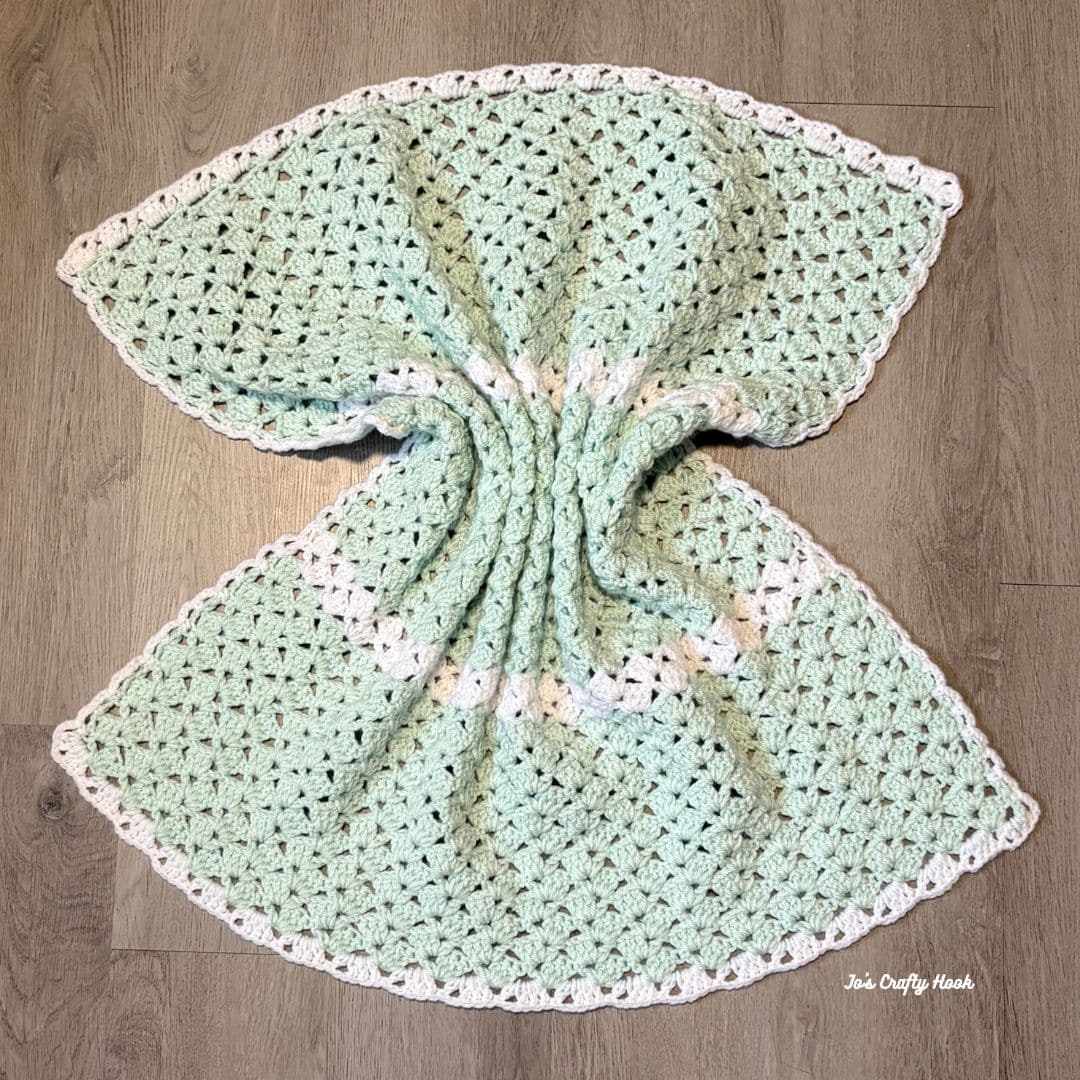
Charity Baby Blanket Crochet Pattern

Charity Baby Blanket Crochet Pattern

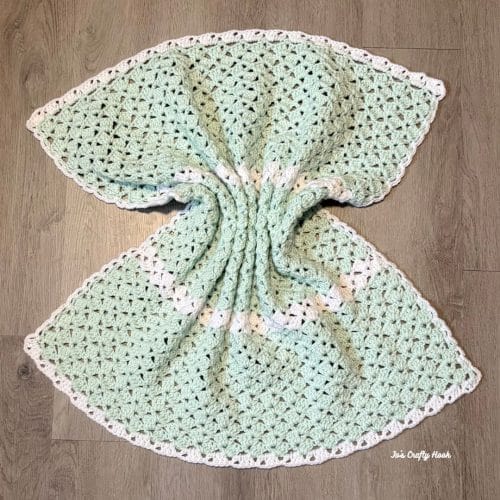
The Charity Baby Blanket is a perfect make to crochet and donate.  You can donate them to your local hospitals, women’s shelters, baby showers, and even make them for expecting families.

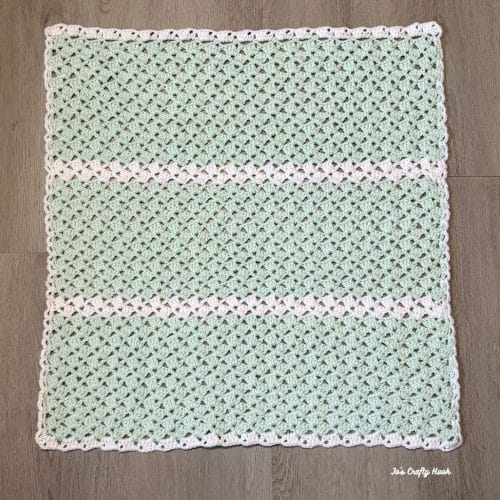
I just love using more than one color!  This pattern has a 1 row repeat, so you can crochet this is one color or make it bright and beautiful with as many colors as you’d like!
This page contains affiliate links

Be sure to sign up for my Newsletter and receive a FREE premium copy of my Freyja Pet Cowl Crochet Pattern.  This would be purr-fect to make and donate it to fur babies in need of a little extra love at your local pet shelters.

You will also receive messages about New Crochet Pattern Releases; FREE Crochet Patterns; Collaborations and more!

Visit the Landing Page below. Once you subscribe you will receive a Thank You email with the link to the crochet pattern sent right to your inbox!

subscribepage.io/joscraftyhook-freyjapetcowlcrochetpattern
Crochet for Charity Blog Hop hosted by The Crochet Village
Each day you will find a FREE crochet patterns for great items you can donate to you local charities, shelters, and even nursing homes.

Each week you will find items for Hats, Scarves, Gloves, and Blankets that you can even crochet for yourself.

My Featured Day – Sept 29th-30th

My Charity Baby Blanket Crochet Pattern is being featured in the Crochet for Charity Blog Hop and on my Featured Day, September 29th, you can get a FREE copy for 24 hours.  This is a perfect make to donate this to your local charities.
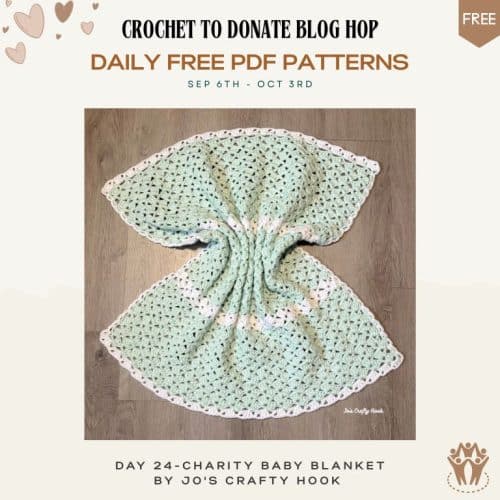
Daily FREE Crochet Patterns

While you are waiting for my featured day, you can still visit the Crochet to Donate Blog Hop where you will find crochet patterns for Hats, Scarves, Gloves, and Blankets.

In the meantime, if you would like to get started on your Charity Baby Blanket, you can find a FREE version below.

Charity Baby Blanket FREE Crochet Pattern
Information Needed

I used Red Heart Super Saver, 100% Acrylic Worsted Weight Yarn. 198 g/7 oz, 333 meters/364 yards 

Beginner Friendly
US Terminology

Materials:
US H or 5 mm Crochet Hook
MC = 700-1200 yds #4 ply Worsted Weight Yarn
CC = 150-300 yds #4 Worsted Weight Yarn
Scissors
Measuring Tape
Tapestry Needle

Finished Sizes:
25” x 25”
31” x 33”
41” x 43”

Abbreviations/Stitches Used:
ch = chain
st = stitch
sl st = slip stitch
sp = space
rep = repeat
sc = single crochet
dc = double crochet
MC = Main Color
CC = Contrasting Color

Notes:
ch 3 counts as a dc
If you do not meet Gauge try going up or down a hook size
The stitch count is a multiple of 5+4
There are 3 sizes to choose from Preemie, Receiving and Crib consecutively

Video Tutorial:
Blocking Crochet Items

Special Stitch:
Shell = (3 dc, ch 2, dc) all in same sp

Special Notes:
To get the suggested sizes, you may need to add or subtract the number of rows suggested below.

Customizing:
If you would like a wider or smaller width add or subtract multiples of 5
If you would like a taller or shorter height add or subtract the number of rows.

Gauge:
US H or 5mm Crochet Hook
3 Shells x 6 rows = 4”

Gauge Swatch:
The Gauge Swatch is done a little differently than most blankets.
You will be measuring 3 Shells across for 4” and completing 6 rows to get the correct height.
R1: ch 19, sk 5 ch, (3 dc, ch 2, dc) all in the next ch. *sk 4 ch. (3 dc, ch 2, dc) all in the next ch. rep from * until last 3 ch, sk 2 ch, dc in last ch.  ch 3, turn.  (2 dc & 3 Shells)
R2: *Shell in the next ch-2 sp, rep from * until last dc, dc in last dc.  ch 3, turn. (2 dc & 3 Shells)
R3-R6: repeat R2

Size Chart 

Size Height Width Yardage Used
Preemie 25” 25” 850-900
Crib 31” 33” 1000-1100
Receiving 41” 43” 1200-1500
Ad-Free Version

If you would like to skip all of the scrolling through my post, I do have an Ad-Free Version of my Charity Baby Blanket Crochet Pattern that you can purchase from my Ravelry Store for a small fee.
Charity Baby Blanket FREE Crochet Pattern
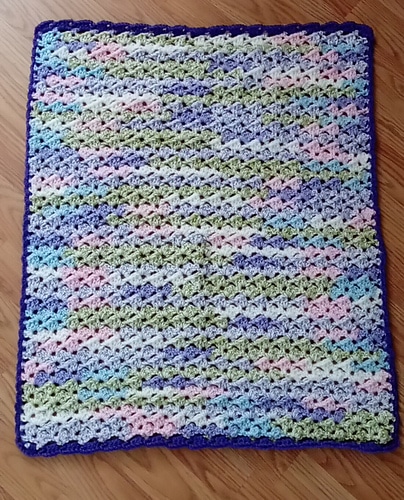
Using MC

R1:  ch 109 (139, 149) sk 5 ch, *(3 dc, ch 2, dc) all in the next ch, *sk 4 ch. (3 dc, ch 2, dc) all in the next ch. rep  from * until last 3 ch, sk 2 ch, dc in last ch. (2 dc & 21, 27, 29 Shells)

R2: ch 3, turn. *Shell in the next ch-2 sp, rep from * until last dc, dc in last dc.   (2 dc & 21, 27, 29 Shells)

R3-R36(48,60): repeat R2

R37 (49, 61): ch 4, turn. *sc in next ch-2 sp, ch 4, rep from * until last dc, sl st in last dc.

Do not turn after last row.

Border

Change to CC

Across the Top:
Starting at last row work, attach yarn with sl st in beginning ch-4 sp
(ch 3, 2 dc, ch 2, dc) all in same ch-4 sp, Shell in each ch-4 sp until last ch-4 sp. Shell in last ch-4 sp. 

Down the Side:
Turn slightly, ch 3, sc in 1st dc of side, *ch 3, sc in next dc, rep from * until last ch-5 sp.

Across the Bottom:
Shell in last ch-5 sp, sk next ch, Shell in each ch-4 sp across the bottom until the last ch-5 sp. Shell in last ch-5 sp.

Up the Side:
*ch 3, sc in next dc, rep from * up the side. ch 3, sl st in top of ch-3 to join.

Fasten off and weave in ends.

For best results, you may want to Block your finished Blanket.

Video Tutorial:
Blocking Crochet Items

@Jo’s Crafty Hook 2026

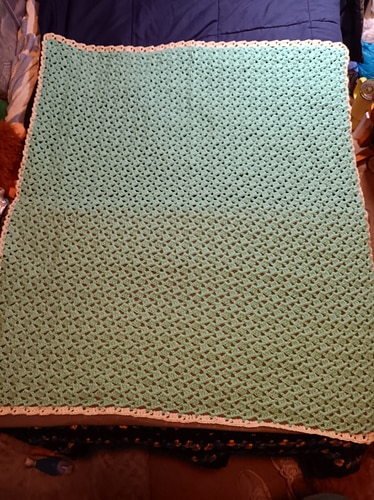
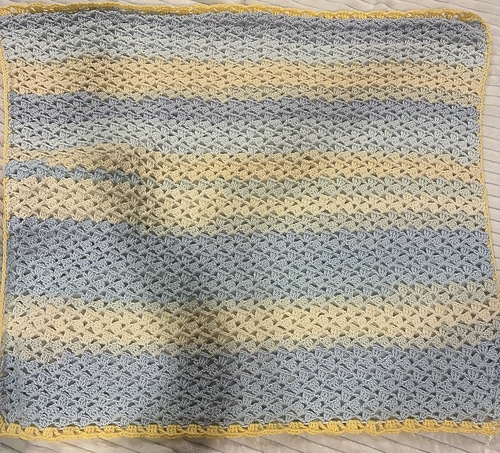
Testers’ Versions

I love my Testers’ Versions.  I appreciate all of their hard work and dedication to make this pattern perfect for you.

As you can see there are so many colors and sizes you can create and donate!
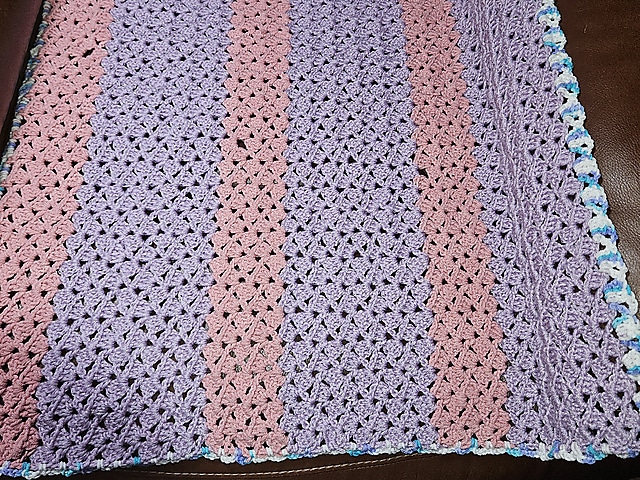
That’s it!  You have made your version of the Charity Baby Blanket!  You can make this in all the different sizes and colors to donate to your local charities or hospitals.

I would LOVE to see what you created!

You can tag me at @joscraftyhook and in my FB Group Jo’s Crafty Hook Designs

I have a wide variety of crochet patterns that would be perfect to donate!  You can find them FREE on my website.

Premium Crochet Pattern Stores
 

*********************************************

Find me, Jo of Jo’s Crafty Hook at the places listed below.

Email:  joeybaird@aol.com

Linktree

Website

Facebook Group Jo’s Crafty Hookers

Facebook Group Jo’s Crafty Hook Designs

Facebook Page Jo’s Crafty Hook

Facebook Page:  Crochet Designer Community

Ravelry

LoveCrafts

Etsy

Instagram

YouTube

Pinterest

Donations Accepted


Loading

Carrie Scarf Crochet Pattern

Carrie Scarf Crochet Pattern

I love adding colors into my scarf designs without having to fasten off and weave in your ends.  The Carrie Scarf Crochet Pattern is a beginner friendly design that lets you add colors.  It uses the basic crochet stitches of single and double crochet to create a beautiful texture.  The scarf works up quickly and is easy to do because there is only a 1 row repeat. 

The scarf pattern uses the Carry Up method (hence the name Carrie) that allows you to change your colors without fastening off ends.

This post contains affiliate links

Be sure to sign up for my Newsletter and receive a FREE premium copy of my Freyja Pet Cowl Crochet Pattern.  This would make a Purr-fect gift just for your fur babies!  You can donate this pet cowl to your local ASPCA or your local veterinary’s office.

You will also receive messages about New Crochet Pattern Releases; FREE Crochet Patterns; Collaborations and more!

Visit the Landing Page below. Once you subscribe you will receive a Thank You email with the link to the crochet pattern sent right to your inbox!

subscribepage.io/joscraftyhook-freyjapetcowlcrochetpattern

Crochet for Charity Blog Hop hosted by The Crochet Village

My Featured Day – Sept 13th-14th

My Carrie Scarf Crochet Pattern is being featured in the Crochet for Charity Blog Hop and on my Featured Day, September 13th, you can get a FREE copy and donate this to your local charities.

Get Coupon Code

Visit the Crochet to Donate Blog Hop on Sept 13th-14th to get a FREE copy of my Carrie Scarf Crochet Pattern.

Redeem you Carrie Scarf Crochet Pattern

Once you have the Coupon Code, visit my Ravelry Store and use the Coupon Code at Checkout.

FREE Daily Crochet Patterns

Each day you will find a FREE crochet patterns for great items you can donate to you local charities, shelters, and even nursing homes.

Each week you will find items for Hats, Scarves, Gloves, and Blankets that you can even crochet for yourself.

In the meantime, if you would like to get started on your Carrie Scarf, you can find a FREE child size version below.

Ad-Free Version

You can find a premium copy of my Carrie Scarf Crochet Pattern at my Ravelry Store for a small fee.  There are multiple sizes to choose from, so save it so you don’t have to scroll through this post.

FREE Carrie Scarf Crochet Pattern


Information Needed

I used Red Heart Super Saver, 100% Acrylic Worsted Weight Yarn. 198 g/7 oz, 333 meters/364 yards 

Materials:
US H or 5mm Crochet Hook
MC – 150-300 yds #4 ply Worsted Weight Yarn
CC – 125-250 yds #4 ply Worsted Weight Yarn
Scissors
Measuring Tape
Tapestry Needle

Abbreviations/Stitch(es) Used:
ch = chain
sc = single crochet
dc = double crochet
sk = skip
rep = repeat
MC = Main Color
CC = Contrasting Color

Special Stitch:
Sedge Stitch:  consists of placing (sc, 2 dc) all in the same stitch.

Notes:
ch 3 counts as a dc
the stitch count used is a multiple of 3 + 1
there are 3 sizes to choose from: Child Size, Teen/Small Adult, Large Adult
The gauge swatch uses the sedge stitch to help you get the right height and width

Video Tutorials:
Carrying Color

Gauge:
US H or 5 mm Crochet Hook
5 sedge st x 8 rows = 4”

Gauge Swatch:
R1:  ch 14, (sc, 2 dc) all in 2nd ch from hook, *sk 2 ch, sedge st in next ch.  rep from * across. ch 1, turn (5 sedge st)
R2-R8:  sk 1st 2 dc, sedge st in next sc.  sedge st in each sc across.  ch 1, turn. (5 sedge st)

Customizing:
*For a shorter scarf, subtract 2 rows of color
*For a wider scarf, add multiples of 3

Size Chart

Size Height Width
Child 48” 4”
Teen/Small Adult 60” 4.5”
Large Adult 72” 5”
Carrie Scarf Child Size Crochet Pattern

Using your MC

R1:  ch 14, (sc, 2 dc) all in 2nd ch from hook, *sk 2 ch, sedge st in next ch.  rep from * across. ch 1, turn (5 sedge st)

R2:  sk 1st 2 dc, sedge st in next sc.  sedge st in each sc across.  (5 sedge st)

Do not fasten off, bring in your CC, ch 1, turn (5 sedge st)

See Carrying Color Video Tutorial if you need help

R3:  sedge st in next sc.  sedge st in each sc across. ch 1, turn (5 sedge st)

R4:  sedge st in next sc.  sedge st in each sc across.  Carry Up previous color. ch 1, turn (5 sedge st)

R5-98: Repeat R3-R4 or until you reach your desired length, being sure to end with your MC.

Fasten off and weave in ends.

@Jo’s Crafty Hook 2026

That’s it!  You have made your version of the Carrie Scarf!  With all the sizes to choose from you can make one for each member or your family; for friends; or even donate it to your local charities, shelters, nursing homes and more!
I would LOVE to see what you create!

You can tag me at @joscraftyhook and in my FB Group Jo’s Crafty Hook Designs

You can find more of my crochet patterns at my Ravelry Store, LoveCrafts, and my Etsy Shop

You can also find a wide variety of my FREE crochet patterns on my website.

*******************************************

Find me, Jo of Jo’s Crafty Hook at the places listed below.

Email:  joeybaird@aol.com

Linktree

Website

Facebook Group Jo’s Crafty Hookers

Facebook Group Jo’s Crafty Hook Designs

Facebook Page Jo’s Crafty Hook

Facebook Page:  Crochet Designer Community

Ravelry

LoveCrafts

Etsy

Instagram

YouTube

Pinterest

Donations Accepted

Posted Beanie Crochet Pattern

Posted Beanie Crochet Pattern

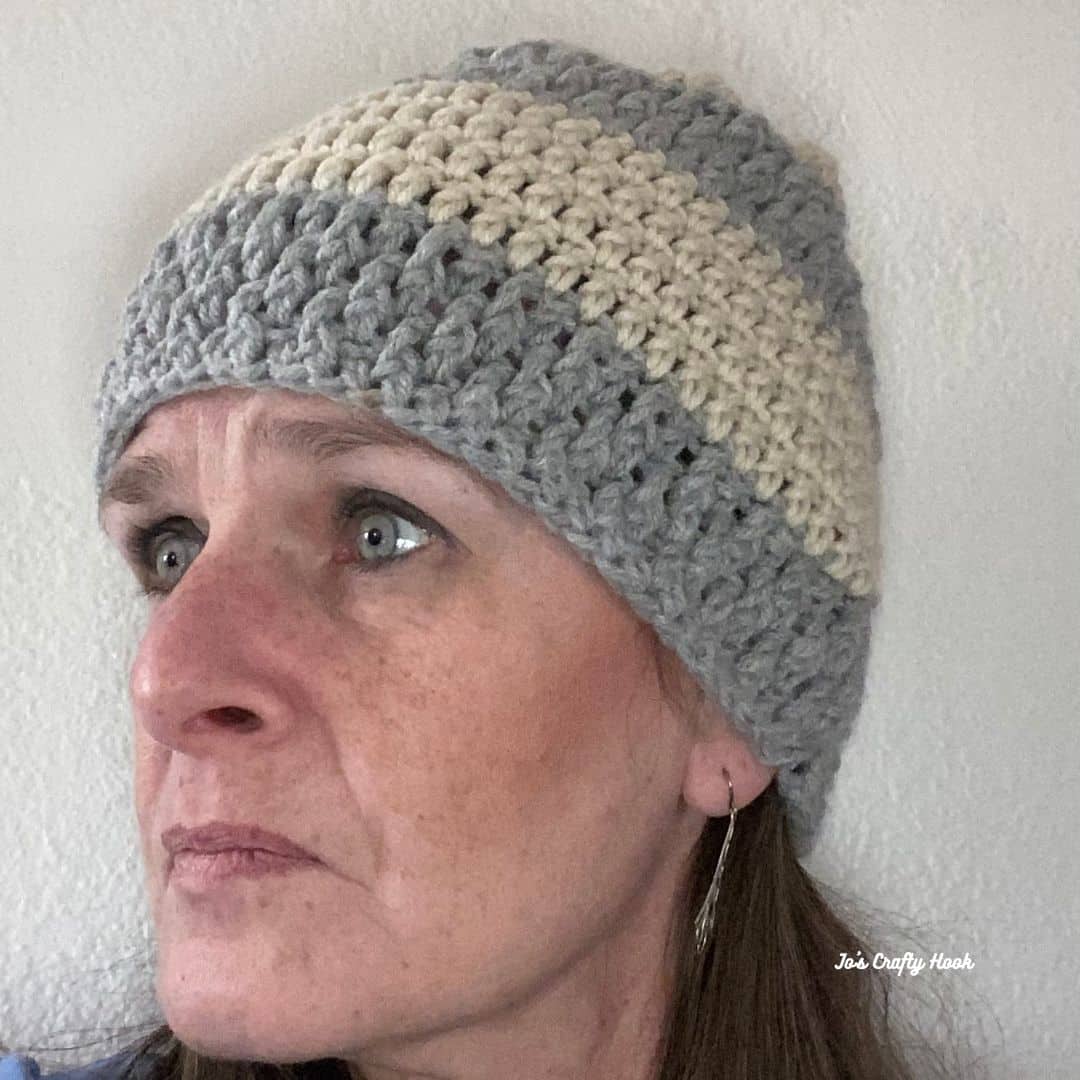
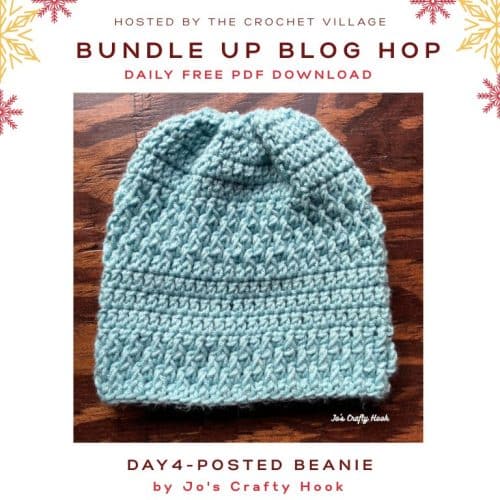
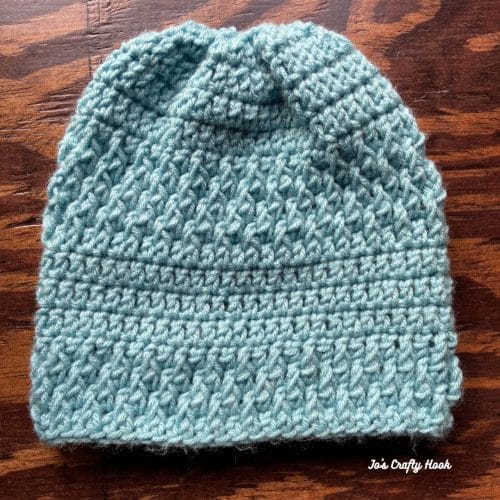
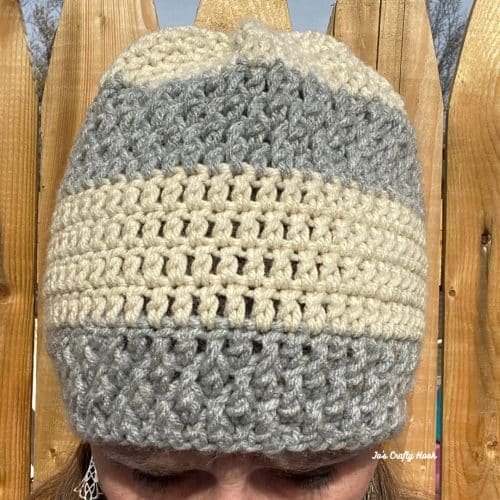
The Posted Beanie Crochet Pattern uses the front post double crochet stitch.  The use of the front post double crochet stitch creates a nice textured look.

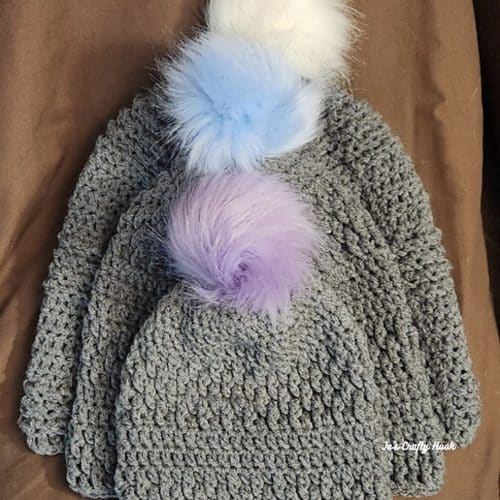
There are 3 sizes to choose from, from 5-10 yrs, Teen/Small Adult and Adult Large.  

The Posted Beanie Crochet Pattern was designed for my 3rd Annual “Keep Our Kids Covered” Charity Drive and would make a great hat that you can donate to keep the kids/adults warm during the colder weather. 

This page contains affiliate links

Be sure to sign up for my Newsletter and receive a FREE premium copy of my Rolling Shells Infinity Scarf Crochet Pattern.  You will also receive messages about New Crochet Pattern Releases; FREE Crochet Patterns; Collaborations and more!

Visit the Landing Page below. Once you subscribe you will receive a Thank You email with the link to the crochet pattern sent right to your inbox!

subscribepage.io/joscraftyhook-rollingshellsinfinityscarfcrochetpattern

Be sure to tell your yarn loving friends to sign up for my Newsletter Incentive and they’ll get the premium copy of my Rolling Shells Infinity Scarf Crochet Pattern for FREE!!

Bundle Up Blog Hop 2026

My newest crochet design, the Posted Beanie Crochet Pattern is being featured in this great blog hop!

From now until December 30, 2026 you can take advantage of daily FREE crochet patterns during the Bundle Up Blog Hop 2026 hosted by The Crochet Village.

My Featured Day is January 4-5, 2026

For 24 hours you can get a FREE copy of my newest crochet design, the Posted Beanie Crochet Pattern as part of the Bundle Up Blog Hop 2026!

Get Coupon Code

On my Featured Day visit the Bundle Up Blog Hop 2026 to get the Coupon Code  needed to get a FREE premium copy of my Posted Beanie Crochet Pattern.

Visit My Ravelry Store

Once you have the Coupon Code, click on the Button below to visit my Ravelry Store and use it at Checkout to get your FREE copy!

Visit the Bundle Up Blog Hop 2026

Be sure to check back daily for another FREE premium crochet pattern during the Bundle Up Blog Hop 2026 until December 30, 2026!

Below you will find a FREE copy of my Posted Beanie Crochet Pattern.
Ad-Free Premium Copy

If you would like to purchase a copy of the Posted Beanie Crochet Pattern, you can find it at my Ravelry Store for a small fee.

Information Needed

Skill Level:
Beginner Friendly
US Terminology

Materials:
US  I or 5.5 mm Crochet Hook
200-450 yds of 4 ply Medium Weight Yarn
Tape Measurer
Scissors
Tapestry Needle

Abbreviations/Stitches Used:
ch = chain
sl st = slip stitch
rep = repeat
rem = remaining
dc = double crochet
alt ch 2 = alternate chain 2 or alternate starting chain
fdc = foundation double crochet
fpdc = front post double crochet
dc2tog = double crochet 2 together

Notes:
alt ch 2 counts as a dc
fpdc counts as a dc
dc2tog counts as 1 dc
the beanie is worked in the round
there are 3 sizes to choose from, 5-10 yrs, Teen/Adult Small, Adult Large consecutively

My Left Handed Video Tutorials
Alternate Chain 2
Foundation Double Crochet
Front Post Double Crochet
Double Crochet 2 Together


Customizing:
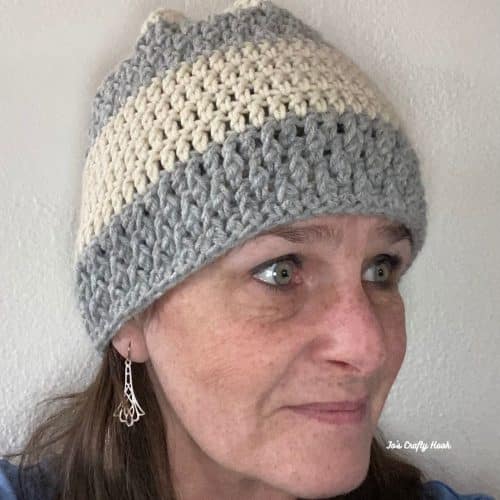
If you would like to use more than one color of yarn, change colors every 4 rows and be sure it is the same thickness so it doesn’t bunch or create gaps.
You can also add or subtract the number of rounds to create your perfect height.

Gauge:
US I or 5.5 mm Crochet Hook
12 dc x 8 rows = 4”
*If you do not meet gauge, try going up or down a hook size until you do.

Gauge Swatch:
R1:  ch 14, dc in 4th ch from hook, dc across.  turn (12 dc)
R2-R8:  ch 3, dc across.  (12 dc)

Size Chart

Size Width Height
5-10 yrs 9” 8”
Teen/Adult Small 11” 10”
Adult Large 13” 12”
Posted Beanie Free Crochet Pattern

5-10 yrs

R1: leaving a long tail of yarn, fdc 55.  To make the beanie round, weave in the long tail of yarn, weave it into the foundation chain to make the beanie round.  (55 dc)
Optional:  ch 49, sl st in 1st ch, ch 3 in same ch, dc in each rem ch around.  (55 dc)

Note:  If you are using the ch-3 at the beginning of each round, be sure to sl st in top of ch-3 to join before starting the next round.

R2:  alt ch 2 or ch 3, *fpdc around the next st, dc in next st, rep from * around.  (55 dc)

R3:  alt ch 2 or ch 3, *dc in next st, fpdc around next st, rep from * around.  (55 dc)

R4:  alt ch 2 or ch 3, *fpdc around the next st, dc in next st, rep from * around.  (55 dc)

R5-R8:  alt ch 2 or ch 3, dc in each rem st around.    (55 dc)

R9:  alt ch 2 or ch 3, *fpdc around the next st, dc in next st, rep from * around.  (55 dc)

R10:  alt ch 2 or ch 3, *dc in next st, fpdc around next st, rep from * around.  (55 dc)

R11-R12:  Rep R9-R10 

R13-R14:  alt ch 2 or ch 3, dc in each rem st around.   (55 dc)

R15:  alt ch 2 or ch 3, *dc2tog, dc in next 4 st, rep from * around. (46 dc)

R16:  alt ch 2 or ch 3, *dc2tog, dc in next 3 st, rep from * around. (37 dc)

Closing the Crown

Step 1:
Fasten off, leaving a long tail of yarn.

Step 2:
Using your long tail of yarn, weave it through each st around.

Step 3:
Pull the long tail of yarn tight to close the Crown.

Teen/Adult Small

R1: fdc 67. To make the beanie round, weave in the ends of the foundation chain.   (67 dc)
Optional:  ch 61, sl st in 1st ch, ch 3 in same ch, dc in each rem ch around.   (67 dc)

Note:  If you are using the ch-3 at the beginning of each round, be sure to sl st in top of ch-3 to join before starting the next round.

R2:  alt ch 2 or ch 3, *fpdc around the next st, dc in next st, rep from * around.  (67 dc)

R3:  alt ch 2 or ch 3, *dc in next st, fpdc around next st, rep from * around.   (67 dc)

R4:  alt ch 2 or ch 3, *fpdc around the next st, dc in next st, rep from * around.   (67 dc)

R5-R8:  alt ch 2 or ch 3, dc in each rem st around.    (67 dc)

R9:  alt ch 2 or ch 3, *fpdc around the next st, dc in next st, rep from * around.  (67 dc)

R10:  alt ch 2 or ch 3, *dc in next st, fpdc around next st, rep from * around.  (67 dc)

R11-R12:  Rep R9-R10

R13-R18:  Rep R5-R10

R19:  alt ch 2 or ch 3, *dc2tog, dc in next 4 st, rep from * around. (56 dc)

R20:  alt ch 2 or ch 3, *dc2tog, dc in next 3 st, rep from * around. (45 dc)

Closing the Crown

Step 1:
Fasten off, leaving a long tail of yarn.

Step 2:
Using your long tail of yarn, weave it through each st around.

Step 3:
Pull the long tail of yarn tight to close the Crown.

  
Adult Large

R1: fdc 73. To make the beanie round, weave in the ends of the foundation chain.   (79 dc)
Optional:  ch 73, sl st in 1st ch, ch 3 in same ch, dc in each rem ch around.   (79 dc)

Note:  If you are using the ch-3 at the beginning of each round, be sure to sl st in top of ch-3 to join before starting the next round.

R2:  alt ch 2 or ch 3, *fpdc around the next st, dc in next st, rep from * around.  (79 dc)

R3:  alt ch 2 or ch 3, *dc in next st, fpdc around next st, rep from * around.  (79 dc)

R4:  alt ch 2 or ch 3, *fpdc around the next st, dc in next st, rep from * around.   (79 dc)

R5-R8:  alt ch 2 or ch 3, dc in each rem st around.    (79 dc)

R9:  alt ch 2 or ch 3, *fpdc around the next st, dc in next st, rep from * around.  (79 dc)

R10:  alt ch 2 or ch 3, *dc in next st, fpdc around next st, rep from * around.  (79 dc)

R11-R12:  Rep R9-R10

R13-R20:  Rep R5-R12

R21-R22:  alt ch 2 or ch 3, dc in each rem st around. (79 dc)

R23:  alt ch 2 or ch 3, *dc2tog, dc in next 4 st, rep from * around. (66 dc)

R24:  alt ch 2 or ch 3, *dc2tog, dc in next 3 st, rep from * around. (57 dc)

R25:  alt ch 2 or ch 3, *dc2tog, dc in next 2 st, rep from * around.  (43 dc)

 Closing the Crown

Step 1:
Fasten off, leaving a long tail of yarn.

Step 2:
Using your long tail of yarn, weave it through each st around.

Step 3:
Pull the long tail of yarn tight to close the Crown.

@Jo’s Crafty Hook 2025

That’s it!  Have created your own version of the Posted Beanie!  I would love to see what you created!

If you are donating this beanie to kids or anywhere else, I would love to hear your story and share it with my community!

You can tag me at @joscraftyhook and in my FB Group Jo’s Crafty Hook Designs

You can also find FREE crochet patterns for more hats and other great crochet patterns on my website.

*****************************************************

Ad- Free Premium Copy

If you would like to purchase a copy of the Posted Beanie Crochet Pattern, you can find it at my Ravelry Store for a small fee.

***********************************************

Premium Crochet Pattern Stores


********************************************************

Find me, Jo of Jo’s Crafty Hook at the places listed below.

Email:  joeybaird@aol.com

Linktree

Website

Facebook Group Jo’s Crafty Hookers

Facebook Group Jo’s Crafty Hook Designs

Facebook Page Jo’s Crafty Hook

Facebook Page:  Crochet Designer Community
Ravelry

LoveCrafts

Etsy

Instagram

YouTube

Pinterest

Donations Accepted


Loading

Puzzle Throw Crochet Pattern

Puzzle Throw Crochet Pattern

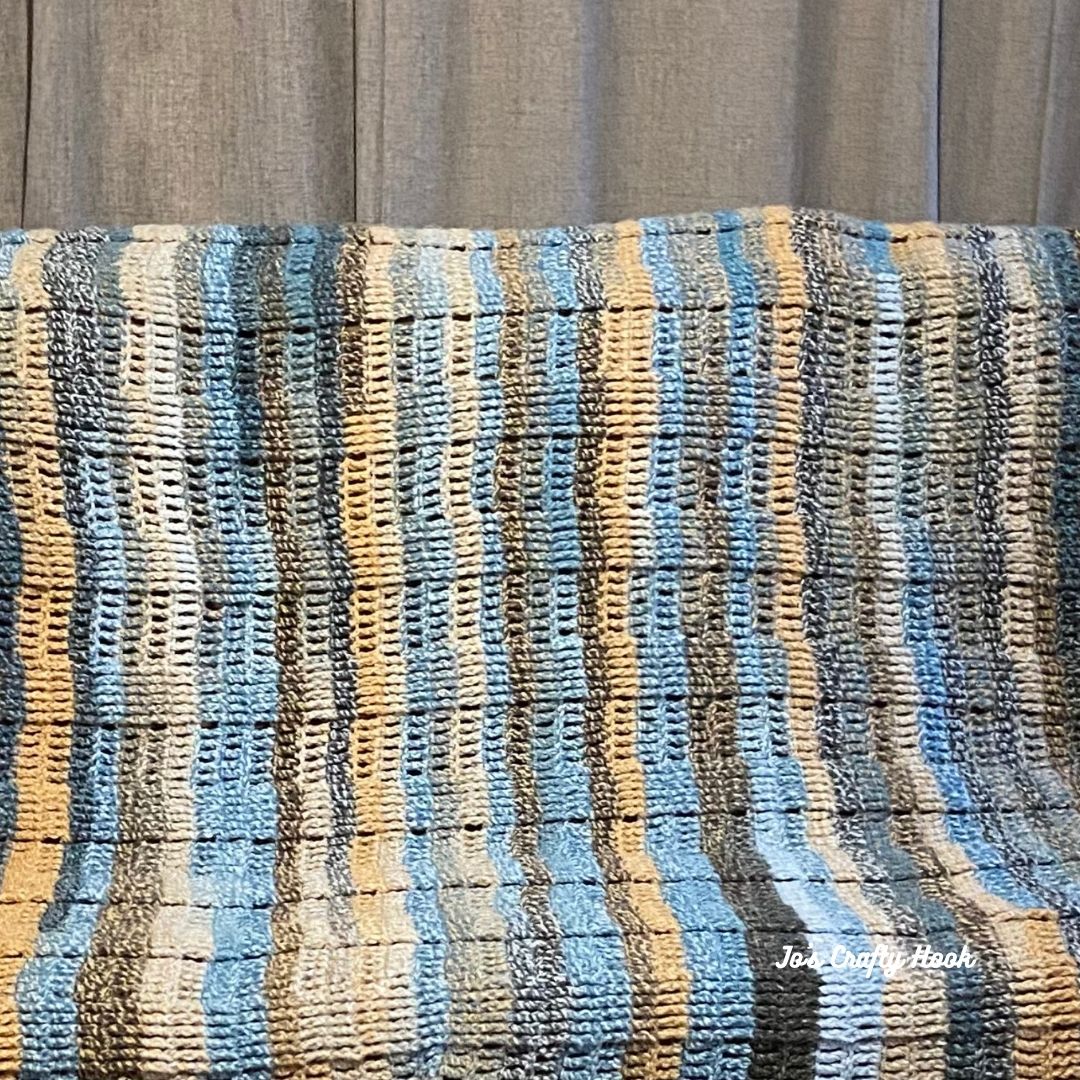
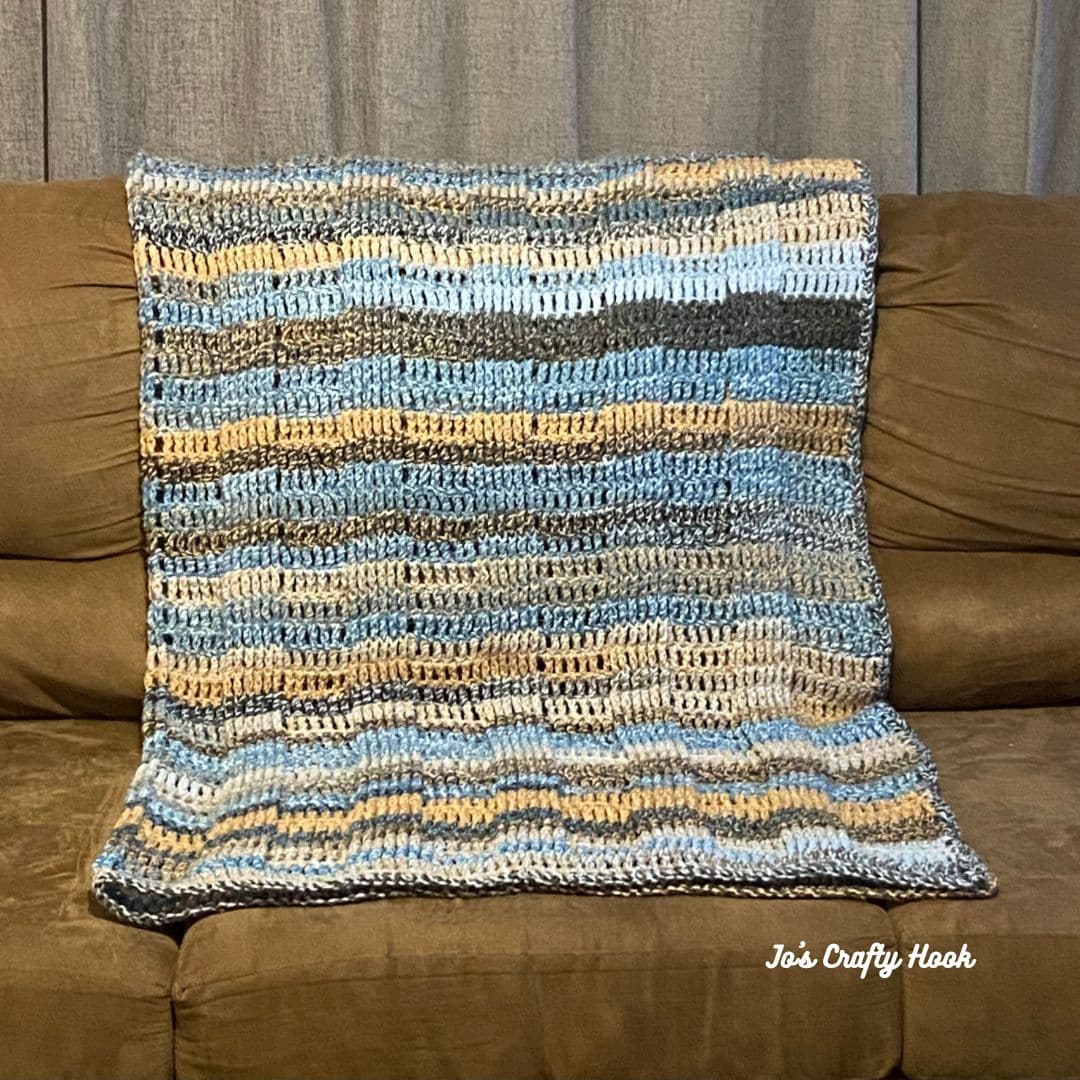
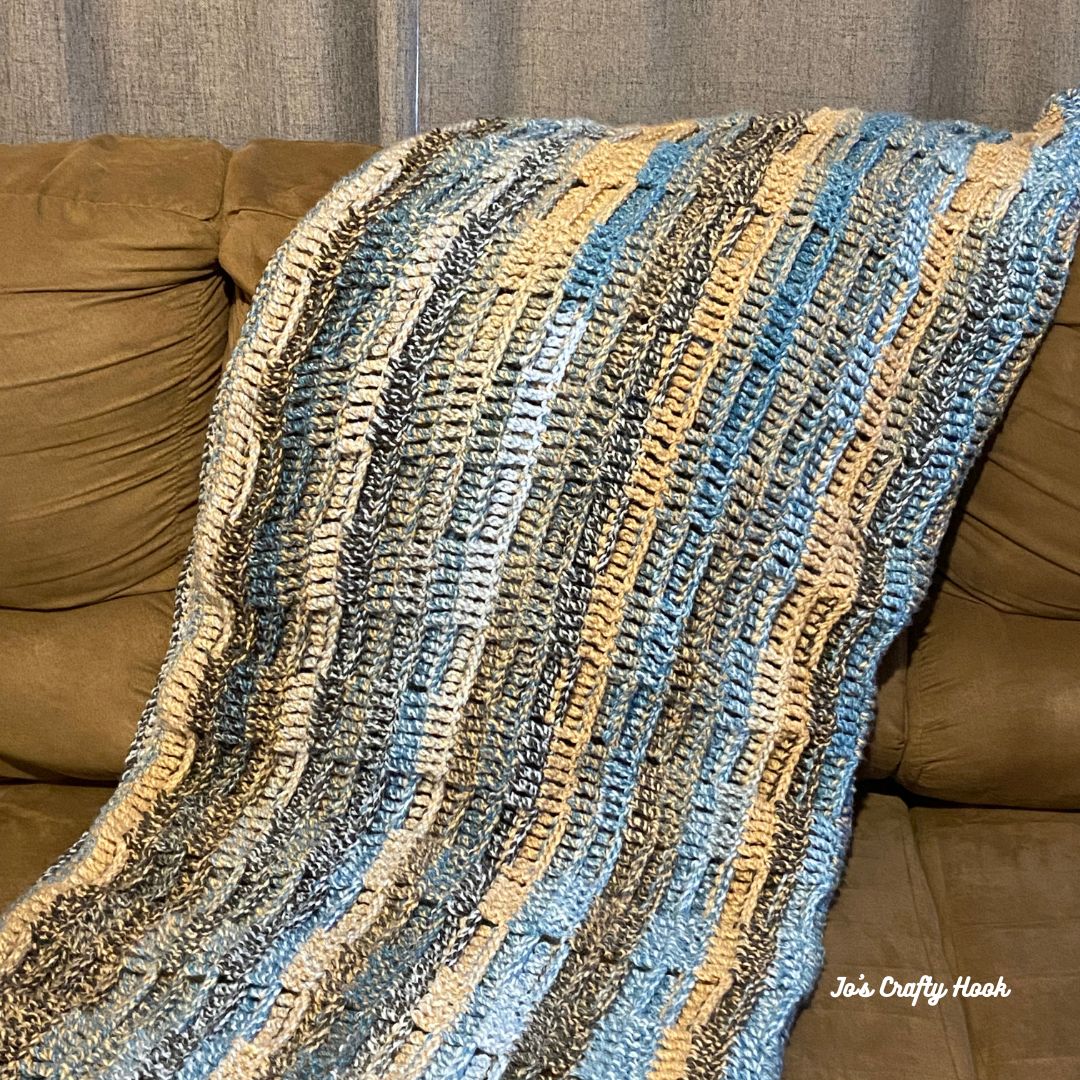
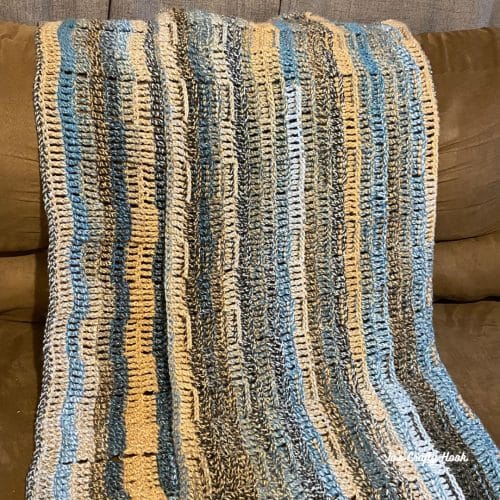
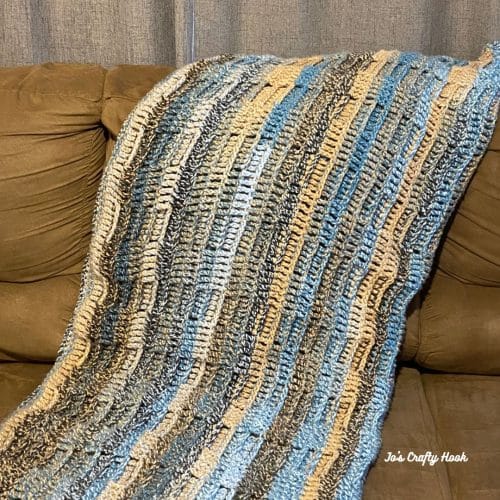
The Puzzle Throw Crochet Pattern was one I really enjoyed designing.  The yarn I used, Premier Puzzle Yarn, was just fabulous to work with!

The crochet stitches used, Front Post and Back Post Treble Crochet Stitches, created such a beautiful texture.

The throw crochet pattern works up quickly and can easily be customized for a larger or smaller blanket.

This page contains affiliate links

Be sure to sign up for my Newsletter and receive a FREE crochet pattern straight to your inbox.  You will also receive messages about New Crochet Pattern Releases; FREE Crochet Patterns; Collaborations and more!

Cozy Blankets Blog Hop – October 1st thru October 18th, 2025

I loved this design so much that I decided to host the Cozy Blankets Blog Hop to share it with you! 

I asked a fabulous group of crochet designers to join me and offer you a cozy blanket crochet pattern of their own.

My Day – October 1st – October 2nd

On October 1st, you can get my newest blanket design, the Puzzle Throw Crochet Pattern for $1.75 which is 50% off!

Visit my Cozy Blankets Blog Hop to find the Coupon Code needed to get it for $1.75!

Once you have the Coupon Code, click on the button below and use it at my Ravelry Store at checkout.

Be sure to visit my Cozy Blankets Blog Hop daily, from October 1-18, 2025 to find more great cozy blanket crochet patterns.

Below you will find a Free version of my Puzzle Throw Crochet Pattern.

Information Needed:

I used Premier Puzzle #5 ply Bulky Yarn. 100% Acrylic Yarn. (328 yds/300 m) (7 oz/200 mg)

US Terminology
Beginner Friendly

Materials:
US J or 6mm Crochet Hook
1300-1700 yds of #5 ply Bulky Yarn
Tape Measurer
Tapestry Needle
Scissors

Abbreviations/Stitches Used:
ch – chain
sl st = slip stitch
sc = single crochet|
trc = triple crochet
FPtr = front post treble crochet
BPtr = back post treble crochet

Finished Sizes:
48” wide x 36” tall
48” wide x 48” tall

Notes:
ch 4 counts as a trc
alt ch 3 counts as a trc
FPtr counts as a trc
BPtr counts as a trc

Video Tutorials:
FPtr & BPtr – Right Handed

FPtr & BPtr – Left Handed

Special Stitches:
Front Post Treble CrochetThe stitch is made around the post of the stitch below so that the stitch being made sits at the front of the work.

  • YO twice, insert hook from front to back of the next stitch  
  • YO, draw through 2 loops on hook (4 loops on hook)
  • YO, draw through 2 loops on hook (2 loops on hook)
  • YO, draw through last 2 loops on hook

Back Post Treble Crochet:  the stitch is made around the post of the stitch below so that the stitch being made sits at the back of the work.

  • YO twice, insert hook from back to front of the next stitch  
  • YO, draw through 2 loops on hook (4 loops on hook)
  • YO, draw through 2 loops on hook (2 loops on hook)
  • YO, draw through last 2 loops on hook

Gauge:
US J or 6mm Crochet Hook
12 trc x 4 rows = 4”

Gauge Swatch:
R1:  ch 15, trc in 5th ch from hook, trc across. turn (12 trc)
R2-R4:  alt ch 3 or ch 4, trc across.  turn (12 trc)

Customizing:
You can make a larger or smaller blanket by adding or subtracting multiples of 12.

Ad-Free Version

Get a premium copy of my Puzzle Throw Crochet Pattern at my Ravelry Store for a small fee.

Puzzle Throw Crochet Pattern

R1:  ch 153, trc in 5th ch from hook, trc across. turn  (150 trc)

R2:  alt ch 3 or ch 4, trc in next 5 st, FPtr around next 6 st, trc in next 6 st, FPtr around next 6 st.  rep from * until last 6 st, trc in last 6 st. turn (150 trc)

R3:  alt ch 3 or ch 4, trc in next 5 st, BPtr in behind next 6 st, trc in next 6 st, BPtr behind next 6 st.  rep from * until last 6 st, trc in last 6 st. turn (150 trc)

R4:  alt ch 3 or ch 4, trc in next 5 st, FPtr around next 6 st, trc in next st, FPtr in around 6 st.  rep from * until last 6 st, trc in last 6 st. turn (150 trc)

R5-35(47):  Repeat R3-R4

R36(48):  alt ch 3 or ch 4, trc across.  (150 trc)

Do NOT turn after R36(38)

Border

Down the Side:
ch 1, sc in same st, 3 sc in side post of trc, *sc in next trc, 3 sc in side post of next trc.  rep from * until 1st ch of foundation row. (sc, ch 2, sc) all in 1st ch.

Across the Bottom:
sc in each ch across until last ch, (sc, ch 2, sc) all in last ch.

Up the Side:
3 sc in side post of trc, *sc in next st. 3 sc in next side post of trc.  rep from * until last st, (sc, ch 2, sc) all in last st.

Across the Top:
sc in each trc across the top until last st, (sc, ch 2) all in last st.  sl st in 1st sc to join.

Fasten off and weave in ends.

@Jo’s Crafty Hook 2025

$5 Blanket Squares Bundle – Jo’s Crafty Hook

I hope you took advantage of the cozy blanket crochet patterns during my Cozy Blankets Blog Hop!

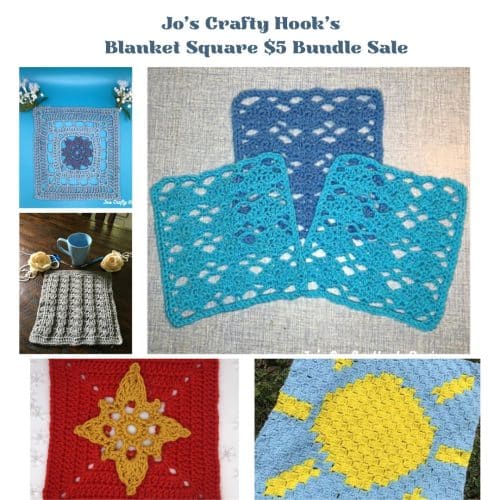
If you would like to make more blankets, I have put together 5 of my blanket square premium crochet patterns that would be perfect for you to make and cuddle up with!  

Inside the $5 Blanket Square Bundle you will find my:

Clematis Flower Square Crochet Pattern
Diamonds Square Crochet Pattern
Jacob’s Ladder Square Crochet Pattern
North Star Blanket Square Crochet Pattern
Sun C2C Crochet Pattern

********************************************************

Premium Crochet Pattern Stores


********************************************************

Find me, Jo of Jo’s Crafty Hook at the places listed below.

Email:  joeybaird@aol.com

Linktree

Website

Facebook Group Jo’s Crafty Hookers

Facebook Group Jo’s Crafty Hook Designs

Facebook Page Jo’s Crafty Hook

Facebook Page:  Crochet Designer Community

Ravelry

LoveCrafts

Etsy

Instagram

YouTube

Pinterest

Donations Accepted


Loading

You’ve Got Mail Bag Crochet Pattern

You’ve Got Mail Bag Crochet Pattern

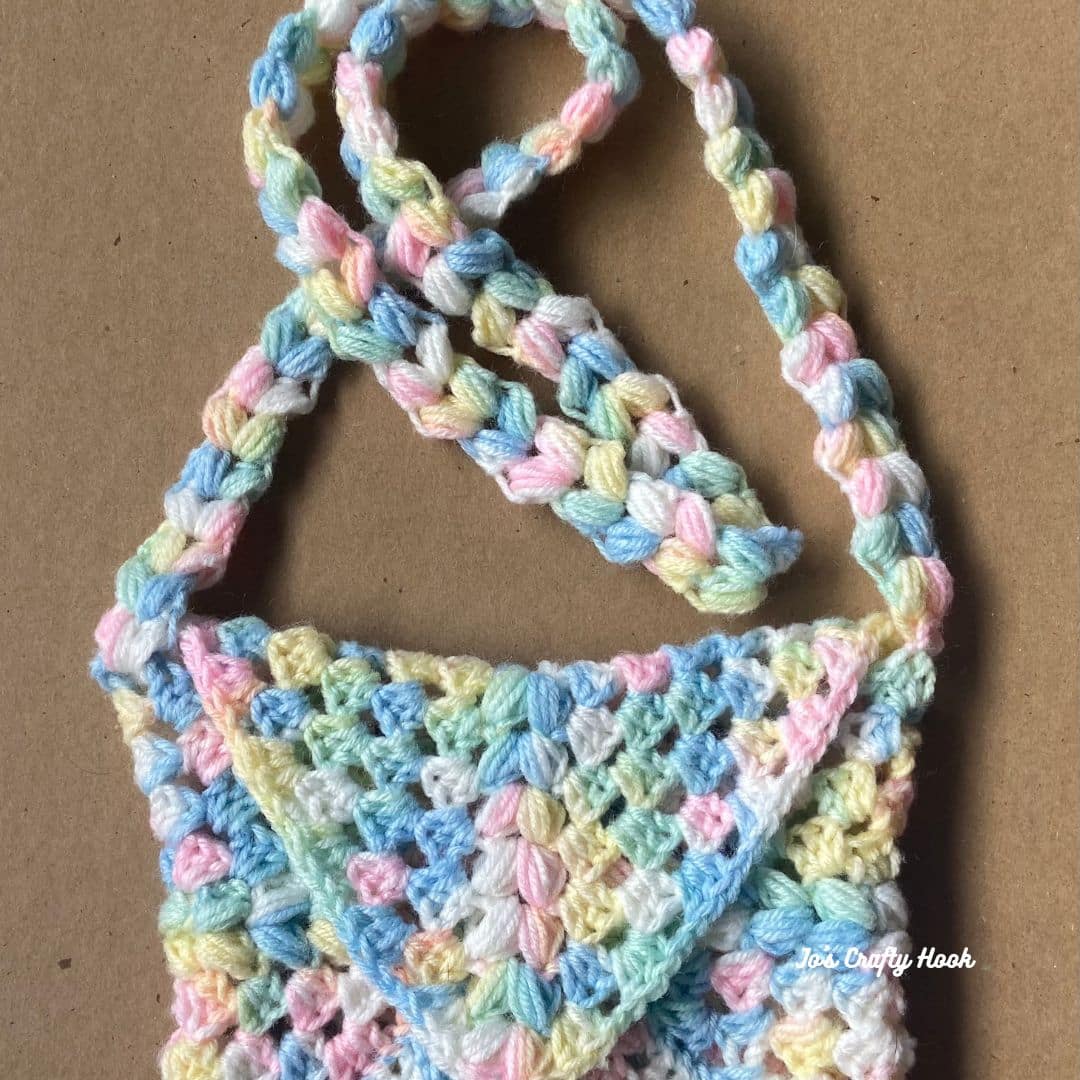
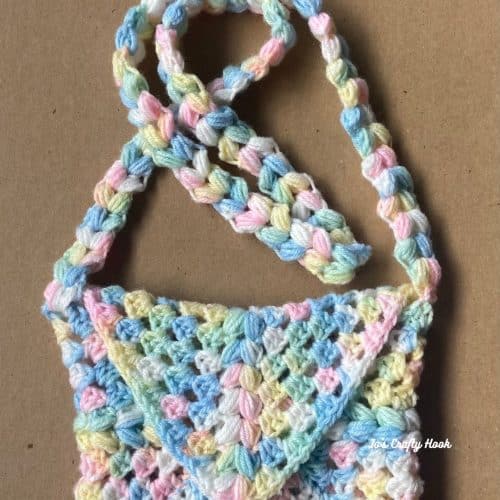
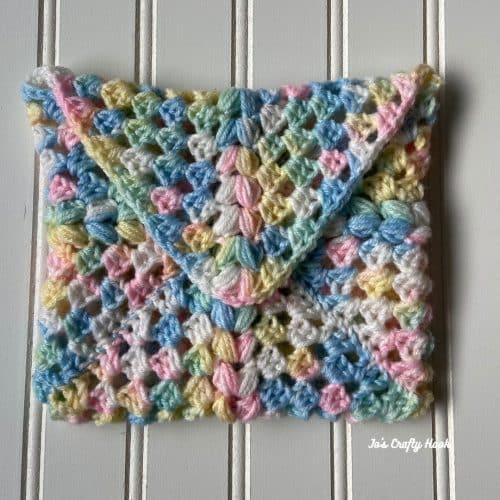
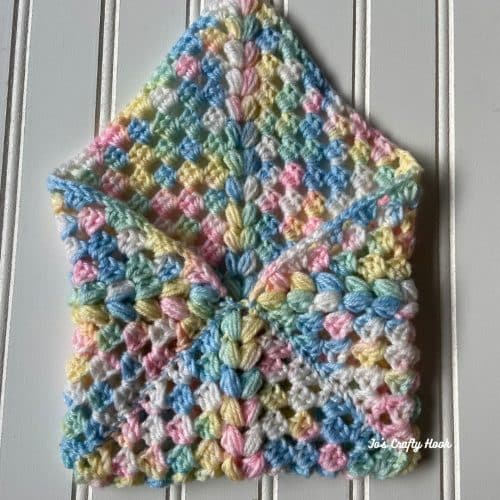
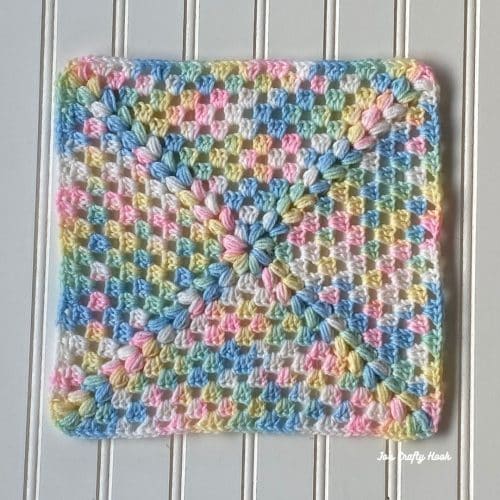
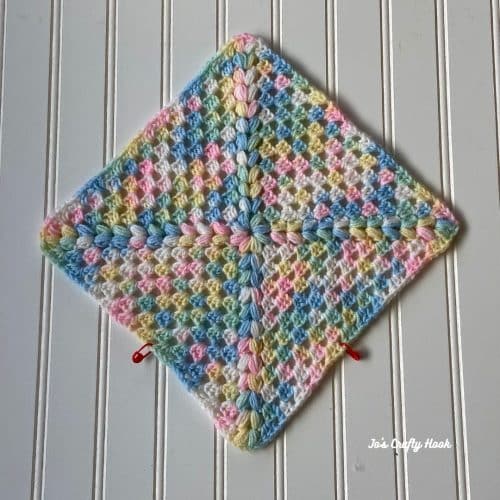
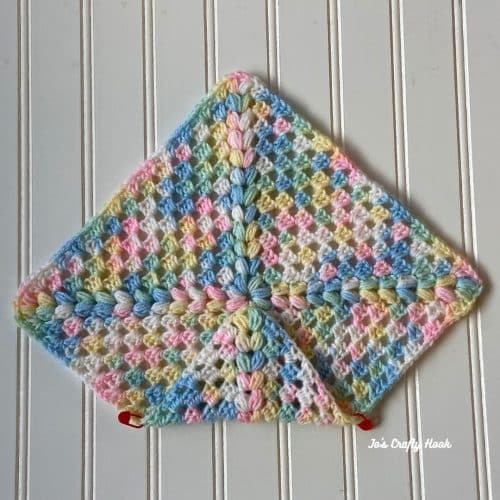
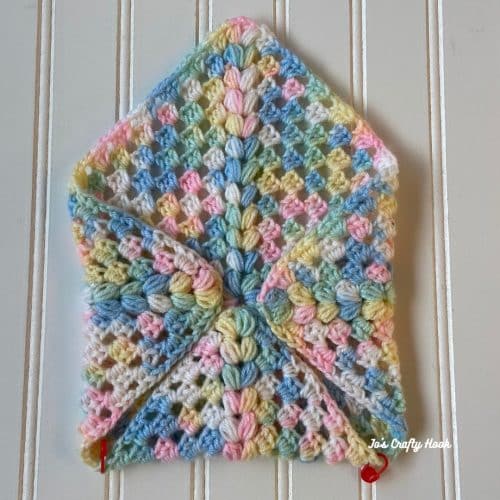
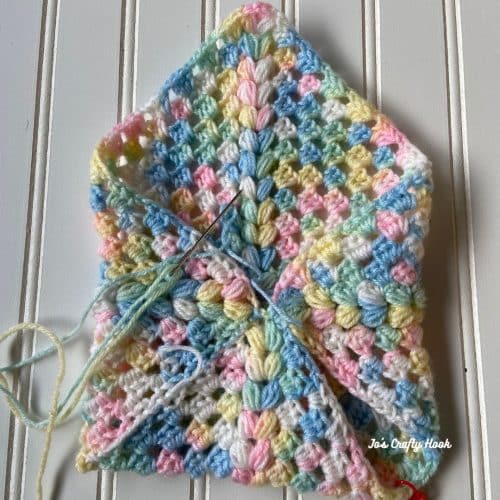
The You’ve Got Mail Bag Crochet Pattern uses instructions for a Granny Square that is folded closed and ends up looking like an envelope.  

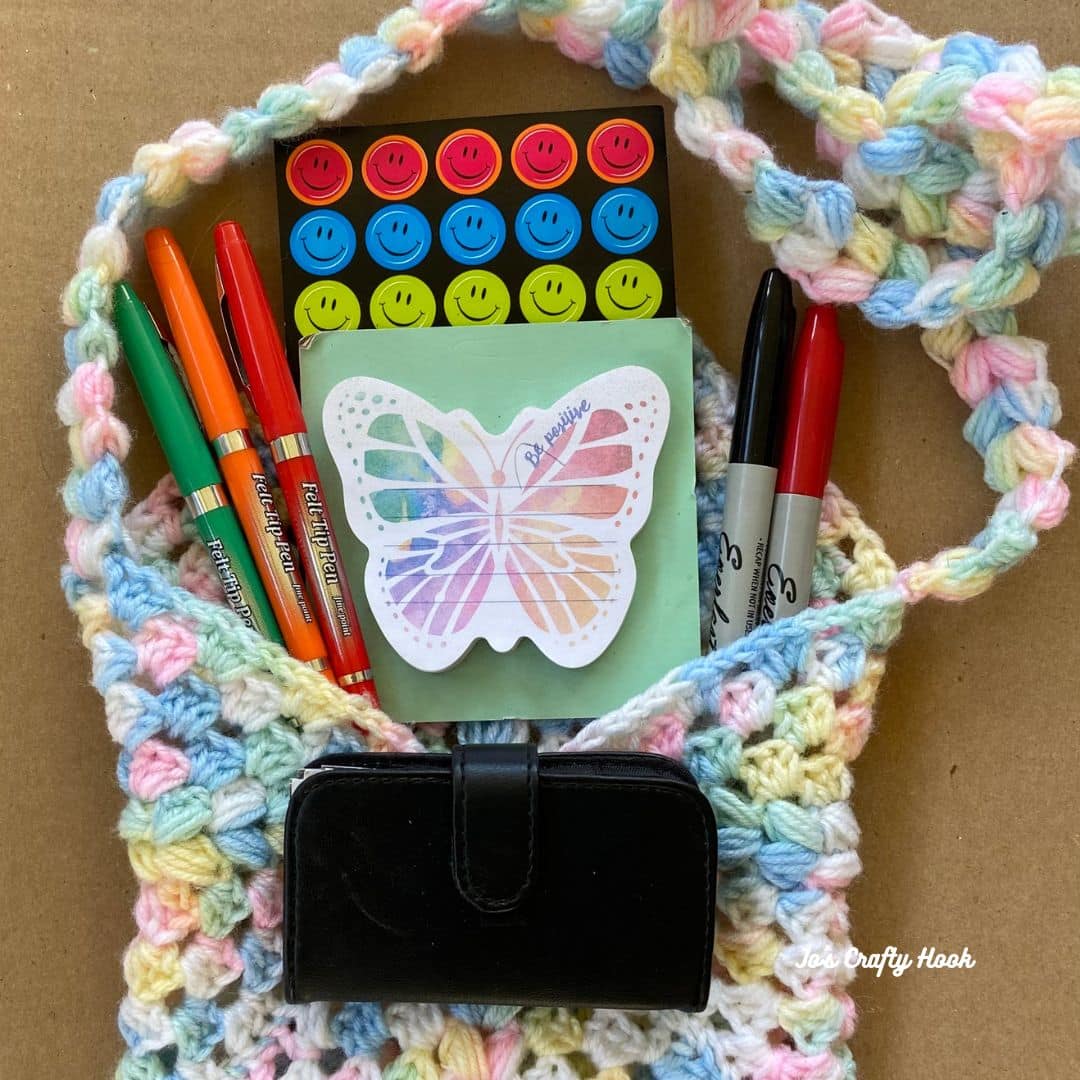
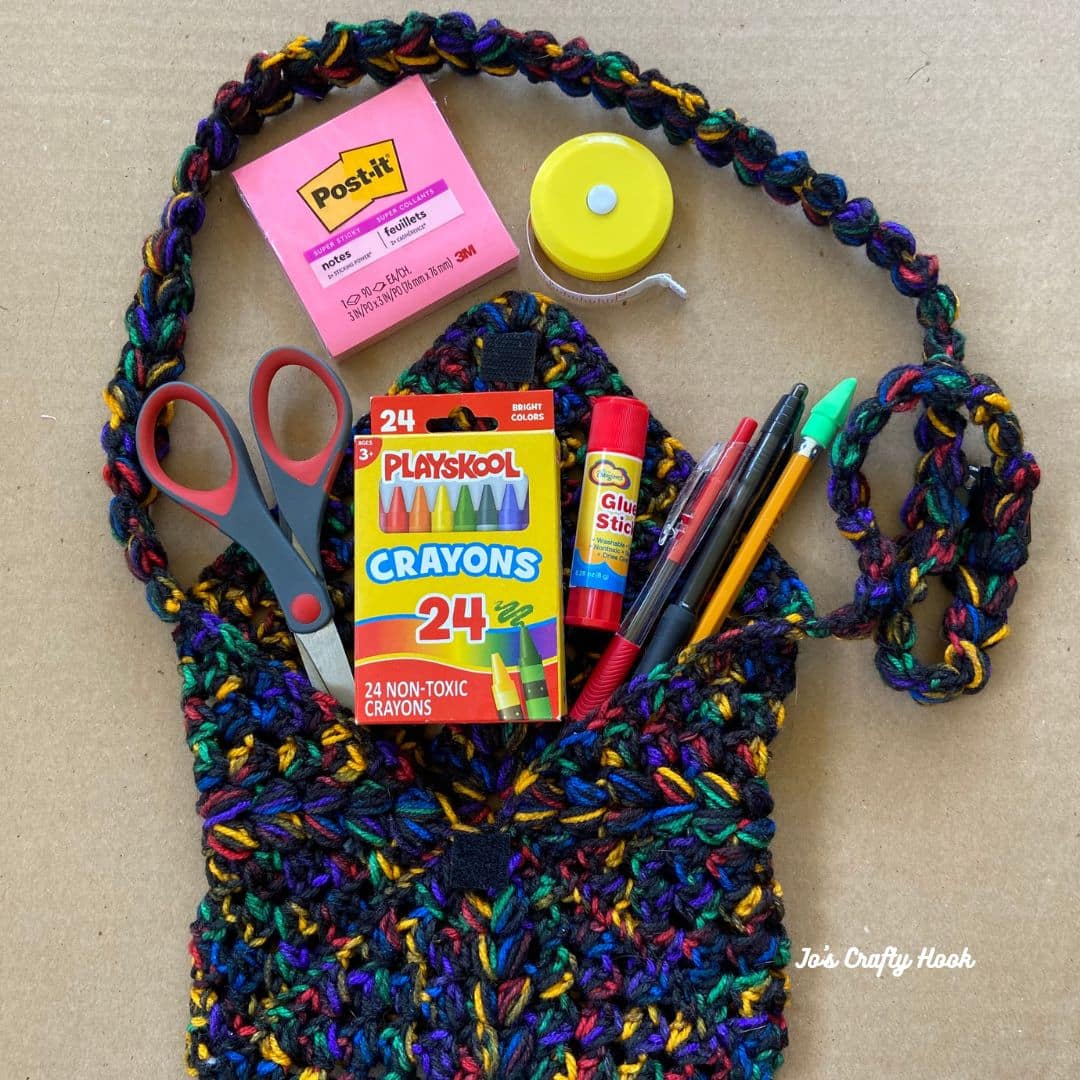
The bag can be made for Teachers or Kids.  The bag would be great for carrying little things like keys, sunglasses, wallets. It is also great for kids to keep their crayons, glue sticks, scissors that can be found all in one place.

This post contains affiliate links

Be sure to sign up for my Newsletter and receive a FREE crochet pattern straight to your inbox.  You will also receive messages about New Crochet Pattern Releases; FREE Crochet Patterns; Collaborations and more!

2025 Giftstravaganza Blog Hop hosted by Underground Crafter

From November 1-30, 2025 you will find daily FREE premium crochet patterns that are great gift ideas you can crochet for Christmas and the Holidays or any time of year.

My Featured Day is November 22-23, 2025

My You’ve Got Mail Bag Crochet Pattern is being featured in the 2025 Giftstravaganz Blog Hop and you can get a FREE premium copy for 24 hours from my Ravelry Store!

Use the Coupon Code:  TEACHER


Also, you can find the FREE version below that you can crochet for Teachers, Kids, and anyone that needs a hip bag/pouch.

Ad-Free  Version

You can purchase an Ad-Free Copy of the crochet pattern at my Ravelry Store for a small fee.

Inside the crochet pattern you will find step-by-step picture tutorials to help you every step of the way.

You’ve Got Mail Bag Free Crochet Pattern

Information Needed

Skill Level:
Beginner
US Terminology

I Red Heart Super Saver, #4 ply Medium Weight Yarn .

Finished Size: 

Materials:
US  G or 4.5 mm Crochet Hook
1000-1200 yds of 4 ply Worsted or Aran Weight Yarn
Tape Measurer
Scissors
Stich Markers
Tapestry Needle
Velcro/Button

Abbreviations/Stitches Used:
ch = chain
hdc = half double crochet
ps = puff stitch
bps = beginning puff stitch
sl st = slip stitch
sp = space
rep = repeat
RS = Right Side
WS = Wrong Side
SM = Stitch Marker

Notes:
The crochet pattern is worked like Granny Square
The crochet pattern is worked flat and in the round
Each round will increase by 12 dc
The ch-1 sp of each round will increase by 4

Special Stitches:
Beginning Puff Stitch – bps

  • ch 2
  • YO, insert into same ch-2 sp, YO, pull up a loop (3 loops on hook)
  • YO, insert hook into same ch-2 sp, YO, pull up a loop (5 loops on hook)
  • YO, insert hook into same ch-2 sp, YO, pull up a loop (7 loops on hook)
  • YO, insert hook into same ch-2 sp, YO, pull up a loop, draw through all 9 loops on hook

Puff Stitch:

  • YO, insert into indicated sp, YO, pull up a loop (3 loops on hook)
  • YO, insert hook into same sp, YO, pull up a loop (5 loops on hook)
  • YO, insert hook into same sp, YO, pull up a loop (7 loops on hook)
  • YO, insert hook into same sp, YO, pull up a loop, draw through all 9 loops on hook

Beg Corner = (bps, ch 2, ps) all in ch-2 sp
Corner = (ps, ch 2, ps) all in ch-2 sp

Gauge:
US G or 4.5 mm Crochet Hook
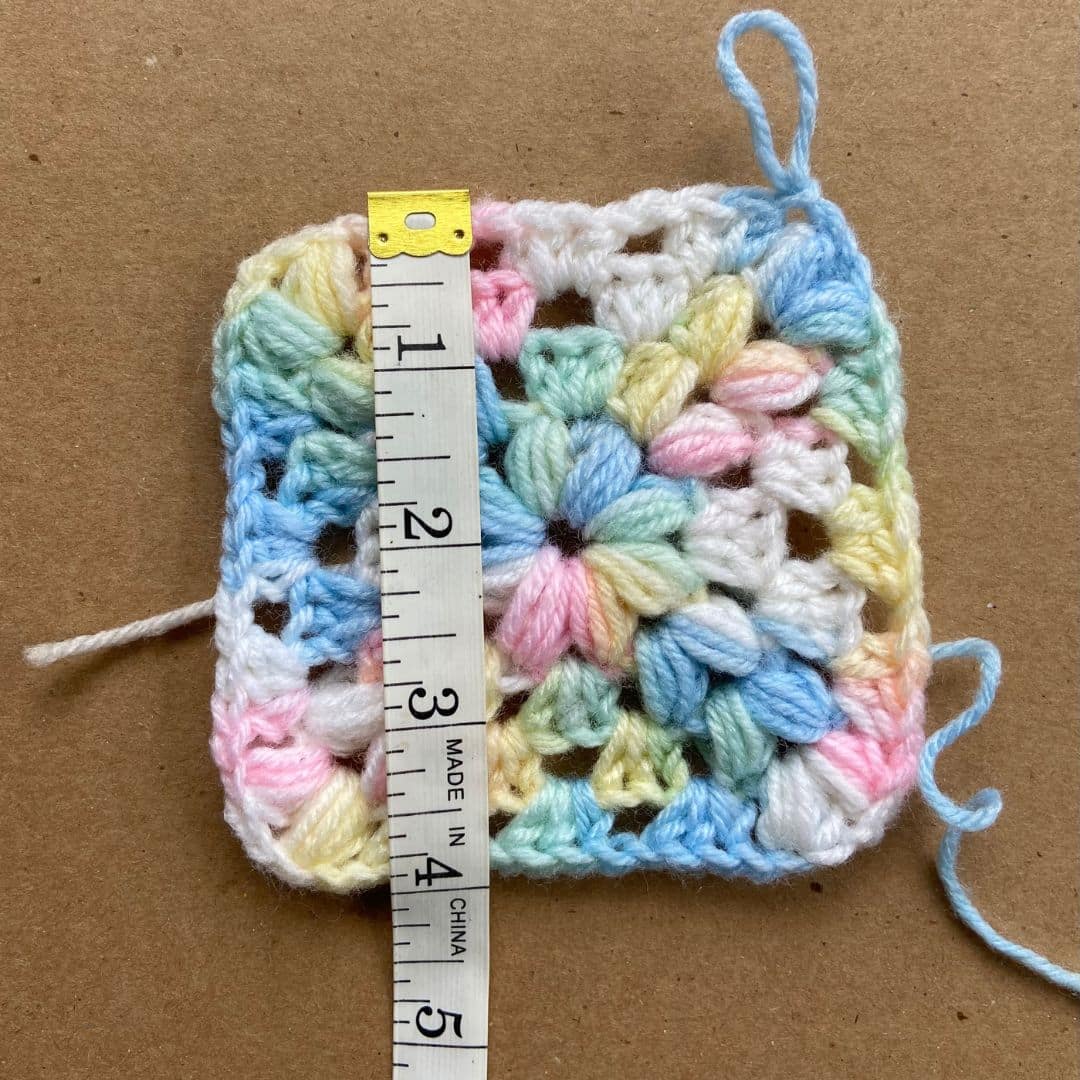
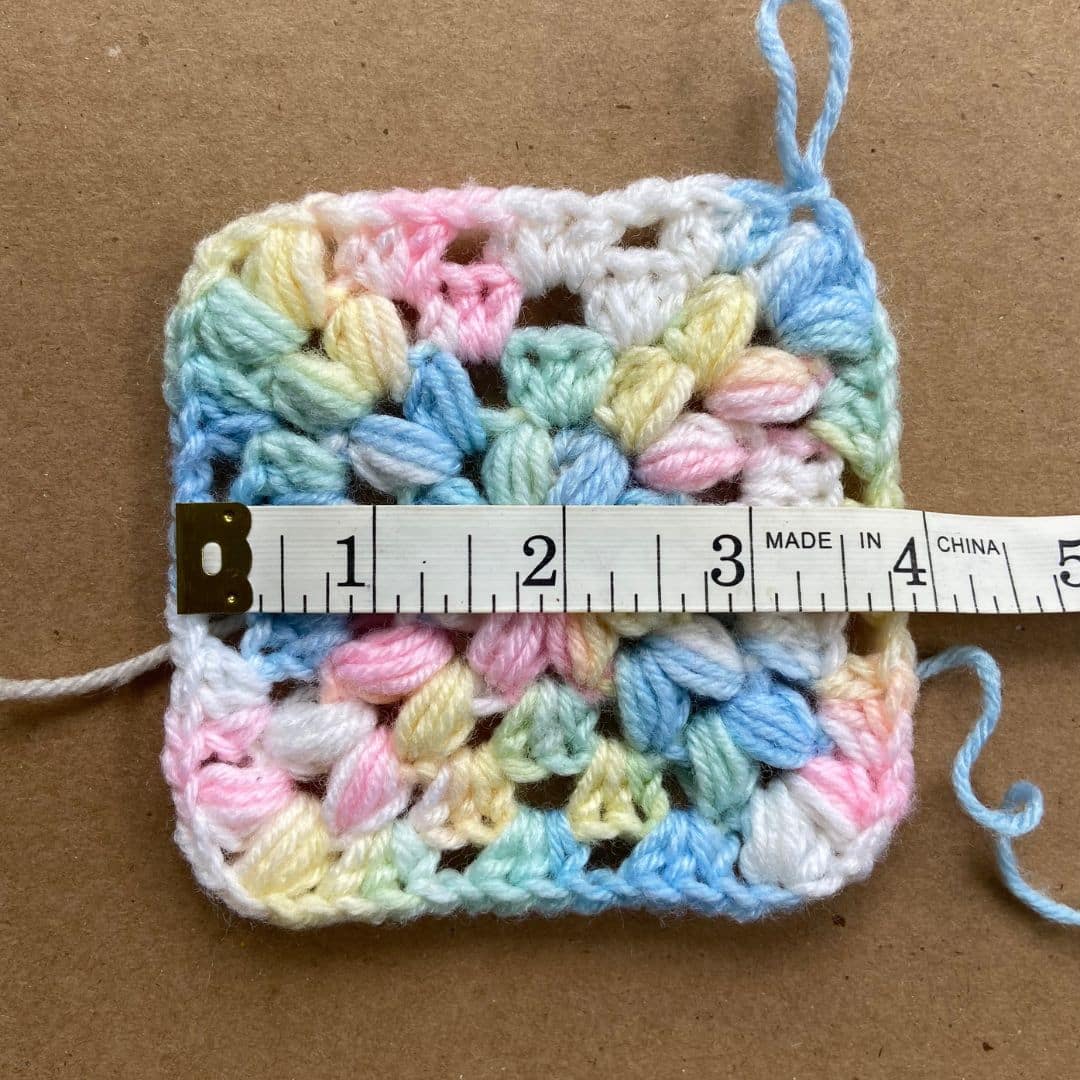
4 rounds of pattern = 4”
Note:  if you do not meet Gauge, try going up or down a hook size until you do.

Gauge Swatch:
The Gauge Swatch will be worked a little differently.
Work R1-R4 of the pattern below for a 4” x 4” square

You’ve Got Mail Bag Crochet Pattern
Ad-Free  Version

You can purchase an Ad-Free Copy of the crochet pattern at my Ravelry Store for a small fee.

Inside the crochet pattern you will find step-by-step picture tutorials to help you every step of the way.

Granny Square Crochet Pattern

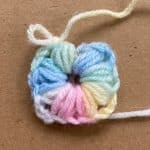
R1:  magic circle, ch 1, Beg Corner, ch 1, *Corner, ch 1, rep from * twice more. sl st in ch-2 sp of Beg Corner. 4 Corners

R1

R2:  Beg Corner, ch 1, *3 hdc in next ch-1 sp, Corner, ch 1, rep from * around until Beg Corner.  Sl st in ch-2 sp of Beg Corner. 4 Corners, 12 hdc

R2

R3:  Beg Corner, ch 1, *3 hdc in next ch-1 sp, Corner, ch 1, 3 hdc in next ch-1 sp, ch 1, rep from * around until Beg Corner.  Sl st in ch-2 sp of Beg Corner. 4 Corners, 24 hdc

R3

R4:  Beg Corner, ch 1, *3 hdc in next ch-1 sp, Corner, ch 1, 3 hdc in next ch-1 sp, ch 1, 3 hdc in next ch-1 sp, rep from * around until Beg Corner.  sl st in ch-2 sp of Beg Corner. 4 Corners, 36 hdc

R5-R12:  Repeat R4

Reminders:
each round will increase by 12 hdc
the ch-1 sp of each round will increase by 4

Customizing:
You can add as many rounds as I did or add as many rounds for your desired size.

Closing Bag

Step 1:
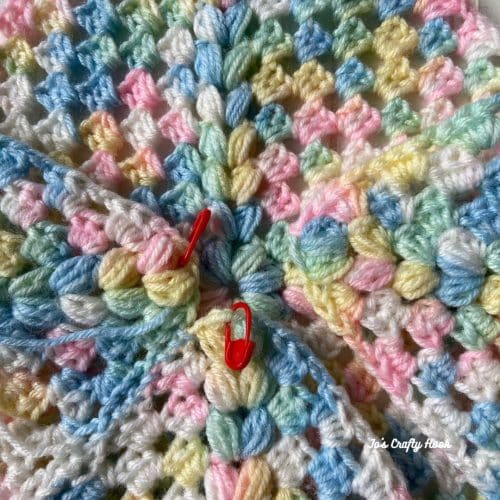
Lay Granny Square WS down, from the bottom Corner, count over 5 groups of 3 hdc on both sides.  Place a SM in the ch-1 sp.

Step 2:
Fold each Corner to the center of Granny Square.

Step 3:
Using a long tail of yarn, attach it in the ch-1 sp before each hdc.
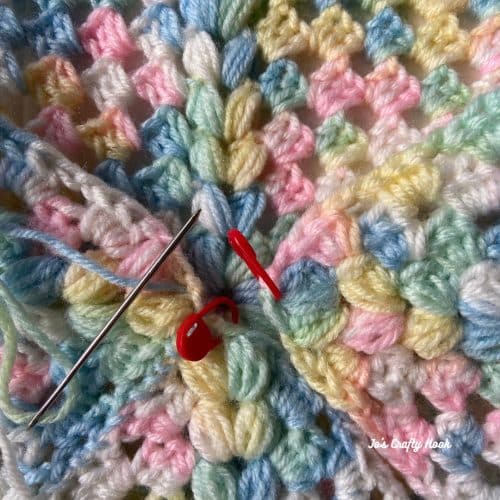
Whip stitch through each hdc until you come to the center of the Granny Square.

Step 4:
Whip Stitch in each ch-2 sp of Corners to join.
Whip Stitch through the Corners you just joined and through the 3rd Corner.

Step 5:
Whip Stitch through each hdc until you come to your SM.  sl st in ch-1 sp(s) to join.

Fasten off and weave in ends.

Strap

Strap Gauge:
US G or 4.5 mm Crochet Hook
8 rows of ps = 4”

Notes:
The Strap will be folded in half, so be sure to account for that when the Strap is attached on both sides.
The Bag is supposed to rest on your hip, so repeat Step 3 until you have reached the desired length of your Strap.

Step 1:
Count over 12 hdc from center of bag, Place SM in previous ch-1 sp.
Count over 12 hdc from the other side of center, Place SM in next ch-1 sp.

Step 3:
ps in ch-2 sp, ch 2, ps in same ch-2 sp.  ch 1, turn.

Repeat Step 3 until you have reached the desired length of your Strap.

Step 4:
Being sure to end with an odd number of rows, going in the ch-1 sp, where you placed your 2nd SM, sl st in the ch-1 sp, sl st through ps and same ch-1 sp, sl st through ch-2 sp of ps and same ch-1 sp, sl st through last ps and same ch-1 sp.

Fasten off and weave in ends.

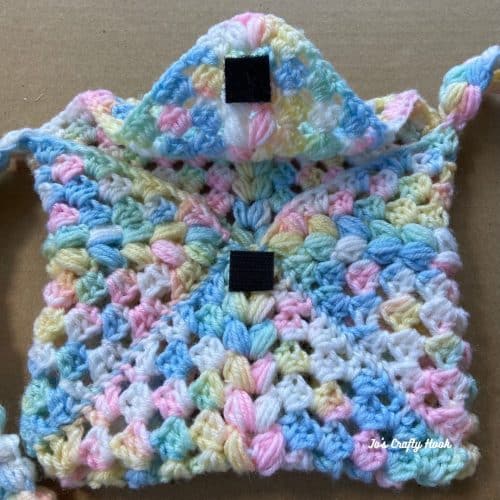
Adding a Closure

There are so many ways you can add something to make the bag open and close easily.  

You can add a Button, Magnets, or even Velcro.  

I used Velcro that has a glue strip on each side.

For the best placement of the Velcro or whatever you decide to use would be:

  1. Attach the sticky side of 1 part of the Velcro on the 2nd Puff Stitch of the flap.
  2. Attach the sticky side of the 2nd part of the Velcro where you joined the 3 of the Corners.

@Jo’s Crafty Hook 2025

I would love to see what you created!

You can tag me at @joscraftyhook and in my FB Group Jo’s Crafty Hook Designs

********************************************************

My Premium Crochet Pattern Stores


********************************************************

Find me, Jo of Jo’s Crafty Hook at the places listed below.

Email:  joeybaird@aol.com

Linktree

Website

Facebook Group Jo’s Crafty Hookers

Facebook Group Jo’s Crafty Hook Designs

Facebook Page Jo’s Crafty Hook

Facebook Page:  Crochet Designer Community

Ravelry

LoveCrafts

Etsy

Instagram

YouTube

Pinterest

Donations Accepted


Loading

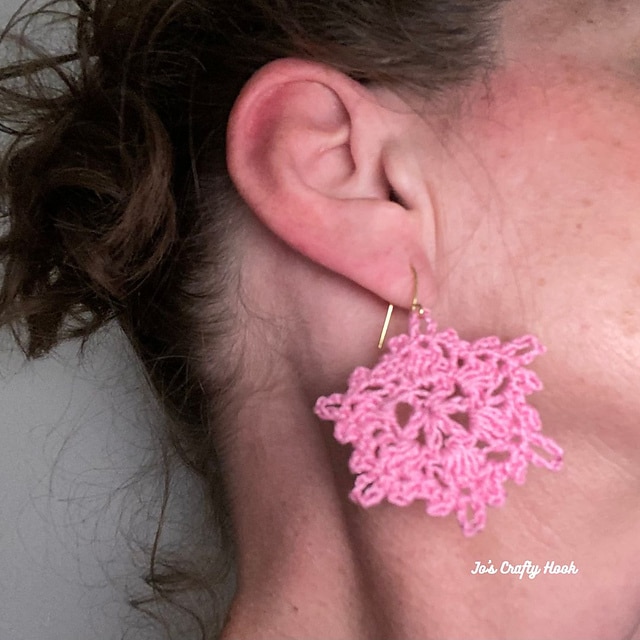
Coreo Flower Earrings Free Crochet Pattern

Coreo Flower Earrings Free Crochet Pattern

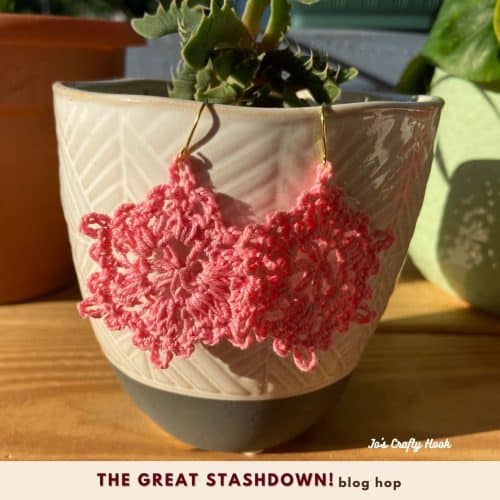
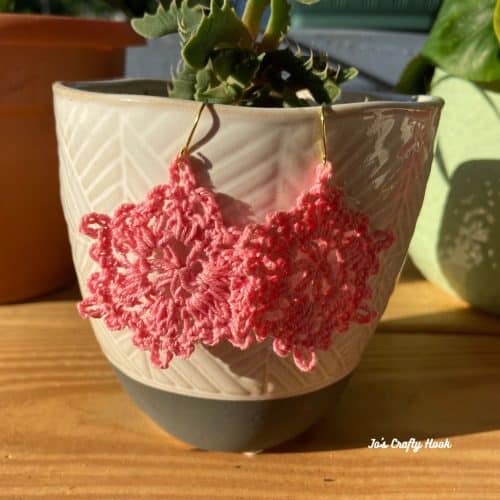
The inspiration behind the design of my Coreo Flower Earrings Crochet Pattern is because I absolutely love flowers.  I came across the Coreopsis Flower while looking for flowers I could plant in my garden this season.

As you know fresh flowers don’t last very long.  So I just had to design some flowers that I could keep around me all year long.

Information about the Coreo Flower Earrings Crochet Pattern

The earring crochet pattern works up quickly.  You can make them in a wide variety of colors and add a little something special to your wardrobe.

So, you can even embellish handbags, headbands, or even use a thicker yarn to embellish just about anything in your wardrobe.  They are a great way to use some of the scraps of yarn you have left over from other projects.

Below you will find a FREE copy of my Coreo Flower Earrings Crochet Free Pattern that you can come back to time and again.  This is a great way to use up stash yarn when you want to add accessories to your updated your wardrobe.

Coreo Flower Earrings Crochet Pattern
The Great Stashdown Blog Hop – Aug 1-30, 2025

My Coreo Flower Earrings Crochet Pattern is being featured in The Great Stashdown Blog Hop hosted by Itchin’ for Some Stitchin’ during the month of August.

The Great Stashdown Blog Hop features 30 days of FREE crochet patterns that are great for using up your stash yarn with quick and easy premium crochet patterns.

The Great Stashdown Bundle – $11.99

If you don’t have time to visit The Great Stashdown Blog Hop daily, you can purchase The Great Stashdown Bundle for $11.99!!

For 90% off you get 30 premium crochet patterns that are all in one place and you can go back to the stash busters again and again when you want to use up your scraps.

My Day – August 17-18, 2025

Starting at 12:01p on August 17th until 11:59p, you can get a FREE premium copy of my Coreo Flower Earrings Crochet Pattern.


Get the Coupon Code

To get a FREE copy of my Coreo Flower Earrings Crochet Pattern, visit The Great Stashdown Blog Hop to get the Coupon Code needed.

Get a FREE copy from my Ravelry Store

After you have the Coupon Code, visit my Ravelry Store to get your FREE copy of my Coreo Flower Earrings Crochet Pattern.  Be sure to add the Coupon Code at Checkout.

Get the Ad-Free copy of my Coreo Flower Earrings for a small fee from my Ravelry Store.


Materials Needed:

I used Aunt Lydia’s Crochet Size 10 Cotton (350yds/320m)
5-10 yds Aunt Lydia’s Crochet Size 10 Cotton
US 2 or 2.5 mm Steel Crochet Hook
(2) 17mm Sterling Silver Plated French Hook Ear Wires
Tapestry Needle
Scissors

Finished Size:  2” x 2”

Abbreviations/Stitches Used:
st = stitch
ch = chain
sc = single crochet
double crochet
sl st = slip stitch
rep = repeat

Notes:
The earrings are worked in the round.
ch 4 counts as a dc + ch 1

Special Notes:
It is always a great idea to Block any crochet item, this helps keep its shape.

You will find some helpful Blocking Tips inside the Ad-Free PDF of the Coreo Flower Earrings Crochet Pattern

Coreo Flower Earrings Crochet Pattern


R1:  make magic circle, ch 4 (dc, ch 1) for a total of 5 more times in magic circle.  pull yarn tight to close circle. sl st in top of ch 3 to join. (6 dc, 6 ch-1 sp)

R2:  ch 1, sc in same st, 3 dc in next ch-1 sp, *sc in next st, 3 dc in next ch-1 sp. rep from * around until 1st st.  sl st in 1st st to join.  (6 sc, 18 dc)

R3:  ch 1, sc in same st, sl st in next st, ch 3, sl st in same st, sl st in next st, ch 5, sl st in same st, sl st in next st, ch 3, sl st in same st, *sc in next st, sl st in next st, ch 3, sl st in same st, sl st in next st, ch 5, sl st in same st, sl st in next st, ch 3, sl st in same st. rep from * around until, last 3 dc.

Attaching Earring to French Hook Ear Wire

Step 1:
sl st in next dc, ch 3, sl st in same dc

Step 2:
cut a long tail of yarn, (about 10 inches) making sure you have enough to attach a french hook and finish off the Earring.

Step 3:
sl st in next dc, ch 2, slip french hook ear wire on ch 2 just made, ch 3, sl st in same dc

Step 4:
sl st in last dc, ch 3, sl st in same dc.  sl st in 1st sc to join.

Fasten off and weave in ends.

©Jo’s Crafty Hook 2025

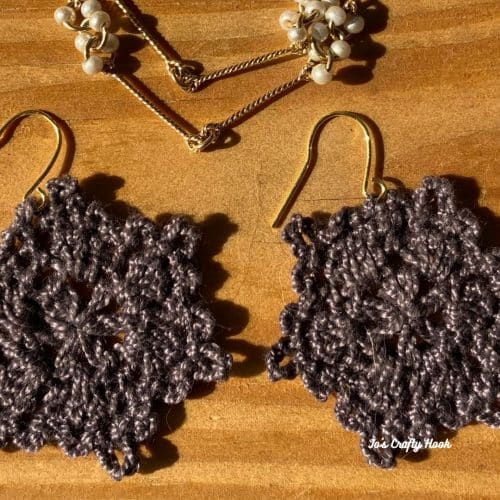
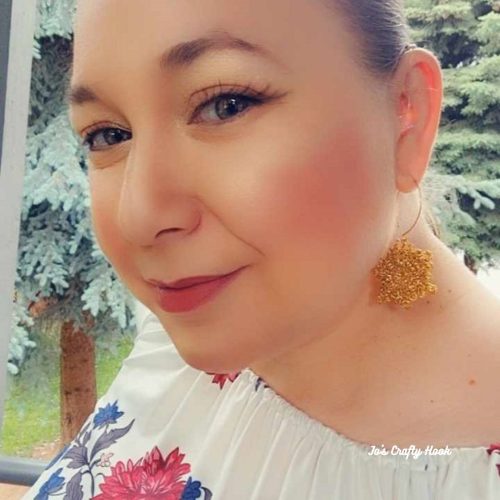
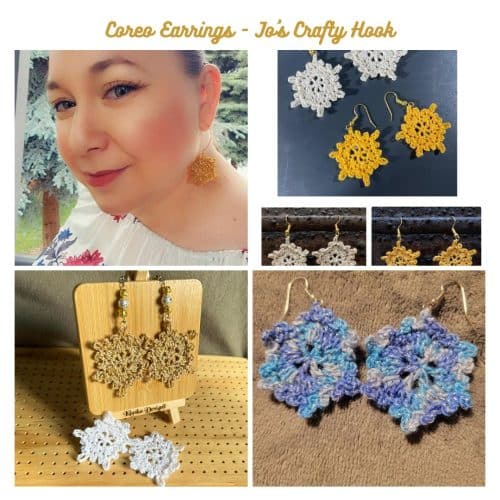
My testers, Amy Locati, Jenny Hinton, Klarisse Cifra-Torres, and Sally Hayes did such a fantastic job that I just have to share them with you!

I would LOVE to see yours too!  You can tag me at @joscraftyhook and in my FB Group Jo’s Crafty Hook

Testers’ versions of the Coreo Flower Earrings.
Find more of my Flower Crochet Patterns at any of my Stores


Find me, Jo of Jo’s Crafty Hook at the places listed below.

Email:  joeybaird@aol.com

Linktree

Website

Facebook Group Jo’s Crafty Hookers

Facebook Group Jo’s Crafty Hook Designs

Facebook Page Jo’s Crafty Hook

Facebook Page:  Crochet Designer Community
Ravelry

LoveCrafts

Etsy

Instagram

YouTube

Pinterest

Donations Accepted

Loading

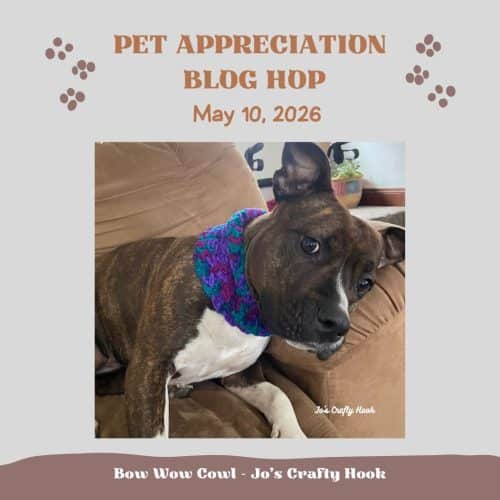
Bow Wow Cowl Free Crochet Pattern

Bow Wow Cowl Free Crochet Pattern

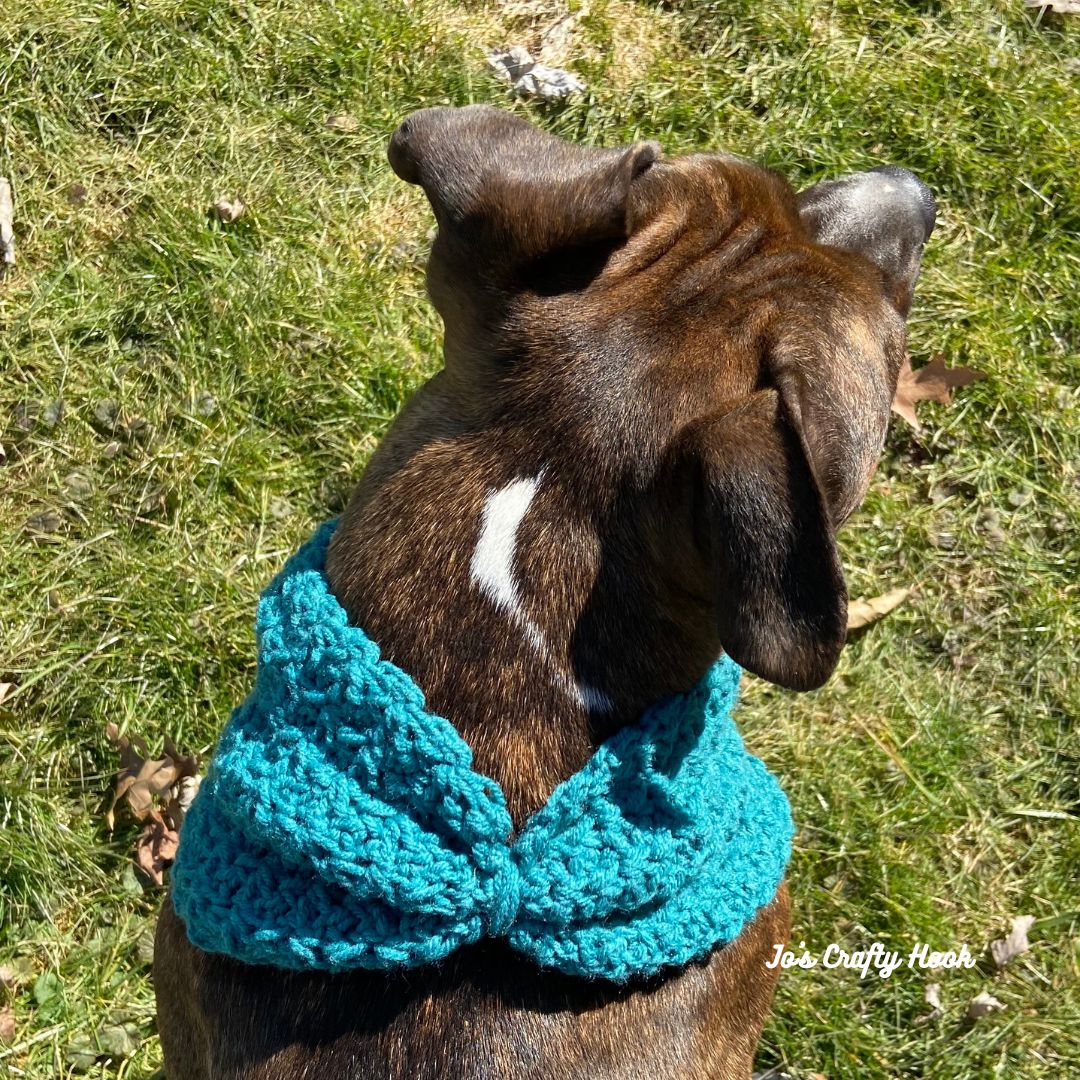
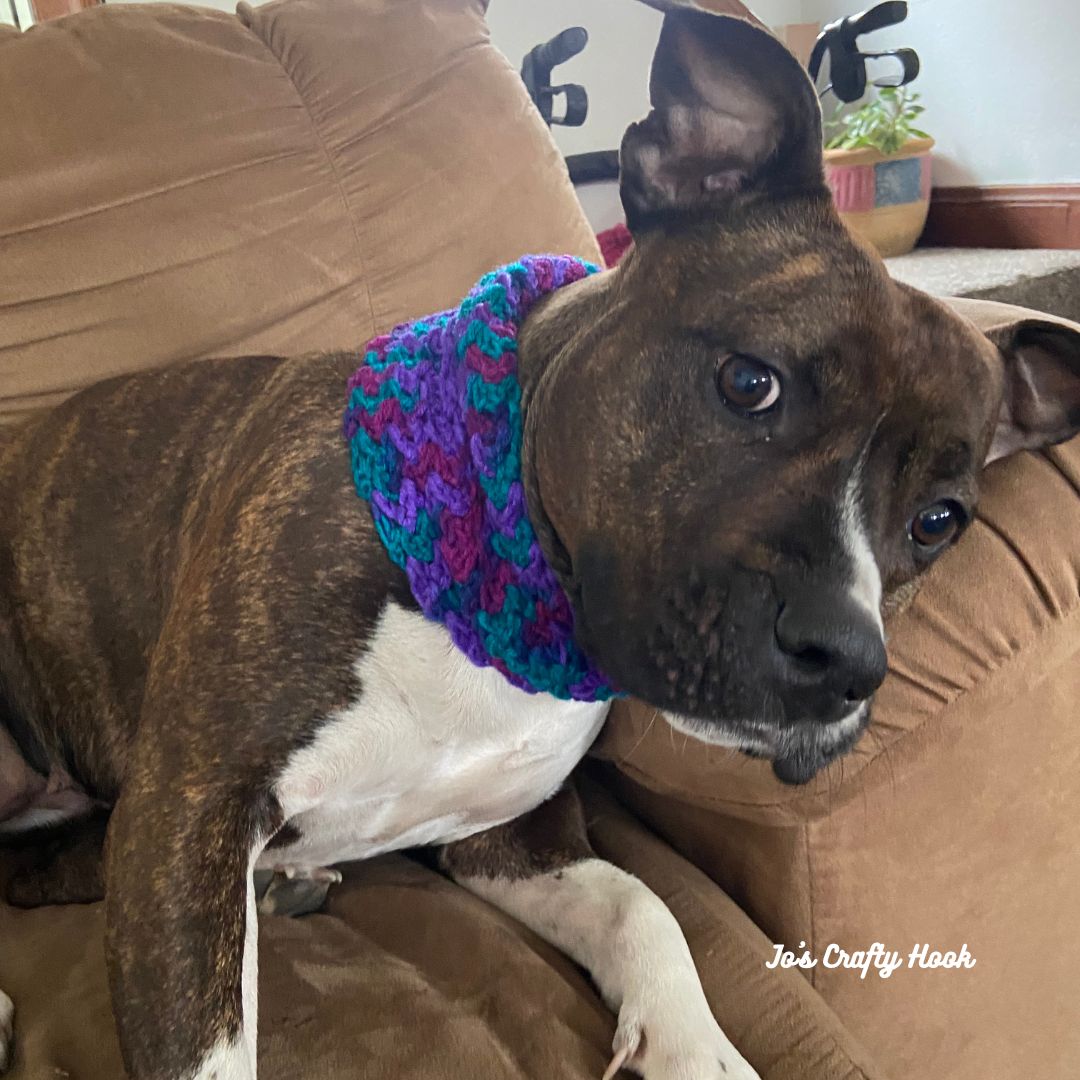
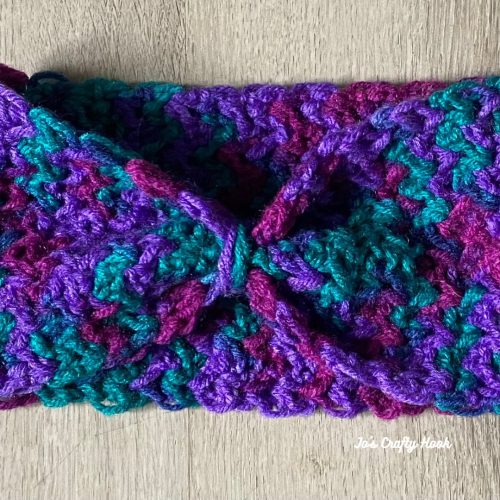
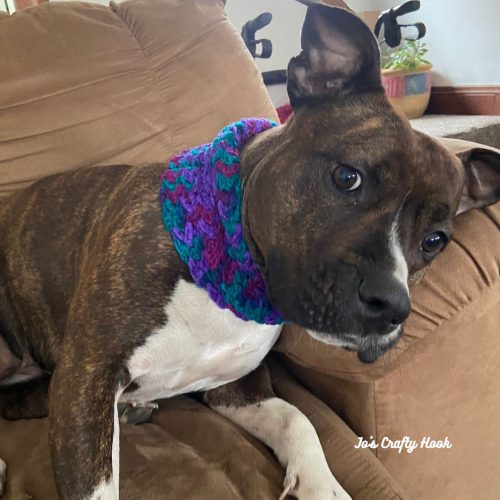
The Bow Wow Cowl Crochet Pattern is designed specifically for pets, but you can also make yourself and others one to match the cowl to your pets. 

I just love love love dressing up my grand-doggy Freyja.  She loves to look her best and dress up too.  She is such a lovey!

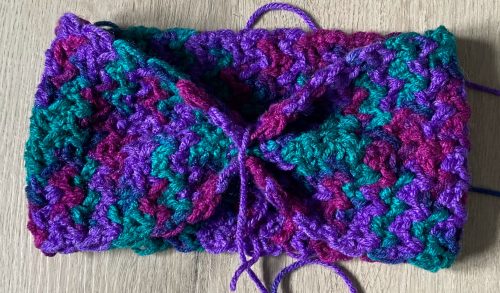
The cowl gets its name because the finishing touch creates a Bow like effect. 

You will find a FREE copy of the Bow Wow Cowl Crochet Pattern below.

The crochet pattern can be customized, making a smaller or larger cowl or it can even be customized to create a headband.  

This post contains affiliate links

2026 Pet Appreciation Blog Hop

May is National Pet Month.  During the month of May they raise awareness about how much Pets can mean to us and a great time to celebrate our cats and dogs or whatever furry friend you have.

So from May 1-14, 2026 I am hosting my 4th Annual Pet Appreciation Blog Hop as a way for you to celebrate your furry friends by sharing FREE crochet patterns you can get daily from May 1st through May 15th.

My Featured Day

My Bow Wow Cowl Crochet Patterns is being featured as part of my 2026 Pet Appreciation Blog Hop.

Starting at 9a EST on May 10th until 8:59a EST on May 11th, you can get a FREE premium copy of my Bow Wow Cowl Crochet Pattern at my Ravelry Store.

While You Wait

In the mean time, visit my 4th annual Pet Appreciation Blog Hop daily to find Free and Discounted Crochet Patterns Daily.

Be sure to sign up for my Newsletter and receive a FREE premium copy of my Freyja Pet Cowl Crochet Pattern.  This would make a Purr-fect addition to your fur babies’ wardrobe! You will also receive messages about New Crochet Pattern Releases; FREE Crochet Patterns; Collaborations and more!

Visit the Landing Page below. Once you subscribe you will receive a Thank You email with the link to the crochet pattern sent right to your inbox!
http://subscribepage.io/joscraftyhook-freyjapetcowlcrochetpattern

Bow Wow Cowl Free Crochet Pattern

Information Needed

I used Red Heart Super Saver 100% Acrylic Yarn.  #4 ply Worsted Weight Yarn (364 g/7 oz) 

Materials:
75-100 yards of #4 Worsted Weight Yarn
US G or 4.5mm Crochet Hook
Tapestry Needle
Scissors

Abbreviations/Stitches Used:
sc = single crochet
dc = double crochet
ch = chain
st = stitch
sk = skip

Notes:
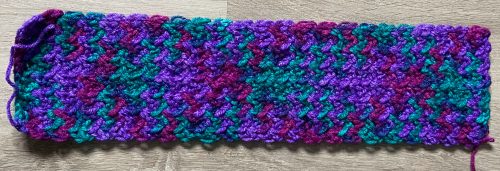
The cowl is worked flat
The cowl is worked sideways
There is no turning chain
Stitch count is a multiple of 3+2

Gauge:
US G or 4.5 mm Crochet Hook
12 st x 8 rows = 4”

Size Chart

Size Small Medium Large
Length before Sewing 10” 14” 18”
Neck Opening 5” 7” 9”
Height 1’ 3” 5”


Customizing

For the best fit for your pet, it may be a good idea to measure the circumference of their neck so you get the perfect fit.This would also look great as a headband or cowl for people too.  Measure the head or neck circumference and use the gauge of the stitches below until you reach your desired circumference.

Bow Wow Cowl Free Crochet Pattern

R1:  fsc 7 (13, 21). turn (7, 13, 21 sc)
Optional:  ch 8 (14, 20) sc in 2nd ch from hook, sc across. (7, 13, 21 sc) turn 

R2:  (dc, ch 1, sc) all in 1st sc, *sk 1 st, (dc, ch 1, sc) all in next st.  rep from * across.  turn. (8, 14, 22 st)

R3:   (dc, ch 1, sc) all in 1st ch-1 sp, *sk 2 st, (dc, ch 1, sc) all in next ch-1 sp. rep from * across.  turn (8, 14, 22 st)

Small

R4-R20: repeat R3 or until you reach your desired circumference of your pet’s neck. ch 1 and turn after you completed your last row.

Medium

R4-R28: repeat R3 or until you reach your desired circumference of your pet’s neck. ch 1 and turn after you completed your last row.

Large


R4-36:  repeat R3 or until you reach your desired circumference of your pet’s neck. ch 1 and turn after you completed your last row.

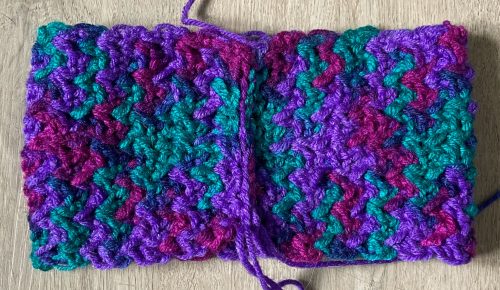
Closing Cowl

Step 1:
Line up WS of beginning row to the WS of the ending row.

Step 2:
sl st in each dc and each sc across.

Fasten off and weave in ends.

Creating Bow Effect

Step 1:
Cut a long tail of yarn (about a yard)

Step 2:
Pinch the sl st row of the cowl

Step 3:
Wrap your long tail of yarn tightly around the sl st row about 10 times or until you reach your desired look.

Fasten off and weave in ends.

@Jo’s Crafty Hook 2025

********************************************************

More FREE crochet patterns for Pets on my website
Premium Crochet Pattern Stores


Find me, Jo of Jo’s Crafty Hook at the places listed below.

Email:  joeybaird@aol.com

Linktree

Website

Facebook Group Jo’s Crafty Hookers

Facebook Group Jo’s Crafty Hook Designs

Facebook Page Jo’s Crafty Hook

Facebook Page:  Crochet Designer Community

Ravelry

LoveCrafts

Etsy

Instagram

YouTube

Pinterest

Donations Accepted


Loading

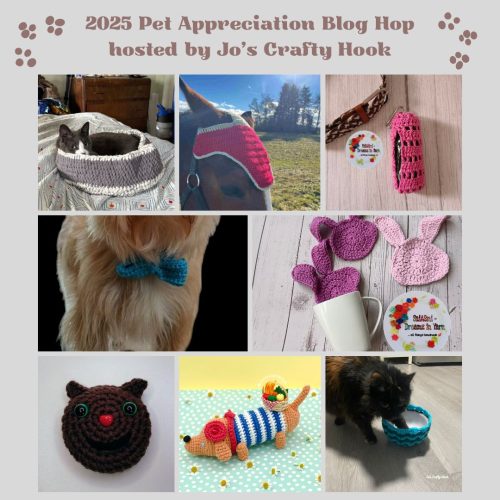
2025 Pet Appreciation Blog Hop

0p2025 Pet Appreciation Blog Hop

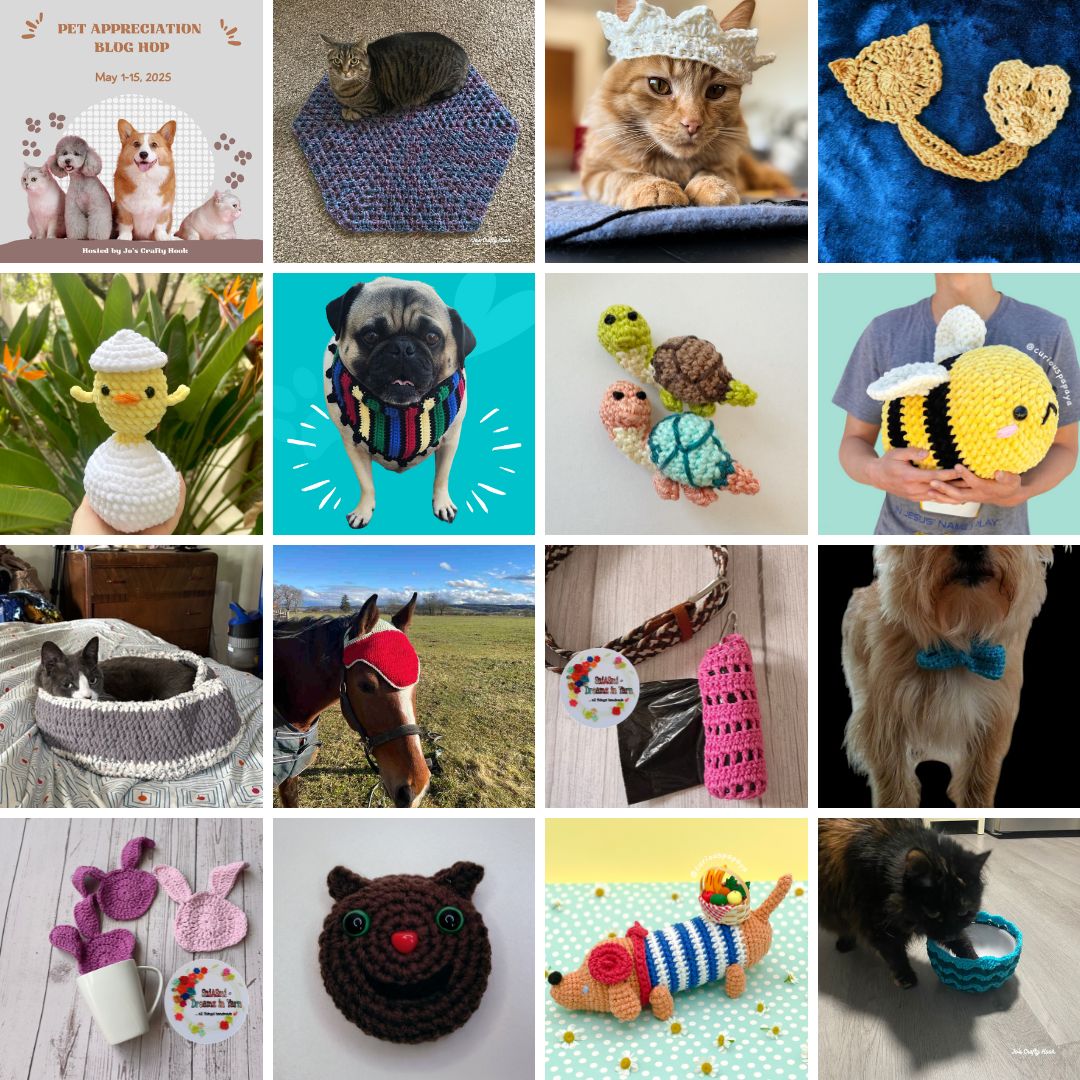
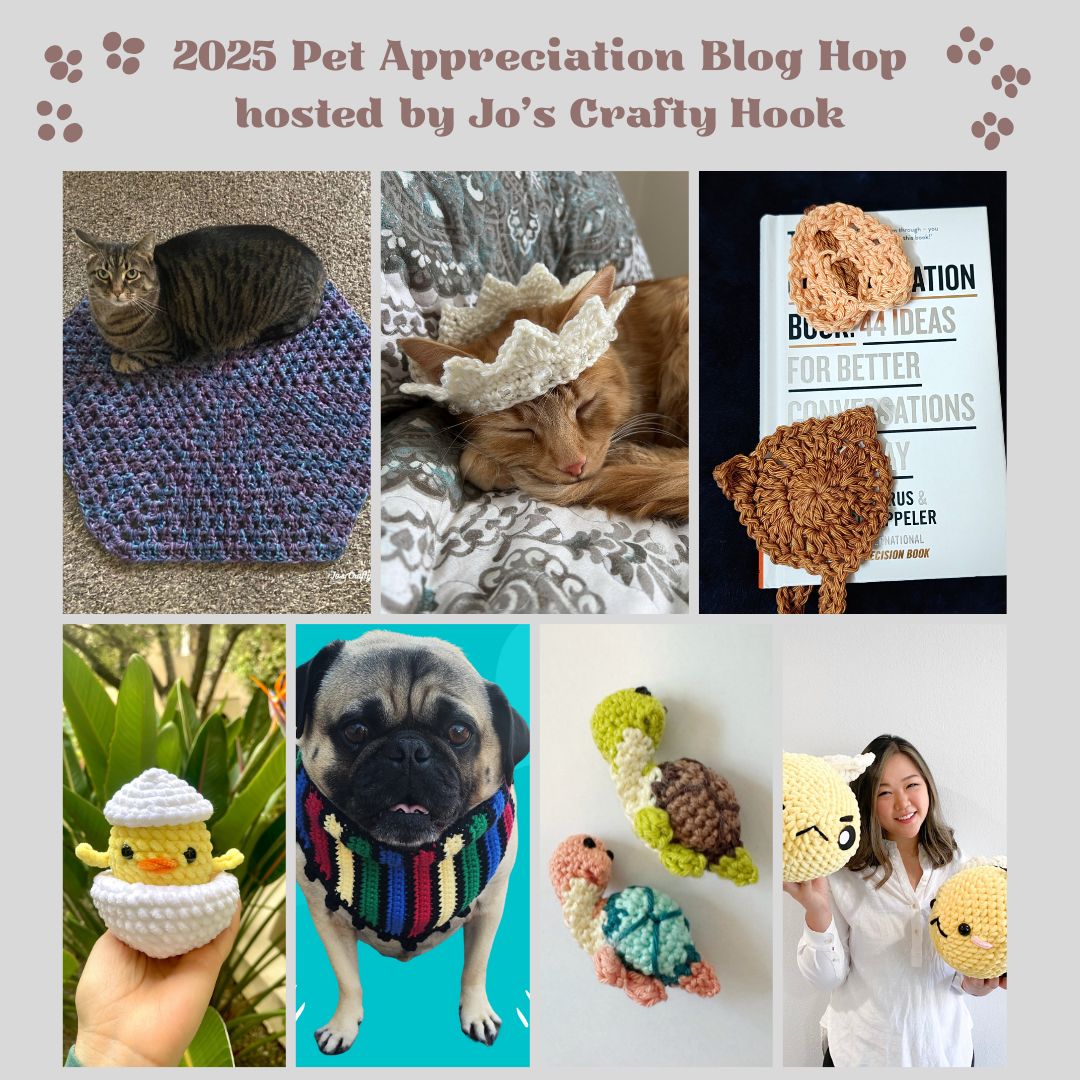
My 3rd annual Pet Appreciation Blog Hop was a huge success!  I just love all of the crochet patterns for pets that were featured this month!

The blog hop may be over, but you can still find all of the crochet patterns designed specifically for our Furry Friends below! 🐶 😻

Some of the crochet patterns are FREE on the designers’ websites!  The links provided will also direct you to the designers’ stores where you can purchase their premium crochet patterns.

I just love dressing up my Grand-Doggy Freyja!  My son loves to dress her up and have me design stuff for her, so of course, I am always making adorable things for her to wear!  😆

This post contains affiliate links.

Most of the year I share crochet patterns designed for people, but to celebrate the LOVE ❤️  I receive from my cat Maze and my furry grand-babies, I love to share crochet designs just for them!

You can still celebrate National Pet Appreciation Month 🐶 🐱 or celebrate your pets with the crochet patterns rounded up below.

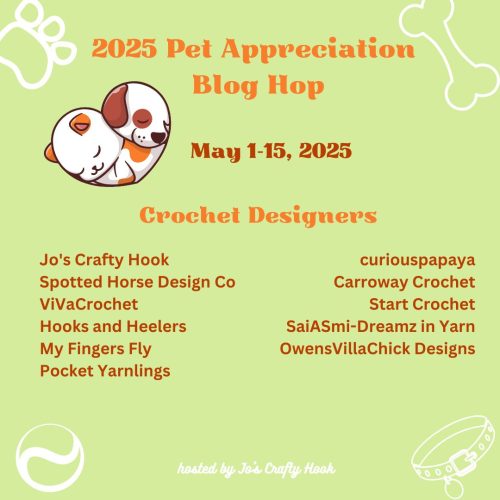
Participating Crochet Designers

We have a GREAT group of crochet designers participating this year.  You will find NEW designs that you can make to celebrate the love you receive from your pets.


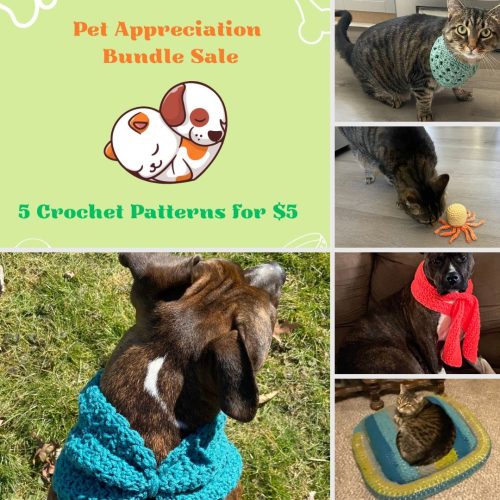
My Pet Appreciation $5 Bundle Sale

To go along with my 3rd annual pet appreciation blog hop, I am having a $5 bundle sale with 5 of my most popular crochet patterns designed specifically for pets in mind.

Bow Wow Cowl (new release), Pet Bandana, Squid Cat Toy, Tuxie Keyhole Scarf, Your Buddy’s  Bed. 

If you would like to purchase a specific crochet pattern, you will also find each crochet pattern on Sale!

For more info, visit the Sales Page on my website.

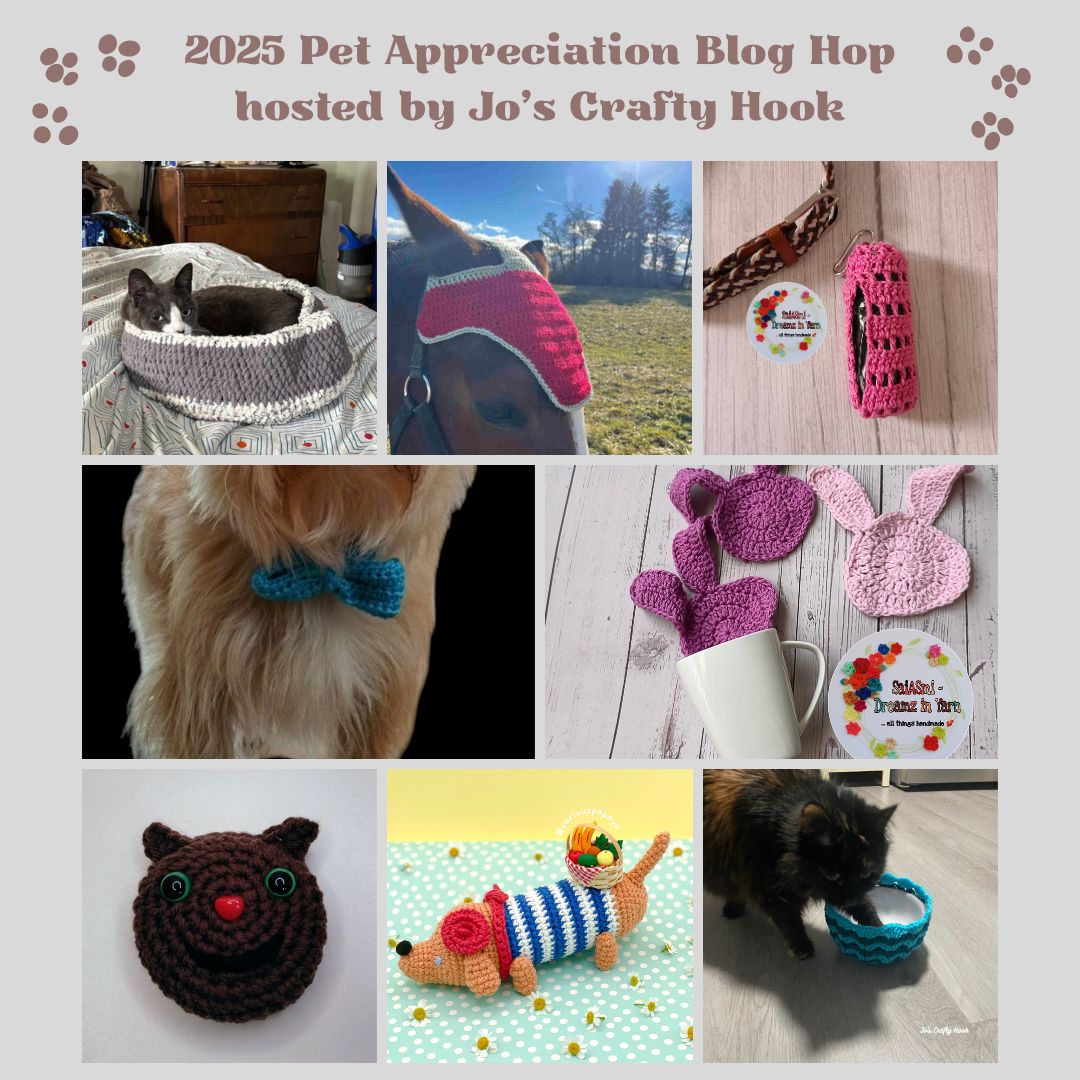
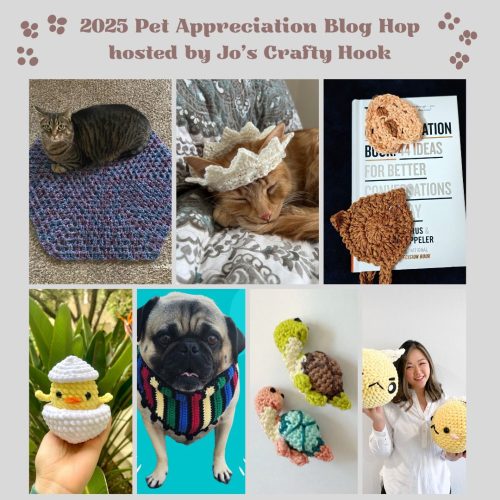
2025 Pet Appreciation R0undup Featured Designs

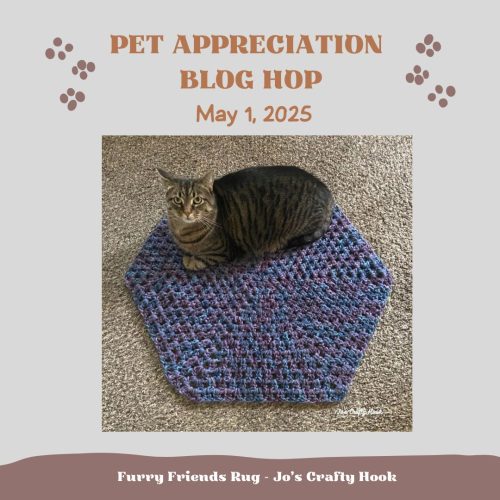
Furry Friends Rug Free Crochet Pattern – Jo’s Crafty Hook

I designed the Furry Friends Rug especially for my cat Maze who just loves to curl up on my crochet designs!

The design uses two strands of yarn to create a nice thick rug to keep your furry friend comfortable.

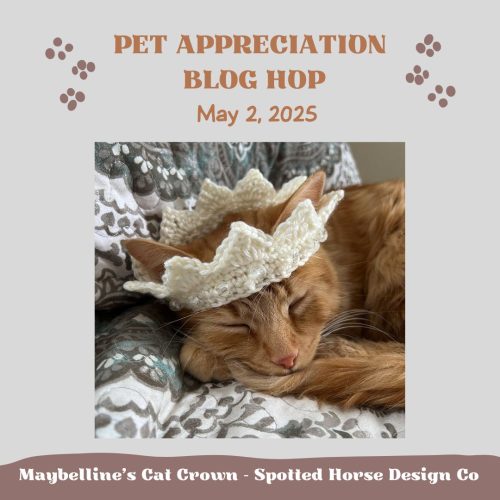
Maybelline’s Cat Crown Crochet Pattern – Spotted Horse Design Co

A charming crochet cat crown pattern, featuring bead accents for extra sparkle.

Purchase the Maybelline’s Cat Crown Crochet Pattern HERE.

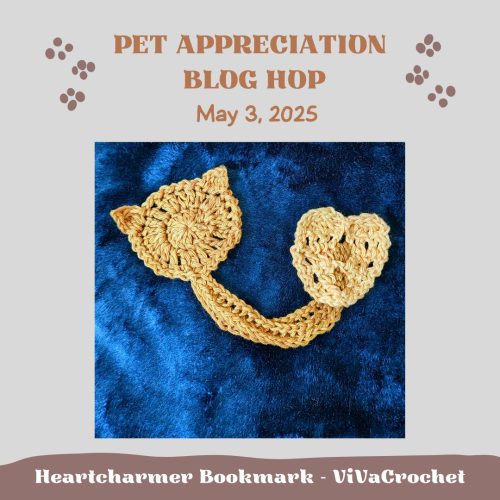
Heartcharmer Bookmark Crochet Pattern – ViVaCrochet

A quick crochet bookmarker with the cats tail entwined in the heart.

Purchase the Heartcharmer Bookmark Crochet Pattern HERE

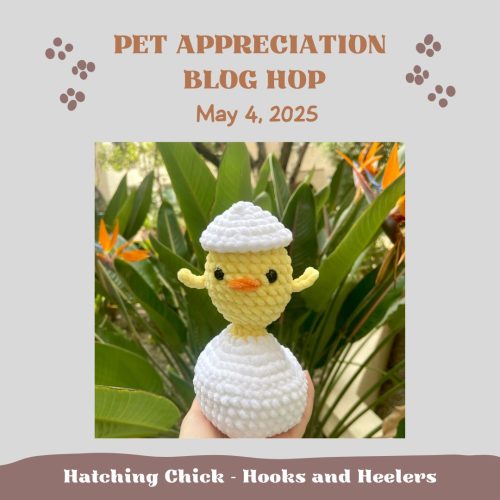
Hatching Chick Crochet Pattern – Hooks & Heelers

This is a no-sew, beginner-friendly pattern that works up very quickly. The chick pops out of the egg, so it doubles as a fidget toy!

Purchase the Hatching Chick Crochet Pattern HERE

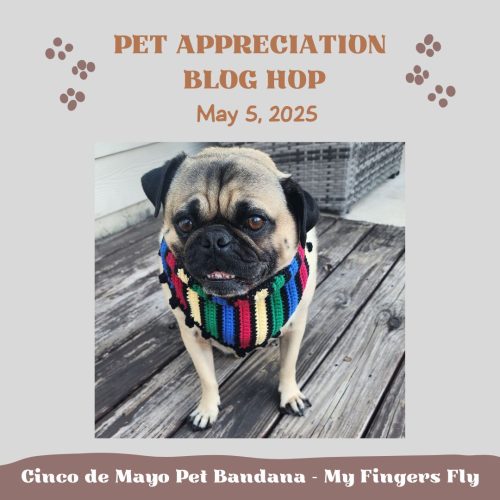
Cinco de Mayo Pet Bandana Crochet Pattern – My Fingers Fly

Celebrate Cinco de Mayo in style with this vibrant Crochet Pet Bandana Pattern! Designed to add a touch of fiesta flair, this easy-to-follow pattern lets you create a colorful accessory perfect for dogs and cats of all sizes.

Purchase the Cinco de Mayo Pet Bandana Crochet Pattern HERE

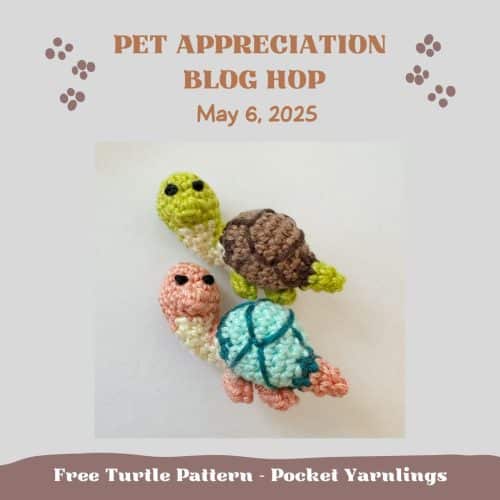
Free Turtle Pattern – Pocket Yarnlings

Turtles are popular amigurumi to make – and this version is done without having to sew on the shell separately! If you are looking to crochet turtle, look no further – try out this little guy with his flippers and shell! There are quite a few colour changes with this, so you should be comfortable with interchanging many crochet colours before trying him out!

Purchase the Turtle Crochet Pattern HERE

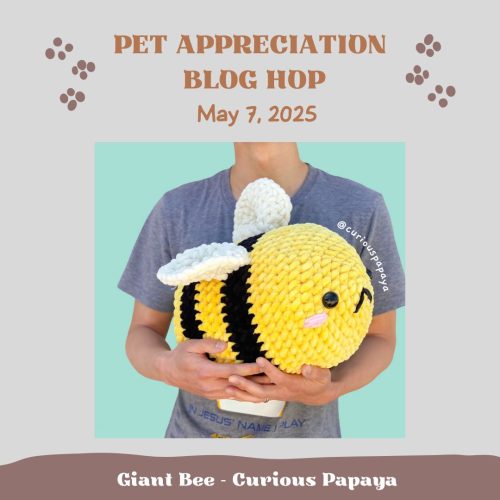
Giant Bee Crochet Pattern – Curious Papaya

Large and in charge. This cuddle-worthy queen is BEE-u-tiful!

Purchase the Giant Bee Crochet Pattern HERE

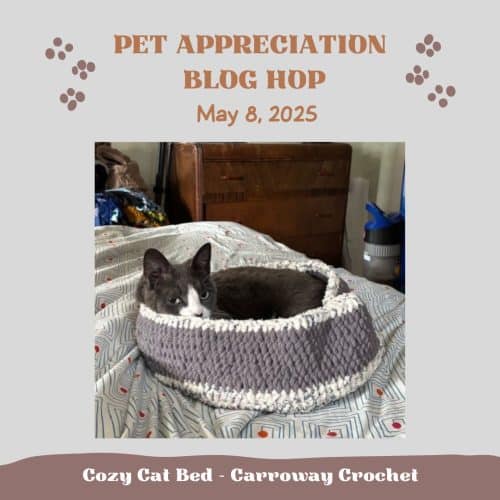
Cozy Cat Bed Crochet Pattern – Carroway Crochet

This Cozy Cat Bed that is purrfect for your precious cat. I used Bernat Blanket Yarn and it is so soft and inviting for your kitty.

Purchase the Cozy Cat Bed Crochet Pattern HERE

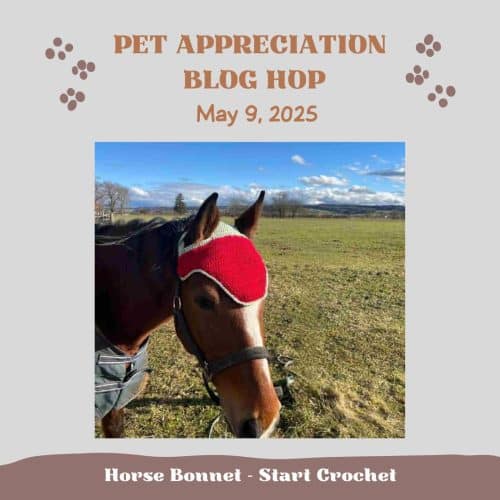
Horse Bonnet Crochet Pattern – Start Crochet

Crochet a stylish and functional horse ear bonnet with this easy-to-follow pattern! Perfect for beginners, this pattern includes step-by-step instructions to create a comfortable, handmade bonnet for your horse.

Purchase the Horse Bonnet Crochet Pattern HERE

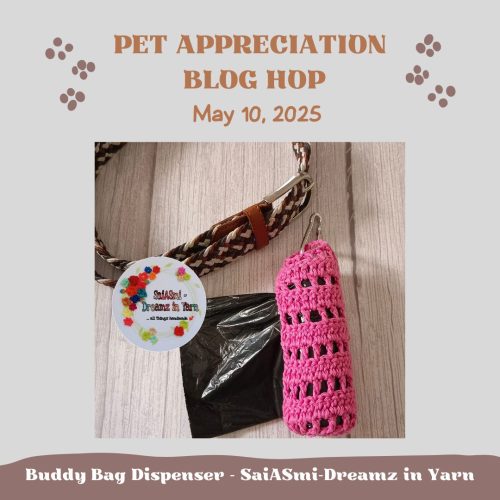
Buddy Bag Dispenser Crochet Pattern- SaiASmi-Dreamz in Yarn

A one piece, no – sew bag dispenser, to tag onto bags, leashes, belt loops to help with when you walk your darling furry babies.

Purchase the Buddy Bag Dispenser Crochet Pattern HERE

Simple Elegance Pet Bowtie Crochet Pattern – OwensVillaChick Designs

This low sew bow tie is a charming accessory for your favorite furry pal!

Purchase the Simple Elegance Bowtie Crochet Pattern HERE

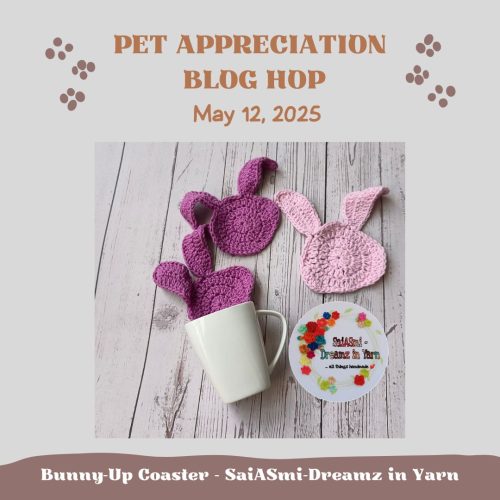
Bunny-Up Coaster Crochet Pattern- SaiASmi-Dreamz in Yarn

The Coaster is a on-piece seamless Crochet Coaster shaped to form the outline of a bunny face.

Purchase the Bunny-Up Coaster Crochet Pattern HERE

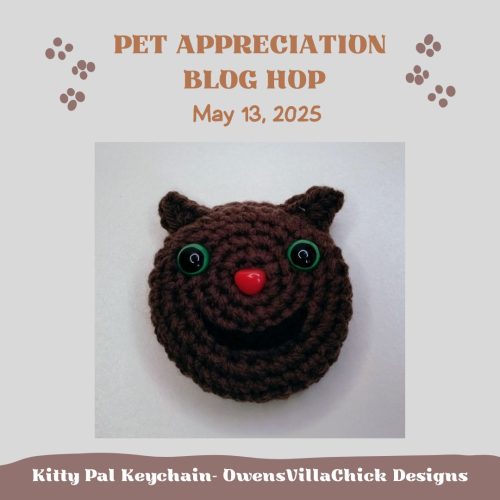
Kitty Pal Keychain Crochet Pattern – OwensVillaChick Designs

The Kitty Pal is a no sew amigurumi project and the purrfect companion for feline enthusiasts.

Purchase the Kitty Pat Keychain Crochet Pattern HERE

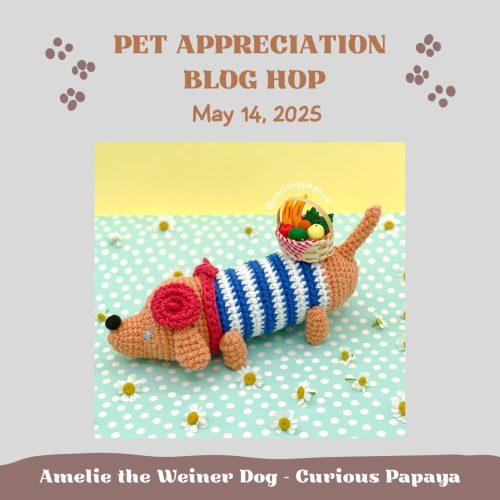
Amelie the Weiner Dog  Crochet Pattern – Curious Papaya

Amelie loves to take leisurely strolls near the Louvre – an elegant lady she is.

Purchase the Amelie the Weiner Dog Crochet Pattern HERE

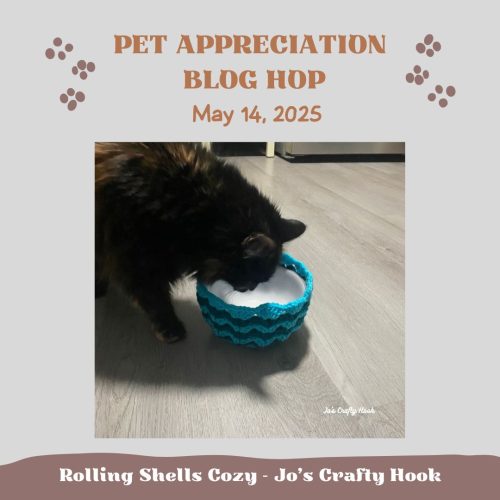
Rolling Shells Cozy Free Crochet Pattern – Jo’s Crafty Hook

The Rolling Shells Cozy Crochet Pattern is a very versatile pattern that can be used to dress up your pet’s food bowl in vibrant colors or to match your Home Decor.

You can purchase a copy of my Rolling Shells Cozy Crochet Pattern HERE

Thank your for joining me again this year and I hope you enjoyed all of the new crochet patterns designed for a great group of designers!

See you again next year!

Find more crochet patterns just for your pets!

FREE on my website
2023 Pet Appreciation Blog Hop
2024 Pet Appreciation Blog Hop

Find my Premium Crochet Patterns for Pets and more!


Find me, Jo of Jo’s Crafty Hook at the places listed below.

Email:  jo@joscraftyhook.com

Linktree

Website

Facebook Group Jo’s Crafty Hookers

Facebook Group Jo’s Crafty Hook Designs

Facebook Page Jo’s Crafty Hook

Facebook Page:  Crochet Designer Community

Ravelry

LoveCrafts

Etsy

Instagram

YouTube

Pinterest

Donations Accepted

Loading

Rolling Shells Wrist Warmers Crochet Pattern

Rolling Shells Wrist Warmers Crochet Pattern

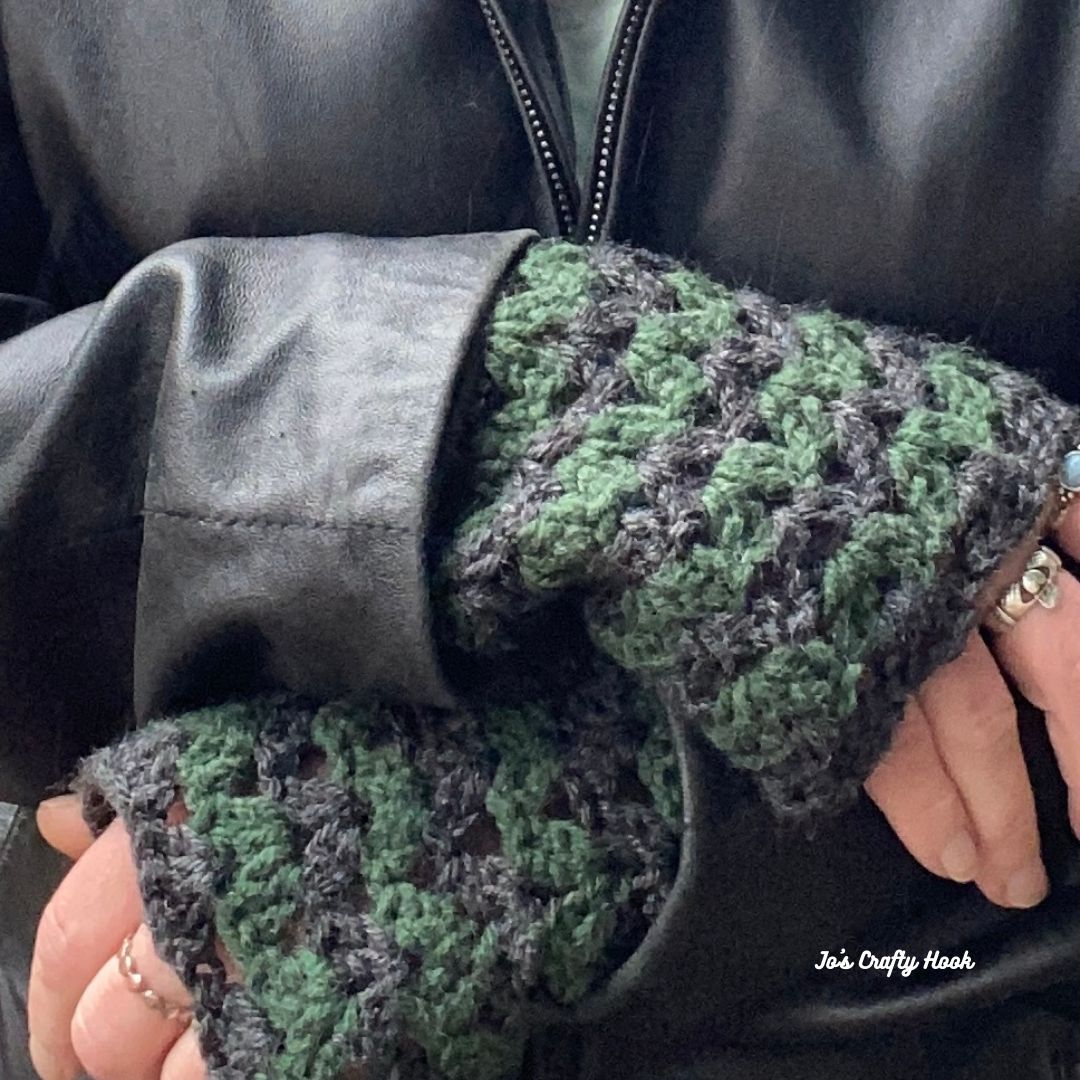
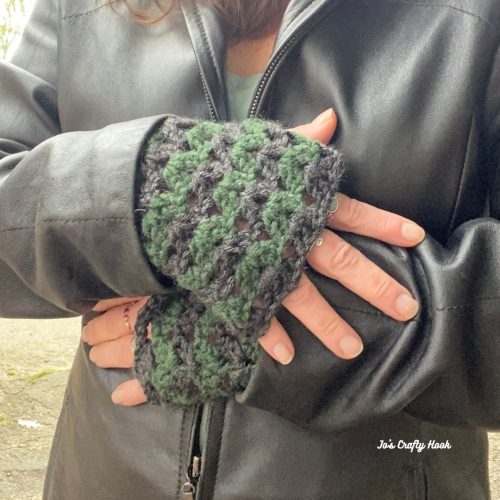
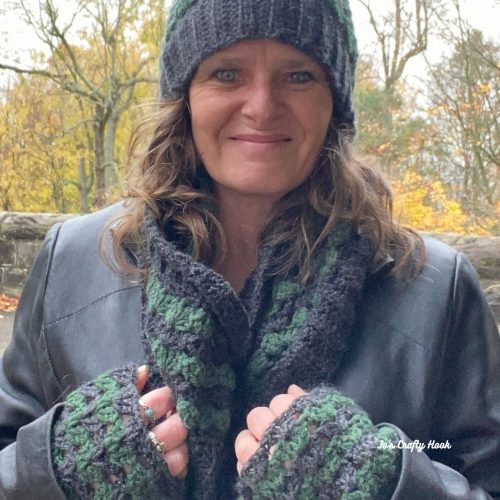
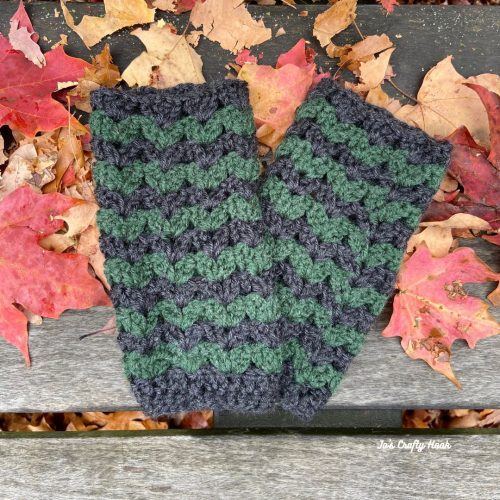
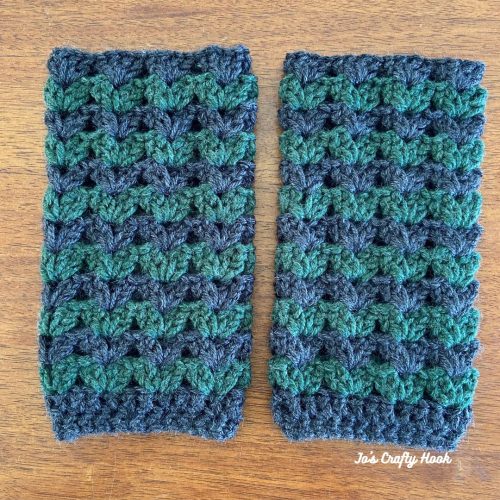
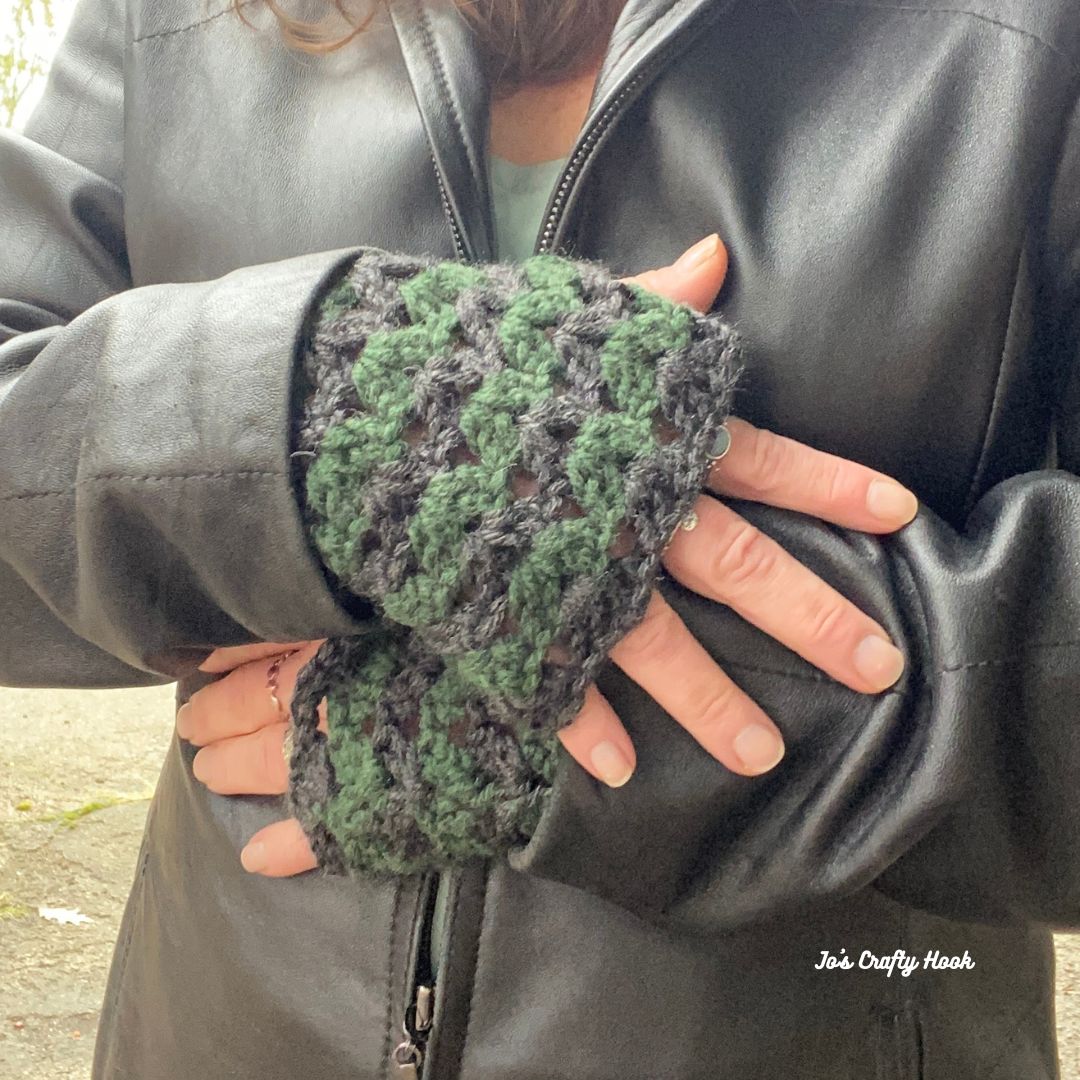
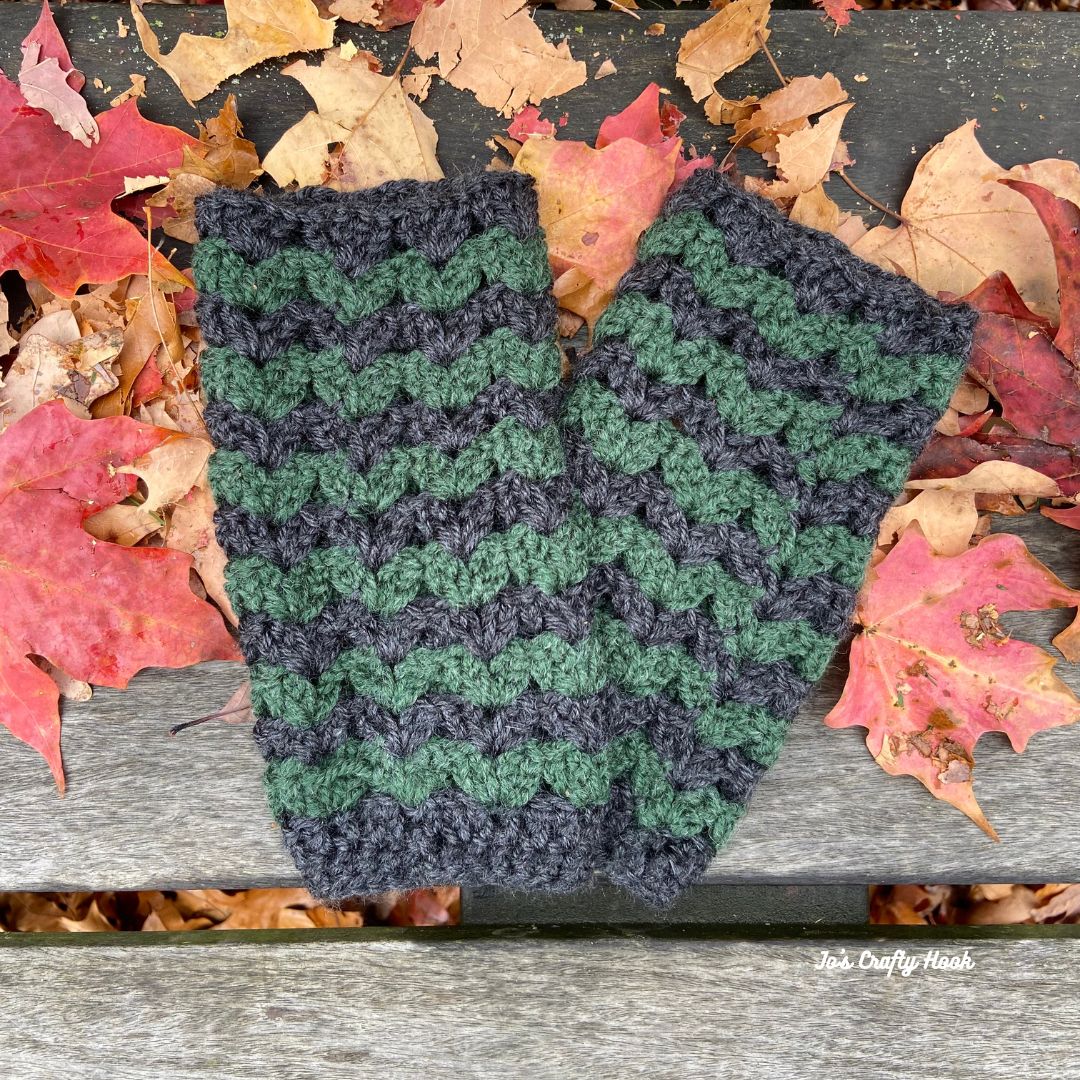
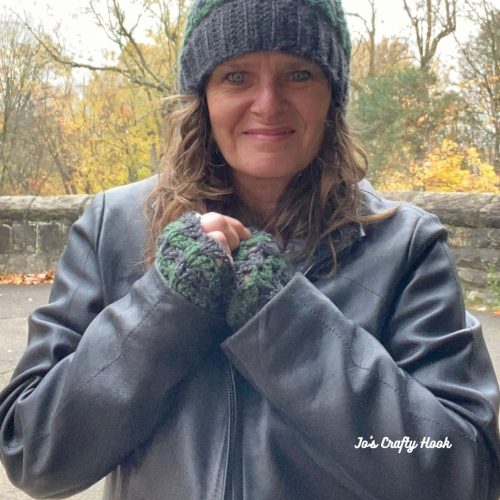
The Rolling Shells Wrist Warmers Crochet Pattern is a Unisex design that can be made for Boys and Girls, even Men and Women.  You can customize the crochet pattern to create a perfect fit for anyone. 

This post contains affiliate links

Be sure to sign up for my Newsletter where you will receive messages about New Crochet Pattern Releases; FREE Crochet Patterns; Collaborations and more!  For signing up to my Newsletter you will receive a FREE premium crochet pattern!

https://dashboard.mailerlite.com/forms/841383/134719051106616408/share

Below you will find a FREE version of the Rolling Shells Wrist Warmers Crochet Pattern.


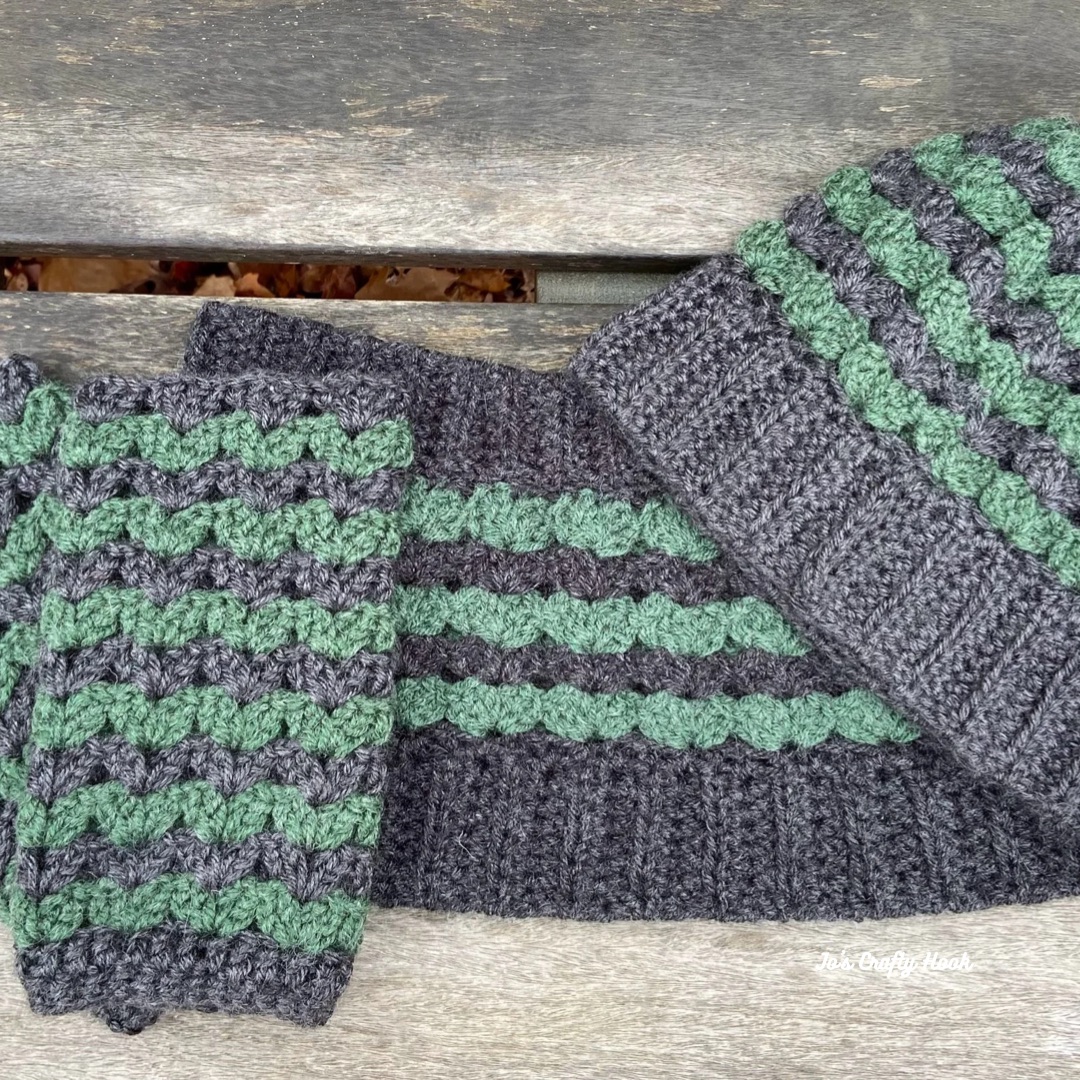
I love this design so much that I created a bundle that has the Rolling Shells Wrist Warmers with a matching Beanie and an Infinity Scarf that you can purchase for $5 at my Ravelry Store.


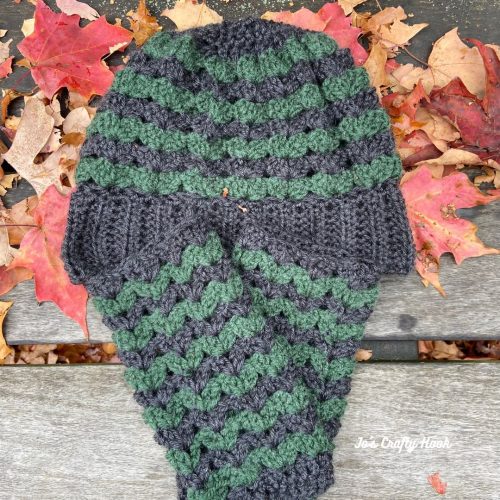
Rolling Shells Beanie Crochet Pattern

You can find the matching Rolling Shells Beanie Crochet Pattern on my website for FREE.

Rolling Shells Wrist Warmers FREE Crochet Pattern

Information Needed

I used 2 colors of Caron One Pound 100% Acrylic Yarn.  (16 oz/453.6 g) (812 yds/742 m)

Beginner Friendly

US Terminology

Materials:
US H or 5mm Crochet Hook
MC = 60-80 yds #4 ply Worsted/Aran Weight Yarn
CC = 50-70 yds of #4 ply Worsted/Aran Weight Yarn

Abbreviations/Stitches Used:
ch = chain
sl st = slip stitch
rep = repeat
dc = double crochet
MC = Main Color
CC = Contrasting Color

Notes:
ch 3 counts as a dc.
stitch count is a multiple of 3.
Beg Shell and Shell are placed in each ch-1 sp.
If you do not meet Gauge try going up or down a hook size.
If you are using 2 colors, it is best to use the same thicknesses for each color.
There are 2 sizes to choose from, Child Size and Adult consecutively.

Gauge:
US H or 5mm Crochet Hook
16 dc x 8 rows = 4”
Shells:  4 rows = 4”

Gauge Swatch:
R1: ch 19 into the 4th ch from hook, dc across.  turn 16 dc
R2-R8: alt ch 2 or ch 3, dc across.  turn 16 dc

Special Stitches:
Beg Shell = (ch 3, dc, ch 1, 2 dc) all in same sp
Shell = (2 dc, ch 1, 2 dc) all in same sp

Special Note:
The pattern calls for using the Carrying Colors Method.  This allows you to carry your MC and CC up the rows without fastening off.

Video Tutorial:
Closing Brim
Carrying Colors

Size Chart

Size Width Circumference Height
Child  3” 6” 9”
Adult 6” 10” 15”
Ad-Free Version

If you would like to purchase a copy of an Ad-Free premium version of the Rolling Shells Wrist Warmers, you will find them at my Ravelry Store for a small fee.


Rolling Shells Wrist Warmers Crochet Pattern (make 2)
Rolling Shells Wrist Warmers


Customizing:
If you would like to make them not so wide, decrease the stitch count by 3.
If you would like to make them wider, increase the stitch count by 3.
If you would like a longer or shorter pair, increase or decrease the amount of rows.

Using MC

R1:  fdc 21 (27) sl st in 1st st to join.  Do NOT turn.  21 (27) dc
Optional:  ch 24 (30) dc in 4th ch from hook, dc around.  sl st in 1st st to join.  Do NOT turn.  21 (27) dc

R2:  alt ch 2 or ch 3 in 1st st, dc around.  sl st in 1st st to join.  Do NOT turn.  21 (27) dc

Do NOT fasten off. This is where you will start the Carrying Color Method

Starting with CC

R1:  Beg Shell in 1st st, sk 2 st, *Shell in next st, sk 2 st.  rep from * around.  sl st in top of ch-3, sl st in next dc, insert hook into ch-1 sp, Carry Up your MC (7, 9 Shells) (42, 54 dc)

R2:  Beg Shell in same ch-1 sp. Shell in each ch-1 sp around.  sl st in top of ch-3, sl st in next dc, insert hook into ch-1 sp, Carry Up your CC (7, 9 Shells) (42, 54 dc)

R3:  Beg Shell in same ch-1 sp. Shell in each ch-1 sp around.  sl st in top of ch-3, sl st in next dc, insert hook into ch-1 sp, Carry Up your MC (7, 9 Shells) (42, 54 dc)

Note:  you can customize the height of your gloves by adding or subtracting the number of rounds.

Child Size

Repeat R2-R3 for a total of 8 rounds or until you reach your desired height.

Fasten off and weave in ends.

Repeat Instructions for 2nd Glove.

Adult

Repeat R2-R3 for a total of 14 rounds or until you reach your desired height.

Fasten off and weave in ends.

Repeat Instructions for 2nd Wrist Warmer.

@Jo’s Crafty Hook 2024

That’s it!  You have made your own version of the Rolling Shells Wrist Warmers!

I would love to see what you created!

If you love this crochet pattern as much as I do, there is a Rolling Shells Bundle for $5 with the Wrist Warmers, Beanie, and Infinity Scarf all in 1 place.


You can tag me at @joscraftyhook and in my FB Group Jo’s Crafty Hook Designs

You can find more of my crochet patterns at my Ravelry Store, LoveCrafts, and my Etsy Shop

You can also find many types of crochet patterns that are Free on my website.

Be sure to sign up for my Newsletter where you will receive messages about New Crochet Pattern Releases; FREE Crochet Patterns; Collaborations and more!  For signing up to my Newsletter you will receive a FREE premium crochet pattern!

https://dashboard.mailerlite.com/forms/841383/134719051106616408/share

Find me, Jo of Jo’s Crafty Hook at the places listed below.

Email:  jo@joscraftyhook.com

Linktree

Website

Facebook Group Jo’s Crafty Hookers

Facebook Group Jo’s Crafty Hook Designs

Facebook Page Jo’s Crafty Hook

Facebook Page:  Crochet Designer Community

Ravelry

LoveCrafts

Etsy

Instagram

YouTube

Pinterest

Donations Accepted

Loading

Rolling Shells Beanie Crochet Pattern

Rolling Shells Beanie Crochet Pattern

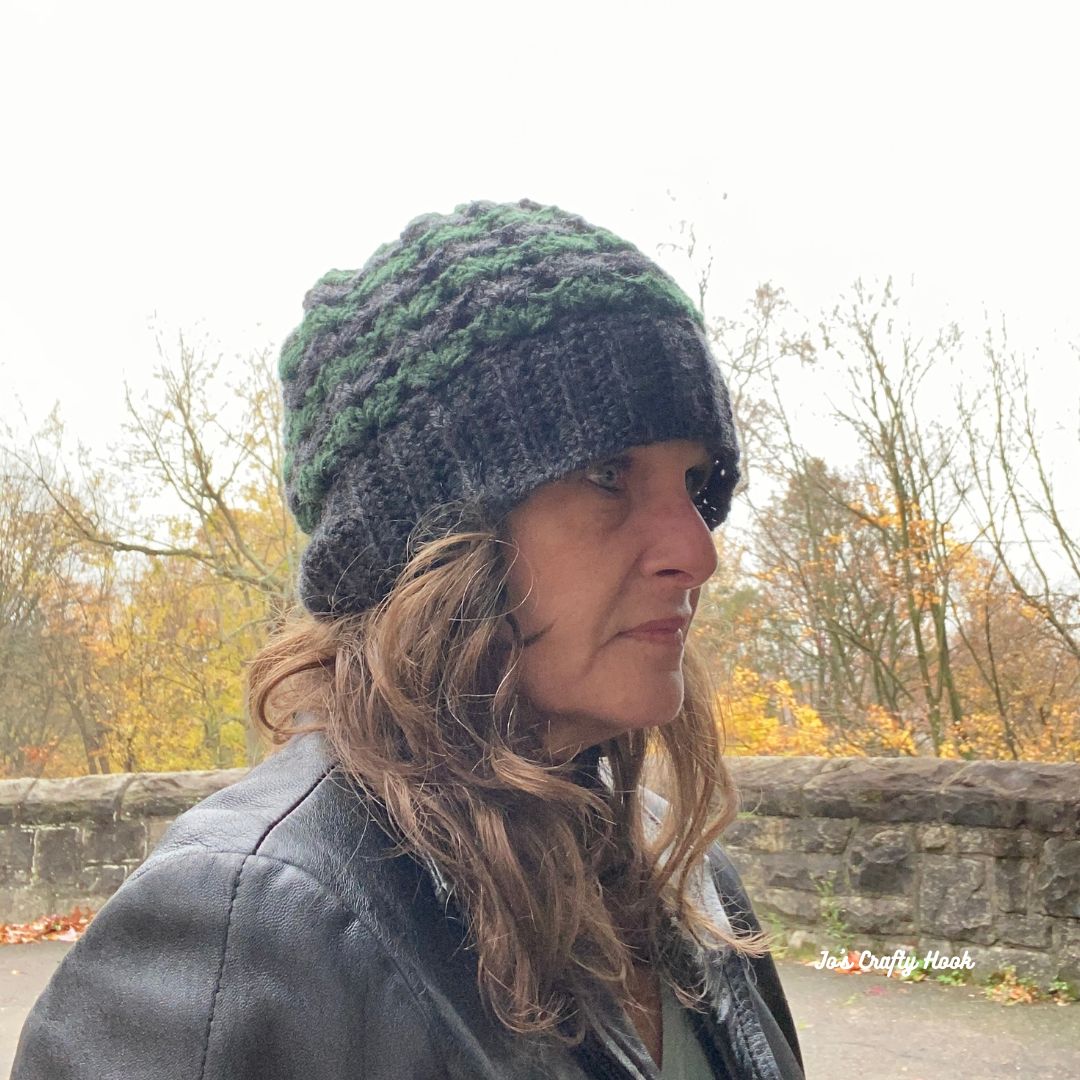
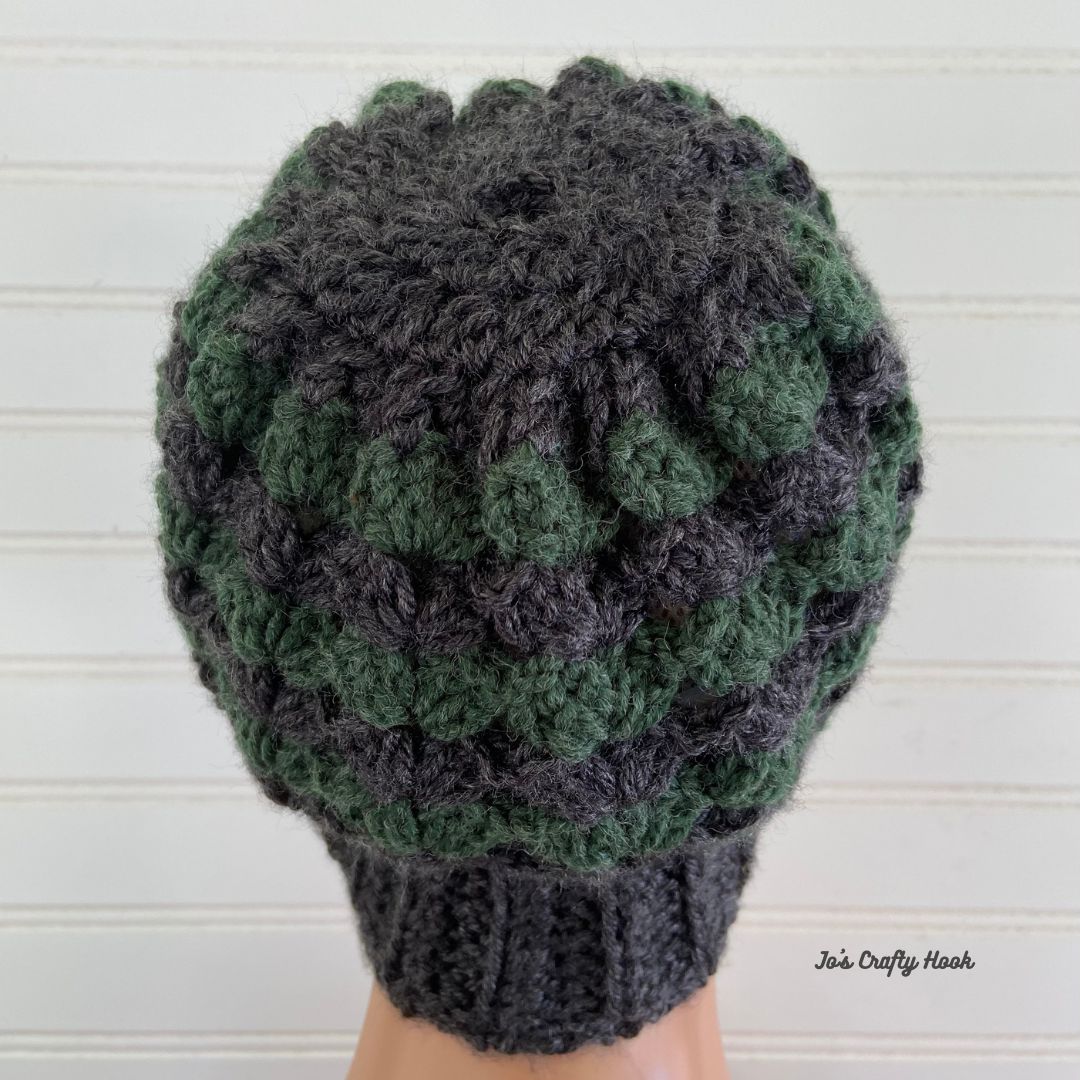
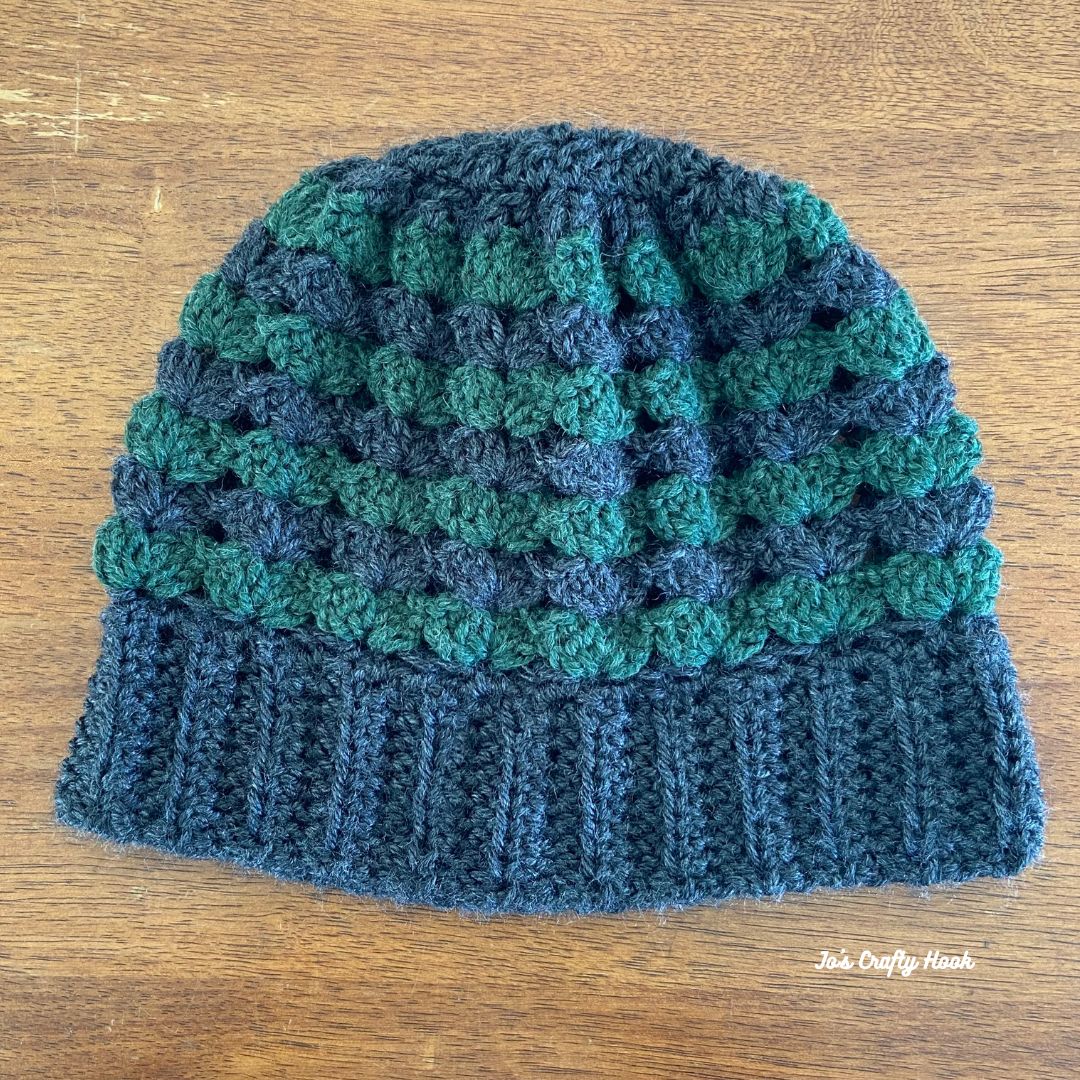
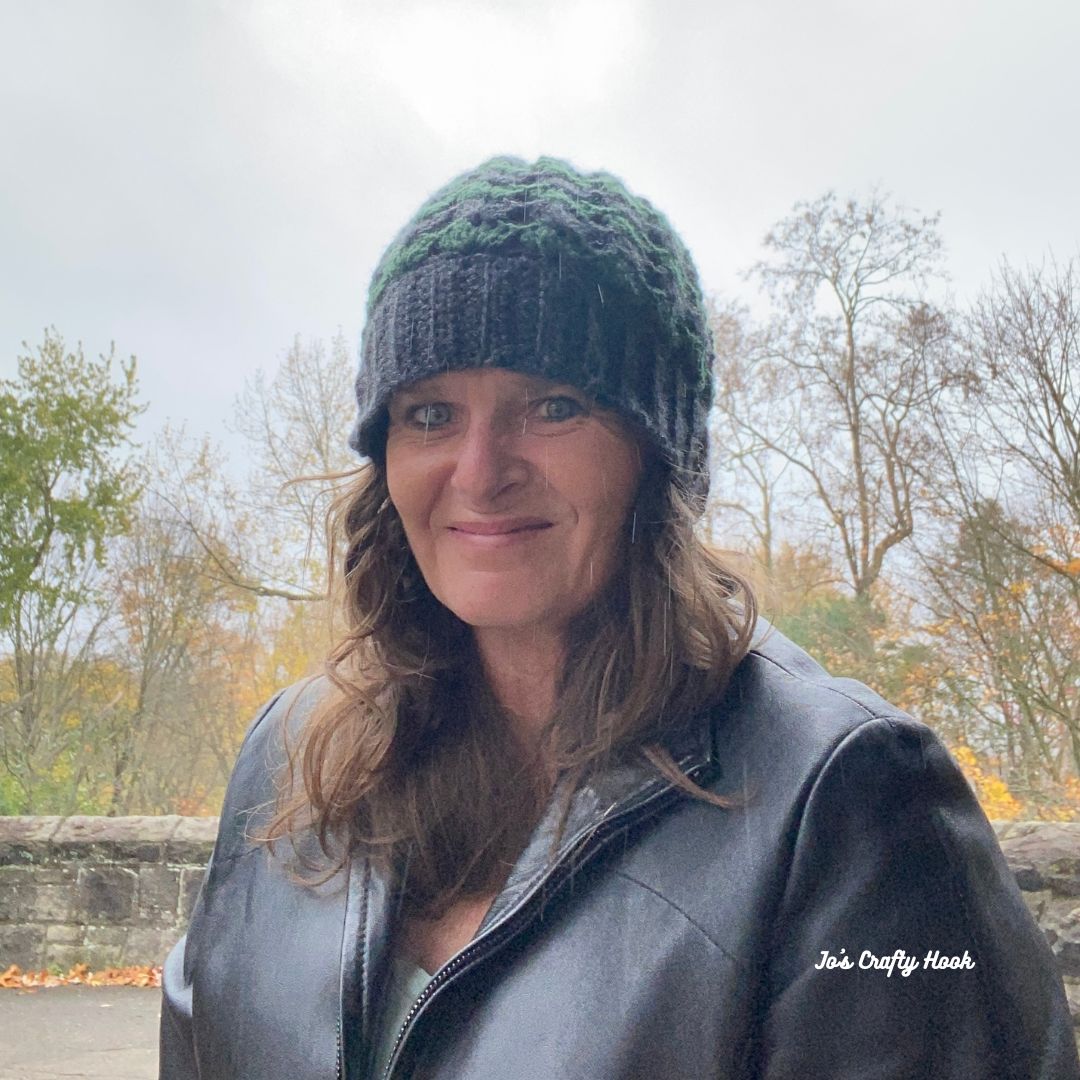
The Rolling Shells Beanie Crochet Pattern is a Unisex design that would be a perfect make for the guys and gals in your life.  You can customize the crochet pattern to create a perfect fit for anyone. 

This post contains affiliate links

Be sure to sign up for my Newsletter and receive a FREE crochet pattern straight to your inbox.  You will also receive messages about New Crochet Pattern Releases; FREE Crochet Patterns; Collaborations and more!

I love this design so much that I designed a whole set and created the Rolling Shells Bundle!  The set contains crochet patterns for the Rolling Shells Beanie, Infinity Scarf and Wrist Warmers that you can purchase for $5 at my Ravelry Store.


Winter Crochet Set Blog Hop – January 5-22, 2025

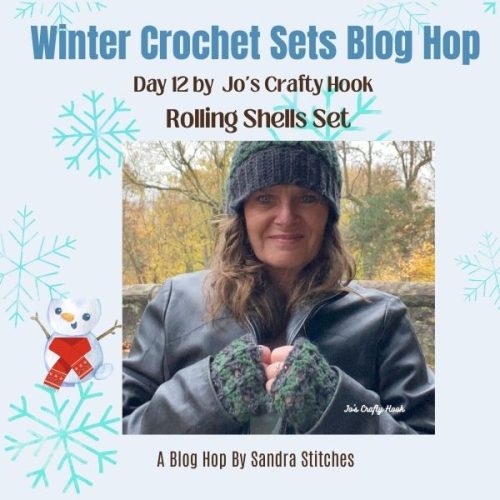
Sandra Stitches is hosting the Winter Crochet Set Blog Hop where you will find Winter Sets daily and you can get for a FREE copy for 24 hours, starting at 7a EST.

You can get a FREE premium copy of my Rolling Shells Bundle crochet pattern set on my featured day, January 12-13, 2025.

Get the Coupon Code

Starting at 7a EST on January 12th until 7a EST January 13th visit the Winter Crochet Set Blog Hop to get the Coupon Code needed to get a FREE premium copy of my Rolling Shells Bundle.

Visit my Ravelry Store

Once you have the Coupon Code, click on the button below to add my Rolling Shells Bundle to your Cart and use the code at Checkout.

Thank you for your support!  I pray you stay warm this Winter and have a very Happy 2025!

Below you will find a FREE version of the Rolling Shells Beanie Crochet Pattern.

Rolling Shells Beanie FREE Crochet Pattern


Information Needed

I used 2 colors of Caron One Pound 100% Acrylic Yarn.  (16 oz/453.6 g) (812 yds/742 m)

Advanced Beginner 

US Terminology

Materials:
US H or 5mm Crochet Hook
MC = 60-80 yds #4 ply Worsted/Aran Weight Yarn
CC = 50-70 yds of #4 ply Worsted/Aran Weight Yarn

Abbreviations/Stitches Used:
ch = chain
st = stitch(es)
sl st = slip stitch
rep = repeat
blo = back loop only
hdc = half double crochet
dc = double crochet
dc2tog = double crochet 2 together
alt ch 2 = alternate chain 2
YO = Yarn Over
MC = Main Color
CC = Contrasting Color

Notes:
ch 2 counts as a hdc
ch 3 counts as a dc
alt ch 2 counts as a st
the hat brim is worked flat
the hat body is worked the round
If you do not meet Gauge try going up or down a hook size
If you are using 2 colors, it is best to use the same thicknesses for each color
Below there are 2 sizes to choose from, Child Size and Adult

Special Stitches:
Beg Shell = (ch 3, 2 dc, ch 1, 3 dc) all in same sp
Shell = (3 dc, ch 1, 3 dc) all in same sp

Double Crochet 2 Together – dc2tog

  • YO, insert hook into specified st
  • YO, pull up a loop
  • YO, pull through 2 loops on hook (2 loops on hook)
  • YO, insert hook into next st, YO, pull up a loop (4 loops on hook)
  • YO, pull through 2 loops on hook. (3 loops on hook)
  • YO, pull through all 3 loops

Special Note:
The pattern calls for using the Carrying Yarn Method.  This allows you to carry your MC and CC up the rows without fastening off.

Video Tutorial:
Closing Brim
Double Crochet 2 Together
Carrying Colors

Gauge:
US H or 5mm Crochet Hook
Brim:  8 st x 8 rows = 4”
Shells:  4 rows = 4”

Brim Gauge Swatch:
US H or 5mm Crochet Hook
16 st x 8 rows = 4”

R1: ch 18 hdc into the 3rd ch from hook, hdc across.  turn (16 hdc)
R2-R8: alt ch 2 or ch 2, hdc in blo of next 14 st, hdc in last st. turn (16 hdc)

Size Chart
Size Brim Height Width Circumference Height
Child 1.5” 10” 20” 10.5”
Adult 2.5” 12” 24” 12.5”
Ad-Free Version

If you would like to purchase a copy of an Ad-Free premium version of the Rolling Shells Wrist Warmers, you will find them at my Ravelry Store for a small fee.


Rolling Shells Beanie Crochet Pattern
BRIM

Note:  you can customize your Brim by repeating R2 until you meet your head’s circumference.

Using MC

R1: ch 8 (14) hdc into the 3rd ch from hook, hdc across.  turn (6, 12 hdc)

R2: alt ch 2 or ch 2, hdc in blo of next 4 (10, 10) st, hdc in last st. turn (6, 12 hdc)

R3-39 (48):  rep R2

Closing Brim  

Step 1:
hold both ends together without twisting, sl st blo in each st across, going through both last row work and starting row.  

Step 2:
turn slightly to start working across the side of the Brim

Step 3:
alt ch 2 or ch 2, hdc in each st around.  sl st in 1st st to join.  (39, 48 hdc)

Do not fasten off.  This is where you will start the Carrying Colors Method.

 Body

Note:  you can customize the height of your hat be adding or subtracting rows

R1:  using your CC, attach yarn with a sl st in same sp as join, Beg Shell in same st, sk 2 sts, *Shell in next st, sk 2 sts.  rep from * around.  sl st in top of ch 3, sl st in next 2 dc, insert hook into ch-1 sp, Carry Up your MC  (13, 16 Shells) (78, 96 dc)

R2:  Beg Shell in same ch-1 sp, *Shell in each ch-1 sp around.  sl st in top of ch 3, sl st in next 2 dc, insert hook into ch-1 sp, Carry Up your CC  (13, 16 Shells) (78, 96 dc)

R3:  Beg Shell in same ch-1 sp, *Shell in each ch-1 sp around.  sl st in top of ch 3, sl st in next 2 dc, insert hook into ch-1 sp, Carry Up your MC  (13, 16 Shells) (78, 96 dc)

R4:  Beg Shell in same ch-1 sp, *Shell in each ch-1 sp around.  sl st in top of ch 3, sl st in next 2 dc, insert hook into ch-1 sp, Carry Up your CC  (13, 16 Shells) (78, 96 dc)

R5:  Beg Shell in same ch-1 sp, *Shell in each ch-1 sp around.  sl st in top of ch 3, sl st in next 2 dc, insert hook into ch-1 sp, Carry Up your MC  (13, 16 Shells) (78, 96 dc)

R6:  Beg Shell in same ch-1 sp, *Shell in each ch-1 sp around.  sl st in top of ch 3, sl st in next 2 dc, insert hook into ch-1 sp, Carry Up your CC  (13, 16 Shells) (78, 96 dc)

R7:  Beg Shell in same ch-1 sp, *Shell in each ch-1 sp around. sl st in top of ch 3, sl st in next 2 dc, insert hook into ch-1 sp, Carry Up your MC  (13, 16 Shells) (78, 96 dc)

R8:  Beg Shell in same ch-1 sp, *Shell in each ch-1 sp around.  sl st in top of ch 3, sl st in next 2 dc, insert hook into ch-1 sp, Carry Up your CC  (13, 16 Shells) (78, 96 dc)

Child Size STOP here.  Do NOT fasten off.  Move to Crown 

R9:  Beg Shell in same ch-1 sp, *Shell in each ch-1 sp around. sl st in top of ch 3, sl st in next 2 dc, insert hook into ch-1 sp, Carry Up your MC  (16 Shells & 96 dc)

R10:  Beg Shell in same ch-1 sp, *Shell in each ch-1 sp around.  sl st in top of ch 3, sl st in next 2 dc, insert hook into ch-1 sp, Carry Up your CC  (16 Shells & 96 dc)

Adult Size STOP here.  Do NOT fasten off.  Move to Crown 

Crown

Note:  ch 1 does NOT counts as a st

R1sl st in 1st dc, ch 3, sk 1 st, dc2tog, *sk 1 st, dc2tog. rep from * around until last 2 st.  sk last 2 st, sl st in top of ch-3 to join. (26, 32 dc)

R2:  ch 2, dc in next st (this counts as dc2tog), dc2tog in each st around.  sl st in 1st st to join.  (13, 16 dc)

Child Size

R3:  ch 3, dc2tog in each st around. sl st in 1st st to join. (7 dc)

Fasten off leaving a long tail of yarn.  Weave the long tail of yarn through each st, draw tight to close the top of the crown.

Adult

R3:  ch 3, dc2tog in each st around until last st. sk last st. sl st in 1st st to join. (8 dc)

Fasten off leaving a long tail of yarn.  Weave the long tail of yarn through each st, draw tight to close the top of the crown.

@Jo’s Crafty Hook 2024

That’s it!  You have created your own version of the Hat Pattern!

I would love to see what you created!

If you love this crochet pattern as much as I do, there is a Rolling Shells Bundle for $5 with the Wrist Warmers, Beanie, and Infinity Scarf all in 1 place.

You can tag me at @joscraftyhook and in my FB Group Jo’s Crafty Hook Designs

You can find more of my crochet patterns at my Ravelry Store, LoveCrafts, and my Etsy Shop

You can also find many types of crochet patterns that are Free on my website.

Be sure to sign up for my Newsletter and get a FREE premium crochet pattern from me!  You will then start receiving messages about New Crochet Pattern Releases; FREE Crochet Patterns; Collaborations and more!

Find me, Jo of Jo’s Crafty Hook at the places listed below.

Email:  jo@joscraftyhook.com

Linktree

Website

Facebook Group Jo’s Crafty Hookers

Facebook Group Jo’s Crafty Hook Designs

Facebook Page Jo’s Crafty Hook

Facebook Page:  Crochet Designer Community

Ravelry
LoveCrafts

Etsy
Instagram

YouTube

Pinterest

Donations Accepted

Loading