
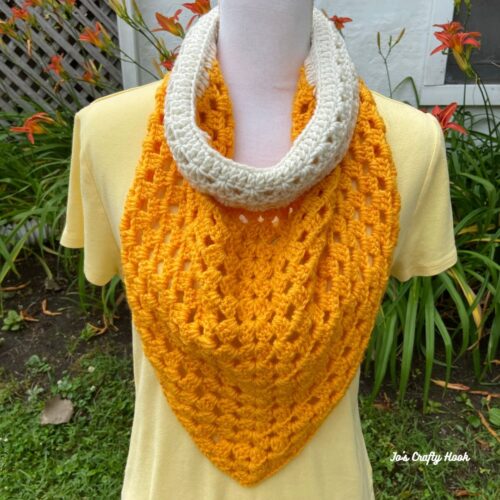
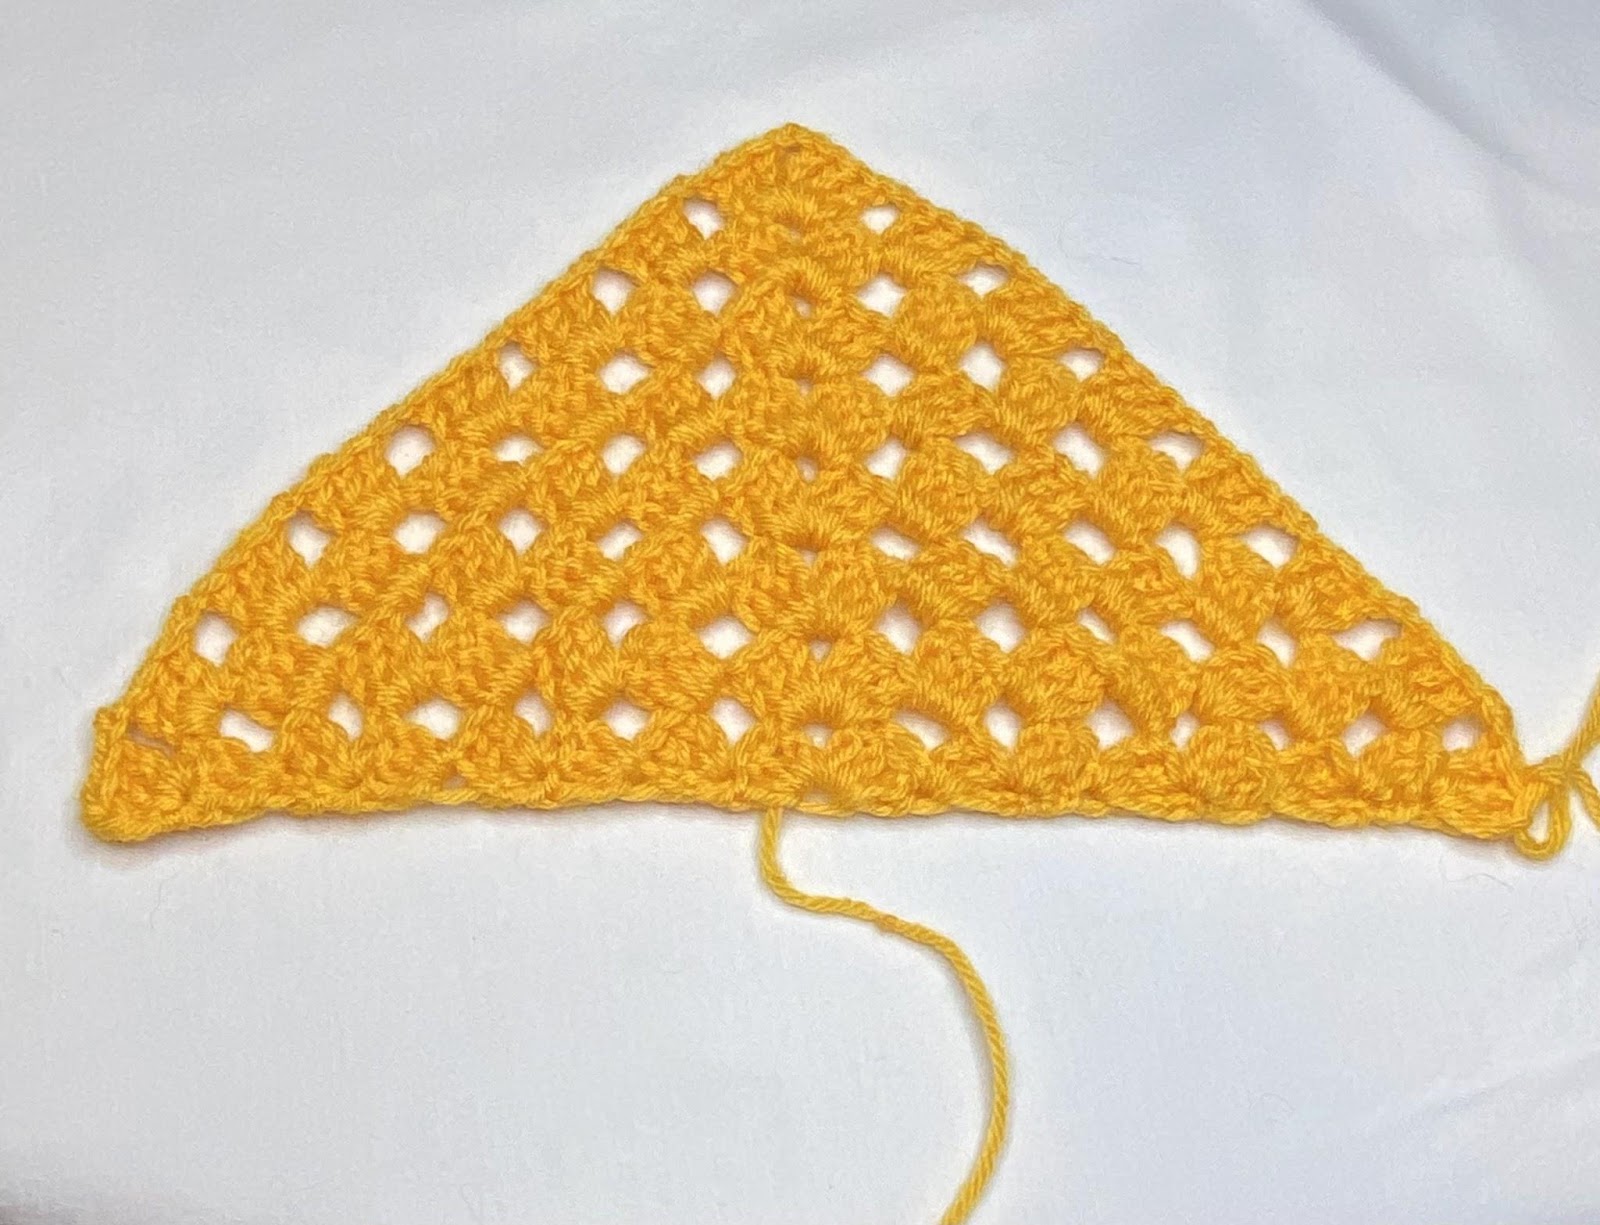
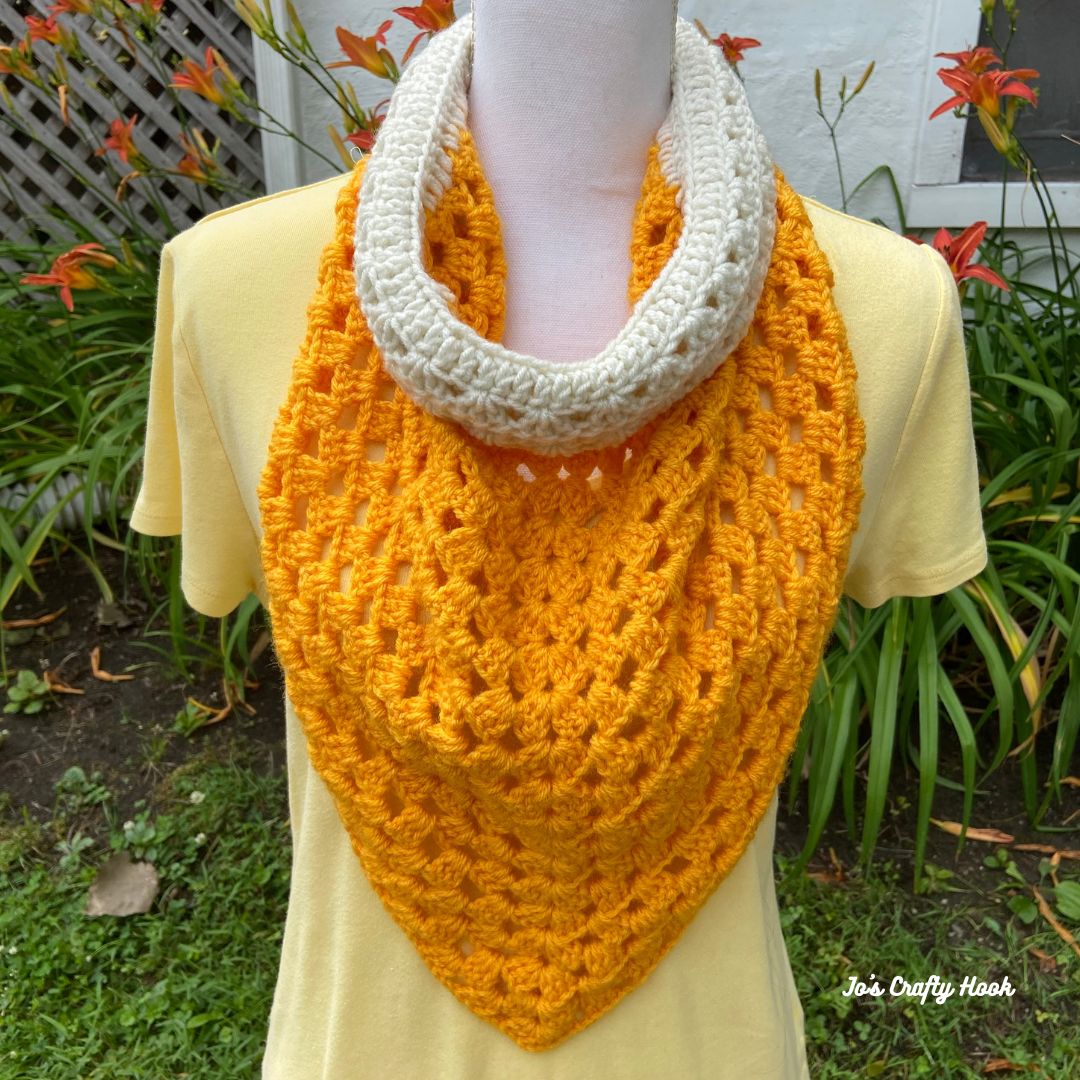
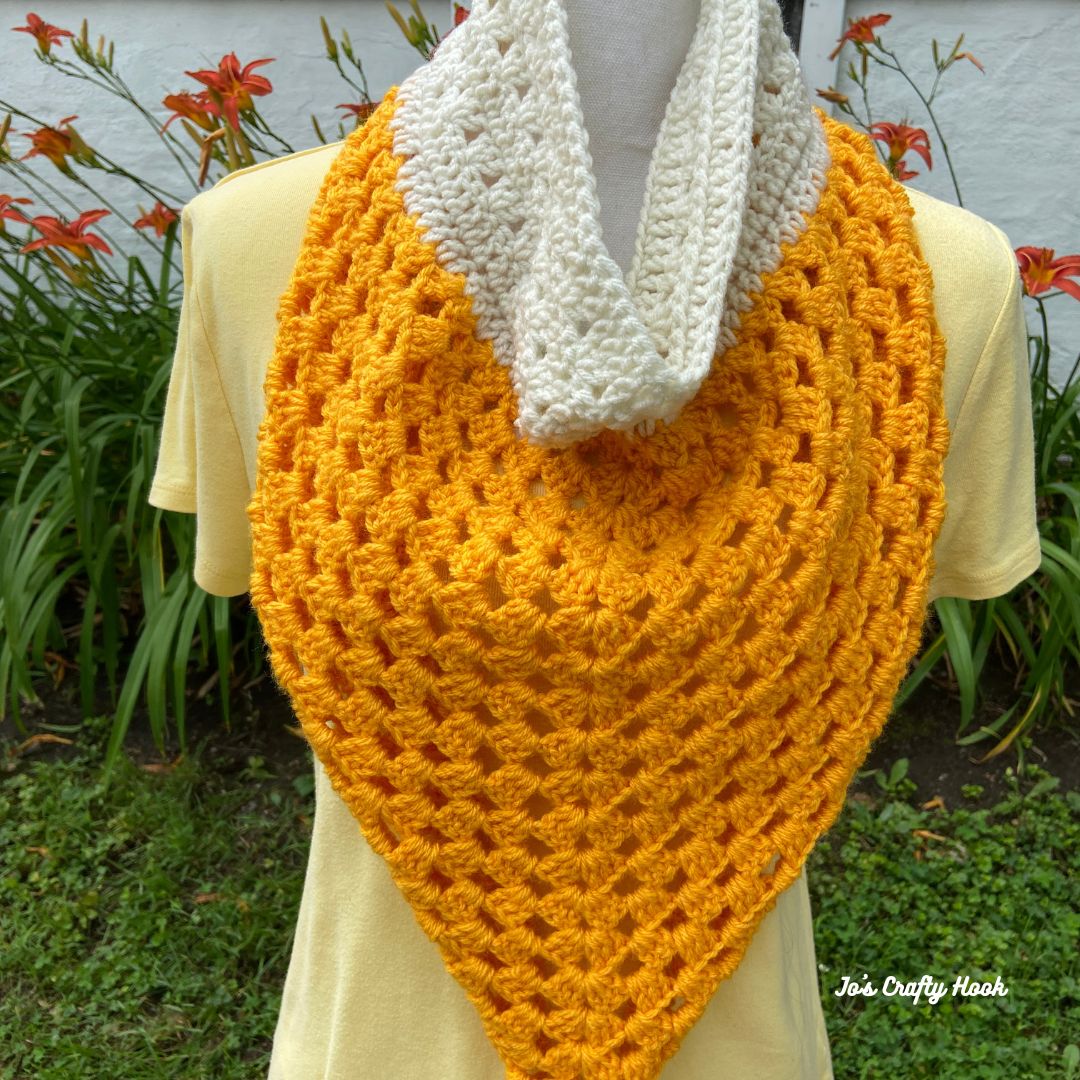
Great Granny Cowl Crochet Pattern
The Great Granny Cowl Crochet Pattern uses a crochet stitch that everyone loves to do, the granny stitch. The granny stitch has been around for as long as I can remember (I won’t say how long lol) I have a granny square afghan that my Ma made over 30 years ago.
The granny stitch is used to create squares, afghans, cowls, scarves, and SO much more! The granny stitch uses a combination of 3 double crochets and a chain. Can you believe that is all it uses to create so many wonderful things?!
Information about the Great Granny Cowl Crochet Pattern
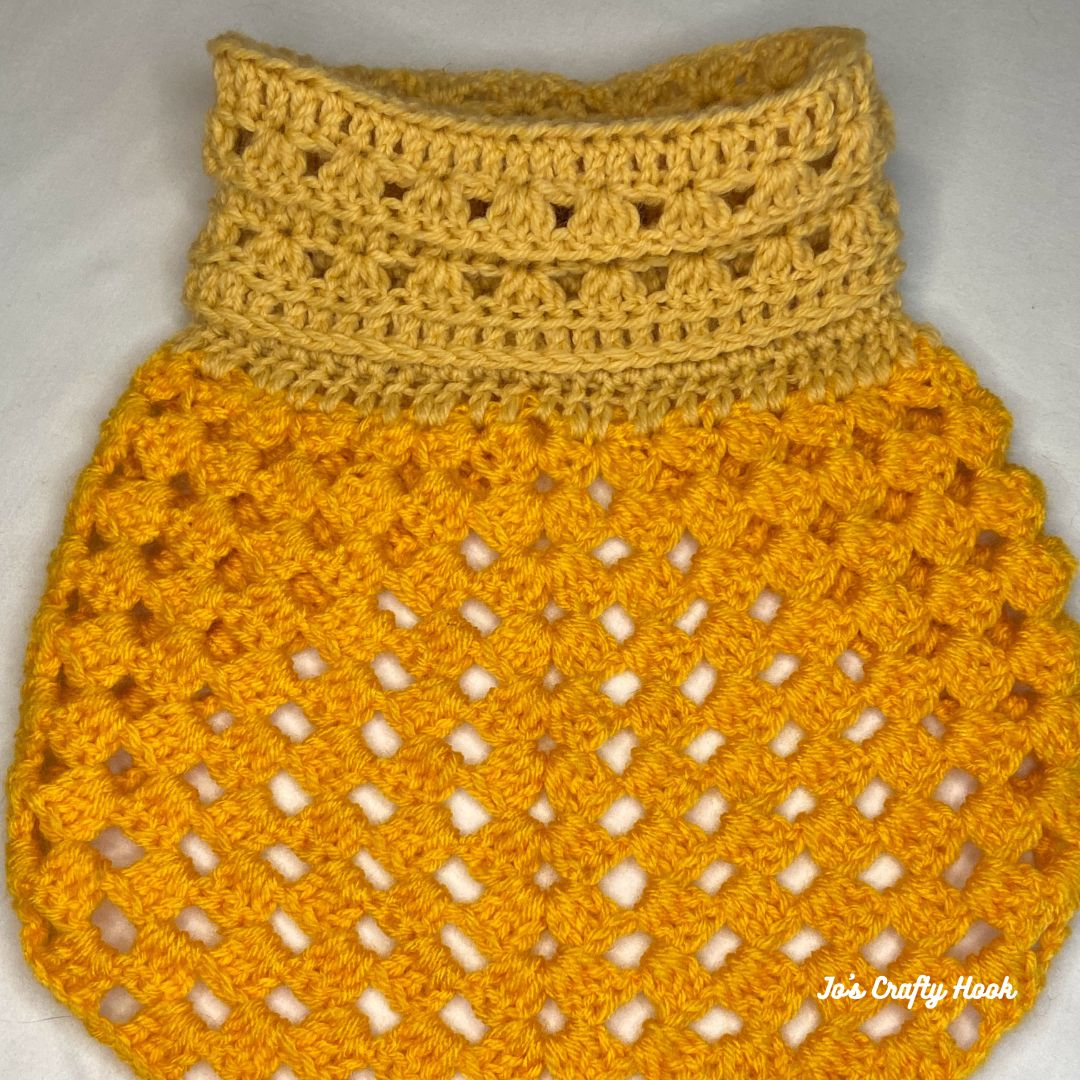
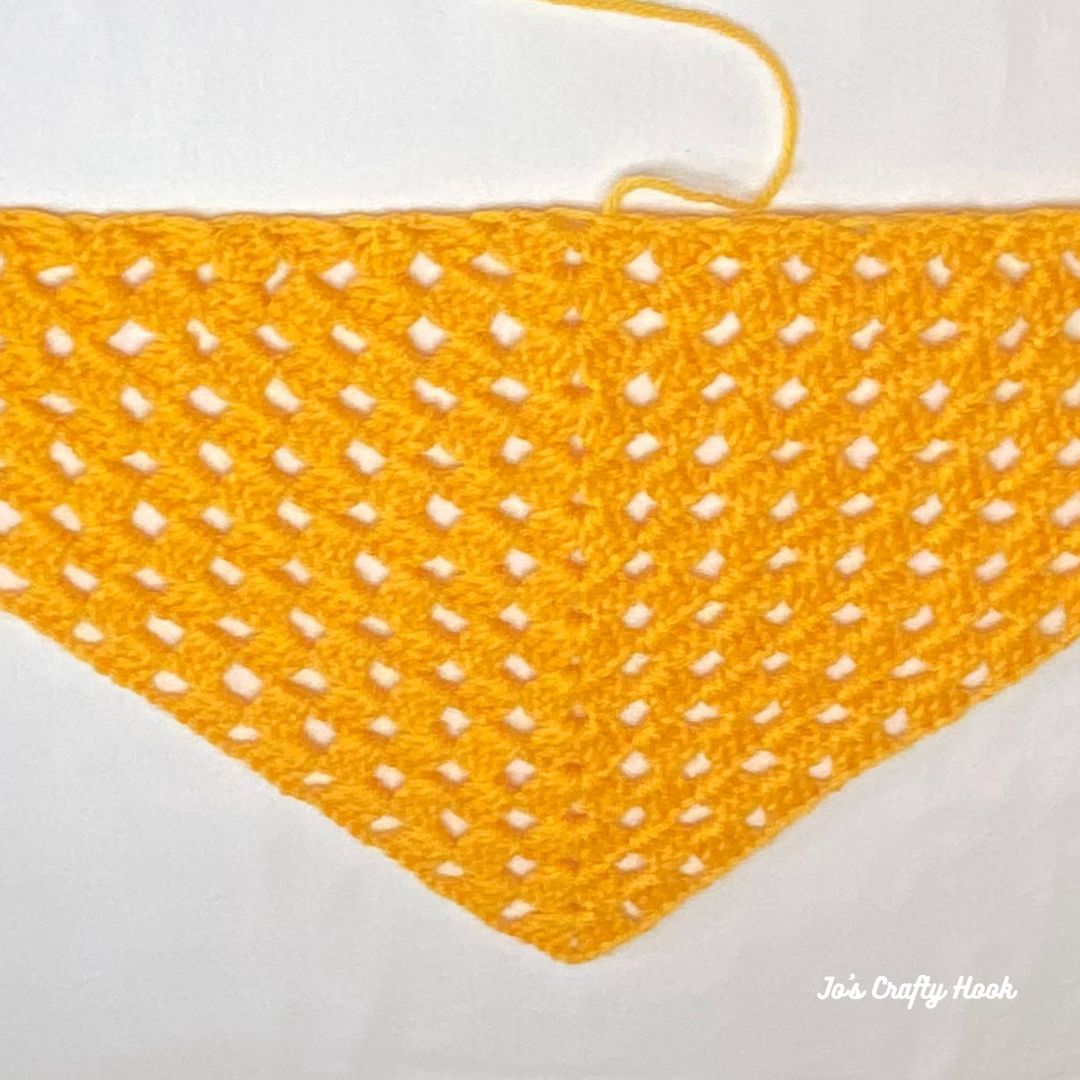
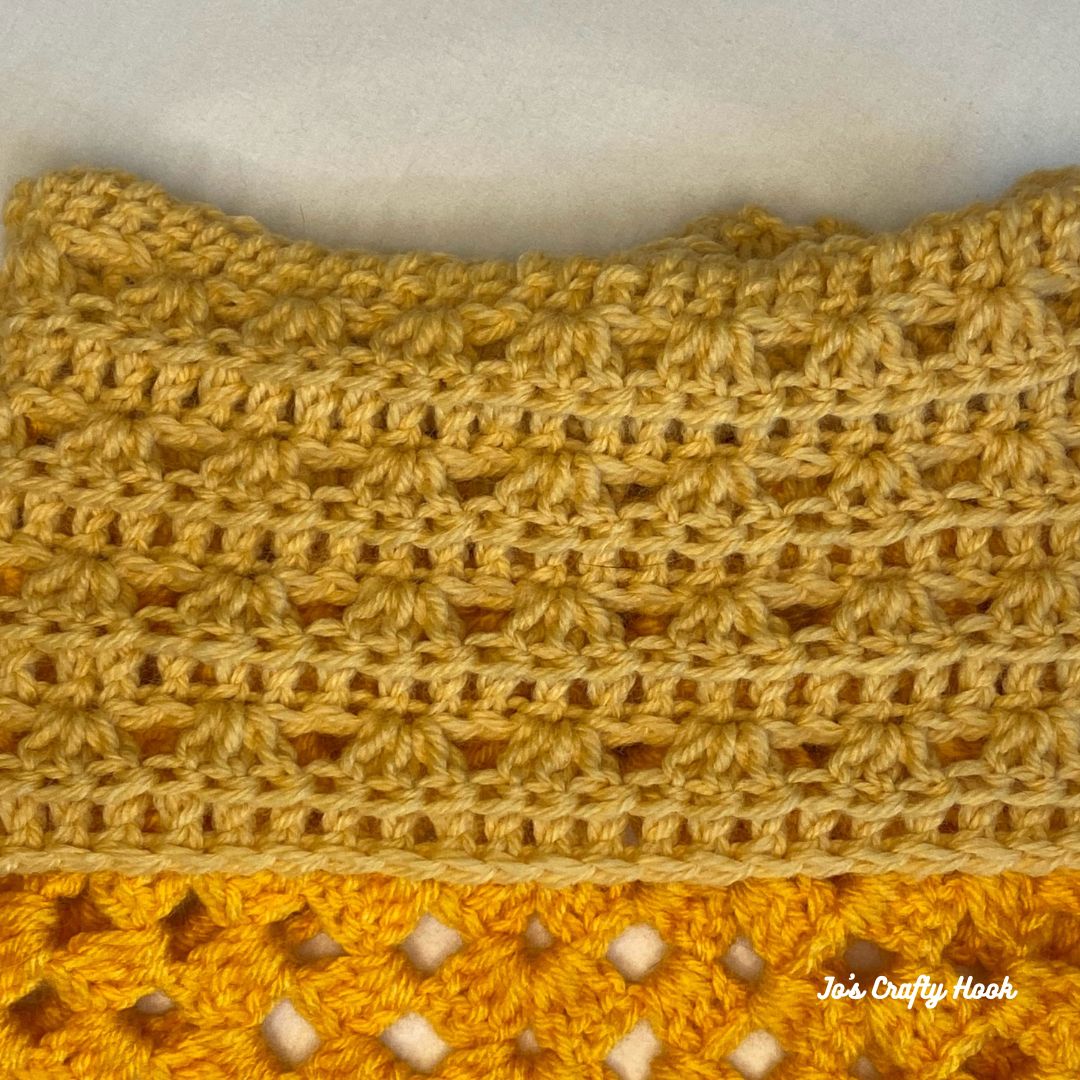
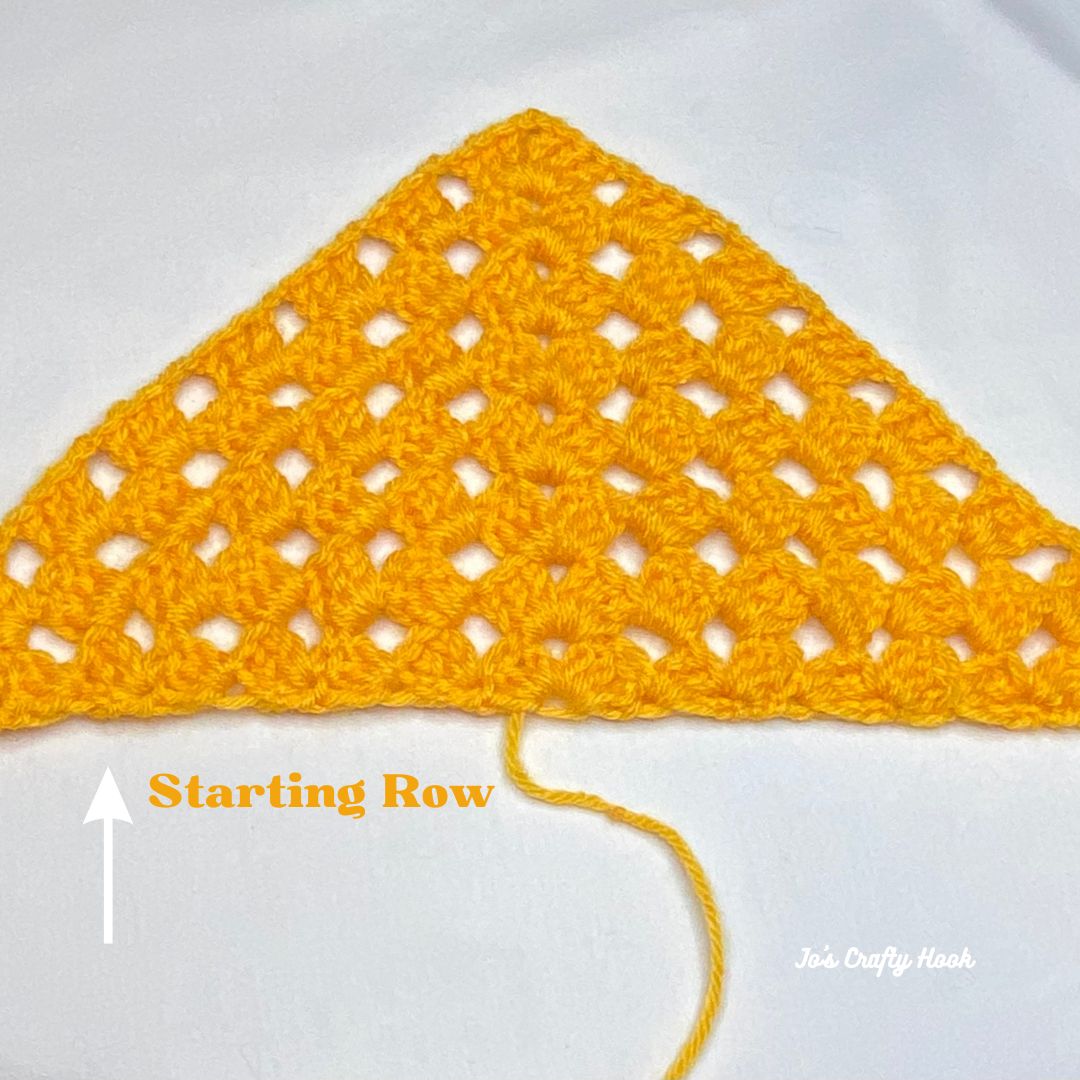
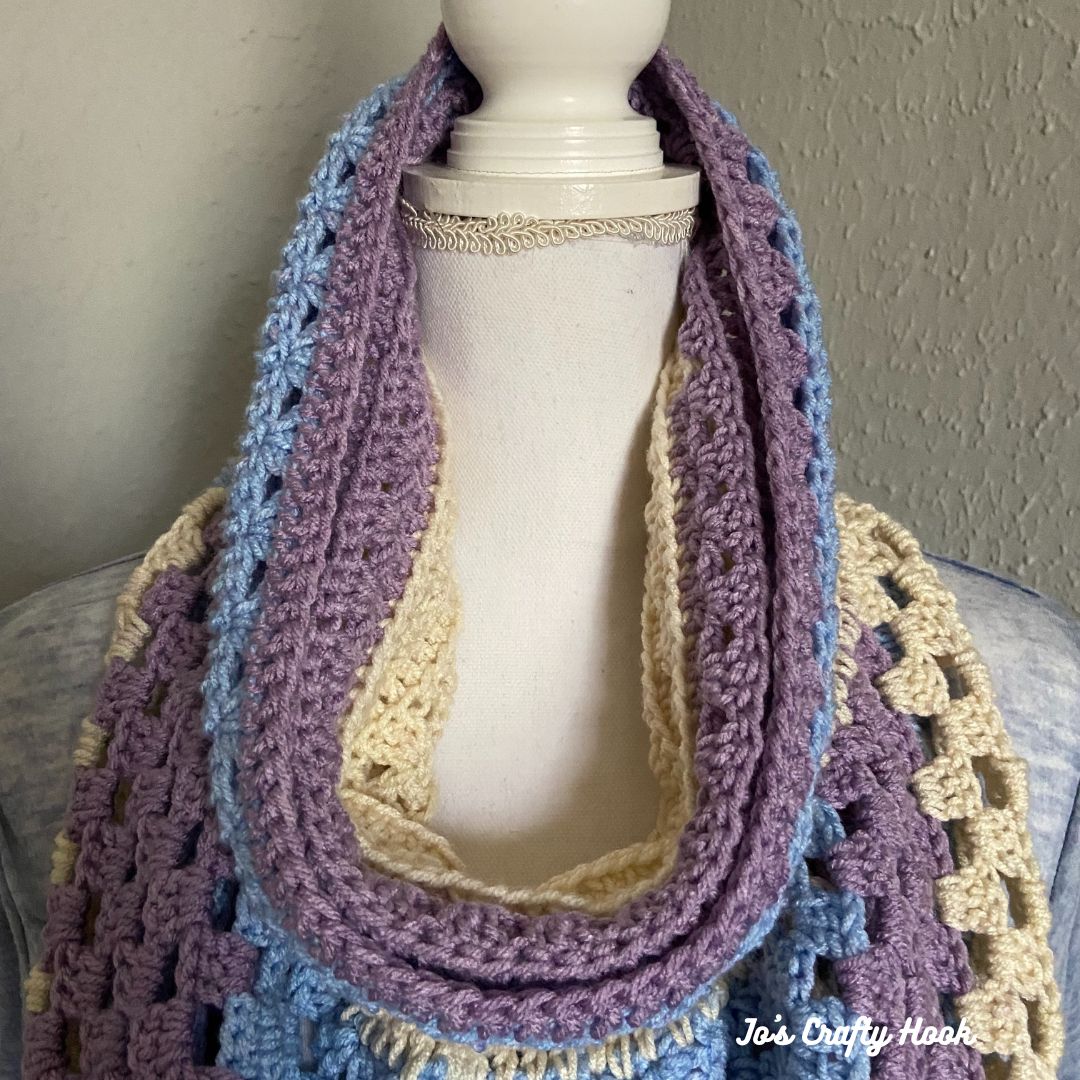
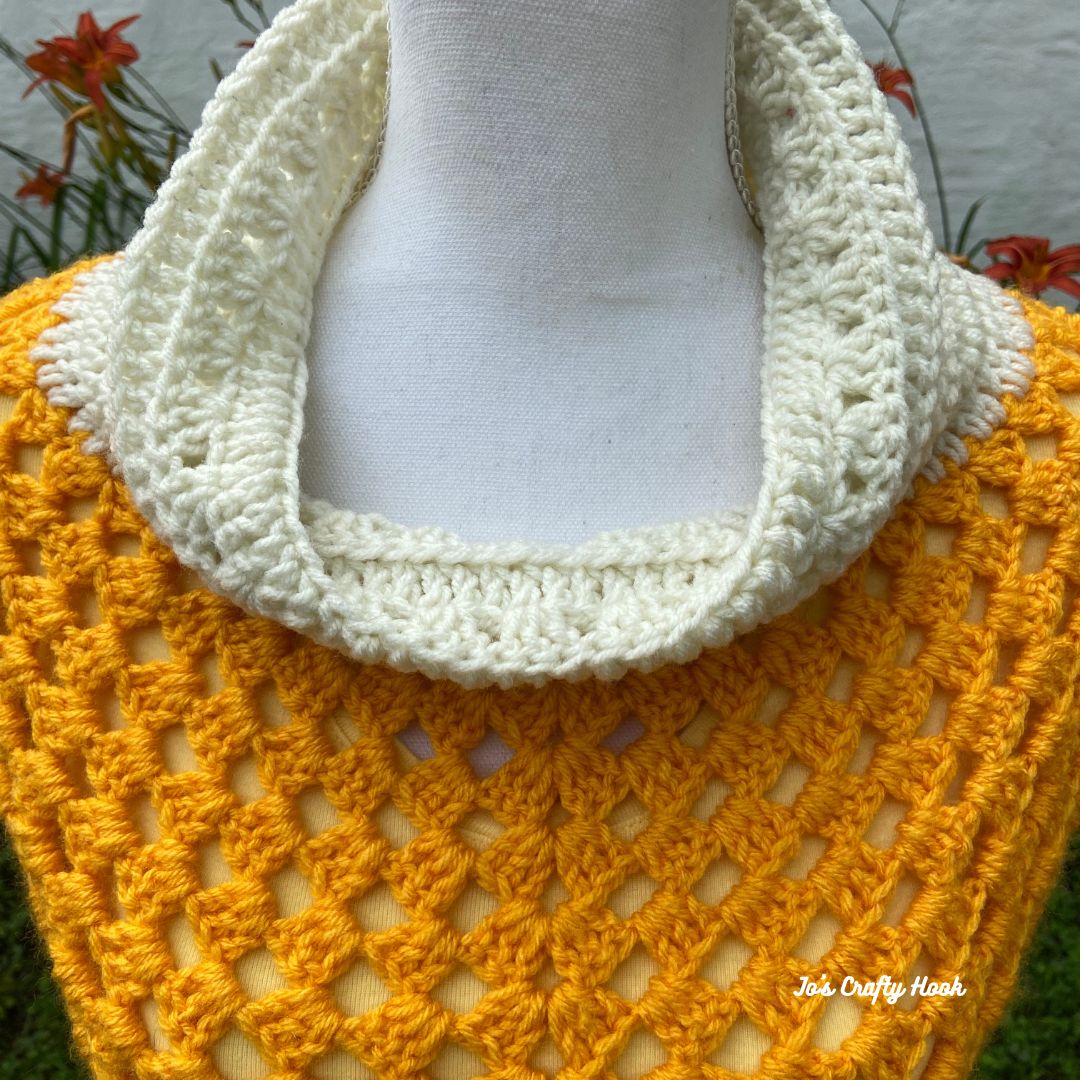
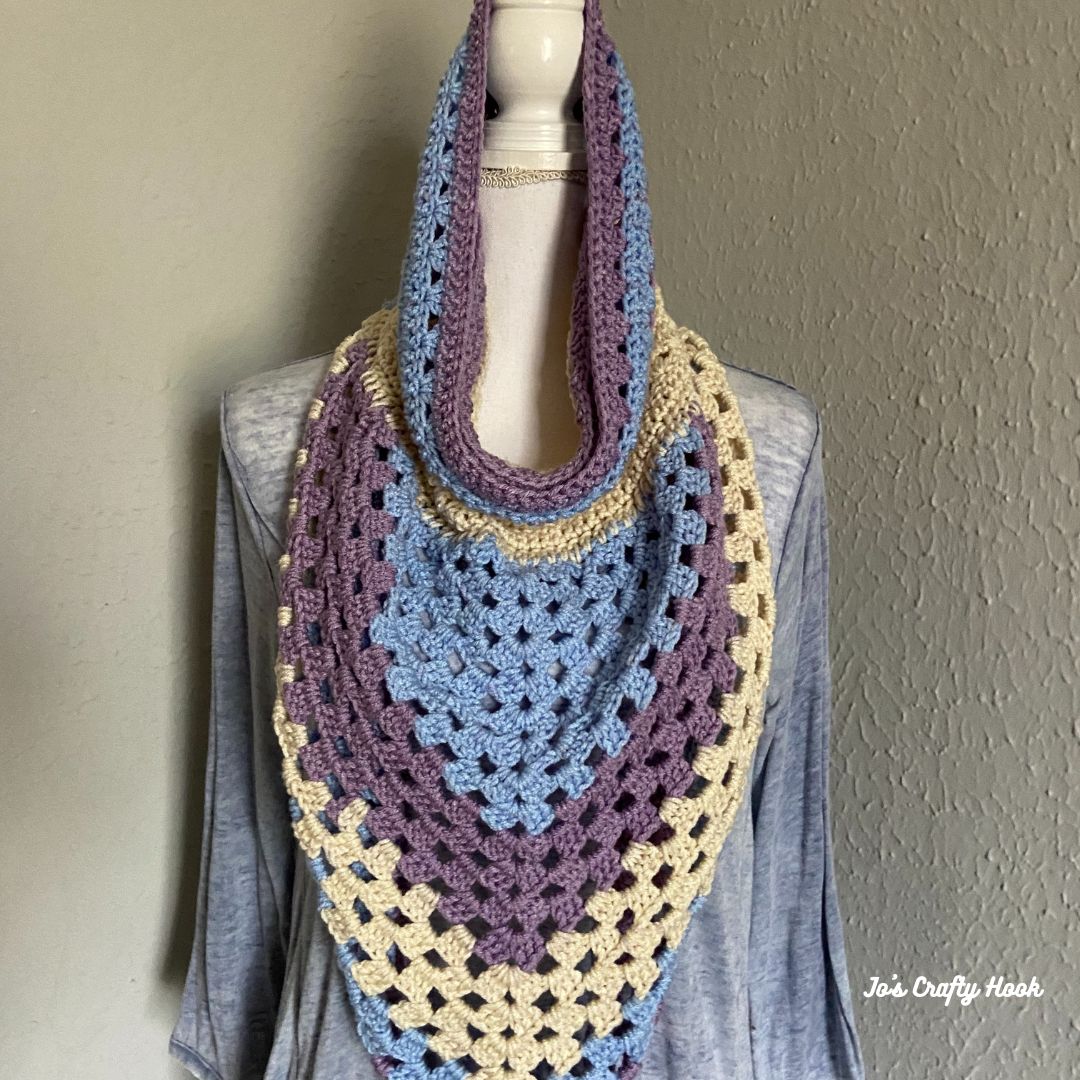
My Great Granny Cowl Crochet Pattern has 2 stages in creating the design. First there is a triangle shawl that covers the chest and then a cowl is created to wrap around the neck.
US Terminology
Beginner Friendly
I used Red Heart Super Saver 100% Acrylic #4 ply Worsted Weight Yarn (198g / 7oz) (333m / 364yd)
Materials:
450-950 yds of #4 ply or Worsted/Aran Weight Yarn
US I or 5.5 mm Crochet Hook
Scissors
Tapestry Needle
Stitches/Abbreviations Used:
ch = chain
dc = double crochet
sp = space
rep = repeat
blo = back loop only
alt ch 2 = alternate chain 2 or alternate turning chain
Beg Shell = Beginning Shell
RS = Right Side
Notes:
ch 3 counts as a dc
alternate chain 2 counts as a dc
the design is worked in 2 parts, a shawl and a cowl
each row of shawl part will increase by 6 st
the shawl is worked in turning rows
the cowl is worked in the round with turning rows
there are 4 sizes to choose from: 4-10 years, Tween, Adult Small & Large consecutively.
Great Granny Cowl Ad-Free Premium Crochet Pattern locations.
![]()
![]()
![]()
Great Granny Cowl Free Crochet Pattern
Note: Due to different types and thicknesses of yarn, you may need to go up or down a hook size to meet Gauge.
Cowl Gauge:
US I or 5.5 mm Crochet Hook
12 dc x 8 rows = 4”
Gauge Swatch:
R1: ch 14, dc in 4th ch from hook, dc across. turn (12 dc)
R2-R8: ch 3, dc across. turn (12 dc)
Special Stitches:
Beg Shell – (alt ch 2 or ch 3, 2dc) all in 1st st.
Shell – (3 dc, ch 2, 3 dc) all in same ch-2 sp.
Cowl Size Chart
| Size | Shawl Length | Cowl Circumference | Cowl Height | Yardage Used |
| 4-10 years | 16” | 32” | 6” | 450-550 |
| Tween | 20” | 40” | 8” | 550-650 |
| Small Adult | 24” | 48” | 10” | 650-800 |
| Large Adult | 28” | 56” | 12” | 800-950 |
Part 1: Shawl
Gauge: 4 rows = 4”
R1: Magic Circle. (3 dc, ch 2, 3 dc) all in magic circle. draw magic circle closed. 6 dc & ch-2
Optional: ch 4, (3 dc, ch 2, 3 dc) all in 1st ch. turn 6 dc & ch-2
R2(RS): (alt ch 2 or ch 3, 2 dc) all in 1st st, ch 2, (3 dc, ch 2, 3 dc) all in ch 2-sp (Shell made) ch 2, 3 dc in last st. turn 12 dc & 2 ch-2 sp
R3: (alt ch 2 or ch 3, 2 dc) all in 1st st (Beg Shell made) ch 2, 3 dc in next ch-2 sp, ch 2, (3 dc, ch 2, 3 dc) all in ch 2-sp of Shell. ch 2, 3 dc in next ch-2 sp, ch 2, 3 dc in last st. turn 18 dc & 5 ch-2 sp
R4: Beg Shell, *ch 2, 3 dc in next ch-2 sp. rep from * until ch-2 sp of Shell, Shell **ch 2, 3 dc in next ch-2 sp. rep from ** until the last ch-2 sp. ch 2, 3 dc all in last st. turn 24 dc & 7 ch-2 sp
Rep R4 until you have 16 (20, 24, 28) rows or until you reach desired length, being sure to end on RS.
Do NOT fasten off.
Part 2 – Cowl
Cowl Gauge
12 dc x 8 rows = 4”
You will now be working in the round with turning rows.
with RS facing you, turn slightly to work across the starting row (longest side)
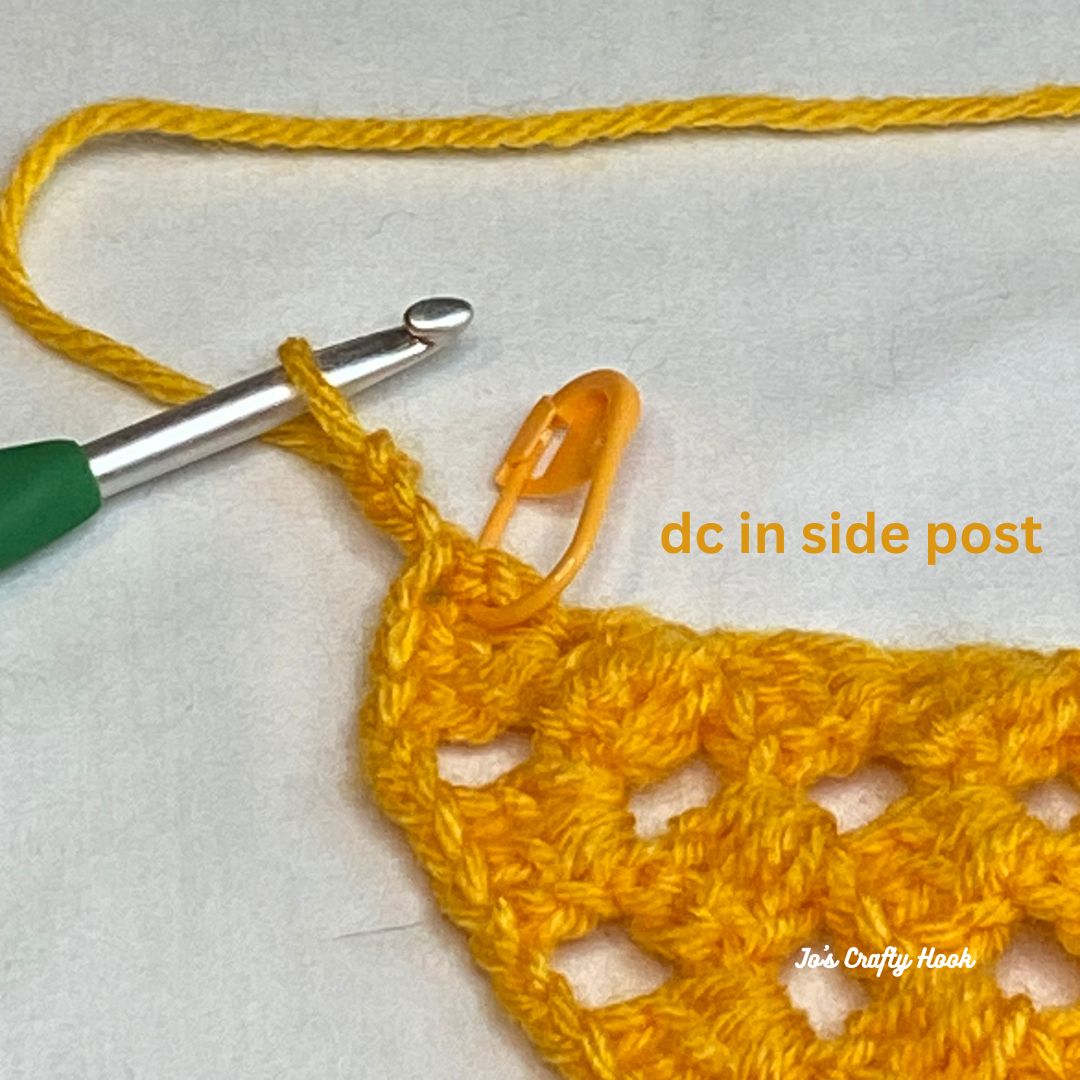
Starting Row
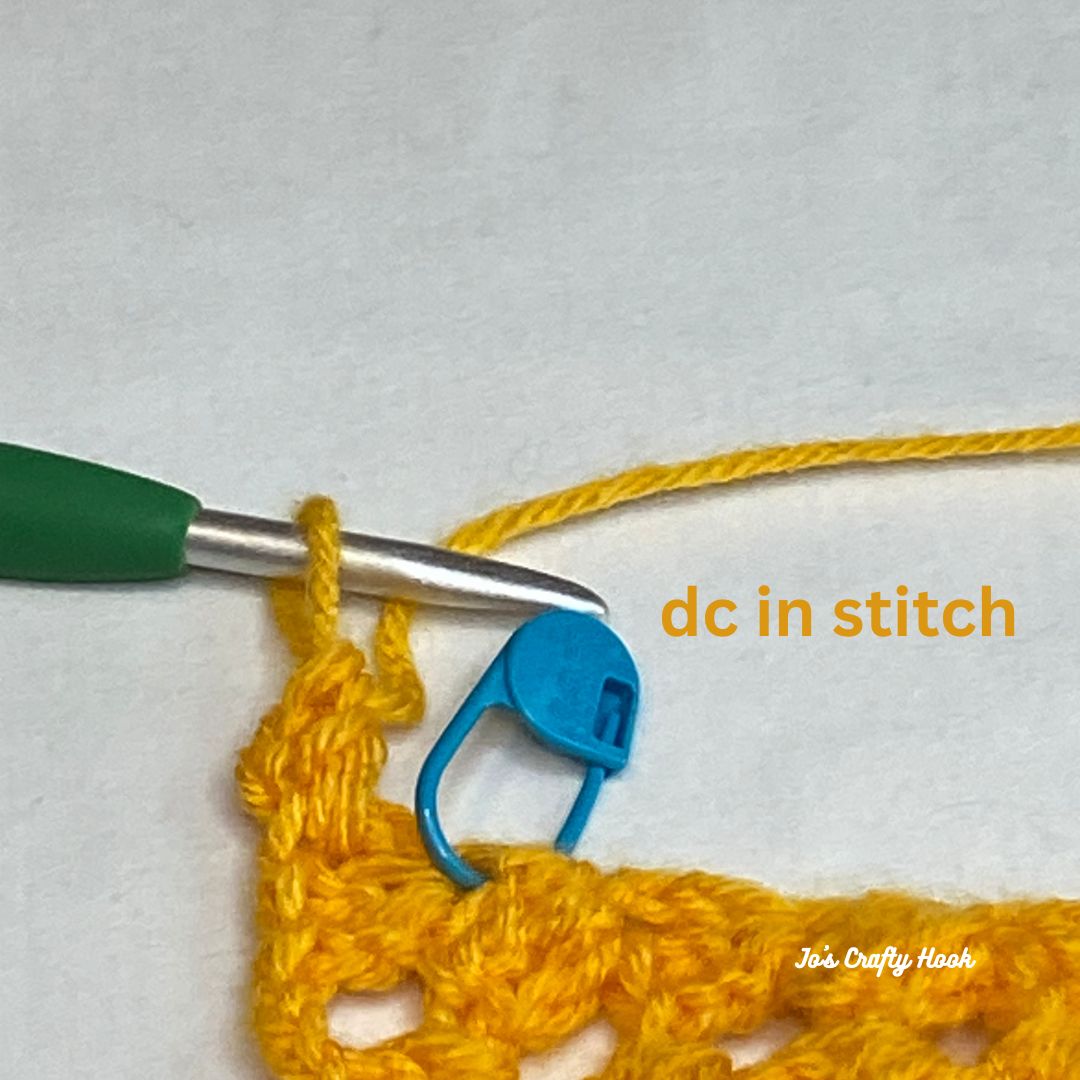
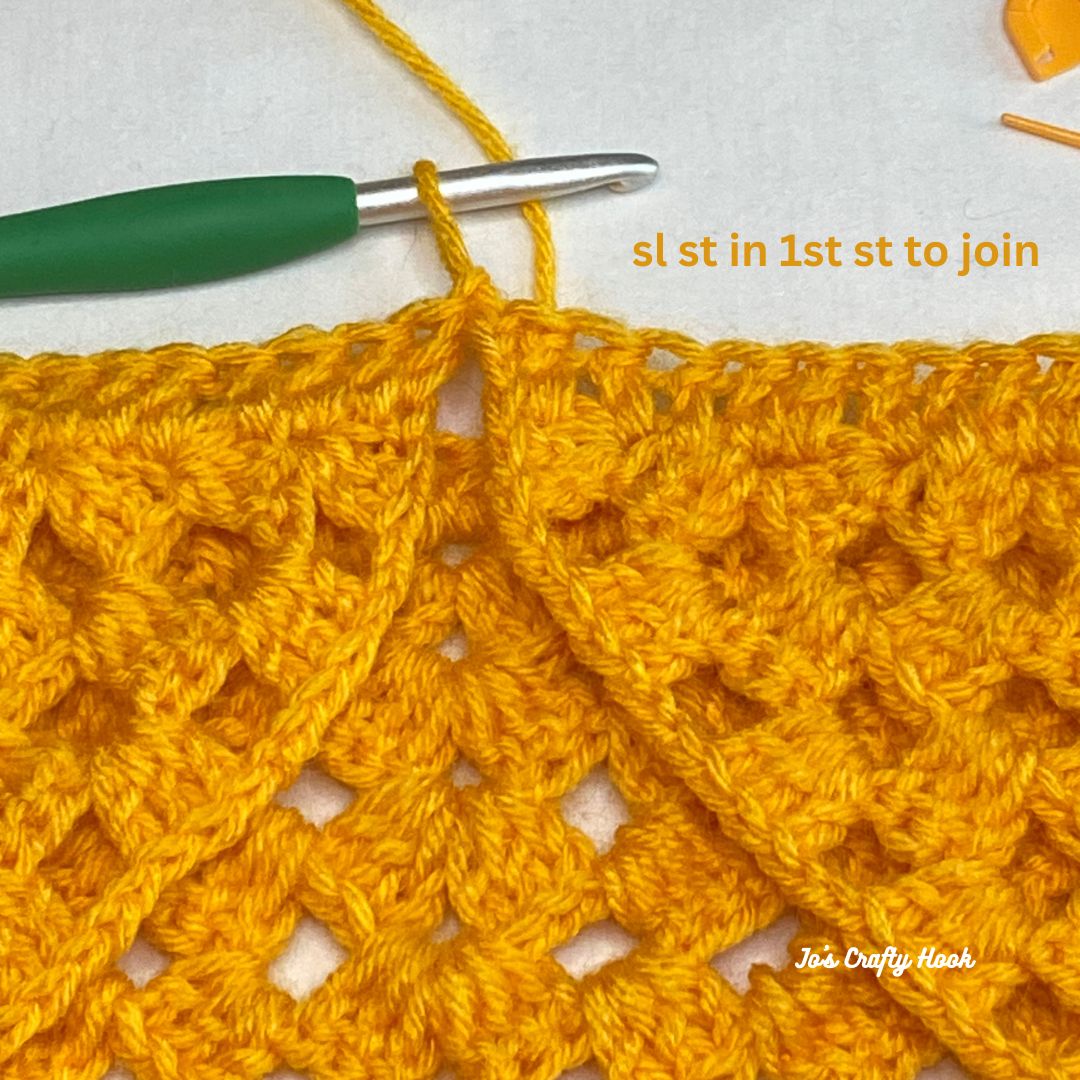
R1: ch 3 in the same st, dc in side post, dc in dc across. sl st in top of ch 3 to join. turn (you should end with an even number of stitches)

R2: ch 3, dc blo in each st around. sl st in top of ch 3 to join. turn
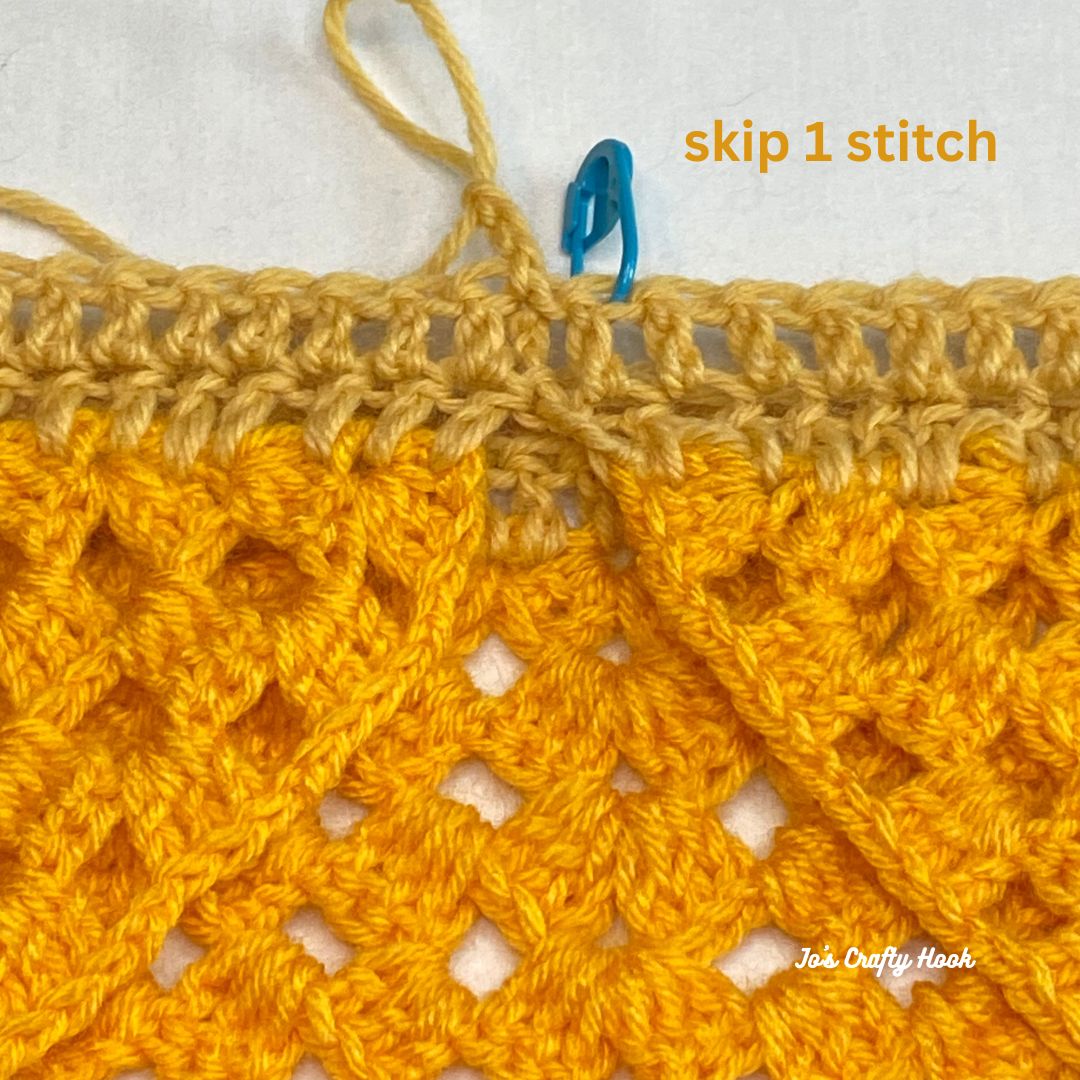
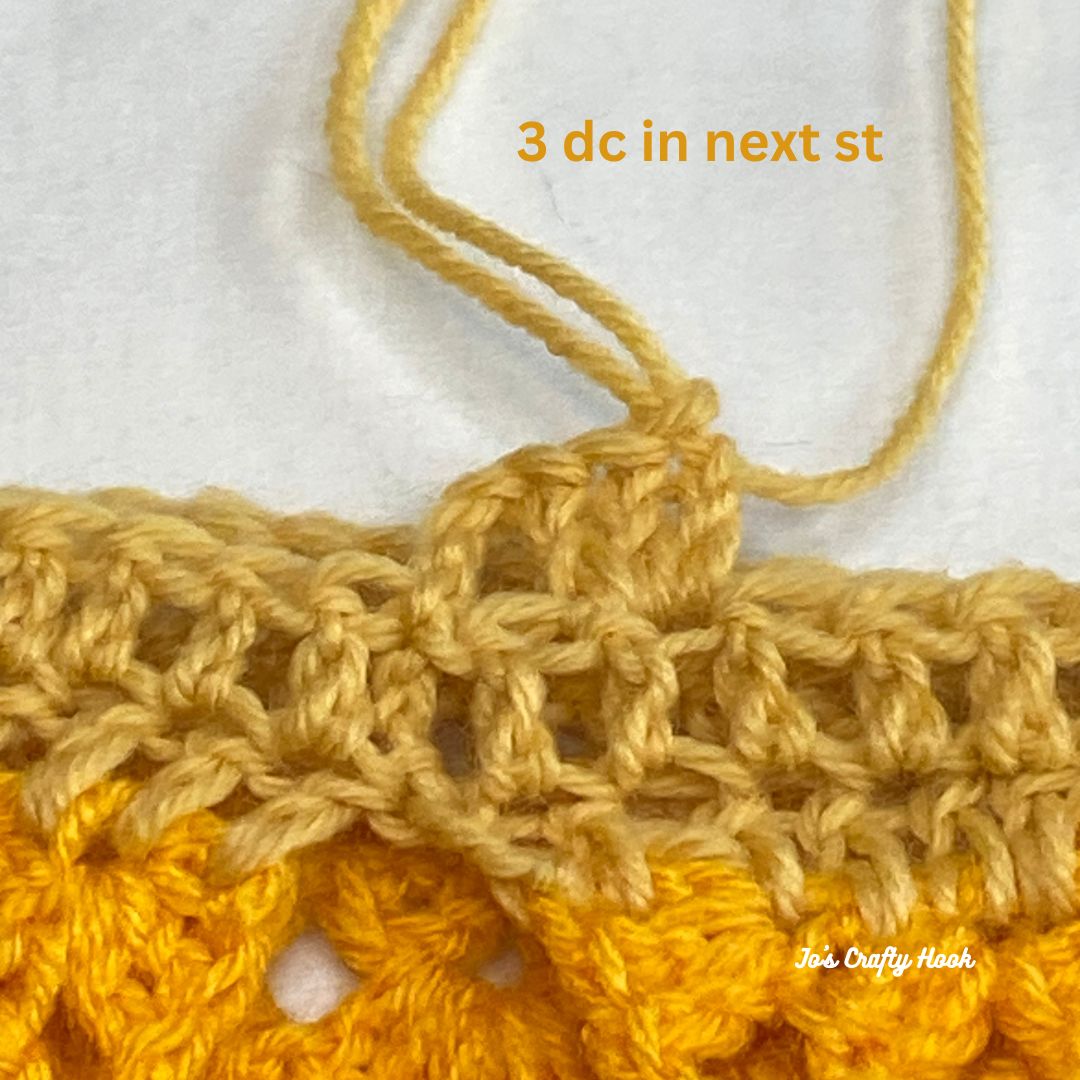
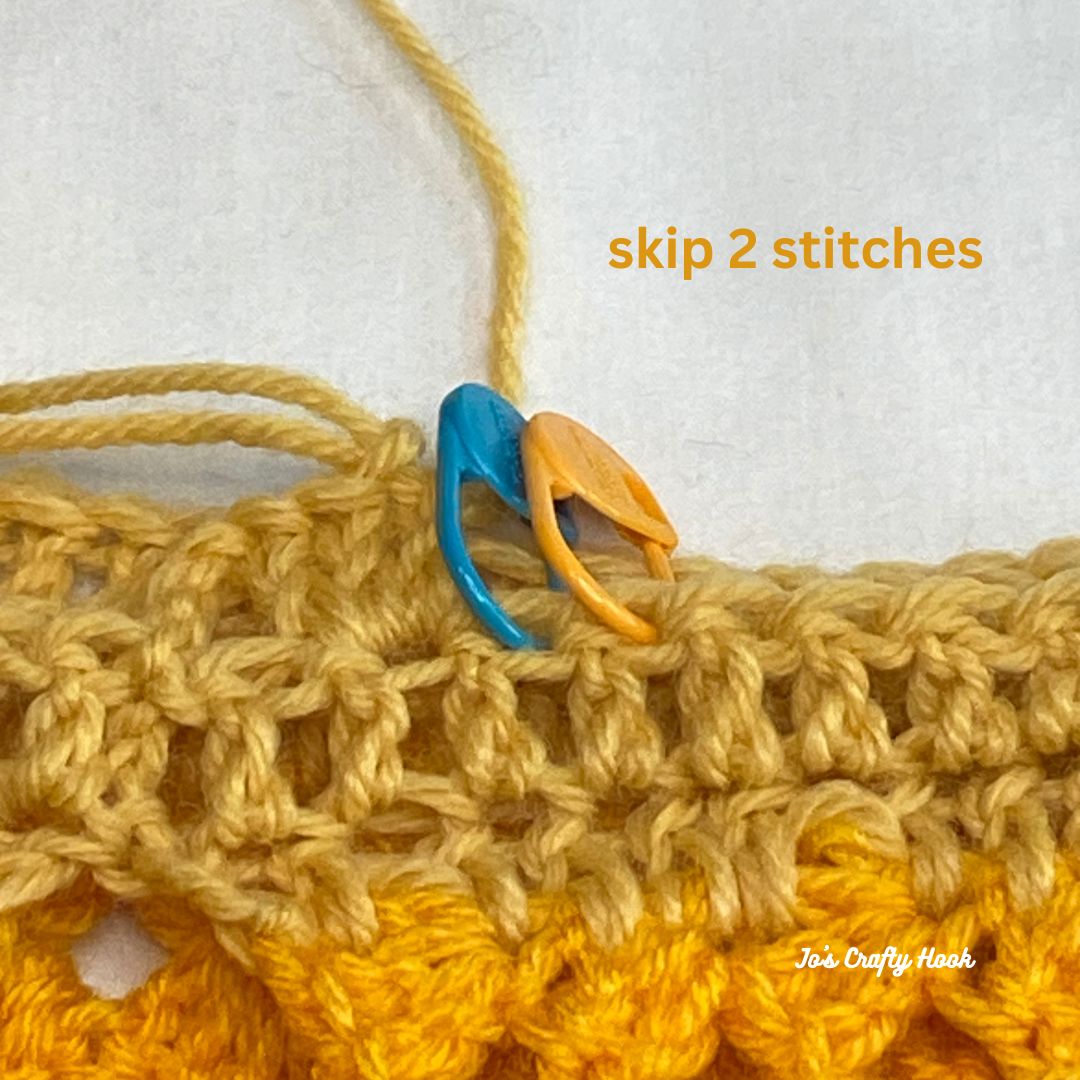
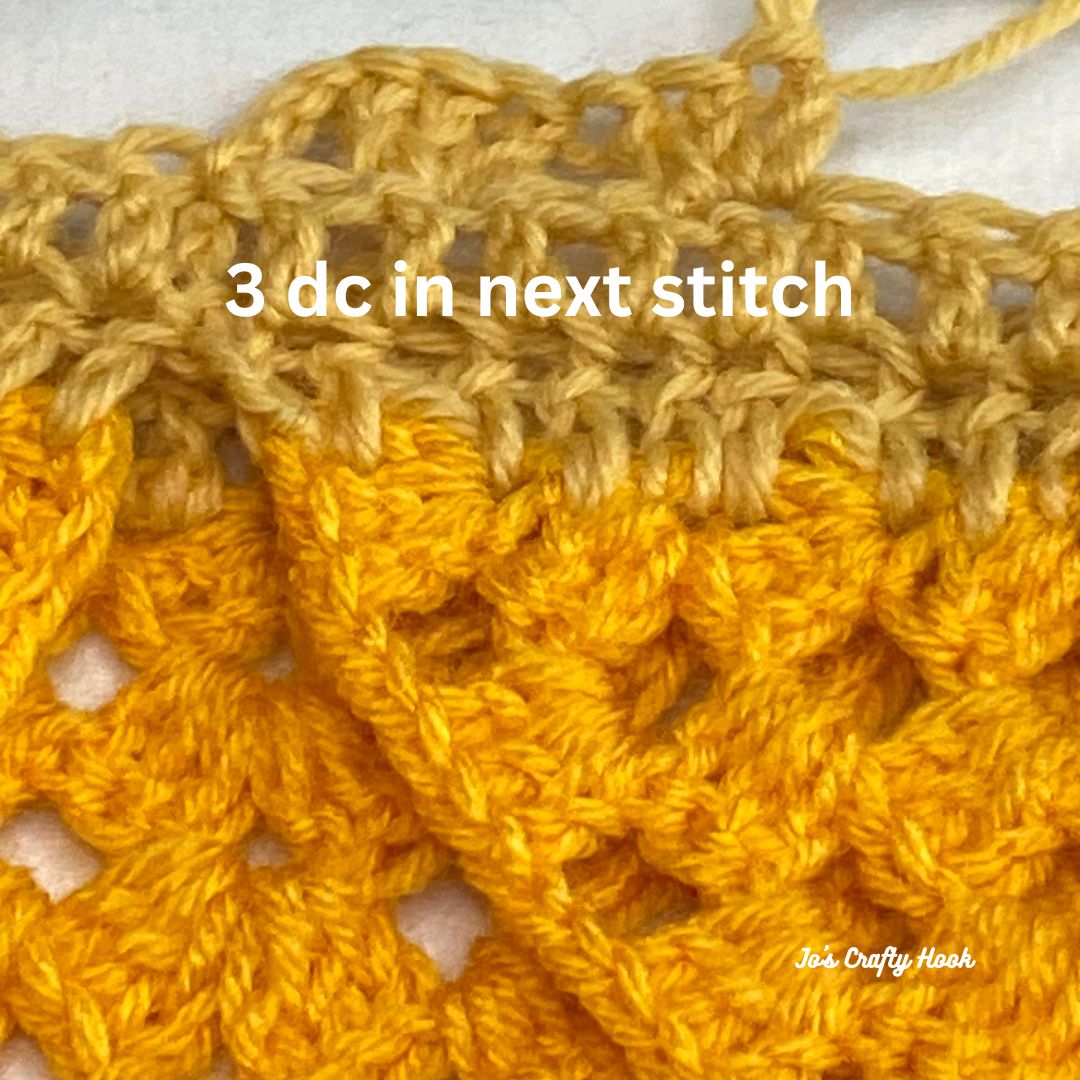
R3: ch 3, sk next st, 3 dc in next st, *sk 2 st, 3 dc in next st. rep from * around until last 2 st. sk last 2 st. sl st in top of ch 3 to join. Turn
R4: ch 3, dc blo in each st around. sl st in top of ch 3 to join. turn
R5: ch 3, sk next st, 3 dc in next st, *sk 2 st, 3 dc in next st. rep from * around until last st. sk last st. sl st in top of ch 3 to join. turn
R6: ch 3, dc blo in each st around. sl st in top of ch 3 to join. turn
Rep R5-R6 until your cowl measures (6” 8” 10” 12”) in height or until you reach your desired height.
Fasten off and weave in ends.
That’s it! You have made your own Great Granny Cowl!

I would LOVE to see your finished version! Share your pics with me at any of my social media sites above using the hashtags below. You can find all of my social media sites listed below.
@joscraftyhook @joeyleabaird
I would LOVE for you to show off your work with us! You can add your finished cowl inside my FB Group Jo’s Crafty Hook Designs. Be sure to join us regularly there where you will find other great crochet designers and their work; collaborations, WIPs from others and SO much more!
If you would like to receive more information about the events happening at Jo’s Crafty Hook and receive a FREE crochet pattern, why not Subscribe to my Newsletter at my website.
You can find some of my free crochet patterns at my website.
You can also find more of my premium crochet patterns at my Ravelry Store and LoveCrafts and Etsy Shop.
Find me, Jo of Jo’s Crafty Hook at the places listed below.
Email: jo@joscraftyhook.com
Linktree
Facebook Group Jo’s Crafty Hookers
Facebook Group Jo’s Crafty Hook Designs
Facebook Page Jo’s Crafty Hook
Facebook Page: Crochet Designer Community
![]()
One thought on “Great Granny Cowl Crochet Pattern”