

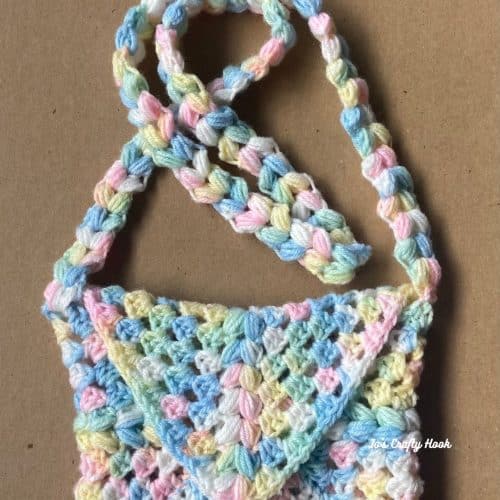
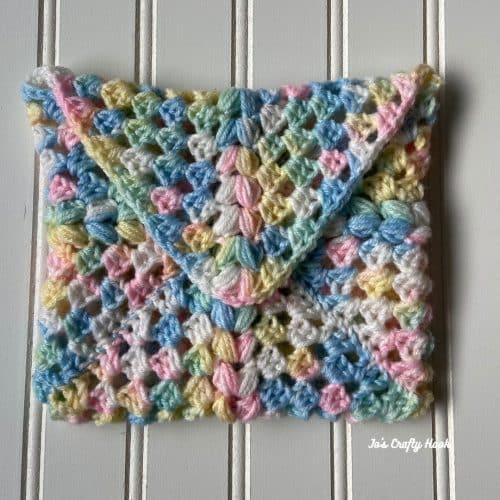
You’ve Got Mail Bag Crochet Pattern
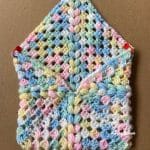
The You’ve Got Mail Bag Crochet Pattern uses instructions for a Granny Square that is folded closed and ends up looking like an envelope.
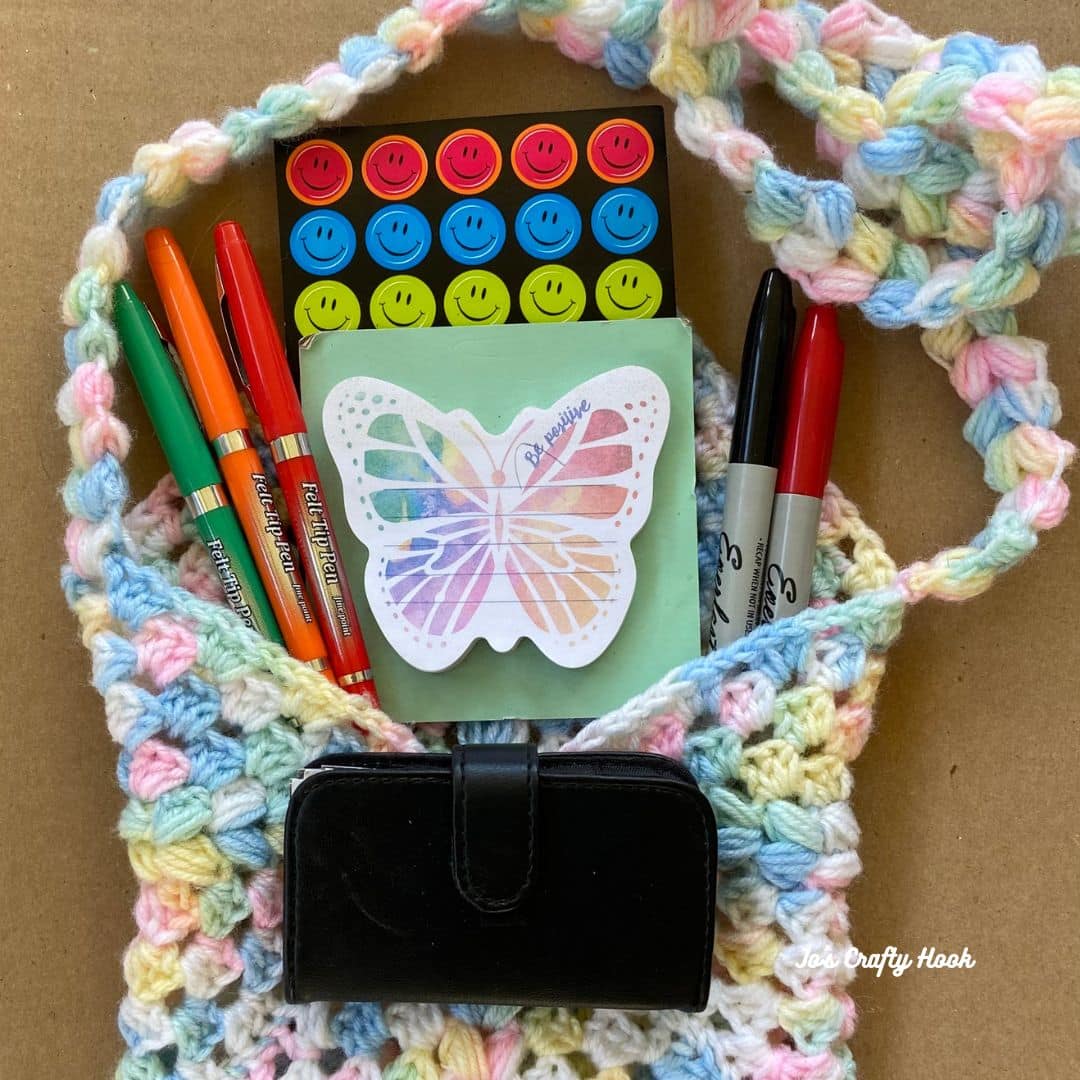
The bag can be made for Teachers or Kids. The bag would be great for carrying little things like keys, sunglasses, wallets. It is also great for kids to keep their crayons, glue sticks, scissors that can be found all in one place.

This post contains affiliate links
Be sure to sign up for my Newsletter and receive a FREE crochet pattern straight to your inbox. You will also receive messages about New Crochet Pattern Releases; FREE Crochet Patterns; Collaborations and more!
2025 Giftstravaganza Blog Hop hosted by Underground Crafter
From November 1-30, 2025 you will find daily FREE premium crochet patterns that are great gift ideas you can crochet for Christmas and the Holidays or any time of year.
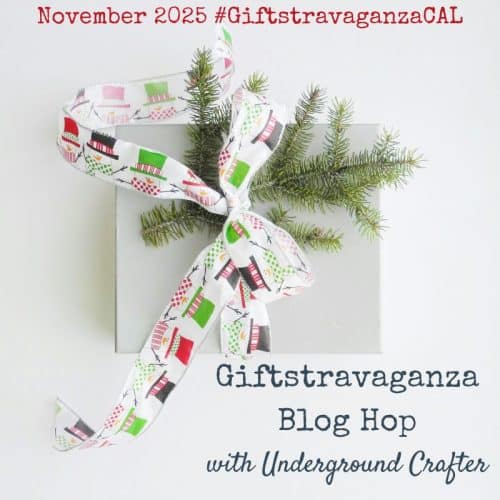
My Featured Day is November 22-23, 2025
My You’ve Got Mail Bag Crochet Pattern is being featured in the 2025 Giftstravaganz Blog Hop and you can get a FREE premium copy for 24 hours from my Ravelry Store!
Use the Coupon Code: TEACHER

Also, you can find the FREE version below that you can crochet for Teachers, Kids, and anyone that needs a hip bag/pouch.
Ad-Free Version
You can purchase an Ad-Free Copy of the crochet pattern at my Ravelry Store for a small fee.
Inside the crochet pattern you will find step-by-step picture tutorials to help you every step of the way.

You’ve Got Mail Bag Free Crochet Pattern
Information Needed
Skill Level:
Beginner
US Terminology
I Red Heart Super Saver, #4 ply Medium Weight Yarn .
Finished Size:
Materials:
US G or 4.5 mm Crochet Hook
1000-1200 yds of 4 ply Worsted or Aran Weight Yarn
Tape Measurer
Scissors
Stich Markers
Tapestry Needle
Velcro/Button
Abbreviations/Stitches Used:
ch = chain
hdc = half double crochet
ps = puff stitch
bps = beginning puff stitch
sl st = slip stitch
sp = space
rep = repeat
RS = Right Side
WS = Wrong Side
SM = Stitch Marker
Notes:
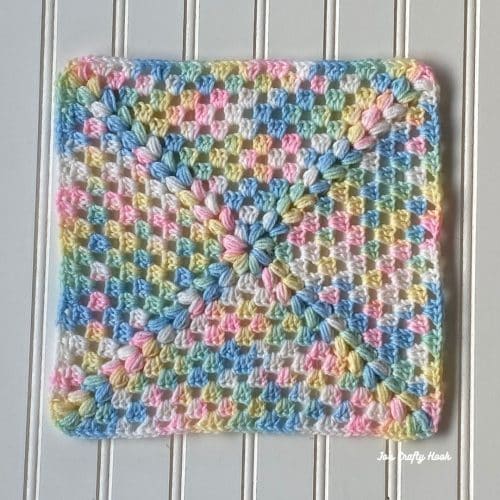
The crochet pattern is worked like Granny Square
The crochet pattern is worked flat and in the round
Each round will increase by 12 dc
The ch-1 sp of each round will increase by 4
Special Stitches:
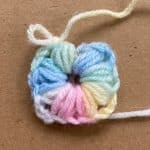
Beginning Puff Stitch – bps
- ch 2
- YO, insert into same ch-2 sp, YO, pull up a loop (3 loops on hook)
- YO, insert hook into same ch-2 sp, YO, pull up a loop (5 loops on hook)
- YO, insert hook into same ch-2 sp, YO, pull up a loop (7 loops on hook)
- YO, insert hook into same ch-2 sp, YO, pull up a loop, draw through all 9 loops on hook
Puff Stitch:
- YO, insert into indicated sp, YO, pull up a loop (3 loops on hook)
- YO, insert hook into same sp, YO, pull up a loop (5 loops on hook)
- YO, insert hook into same sp, YO, pull up a loop (7 loops on hook)
- YO, insert hook into same sp, YO, pull up a loop, draw through all 9 loops on hook
Beg Corner = (bps, ch 2, ps) all in ch-2 sp
Corner = (ps, ch 2, ps) all in ch-2 sp
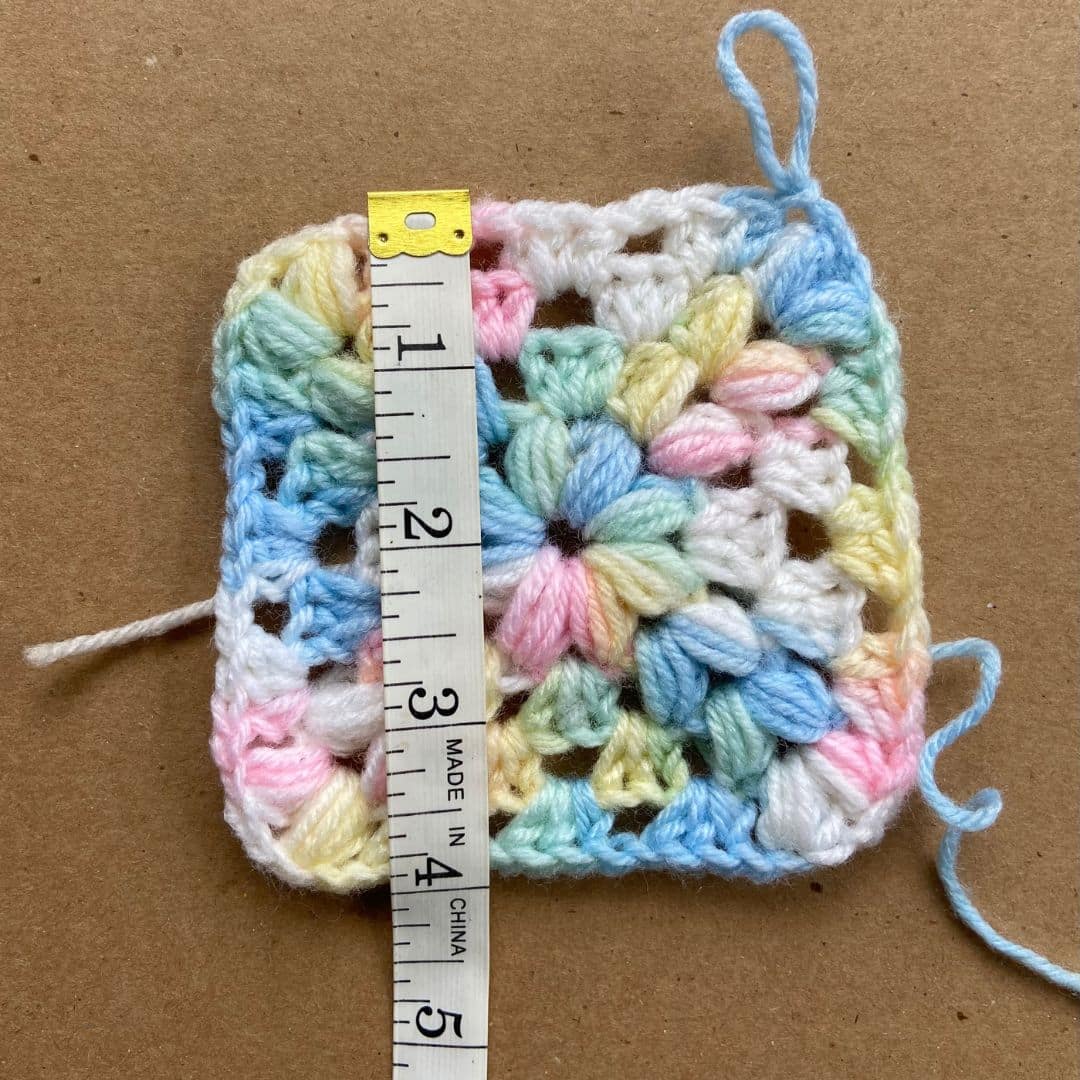
Gauge:
US G or 4.5 mm Crochet Hook
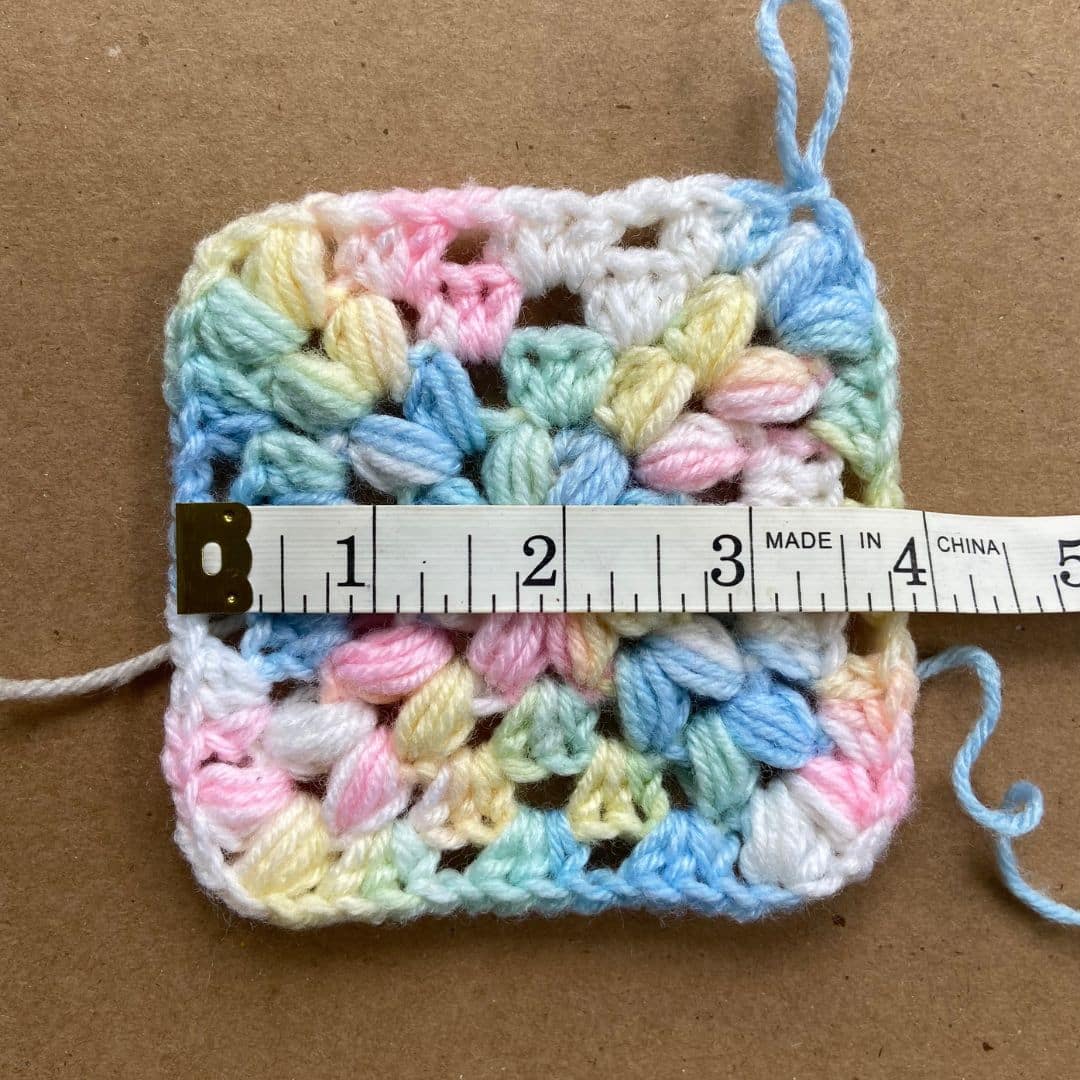
4 rounds of pattern = 4”
Note: if you do not meet Gauge, try going up or down a hook size until you do.
Gauge Swatch:
The Gauge Swatch will be worked a little differently.
Work R1-R4 of the pattern below for a 4” x 4” square
You’ve Got Mail Bag Crochet Pattern

Ad-Free Version
You can purchase an Ad-Free Copy of the crochet pattern at my Ravelry Store for a small fee.
Inside the crochet pattern you will find step-by-step picture tutorials to help you every step of the way.
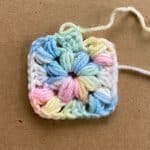
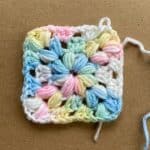
Granny Square Crochet Pattern
R1: magic circle, ch 1, Beg Corner, ch 1, *Corner, ch 1, rep from * twice more. sl st in ch-2 sp of Beg Corner. 4 Corners
R2: Beg Corner, ch 1, *3 hdc in next ch-1 sp, Corner, ch 1, rep from * around until Beg Corner. Sl st in ch-2 sp of Beg Corner. 4 Corners, 12 hdc
R3: Beg Corner, ch 1, *3 hdc in next ch-1 sp, Corner, ch 1, 3 hdc in next ch-1 sp, ch 1, rep from * around until Beg Corner. Sl st in ch-2 sp of Beg Corner. 4 Corners, 24 hdc
R4: Beg Corner, ch 1, *3 hdc in next ch-1 sp, Corner, ch 1, 3 hdc in next ch-1 sp, ch 1, 3 hdc in next ch-1 sp, rep from * around until Beg Corner. sl st in ch-2 sp of Beg Corner. 4 Corners, 36 hdc
R5-R12: Repeat R4
Reminders:
each round will increase by 12 hdc
the ch-1 sp of each round will increase by 4
Customizing:
You can add as many rounds as I did or add as many rounds for your desired size.
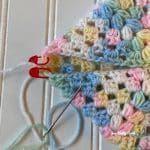
Closing Bag
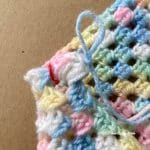
Step 1:
Lay Granny Square WS down, from the bottom Corner, count over 5 groups of 3 hdc on both sides. Place a SM in the ch-1 sp.

Step 2:
Fold each Corner to the center of Granny Square.
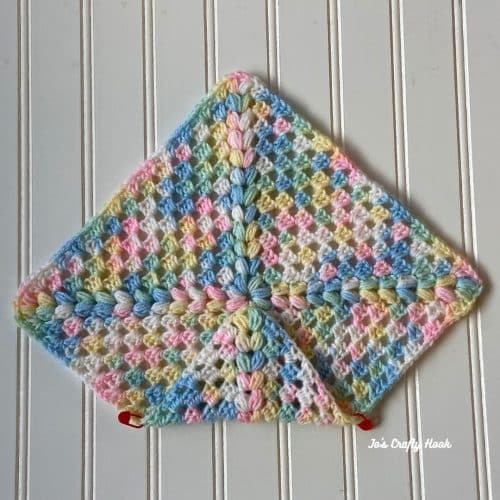
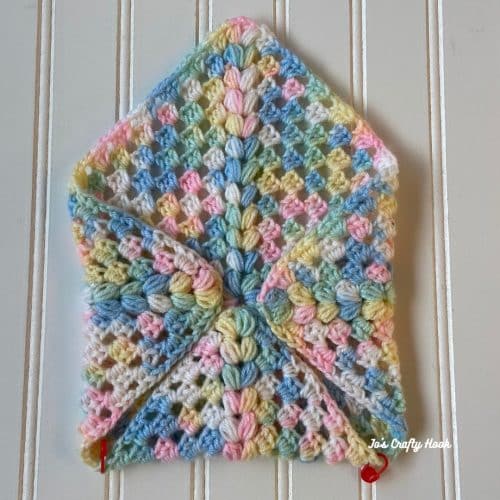
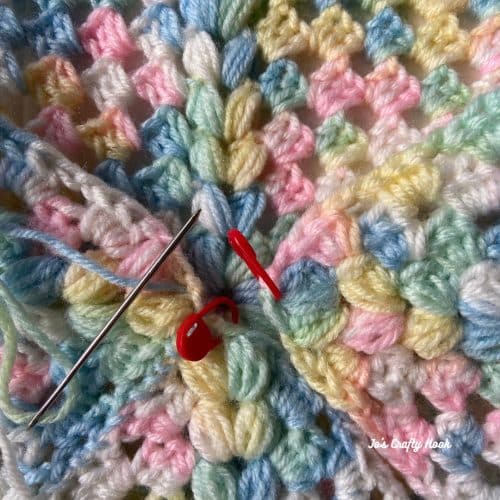
Step 3:
Using a long tail of yarn, attach it in the ch-1 sp before each hdc.
Whip stitch through each hdc until you come to the center of the Granny Square.
Step 4:
Whip Stitch in each ch-2 sp of Corners to join.
Whip Stitch through the Corners you just joined and through the 3rd Corner.

Step 5:
Whip Stitch through each hdc until you come to your SM. sl st in ch-1 sp(s) to join.
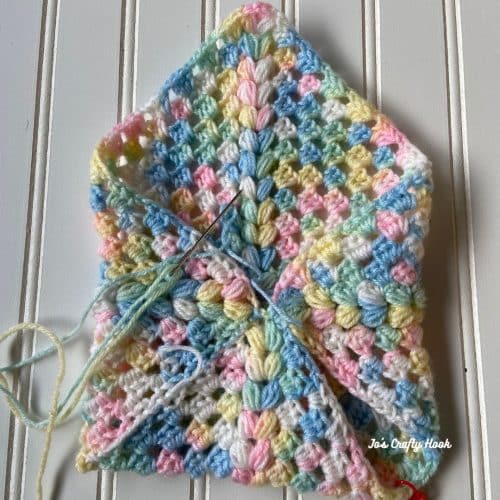
Fasten off and weave in ends.
Strap
Strap Gauge:
US G or 4.5 mm Crochet Hook
8 rows of ps = 4”
Notes:
The Strap will be folded in half, so be sure to account for that when the Strap is attached on both sides.
The Bag is supposed to rest on your hip, so repeat Step 3 until you have reached the desired length of your Strap.
Step 1:
Count over 12 hdc from center of bag, Place SM in previous ch-1 sp.
Count over 12 hdc from the other side of center, Place SM in next ch-1 sp.
Step 3:
ps in ch-2 sp, ch 2, ps in same ch-2 sp. ch 1, turn.
Repeat Step 3 until you have reached the desired length of your Strap.
Step 4:
Being sure to end with an odd number of rows, going in the ch-1 sp, where you placed your 2nd SM, sl st in the ch-1 sp, sl st through ps and same ch-1 sp, sl st through ch-2 sp of ps and same ch-1 sp, sl st through last ps and same ch-1 sp.
Fasten off and weave in ends.
Adding a Closure
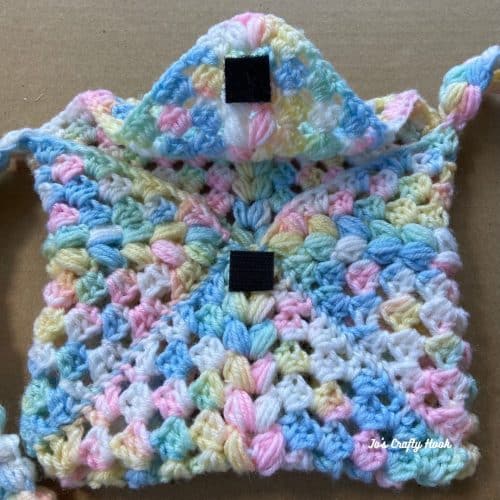
There are so many ways you can add something to make the bag open and close easily.
You can add a Button, Magnets, or even Velcro.
I used Velcro that has a glue strip on each side.
For the best placement of the Velcro or whatever you decide to use would be:
- Attach the sticky side of 1 part of the Velcro on the 2nd Puff Stitch of the flap.
- Attach the sticky side of the 2nd part of the Velcro where you joined the 3 of the Corners.
@Jo’s Crafty Hook 2025
I would love to see what you created!
You can tag me at @joscraftyhook and in my FB Group Jo’s Crafty Hook Designs
********************************************************
My Premium Crochet Pattern Stores

![]()
![]()
********************************************************
Find me, Jo of Jo’s Crafty Hook at the places listed below.
Email: joeybaird@aol.com
Facebook Group Jo’s Crafty Hookers
Facebook Group Jo’s Crafty Hook Designs
Facebook Page Jo’s Crafty Hook
Facebook Page: Crochet Designer Community
![]()