Jo’s Boat Tote Crochet Pattern

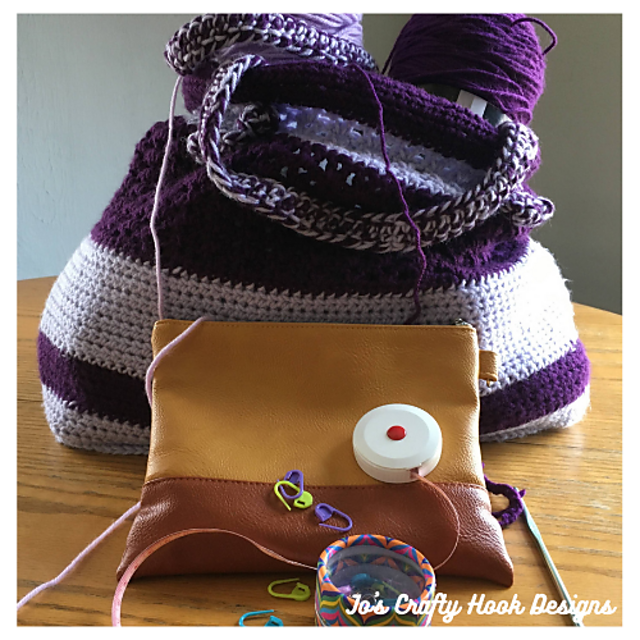
I seem to be designing a lot more totes, handbags, and clutches lately.  This is why I am sharing with you Jo’s Boat Tote Crochet Pattern for FREE!

This post contains affiliate links.  If you make a purchase using these links I may receive compensation (at no added cost to you.)


If you would like to receive information new Crochet Pattern Releases; more FREE Crochet Patterns; my Collaborations and more, click on the Subscribe Button in the top right corner to subscribe.  When you Subscribe you will receive a FREE crochet pattern for doing so!

Jo’s Boat Tote Crochet Pattern is a great make for those kids going back to school, as teacher’s gifts, as WIP bags, and so many other uses for this tote!  This pattern would make a great Stash Buster!  I used 2 colors of yarn, but you can use as many colors as you like!


********************************************************

I used Main Stays Basic Yarn.
(7oz/397yds) 363m/198g)

Materials:

US Hook H/5.0 mm
US Hook J/6.0 mm
450 yds of Light Color 4 ply Worsted Weight
450 yds of Dark Color 4 ply Worsted Weight
Scissors
Tapestry Needle
Stitch Marker

Gauge:
Hook US H/5.0 mm
Bottom:  7 sc  x 6 rows  = 2”
V-Stitch Rows:  3 v-st x 4 rows  = 2”

Size:
18” wide
13” tall

Abbreviations:
ch = chain
sl st = slip stitch
sc = single crochet
dc = double crochet
blo  = back loop only  v-stitch = V-st

Notes:
Beginning V-Stitch  = (ch 4 + 1 dc) in same space
V-Stitch = (1 dc + ch 1 + 1 dc) in same space
Ch 2 does NOT count as a stitch until the Purse section of the tote
Bottom part of tote is worked flat
Purse part of tote is worked in the Round

********************************************************

You can find an Ad-Free pdf version at my Ravelry Store or LoveCrafts that has helpful picture tutorials.

Jo’s Boat Tote Crochet Pattern:

Bottom of Bag

With the Lighter Color

Bottom Piece measures 16” x 5.5”

R1:  Using the Lighter yarn ch 51, sc in 2nd chain from hook and to the end of ch. (50 sc)
R2-R20:  ch 1 and turn.  sc in same st and in each remaining st across.   (50 sc)

DO NOT TURN.  You will now start working in the round. 

R21:
Step 1:  ch 1 and turn. This will be the short row and sc in each st across the short row.  (19 sc)
Step 2:  turn work again to see the long row and sc in each st across the long row. (50 sc)
Step 3:  turn work again and sc in each st across of the short row.  (19 sc)
Step 4:  turn work again and sc in each st across the long row.  Sl st in 1st st to join.  (50 sc)
R22:  ch 1 sc in blo of same st and sc in blo of each sc around . sl st in 1st st.  ( 138 sc)

Fasten off and weave in ends.


Change to Darker Color

Purse:
R1: Flip the Bottom piece over and attach yarn by sl st in 1st st of any corner of Row 22.  ch 2, hdc in same st and hdc in each st around. (ch 2 counts as a hdc)  (139 hdc) 

**Do not turn at the end of the row, the Purse is worked in the round.   Place a stitch marker in the 1st st made at the start of each RoundYou may want to move the stitch marker every time you start a new round**

R2-R5:  ch 2, hdc in same st and hdc in each remaining st around. sl st in 2nd hdc. (139 hdc)  

Change to Lighter Color

R6-R11:   ch 2, hdc in same st and hdc in each remaining st around. sl st in 2nd hdc. (139 hdc) 

Change to Darker Color

R12-R25: ch 2, hdc in same st and hdc in each remaining st around. sl st in 2nd hdc. (139 hdc) 

Change to Lighter Color

R26:  ch 2, hdc in same st and hdc in each remaining st around. sl st in 2nd hdc. (139 hdc)
R27:  beg v-st, *skip 2 st and v-st in next st [(dc, ch 1, dc) all in same st] .*  repeat from * to * around until the last 2 st, skip last 2 st.  sl st in the 1st ch-2 sp.  (30 v-st)
R28-R34:  beg v-st in the ch-2 sp.  v-st in the each ch-2 space around.  sl st in 1st ch-2 sp (30 v-st)

 Change to Darker Color

R35:  ch 2, hdc in same st and hdc in each remaining st around. sl st in 2nd hdc. (139 hdc)
R36:  beg v-st, *skip 2 st and v-st in next st [(dc, ch 1, dc) all in same st] .*  repeat from * to * around until the last 2 st, skip last 2 st.  sl st in the 1st ch-2 sp.  (30 v-st)
R37-R39:  beg v-st in the ch-2 sp.  v-st in the each ch-2 space around.  sl st in 1st ch-2 sp (30 v-st)
R40:  ch 2, hdc in same st and hdc in each remaining st around. sl st in 2nd hdc. (139 hdc)
R41-R44:  ch 3, dc in same sp and each remaining st around.  sl st in 1st dc to join.  (139 dc)

Using your tapestry needle fasten off and weave in ends.

The Straps can be placed anywhere you like or be made as long as you like.  Below is how I did mine.

Straps:

Make 2 using the J Hook
I used both colors when making the Straps.

1st Strap:

Straps will be worked around the beginning chain.

Step 1:  ch 81.  sc in the blo of the 2nd ch from hook and each st across.  (80 sc),  sc in back loop
Step 2:  Place 2 more sc in the last stitch. (82 sc)
Step 3:  Turn and sc in blo of each remaining st across.  (80 sc)
Step 4:  Place 2 more sc in last st, sl st in 1st sc to join.  (82 sc)  Total sc around 164.

Fasten off and weave in ends. 

Strap Assembly:

 First Strap:  

Step 1:  Find the V-St that lines up with the end rows of the purse (this is your starting point)
Step 2:  count 3 V-St to the Right and feed 1 strap through the front in the space between the 3rd & 4th V-Stitch from the starting spot.
Step 3:  Tie a knot at the end of the strap leaving 5-7 sc showing.
Step 4:  Count over 7 V-St and feed the remaining strap from the inside of the Purse out.
Step 5:  Tie a Knot at the end of the Strap leaving 5-7 sc showing.  

Second Strap: 

Step 1:  From the Starting Point count 3 V-Stitches to the Left and feed 1 strap through the front in the space between the 3rd & 4th V-Stitch from the starting spot.
Step 2:  Tie a knot at the end of the Strap leaving 5-7 sc showing.
Step 3:  Count over 7 V-St and feed the remaining strap from the inside of the purse out.
Step 4:  Tie a knot at the end of the Strap leaving 5-7 sc showing

Add your Straps to fit your best placement.

You can find an Ad-Free pdf version at my Ravelry Store or LoveCrafts that has helpful picture tutorials.

That’s it!  I would LOVE to see your version of Jo’s Boat Tote!  Tag me on FB @joscraftyhook @joeyleabaird or on IG at @joscraftyhook.  You can also use the hashtag #josboattote #boattote #joscraftyhook at any of the social media sites listed below.


You can find my Ad-Free crochet patterns at any of the locations below:

Ravelry
Lovecraft
Etsy

If you would like to make a donation to Jo’s Crafty Hook and help me with the costs of running Jo’s Crafty Hook, any help would be greatly appreciated!

Find me, Jo of Jo’s Crafty Hook at the places listed below.

Email:  j.o@joscraftyhook.com

Website

Facebook Group Jo’s Crafty Hookers

Facebook Group Jo’s Crafty Hook Designs

Facebook Page Jo’s Crafty Hook

Facebook Page:  Crochet Designer Community

Ravelry

LoveCrafts

Instagram

YouTube

Pinterest

Donations Accepted