
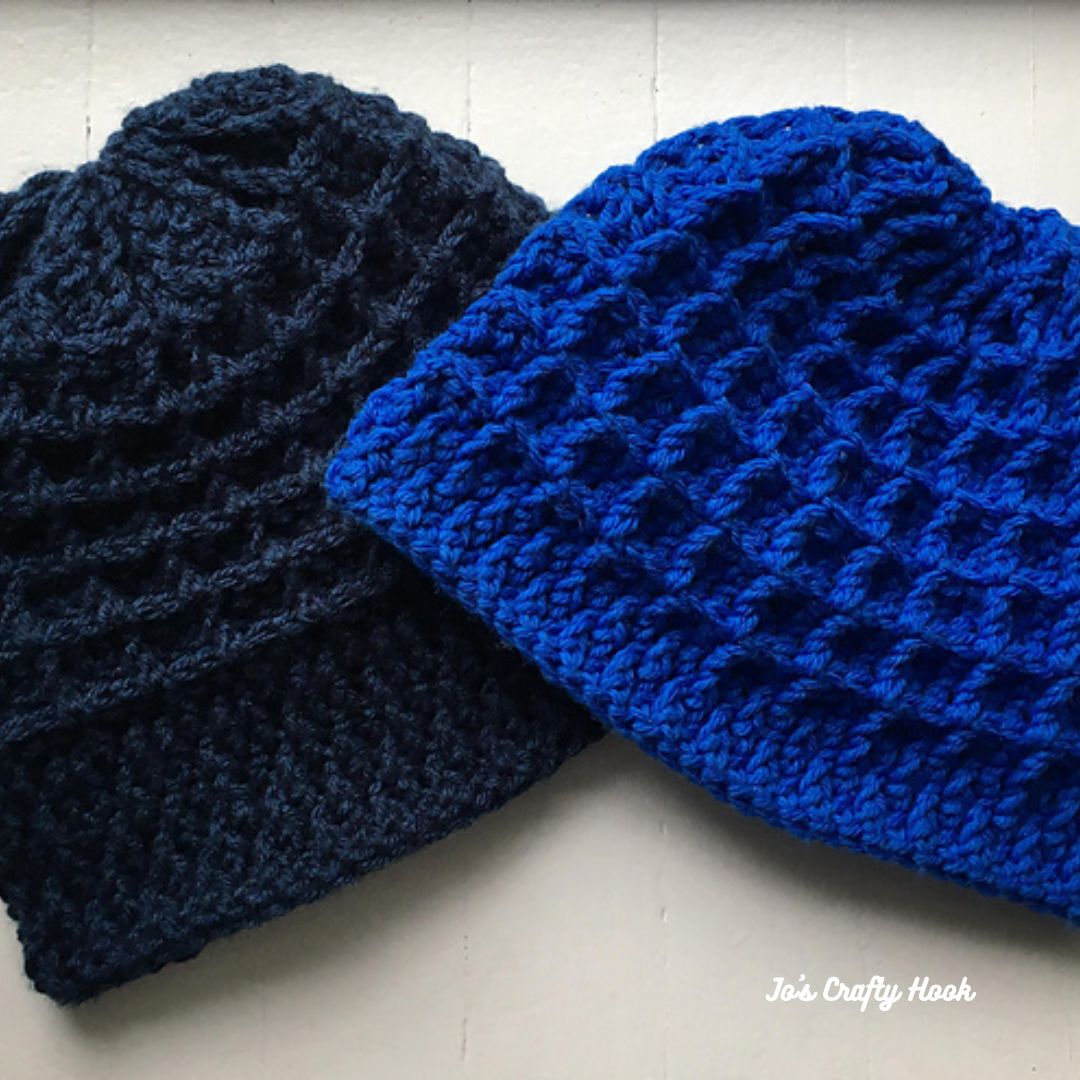
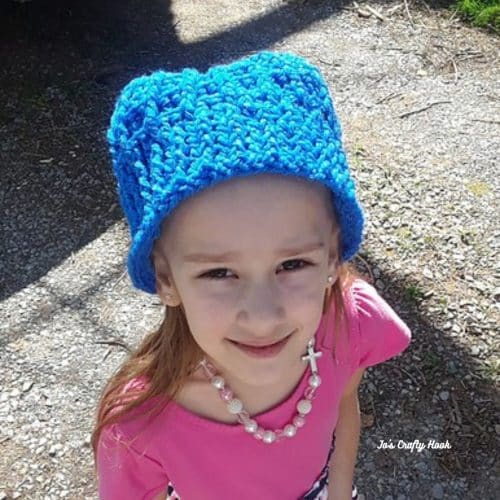
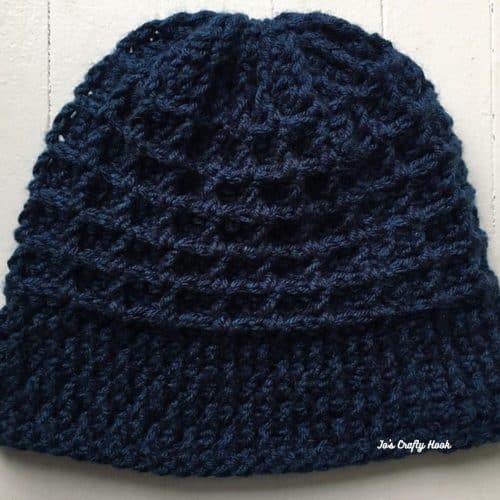
BlueBerry Waffle Beanie Crochet Pattern
The BlueBerry Waffle Beanie Crochet Pattern uses the Waffle Stitch that creates a beautiful textured look.
I designed the BlueBerry Waffle Beanie with 2 versions for Lion Brand’s #HatNotHate drive that increases awareness about Bullying. Here is what Lion Brand has to say about #HatNotHate:
“With #HatNotHate Lion Brand Yarn hopes to increase awareness on the impact of bullying has on children, teens and adults by rallying together and crafting blue hats to proudly wear throughout the month of October, National Bullying Prevention Month. With your help we hope to create a new “craftivist” movement to send the message that bullying in unacceptable.”
If you would like to donate your version(s) of the BlueBerry Waffle Beanie, the address is listed below the BlueBerry Waffle Beanie Free Crochet Patterns.
This page contains affiliate links
Be sure to sign up for my Newsletter and receive a FREE premium copy of my Rolling Shells Infinity Scarf Crochet Pattern. You will also receive messages about New Crochet Pattern Releases; FREE Crochet Patterns; Collaborations and more!


Visit the Landing Page below. Once you subscribe you will receive a Thank You email with the link to the crochet pattern sent right to your inbox!
subscribepage.io/joscraftyhook-rollingshellsinfinityscarfcrochetpattern
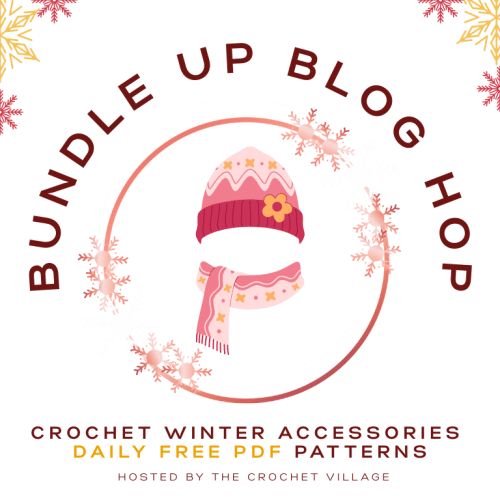
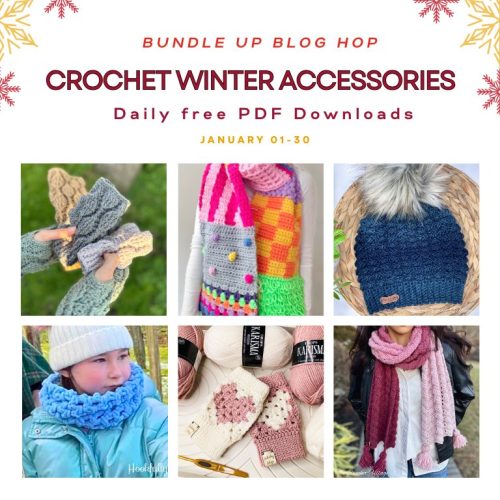
Bundle Up Blog Hop 2026
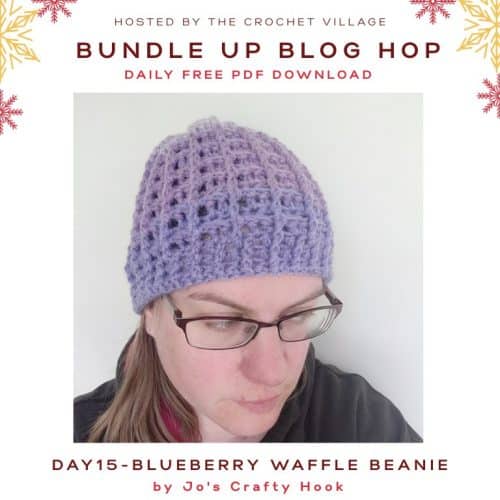
My BlueBerry Waffle Beanie Crochet Pattern is being featured in this great blog hop!
From now until December 30, 2026 you can take advantage of daily FREE crochet patterns during the Bundle Up Blog Hop 2026 hosted by The Crochet Village.
My Featured Day is January 11-12, 2026
For 24 hours you can get a FREE premium copy of my BlueBerry Waffle Beanie Crochet Pattern as part of the Bundle Up Blog Hop 2026!

Get the Coupon Code
On my featured day, visit the Bundle Up Blog Hop 2026 to get the Coupon Code needed to get a FREE copy of my BlueBerry Waffle Beanie Crochet Pattern.

Get the FREE pattern

Visit the Bundle Up Blog Hop 2026
Be sure to check back daily for another FREE premium crochet pattern during the Bundle Up Blog Hop 2026 until December 30, 2026!

You can find a FREE copy of my BlueBerry Waffle Beanie Crochet Pattern below.
**********************************************************BlueBerry Waffle Beanie Free Crochet Pattern
Information Needed
Materials:
US H Crochet Hook/5.0 or 5 mm
US I Crochet Hook/5.5mm
150-400 yards of 4 ply Worsted or Aran Weight Yarn
Scissors
Tapestry Needle
Gauge:
US Hook H/5.0 or 5 mm
8 FPDC/BPDC x 5 Rows = 2 inch
Abbreviations:
CH = Chain
Sl St = Slip Stitch
DC = Double Crochet
FDC = Foundation Double Crochet
FPDC = Front Post Double Crochet
BPDC = Back Post Double Crochet
DC2TOG = Double Crochet 2 Together
Notes:
Ch 3 does count as a DC
Ch 1 does NOT count as a stitch
My Left Handed Video Tutorials:
DC2TOG instructions from YouTube here.
FDC instructions on YouTube here.
FPDC instructions on YouTube here.
BPDC instructions here.
Special Stitches:
Front Post Double Crochet – Double Crochet going around the Front Post of the DC in the Previous Row.
Back Post Double Crochet – Double Crochet going behind the Front Post of the DC in the Previous Row.
Double Crochet 2 Together – when you double crochet two together, you are taking what were two double crochet stitches and turning them into just one double crochet stitch. This is also known as a decrease.
Special Notes:
- Stitch multiple after the band is 3, so if your band is too tight or too loose try going up or down in hook size instead of adjusting stitch count.
- Pattern written for: NB-6mth (6-12 mth, 12-24 mth, 2-4 yrs, 5-10 yrs, Teen/Sm Adult, Med Adult, Lg Adult)
- Brim is worked in the round.
- Waffle Stitch is worked as rows.
- If Height of Hat is NOT met, Repeat R6-R7 until Height is met. Remember you will be adding 1.5”-2.5” for Decreasing.
- If Height IS Hat IS met, end with R7 repeat, skip the rest of the Rows and go to Decrease Rows. Remember you will be adding 1.5”-2.5” when decreasing.
- If Height of Hat is NOT met after adding all the Rows, you can use more Decrease Rows below.
Size Chart
| Size | Hat Width (Circumference) | Hat Height | Crown |
| 0-6 months | 12.5” | 5” – 5.25” | 4” – 4.5” |
| 6-12 months | 14.5 | 5.5” – 6.5” | 4.5” – 5” |
| 12-24 months | 16.5 | 6.5” – 6.75” | 4.5” – 5” |
| 2-4 years | 18.5” | 6.75” – 7” | 5” – 5.5” |
| 5-10 years | 20” | 6.75” – 7.5” | 5.5” – 6” |
| Tween/Small Adult | 21.5” | 7.5” – 8” | 6” 6.25” |
| Medium Adult | 22” | 23.5” | 6.25” – 6.75” |
| Large Adult | 22.5” | 8.5” -9” | 6.5” – 7” |
**********************************************************
Ad-Free Copy of the BlueBerry Waffle Beanie Crochet Pattern


Version 1

Brim:
R1: Fdc 48 (57, 60, 69, 78, 81, 87, 90) join.
R2: Ch 3, fpdc in the next st *dc in the next st, fpdc in the next st* Repeat from * to * around. sl st to join. (48, 57, 60, 69, 78, 87, 90) st
R3: Ch 2, fpdc in the same st, *dc in the next st, fpdc in the next st* Repeat from * to * around. sl st to join. (48, 57, 60, 69, 78, 81, 87, 90) st
Waffle Stitch:
R4: Ch 3, dc in same stitch and each stitch around. sl st to join.
R5: Ch 3, turn, dc in the next st. *fpdc around the post of the next stitch, dc in the next two st.* Repeat from * to * around. sl st to join.
R6: Ch 3, turn, dc in the next st. Fpdc around the post of the next st, dc in the next 2 st.* Repeat from * to * around. sl st to join.
Ages 0-6 mth, 6-12 mth, 12-24 mth
R7-R10: Repeat R5-R6 twice then go to Decrease Rows
Ages 2-4 yrs
R7-R12: Repeat R5-R6 three times then go to Decrease Rows
Ages 5-10 yrs
R7-14: Repeat R5-R6 four times then go to Decrease Rows
Tween/Small Adult
R7-14: Repeat R5-R6 four times then go to Decrease Rows
Medium Adult
R7-R16: Repeat R5-R6 five times and go to Decrease Rows
Large Adult
R7-R18: Repeat R5-R6 six times and go to Decrease Rows
Decrease Rows:
R1: Ch 2, fpdc in the next st, *dc2tog in the next 2 dc, (fpdc in the next st, dc in the next 2 st) twice* Repeat from * to * around. sl st to join. turn
R2: Ch 3, *bpdc in the next st, (dc in the next st, bpdc in the next 2 st) twice.* Repeat from * to * around. sl st to join. turn
R3: Ch 2 *fpdc in the next st, dc in the next st, fpdc in the next st, dc2tog, fpdc in the next st, dc in the next 2 st* Repeat from * to * around. sl st to join. turn
R4: Ch 3, bpdc in the next st, dc in the next st, bpdc in the next st, dc in the next st, bpdc in the next 2 st, *(dc in the next st, bpdc in the next st) twice then dc in the next st, bpdc in the next 2 st* Repeat from * to * around. sl st to join.
If you are wanting your Hat to be a Messy Bun do NOT sew the Crown of the Hat closed. **If Height of Hat is NOT met, please see more Decrease Rows below.
Leave a 6-8” tail for sewing the Crown of the Hat closed.
Sew the crown closed being sure to pull your long tail tight once you’ve reached the 1st st.
Fasten off and weave in ends with Tapestry Needle.
You can add a Pom Pom if you would like.
Extra Decrease Rows
Decrease Rows to meet the Hat’s Height.
R1: Ch 3 and turn, *dc2tog in the next 2 dc, fpdc.* Repeat from * to * around. sl st to join.
R2-R4: Ch 3 and turn. *dc in the next st, fpdc in the next st .* Repeat from * to * around. sl st to join.
You can Repeat R2-R4 in continuing to add Height to your Hat.
Leave a 6-8” tail for sewing the Crown of the Hat closed.
Sew the crown of the hat closed being sure to pull long tail tight once you’ve reached the 1st st.
Fasten off and weave in ends with Tapestry Needle.
You can add a Pom Pom if you would like.
You can make a Messy Bun Version. See instructions above.
**********************************************************
Ad-Free Copy of the BlueBerry Waffle Beanie Crochet Pattern
Version 2
Using I Hook
Brim:
R1: Fdc 35 ( 38, 44, 50, 56, 62, 68, 74) join.
R2: Ch 3, fpdc in the next st *dc in the next st, fpdc in the next st* Repeat from * to * around. sl st to join. (35, 38, 44, 50, 56, 62, 68, 74) st
R3-R5: Repeat the last round (dc in dc and fpdc in fpdc). sl st to join. (35, 38, 44, 50, 56, 62, 68, 74) st
Using H Hook
Waffle Stitch:
R6: Ch 3, dc in the next st and each st around. sl st to join.
R7: Ch 3, turn and dc in the next st. *fpdc around the post of the next st, dc the next two st.* Repeat from * to * around. sl st to join.
R8: Ch 3, turn, and dc in the next st. Fpdc around the post of the next st. Repeat from * to * around. sl st to join.
Ages 0-6 mth, 6-12 mth, 12-24 mth
R9-R12: Repeat R7-R8 twice then go to Decrease Rows
Ages 2-4 yrs
R9-R14: Repeat R7-R8 three then go to Decrease Rows
Ages 5-10 yrs
R9-16: Repeat R7-R8 four times then go to Decrease Rows
Tween/Small Adult
R9-18: Repeat R7-R8 five times then go to Decrease Rows
Medium Adult
R9-R20: Repeat R7-R8 six times and go to Decrease Rows
Large Adult
R9-R22: Repeat R7-R8 seven times and go to Decrease Rows
Decrease Rows:
R1: Ch 3 and turn, *dc2tog in the next 2 dc, fpdc.* Repeat from * to * around. sl st to join.
R2-R4: Ch 3 and turn. *dc in the next st, fpdc in the next st .* Repeat from * to * around. sl st to join.
If you are wanting your Hat to be a Messy Bun do NOT sew the Crown of the Hat closed.
**If Height of Hat is NOT met, Repeat R2-R4 until Height is met.**
Leave a 6-8” tail for sewing the Crown of the Hat closed.
Sew the crown of the hat closed being sure to pull long tail tight once you get back to your 1st st.
Fasten off and weave in ends with Tapestry Needle.
**********************************************************
Lion Brand’s #HatNotHate campaign asks for blue hats to be donated for kids to wear against Bullying in October! Find out more about Lion Brand’s #HatNotHate campaign here!
Send your hats to:
#HATNOTHATE
140 Kero Road
Carlstadt, NJ 07072
**********************************************************
My Premium Crochet Pattern Stores

![]()
![]()
*******************************************************
Find me, Jo of Jo’s Crafty Hook at the places listed below.
Email: joeybaird@aol.com
Facebook Group Jo’s Crafty Hookers
Facebook Group Jo’s Crafty Hook Designs
Facebook Page Jo’s Crafty Hook
Facebook Page: Crochet Designer Community
![]()