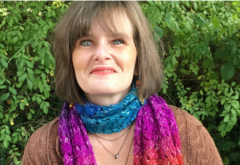
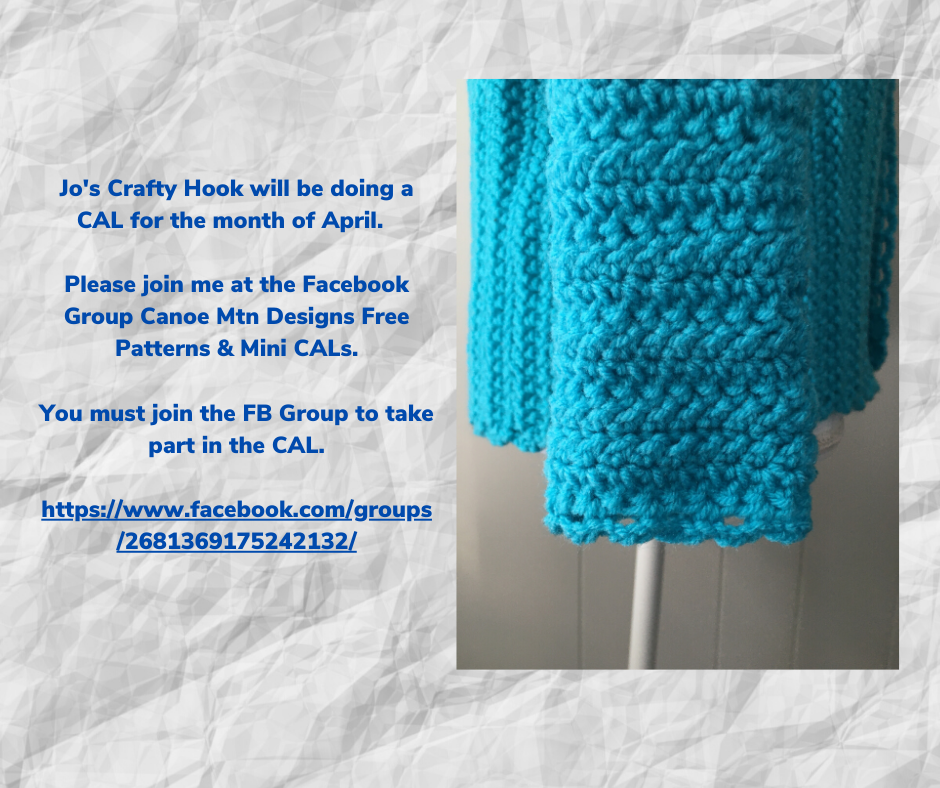
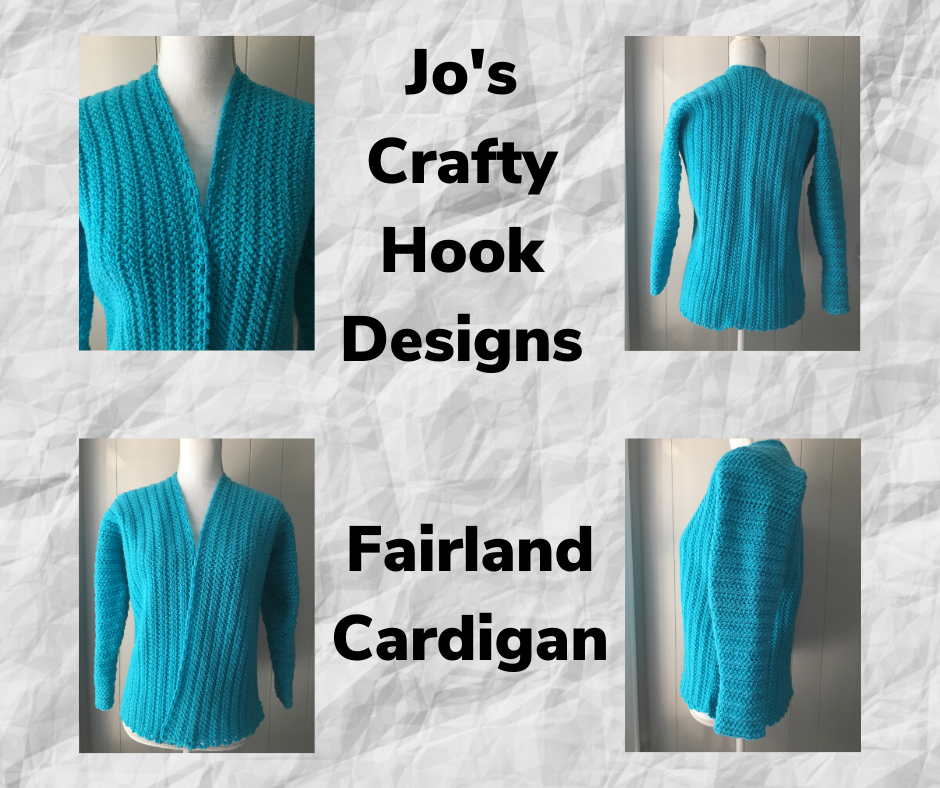
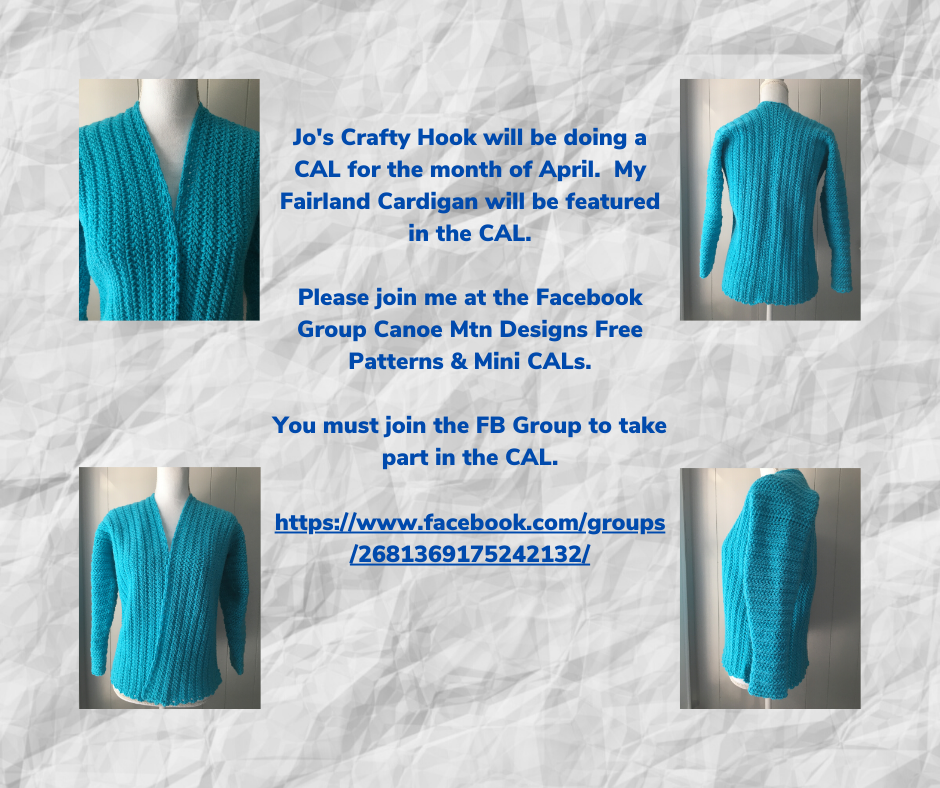
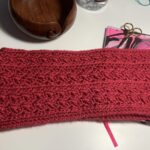
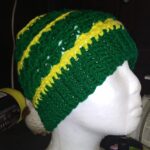
During the month of April I will be hosting the Fairland Cardigan CAL! I am SO excited! I am nervous as well, I have never done a month long CAL, but I am looking forward to this new experience! I hope you will join me for the Fairland Cardigan CAL on Facebook.
This page contains affiliate links. You can make a purchase using these links that I provide where I may receive compensation (at no added cost to you.) Purchases you make will help keep my website, Etsy Shop, and my Ravelry Store going and provide quality designs just for you!
The Fairland Cardigan CAL will be done at my friend’s, Audrey Friesen, Facebook Group Canoe Mtn Designs FREE Crochet Patterns & Mini CALS. You can join me for this free CAL inside the Facebook Group here.
Fairland Cardigan CAL
I hope you can join me here for the Fairland Cardigan CAL! It will be FREE inside the Facebook Group Canoe Mtn Designs FREE Crochet Patterns & Mini CALS!
If you can not take part in the Fairland Cardigan CAL, you can still find the Crochet Pattern at my Ravelry Store Jo’s Crafty Hook Designs here or at my Etsy Shop JosCraftyHook here.
From the Designer:
Thank you for your interest in my website! Check out my GREAT patterns at my Etsy Shop JosCraftyHook or at my Ravelry Store here! While you are here at my website be sure to subscribe to my Mailing List and Newsletter. This way you will be notified when I release another pattern or blog post!
If you have any questions or concerns about this pattern or any other pattern please find me at Jo’s Crafty Hook Designs on Facebook or email me at jo@joscraftyhook.com
You are free to sell or gift the item, please do NOT claim this design as your own. Please forward any one who would like to do this crochet pattern or any of my patterns to my Etsy shop, the Ravelry Store, or to my website. The web addresses for any place to connect with me are listed below.
Every purchase of my patterns helps! It allows me to buy more yarn so I can create and design more Handmade Crocheted Creations for you to enjoy.
I would LOVE to see your version of my designs! You can “Hook It” at my Ravelry Jo’s Crafty Hook Designs OR add a pic on my Facebook Page Jo’s Crafty Hook Designs OR at any one of the places below that allows you to connect with me! Pictures, Comments, Feedback, etc. are ALWAYS welcome at my website www.joscraftyhook.com!
Find me, Jo of Jo’s Crafty Hook Designs at any one of these places listed below!
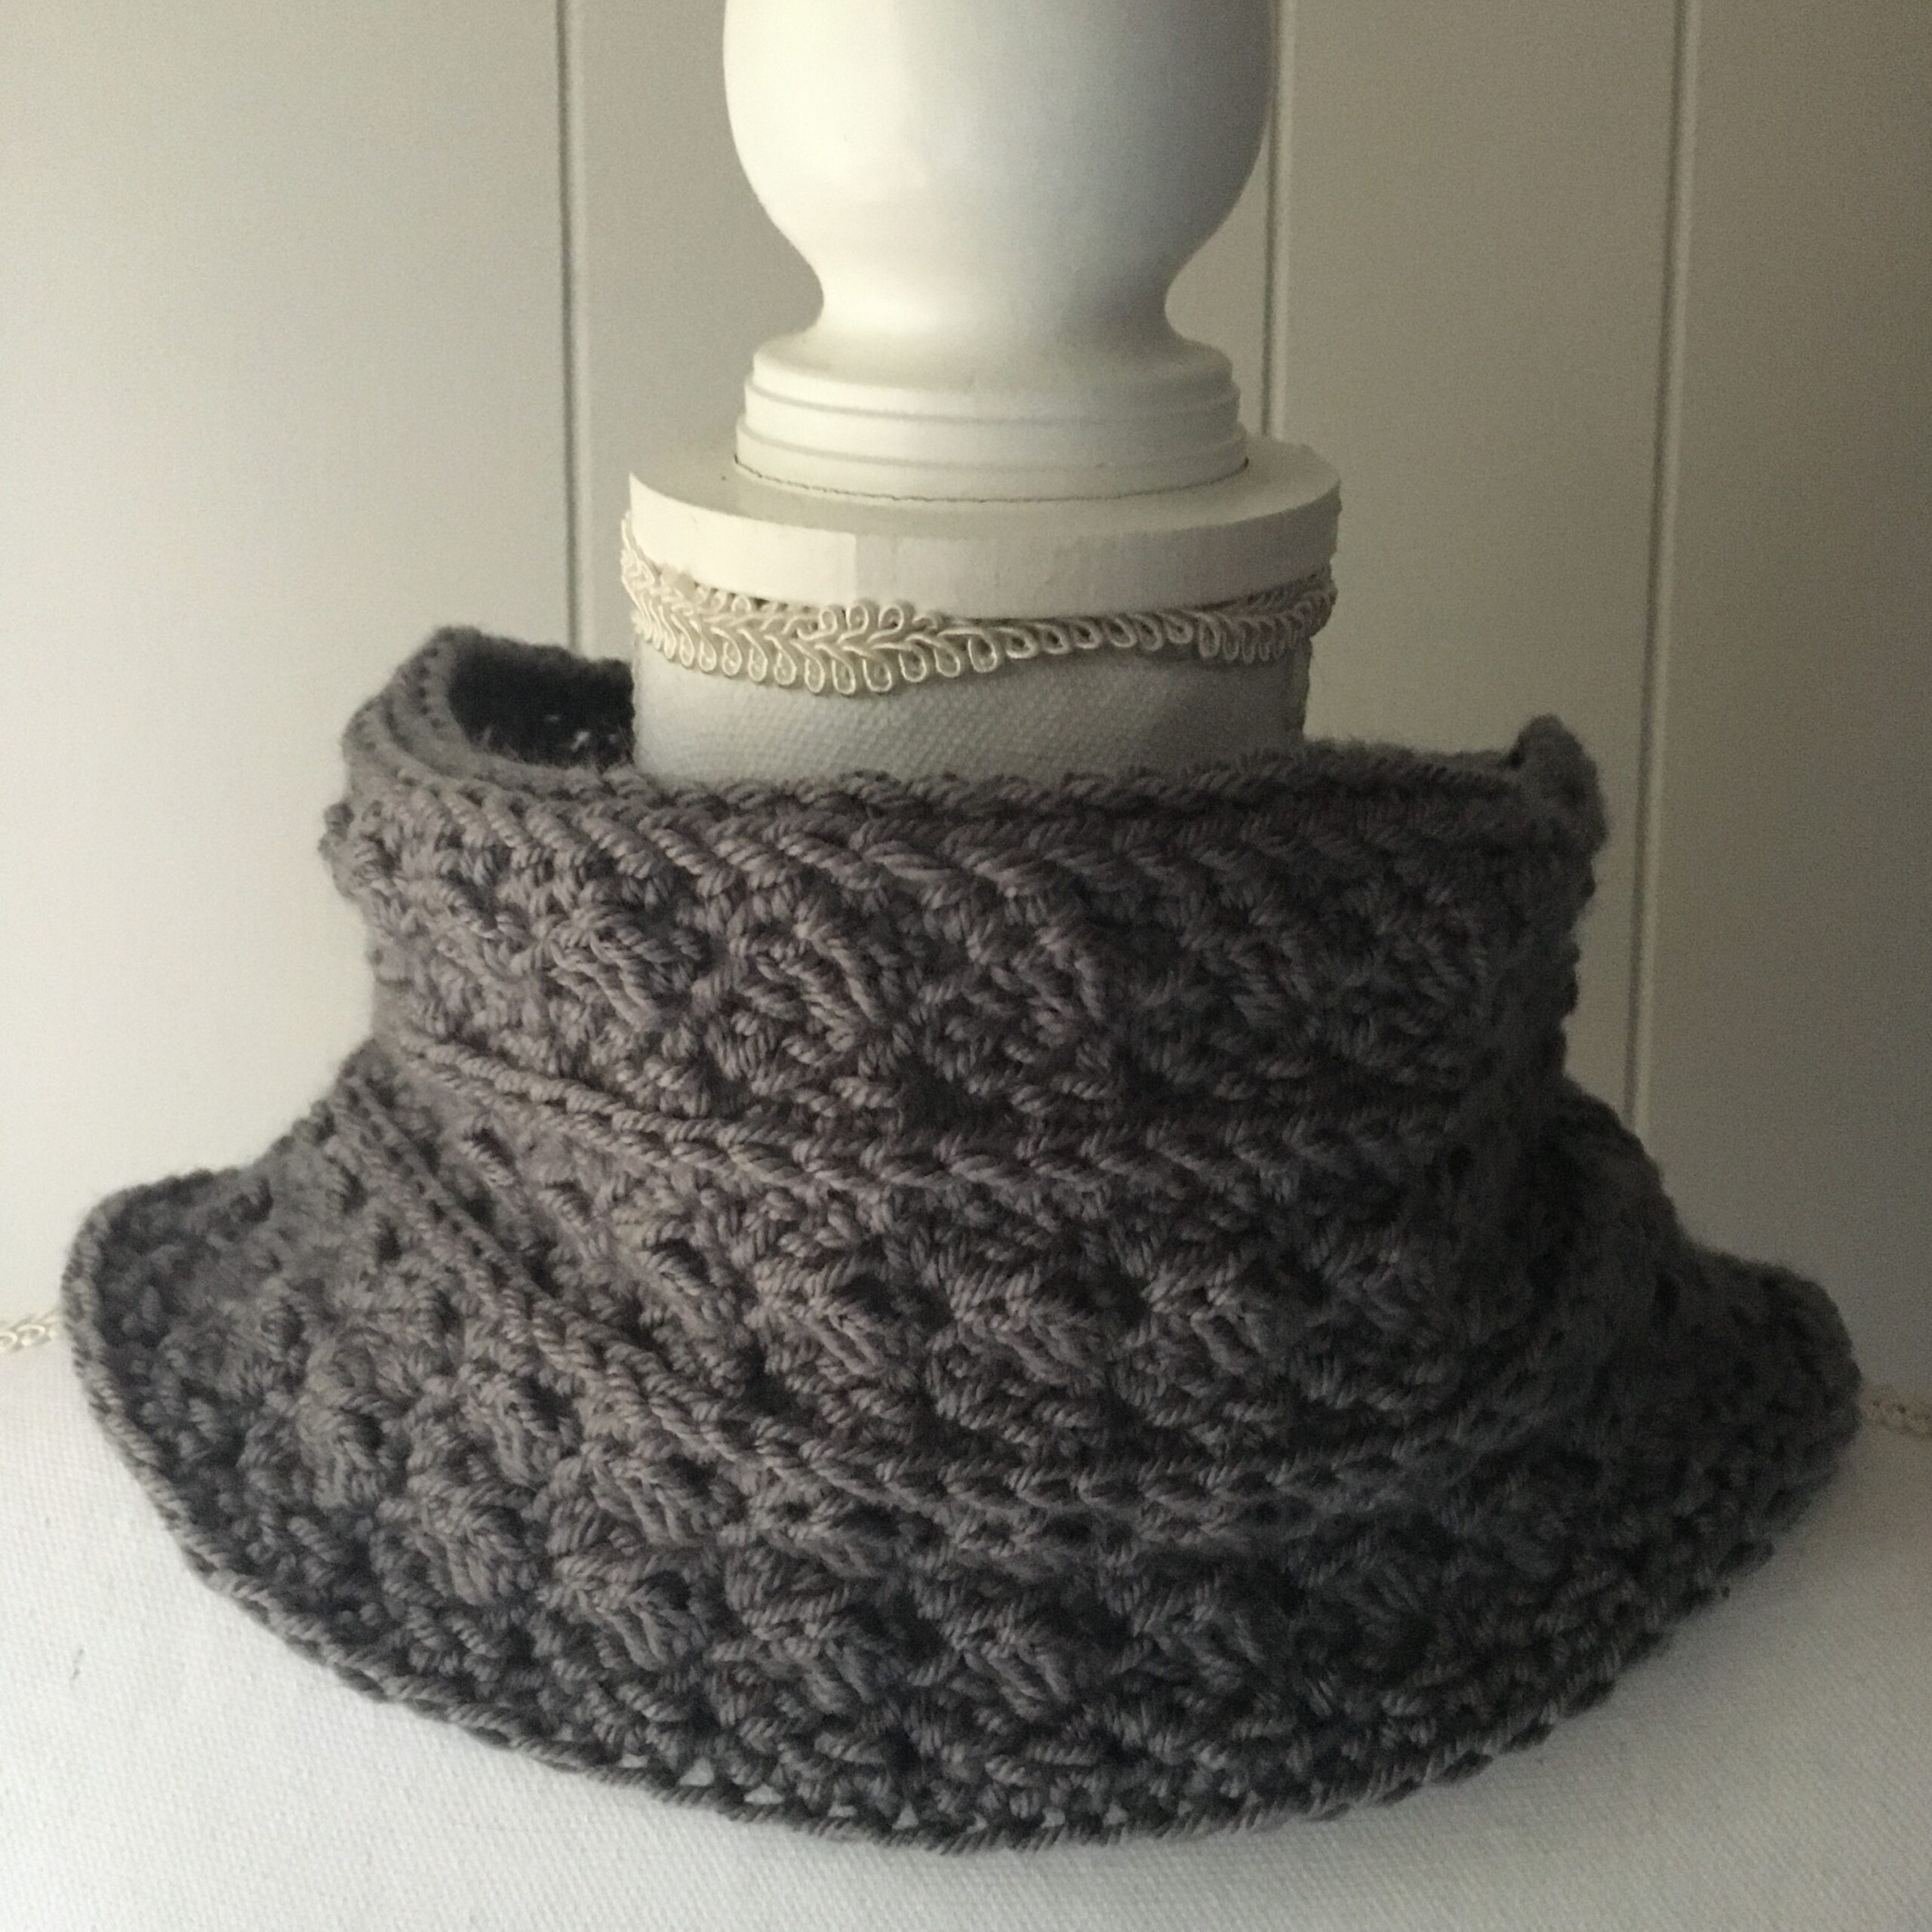
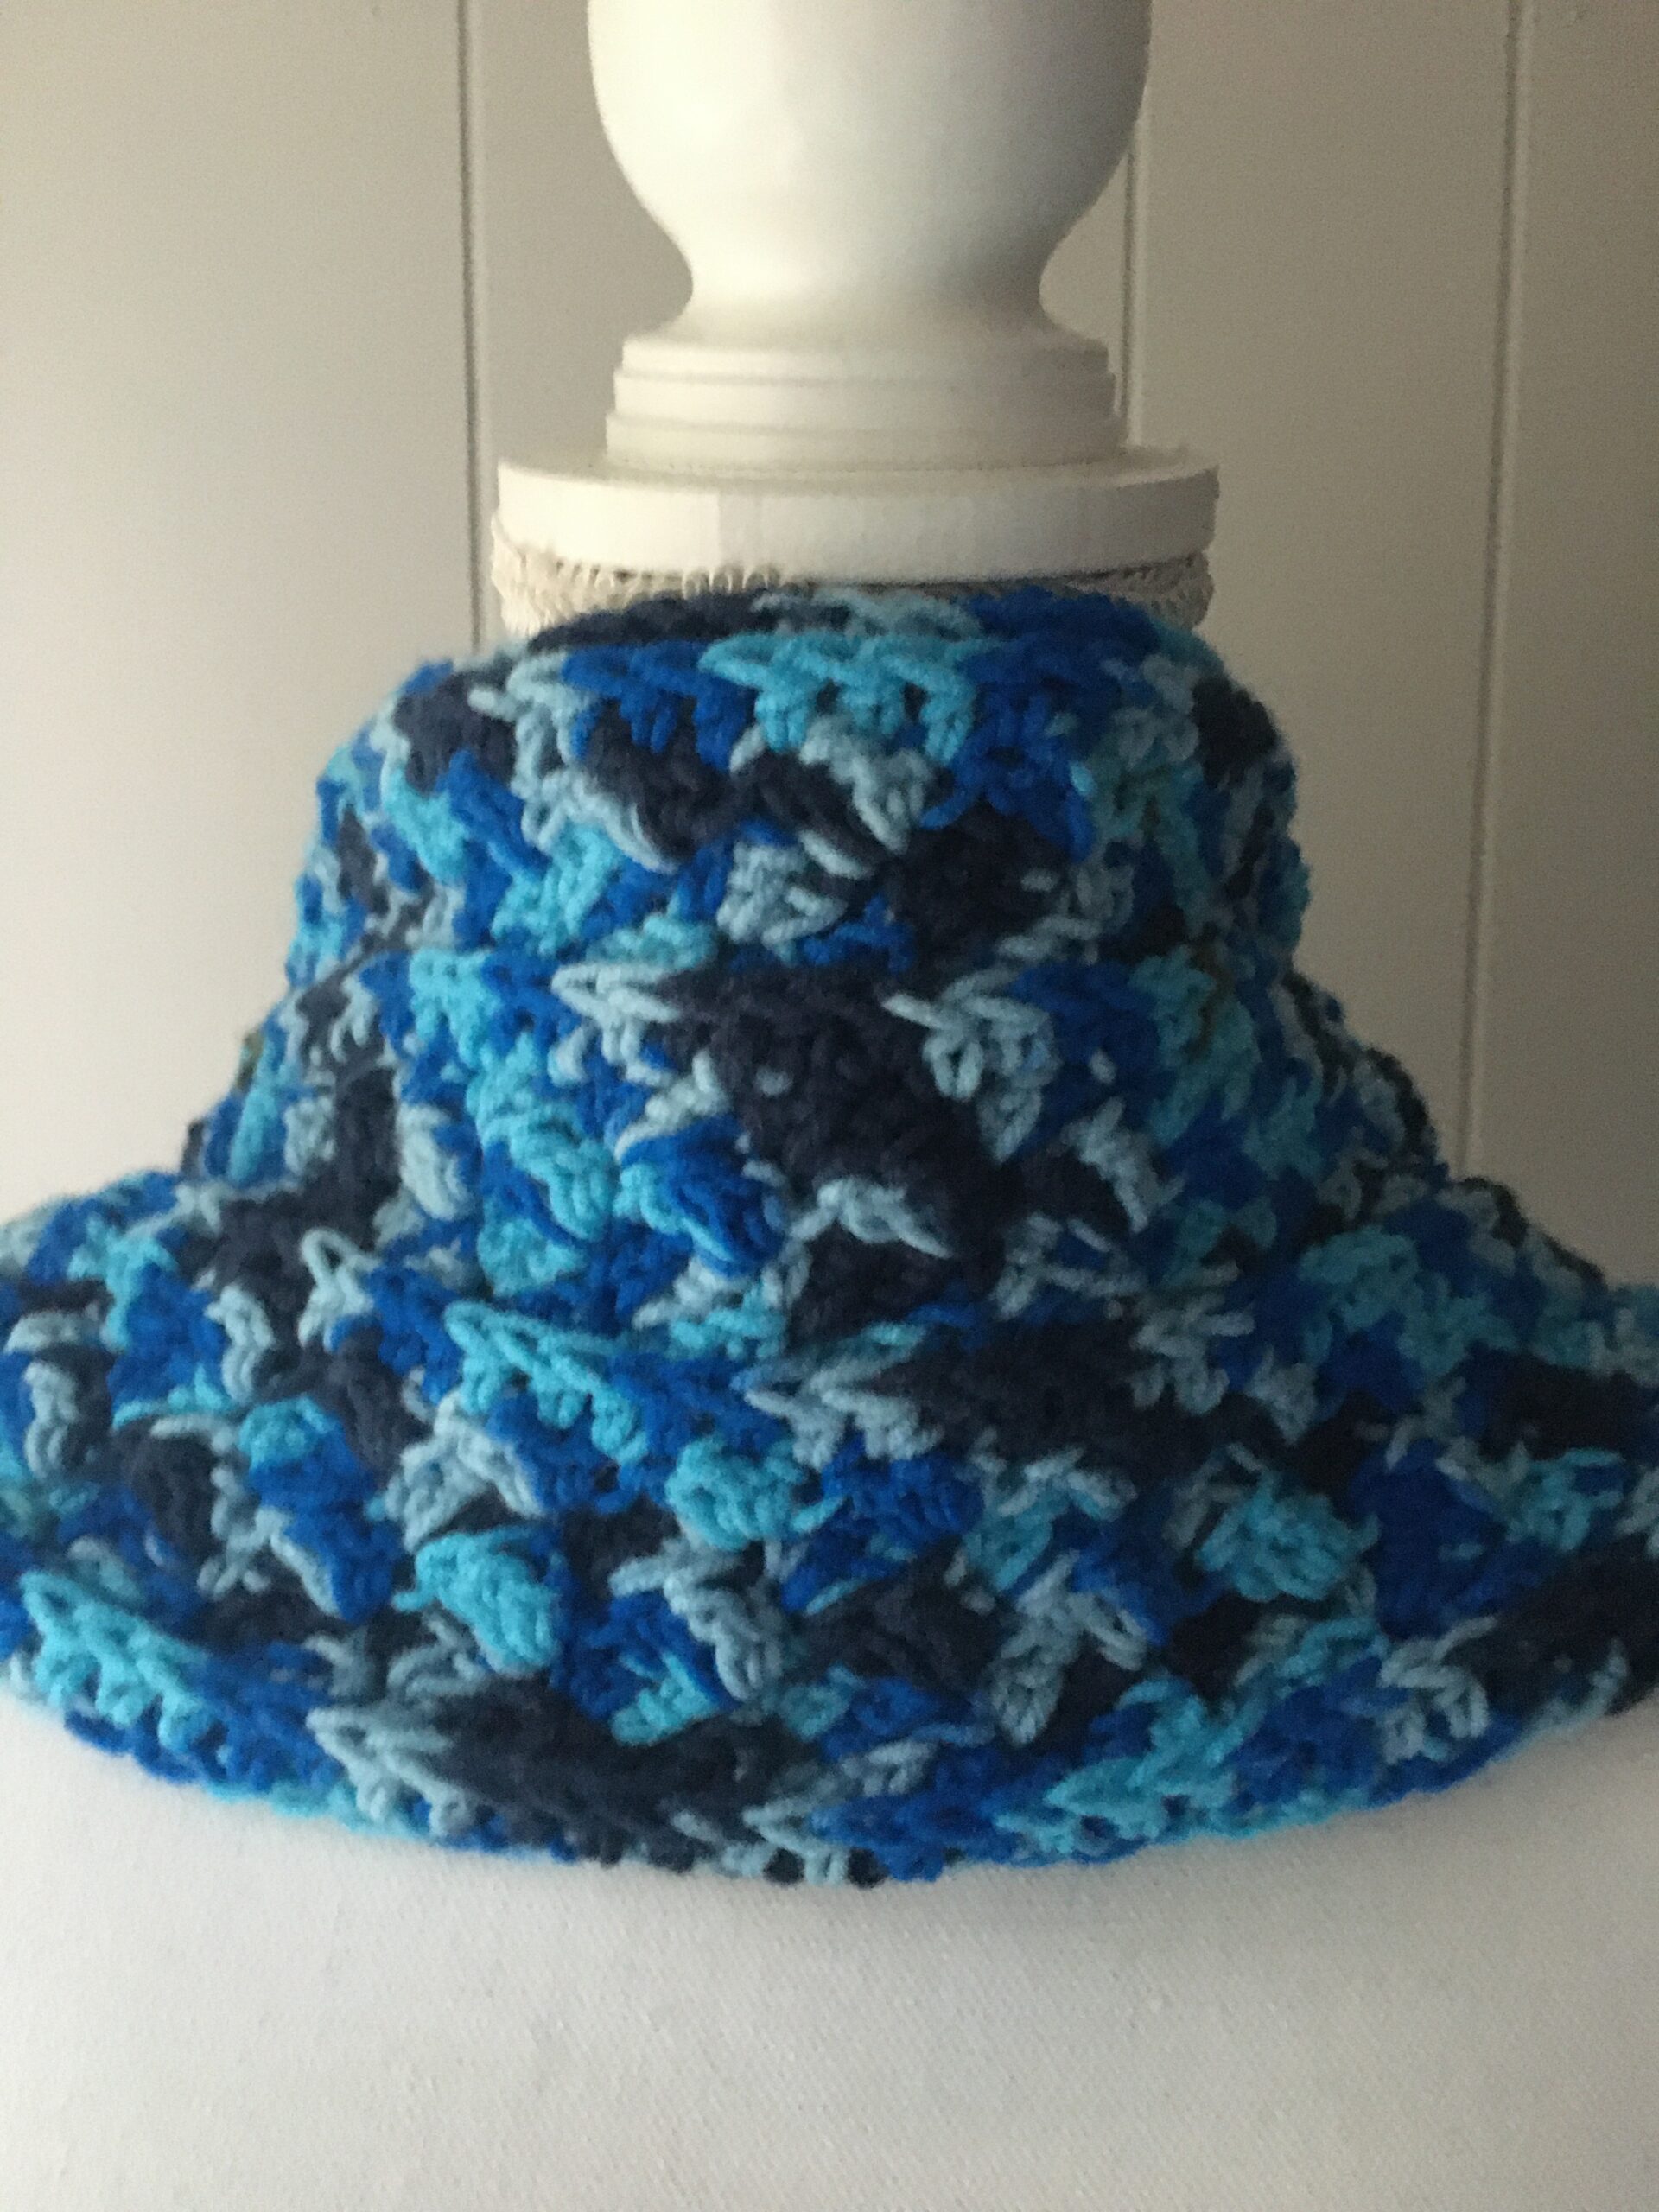
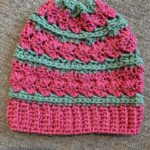
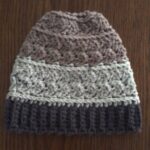
Jo’s Crafty Hook Designs is bringing you another free crochet pattern, the Rugged Slopes Cowl. The Rugged Slopes Cowl Crochet Pattern has a matching hat, the Rugged Slopes Messy Bun & Beanie which you can find here on my website.
This page contains affiliate links. You can make a purchase using these links that I provide where I may receive compensation (at no added cost to you.) Purchases you make will help keep my website and pattern stores going and provide quality designs just for you!
The Rugged Slopes Cowl also uses the Sedge Stitch, which is a new stitch I learned not that long ago. I love learning new stitches and I hope you do too! I currently learned how to do the Celtic Weave, the Crunch Stitch, the N Stitch and more. This year has opened so many new things that I never tried before. You can read more about some of the new things I have tried here on my website.
While you are here on my website, please sign up for my Newsletter. I would hate you to miss any of the GREAT things I have planned in the months ahead!
[yikes-mailchimp form=”1″]
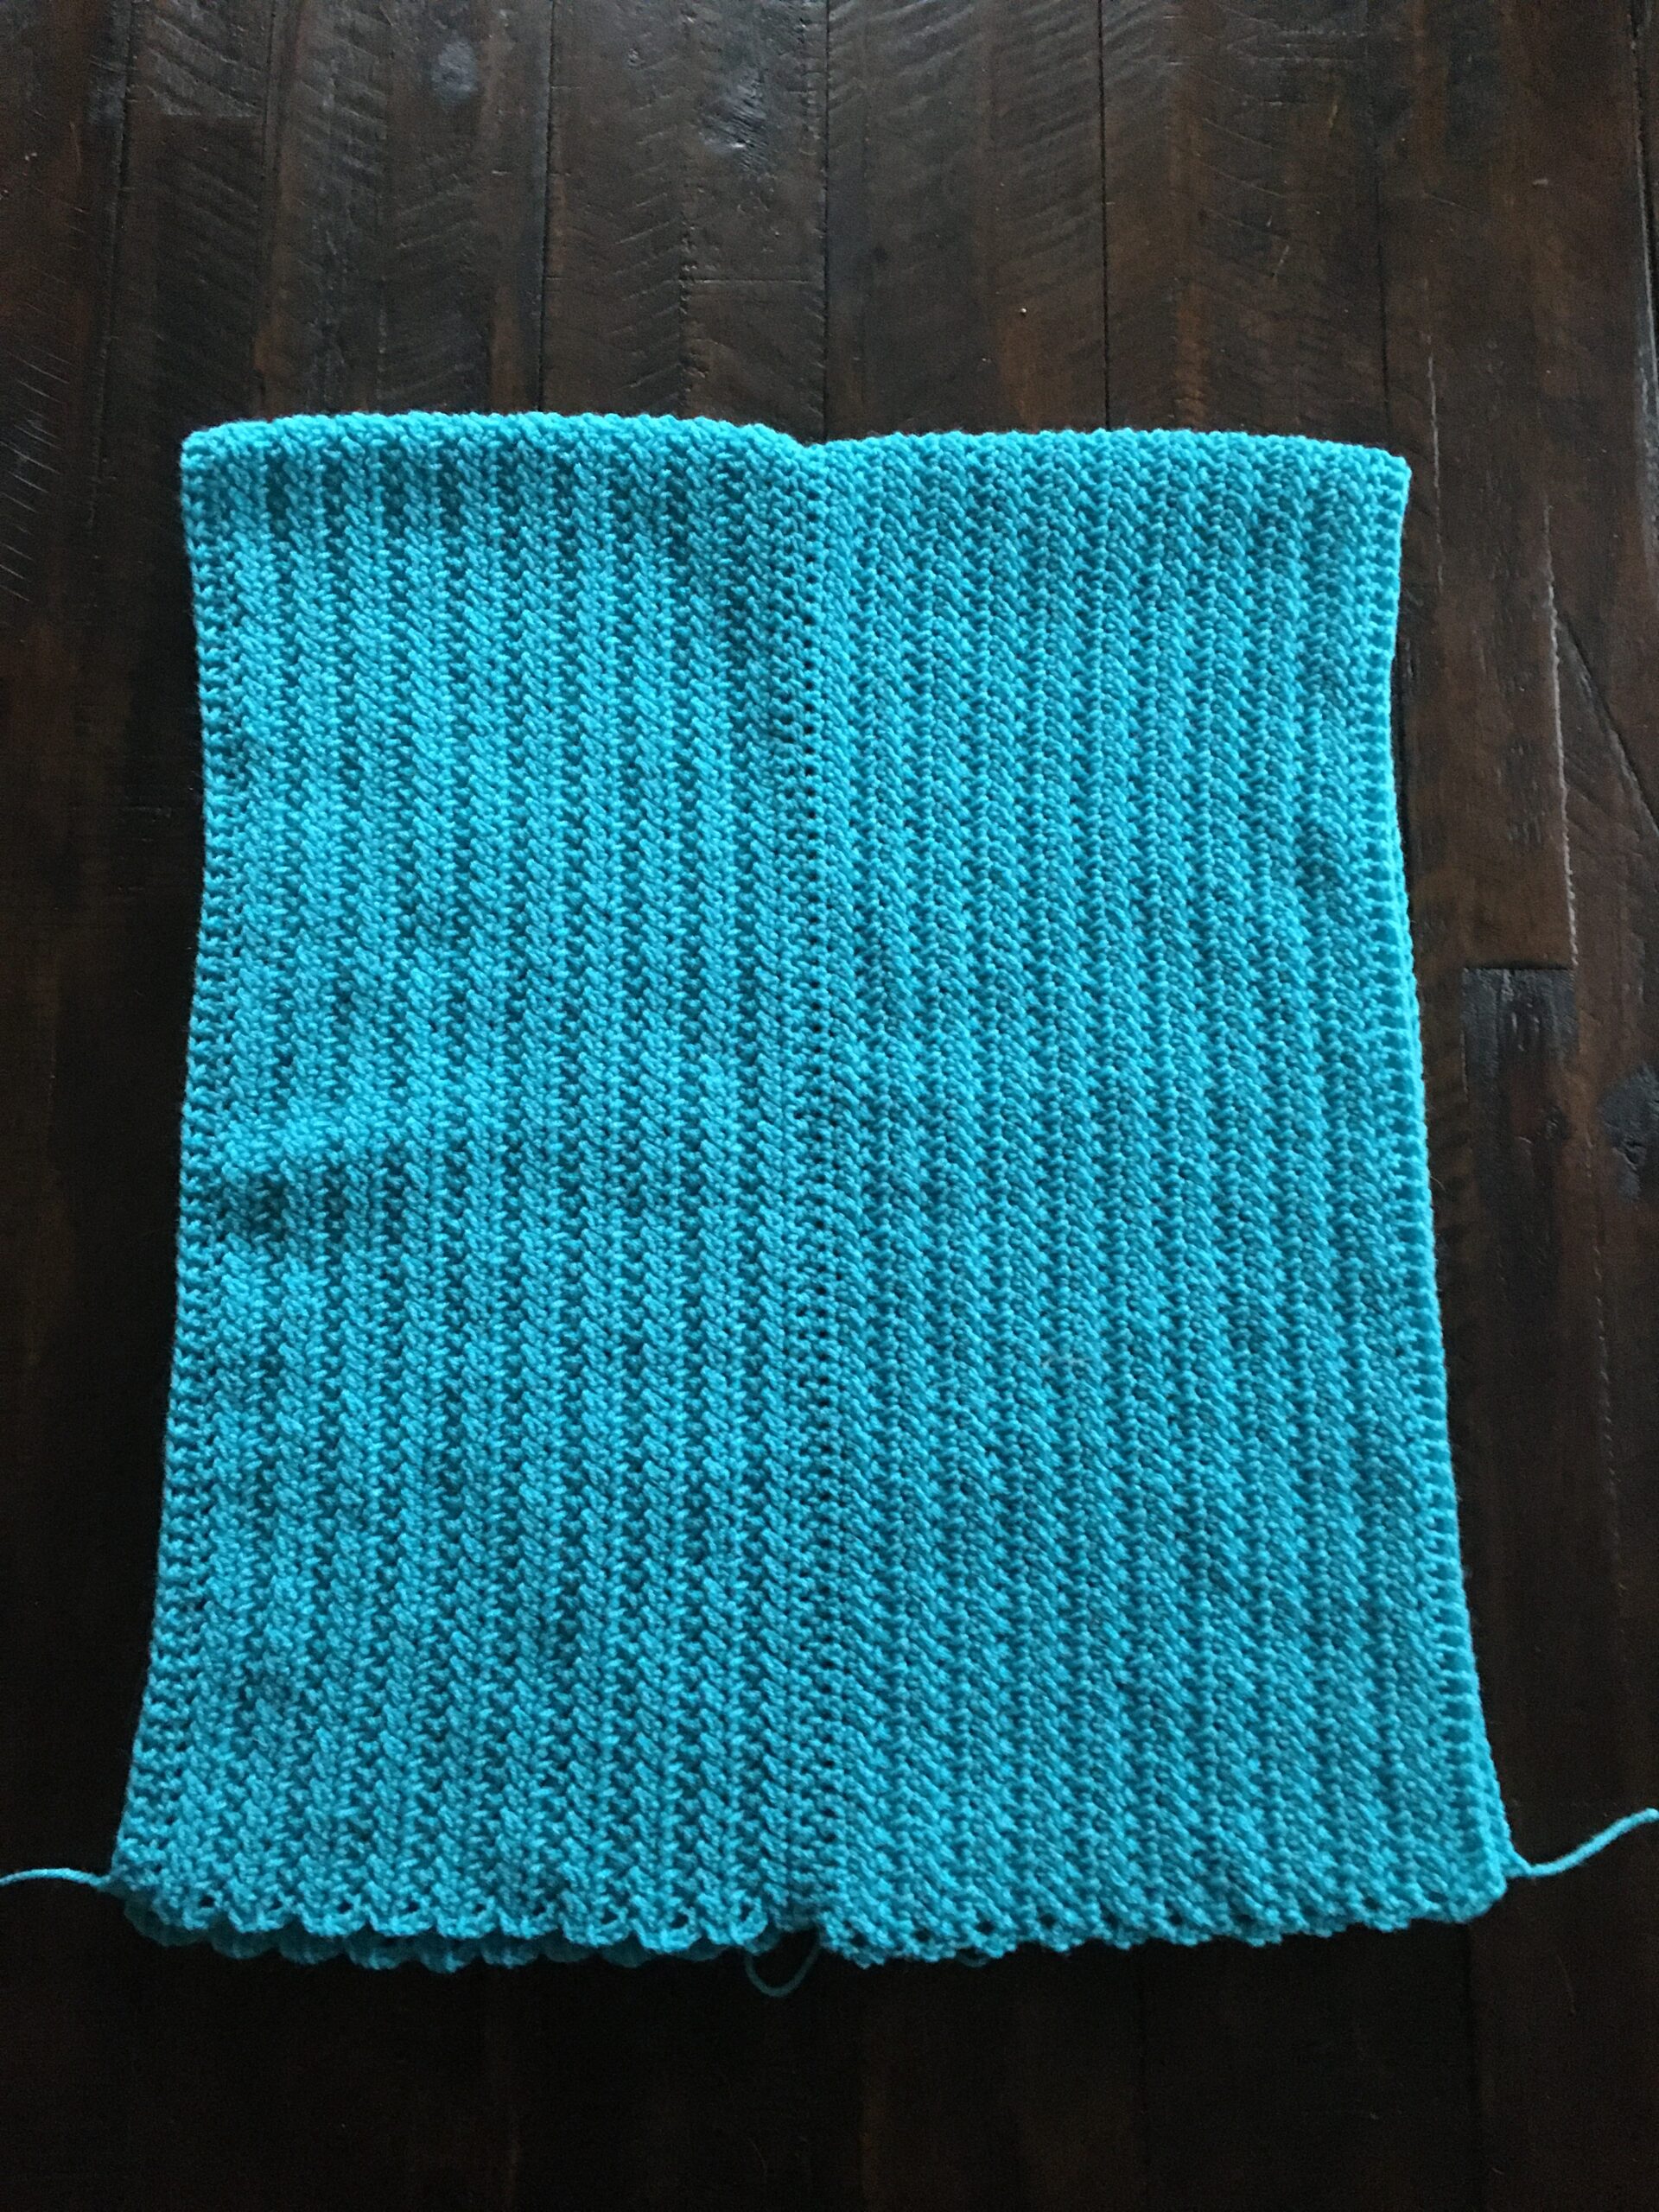
Rugged Slopes Cowl
Rugged Slopes Cowl
Materials:
US Hook I or 5.5mm 180-220 yards of #4 Worsted Weight Yarn Tapestry Needle Scissors
Gauge: US Hook I or 5.5mm
12 rows = 4″ 11 st = 3.5″ Gauge is not that important in this pattern.
Abbreviations: CH = Chain SC = Single Crochet HDC = Half Double Crochet 3rd Loop = 3rd Loop behind HDC ST = Stitch STS = Stitches SS = Slip Stitch
Notes: Chain 1 does NOT count as a stitch. The Cowl is worked in Rows and in the Round. SC are done in the 3rd Loop of the HDC Pattern is written for Small. Stitch count is 72.
If you would like to purchase a pdf version of this crochet pattern for a small fee you can find it any any of my shops listed below.
R1: FSC 72 (82, 92) being sure not to twist, ss into the 1st sc to join. turn 72 (82, 92)
Optional: ch 73 (83, 93) sc in 2nd ch from hook and each remaining ch. Being sure not to twist, ss in 1st st to join. 72 (82, 92)
R2: ch 1, hdc in the same st and each st around. ss in 1st st to join. Do NOT turn. 72 (82, 92)
R3: ch 1, sc in the same st. sc in the 3rd loop of hdc around. ss in 1st st to join. Do NOT turn. 72 (82, 92)
R4: ch 1 *(sc, 2 dc) all in the same st (the 1st sc of the previous row), skip 2 sts*. Repeat around. ss in 1st st to join. Turn. 144 (164, 194)
R5: ch 1, *(sc, 2 dc) all in the same st (the 1st sc of the previous row), skip 2 sts.* Repeat around. ss in 1st st to join. Turn. 144 (164, 194)
R6: ch 1, *(sc, 2 dc) all in the same st (the 1st sc of the previous row), skip 2 sts.* Repeat around. ss in 1st st to join. Turn. 144 (164, 194)
R7: ch 1, *(sc, 2 dc) all in the same st (the 1st sc of the previous row), skip 2 sts.* Repeat around. ss in 1st st to join. Turn. 144 (164, 194)
R8: Ch 1 *hdc in the next 2 st, skip 1 st* repeat around. ss in 1st st to join. Do not turn. 72 (82, 92)
R9: ch 1, sc in same st, and sc in 3rd loop of hdc around. ss in 1st st to join. Do not turn. 72 (82, 92)
R10: ch 1, *(sc, 2 dc) all in the same st (the 1st sc of the previous row), skip 2 sts.* Repeat from * to * around until the last st, skip last st. ss to in 1st st to join. Turn. 144 (164, 194)
R11: ch 1, *(sc, 2 dc) all in the same st (the 1st sc of the previous row), skip 2 sts.* Repeat around. ss in 1st st to join. Turn. 144 (164, 194)
R12: ch 1, *(sc, 2 dc) all in the same st (the 1st sc of the previous row), skip 2 sts.* Repeat around. ss in 1st st to join. Do NOT turn. 144 (164, 194)
R13: Ch 1, *hdc in the next 2 st, skip 1 st* repeat around. ss in 1st st to join. Do not turn. 72 (81, 99)
R14: ch 1, sc in same st, and sc in 3rd loop of hdc around. ss in 1st st to join. Do not turn. 72 (82, 92)
R15: ch 1, *(sc, 2 dc) all in the same st (the 1st sc of the previous row), skip 2 sts.* Repeat around. ss in 1st st to join. Turn. 144 (164, 194)
R16: ch 1, *(sc, 2 dc) all in the same st (the 1st sc of the previous row), skip 2 sts.* Repeat around. ss in 1st st to join. Turn. 144 (164, 194)
R17: ch 1, *hdc in the next 2 st, skip 1 st* repeat around. ss in 1st st to join. Do not turn. 72 (82, 94)
R18: ch 1, hdc in same st and hdc in 3rd loop of hdc around. ss in 1st st to join. Do not turn. 72 (82, 92)
R19: ch 1, sc in 1st st and each remaining st around. Do not turn. 72 (82, 92)
R20: ch 1, ss in 1st st and each remaining st around. 72 (82, 92)
Fasten off and weave in the ends.
Find me, Jo of Jo’s Crafty Hook at any one of these places listed below!
Thank you for your interest in this crochet pattern! Check out some of my patterns at my Ravelry Store Jo’s Crafty Hook Designs or LoveCraft or Etsy Shop JosCraftyHook or at my website joscraftyhook.com! While you are at my website be sure to subscribe to my Newsletter. This way you will be notified when I release another pattern or giveaway or blog post!
If you have any questions or concerns about this pattern or any other pattern please find me at Joey Lea Baird on Facebook or email me at jo@joscraftyhook.com
You are free to sell or gift the item, please do NOT claim this design as your own. If you share your finished product, please acknowledge me as the designer. Please forward any one who would like to do this crochet pattern or any of my patterns to the Ravelry Store or to LoveCraft or to my Etsy shop, or to my website. The web addresses for any place to connect with me are listed below.
Every purchase of my patterns helps! It allows me to buy more yarn so I can create and design more Handmade Crocheted Creations for you to enjoy.
I would LOVE to see your version of my designs! You can “Hook It” at my Ravelry Jo’s Crafty Hook Designs OR add a pic using the hashtag #nellieponcho or #joscraftyhook or #jo_bear38 or at anyone of the places below that allows you to connect with me! Comments, Feedback, etc. are ALWAYS welcome at my website www.joscraftyhook.com!
If you would like to make a donation to Jo’s Crafty Hook and help me with the costs of running my website, crocheting new designs I would greatly appreciate it!
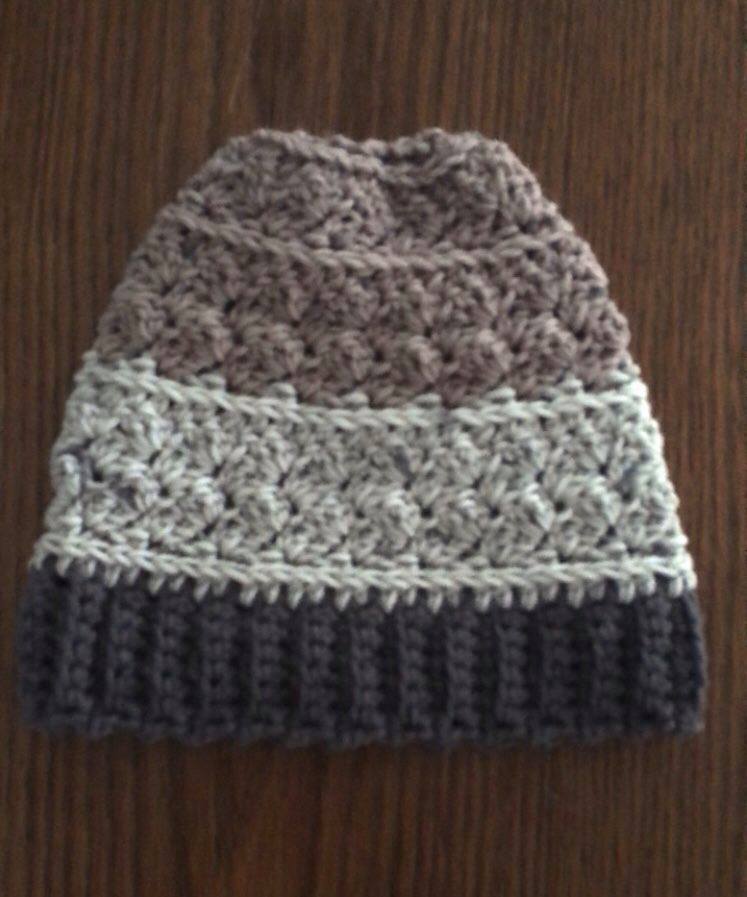
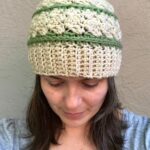
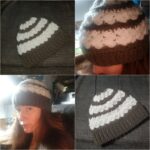
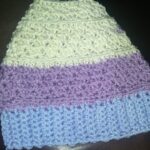
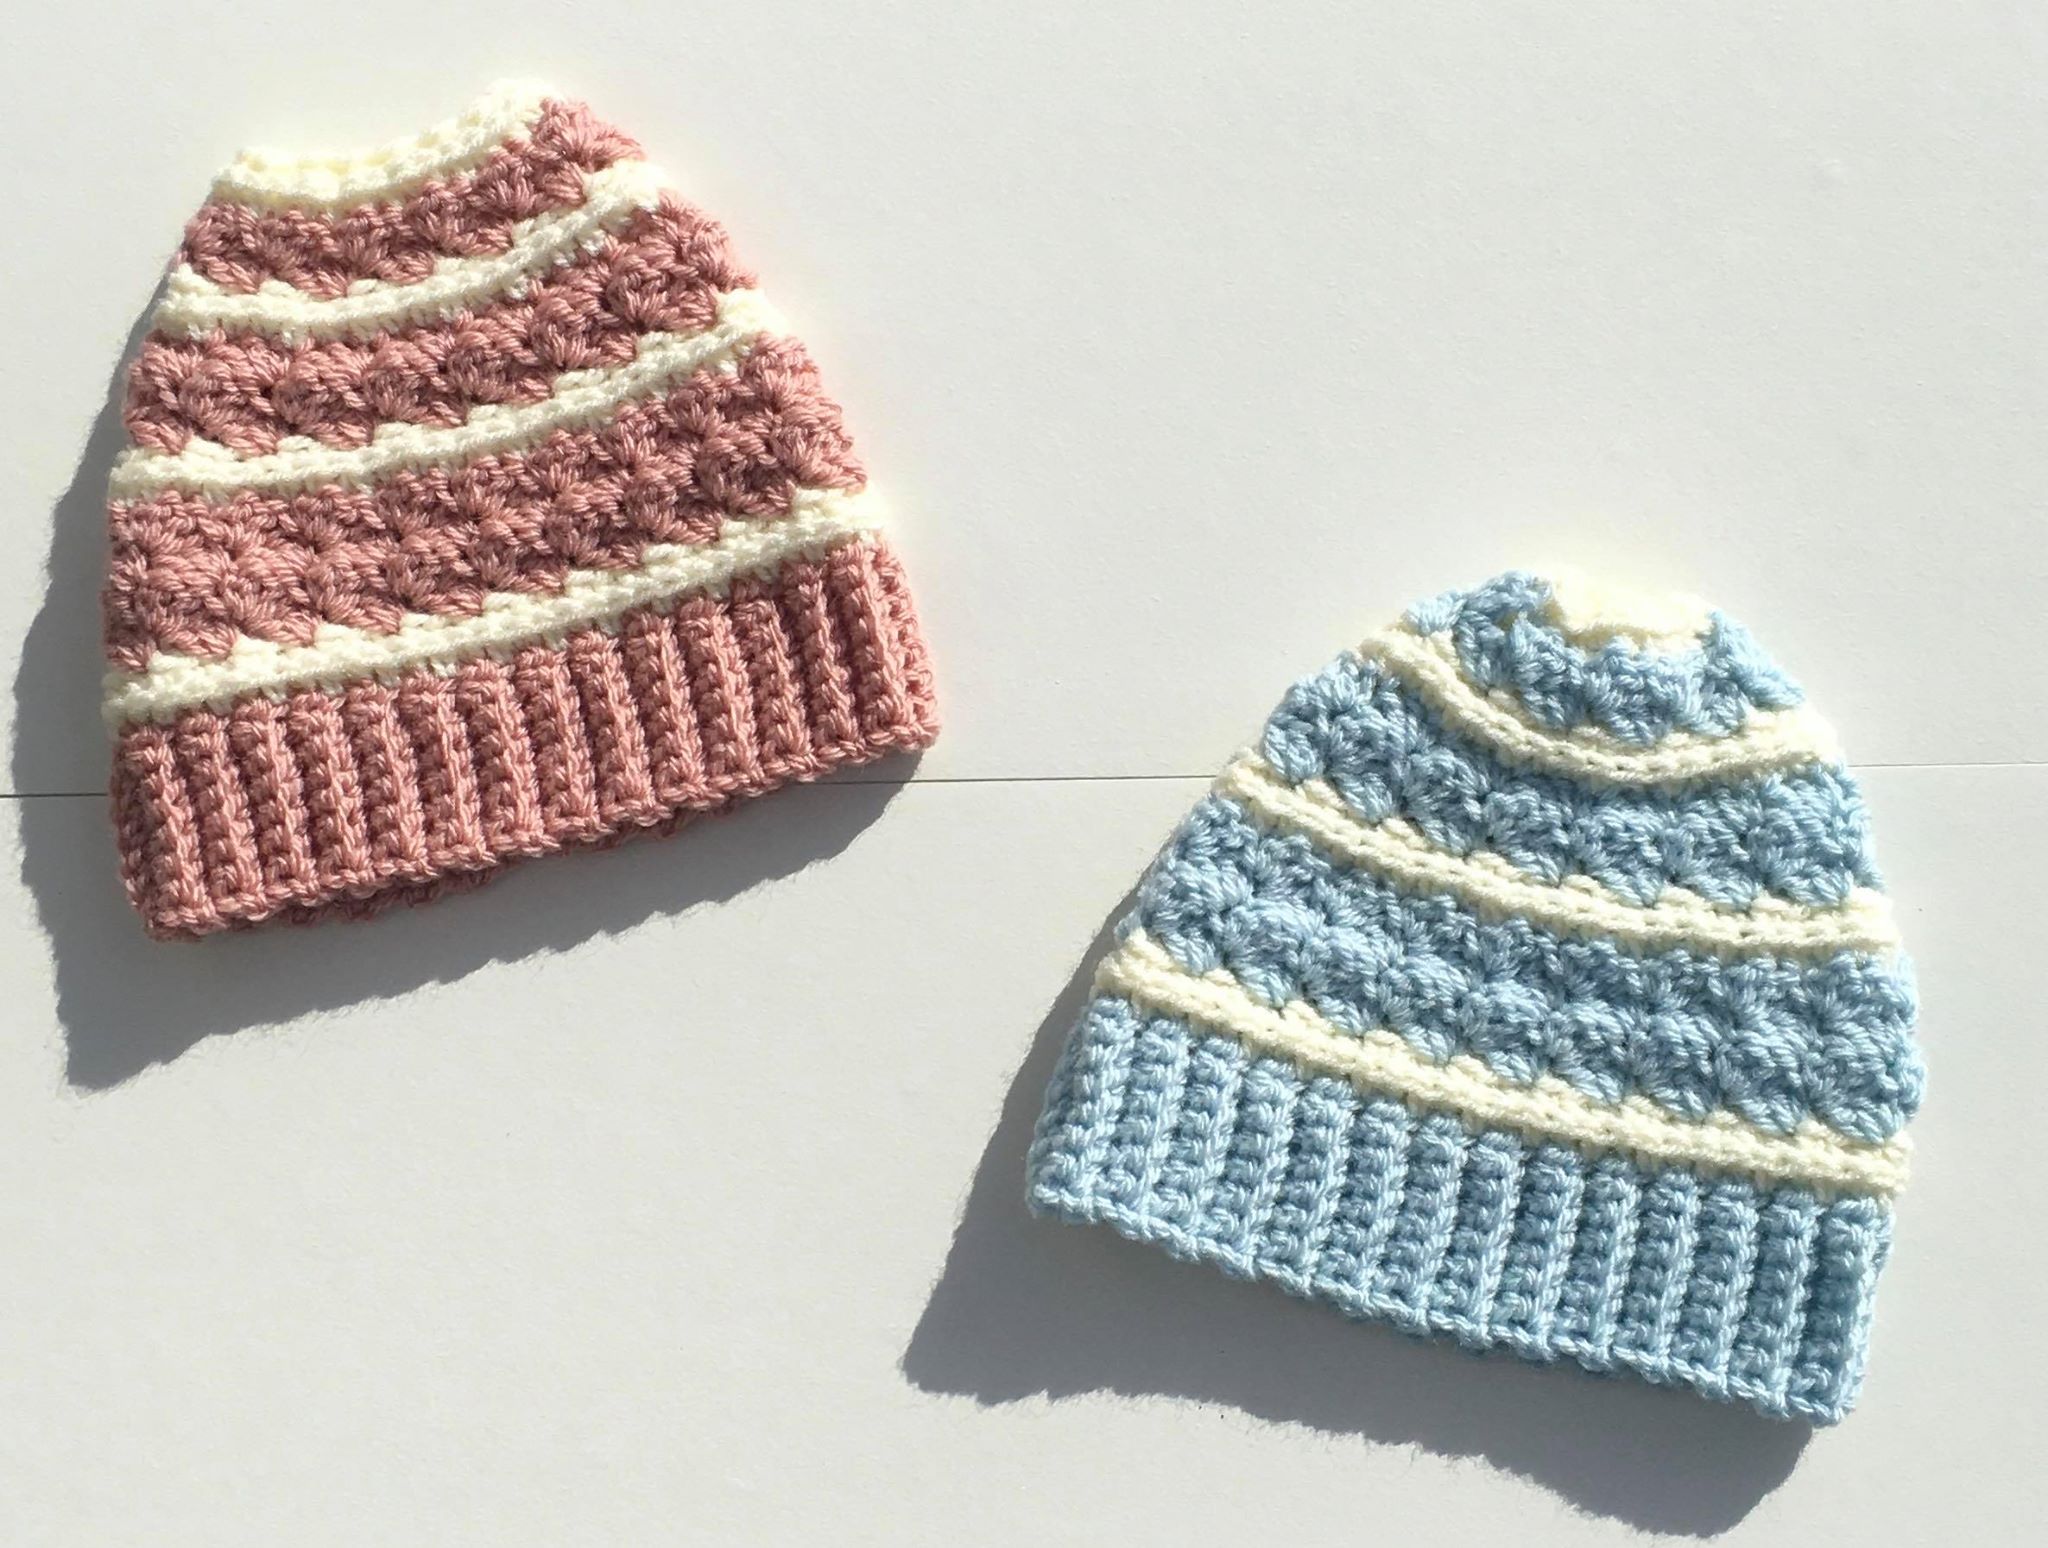
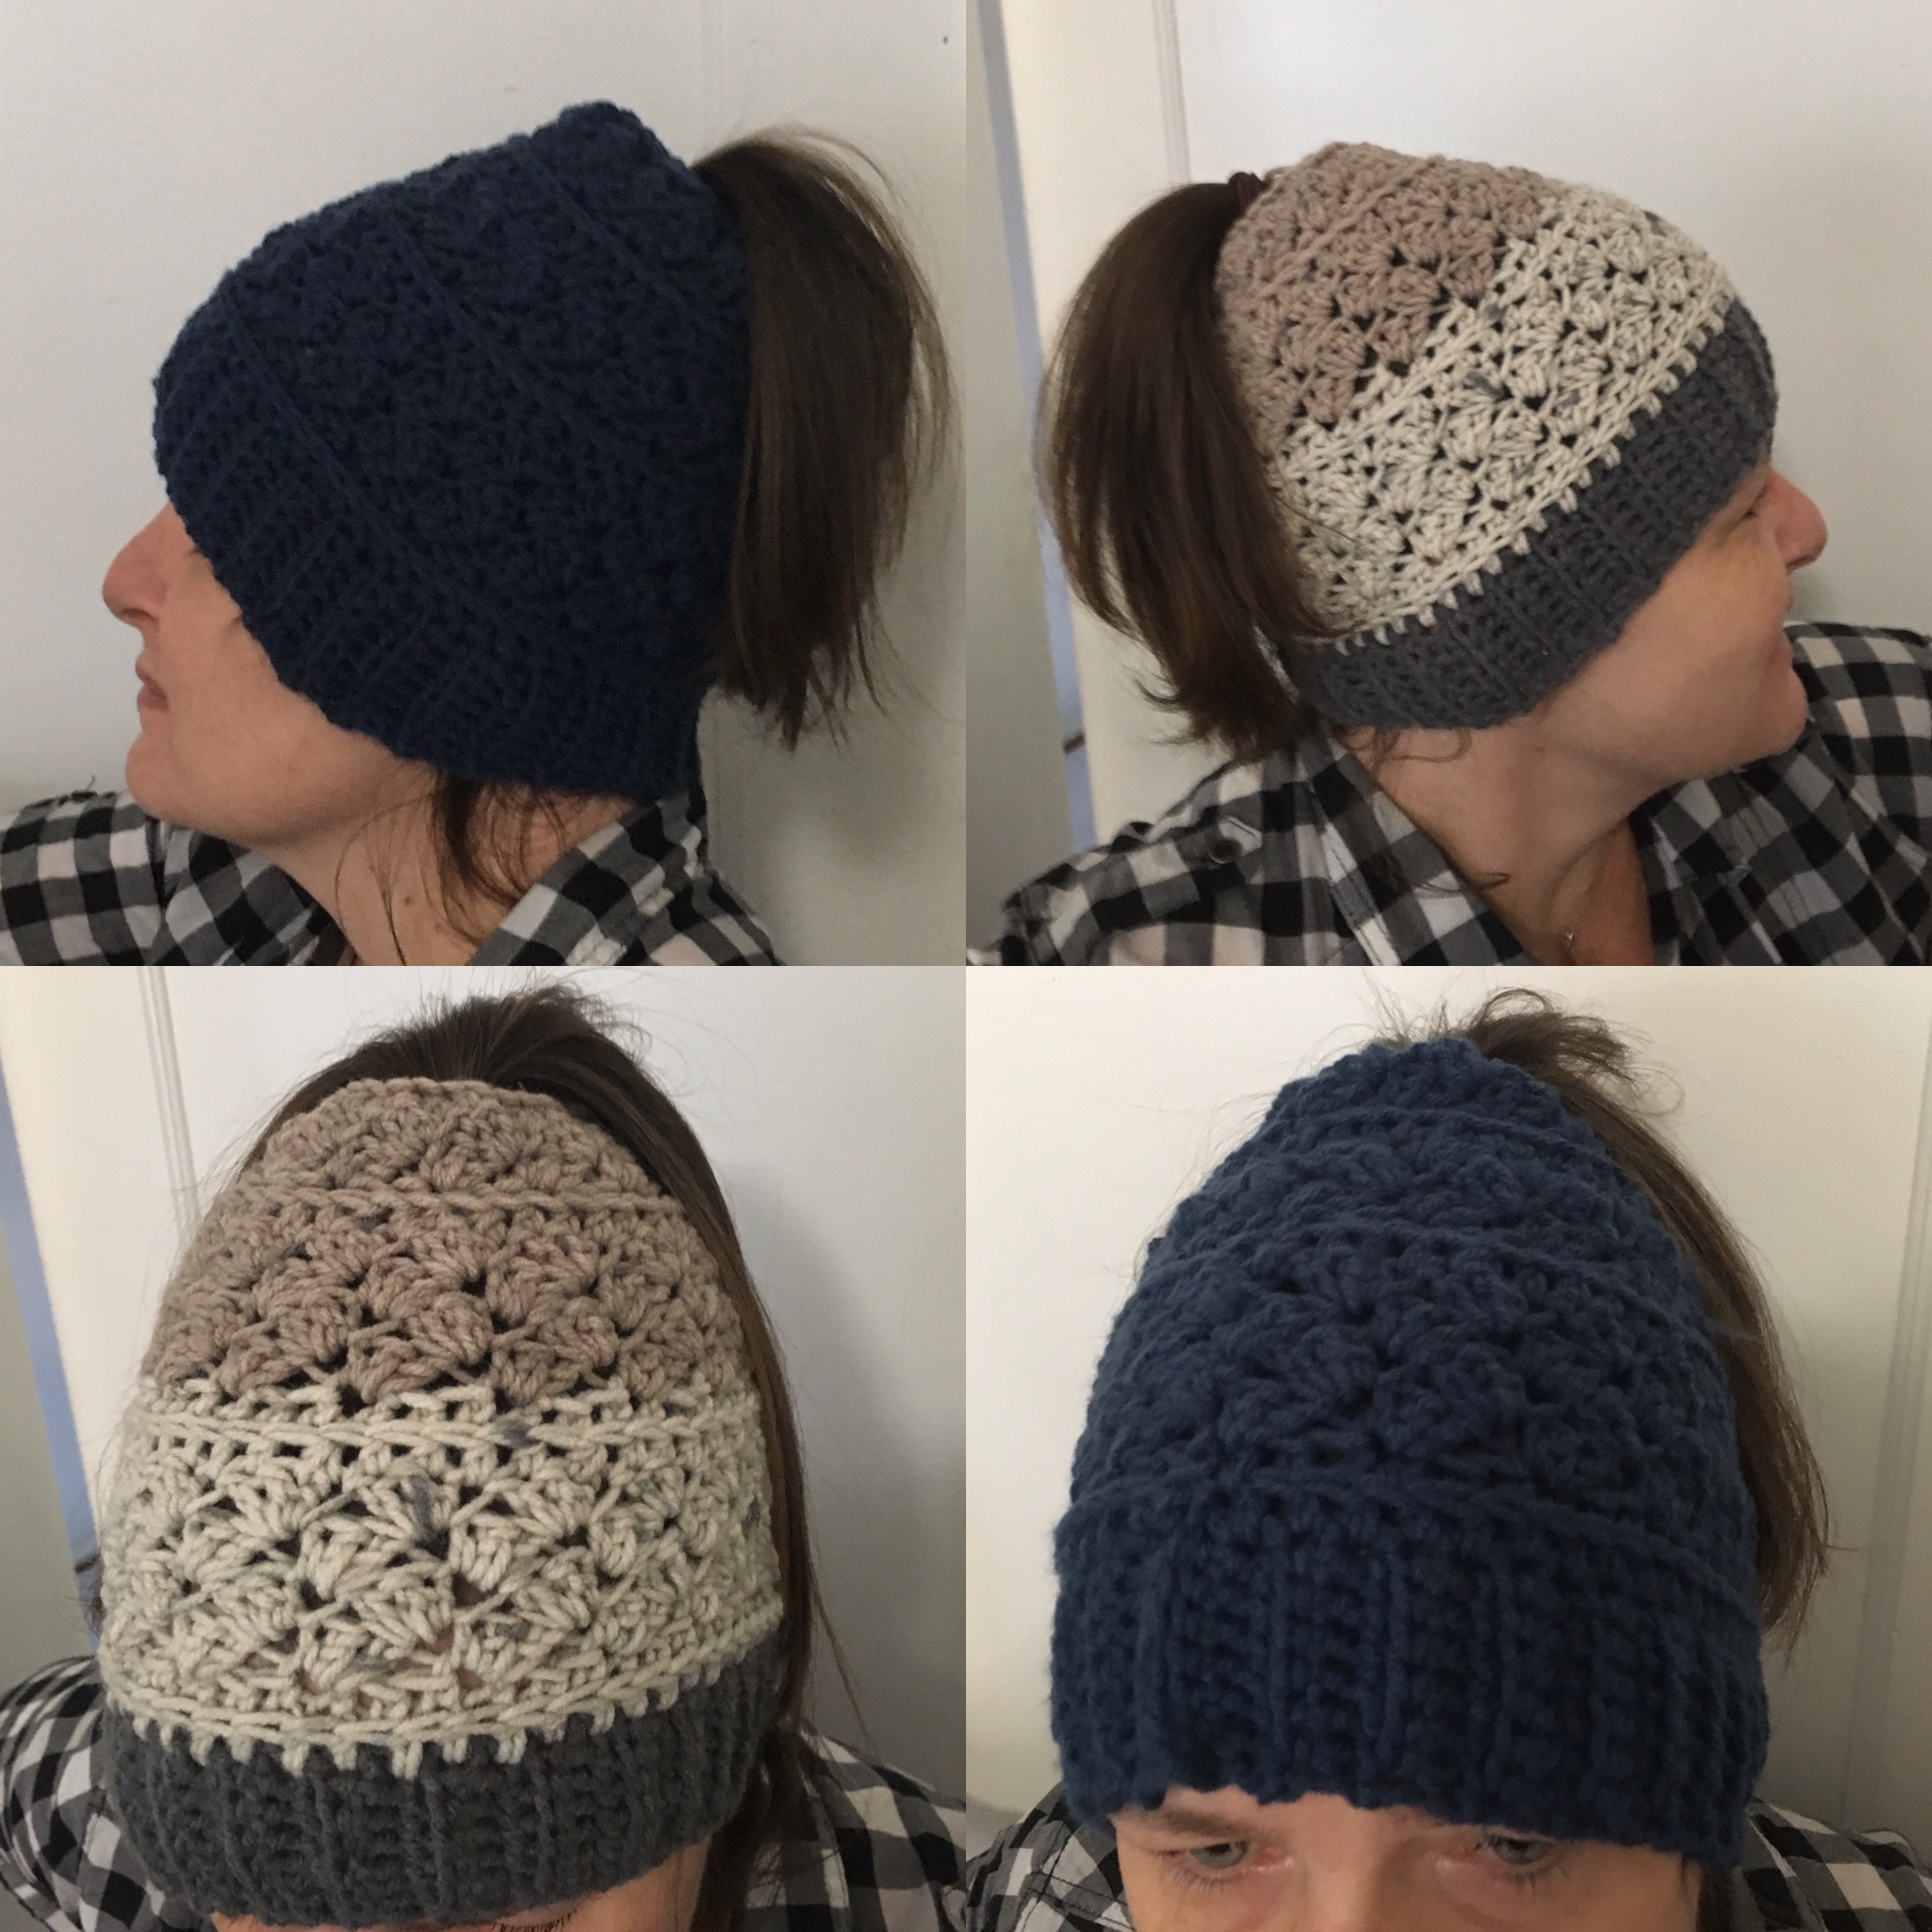
WoW! I can finally take a breath and add one of my newest designs for you to my website, the Rugged Slopes Beanie & Messy Bun Crochet Pattern. This crochet pattern is a 4-in-1 pattern. As you can see by the pictures above there are quite a few different versions. In the pattern here on the website I give you instructions for a Beanie and Messy Bun that can be turned into 4 different versions. You will see once you get into the pattern.
This page contains affiliate links. You can make a purchase using these links that I provide where I may receive compensation (at no added cost to you.) Purchases you make will help keep my website, Etsy Shop, and my Ravelry Store going and provide quality designs just for you!
On top of all the excitement going on here at Jo’s Crafty Hook I have been learning a lot of new stitches and one of them is featured in this crochet pattern. It is called the Sedge Stitch, I hope you fall in love with it as much as I have!
While you are here at my website, please be sure to sign up for my Newsletter. I have a LOT of things scheduled in the months ahead and I would hate for you to miss out! I will be hosting CALs, Giveaways, and sharing more FREE crochet patterns here on my website!
Below you will find 3 adult sizes to choose from. If you would like to purchase you can find the pdf crochet pattern at any of the places listed below.
US Hook I or 5.5mm US Hook J or 6mm 150-200 yards of #4 Worsted Weight Yarn Tapestry Needle Scissors
Gauge US Hook I or 5.5mm 11 st = 3.5” wide 12 rows = 4” long
Gauge Swatch: US Hook I or 5.5mm or size to meet Gauge. 11 st = 3.5” wide 12 rows = 4” long
Video Tutorial on how to crochet the Alternative Hat Brim or Band here.
R1: Ch 12, sc into the 2nd ch from your hook and in the next 10 ch. (11) sts
R2: Ch 1, turn. sc into 1st st, blo of the next 9 sts, sc into the last st. (Go through both loops for the first and last st.) (11)sts
R3-R12: Ch 1, turn. sc in the 1st st (go through both loops), sc in the blo in the next 9 sts, sc in the last st. (11) sts
Abbreviations: CH = Chain SC = Single Crochet HDC = Half Double Crochet HDC2TOG = Half Double Crochet 2 stitches Together HDC3TOG = Half Double Crochet 3 stitches Together DC = Double Crochet BLO = Back Loop Only 3rd Loop = 3rd Loop behind HDC ST = Stitch STS = Stitches SL ST = Slip Stitch
Notes:
This is a 4-in-1 pattern. Each hat can be made into a Messy Bun or a Beanie:
Solid color Messy Bun
Solid color Beanie
Multi-color Messy Bun
Multi-color Beanie
Some yarns are different. Gauge may need to be met using a different size Hook.
Rugged Slopes Messy Bun Hat
Using I Hook
BRIM
Using MC R1: ch 5 (7, 12) sc into the 2nd ch from hook and in each remaining ch. 4 (6, 11) sc
R2: ch 1, turn. sc into 1st st, blo of the next 2 (4, 9) st, sc into the last st. (Go through both loops for the first and last st.) 4 (6, 11) sc
R3-R54 (60, 66): Ch 1, turn. sc in the 1st st (go through both loops), sc in the blo in the next 2 (4, 9) st. sc in the last st. 4 (6, 11) sc
Join Brim: Once you work 54 (60, 66) rows hold both ends together without twisting, sl st together through the blo loop of the previous row and foundation row. Do NOT turn or fasten off.
Multi-Color
Multi-Color
Rugged Slopes Beanie
Multi-Color
If you would like to do a solid color beanie or messy bun hat, disregard the colors changes from MC to CC.
Switch to J Hook
HAT BODY
ALL SIZES
Change to CC
R1: ch 1, hdc in each st around. sl st in 1st to join. Do not turn. 54 (60, 66) hdc
R2: ch 1, sc in same st, and sc in 3rd loop around. sl st in 1st to join. Do not turn. 54, (60, 66) sc
Change to MC
R3: ch 1 *(sc, 2 dc) all in the same st (the 1st sc of the previous row), skip 2 sts*. Repeat around. sl st in 1st to join. Turn. 54, (60, 66) st
R4: ch 1, *(sc, 2 dc) all in the same st (the 1st sc of the previous row), skip 2 sts.* Repeat around. sl st in 1st st to join. Turn. 54, (60, 66) st
R5 & R6: Repeat R3 & R4
Change to CC
R7: ch 1, hdc in each st around. sl st in 1st to join. Do not turn. 54 (60, 66) hdc
R8: ch 1, sc in same st, and sc in 3rd loop around. sl st in 1st to join. Do not turn. 54, (60, 66) sc
Change to MC
R9: ch 1, *(sc, 2 dc) all in the same st (the 1st sc of the previous row), skip 2 sts.* sl st in 1st to join. Repeat from * to * around. Turn. 54, (60, 66) hdc
R10: Repeat R9
R11: Repeat R9 but do NOT turn
Change to CC
R12: ch 1, hdc in each st around. sl st in 1st to join. Do not turn. 54 (60, 66) hdc
R13: ch 1, sc in same st, and sc in 3rd loop around. sl st in 1st to join. Do not turn. 54, (60, 66) sc
Change to MC
R14: Repeat R9
R15: Repeat R9. Turn
Change to CC
R17: ch 1, hdc in each st around. sl st in 1st to join. Do not turn. 54 (60, 66) hdc
R18: ch 1, sc in same st, and sc in 3rd loop around. sl st in 1st to join. Do not turn. 54, (60, 66) sc
Leave a long tail for closing the beanie. Use the running stitch or weave through the stitches to close.
Messy Bun Optional: Use the running stitch to weave the crown almost closed. Leave a 2” hole for the ponytail to fit through.
Fasten off and weave in the ends.
Multi-Color Option
Messy Bun Option
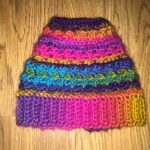
Rugged Slopes Multi-Color Options
Multi-Color
Multi-Color
Multi-Color
Multi-Color Option
I would LOVE to thank ALL of my crochet pattern testers, Thank You! They did an amazing job keeping me on my toes and working with me to bring you this awesome crochet pattern! They are: Tara Womack, Jennifer Secord, Tammy Alexander, Alison Christie, Brucene Plass, Crystal Marin Long, LJ Read, Amanda Cornellio, and Christal Dines Friend.
Jo Baird’s Rugged Slopes Messy Bun & Beanie
You can find my crochet patterns at these locations listed below.
Thank you for your interest in this crochet pattern! Check out some of my patterns at my Ravelry Store Jo’s Crafty Hook Designs or LoveCraft or Etsy Shop JosCraftyHook or at my website joscraftyhook.com! While you are at my website be sure to subscribe to my Newsletter. This way you will be notified when I release another pattern or giveaway or blog post!
If you have any questions or concerns about this pattern or any other pattern please find me at Joey Lea Baird on Facebook or email me at jo@joscraftyhook.com
You are free to sell or gift the item, please do NOT claim this design as your own. If you share your finished product, please acknowledge me as the designer. Please forward any one who would like to do this crochet pattern or any of my patterns to the Ravelry Store or to LoveCraft or to my Etsy shop, or to my website. The web addresses for any place to connect with me are listed below.
Every purchase of my patterns helps! It allows me to buy more yarn so I can create and design more Handmade Crocheted Creations for you to enjoy.
I would LOVE to see your version of my designs! You can “Hook It” at my Ravelry Jo’s Crafty Hook Designs OR add a pic using the hashtag #nellieponcho or #joscraftyhook or #jo_bear38 or at anyone of the places below that allows you to connect with me! Comments, Feedback, etc. are ALWAYS welcome at my website www.joscraftyhook.com!
If you would like to make a donation to Jo’s Crafty Hook and help me with the costs of running my website, crocheting new designs I would greatly appreciate it!
The Crochet Pattern Train is scheduled to stop your way again! Starting March 9, 2020 through March 14, 2020 the Instagram Crochet Pattern Giveaway will be stopping at YOUR destinations!
This page contains affiliate links. You can make a purchase using these links that I provide where I may receive compensation (at no added cost to you.) Purchases you make will help keep my website, Etsy Shop, and my Ravelry Store going and provide quality designs just for you!
Last month we did the Crochet Pattern Giveaway on Facebook for Valentine’s Day crochet patterns and sales. This month will be the same thing, just on Instagram.
What an exciting year 2020 is turning out to be for me! I will be featured with 9 other Crochet Designers in a FREE Pattern Giveaway Train starting March 9, 2020 thru March 14, 2020! How exciting for me and for YOU! There will be all kinds of goodies from all designers featured on the Train! Below is what will be posted on my Instagram and account and you can find the link here!
**Crochet Train Pattern Giveaway**
Jump on board and see all the fun pattern you could win. I, Jo’s Crafty Hook, along with 9 other amazing Crochet Designers have joined in the pattern give away.
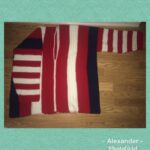
I will be giving away pdf copies of my Fairland Sweater to 2 lucky winners. The winner’s will be chosen the morning of March 15.
Be sure to grab your seat on the train and win some FREE patterns from me and the other 9 Crochet Designers! You can grab your seat right here and visit the other exciting patterns from all of 10 Crochet Pattern Designers!
From the Designer:
Thank you for your interest in my website! Check out my GREAT patterns at my Etsy Shop JosCraftyHook or at my Ravelry Store here! While you are here at my website be sure to subscribe to my Mailing List and Newsletter. This way you will be notified when I release another pattern or blog post!
If you have any questions or concerns about this pattern or any other pattern please find me at Jo’s Crafty Hook Designs on Facebook or email me at jo@joscraftyhook.com
You are free to sell or gift the item, please do NOT claim this design as your own. Please forward any one who would like to do this crochet pattern or any of my patterns to my Etsy shop, the Ravelry Store, or to my website. The web addresses for any place to connect with me are listed below.
Every purchase of my patterns helps! It allows me to buy more yarn so I can create and design more Handmade Crocheted Creations for you to enjoy.
I would LOVE to see your version of my designs! You can “Hook It” at my Ravelry Jo’s Crafty Hook Designs OR add a pic on my Facebook Page Jo’s Crafty Hook Designs OR at any one of the places below that allows you to connect with me! Pictures, Comments, Feedback, etc. are ALWAYS welcome at my website www.joscraftyhook.com!
Find me, Jo of Jo’s Crafty Hook Designs at any one of these places listed below!
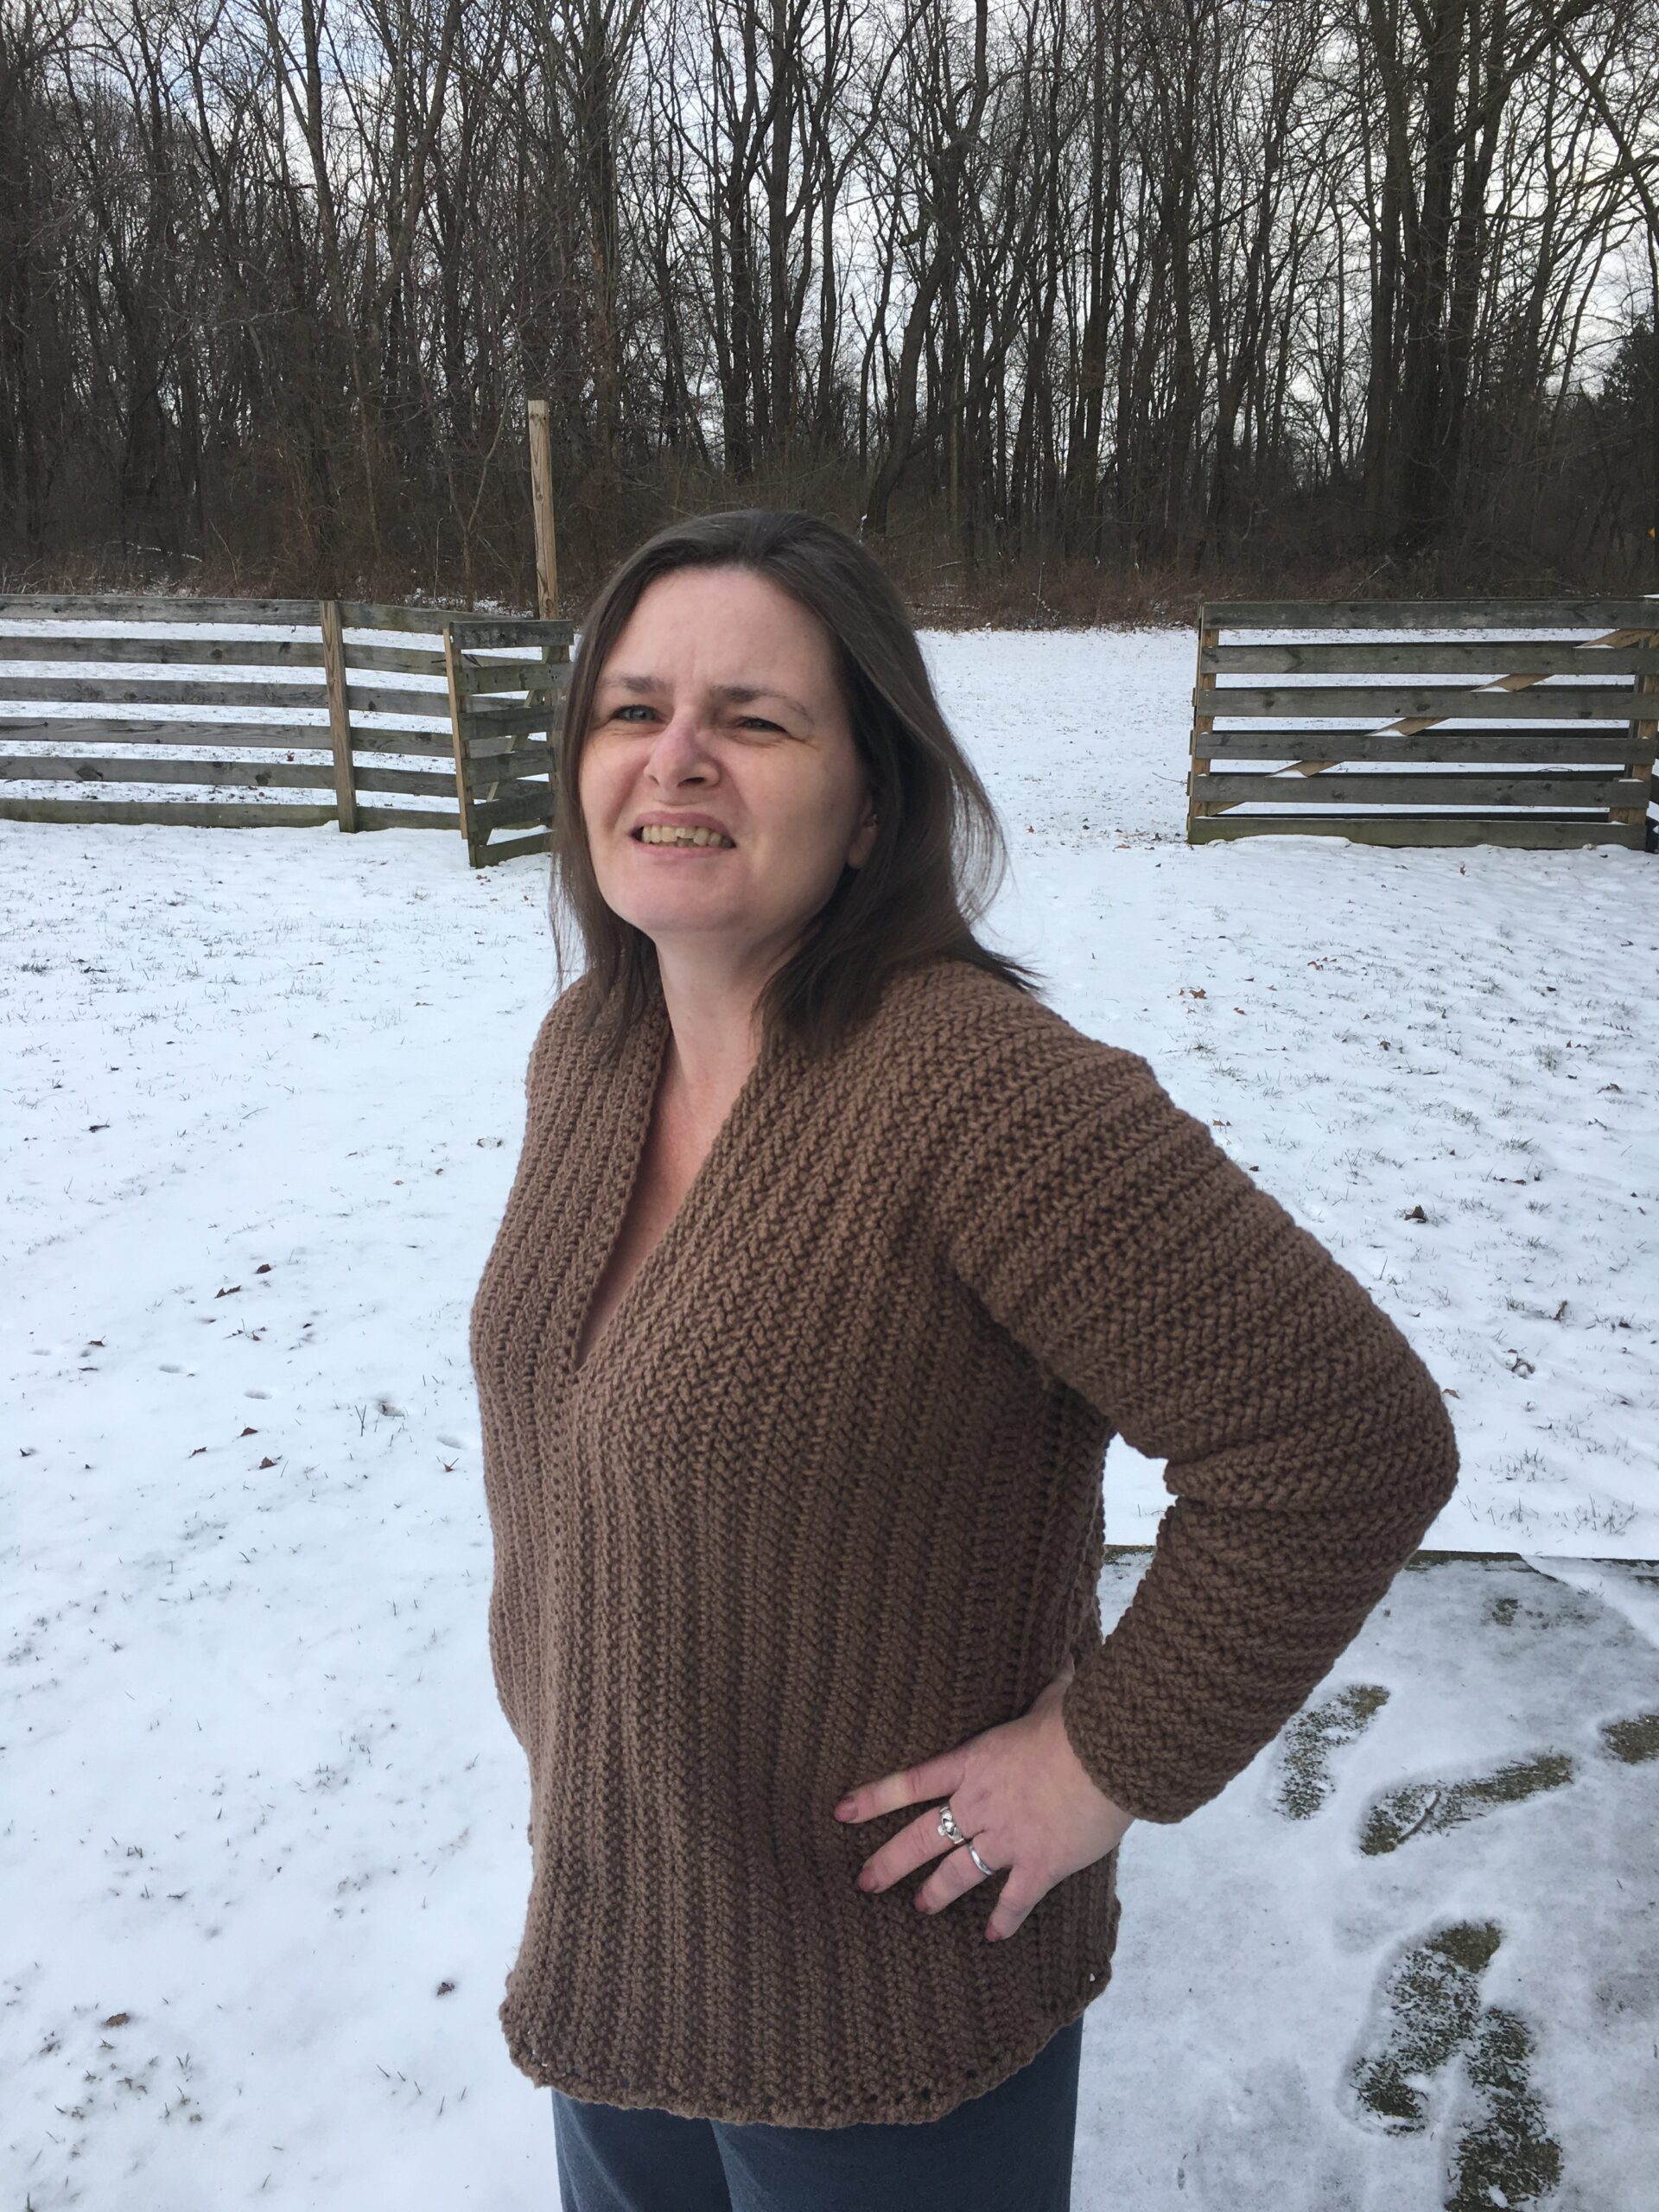
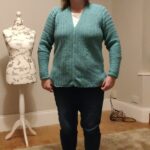
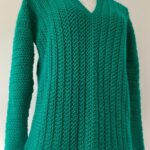
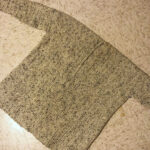
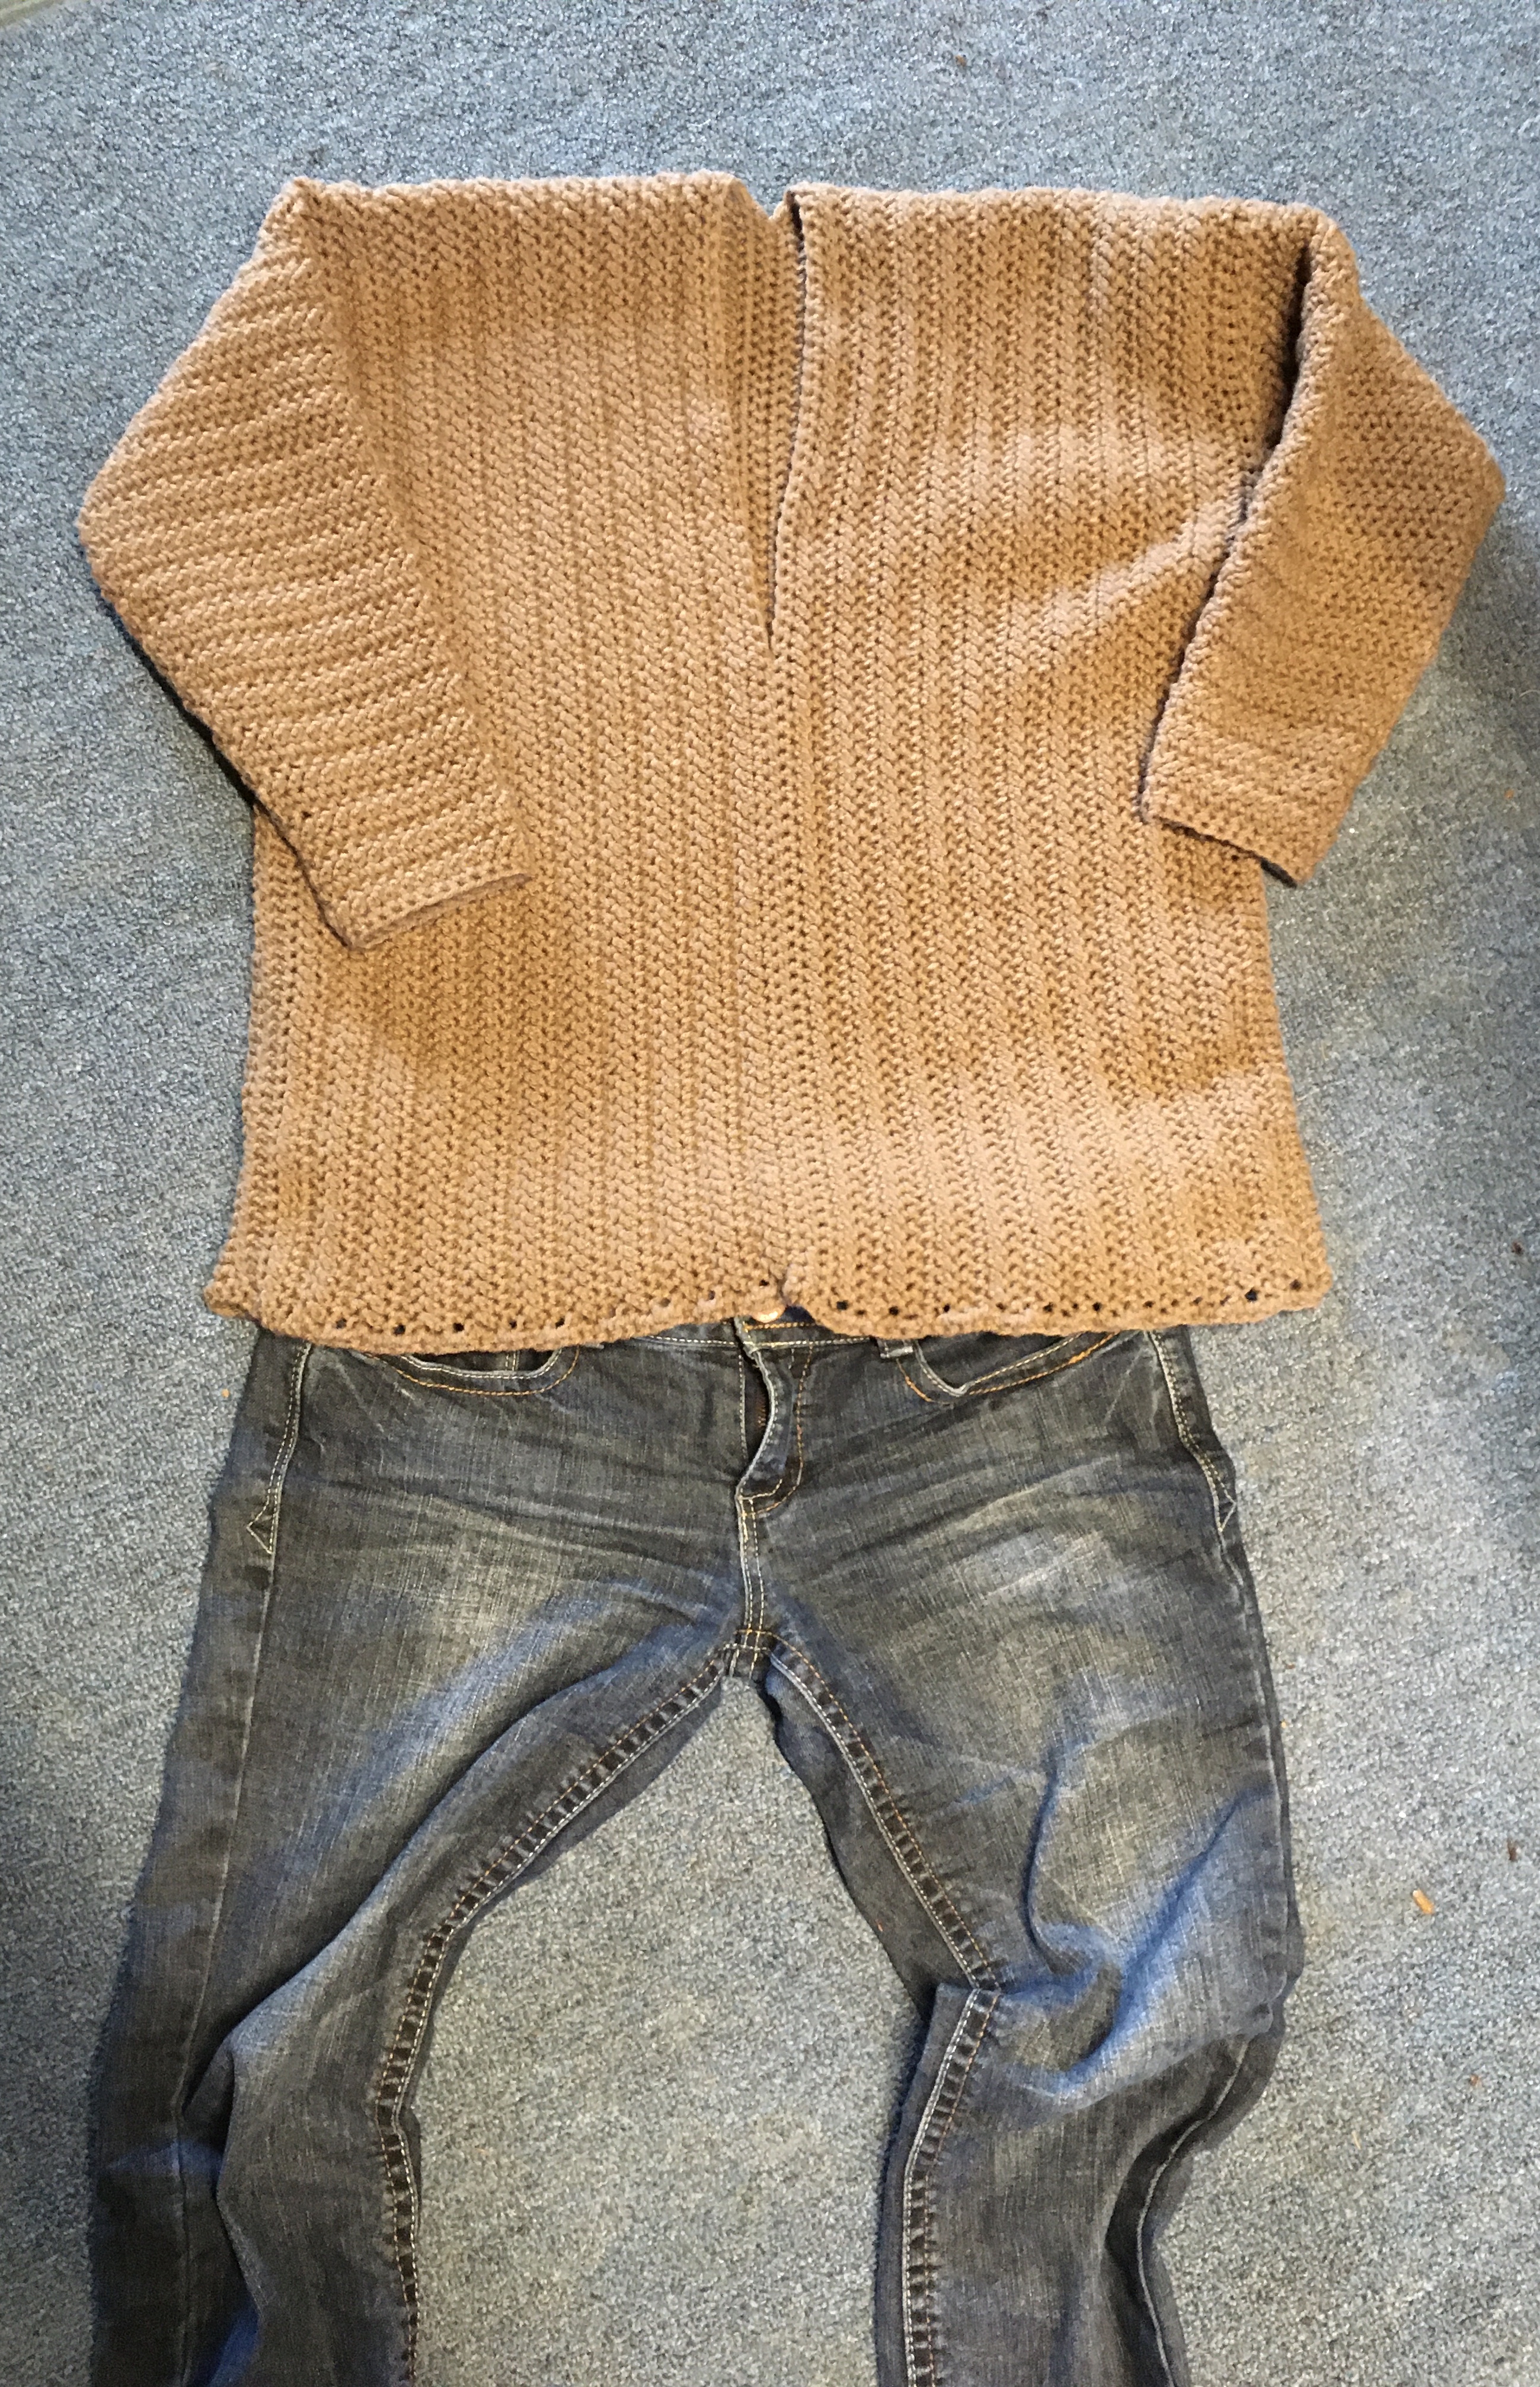
The Fairland Sweater Free Crochet Pattern was inspired by one of my crochet pattern testers, Laura. We both fell in love with the Herringbone Half Double Crochet, which is used in this crochet pattern. Laura told me the design I was using for the Rain Drops Mittens would look awesome in a sweater. Therefore the Fairland Sweater was born.
This page contains affiliate links. You can make a purchase using these links that I provide where I may receive compensation (at no added cost to you.) Purchases you make will help keep my website, Etsy Shop, and my Ravelry Store going and provide quality designs just for you!
The Rain Drops Mittens can be found in my Ravelry Store Jo’s Crafty Hook.
https://www.ravelry.com/patterns/library/rain-drops-mittensJo Baird’s Version
The great thing I found in designing this sweater was the feedback I received from my pattern testers. It led me to look at the design from their point of views. I always encourage my crochet pattern testers to be completely honest with me whether the comments are good or bad. I ask them: “How am I going to grow as a Crochet Designer if no one gives me feedback; asks questions, or comments on a particular part of the design?” Below you will hear from another one of my testers, so be sure to look for it.
So let’s get started on crocheting the Fairland Sweater!
US Hook I/5.5 or 5.5 mm 900-2500 yards of #4 Worsted Weight Yarn Scissors Tapestry Needle Stitch Markers
Gauge:
US Hook I/5.5 or 5.5 mm 12 HBDC x 8 Rows = 4 inch
Abbreviations:
CH = ChainCh 1 does NOT count as a stitch SS = Slip StitchCh 2 does NOT count as a stitch ST = StitchCh 3 does count as a stitch FDC = Foundation Double Crochet HBDC = Herringbone Double Crochet DC2TOG = Double Crochet 2 Together
R1: FDC 14 or chain 17, dc in the 4th st from Hook and each remaining st. Ch 3 (14 st)
R2: Ch 3 and turn. HBDC in each remaining st. (Ch 3 counts as stitch)
R3-R10: Ch 3 and turn. HBDC in each remaining st.
Special Notes
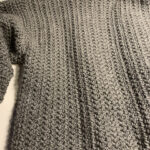
*Sizes range from S, M, L, XL, 2X, and 3X *The Sweater is crocheted in 2 Panels. *The Sweater is done in Rows. *The Sleeves are done in the Round, turning after each row. *Be sure to note different brands of yarn may result in different sizes and yardage.
These are my Measurements
Bust Size
34
36
38
40
42
44
Sizes
Small
Medium
Large
X-Large
2X
3X
Panel Width
8”
10”
12”
14”
16”
18”
Panel Length
48”
52”
56”
60”
64”
68”
Back of Sweater Stitch Count
68
74
78
82
86
90
½ Stitch Count for Sleeves
18
20
22
24
26
28
Full Sleeve Opening
36
40
44
48
52
56
Front Stitch Count for Sewing
42
44
46
48
50
52
Sleeve Length
16”
17”
18”
19”
20”
21”
Sweater Panel (make 2)
R1: FDC 136 (148, 156, 164, 172, 180) st Turn
Optional: Ch 139 (151, 159, 167, 175, 183), dc in 4th loop from hook and each st across. Turn 136 (148, 156, 164, 172, 180) st
R2-R20 (22, 24, 26, 28, 30): Ch 3 (counts as st), hbdc in each st across. Turn 136 (148, 156, 164, 172, 180) st
R21 (23, 25, 27, 29, 31): Ch 1, sc in same st and each st across. 136 (148, 156, 164, 172, 180) st
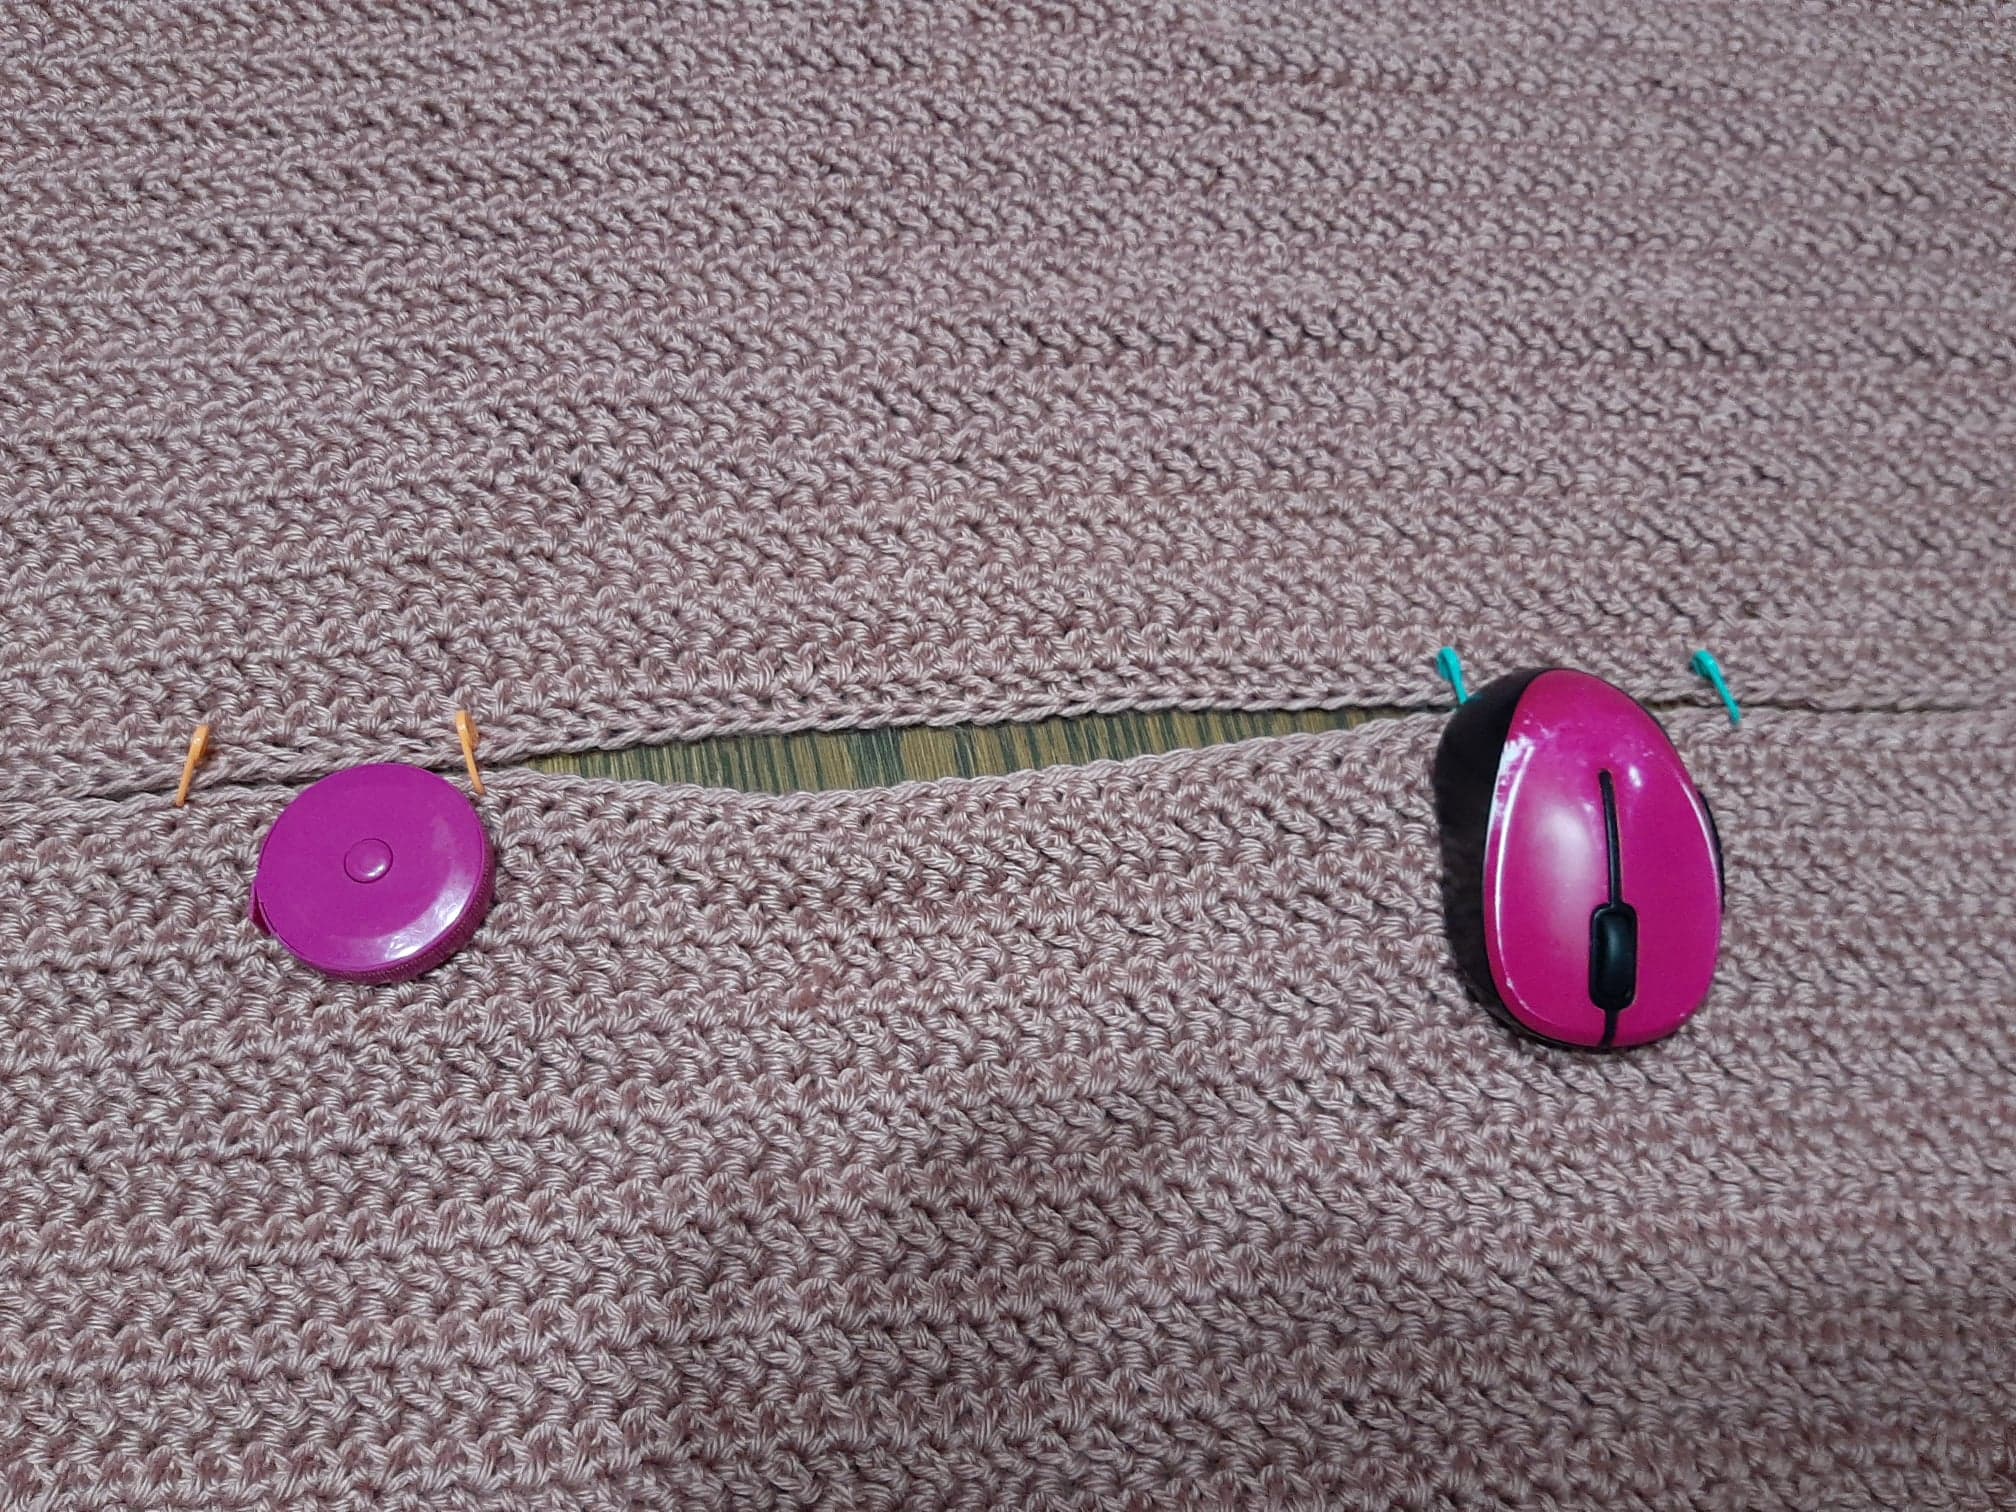
Step 1: Fold Panel in half or count up from the Bottom and place Stitch Marker in 68 (74, 78, 82, 86, 90) st
Step 2: Place Panels together with SC row facing SC row, long tails at opposite ends.
Step 3: Using Long Tail, Sew Panels together using the Mattress Stitch and Stitch Count from Step 1. 68 (74, 78, 82, 86, 90) st
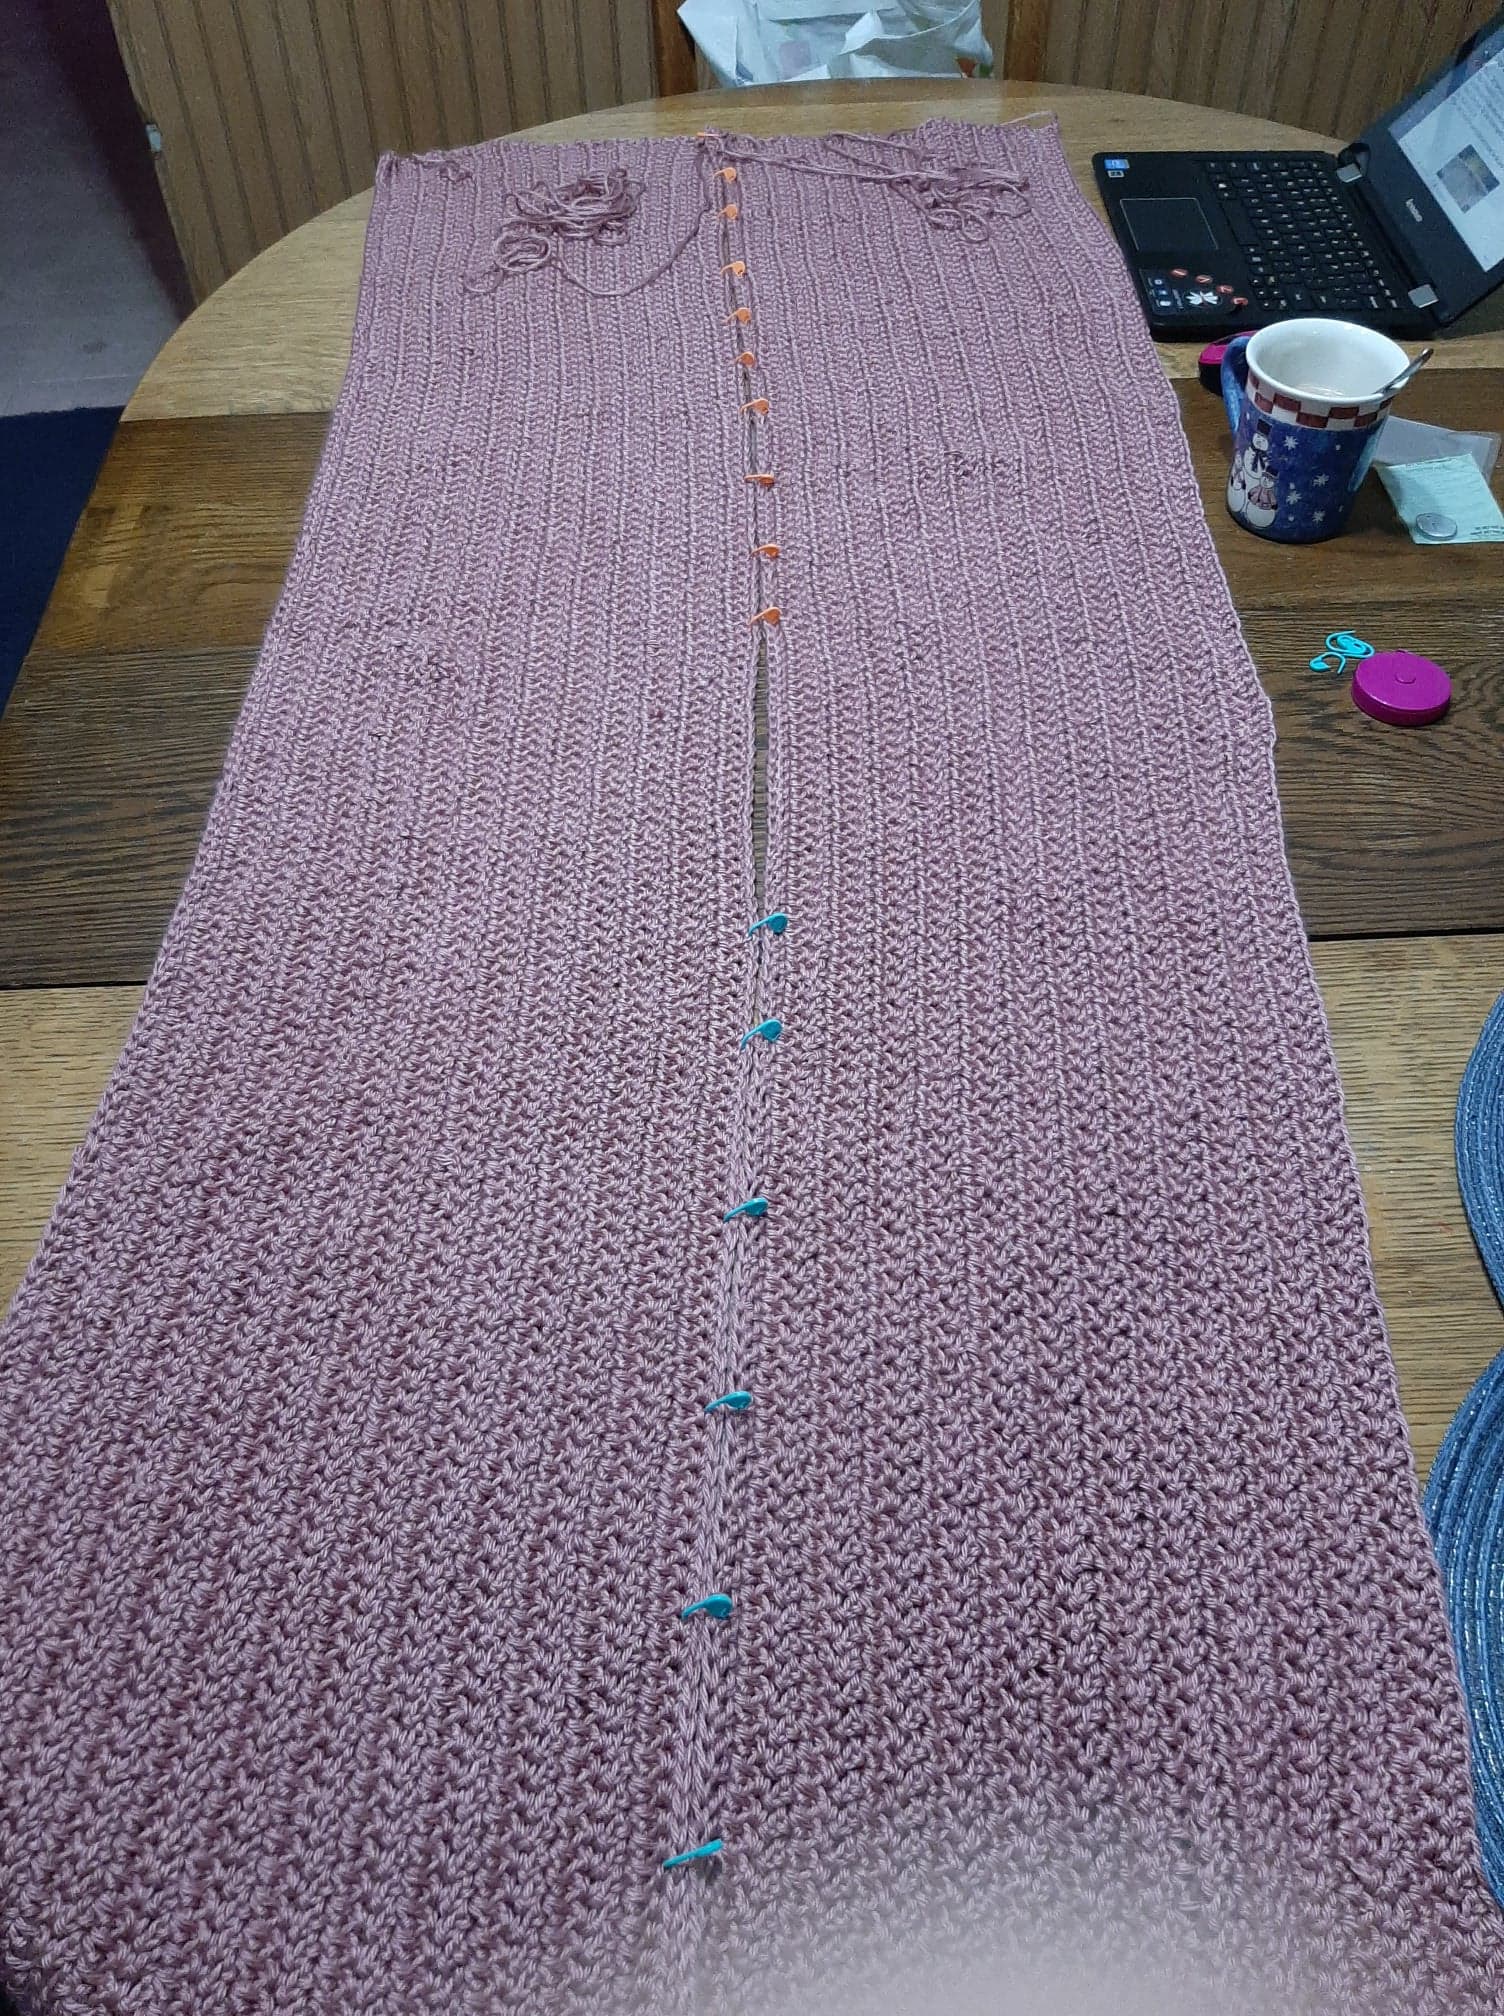
Front of Sweater
Front of Sweater
Step 1: Turn Panels around with the bottom facing you.
Step 2: Measure 9.5” (10” 10.5” 11” 11.5” 12”) from the bottom and place Stitch Marker in stitch or use Stitch Count in Table above for sewing front panels closed.
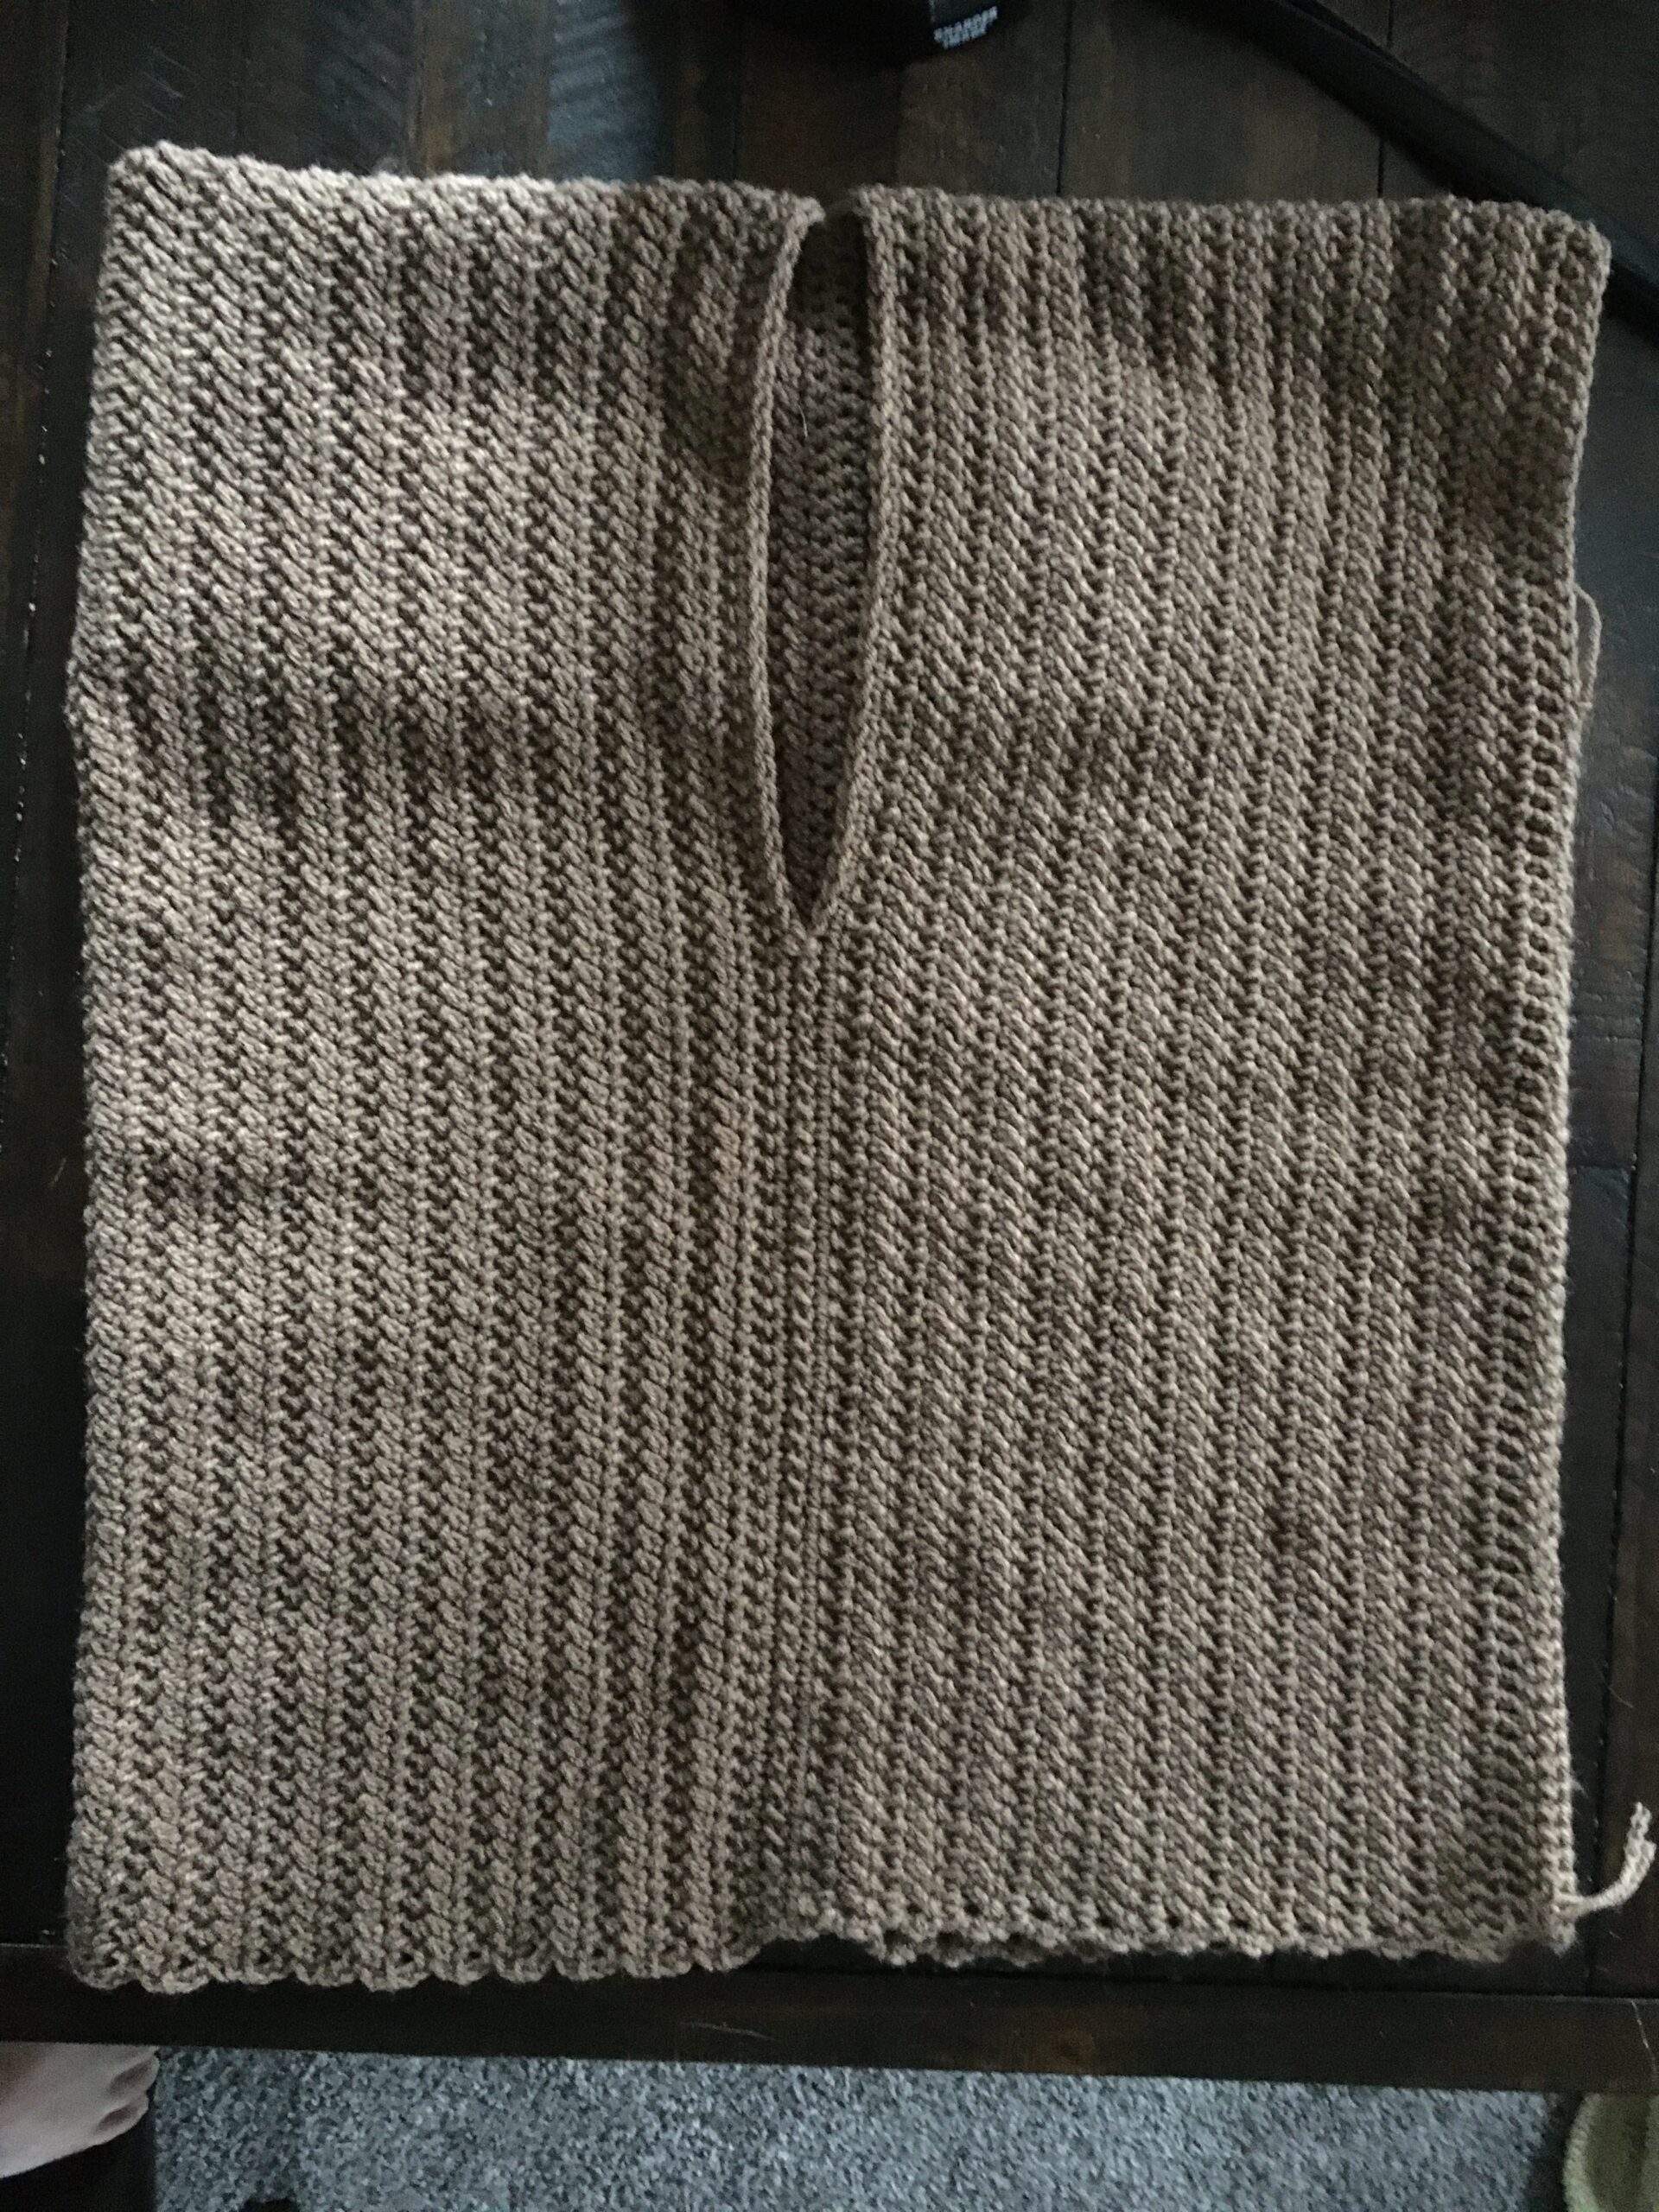
Neck Opening
Step 3: Using Long Tail, Sew Panels together, starting from the bottom, to create neck opening. 42 (44, 46, 48, 50, 52) st
**The Video Tutorial for sewing the back closed can be used for the front as well.
Another one of my crochet pattern tester was interested in sharing her viewpoint about the Fairland Sweater’s sleeves. Below is what she has to say about altering sleeves to YOUR fit:
The construction of this sweater offers a unique opportunity to easily alter the sleeves for a custom fit. Due to the drop shoulders the sleeve opening will fall on a different place on your arm depending on how you choose to have your sweater fit (form fitting, or loose). I prefer to have my sweaters more form fitting. I made the medium sweater and the sleeve openings felt a little tight for me because they fell very close to my shoulder. All I had to do was go up one size on the sleeve portion and then they fit perfectly! The transverse is also true. If you like a very loose fit to your sweater you may want to go down a size on your sleeves.
Step 1: From the Top of the Sweater measure 6.5” (7” 7.5” 8” 8.5” 9”) and place Stitch Marker in Stitch on each panel. Leave Stitch Marker in place as a guide to where you will place your first and last stitch for your Sleeves.
Optional: Use the Halfway count from Table above or count 18 (20, 22, 24, 26, 28) from the Top of sweater and place Stitch Marker in Stitch on each side. You will have a total of 36 (40, 44, 48, 52, 56) st for your armhole.
Step 2: Sew Panels together, using the Mattress Stitch, from the bottom using your Stitch Marker, at the Armhole, as a guide for when to stop.
Sleeve – Attaching on the Right Side of the Sweater
R1: Slip Stitch into 1st stitch of Sleeve opening (using your Stitch Marker). Ch 2, hbdc in the same st, and each stitch around. 36 (40, 44, 48, 52, 56) ss in 1st st to join.
R2: Ch 2, turn and hbdc in each st around. Ss in 1st st to join. 36 (40, 44, 48, 52, 56) st
R3: Ch 2, turn and hbdc in each st around. Ss in 1st st to join. 36 (40, 44, 48, 52, 56)
R4-R10 (12, 14, 16, 18, 20): Repeat R2-R3
Sleeve – Decreases
R11 (13, 15, 17, 19, 21): Ch 2, turn, dc2tog in the same st and next st. hbdc in each st until the last 2 st, dc2tog. Ss in 1st st to join. 34 (38, 42, 46, 50, 54) st
R12 (14, 16, 18, 20, 22): Ch 2 and turn. Hbdc in the same st and each st around. Ss in 1st st to join. 34 (38, 42, 46, 50, 54) st
R13 (15, 17, 19, 21, 23): Ch 2, turn, dc2tog in same st and next st. hbdc in each st until the last 2 st, dc2tog. Ss in 1st st to join. 32 (36, 40, 44, 48, 52) st
R14 (16, 18, 20, 22, 24): Ch 2 and turn. Hbdc in the same st and each st around. Ss in 1st st to join. 32 (36, 40, 44, 48, 52)
R15 (17, 19, 21, 23, 25): Ch 2, turn, dc2tog in same st and next st. hbdc in each st until the last 2 st, dc2tog. Ss in 1st st to join. 30 (34, 38, 42, 46, 50) st
R16 (18, 20, 22, 24, 26): Ch 2 and turn. Hbdc in the same st and each st around. Ss in 1st st to join. 30 (34, 38, 42, 46, 50) st
R17 (19, 21, 23, 25, 27): Ch 2, turn, dc2tog in same st and next st. hbdc in each st until the last 2 st, dc2tog. Ss in 1st st to join. 28 (32, 36, 40, 44, 48) st
R18 (20, 22, 24, 26, 28): Ch 2 and turn. Hbdc in the same st and each st around. Ss in 1st st to join. 28 (32, 36, 40, 44, 48) st
R19 (21, 23, 25, 27, 29): Ch 2, turn, dc2tog in same st and next st. hbdc in each st until the last 2 st, dc2tog. Ss in 1st st to join. 26 (30, 34, 38, 42, 46) st
R20 (22, 24, 26, 28, 30): Ch 2 and turn. Hbdc in the same st and each st around. Ss in 1st st to join. 26 (30, 34, 38, 42, 46) st
R21 (23, 25, 27, 29, 31): Ch 2, turn, dc2tog in same st and next st. hbdc in each st until the last 2 st, dc2tog. Ss in 1st st to join. 24 (28, 32, 36, 40, 44) st
R22 (24, 26, 28, 30, 32): Ch 2 and turn. Hbdc in the same st and each st around. Ss in 1st st to join. 24 (28, 32, 36, 40, 44) st
R23 (25, 27, 29, 31, 33): Ch 2, turn, dc2tog in same st and next st. hbdc in each st until the last 2 st, dc2tog. Ss in 1st st to join. 22 (26, 30, 34, 38, 42) st
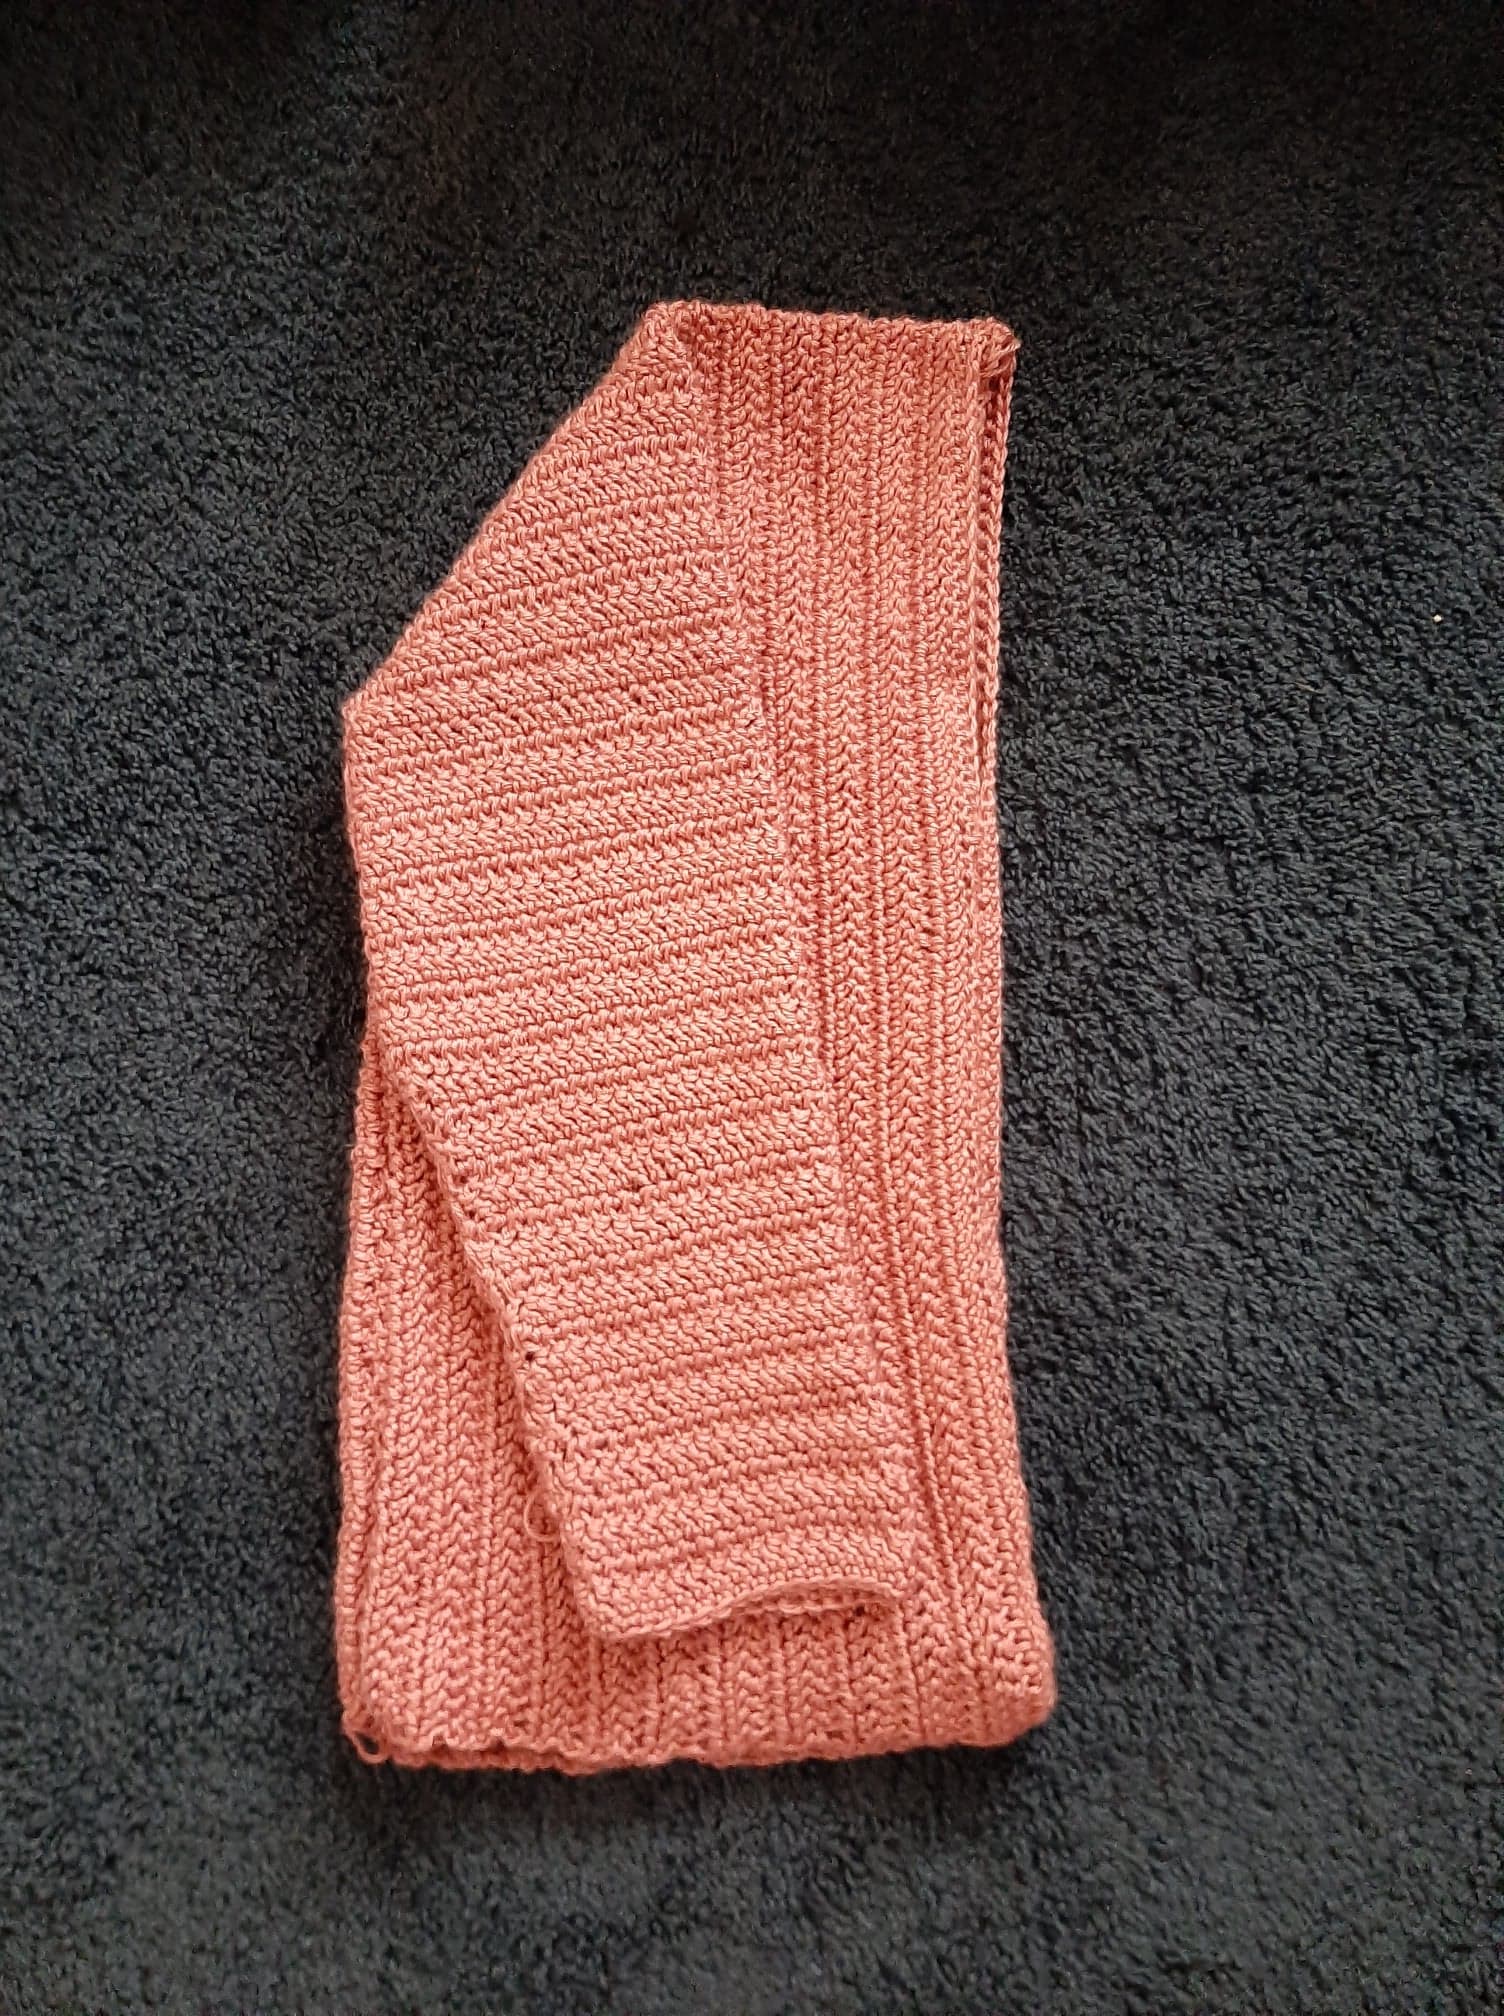
Sleeve from Elbow to Wrist R1: Ch 2 and turn. Hbdc in the same st and each st around. Ss in 1st st to join. 22 (26, 30, 34, 38, 42) st
Repeat R1 until Sleeve measures 16” (17” 18” 19” 20” 21”) or desired length. If your Sleeves seem too big or too small try going up or down a size.
Sleeve Edging
R1: Ch 1 and turn. Sc in the same st and each st around. Ss in 1st st to join. 22 (26, 30, 34, 38, 42) st
Thank you for your interest in this crochet pattern! Check out my other GREAT patterns at my Etsy Shop JosCraftyHook or at my Ravelry Store here! While you are here at my website be sure to subscribe to my Mailing List and Newsletter. This way you will be notified when I release another pattern or blog post!
If you have any questions or concerns about this pattern or any other pattern please find me at Jo’s Crafty Hook Designs on Facebook or email me at jo@joscraftyhook.com
You are free to sell or gift the item, please do NOT claim this design as your own. Please forward any one who would like to do this crochet pattern or any of my patterns to my Etsy shop, the Ravelry Store, or to my website. The web addresses for any place to connect with me are listed below.
Every purchase of my patterns helps! It allows me to buy more yarn so I can create and design more Handmade Crocheted Creations for you to enjoy.
I would LOVE to see your version of my designs! You can “Hook It” at my Ravelry Jo’s Crafty Hook Designs OR add a pic on my Facebook Page Jo’s Crafty Hook Designs OR at any one of the places below that allows you to connect with me! Pictures, Comments, Feedback, etc. are ALWAYS welcome at my website www.joscraftyhook.com!
Find me, Jo of Jo’s Crafty Hook Designs at any one of these places listed below!