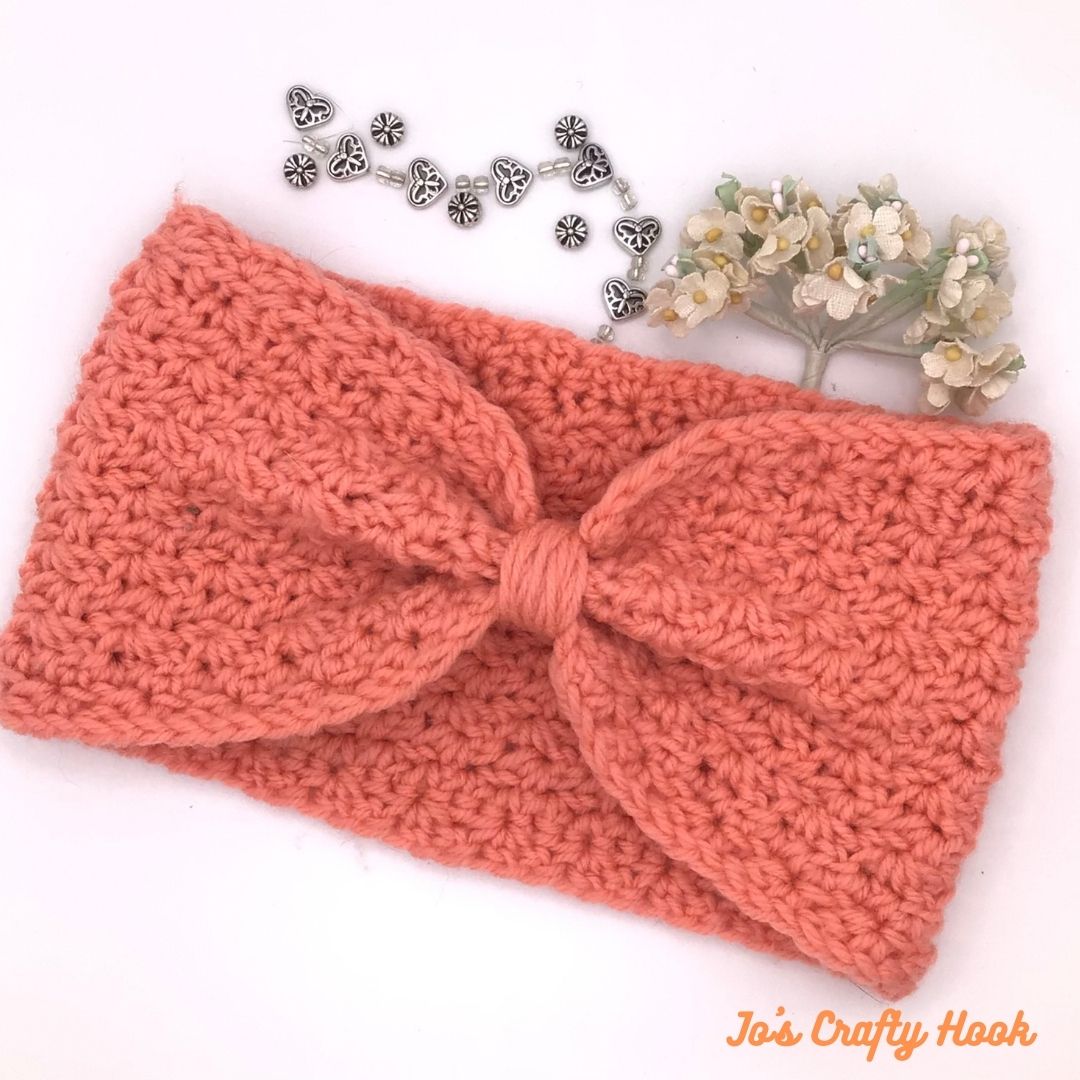
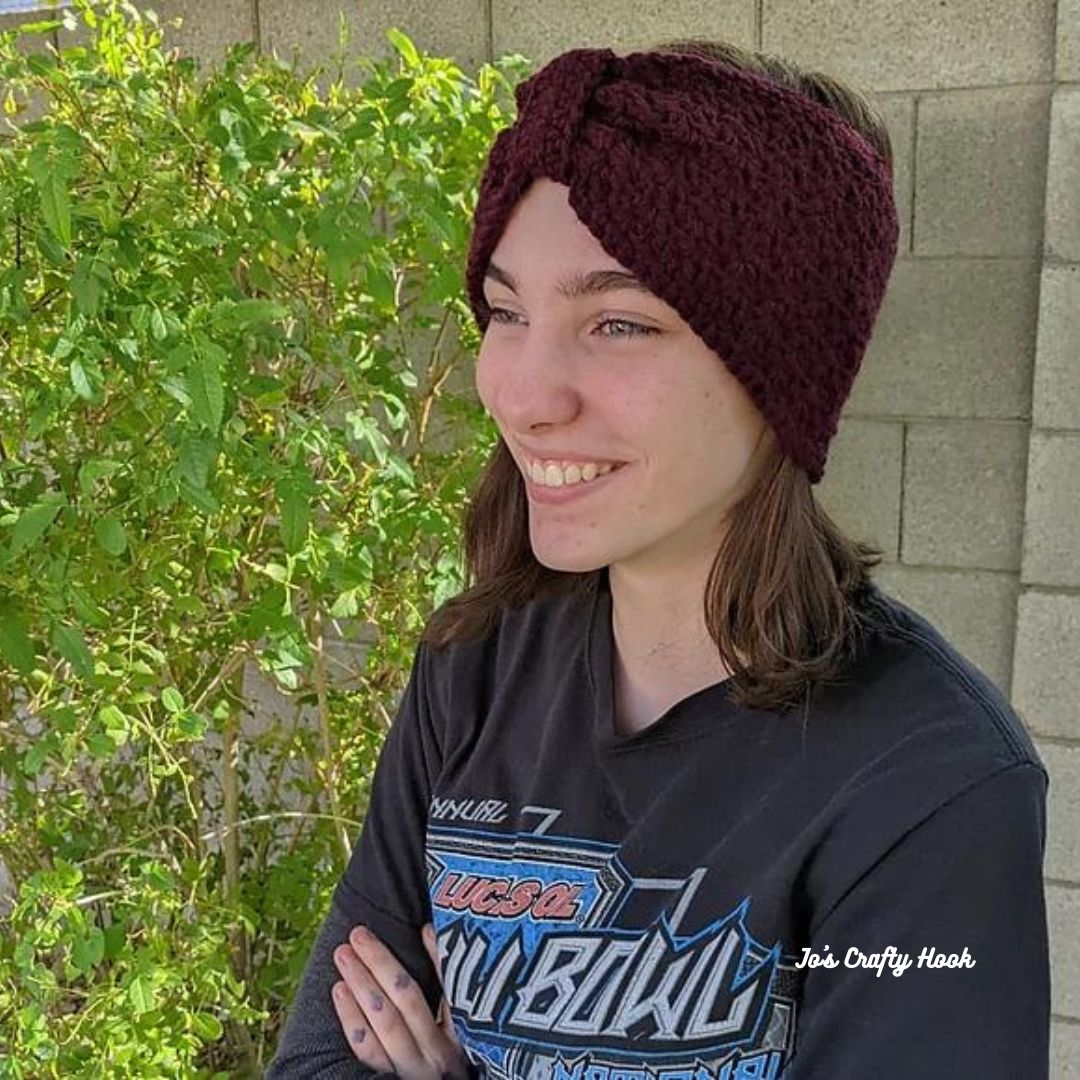
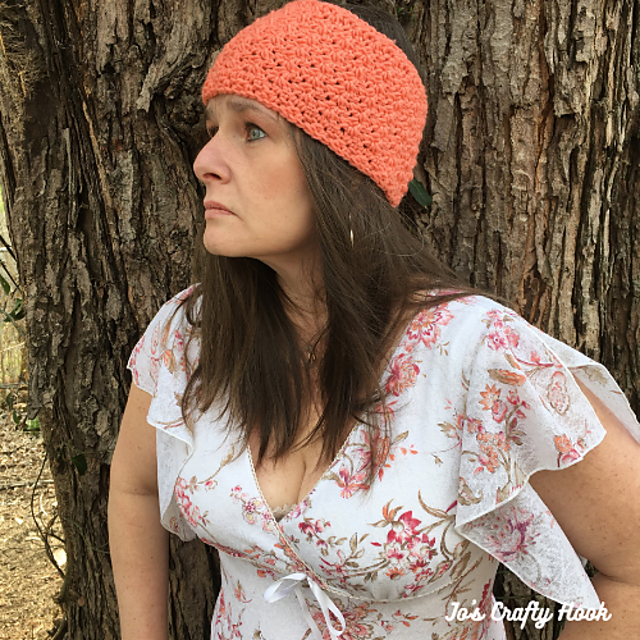
Today’s I am sharing with you my Acacia Headband Free Crochet Pattern. Each year it seems like I learn a new stitch and fall in love with it so much that I design multiple crochet patterns using that stitch. The Acacia Headband uses the wattle stitch that I recently fell in love with.
This post contains affiliate links. If you make a purchase using these links I may receive compensation (at no added cost to you.)
Acacia Headband Crochet Pattern
I have used it to design a beanie, a cowl, a skirt, a clutch and now a headband. Of course I have a couple more in the works. 🙂
If you would like to purchase the Ad-Free Premium crochet pattern with multiple sizes, 0-3 mths to Adult Large, you can get it at my Ravelry Store.
************************************************
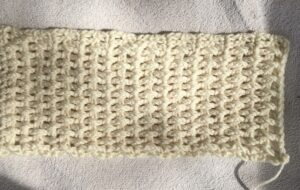
Acacia Headband Free Crochet Pattern
Acacia Headband Free Crochet Pattern
I used 300 yards for the set for the size Medium. I used Joann Fabrics Big Twist Yarn in Apricot. ( 6 oz/380 yds)
Materials: 75-200 yards of 4 ply Worsted or Aran Weight Yarn US H Hook or 5mm Tapestry Needle Scissors
Abbreviations: fsc = foundation single crochet sl st = slip stitch st = stitch
sc = single crochet sp = spacews = wattle stitch ch = chain RS = Right Side
WS = Wrong Side
Gauge: US H Hook or 5mm
5 ws x 8 Rows = 4”
Special Stitches: Wattle Stitch = (sc, ch 1, dc) all in same stitch
Gauge Swatch:
R1: fsc 18 Optional: ch 19, sc in 2nd ch from hook and each remaining st. 18 sc
R2: ch 1 and turn. sk 2 st, *[ws (sc, ch 1, dc)] all in same st in next st, sk 2, ws in next st. Repeat from * until the last 3 st. sk 2 st, sc in the last st. (4 ws)
R3: ch 1 and turn. Ws in each ch-1 sp across until the last 3 st. sk 2 st, sc in last st (which will be the ch 1 from the previous row).
R4-R8: Repeat R3
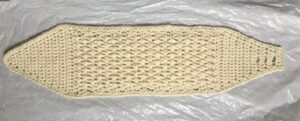
Notes: Ch 1 does count as a stitch. The headband is worked in rows. The Right Side is the foundation single crochet row. The Headband size: 0-3 mths
Video Tutorials: Foundation Single Crochet Left Handed here. Foundation Single Crochet Right Handed here. Running Stitch Video Tutorial here
0-3 months: 13” x 2.5”
R1: (RS) FSC 45, ch 1 and turn. (45 sc) Optional: Ch 46, sc in 2nd ch from hook and each st across. Ch 1 and turn. (45 sc)
R2: sk 2 st, ws [(sc, ch 1, dc) all in same st] in the next st, *sk 2 st, ws in next st. Repeat from * until the last 3 st. sk 2 st, sc in last st. Ch 1 and turn. (1 ch-1, 1 sc & 14 ws)
R3: ws in each ch-1 sp across until last 2 st. sk 1 st, sc in last st (which will be the ch 1 from the previous row). Ch 1 and turn. (1 ch-1, 1 sc & 14 ws)
R4: Repeat R3 until you reach your desired height or until the piece measures 2-2.5” being sure to end with an odd row.
Last Row: ch 1 and turn. sc in the first stitch and each stitch across. (44 sc)
Border:
1st Side (shorter side): Turn your work to go down the side. sc evenly down each end post until you come to the last st. (sc, ch 1, sc) all in the last st.
Bottom (longer side): Turn your work to work across the bottom. sc evenly in each foundation chain until you come to the last st. (sc, ch 1, sc) all in the last st.
2nd Side (shorter side): Turn your work to go up the side. sc evenly up each end post until you come to the 1st st of the top. (ch 1, sc) all in the 1st st of top. sl st in 1st st to join.
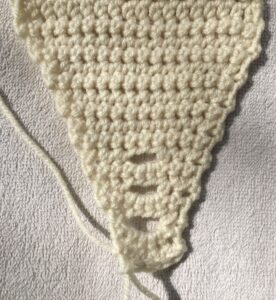
Fasten off leaving a long tail to close the side of the headband closed. If you would like to create a smaller closer, leave a longer tail of yarn to wrap multiple times around your closure seam. See image below.
Closing instructions:
With RS facing RS, match together the sc row to the fsc row, sew together the side of the headband using the running stitch or whichever stitch you prefer.
I hope you loved using the Wattle Stitch while making this headband as much as I did!
In today’s post I’d like to share with you the Ribbon Ear Warmers Free Crochet Pattern. It is called Ribbon because the ear warmers design used a version of the Rib Stitch or Waffle Stitch.
This post contains affiliate links. You can make a purchase using these links that I provide where I may receive compensation (at no added cost to you.) Purchases you make will help keep my website, Etsy Shop, and my Ravelry Store going and provide quality designs just for you!
You can find my Ribbon Ear Warmers in the Crochet Flower Roundup. You can find crocheted flowers from 10 other crochet designers on my website. You will find either free or paid patterns from these 10 designers. Click on the image below and you will be directed to the Crochet Flower Roundup!
In this pattern you will find left handed video and picture tutorials to go along with this pattern. I even designed the flower that is attached to my version of my pattern. I hope you enjoy it!
**If you like what you have read here, be sure to sign up for my Newsletter. You will be notified the next time I release a post, have a crochet pattern sale or giveaway, and more. Sign up below.**
[yikes-mailchimp form=”1″]
Now, let’s get started!
Finished Ribbon Ear Warmers
Materials:
US Hook I/5.50 mm US Hook H/5 mm 150 yards of 5 ply Bulky Yarn 25 yards of 4 ply Worsted Weight Yarn 1 inch Button Scissors Tapestry Needle
Size:
5” Height
21.5”-22.5” Length
Gauge: US Hook I/5.50 mm
4 HDC x 2 Rows = 1 inch
Abbreviations: CH = Chain SL ST = Slip Stitch SC = Single Crochet SC2TOG = Single Crochet 2 Together FPDC = Front Post Double Crochet BPDC = Back Post Double Crochet WS = Waffle Stitch
Notes: Ch 1 does NOT count as a stitch
Ch 2 does NOT count as a stitch
SC2TOG instructions on YouTube here.
FPDC & BPDC instructions on YouTube here.
Special Stitches: Front Post Double Crochet – Double Crochet going around the Front Post of the DC in the Previous Row. Back Post Double Crochet – Double Crochet going around the Back of the DC in the Previous Row. SC2TOG – Crochet 2 single crochets together. Waffle Stitch – Alternating FPDC and BPDC
R2: ch 1, 2 sc in 1st st, sc, 2 sc in last st. (5 sc) Turn
R3: ch 1, sc across. (5 sc) Turn
R4: ch 1, 2 sc in 1st st, sc in next 3 st, 2 sc in last st. (7 sc) Turn
R5: ch 1, sc across. (7 sc) Turn
R6: ch 1, 2 hdc in 1st st, hdc in next 5 st, 2 hdc in last st. (9 sc) Turn
R7: ch 1, sc across. (9 sc) Turn
R8: ch 1, 2 hdc in 1st st, hdc in next 7 st, 2 hdc in last st. (11 sc) Turn
R9: ch 1, sc across. (11 sc) Turn
R10: ch 1, 2 hdc in 1st st, hdc in next 9 st, 2 hdc in last st. (13 sc) Turn
R11: ch 1, sc across. (13 sc) Turn
R12: ch 1, 2 hdc in 1st st, hdc in next 11 st, 2 hdc in last st. (15 sc) Turn
R13: ch 1, sc across. (15 sc) Turn
R14: ch 1, 2 hdc in 1st st, hdc in next 13 st, 2 hdc in last st. (17 sc) Turn
R15: ch 1, sc across. (17 sc) Turn
R16: ch 1, 2 hdc in 1st st, hdc in next 15 st, 2 hdc in last st. (19 sc) Turn
R17: ch 1, sc across. (19 sc) Turn
Should Measure 5 inches before R18.
R18: ch 1, hdc in each st across. Turn (19 hdc)
R19: ch 1, dc in each st across. Turn (19 dc)
R20: ch 2, dc in first 2 st, *fpdc in next st, bpdc in next st (Waffle Stitch made)* Repeat from * to * across to last 2 st, dc in last 2 dc. Turn (19 st)
R21: ch 2, dc in first 2 st, *alernate WS from previous Row.* Repeat from * to * across to last 2 st, dc in last 2 dc. Turn (19)
Repeat Waffle Stitch in R20-21 or until the Waffle Stitch measures 11.5 inches. End with R21.
Ribbed Stitches should measure 11.5 inches from R18.
Decrease Rows R1: ch 1, dc in each st across. Turn (19 dc)
R2: ch 1, hdc in each st across. Turn (19 hdc)
R3: ch 1, sc in each st across. Turn (19 sc)
R4: ch 1, sc2tog, sc in next 15 st, sc2tog. Turn (15 sc + 2 sc2tog)
R5: ch 1, sc in each st across. Turn (17 sc)
Making of Button Holes
R6: ch 1, sc2tog, sc in next 13 st, sc2tog. Turn (13 sc + 2 sc2tog)
R7: ch 1, sc in each st across. Turn (15 sc)
R8: ch 1, sc2tog, sc in next 11 st, sc2tog. Turn (11 sc + 2 sc2tog)R9: ch 1, sc in each st across. Turn (13 sc)
R9: ch 1, sc2tog, sc in next 9 st, sc2tog. Turn (9 sc + 2 sc2tog)
R10: ch 1, sc in each st across. Turn (11 sc)
R11: ch 1, sc2tog, sc in next 2 st, ch 3, sk 3 st, sc in next 2, sc2tog. Turn (4 sc + 2 sc2tog + ch 3)
R12: ch 1, sc in next 3 st, place 3 sc across ch 3, and sc in last 3 st. Turn (9 sc)
R13: ch 1, sc2tog, sc in next sc, ch 3, sk 3 st, sc in next sc, sc2tog. Turn (2 sc + 2 sc2tog + ch 3)
R14: ch 1, sc in next 2 sc, place 3 sc across ch 3, sc in last 2 sc. Turn (7 sc)
R16: ch 1, sc in 1st sc, sc across ch 3, sc in last sc. Turn (5 sc)
R17: ch 1, sc across. (5 sc) Do NOT turn
Should measure 5 inches from the body of the ear warmers when finished.
Border
Ch 1, sc in each end row and stitch evenly around the ear warmers. sl st in 1st sc made.
Fasten off and weave in ends with Tapestry Needle.
Sew a button onto R2-R3 at beginning of Ear Warmers, being sure to line up with Button Holes made at R6-R18 of Decrease Rows
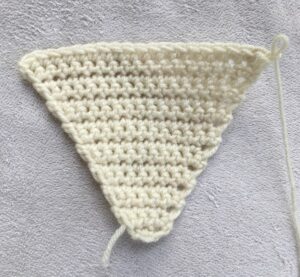
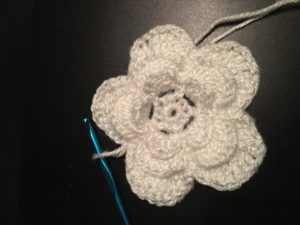
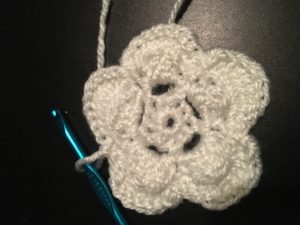
Below you will find a crochet pattern for a Flower. You can attach it to the Ear Warmers or leave it off, it is up to you.
Ear Warmers before Button
Ribbon Ear Warmers Flower Pattern
Finished Flower
Materials: US Hook H/5.00 mm 25 yards of 4 ply Worsted Weight Yarn 1 inch Button Scissors Tapestry Needle
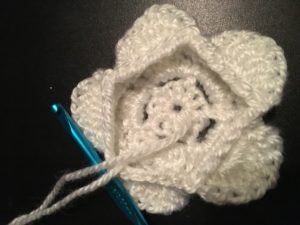
1st Layer of Flower
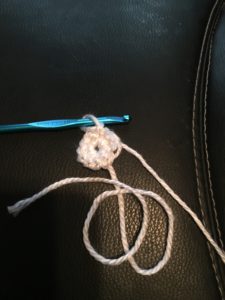
R1: Make a Slip Knot, leaving a long tail for attaching to Ear Warmers. Ch 1, 10 sc in the ch 1 loop, ss in 1st sc to join. 10 sc
10 sc in ch 2 space
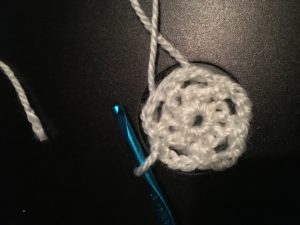
R2: ch1, sc in the same stitch, *ch 3, skip the next stitch, sc in the next st* Repeat from * to * until you have 5 Ch 3 spaces, ss into 1st sc. You will work in the ch 3 loops in R3.
5 ch 3 spaces
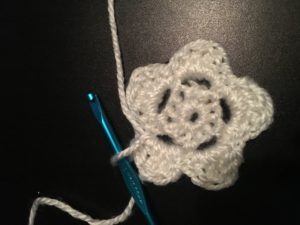
R3: *sc in ch 3, hdc, 2 dc, hdc, sc in the ch 3 space* Repeat from * to * until you have 5 petals. Ss in sc to join.
5 White Petals
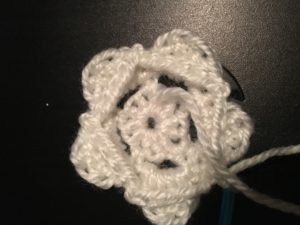
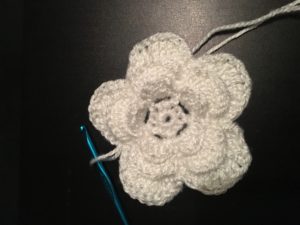
2nd layer of flower
R4: Ch 5, *sc in 1st sc on next petal, ch 5* Repeat from * to * until you have 5 chain 5 spaces. Ss in 1st ch 5 space.
5 ch 5 spaces
R5: *ch 1, *sc, 2 hdc, 5 dc, 2 hdc, sc in the chain 5.* Repeat from * to * until you have 5 petals. Ss in 1st sc.
2nd Layer Petals
3rd layer of flower
R6: ch 1 *ss in 1st sc of petal, ch 6* Repeat from * to * until you have 5 ch 6 spaces. Ss in 1st ch 6 to join.
5 ch 6 spaces
R7: ch 1 *sc, 1 hdc, 2 dc, 7 tc, 2 dc, 1 hdc, sc in the chain 6 space.* (1st petal made) Repeat from * to * until you have 5 petals. Ss in 1st sc to join. Leave a long tail for attaching to Ear Warmers.
3rd Layer Petals
Leave a long tail for attaching to Ribbon Ear Warmers. Fasten Off.
Attach Flower to Ribbon Ear Warmers.
Sew 1″ Button to the starting end of the ear warmers.
Thank you for your interest in the Ribbon Ear Warmers Crochet Pattern! If you haven’t already, be sure to sign up for my Newsletter! I have so much more I want to share with you! Please sign up below.
[yikes-mailchimp form=”1″]
You can find all of the crochet patterns at any of the locations below:
If you would like to make a donation to Jo’s Crafty Hook and help me with the costs of running my website, crocheting new designs I would greatly appreciate it!
From the Designer:
While you are at my website be sure to subscribe to my Newsletter. This way you will be notified when I release another crochet pattern or blog post and be alerted to Sales, Coupons, and more! Also be sure to subscribe to my new YouTube Channel to receive alerts when I upload a new Video Tutorial here!
[yikes-mailchimp form=”1″]
If you have any questions or concerns about the Ribbon Ear Warmer Crochet Pattern or any other pattern please email me at jo@joscraftyhook.com. You will find my other crochet patterns here at my website. I just posted a couple of my new crochet pattern designs, you will find them under Free Crochet Patterns.
You are free to sell or gift the Ribbon Ear Warmers. If you sell them please reference me as the designer and where you found the Ribbon Ear Warmers Crochet Pattern. If they would like to crochet the pattern themselves, please refer them back to my here website.
You can find all of the crochet patterns at any of the locations below:Ravelry Lovecraft EtsyEvery purchase of my patterns helps! The money earned allows me to buy more yarn so I can create and design more Handmade Crocheted Creations and crochet patterns for you to enjoy.
I would LOVE to see your version of my Ear Warmers! You can “Hook It” at the Ravelry Store under Jo’s Crafty Hook Designs here. You can also post your version at any of my Social Media sites listed above! If you share your version please use the hashtag #ribbonearwarmers or #ribbonheadband #twistedearwarmers or #jostwisted. Thank you!
Comments, Questions, and Feedback are always welcome here at my website or at any of my Social Media Sites.