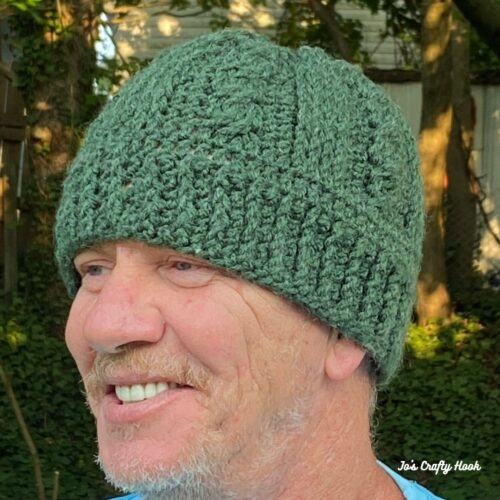
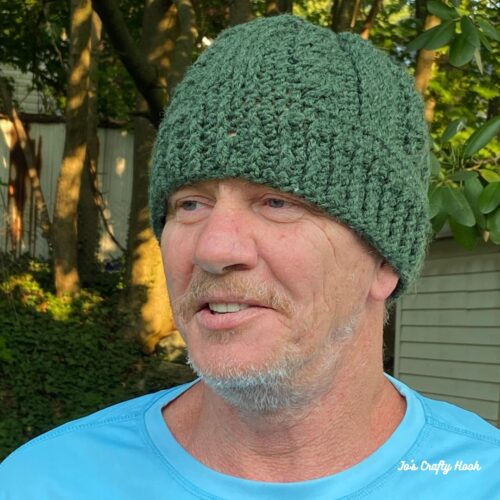
Jimmy Beanie Crochet Pattern
If you love to do the Cable Stitch or you would love to learn how, then my Jimmy Beanie is the perfect crochet pattern for you! This pattern is named after my hubby Jim, but it is also a perfect Unisex Beanie.
This post contains affiliate links that help me raise money to allow me to share more information with you.
**While you are here why not sign up for my Newsletter by using the Subscribe button in the Right Hand Corner**
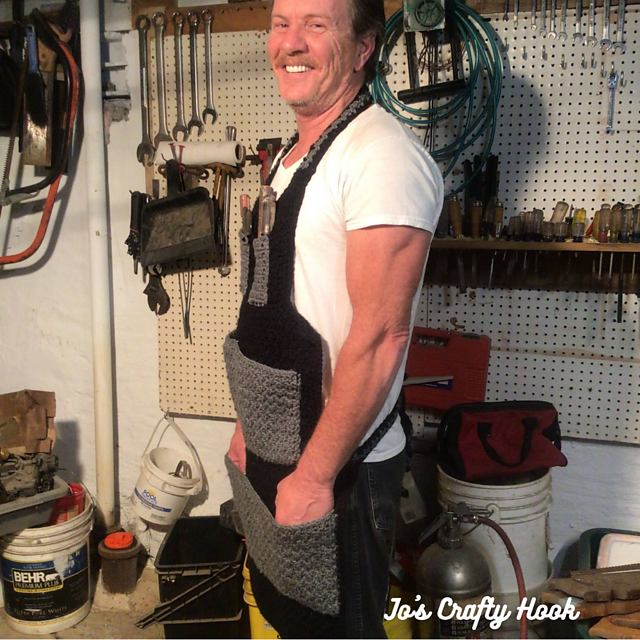
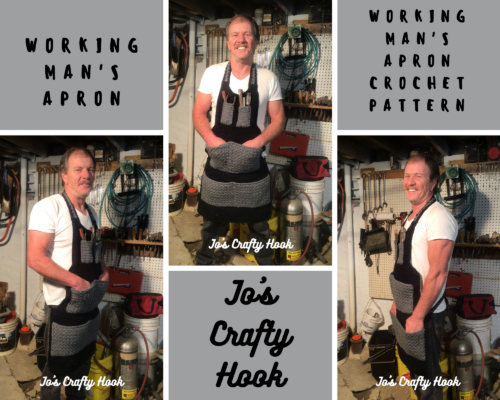
Just for Him Blog Hop & Bundle
Do you have a hard time finding crochet patterns that are made just for men? Maybe you see a lot of crochet patterns that you think would work, but you are unsure how they would look like on him.
Well, Michelle of Two Brothers Blanket and Helen of Sunflower Cottage Crochet has put together and Blog Hop and Bundle Sale with crochet patterns that are designed especially for Him!
Starting September 1-21, 2023 you can take advantage of daily FREE crochet patterns in the Just for Him Blog Hop using the Button below.

OR
Starting September 1-21, 2023 you can purchase a copy of the Just for Him Crochet Pattern Bundle for $14.99 with 21 premium crochet patterns all in one place! Click on the button below and check it out!

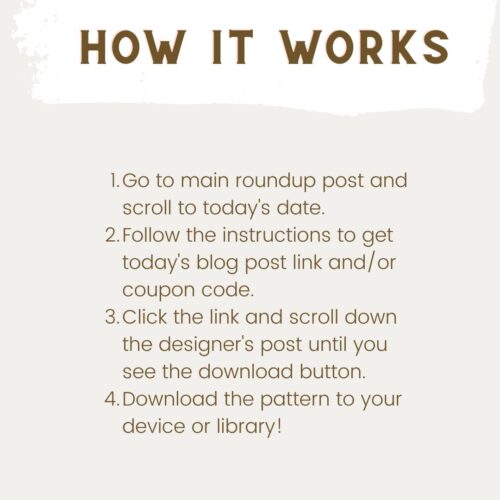
On September 3, 2023 starting at 6a EST until September 4, 2023 6a EST you can get a FREE pdf of the Jimmy Beanie Crochet Pattern.
Visit the Just for Him Blog Hop using the Button below to get the Coupon Code needed to download your FREE pdf from my Ravelry Store.

Once you have the Coupon Code, click on the Button below to add it to your Ravelry Cart, use the code, checkout. That’s it!

Be sure to stop back by the Just for Him Blog Hop daily, starting at 6a EST for each day’s FREE crochet pattern!
Information Needed to Crochet the Jimmy Beanie
Materials:
US H or 5 mm Crochet Hook
US I or 5.5 mm Crochet Hook
75-200 yds of #4 ply Worsted/Aran Weight Yarn
Scissors
Tapestry Needle
Stitch Marker
Abbreviations/Stitches Used:
ch = chain
st = stitch(es)
sc = single crochet
dc = double crochet
fpdc = front post double crochet
bpdc = back post double crochet
fptrc = front post triple crochet
alt ch 2 = alternate ch 2 or alternate turning chain
dc2tog = double crochet 2 together
sk = skip
rep = repeat
SM = Stitch Marker
Special Stitches:
Double Crochet 2 Together – decreasing 2 dc into 1 dc
Alternate Chain 2 – takes the place of a double crochet and creates a nice closed stitch
Front Post Double Crochet – double crochet going around the front post of the dc in the previous row.
Back Post Double Crochet – double crochet going around the back post of the dc in the previous row..
Front Post Triple Crochet
* YO twice, Insert hook behind post indicated st
* YO, pull up a loop (4 loops on hook)
* YO, pull through 2 loops (3 loops on hook)
* YO, pull through 2 loops (2 loops on hook)
* YO, pull through last 2 loops on hook
Left Hand Video Tutorials: Right Hand Video Tutorials:
alternate ch 2 or alternate turning chain alternate chain 2 or alternate turning chain
front post double crochet front post double crochet
back post double crochet back post double crochet
front post triple crochet front post triple crochet
double crochet 2 together double crochet 2 together
invisible join invisible join
Notes:
ch 3 counts as a dc
alt ch 2 counts as a dc
the beanie is worked in the round
the beanie the invisible join in the round
place a SM in 1st st of each round of beanie
Special Notes:
st count is a multiple of 12
2-4 yrs, 5-10 yrs, Teen, Sm Adult, Large Adult consecutively
Hat Band Circumference: 16” (17” 19” 20” 21”)
Gauge:
US I or 5.5 mm Crochet Hook
16 dc x 8 rows = 4”
Gauge Swatch:
R1: ch 18, dc in 4th ch from hook, dc across. (16 dc)
R2-R8: ch 3, dc across. (16 dc)
Size Chart
|
Size |
Height |
Circumference |
Crown Width |
|
2 years – 4 years |
6.5” – 6.75” |
16” -17” |
5” – 5.5” |
|
5 years – 10 years |
6.75” – 7.5” |
17” – 19” |
5.5” – 6” |
|
Teenager |
7.5” – 8” |
19” – 20” |
6” – 6.25” |
|
Small Adult |
8” – 8.5” |
20” – 21” |
6.25” – 6.75” |
|
Large Adult |
9” – 9.5” |
21” – 22” |
6.75” – 7” |
Jimmy Beanie Crochet Pattern

Band
2-4 yr, 5-10 yr, Teen, Sm & Large Adult
Using H or 5 mm Hook
**Note: be sure to place SM in 1st st of each round**
R1: fdc 60 (60, 60, 72, 84) Do NOT join.
R2: dc in 1st st, fpdc in the next st *dc in the next st, fpdc in the next st* rep from * around. Do NOT join. (60, 60, 60, 72, 84) st
2-4 yrs
R3-R4: dc in each dc and fpdc in each fpdc. (60, 60, 60, 72, 84) st
Remaining Sizes
R3-R5: dc in each dc and fpdc in each fpdc. (60, 60, 60, 72, 84) st
Do not fasten off
Beanie
Switch to I or 5.5 mm Crochet Hook
**Note: be sure to place SM in 1st st of each round**
Place a SM in 1st st of each round of beanie.
R1-R2: dc in each st around. (60, 60, 72, 84) dc
R3: fpdc in next 2 st, dc in next 2 st, sk 2 st, fptrc in the next 2 st, fptrc in 2 sk st, dc in next 2 st. *fpdc in next 4 st. dc in next 2 st, skip 2 st, fptrc in the next 2 st, fptrc in 2 sk st. dc in next 2 st. rep from * around until last 2 st. fpdc in last 2 st.. (60, 60, 72, 84) st
R4: fpdc in next 2 st, dc in next 2 st, fpdc in next 4 st, dc in next 2 st. *fpdc in next 4 st, dc in next 2 st. rep from * around until last 2 st. fpdc in last 2 st. (60, 60, 60, 72, 84) st
rep R3-R4 ending with R7 until beanie measures 6.5” 7” 7” 7.5” 8” or until you reach your desired height.
Crown
R1: fpdc in next 2 st, dc2tog, sk 2 st, fptrc in the next 2 st, fptrc in 2 sk st, dc2tog. *fpdc in next 4 st. dc2tog, skip 2 st, fptrc in the next 2 st, fptrc in 2 sk st. dc2tog next 2 st. rep from * around until last 2 st. fpdc in last 2 st.. (48, 48, 48, 60, 72) st
R2: fpdc in next 2 st, dc in next st, fpdc in next 4 st, dc in the next st, fpdc in the next st, dc in next st. rep from * until last 2 st. pdc2tog, rep from * around. (48, 48, 48, 60, 72) st
R3: dc2tog, *dc in the next st, skip 2 st, fptrc in the next 2 st, fptrc in 2 sk st, dc in the next st, dc2tog twice. rep from * around until last 2 st. dc2tog. sl st in 1st st to join. (38, 38, 38, 50, 62) st
Do NOT fasten off.
Leave a long tail, weave the crown closed.
**If you are wanting a Messy Bun Hat instead of a Beanie, do NOT use a long tail to weave in the ends. The beanie can be left open here to make a Messy Bun Hat.**
Fasten off and weave in ends.
Sewing Crown Closed
Step 1:
Using your long tail of yarn, weave yarn in each st around the top of the beanie.
Step 2:
Once you have come back to where you started, pull the yarn tight to close the crown.
Fasten off and weave in ends.
That’s it! You have made your own version of the Jimmy Beanie!
I would LOVE to see your finished version! Share your pics with me at any of my social media sites above using the hashtags below. You can find all of my social media sites at the beginning of the pattern.
@joscraftyhook @joeyleabaird @jo_bear38 or at my FB Group Jo’s Crafty Hook Designs
You can find some of my free crochet patterns at my website.
You can also find more of my premium crochet patterns at my Ravelry Store and LoveCrafts or Etsy.
Find me, Jo of Jo’s Crafty Hook at the places listed below.
Email: j.o@joscraftyhook.com
Facebook Group Jo’s Crafty Hookers
Facebook Group Jo’s Crafty Hook Designs
Facebook Page Jo’s Crafty Hook
Facebook Page: Crochet Designer Community
![]()