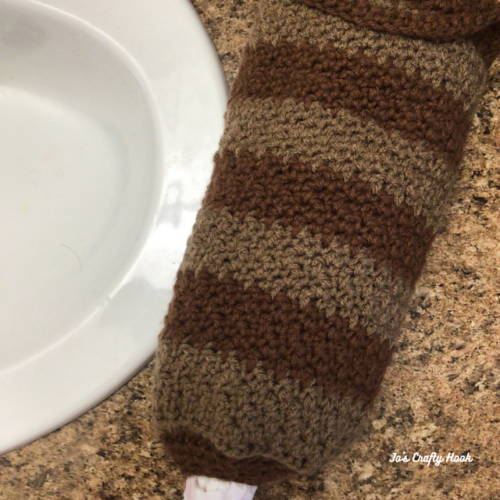
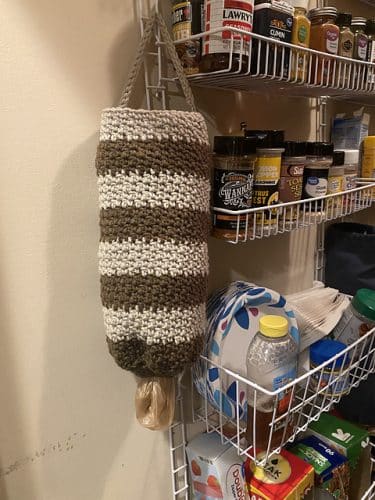
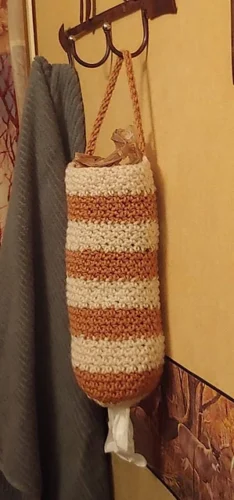
Guy’s Drawstring Bag Free Crochet Pattern

Guy’s Drawstring Gift Bag Free Crochet Pattern

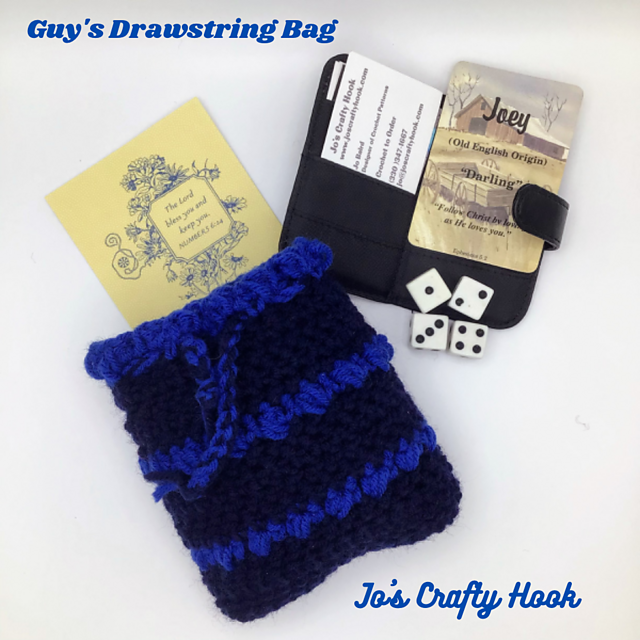
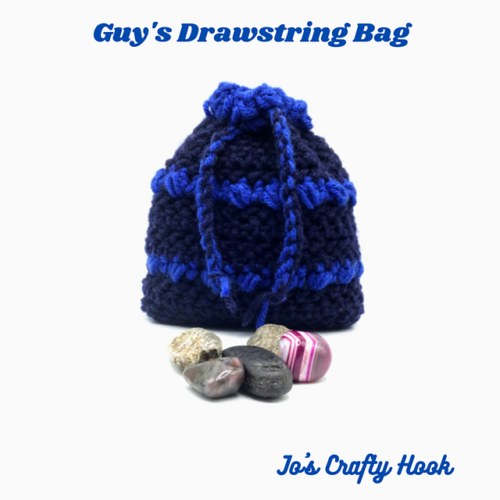
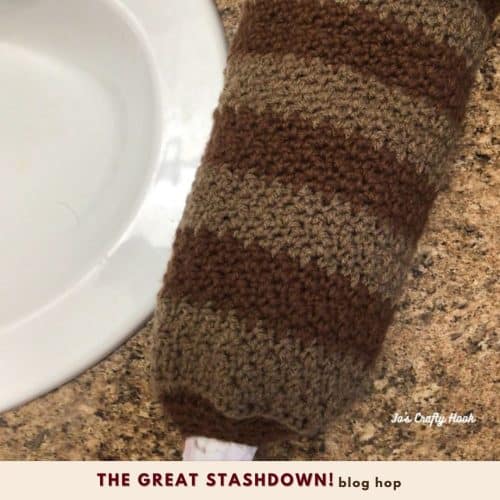
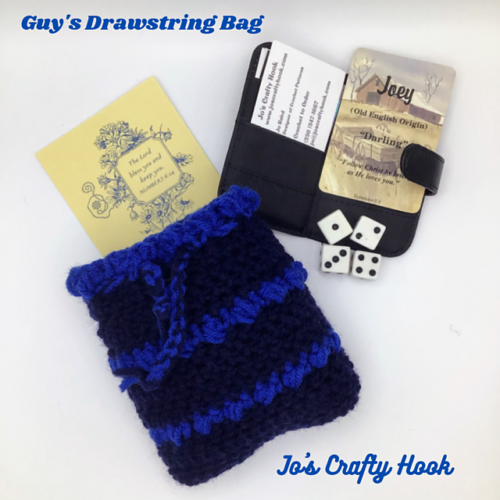
In today’s post you will find the Guy’s Drawstring Bag Free Crochet Pattern.  Have you ever wondered what those guys in your life do with the little things they collect??  

While you are there be sure to sign up for my Newsletter by clicking of the Subscribe button in the right hand corner.  You will receive news about my New Crochet Pattern Releases, Collaborations, and MORE!  For signing up you will also get a FREE crochet pattern!

This post contains affiliate links.  If you make a purchase using these links I may receive compensation (at no added cost to you.)

With Father’s Day right around the corner, this would make the perfect gift for him to store his collectibles.  This crochet pattern doesn’t have to made just for the guys, it can be made for the girls as well!

The Guy’s Drawstring Bag would make a perfect gift for Birthdays, Christmas & the Holidays or just because.

You can get an Ad-Free Premium Copy of the Guy’s Drawstring Gift Bag with Step-by-Step Picture Tutorials and my Left Handed Video Tutorial for the Herringbone Half Double Crochet at my Ravelry Store or LoveCrafts or my Etsy Shop for a small fee.

*******************************************

Information Needed to crochet the bag:

I used Joann Big Twist (6 oz/380 yd)

Materials:
40 yds MC 4 ply Worsted Weight/Aran Weight Yarn
20 yds CC 4 ply Worsted Weight/Aran Weight Yarn
US H Crochet Hook or 5 mm
Scissors
Tapestry Needle
Stitch Markers

Stitches Used/Abbreviations:
st – stitch
ch = chain
sl st = slip stitch
sc = single crochet
hbhdc = herringbone half double crochet
bs = bean stitch
MC = Main Color
CC = Contrasting Color
SM = Stitch Marker
RS = Right Side
WS = Wrong Side

Notes:
The bag is worked in the round from the bottom up with turning rows.

Using a SM will help you keep track of where you start and end the specific rows.

If you do not like to fasten off when changing colors, you can carry the colors on the inside of the bag.

Special Stitches:
Bean Stitch – insert your hook into the stitch, pull up a loop *yarn over insert your hook into the same stitch, yarn over and pull up a loop.  Rep from * once more.  You will have 6 loops on your hook.  Yarn over and pull through all 6 loops.

My Left Handed Video Tutorial for the Herringbone Half Double Crochet can be found on my YouTube Channel.


My Left Handed Herringbone Half Double Crochet


Size:  4” x 5”

Gauge:
US H or 5 mm Crochet Hook
16 hbhdc x 8 rows = 4”


************************************************

Guy’s Drawstring Bag Free Crochet Pattern:


Guy’s Drawstring Bag Ad-Free Premium Crochet Pattern

You can get an Ad-Free Premium Copy of the Guy’s Drawstring Gift Bag with Step-by-Step Picture Tutorials and my Left Handed Video Tutorial for the Herringbone Half Double Crochet at my Ravelry Store or LoveCrafts or my Etsy Shop for a small fee.


Starting with MC

You will be working on both sides of the starting chain.

Starting Chain

ch 13, 2 sc in the 2nd ch from hook, 2 sc in next st, sc in next 8 st, 2 sc in the next 2 st.  continuing around the ch, 2 sc in the next 2 st, sc in the next 8 st, 2 sc in the last 2 st.  place a SM in the last st.  sl st in 1st st to join.  (32 sc)

R1-R4: ch 1 and turn.  hbhdc in next st (where you placed your SM) and each remaining st around.  place SM in the last st.  sl st in 1st st to join.  (32 hbhdc)  R4 will be the RS.

Fasten off and weave in ends or carry your color up the inside of the bag.


Change to CC

R5:  Attach yarn in the 1st st on the RS of the previous row.  ch 1 and sc in same st *bs in the next st, sc in the next st.  rep from * until last st, bs in the last st.  place SM in last st.  sl st in 1st to join.  (32 st)

Fasten off and weave in ends or carry your color up the inside of the bag.


Change to MC


R6:  turnattach yarn in the SM of the previous row on the WS.  ch 1, hbhdc in the next st and each rem st around. place SM in last st.  sl st in 1st st to join.  (32 hbhdc)

R7-R8:  ch 1 and turn.  hbhdc in st with SM and each st around.  place SM in last st.  sl st in 1st to join.  (32 hbhdc)

Fasten off and weave in ends or carry your color up the inside of the bag.


Change to CC

R9:  turn.  attach yarn in the same st as join, on the WS of the previous row.  ch 1 and sc in same st *bs in the next st, sc in the next st.  rep from * until last st, bs in the last st.  place SM in last st.  sl st in 1st to join.  (32 st)

Fasten off and weave in ends or carry your color up the inside of the bag.


Change to MC


R10:  do not turnattach yarn in the last st of the previous row on the RS.  ch 1, hbhdc in the next st and each rem st around.  Place SM in last st.  sl st in 1st st to join.  (32 hbhdc)

R11-R12:  ch 1 and turn. hbhdc in st with SM and each st around.  place SM in last st.  sl st in 1st to join.  (32 hbhdc)

Fasten off and weave in ends or carry your color up the inside of the bag.


Change to CC

R13:  turn.  attach yarn in the same st as join, on the WS of previous row.  ch 1, sc in same st, *ch 1, sk st and sc in next st.  rep from * until the last st, ch 1.  sl st in 1st st st join.

**ch-1 counts as a st**

R14:  do not turn.  ch 1, sc in same st, *bs in ch-1 sp, sc in next st. rep from * until last st, bs in the last st.  sl st in 1st st to join.  place a SM in last st.  (32 st)

Fasten off and weave in ends.

************************************************

Drawstring
Can be made with the color(s) of your choice.

Using MC and CC

Leave a 4-6” tail of yarn for knots and ch 40.  Leave a 4-6” tail of yarn at the end of your ch for knots.


Fasten off and weave in ends.

************************************************


Drawstring Assembly:

Step 1:
Place SM in the last st of R14.

Step 2:
Lay the bag flat.  count over 4 bs.

Step 3:
Place SM in the ch-1 sp under the 4th bs and the 5th ch-1 sp under the bs. 

Step 4:
Start weaving your drawstring in the 3rd SM.  weave the drawstring around, ending in the 2nd SM.

Step 5:
Tie off by placing knots at the end of the chain.

Step 6:
Trim your long tails to the same size.

Fasten off and weave in ends.


************************************************


While you are there be sure to sign up for my Newsletter by clicking of the Subscribe button in the right hand corner.  You will receive news about my New Crochet Pattern Releases, Collaborations, and MORE!  For signing up you will also get a FREE crochet pattern!

Some of my crochet patterns can be found FREE on my website.

Also, you will find some of my Premium crochet patterns , by visiting any of my stores, by clicking on any of the Buttons below.


Custom Orders Welcome

If you would like me to crochet any of my designs for you or others, I do take Custom Orders.  Visit my Ravelry Store or LoveCrafts or my Etsy Shop to see some ideas of what you would like to Custom Order.  You can email me with your order or any other questions at j.o@joscraftyhook.com.

Find me, Jo of Jo’s Crafty Hook at the places listed below.

Email:  j.o@joscraftyhook.com

Website

Linktree

Facebook Group Jo’s Crafty Hookers

Facebook Group Jo’s Crafty Hook Designs

Facebook Page Jo’s Crafty Hook

Facebook Page:  Crochet Designer Community

Ravelry

LoveCrafts

Etsy

Instagram

YouTube

Pinterest

Donations Accepted


Loading

Mae’s Flower Garden Afghan Crochet Pattern

Mae’s Flower Garden Afghan Crochet Pattern

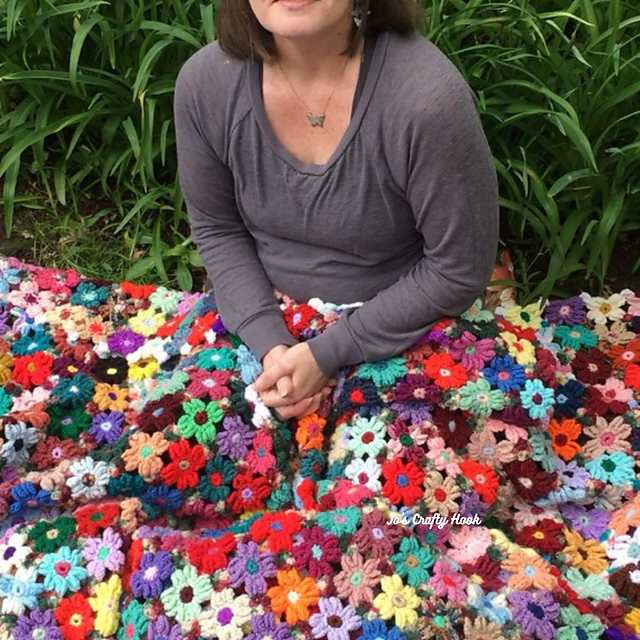
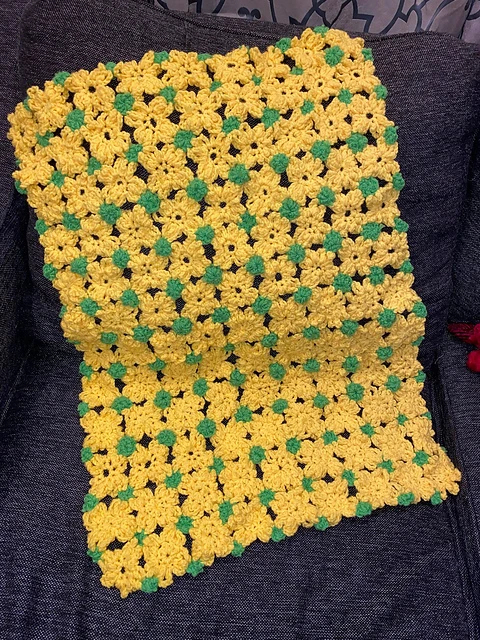
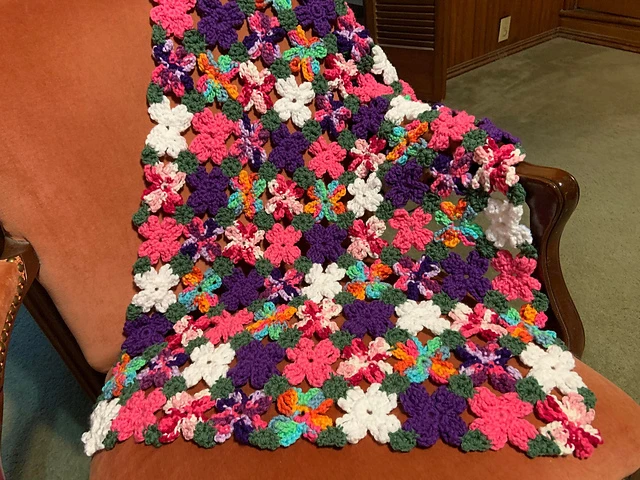
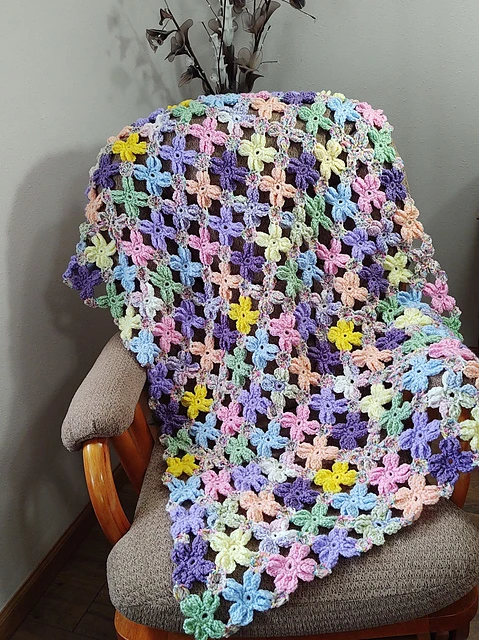
You can create your own beautiful blanket using the Mae’s Flower Garden Afghan Crochet Pattern.  This is a great scrap busting project!

Thank you for your interest in my Mae’s Flowers Crochet Pattern.  This is a project that has been in the works for over 25 years.  My gram started making these flowers for an Afghan back in 1994.  I inherited the Afghan when she passed away about 20 years ago.  It moved from house to house, taken out every once in a while, and I always said I was going to finish it and I have.

I decided I would write out the steps she did and turn it into a crochet pattern.  I took the flowers apart to learn the stitches she used, so I could make my own.  This pattern is dedicated to Gram.  She was a very important part of my life.   I hope you enjoy making the Mae’s Flowers too!  


The afghan can be made in a solid color or a variety of colors as you like.  The flowers use such a small amount of yarn that you can use up ALL of that Scrap Yarn you have laying around!

You can find the premium copy of the Mae’s Flower Garden Crochet Pattern for $5 at my Ravelry Store.  Inside the PDF copy of the Mae’s Flower Garden Afghan crochet pattern there are a lot of extra goodies for Right & Left Handed crocheters.

  • 2 Sizes to Choose from – Throw or Lapghan
  • Step-by-Step Picture Tutorials
  • Video Tutorials of Flowers and Assembly


Crochet Pattern Details

I used a variety of yarns in a variety of colors.  The Mae’s Flowers can be made in solid or contrasting colors.  This crochet pattern is a great way to use up your scrap yarn.

Materials:
2-4 yds of 4 ply Worsted/Aran Weight Yarn
US H Crochet Hook or 5mm
Tapestry Needle
Scissors

Abbreviations/Stitches Used:
sc = single crochet
dc = double crochet
ch = chain
st = stitch
sl st = slip stitch
sp = space
rep = repeat
RS = Right Side

Flower Size: 3” x 3”
Flowers Needed:  176

Throw Afghan Size:  48″ x 60″


Notes:
It would be a great idea to weave in your ends as you go.  If you do not, you will spend a long time weaving them in after the afghan is complete

Mae’s Flower Video Tutorial

Mae’s Flower Free Crochet Pattern
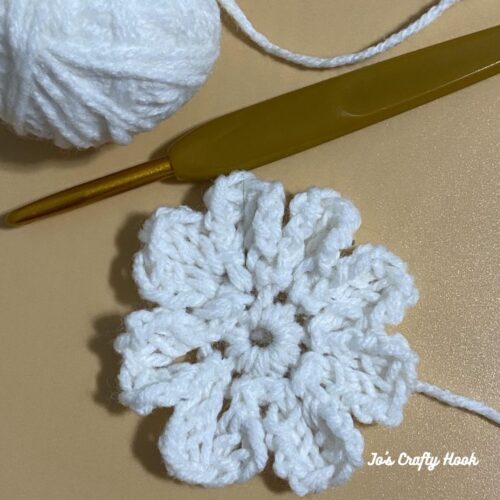
Mae’s Flower

R1: make a loose slip knot or a magic circle, ch 2, 8 sc in ch 1 or magic circle.  sl st in 1st sc to join.

R2:  ch 4, dc in ch 1 just made , ch 4, dc in 2nd ch 1 made, sl st in same sc.  *sl st in next sc, ch 4, dc in ch 1 just made, ch 4, dc in 2nd ch 1, sl st in same sc.  rep from * around.  sl st in 1st st to join.

Rep R2 until you have 8 flower petals.

Fasten off and weave in ends.

Continue these steps until you have 180 flowers

************************************************

Border Pieces

ch 1, 4 dc in ch-1 sp.  sl st in 1st dc to join.  4 dc

Fasten off and weave in ends.

rep until you have 50 Edgers.

Connection Pieces

ch 1, 8 dc in ch-1 sp.  sl st in 1st dc to join.  8 dc

Fasten off and weave in ends.

rep until you have 180 Connectors.

************************************************
The Mae’s Flower Garden Afghan Assembly

The assembly of the afghan is simple, but it is better explained in my Assembly Instructions Video Tutorial found on my YouTube Channel.


You can purchase the premiun copy of the Mae’s Flower Garden Afghan Crochet Pattern for $5 at my Ravelry Store.  

Inside the premium copy of the Mae’s Flower Garden Afghan crochet pattern there are a lot of extra goodies.  You get:

  • 2 Sizes to Choose from – Throw or Lapghan
  • Step-by-Step Picture Tutorials
  • Video Tutorials of Flowers and Assembly
Shop my Stores

Ravelry
Lovecraft
Etsy

Find me, Jo of Jo’s Crafty Hook at the places listed below.

Email:  jo@joscraftyhook.com
LinkTree

Website

Facebook Group Jo’s Crafty Hookers

Facebook Group Jo’s Crafty Hook Designs

Facebook Page Jo’s Crafty Hook

Facebook Page:  Crochet Designer Community

Ravelry

LoveCrafts

Etsy

Instagram

YouTube

Pinterest

 Donations Accepted

Loading

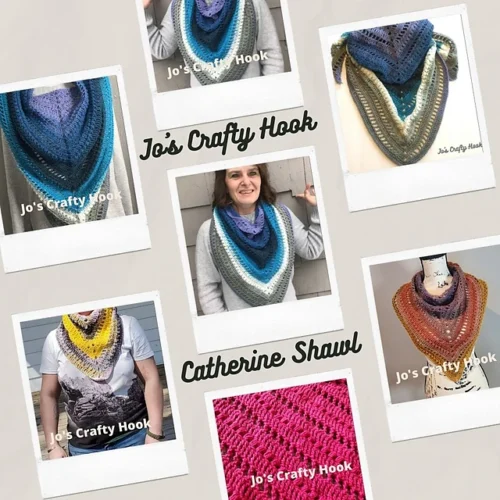
Catherine Shawl Free Crochet Pattern

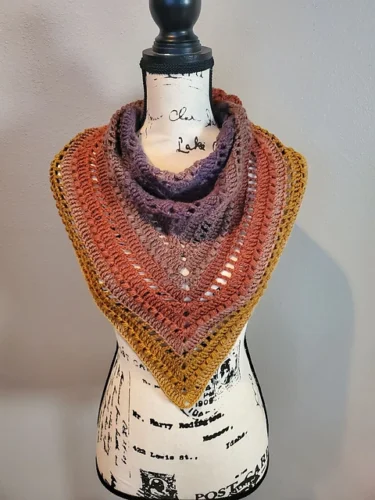
The Catherine Shawl Free Crochet Pattern is a new crochet pattern I want to share with you.  With Mother’s Day right around the corner the Catherine Shawl would be GREAT for Mother’s Day.  This shawl would also be a great make for any season!

This post contains affiliate links.  If you make a purchase using these links I may receive compensation (at no added cost to you.)


I have been wanting to design a triangle shawl for a long time, but it always intimidated me.  I came across some old pictures of a triangle shawl in my Memories on Facebook.  I told myself “self, you have done this before so you can do it now!”  One of my friends on Facebook saw my old pictures and told me the shawl would be a perfect Mother’s Day.  So I named the shawl after her, Catherine. 
If you have ANY questions please email me at j.o@joscraftyhook.com.

Below you will find the Catherine Shawl Free Crochet Pattern.  Inside this pattern there are helpful Video Tutorials to help you with the Puff Stitch.

********************************************************

I used 700 yards of #3 ply or DK Lightweight Yarn.  I used Lion Brand Mandala Yarn.  ( 6 oz/380 yds)

Materials:
650-700 yds of 3 ply Lightweight or DK Weight Yarn
US F Hook or 3.75 mm
Tapestry Needle
Scissors

Abbreviations:
trc = triple crochet
sp = space
ch = chain
ps = puff stitch
alt ch 3 = alternate chain 3

Notes:
The shawl is worked in rows.
Alternate Chain 3 counts as a stitch.
You can substitute a chain 4 in place of the Alternate Chain 3.
Every row will increase.

Gauge:
US F Hook or 3.75mm
16 st  x 4 Rows = 4”

Special Stitches:
Puff Stitch – yarn over, Insert hook into the next stitch, *yarn over and pull up a loop, insert the hook into the same st* rep from *to* for a total of 4 times. You will have 8 loops on hook. yarn over and pull through all 8 loops on hook.

Video Tutorials:
Puff Stitch Right Handed
Puff Stitch Left Handed


If you would like to purchase the Ad-Free premium crochet pattern for the Catherine Shawl you can find it at my Ravelry Store.  The Catherine Shawl Crochet Pattern can also be found on LoveCrafts.  You can also find more of my premium crochet patterns at Ravelry or LoveCrafts or my Etsy Shop.

********************************************************


Shawl Crochet Pattern:


R1:  ch 4, 2 trc, ch 3, 3 trc.  turn (6 trc & 1 ch-3)

R2:  (alt ch 3, 2 trc) all in 1st st.  trc in each st until ch-3, (3 trc, ch 3, 3 trc) all in ch-3 sp, trc in each st until last st, 3 trc in last st. turn (14 trc & ch-3 sp)

R3:  (alt ch 3, 2 trc) all in 1st st. ch 1, *sk 1 st, trc in next st, ch 1.  rep from * until ch-3 sp (3 trc, ch 3, 3 trc) all in ch-3 sp.  ch 1, sk 1 st, *trc in next st, ch 1, sk 1 st.  rep until last st, 3 trc in last st. turn (18 trc, 8 ch-1 sp, ch-3 sp)

R4:  (alt ch 3, 2 trc) all in 1st st.  trc in each st until ch-3 sp (3 trc, ch 3, 3 trc) all in ch-3 sp, trc in each st until last st, 3 trc in last st. turn (36 trc & ch-3 sp)

R5: (alt ch 3, 2 trc) all in 1st st, ch 1, *sk 1 st, trc in next st, ch 1.  rep from * until ch-3 sp (3 trc, ch 3, 3 trc) all in ch-3 sp.  ch 1, sk 1 st, *trc in next st, ch 1, sk 1 st.  rep until last st, 3 trc in last st. turn (18 trc, 8 ch-1 sp, ch-3 sp)

R6:  (alt ch 3, 2 trc) all in 1st st. trc in each st until ch-3, (3 trc, ch 3, 3 trc) all in ch-3, trc in each st until last st, 3 trc in last st. turn (14 dc & ch-3 sp)

R7:  (alt ch 3, 2 trc) all in same st. ch 1, *ps in next st, sk 1 st, ch 1. rep from *until ch-3 sp, (3 trc, ch 3, 3 trc) all in ch-3.  ch 1, sk 1 st *ps, ch 1, sk 1 st until last st.  3 trc in last st. turn (

Repeat R2-R7 or until you have reached your desired size. Remember every other row will increase.

If you would like to purchase the Ad-Free premium crochet pattern for the Catherine Shawl you can find it at my Ravelry Store.  The Catherine Shawl Crochet Pattern can also be found on LoveCrafts.

********************************************************

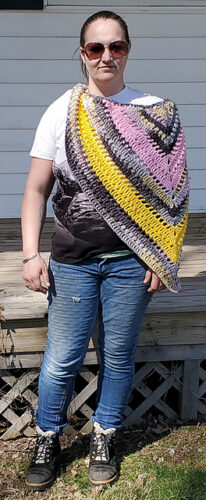
I want to thank my pattern testers for making the Catherine Shawl pattern the best it could be!  Thank you LaShika Taylor, Christy Thibodeau, and Tami Mascho for making your beautiful versions of the Catherine Shawl!

That’s it!  You have completed your Catherine Shawl!    I would LOVE to see your version of the shawl!  Please tag me at any of my Social Media Sites listed above using the hashtags below!

@joscraftyhook @joeyleabaird #catherineshawl #catherineshawlcrochetpattern #catherinewrappattern #joscraftyhook #handmadecrochetedcreations 

********************************************************

You can also check out some of my Free Crochet Patterns HERE on my website or my premium crochet patterns at my stores listed below.

Ravelry
Lovecraft
Etsy


Find me, Jo of Jo’s Crafty Hook at the places listed below.

Email:  j.o@joscraftyhook.com

Website

Facebook Group Jo’s Crafty Hookers

Facebook Group Jo’s Crafty Hook Designs

Facebook Page Jo’s Crafty Hook

Facebook Page:  Crochet Designer Community

Ravelry

LoveCrafts

Etsy

Instagram

YouTube

Pinterest

Donations Accepted

Acacia Headband Free Crochet Pattern

Acacia Headband Free Crochet Pattern

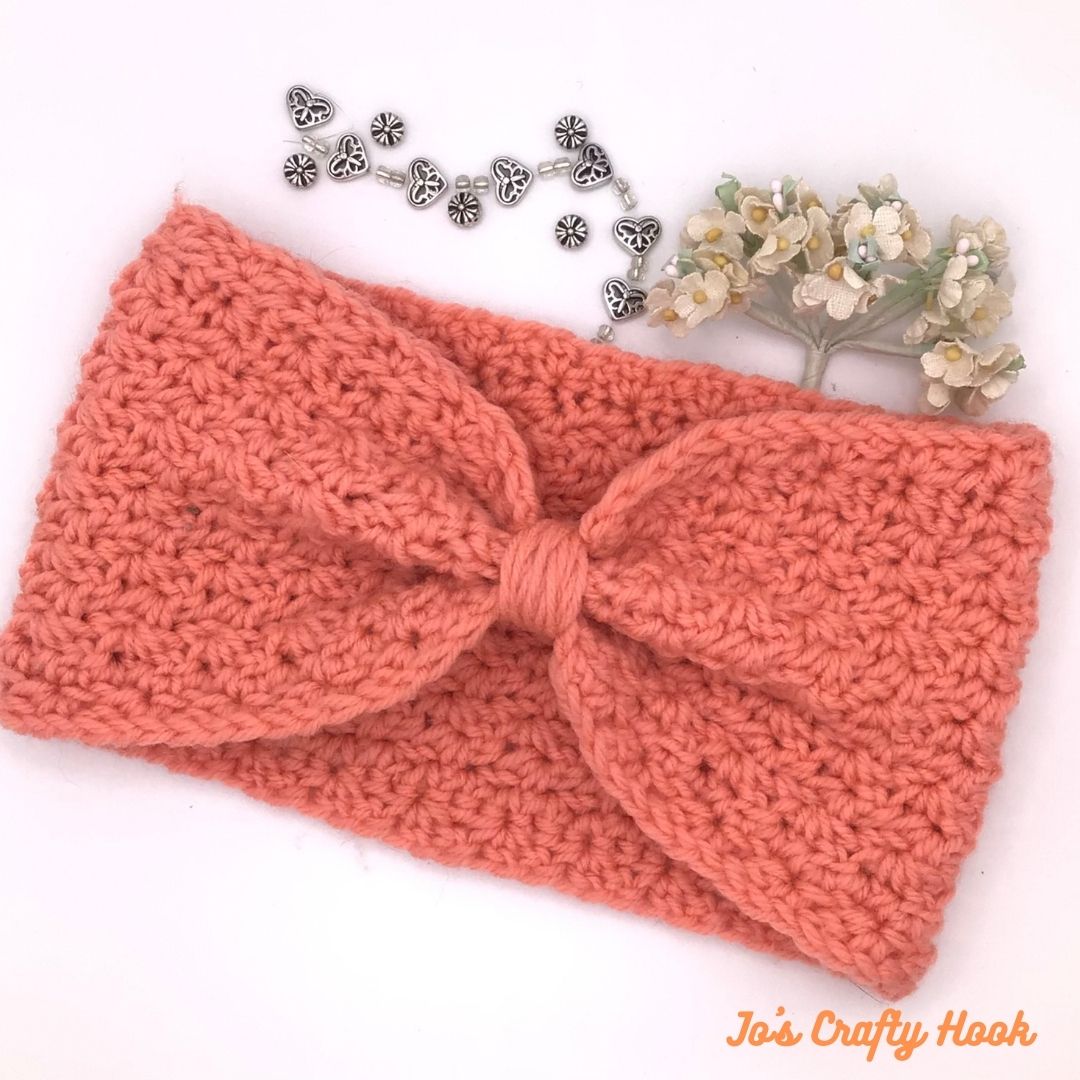
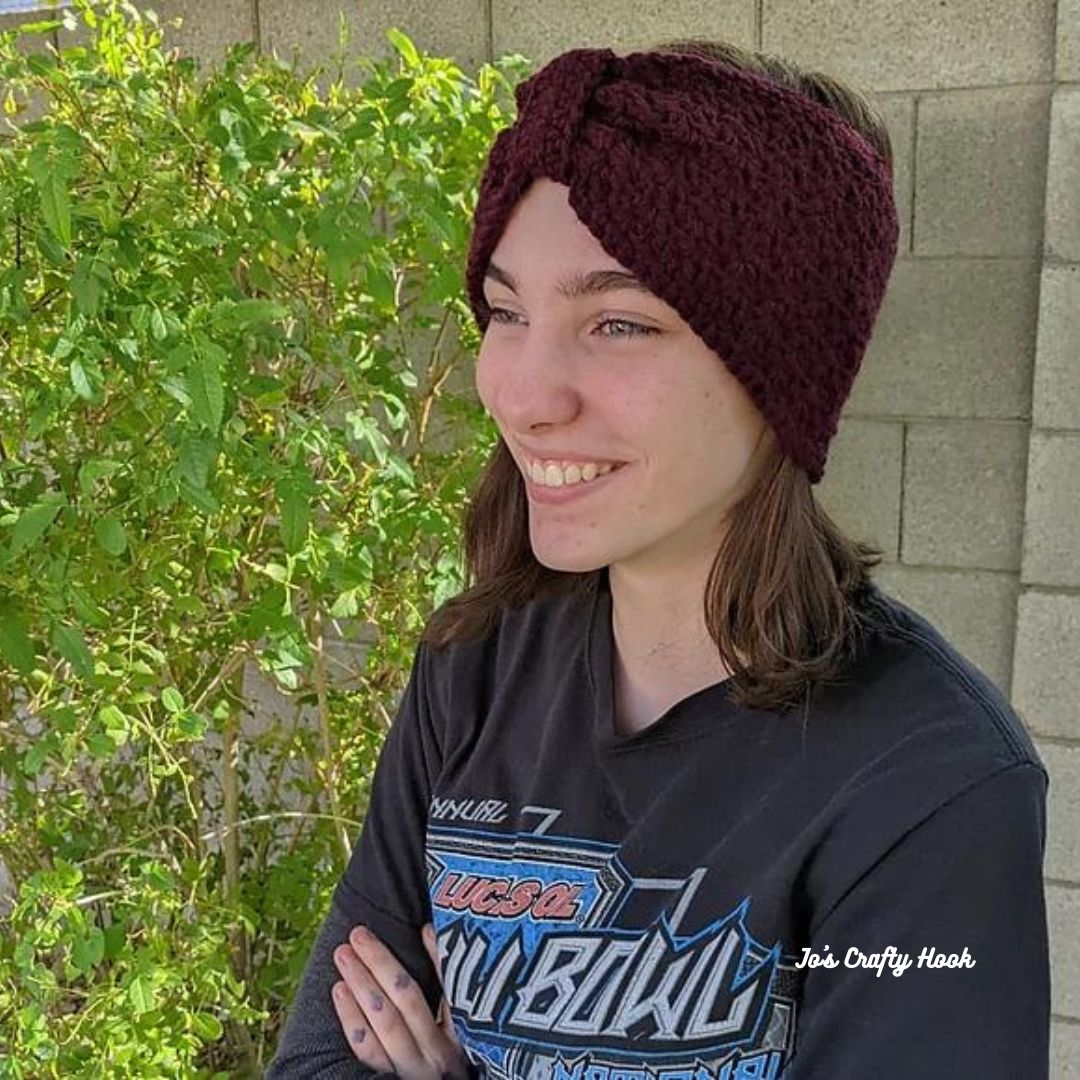
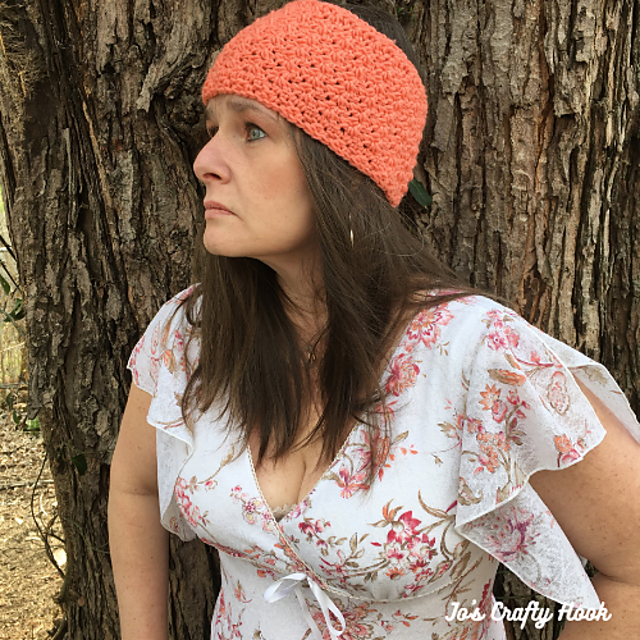
Today’s I am sharing with you my Acacia Headband Free Crochet Pattern.  Each year it seems like I learn a new stitch and fall in love with it so much that I design multiple crochet patterns using that stitch.  The Acacia Headband uses the wattle stitch that I recently fell in love with.

This post contains affiliate links.  If you make a purchase using these links I may receive compensation (at no added cost to you.)

Acacia Headband Crochet Pattern

I have used it to design a beanie, a cowl, a skirt, a clutch and now a headband.  Of course I have a couple more in the works.  🙂

If you would like to purchase the Ad-Free Premium crochet pattern with multiple sizes, 0-3 mths to Adult Large, you can get it at my Ravelry Store.

************************************************


Acacia Headband Free Crochet Pattern

I used 300 yards for the set for the size Medium.  I used Joann Fabrics Big Twist Yarn in Apricot. ( 6 oz/380 yds)

Materials:
75-200 yards of 4 ply Worsted or Aran Weight Yarn
US H Hook or 5mm
Tapestry Needle
Scissors

Abbreviations:
fsc = foundation single crochet
sl st = slip stitch
st = stitch
sc = single crochet
sp = spacews = wattle stitch 
ch = chain
RS = Right Side
WS = Wrong Side 

Gauge:
US H Hook or 5mm
5 ws x 8 Rows = 4”

Special Stitches:
Wattle Stitch = (sc, ch 1, dc) all in same stitch


Gauge Swatch:

R1:  fsc 18
Optional: ch 19, sc in 2nd ch from hook and each remaining st.  18 sc

R2:  ch 1 and turn.  sk 2 st, *[ws (sc, ch 1, dc)] all in same st in next st, sk 2, ws in next st.  Repeat from * until the last 3 st.  sk 2 st, sc in the last st.  (4 ws)

R3:  ch 1 and turn.  Ws in each ch-1 sp across until the last 3 st.  sk 2 st, sc in last st (which will be the ch 1 from the previous row).

R4-R8:  Repeat R3

Notes:
Ch 1 does count as a stitch.
The headband is worked in rows.
The Right Side is the foundation single crochet row.
The Headband size:  0-3 mths

Video Tutorials:
Foundation Single Crochet Left Handed here.
Foundation Single Crochet Right Handed here.
Running Stitch Video Tutorial here

0-3 months:  13” x 2.5”

R1:  (RS) FSC 45, ch 1 and turn. (45 sc)
Optional:  Ch 46, sc in 2nd ch from hook and each st across.  Ch 1 and turn.  (45 sc)

R2: sk 2 st, ws [(sc, ch 1, dc) all in same st] in the next st, *sk 2 st, ws in next st.  Repeat from * until the last 3 st.  sk 2 st, sc in last st.  Ch 1 and turn.  (1 ch-1, 1 sc & 14 ws)

R3:  ws in each ch-1 sp across until last 2 st.  sk 1 st, sc in last st (which will be the ch 1 from the previous row).   Ch 1 and turn.  (1 ch-1, 1 sc & 14 ws)

R4:  Repeat R3 until you reach your desired height or until the piece measures 2-2.5” being sure to end with an odd row.

Last Row:  ch 1 and turn.  sc in the first stitch and each stitch across.  (44 sc)


Border:

1st Side (shorter side):
Turn your work to go down the side.  sc evenly down each end post until you come to the last st.  (sc, ch 1, sc) all in the last st.

Bottom (longer side):
Turn your work to work across the bottom.  sc evenly in each foundation chain until you come to the last st.  (sc, ch 1, sc) all in the last st. 

2nd Side (shorter side):
Turn your work to go up the side.  sc evenly up each end post until you come to the 1st st of the top.  (ch 1, sc) all in the 1st st of top.  sl st in 1st st to join.

Fasten off leaving a long tail to close the side of the headband closed.  If you would like to create a smaller closer, leave a longer tail of yarn to wrap multiple times around your closure seam.  See image below.

Closing instructions:

With RS facing RS, match together the sc row to the fsc row, sew together the side of the headband using the running stitch or whichever stitch you prefer.

I hope you loved using the Wattle Stitch while making this headband as much as I did!

More of my FREE Crochet Patterns


Find my Premium Crochet Patterns at any of my Stores


********************************************************

Find me, Jo of Jo’s Crafty Hook at the places listed below.

Email:  jo@joscraftyhook.com

Linktree

Website

Facebook Group Jo’s Crafty Hookers

Facebook Group Jo’s Crafty Hook Designs

Facebook Page Jo’s Crafty Hook

Facebook Page:  Crochet Designer Community

Ravelry

LoveCrafts

Etsy

Instagram

YouTube

Pinterest

Donations Accepted

Stuff It Storage Bag

When you think of Spring you think of trees budding, flowers blooming, birds singing, and of course….Spring Cleaning.

Why not clean up some of those many, many store bags laying around or stuffed in drawers; on shelves; and overflowing everywhere.  The Stuff It Storage Bag can be used to stuff all of those bags into and take one out as you need them.  You can actually store whatever you like in them as well, your scrap yarn, which would be perfect to use in making this; toys; socks; and more.

I would love to see your versions!  You will find the Stuff It Storage Bag Free Crochet Pattern below.

While you are there be sure to sign up for my Newsletter where you will receive news about my New Crochet Pattern Releases, Collaborations, and MORE!  For signing up you will also get a FREE crochet pattern!

This post contains affiliate links.  If you make a purchase using these links I may receive compensation (at no added cost to you.)

**********************************************************

Stuff It Storage Bag Free Crochet

Information Needed:

I used Red Heart Super Saver in multiple colors.  Contents 100% Acrylic Weight: Medium (4) Skein Weight 7 oz / 198 g Yardage 364 yd / 333 m

Stitches/Abbreviations Used:

ch = chain
sc = single crochet
dc = double crochet
MC = Main Color
CC = Contrasting Color 

Materials:
US H Crochet Hook
(MC) 25 yds of Worsted/Aran Weight Yarn
(CC) 30 yds of Worsted/Aran Weight Yarn
Scissors
Tapestry Needle

Gauge:
US H Crochet Hook or 5mm
12 st x 8 rows = 4”

Size:
16’ long x 8” wide


********************************************************

Bag Crochet Pattern:

R1:  fsc 49 (49 sc) sl st in 1st st to join.

Optional: ch 50, sc in 2nd ch from hook and each rem st around. sl st in 1st st to join. turn (49 sc)

R2:  ch 1, *sc in next st, dc in next st.  rep from * until last st, sc in last st.  sl st in 1st st to join.  (49 st)

R3:  ch 1, *dc in next st, sc in next st.  rep from * until last st, dc in last st.  turn (49 st)

R4-R32:  Rep R2-R3 change to CC color every 4 rows.

********************************************************

Strap:

ch 30.  sl st in the 24th st.  turn slightly and sc in the blo of each chain.  sl st in 1st st to join.

Fasten off and weave in ends.

********************************************************

Bottom Hole:

Turn the bag upside down to work in the foundation row.

R1:  sc2tog around until last st, sc in last st. turn (25 sc)

R2:  sc in each st around. turn (25 sc)

R3:  sc2tog around until last st, sc in last st. turn (13 sc)

R4:  sc in each st around. (13 sc)

Note:  If you would like a smaller hole, try adding another decreasing row or just another row of single crochet.

Fasten off and weave in ends.

********************************************************

That’s it!  You have made the Storage Bag!  I would ❤️ to see your version!  Please tag me at any of my Social Media Sites listed above using any of the hashtags below.

#scrapitstoragebag #scrapitstoragebagcrochetpattern #scrapitstoragebagpattern #joscraftyhook #joscraftyhookdesign #handmadecrochetedcreations #jo_bear38


While you are there be sure to sign up for my Newsletter where you will receive news about my New Crochet Pattern Releases, Collaborations, and MORE!  For signing up you will also get a FREE crochet pattern!


You will find some of my Premium crochet patterns , by visiting any of my stores, by clicking on any of the Buttons below.


Custom Orders Welcome

If you would like me to crochet any of my designs for you or others, I do take Custom Orders.  Visit my Ravelry Store or LoveCrafts to see some ideas of what you would like to Custom Order.  You can email me with your order or any other questions at j.o@joscraftyhook.com.

Find me, Jo of Jo’s Crafty Hook at the places listed below.

Email:  j.o@joscraftyhook.com

Website

Facebook Group Jo’s Crafty Hookers

Facebook Group Jo’s Crafty Hook Designs

Facebook Page Jo’s Crafty Hook

Facebook Page:  Crochet Designer Community

Ravelry

LoveCrafts

Etsy

Instagram

YouTube

Pinterest

Donations Accepted

Jaide Wrap Free Crochet Pattern

Jaide Wrap Free Crochet Pattern

My Jaide Wrap Free Crochet Pattern can be found below.  This is a great make for Spring and Summer Days because it so lightweight.


This post contains affiliate links.  If you make a purchase using these links I may receive compensation (at no added cost to you.)

March Events

Sign up for my Blooming Flowers Wall Hanging CAL.

Please wait...

Thank you for signing up!

I was updating some of my earlier crochet when I came across the stitch I fell in love with when I was first designing, the Tulip Stitch.  I had some beautiful yarn I bought at a fiber fair that I was chomping at the bit to use, so I used that here with my Jaide Wrap. 

Information Needed

I used Custom Yarn by Knitting on the Fringe. (Skein Weight:75g/2.64 oz
Yardage/Meters: 200 meters/217 yards)


Materials:
US G Crochet Hook or 4 mm
217 yards of # 2 Fine Yarn or Sports Weight Yarn
Scissors
Tapestry Needle

Stitches Used/Abbreviations:
dc – double crochet
sc – single crochet
ch – chain
alt ch 2 – alternate chain 2
fsc – foundation single crochet
sk – skip
rem – remaining

Special Stitches:
Shell = (2 dc, ch 2, 1 dc) all in the same stitch.
Foundation Single Crochet – is where you create the starting chain plus a row of single crochet all at one time.

Special Notes:

My yarn was handmade.  With the different weights of 2 Fine Yarn or Sport Weight Yarn it may make your gauge a little different from mine.  You can try going up or down a hook size to meet the gauge.

Video Tutorials:
foundation single crochet – Left Handed
foundation single crochet – Right Handed
alternate chain 2 – Left Handed
alternate chain 2 – Right Handed

Finished Size:  14” x 64”

Pattern Notes:
Pattern is written in U.S. Crochet Terms
beginning chain 3 counts as the 1st dc
alt ch 2 counts as the 1st dc
alt ch 2 takes the place of a double crochet and counts as your 1st dc.  It is used to create a cleaner edge.
Row count is a multiple of 3
Due to different yarn types, the gauge may be off.  Try going up or down a hook size to meet gauge.

Gauge:
US G Crochet Hook or 4 mm
18 st x 8 rows = 4”
6 Shells x 8 Rows = 4”

Gauge Swatch:  4” x 4″

R1:  ch 19, sc in 2nd ch from and each rem st across.  turn (18 sc)

R2:  alt ch 2 (or ch 3) in the 1st st, *sk 2 st, shell in the next st (see instructions above) repeat  from * across until the last 3 st, sk 2 st and dc in the last st.  turn

R3:  alt ch 2 (or ch 3) in the 1st st, shell in the next dc, *sk 4 st, shell in the next st* Repeat from * across until the last dc, dc in the last dc.  turn

R4-R9:  Repeat R2-R3 

Customizing 


Width: 
To create a wider wrap (short rows) add multiples of 3.  The basic width of a wrap is 14” – 18”

Length:
Use your Height plus 4” – 8” to reach your desired length by continuing to repeat R2 & R3.

4 st x 2 rows = 1”
8 st x 4 rows = 2”
12 st x 6 rows = 3”
16 st x 8 rows = 4”
6 Shells x 8 Rows = 4”

********************************************************


Jaide Wrap Crochet Pattern:


R1:  fsc 69 turn (69 sc)
Optional:  ch 70, sc in the 2nd ch from hook and each rem st across.  (69 sc)

R2:  alt ch 2 (or ch 3) in the 1st st, *sk 2 st, shell  (see instructions above) in the next dc from the previous row.  repeat  from * across until the last 2 st, sk 1 st and dc in the last st.  turn  (22 shells & 2 dc)

R3:  alt ch 2 (or ch 3) in the 1st st, shell in the next dc, *sk 4 st, shell in the next st* Repeat from * across until the last dc, dc in the last dc. turn (22 shells & 2 dc)

Repeat R2-R3 until you reach 64” or until you reach your desired length. (see Customizing above)

Last Row:  ch 1, sc in same st and each rem st across.

Fasten off and weave in your ends.

********************************************************

That’s it!  You have completed your Jaide Wrap!  I would LOVE to see your version of the wrap!  Please tag me at any of my Social Media Sites listed below.

You can find more of my premium crochet patterns at the links below.  You can also find FREE crochet patterns on my website.

Ravelry

LoveCrafts

Etsy Shop

********************************************************

Find me, Jo of Jo’s Crafty Hook at the places listed below.
Email:  jo@joscraftyhook.com
Linktree

Website
Ravelry
Instagram
LoveCrafts
Etsy Shop
Facebook Group
Jo’s Crafty Hookers
Facebook Page Jo’s Crafty Hook
Facebook Page Jo’s Crafty Hook Designs
Pinterest
Twitter
YouTube
 Donations Accepted


Loading

Two Faced Scarf Free Crochet Pattern

Thank you for stopping by Jo’s Crafty Hook!  In today’s post you will find my Two Faced Scarf Free Crochet Pattern.

Have you ever crocheted a scarf and the design looks great on one side, but the other side of the item is upside down?  Well I have.   When making a design I want to see the design the right way on both sides.  That is how I designed the Two Faced Scarf Crochet Pattern, seeing the pattern the right way on both sides.


This post contains affiliate links.  If you make a purchase using these links I may receive compensation (at no added cost to you.)

Be sure to sign up to my Newsletter so you can be notified when there is a blog hop, sale, free crochet patterns and more!  As a new subscriber you will receive a free pdf crochet pattern.  You can find out more about me and the steps you would need to follow for signing up on my Newsletter Incentive page on my website.


**********************************************************

You can find the premium Two Faced Scarf at my Ravelry Store or LoveCrafts .  This crochet pattern can be customized to fit your style, size and color.  The Two Faced Scarf can even be made for the men in your life.


********************************************************

You will find the free crochet pattern for the Two-Faced Scarf below.


Information Needed:

Skill Level:
Beginner
US Terms

Finished Size:  8” x 60”

Materials:
US J Crochet Hook or 6 mm          
MC – 100 yds of Worsted/Aran Weight Yarn
CC – 100 yds of Worsted/Aran Weight Yarn
Scissors
Tapestry Needle

Abbreviations/Stitches Used:
ch = chain
dc = double crochet
wdc = wrapped double crochet
sk = skip
rep = repeat
MC = Main Color
CC = Contrasting Color
WS = Wrong Side

Gauge:
US J Crochet Hook/6 mm
12 wdc x 6 rows = 4”
If you are not meeting gauge, you may need to go up or down a hook size.

Gauge Swatch:
R1:  ch 15, dc in 4th ch from hook and each remaining st across. turn (13 dc)
R2:  ch 2 *sk 1 st, dc in next st, wdc around body of dc just made* rep from * until the last 2 st. sk 1 st and dc in last st. turn. (24 dc)
R3-R6:  rep R2

Notes:
ch 2 counts as your 1st double crochet
Stitch count is in multiples of 3+1

Special Stitches:
Wrapped Double Crochet ch 2 in the 1st st, sk 1 st, dc in the next st, wrap 1 dc around the body of the dc just made.  This counts as 2 dc.

Video Tutorials:
WDC Left Handed
WDC Right Handed


Width: 
To create a wider wrap (short rows) add multiples of 3.  The basic width of a wrap is 14” – 18”

Length:
Use your Height plus 4” – 8” to reach your desired length.

3 st x  rows = 1”
6 st x  rows = 2”
9 st x  rows = 3”
12 st x 6 rows = 4”

Customizing:
This scarf can be customized easily to fit from a baby up to a large adult.  You can use the Gauge above to adjust the pattern below.  I have supplied another gauge below in 1” 2” 3” 4” stitch counts you can use to adjust the scarf to fit your style, size and colors.

********************************************************


You can find the premium Two Faced Scarf at my Ravelry Store or LoveCrafts .  This crochet pattern can be customized to fit your style, size and color.  The Two Faced Scarf can even be made for the men in your life.


My Left Handed Video Tutorial of the Wrapped Double Crochet


1st Piece:

With MC

R1:  ch 28, dc in 3rd ch from hook and each remaining ch across. turn (25 dc)

R2:  ch 2 *sk 1 st, dc in next st, wdc around body of dc just made* rep from * until the last 2 st. sk 1 st and dc in last st. turn. (24 dc)

R3-R40:  Repeat R2

R41 (WS):  ch 2, dc in the next st and each remaining st across.  turn (24 dc)

R42:  ch 1, sc in the same sp and sc in a each st across.  (24 sc)

********************************************************


2nd Piece:


With CC

Repeat R1-R42 from above.

Leave a long tail of yarn for sewing the 2 pieces together.

Fasten off and weave in ends.

********************************************************

Sewing the pieces together

With WS of scarves facing each other, sew the 2 pieces together using the whip stitch or whichever method you prefer when sewing.

Fasten off and weave in ends.

********************************************************

That’s it!  You have made the Two Faced Scarf!  You can customize it to fit your style, size, and color(s)!  I would ❤️ to see your version!  You can tag me at any of my Social Media Sites using any of the hashtags listed below.

#twofacedscarf #twofacedscarfcrochetpattern #scarfcrochetpattern #joscraftyhook #joscraftyhookdesigns #handmadecrochetedcreations #jo_bear38


You can also find some of my other premium crochet patterns at the stores listed below.

Ravelry
LoveCraft 
Etsy Shop


You can find more of my Social Media Sites below.

********************************************************


Again, be sure to sign up to my Newsletter so you can be notified when there is a blog hop, sale, free crochet patterns and more!  As a new subscriber you will receive a free pdf crochet pattern.  You can find out more about me and the steps you would need to follow for signing up on my Newsletter Incentive page on my website.


********************************************************

Find me, Jo of Jo’s Crafty Hook at the places listed below.

Email:  j.o@joscraftyhook.com

Website

Facebook Group Jo’s Crafty Hookers

Facebook Group Jo’s Crafty Hook Designs

Facebook Page Jo’s Crafty Hook

Facebook Page:  Crochet Designer Community

Ravelry

LoveCrafts

Instagram

YouTube

Pinterest

Donations Accepted

Get Around Face Scrubbies and Washcloths Free Crochet Patterns

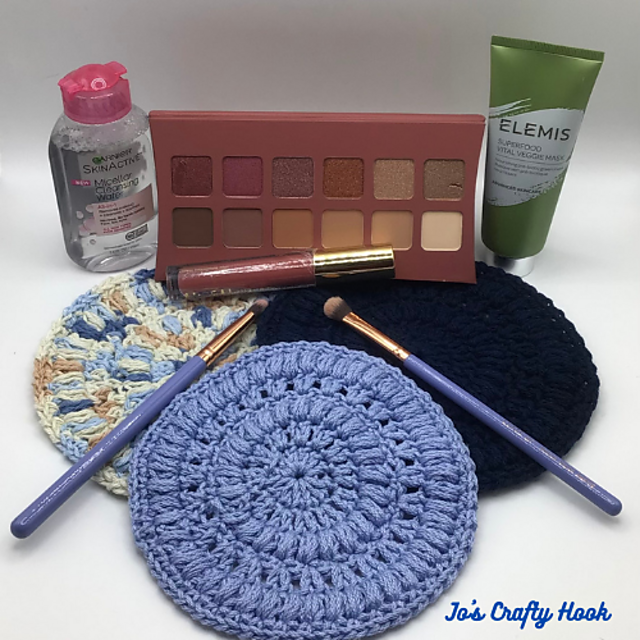
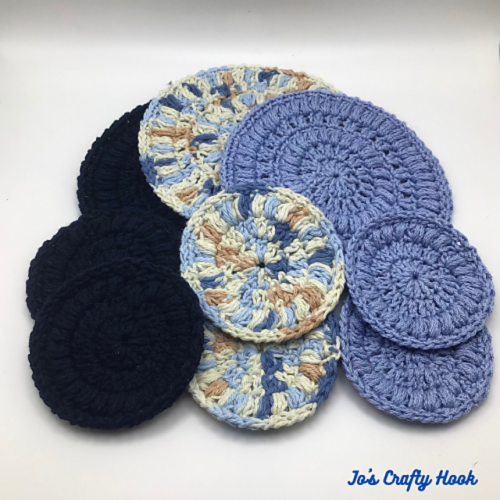
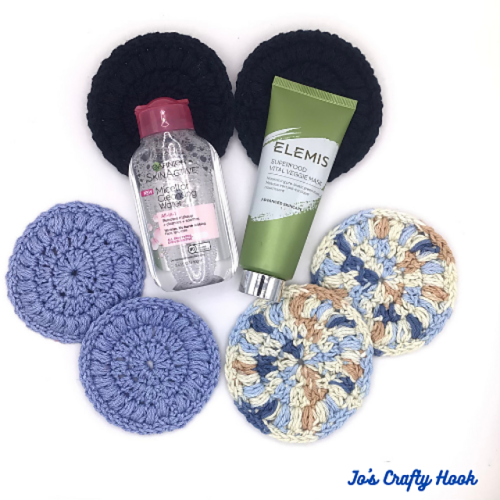
Today I like to share with you my Get Around Face Scrubbies and Washcloths Free Crochet Patterns.

Do you wear makeup?  Does your face not feel clean even after using soap?  Do you spend a lot of money on disposable face cleaning pads?  If you answered YES to any of these questions then these crochet patterns are perfect for you.  The puff stitch used in these crochet patterns adds an extra buffer to help reach your pores and gives your face a nice clean feeling after you use them.  The added bonus is they are made with 100% cotton and are machine washable.  The face scrubbies and washcloths would also make a perfect gift for those women in your life!  

This post contains affiliate links.  If you make a purchase using these links I may receive compensation (at no added cost to you.)

Testimonials

The Get Around Face Scrubbies & Washcloths crochet patterns are SO quick and easy to do!  My pattern testers had so many good things to say about them!

Here are some testimonials from my testers:

Kathy Hungerford Paquette:  I enjoyed making the scrubbie and washcloth pattern. It worked up quick and easy.   I used two different colors for mine to match my bathroom.  Kathy was the one who invented the name, Get Around Face Scrubbies and Washcloths Free Crochet Pattern!

Stacy Secoy:  These work up quickly! I think the will make great gifts and sell well at craft fairs!  Thanks for having me test these!


Dina Sengupta:  I make these small ones to supply to an eco friendly store. They will go perfectly with yours to make full set. I will use them to gift.

Cor Chris Desro:  Pattern is great!  Done in 15 minutes at most!  I am going to make 3 colors so I can have them to match.


Sign Up to my Newsletter

I will not fill your inbox with a lot of emails, you will only receive an email when:

  •  I release a new pattern, free or paid.
  • I have a new blog post.
  •  I have a sale.
  • I am hosting an event or collaborating with other crochet designers.

https://dashboard.mailerlite.com/forms/841383/134719051106616408/share
********************************************************

You can find the Ad-Free pdf copy of the Get Around Face Scrubbies and Washcloths Crochet Patterns at LoveCrafts, and my Ravelry Store

********************************************************

Get Around Face Scrubbies and Washcloths Free Crochet Patterns

Pattern Information

I used Lily Sugar n Cream in a multiple of colors.
100% Cotton (Weight 2.5 oz / 70.9 g) (120 yds / 109 m)

 Materials:
25-40 yards of #4 Medium Weight Cotton Yarn
US G Crochet Hook or 4 mm Crochet Hook

Abbreviations: Size:
ch = chain
dc = double crochet 
sc = single crochet
ps = puff stitch
sl st = sl st
rep = repeat
rem = remaining 

Size:
Scrubbie – 4”
Washcloth – 8″

Notes:
Scrubbies and Washcloths are worked in the round.
Chain 3 counts as a double crochet.
Ch 2 does not count as a stitch.
Puff stitches vary in the number of loops on your hook, but all follow the same technique.

Special Stitches:
Puff Stitch – Yarn over, Insert hook into the next stitch, *Yarn over and pull up a loop, insert the hook into the same st* rep from *to* for a total of 3 times. You will have 7 loops on hook. Yarn over and pull through all 7 loops on hook.

Video Tutorials:
Puff Stitch Right Handed
Puff Stitch Left Handed

****************************************************

Free Scrubbies Crochet Pattern:

R1:  ch 1 loosely, 12 dc in ch-1 sp.  sl st 1st st to join. (12 dc)
R2:  ch 3, dc in same sp, 2 dc in each rem st around.  sl st in top ch 3 to join. (24 dc)
R3:  ch 2, ps in same st. ch 1,  *ps in the next st, ch 1.  rep from * around.  sl st in ps to join.  (24 bs & 24 ch-1 sp)
R4:  ch 1, sc in same st, ch 1.  sk ch-1 sp *sc in next st, ch 1, sk ch-1 sp.  rep from * around.   sl st in 1st st to join.  (24 sc & 24 ch-1 sp)

Fasten off and weave in ends.

To make as many Scrubbies as you’d like, repeat R1-R4.

********************************************************

Free Washcloths Crochet Pattern:

R1:  ch 1 loosely, 12 dc in ch-1 sp.  sl st 1st st to join. (12 dc)
R2:  ch 3, dc in same sp, 2 dc in each rem st around.  sl st in top ch 3 to join. (24 dc)
R3:  ch 2, ps in same st. ch 1,  *ps in the next st, ch 1.  rep from * around.  sl st in ps to join.  (24 bs & 24 ch-1 sp)
R4:  ch 1, sc in same st, ch 1.  sk ch-1 sp *sc in next st, ch 1, sk ch-1 sp.  rep from * around.   sl st in 1st st to join.  (24 sc & 24 ch-1 sp)
R5:  ch 3, dc in same sp, sk ch-1 sp *2 dc in next st, sk ch-1 sp* rep from * around.  sl st in top ch 3 to join. (48 dc)
R6:  ch 2, ps in same st, ch 1,  *ps in the next st, ch 1.  rep from * around.  sl st in ps to join.  (48 bs & 48 ch-1 sp)
R7:  ch 1, sc in same st, ch 1.  sk ch-1 sp *sc in next st, ch 1, sk ch-1 sp.  rep from * around.   sl st in 1st st to join.  (48 sc & 48 ch-1 sp)

 Fasten off and weave in ends.

To make as many washcloths as you’d like, repeat R1-R7.

********************************************************

You’re all done! I am glad you took advantage of the Get Around Face Scrubbies and Washcloths Free Crochet Patterns!   I would ❤️ to see your versions!  Please tag me at any of my Social Media Sites listed above by using any of the hashtags below.

My Facebook Group – Jo’s Crafty Hook Designs

Instagram – @joscraftyhook


********************************************************

You can check out some of my other crochet patterns at any of my stores listed below.

Ravelry   
LoveCraft  
Etsy Shop    

********************************************************

Find me, Jo of Jo’s Crafty Hook at the places listed below.

Email:  jo@joscraftyhook.com

Linktree

Website

Facebook Group Jo’s Crafty Hookers

Facebook Group Jo’s Crafty Hook Designs

Facebook Page Jo’s Crafty Hook

Facebook Page:  Crochet Designer Community

Ravelry

LoveCrafts

Etsy

Instagram

YouTube

Pinterest

Donations Accepted


Loading

Seed Head Scarf Free Crochet Pattern

Do you like to use your leftover yarn to crochet a project in multiple colors?  Well this Seed Stitch Head Scarf Free Crochet Pattern is perfect to use that scrap yarn left over from projects you have been working on all year. 

This post contains affiliate links.  If you make a purchase using these links I may receive compensation (at no added cost to you.)

********************************************************


The Seed Stitch Head Scarf crochet pattern used the Seed Stitch. The Seed Stitch uses the basic stitches, single crochet and double crochet.  Also in the crochet pattern you will find instructions on how you can customize this to meet your style, size, and color. You can customize it to fit babies, toddlers, tweens, teens and all adult sizes.

Materials:
US G Hook/4 mm
MC 150 yds of  #3/DK Weight Yarn
CC 150 yds of #3/DK Weight Yarn
Tapestry Needle

Gauge:
US G Hook/4 mm
16 st x 16 rows = 4”

Size:
4” wide x 56” long

Abbreviations/Stitches Used:
ch = chain
sl st = slip stitch
sc = single crochet
dc = double crochet
sp = space
CC =  Contrasting Color
MC = Main Color


You can also find a premium copy of the Seed Head Scarf Crochet Pattern at my Ravelry Store or LoveCrafts or my Etsy Shop that contain Picture Tutorials and Step-by-Step instructions.


Notes:
Alt ch 2 counts as a dc
You will change colors after every 32 rows or every 8”
You can customize how many rows you would like to do before you change colors.


Special Stitches:
Foundation Single Crochet:  creates your foundation row at the same time as your first row of single crochet stitches.
Seed Stitch:  alternate sc and dc in the 1st row then you add a dc in the sc and a sc in the dc in the consecutive rows.


*********************************************************


Head Scarf Pattern:

Using MC

R1:  fsc 16 turn  (16 sc)
alternative:  ch 17, sc in the 2nd ch from hook and each remaining st across.  (16 sc)

R2:  ch 1, alt ch 2 in 1st st. *sc in the next st, dc in the next st*  rep from * until last st, sc in last st.  turn ( 16 st)

R3-R32:  alt ch 2 in 1st st. *sc in the next st, dc in the next st*  rep from * until last st, sc in last st.  turn (16 st)

Using CC

R33-64:  alt ch 2 in 1st st. *sc in the next st, dc in the next st*  rep from * until last st, sc in last st.  turn (16 st)

Repeat R1-R64 or until you reach your desired length.


Fasten off and weave in ends.


You can find a premium copy of the Seed Stitch Head Scarf Crochet Pattern at my Ravelry Store or LoveCrafts or my Etsy Shop that contain Picture Tutorials and Step-by-Step instructions.


**********************************************************

Be sure to sign up for my Newsletter.  I will be sharing my collaborations, Free Crochet Patterns added to my website, Pattern Releases, and more.  When you sign up, you will receive a free pdf crochet pattern sent directly to your inbox.  You can find more information about the free pattern on my website HERE.


**********************************************************


That’s it!  You have made the Seed Head Scarf!  You can customize it to fit your style, size, and color(s) using your yarn stash!  I would ❤️ to see your version!  You can tag me at any of my Social Media Sites and using the hashtags listed below.

#seedstitchheadscarf #seedstitchheadscarfcrochetpattern #seedstitchheadscarffreecrochetpattern #headscarfcrochetpattern #headscarffreecrochetpattern #joscraftyhook #joscraftyhookdesigns #handmadecrochetedcreations #jo_bear38

You can check out some of my scarf crochet patterns at the sites listed below.

Ravelry   
LoveCraft  
Etsy Shop    

********************************************************

Find me, Jo of Jo’s Crafty Hook at the places listed below.

Website
Facebook Group Jo’s Crafty Hookers
Facebook Page Jo’s Crafty Hook
Facebook Page
Jo’s Crafty Hook Designs
Ravelry
LoveCraft
Etsy Shop
Instagram
Pinterest
Twitter
YouTube
Donations Accepted


Sweet Georgia Clutch Free Crochet Pattern

In today’s post I wanted to share with you my Sweet Georgia Clutch Free crochet pattern.  I had some really great yarn left over from a testing I took part in a couple of years ago for Knotions Magazine.  I didn’t want to waste this gorgeous yarn so I held on to it for awhile!  Do you hang on to your scraps of yarn for 2 years or more?? 

This post contains affiliate links.  If you make a purchase using these links I may receive compensation (at no added cost to you.)


I am SO excited to be collaborating with Veronika of Blue Star Crochet and 19 other crochet designers in the 3rd Week of the Last Minute Crochet Gifts Giveaway!  Week 3, the last week, runs from 10/18-24. 2021.  The giveaway starts 10/18/21 at 0:00a in the UK time zone or at 7p on 10/17/21.

I will be giving away a free pdf copy of my Sweet Georgia Clutch crochet pattern.  There are also 20 other crochet ideas that would be perfect for those last minute Christmas or holiday gifts for your family and friends!


Sweet Georgia Clutch – Jo’s Crafty Hook


You can download my free pdf copy of the Sweet Georgia Clutch as part of the Last Minute Crochet Gifts Pattern Giveaway from Ravelry using the button below.  Starting 10/18/21 at 0:00a the UK Time Zone or 10/17/21 at 7p EST, use the Coupon Code: CROCHETGIFTS21


To got back to the Last Minute Crochet Gifts Pattern Giveaway hosted by Blue Star Crochet and get the rest of the free crochet patterns you like click on the button below.


Thank you for stopping by to collect all your last minute crochet gift ideas from ALL the awe-some crochet designers that contributed this year!  I hope you have a Blessed Thanksgiving, a Merry Christmas, and Happy Holiday!

**********************************************************

If you prefer to add the Ad-Free Version, for a small free, of the Sweet Georgia Clutch Crochet Pattern to your Ravelry Library, click on the picture below.


I used 100 yards of Sweet Georgia Superwash SK (100% superwash merino, 256 yds [234m]/4oz [115g]) in the color Mink

Materials:

100 yards of 3 Ply Light or DK Weight Yarn
US G Hook or 4mm
Scissors
Tapestry Needle                                                                 

Size:
Closed: 4” tall x 8” wide
Open: 8” tall x 8” wide

Stitches Used/Abbreviations: 
ch = chain US G Hook or 4 mm
sc = single crochet
dc = double crochet
sp = space
ws = wattle stitch

Gauge:
US G Crochet Hook or 4 mm
21 st x 14 rows = 4″
7 ws x 14 rows = 4:

Notes:
The clutch is worked in the round until the flap, then you will turn your work and work in rows.
Wattle Stitch adds 1 stitch to the stitch count.

Special Stitches:
Wattle Stitch – consists of (sc, ch 1, dc) all in the same stitch.

Gauge Swatch:
Measures 4” x 4”

R1:  ch 20, sc in 2nd chain from hook and each remaining st across.  Turn  (19 sc)

R2:  ch 1, ws in same sp, *sk 2 st, ws in next st*  repeat from * to * until last st.  (7 ws)

R3:  ch 1 and turn.  ws in each ch-1 sp across.  (7 ws)

R4-R14:  Repeat R3

**Be aware that different types of yarn differ in thicknesses, so you may need to go up or down a hook size or change type of yarn being used**

**********************************************************

Clutch Crochet Pattern:

R1:  Chain 37,  sc in 2nd chain from hook, sc in same space.  2 sc in next st, sc in the next 32 sts, 2 sc in next st, 2 sc in the last st.  On the other side of the chain, 2 sc in 1st st, 2 sc in next st, sc in the next 32 sts, 2 sc in the next st, and 2 sc in the last st. (bottom of 1st sc).  sl st in 1st st to join.  (80 sc) total

R2: ch 1 and (sc, ch 1, dc) all in the same st (ws made), *sk 2 st, ws in next st* Repeat from * to * until the last 2 st.  sk 1 st and sl st in 1st sc to join.  (27 ws & 81 st)

**your st count will increase by 1 after R2**

R3:  ch 1, turn, and ws in 1st ch-1 sp.  ws in each ch-1 sp around.  sl st in 1st sc to join.  (27 ws)

R4-R14:  Repeat R3

Continue to the Flap part of the clutch.

**********************************************************

Flap Pattern:

R15-25:  ch 1, turn, and ws in 1st ch-1 sp.  ws in the next 12 ch-1 sp across.  Turn (13 ws)

Fasten off and weave in your ends.

Closure:

There are so many ways you can add something to keep your clutch closed.

A button…a snap…a magnet…sew on a flower…and SO many more!

How will you close yours??  Show me by sharing your version on any of my Social Media Sites listed below!

#sweetgeorgiaclutch #joscraftyhookdesigns #joscraftyhook #handmadecrochetedcreations #jo_bear38

**********************************************************

You can find other crochet patterns for my Handbags and Clutches at my Ravelry Store or Etsy Shop.

Cream Pop Handbag & Clutch


Jo’s Boat Tote

Garden Tote

Sharon Bag Crochet Pattern
Sharon Bag

You can find more of my crochet designs at any of the places below:

Ravelry

LoveCrafts 

Etsy Shop

**********************************************************

Find me, Jo of Jo’s Crafty Hook Designs, at the places listed below.

Website 

Ravelry

LoveCrafts 

Etsy Shop

Facebook Page Jos Crafty Hook

Facebook Page JosCraftyHookDesigns

Instagram    

Pinterest

Twitter

YouTube  

Donations Accepted

**********************************************************