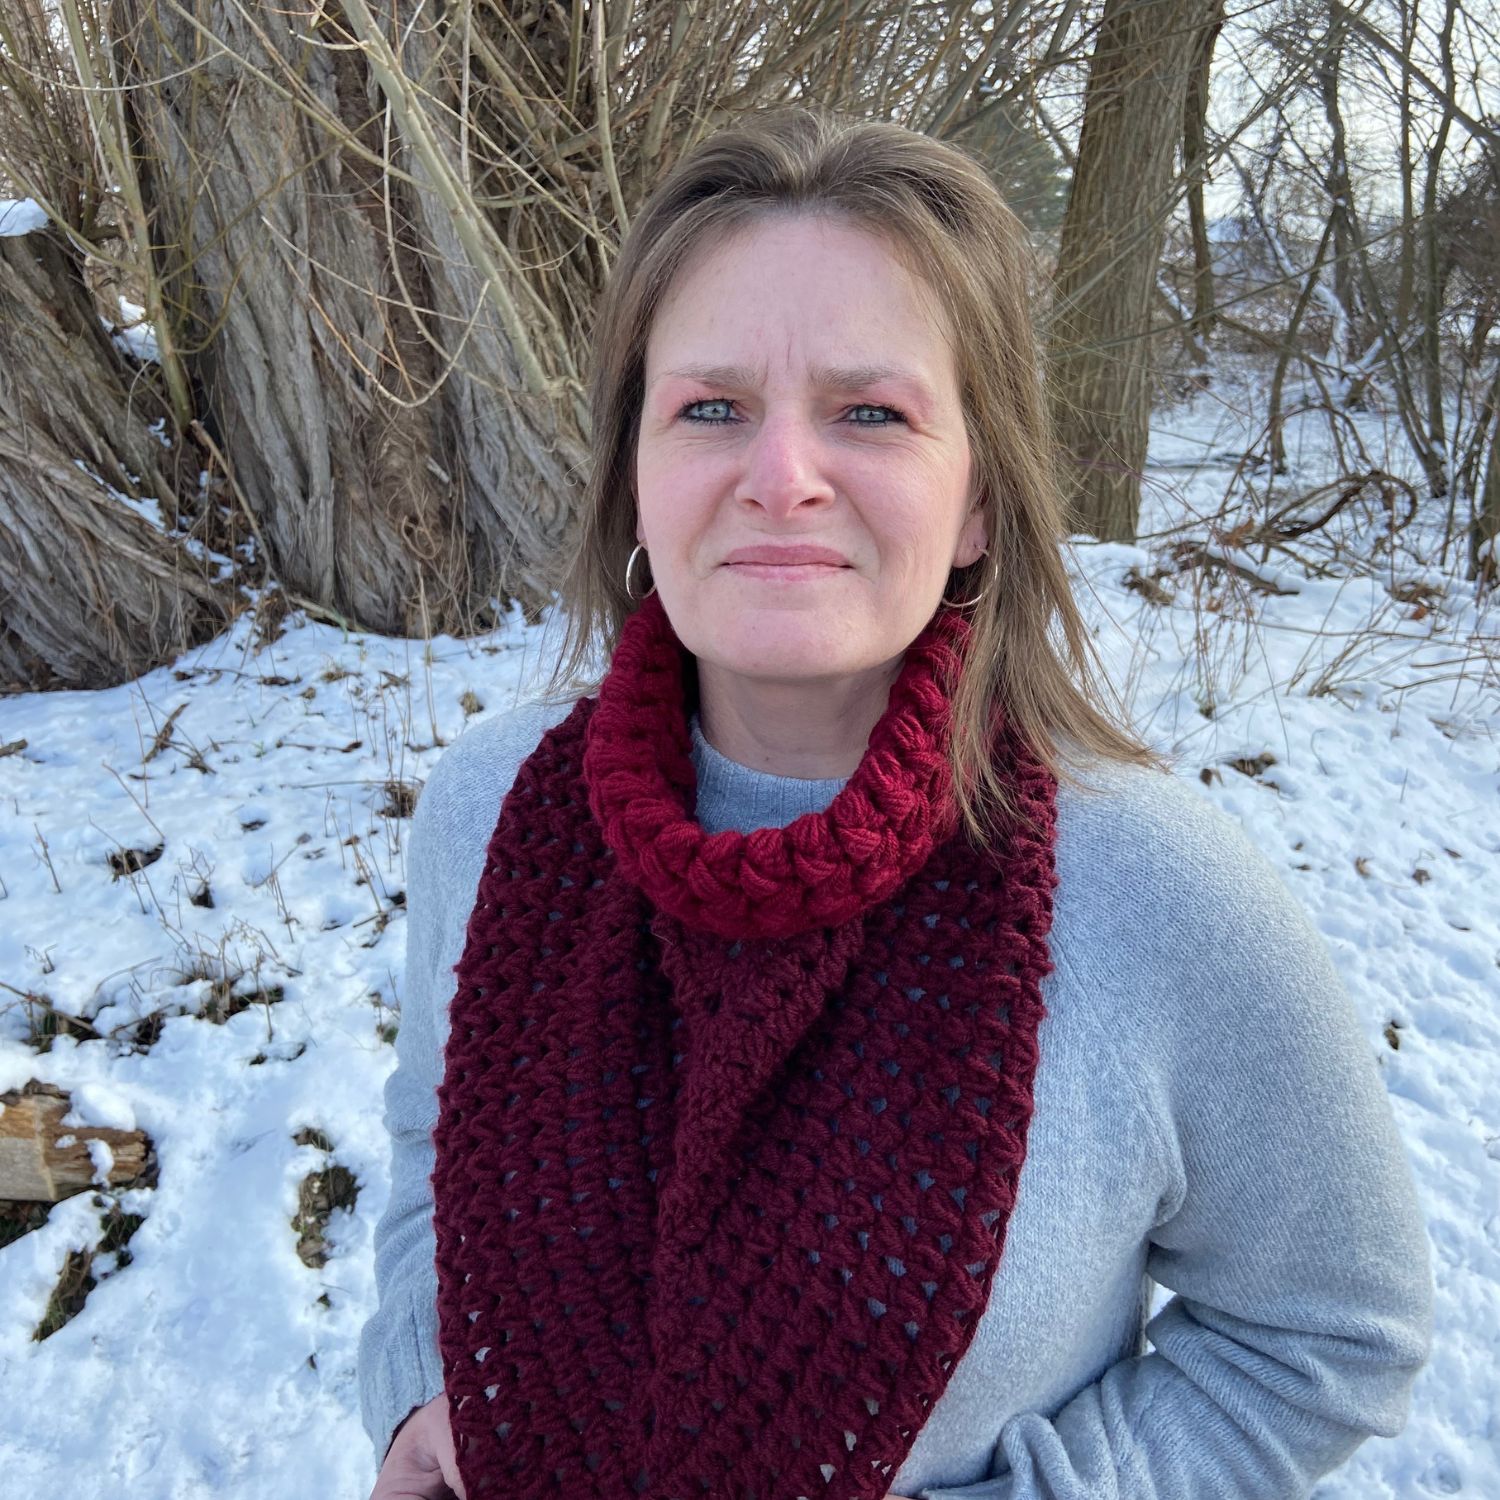
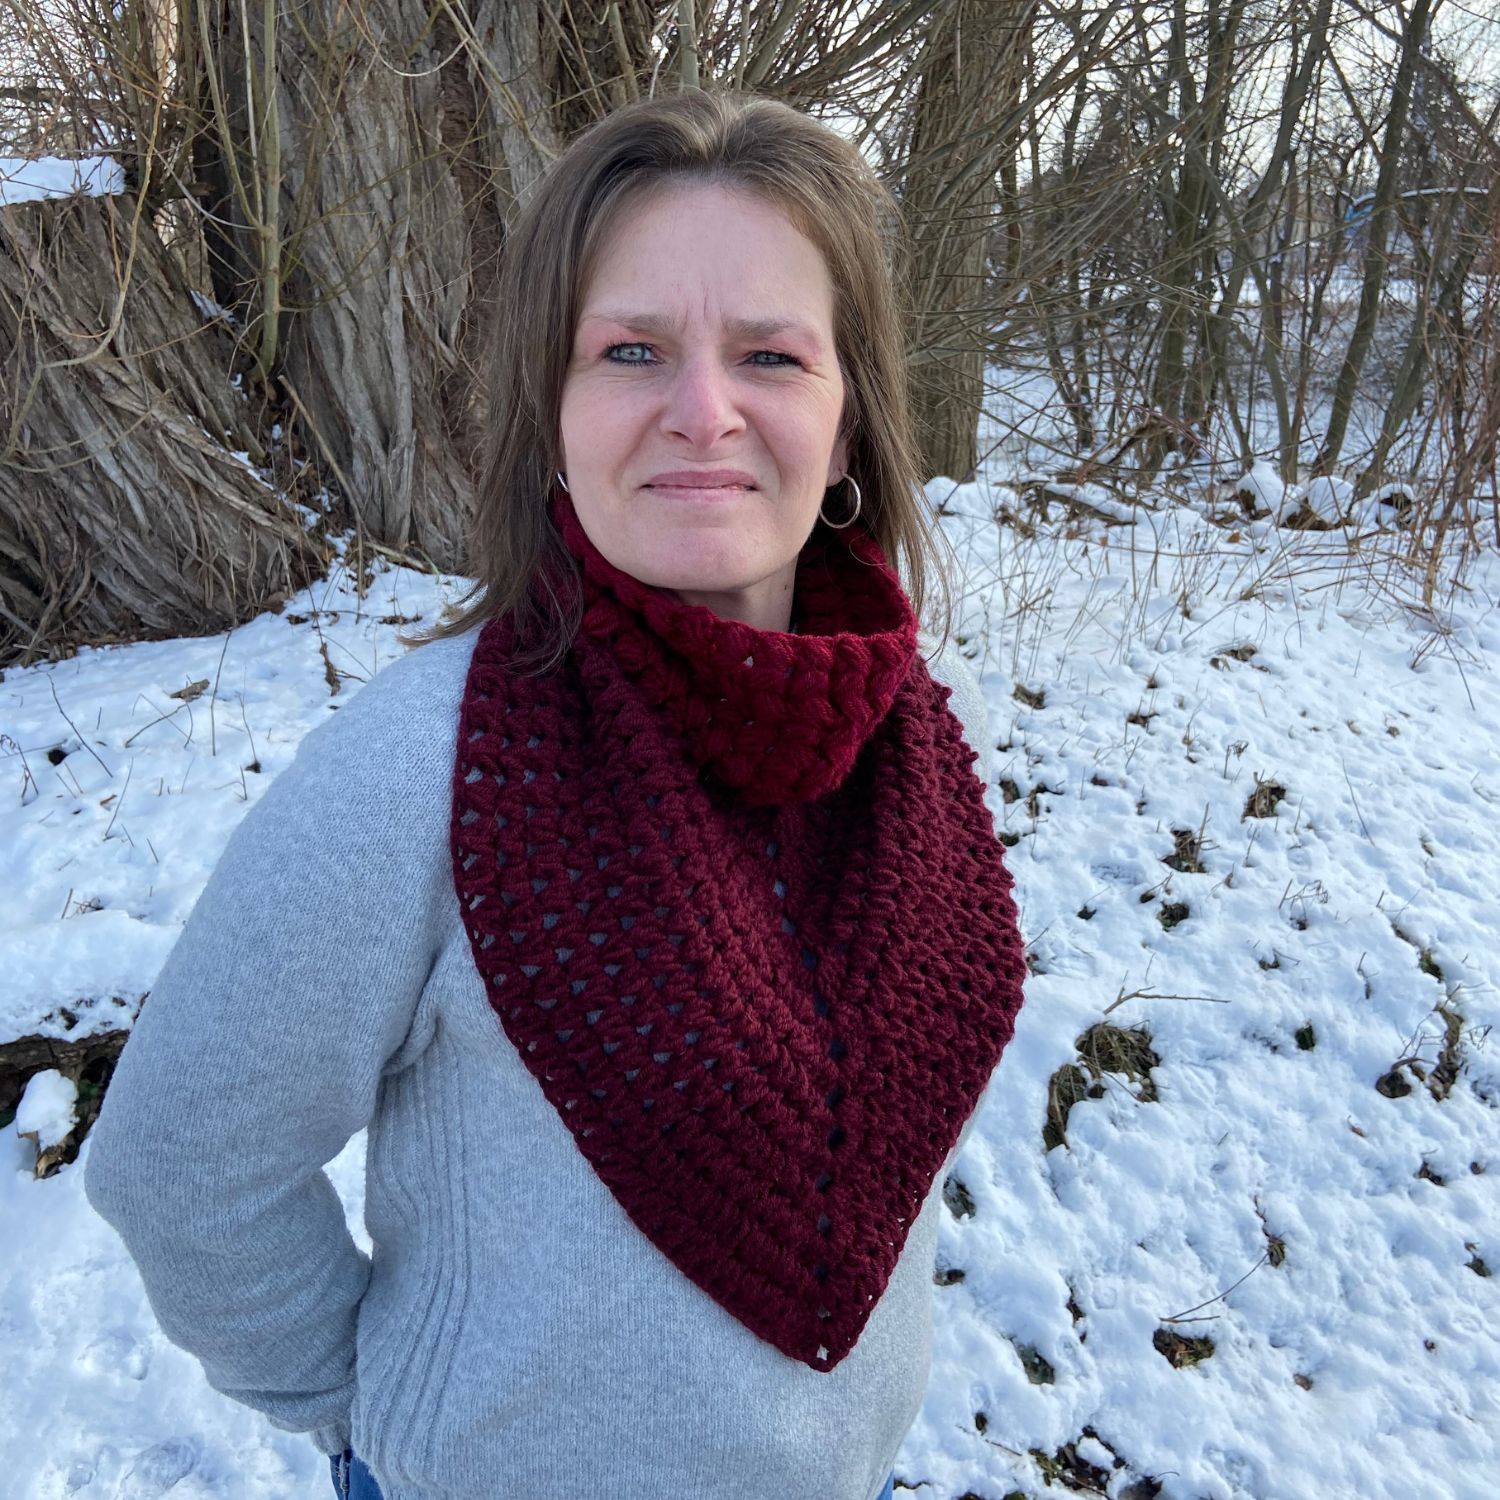
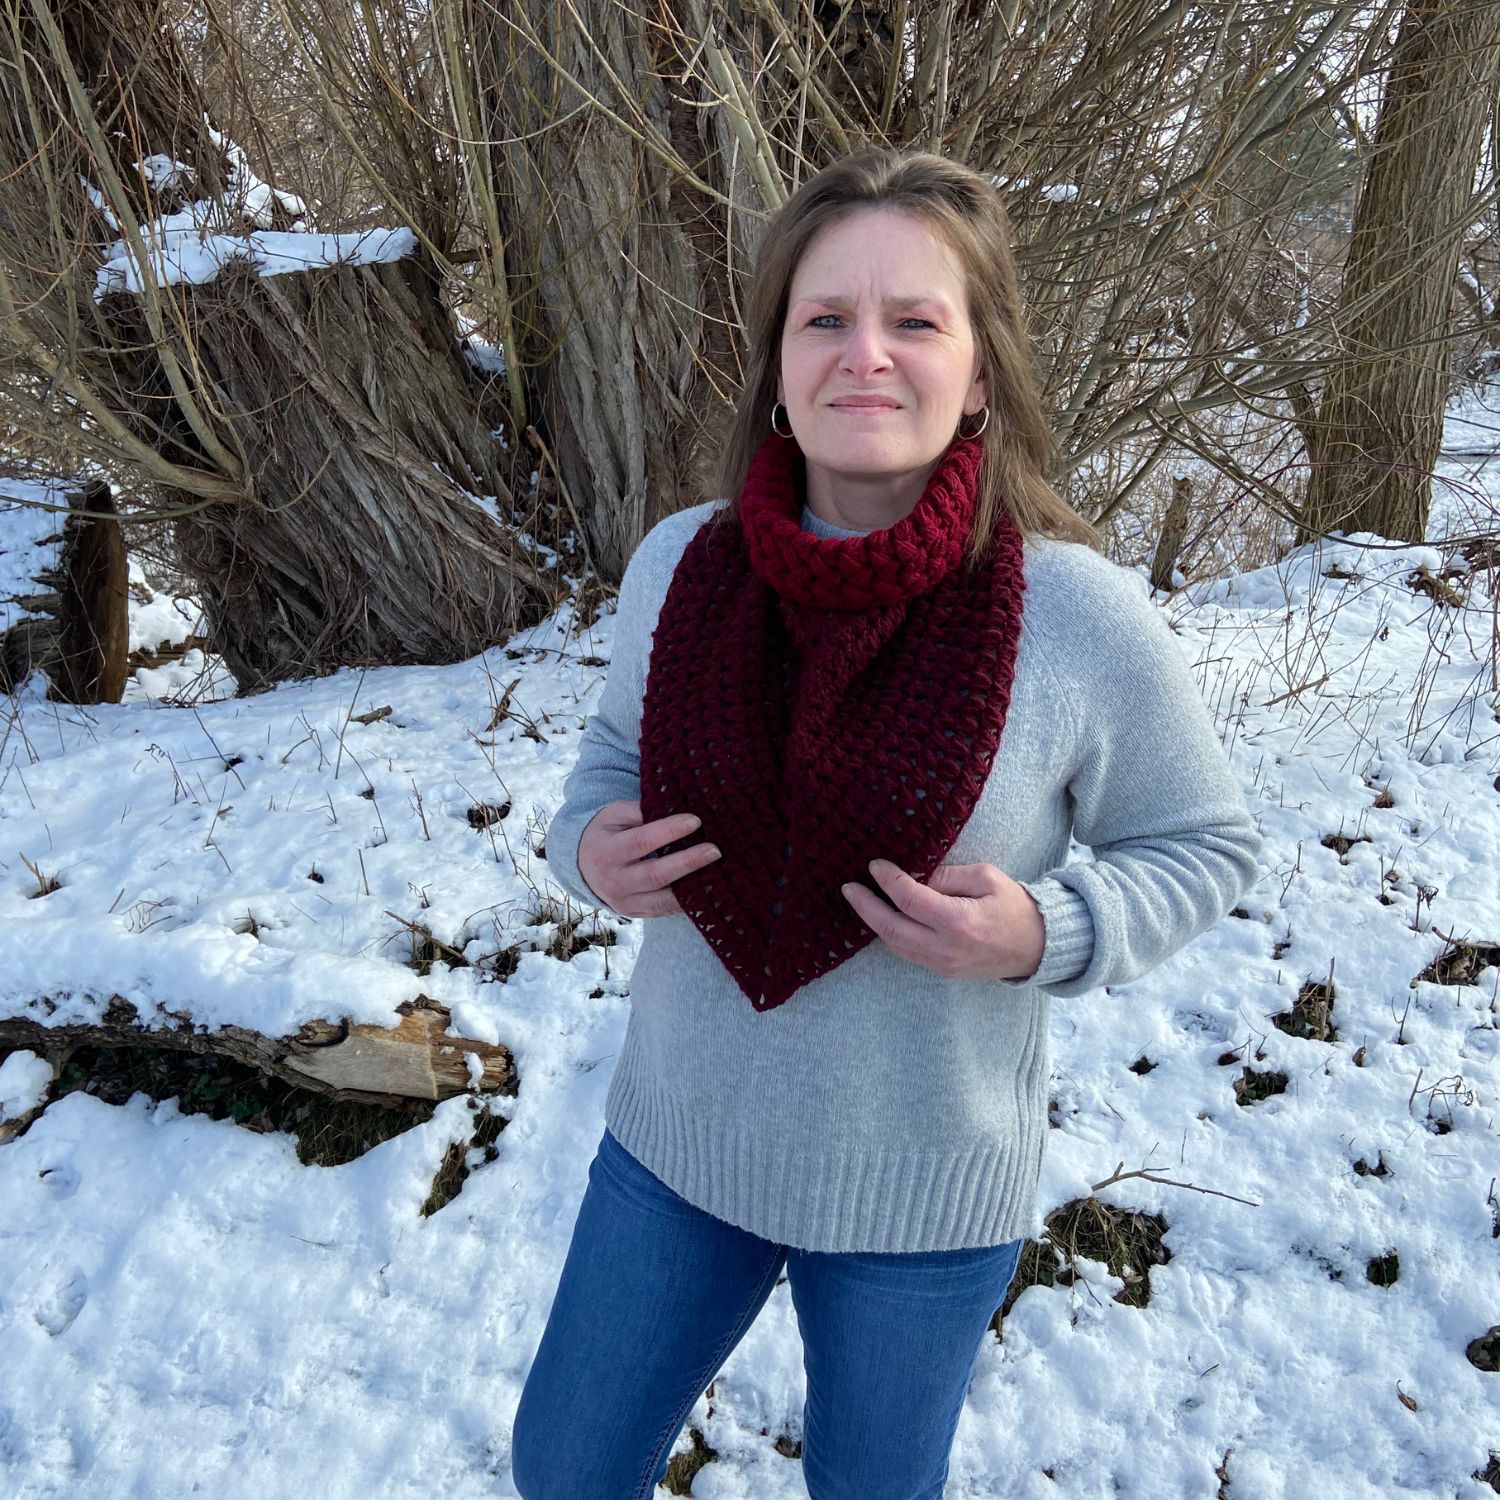
Styrofoam Ring Cover Crochet Pattern

Styrofoam Ring Cover Crochet Pattern

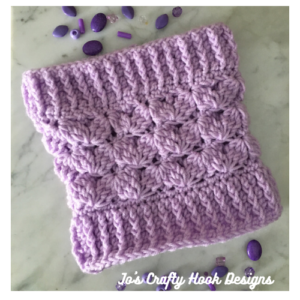
The Styrofoam Ring Cover Crochet Pattern is a great design that you can use to add a little something extra to your Home Decor.

The crochet pattern is designed to wrap around a 16″ x 2″ Styrofoam Ring.  The crochet pattern can easily be customized to fit just about any size of a Styrofoam Ring.

The post contains affiliate links that appear at no cost to you.

Day 10 – Blooming Flowers Wall Hanging CAL

For the last 9 days I have shared 7 of my crochet flower crochet patterns that you can add to your wall hanging.  Now it is time to make your ring cover so you can start adding your flowers and leaf appliques.
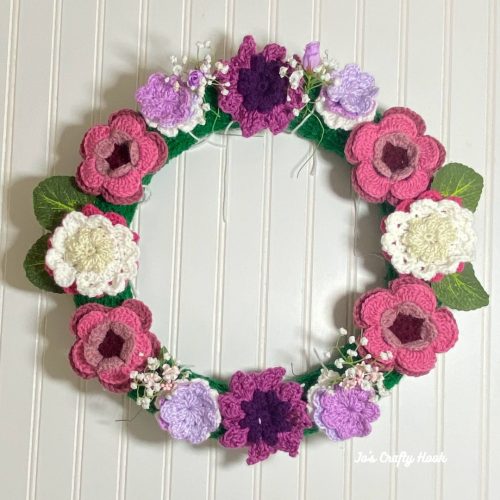
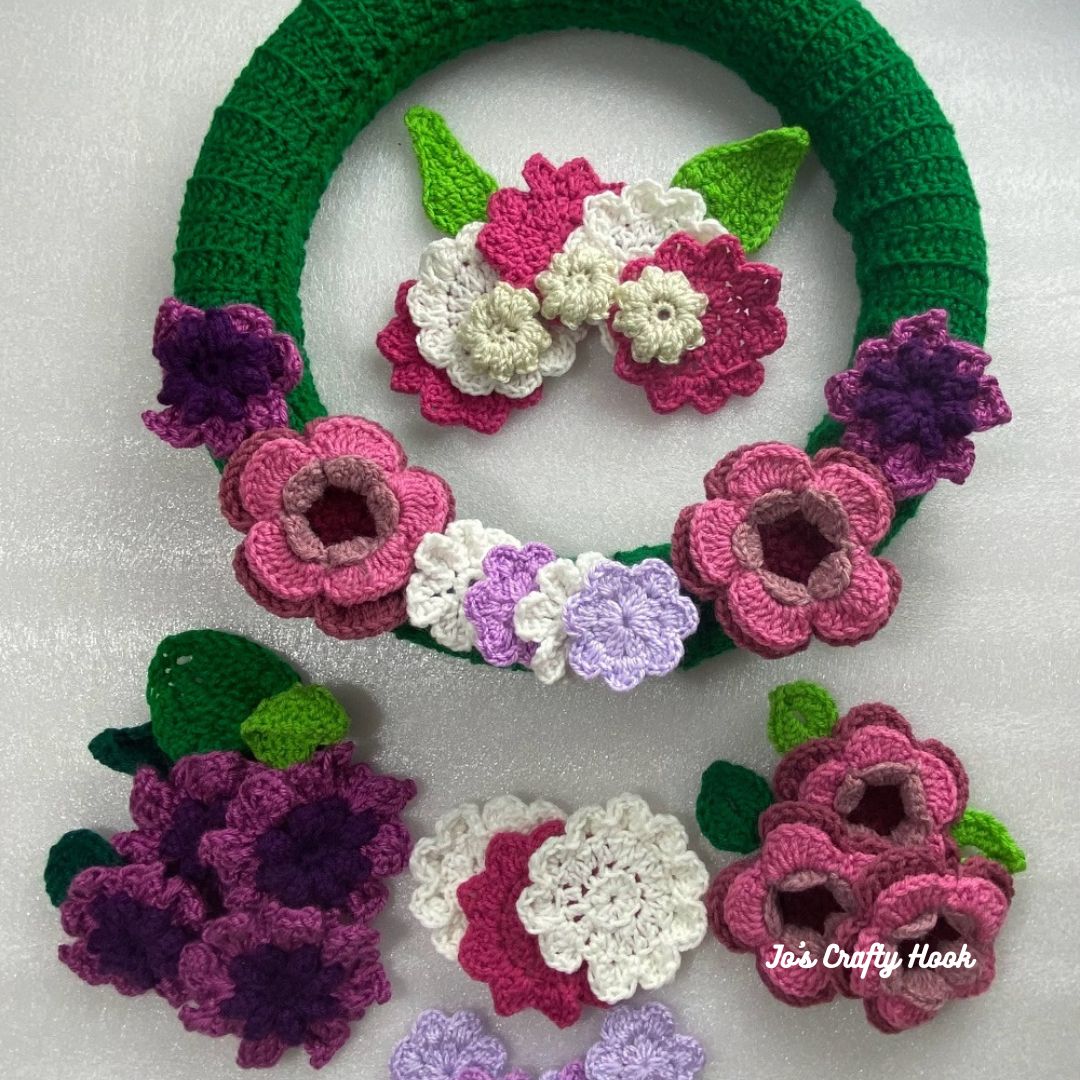
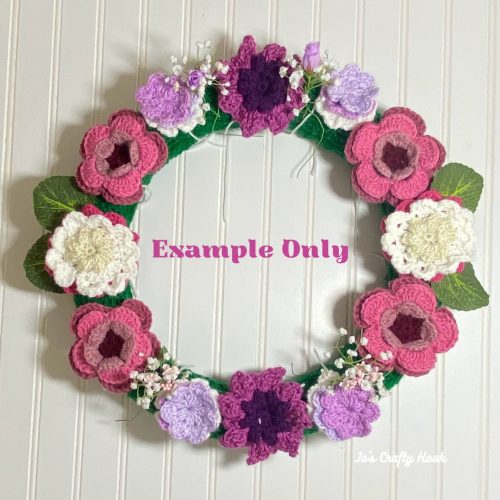
My finished Blooming Flowers Wall Hanging

Find all of the FREE crochet patterns HERE on my website and make your own Blooming Flowers Wall Hanging.

If you haven’t started or if you would like to make your own Blooming Flowers Wall Hanging, I have and eBook that contains all of the flower crochet patterns, a leaf applique crochet pattern with 2 versions and the ring cover crochet pattern all inside.  The Blooming Flowers Wall Hanging eBook can be found at my Ravelry Store.
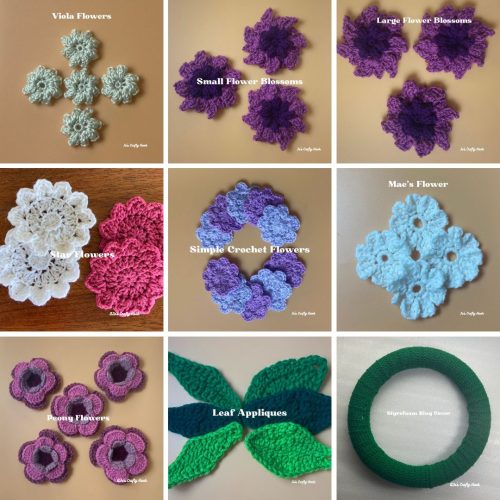
This is a pattern you can use this to decorate your home for the holidays, birthdays, as gift.  There are so many great uses for this.

Below you will find a FREE version of the Styrofoam Ring Cover Crochet Pattern.

There are a lot of great yarns you can use for the wall hanging at LoveCrafts.  You can use my affiliate link and check out their wonderful selection of yarns.

Information Needed to Crochet the Styrofoam Ring Cover

I used Caron One Pound 100% Acrylic Yarn.  (16 oz/453.6 g) (812 yds/742 m) in Azure.

Materials Used:
75-100 yds of #4 ply or Worsted/Aran Weight Yarn
US H or 5mm Crochet Hook
16” x 2” Styrofoam Wreath
Tapestry Needle
Scissors

Abbreviations/Stitches Used:
ch = chain
sc = single crochet
dc = double crochet
dcblo = double crochet back loop only
dcflo = double crochet front loop only
sl st = slip stitch
RS = Right Side
WS = Wrong Side

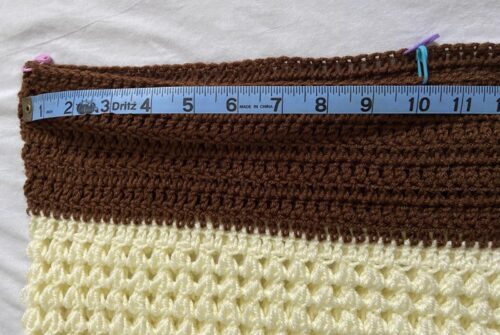
Size of Panel: 6” x 32”

Notes:
this crochet pattern is designed to cover a 16” x 2” styrofoam ring.
the crochet pattern is double the size of the ring because it wraps around the ring.
ch 3 counts as a dc.
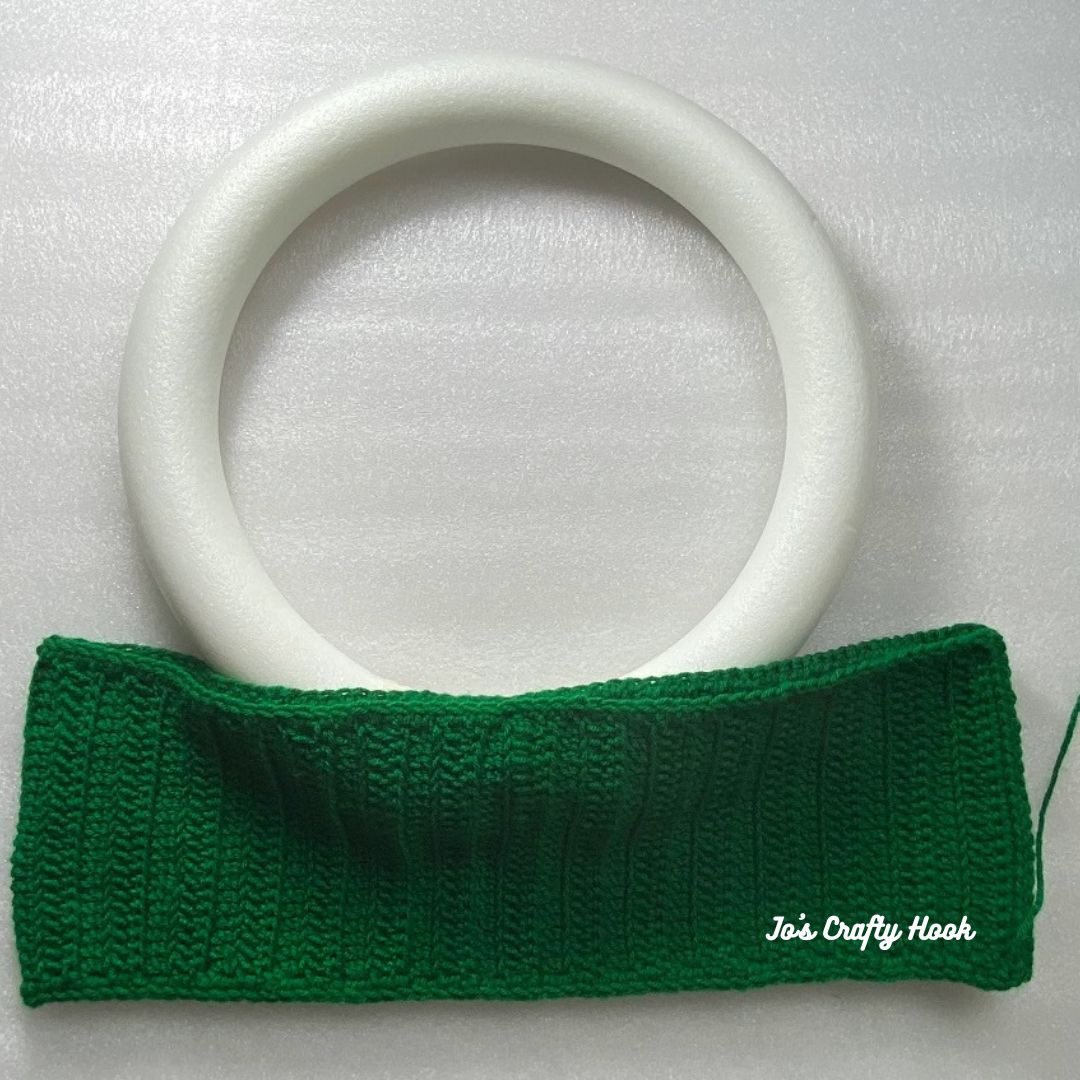
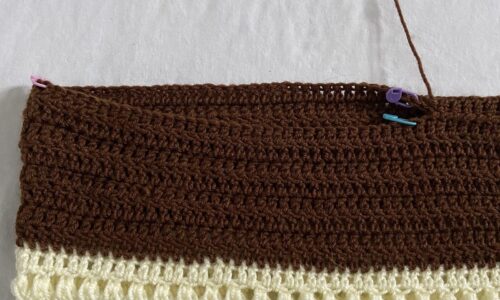
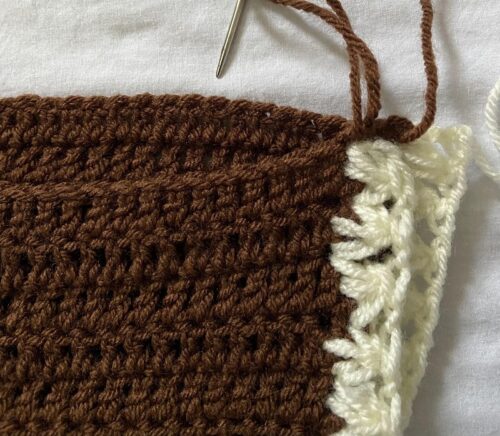
there are some picture tutorials below to help with cover assembly.

Customizing:
The crochet pattern is double the size due to the ring’s Circumference and Diameter.

Example Ring Sizes:  8” 10” 12” 15”

Gauge:
US H or 5mm Crochet Hook
16 st x 8 rows = 4”

Gauge Swatch:
US H or 5mm Crochet Hook
R1:  ch 19, dc in 4th ch from hook, dc across.  ch 3, turn (16 dc)
R2-R8:  dc across.  ch 3, turn  (16 dc)

Styrofoam Ring Cover Crochet Pattern

R1:  ch 25, sc in 2nd ch from hook, sc across.  turn (24 sc)

R2:  ch 3, dcblo across until last st.  dc in last st. turn (24 dc)

R3:  ch 3, dcflo across until last st.  dc in last st. turn (24 dc)

rep R2-R3 until the panel fits the total circumference of your ring.

Do NOT fasten off.  Move to the Border

Border


Across the Top (RS):
being sure you turned your work after R63, ch 1, (sc, ch 1, sc) all in same st, sc across until last st.  (sc, ch 1, sc) all in last st.  

Down the Side:
turn slightly, sc in next st.  2 sc in each dc until last st.  (sc, ch 1, sc) all in last st.

Across the Bottom:
turn slightly, sc in each st across the bottom until last st.  (sc, ch 1, sc) all in last st.

Up the Side:
turn slightly, 2 sc in each dc up the side until 1st st. sl st in 1st st to join.

Across the Top:
With WS face WS, ch 1, sl st in each st across, going through both the foundation row and last row worked.

Fasten off, leaving a long tail of yarn to close the panel around the ring.

Closing Panel

Step 1:
With WS to WS of panel border. Whip Stitch (or whatever sewing stitch you prefer) the sides of the panel closed around the styrofoam ring.

Fasten off and weave in ends.
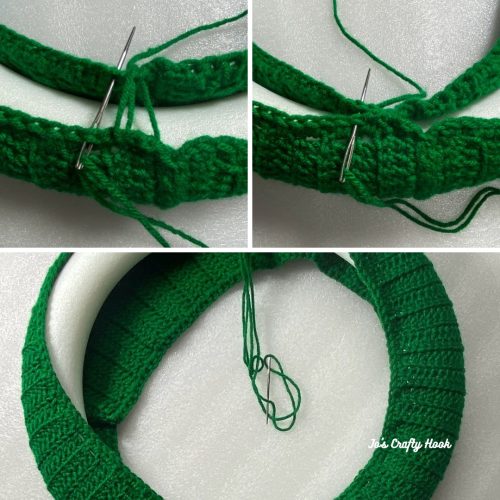
That’s it!  You made your own Styrofoam Ring Cover!  I would love to see your version!  You can tag me at @joscraftyhook and in my FB Group Jo’s Crafty Hook Designs

You can decorate it as a Wall/Door Hanging for the Holidays or even add a little extra to your Home Decor.

You can find all of my flower appliques and my leaf appliques at my Ravelry Store, LoveCrafts, and my Etsy Shop

My Premium Crochet Pattern Stores

Find me, Jo of Jo’s Crafty Hook at the places listed below.

Email:  jo@joscraftyhook.com

Linktree

Website

Facebook Group Jo’s Crafty Hookers

Facebook Group Jo’s Crafty Hook Designs

Facebook Page Jo’s Crafty Hook

Facebook Page:  Crochet Designer Community

Ravelry

LoveCrafts

Etsy

Instagram

YouTube

Pinterest

Donations Accepted

Loading

Wash Up Cloths

Wash Up Cloths

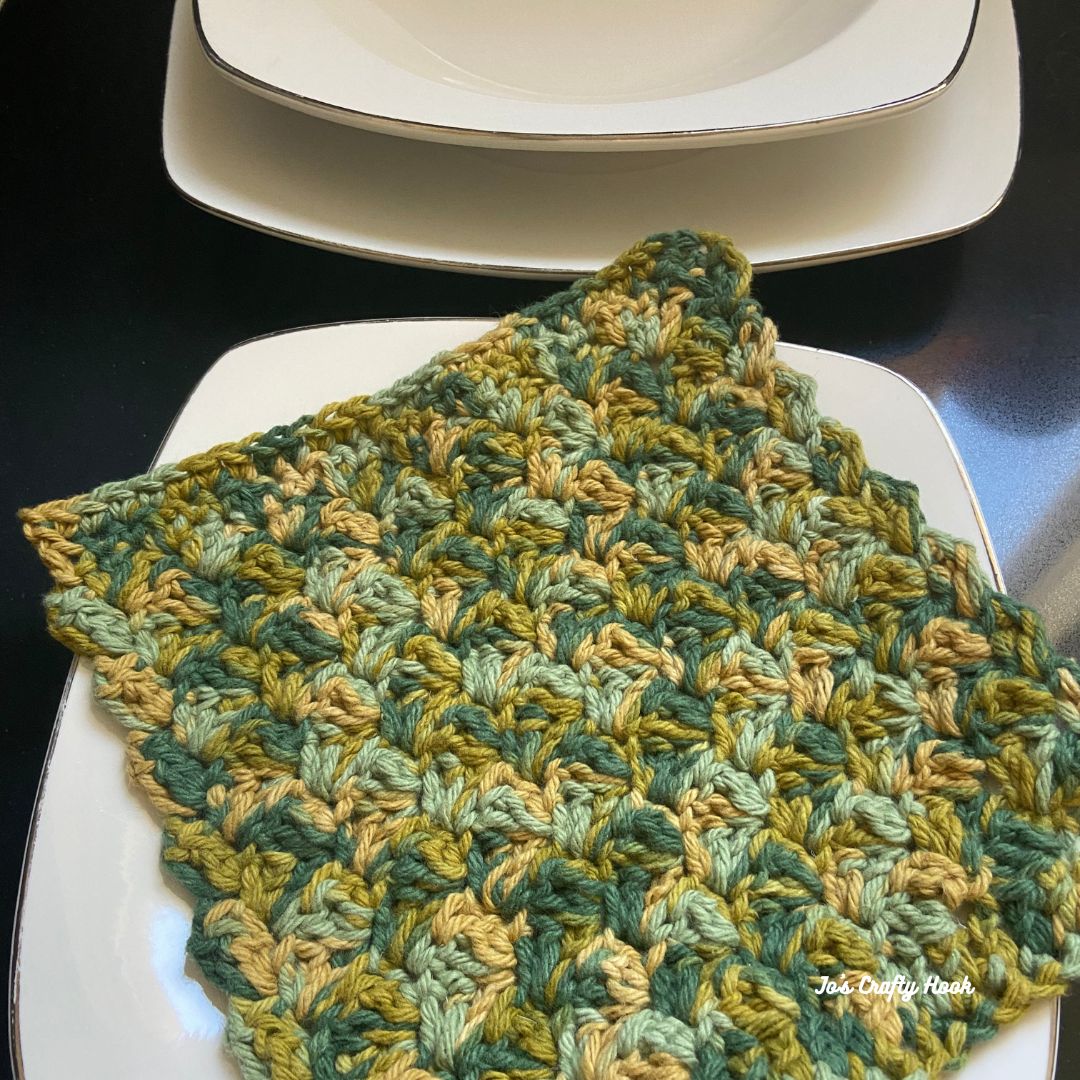
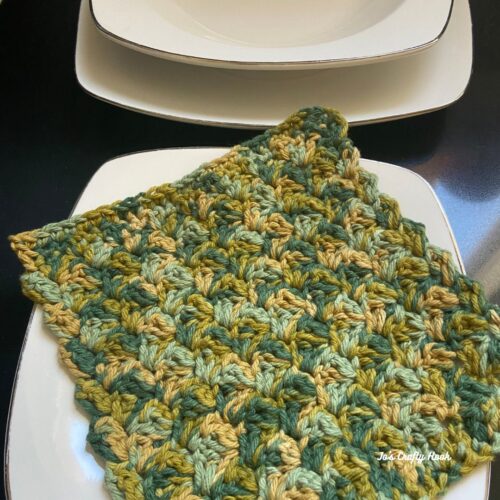
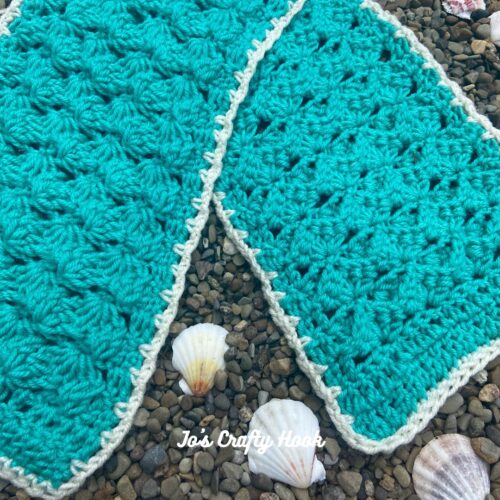
The Wash Up Cloths Crochet Pattern features a crochet stitch some of you may have not tried before, the Sedge Stitch.

The Sedge Stitch inside the Wash Up Cloths Crochet Pattern consist of a single crochet and 2 double crochet all in one stitch.  The Sedge Stitch gives the washcloth a nice textured look and feel that is great for cleaning and washing up.

My Wash Up Cloths Crochet Pattern contains 2 cloth crochet patterns inside.  The crochet pattern is a quick and easy one and hey work up so fast you can make a lot in one day!

You will find a FREE version of my Wash Up Washcloths below.  These would be a perfect make for the guys in your life.  My hubby uses them in his garage for when he works on cars or needs to wash up his tools.

This post contains affiliate links that appear at no cost to you.

March Events

Sign up for my Blooming Flowers Wall Hanging CAL.

Please wait...

Thank you for signing up!

Wash Up Washcloths Free Crochet Pattern

Info Needed to make the Wash Up Washcloths

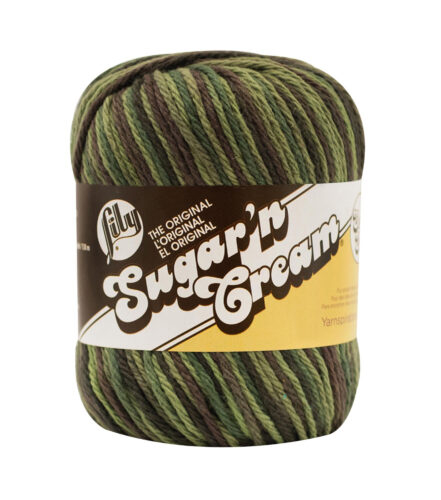
I used Lily Sugar’n Cream 100 % Cotton Yarn in Camouflage.  113g / 4oz, 184m / 200yd

You can find Lily Sugar’n Cream at LoveCrafts in Camouflage or in a Solid Color.


US Terminology

Beginner Friendly

Materials:
US H or 5 mm Crochet Hook
Washcloth – 50-65 yds #4 Ply Medium Weight Cotton Yarn
Dishcloth – 80-100 yds of #4 Ply Medium Weight Cotton Yarn
Tapestry Needle
Scissors

Abbreviations/Stitch(es) Used:
ch = chain
sc = single crochet
fsc = foundation single crochet
sk = skip

Special Stitch:
Sedge Stitch:  consists of placing (sc, 2 dc) all in the same stitch.

Notes:
the stitch count used is a multiple of 3 + 1
the discloth’s stitch count is in parentheses

Gauge:
US H or 5 mm Crochet Pattern
12 st x 8 rows = 4”

Finished Sizes:
Washcloth:  8” x 8”
Dishcloth:  12” x 12”

My Left Hand Video Tutorial can be found on my YouTube Channel
fsc = foundation single crochet

Free Crochet Pattern

R1:  fsc 25 (37). ch 1, turn (25, 37 sc)

Optional:  ch 26 (38) sc in 2nd ch from hook, sc across.  ch 1, turn (25, 37 sc)

R2:  sc in 1st st, sc across.  (25, 37 sc)

R3:  ch 1, turn  (sc, 2 dc) all in 1st st *sk 2 st, sedge in next st.  rep from * across.  (27, 39 st)

R4:  ch 1, turn.  sk 1st 2 dc, sedge st in next sc.  sedge st in each sc across  (27, 39 st)

R5-R16(24):  rep R4

R17(25):  ch 1, turn.  sk 1st dc, sc in next dc, dc in next sc.  *sc in next 2 dc, dc in next sc.  rep from * across. (26, 38 st)

R18(26):  ch 1, turn.  sc in same st, sc across.  (26, 38 sc)

Fasten off and weave in ends.

See!  I told you the Wash Up Cloths Crochet Pattern was Quick & Easy!  I would love to see your finished version! 

You can tag me:
@joscraftyhook on IG
Jo’s Crafty Hook FB Group


You can find some of my free crochet patterns at my website.


Find me, Jo of Jo’s Crafty Hook at the places listed below.

Email:  j.o@joscraftyhook.com
Linktree

Website

Facebook Group Jo’s Crafty Hookers

Facebook Group Jo’s Crafty Hook Designs

Facebook Page Jo’s Crafty Hook

Facebook Page:  Crochet Designer Community

Ravelry

LoveCrafts

Etsy

Instagram

YouTube

Pinterest

Donations Accepted


Loading

Long Stalks Placemat

Long Stalks Placemat

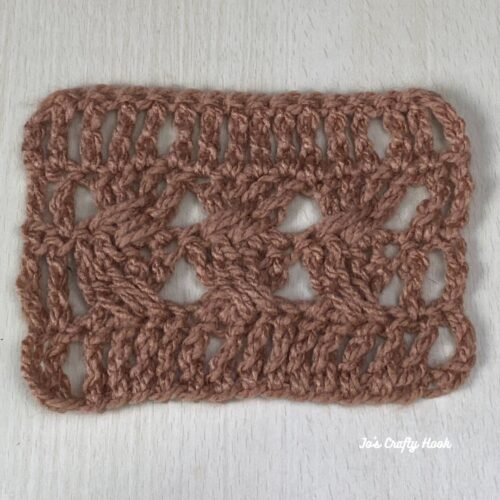
The Long Stalks Placemat crochet pattern uses a crochet stitch I designed recently. It is called the triple crochet box stitch. 

The Triple Crochet Box Stitch can be called the Triple Crochet X Stitch or the Triple Crochet Crossover Stitch.  The design is a take of the Double Crochet X Stitch, it just uses triple crochet instead.


Triple Crochet Box Stitch or Triple Crochet X Stitch


Triple Crochet Box Stitch can be found on my YouTube Channel.
15 Days of December Discounts Blog Hop hosted by Regina P Designs

For the 1st 15 days of December you can find great discounted crochet patterns for $1.  These crochet patterns are quick & easy to make for those on your Christmas lists.  

Visit the 15 Days of December Deals Blog Hop daily and get some great crochet patterns for $1!


Get the Long Stalks Placemat Crochet Pattern for $1 on December 12-13, 2023 for 24 hours.

Get a Premium Copy of my Long Stalks Placemat Crochet Pattern for $1 on December 12-13, 2023.  

Visit the 15 Days of December Discounts Blog Hop and get the Coupon Code needed to get my Long Stalks Placemat Crochet Pattern for $1.


Once you have the Coupon Code needed to get the discounted Long Stalks Placemat Crochet Pattern, click on the button below.  Use the code and apply it at Checkout at my Ravelry Store.  That’s it!


Crochet Patterns using the Triple Crochet Box Stitch.
Long Stalks Placemat

The premium copy of the Long Stalks Placemat crochet pattern has Step-by-Step Picture Tutorials and my Left Handed Video Tutorials for the Triple Crochet Box Stitch and the Alternate Chain 3.  You can find the Long Stalks Placemat Crochet Pattern at my Ravelry Store or LoveCrafts.

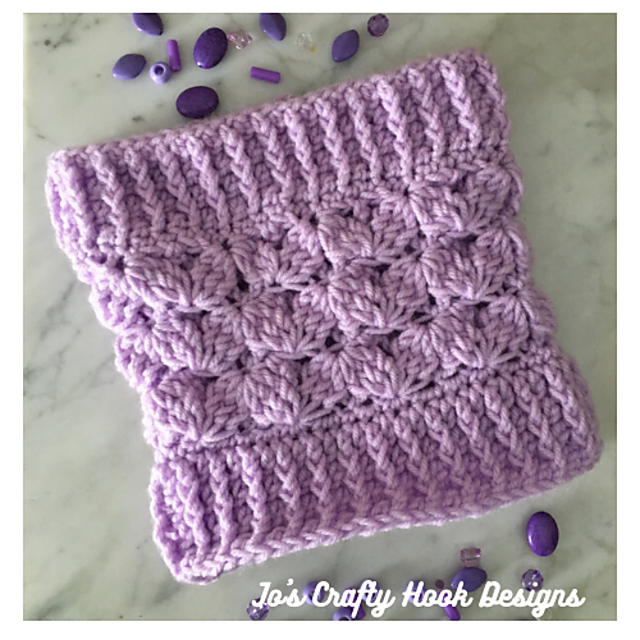
Boxy Bulky Cowl

I originally created the Triple Crochet Box Stitch for the Boxy Bulky Cowl.  I wanted a longer stitch because I was using a #6 ply Bulky Yarn.   I wanted to give the cowl a nice textured stitch that would create a drape to the cowl.

Most cowls are designed for a tighter stitch because most of them are worn to keep the chill out.  Since I was using a bulkier yarn, I wanted something that wouldn’t cause the wearer to get too hot.

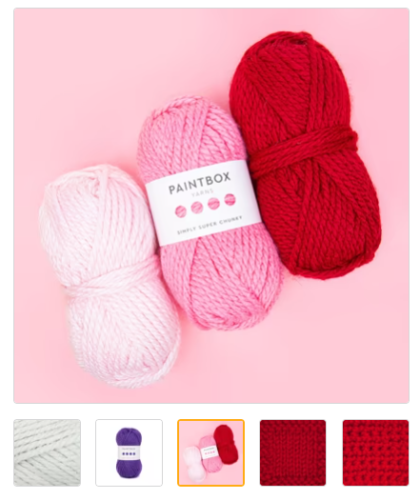
If you would like to try the Triple Crochet Boxy Stitch with a heavier yarn, like Paintbox Yarns Simply Super Chunky, you can find the premium crochet patterns at my Ravelry Store or LoveCrafts or at my Etsy Shop.

Triple Crochet Box Stitch


Special Stitches
Triple Crochet:
YO twice, insert hook into specified space, YO draw through 2 loops on hook.  YO, draw through 2 loops on hook, YO, draw through last 2 loops on hook.

How to Crochet the Triple Crochet Box Stitch

1st Step:
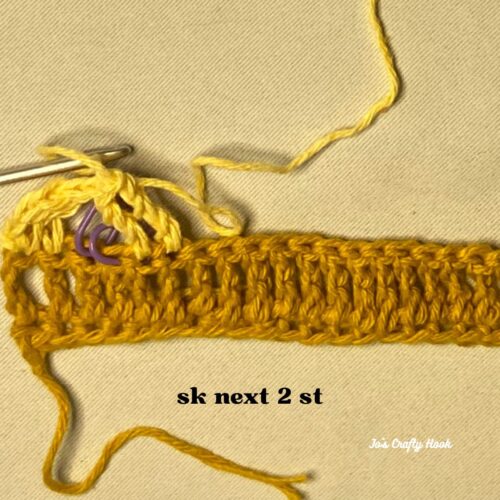
trc in 1st 2 st, sk 2 st, YO twice, insert hook into next st, YO draw through 2 loops on hook, YO, draw through 2 loops on hook, YO draw through last 2 loops on hook.  rep once more.


2nd Step:
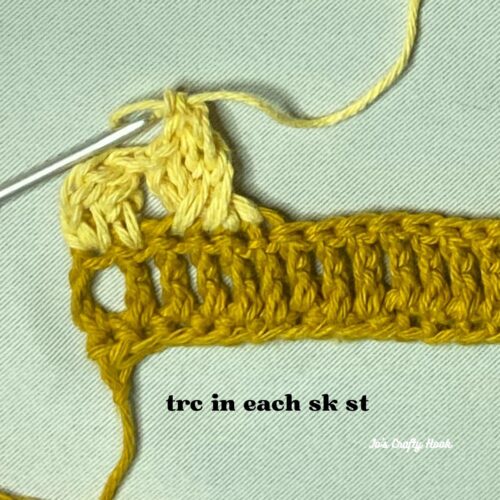
YO twice, insert hook into 1st sk st, YO draw through 2 loops on hook, YO, draw through 2 loops on hook, YO draw through last 2 loops on hook.  YO, insert hook into 2nd sk st, YO, draw through 2 loops on hook, YO, draw through 2 loops on hook, YO, draw through last 2 loops on hook.


Newsletter

While you are there be sure to sign up for my Newsletter where you will receive news about my New Crochet Pattern Releases, Collaborations, and MORE!  For signing up you will also get a FREE crochet pattern!

Jo’s Crafty Hook’s Crochet Patterns

You will find some of my Premium crochet patterns , by visiting any of my stores, by clicking on any of the Buttons below.


Custom Orders Welcome

If you would like me to crochet any of my designs for you or others, I do take Custom Orders.  Visit my Ravelry Store or LoveCrafts to see some ideas of what you would like to Custom Order.  You can email me with your order or any other questions at j.o@joscraftyhook.com.

********************************************************

Find me, Jo of Jo’s Crafty Hook at the places listed below.

Email:  j.o@joscraftyhook.com

Website

Facebook Group Jo’s Crafty Hookers

Facebook Group Jo’s Crafty Hook Designs

Facebook Page Jo’s Crafty Hook

Facebook Page:  Crochet Designer Community

Ravelry

LoveCrafts

Etsy

Instagram

YouTube

Pinterest

Donations Accepted

Loading

Oyster Shell Napkin Free Crochet Pattern

Oyster Shell Napkin Free Crochet Pattern

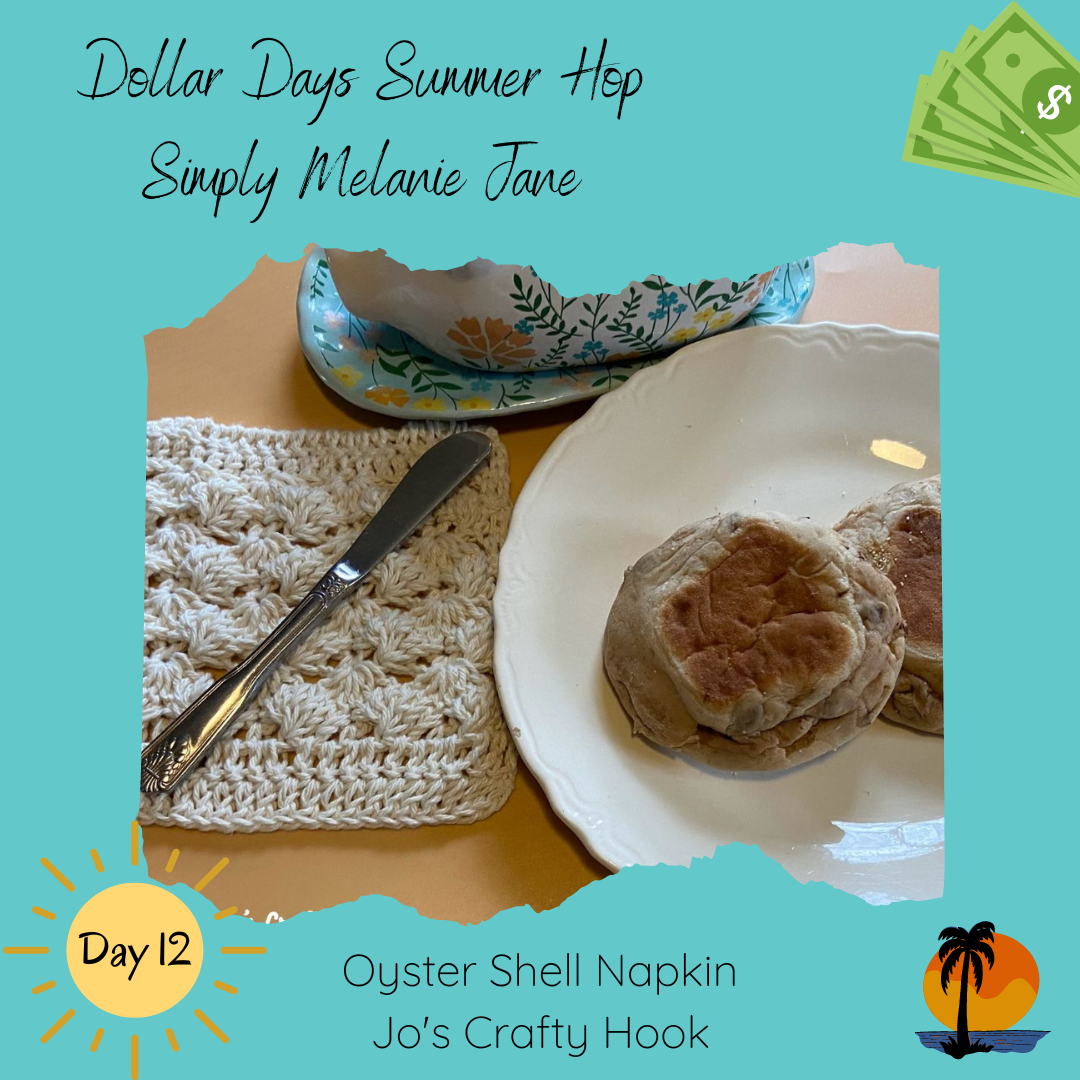
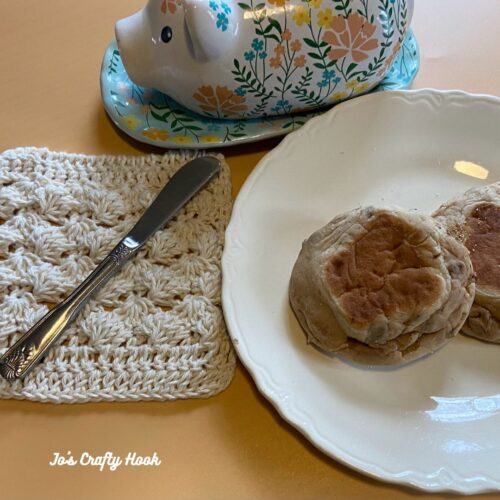
Who doesn’t like adding a little something special to our table settings?  Because I do, I want to share with you the Oyster Shell Napkin Free Crochet Pattern with you free here on my website.


This post contains affiliate links that help me raise money to allow me to share more information with you.  

While you are there be sure to sign up for my Newsletter by clicking on the Subscribe Button in the top right hand corner.  You will receive news about my New Crochet Pattern Releases, Collaborations, and MORE!  For signing up you will also get a FREE crochet pattern!


Oyster Shell Napkin Crochet Pattern


You can find the Ad-Free premium copy of the Oyster Shell Napkin at my Ravelry or LoveCrafts Store for a small fee.


Terminology:
US Terms

Skill Level:
Advanced Beginner/Intermediate

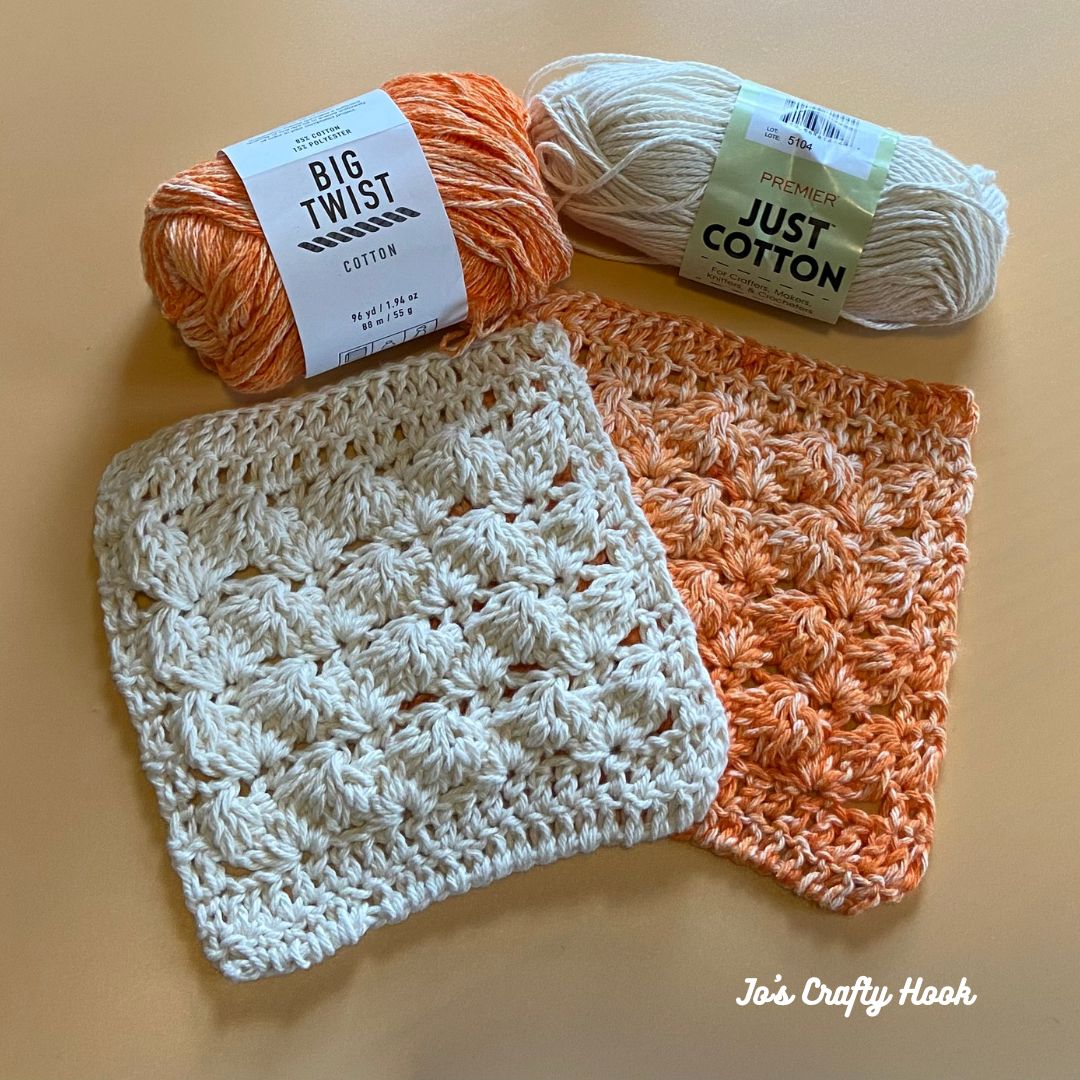
I used Big Twist #4 ply Medium Weight Cotton in Sherbert.  (96 yds/1.94 oz) (88 m/55 g)
I used Premier Just Cotton #4 ply Medium Weight Cotton in Cream.  (87 yds/ 50 g) (1.76 oz/ 80 m) 

Materials:
US G or 4 mm Crochet Hook
40-50 yds #4 Medium Cotton Weight Yarn
Scissors
Tapestry Needle

Abbreviations/Stitches Used:
ch = chain
st(s) = stitch(s)
sl st = slip stitch
R = Row
dc  = double crochet
alt ch 2 = alternate chain 2
rep = repeat
sp(s) = space
sk = skip
fpdc = front post double crochet
fpdc3tog = front post double crochet 3 together
fpdc6tog = front post double crochet 6 together

Special Stitches:

Shell Stitch – when you crochet (3 dc, ch 2, 3 dc) all in the same stitch.

Alternate Chain 2 – is used in place of ch 3, this creates a smoother edge.

Front Post Double Crochet – double crochet going around the front post of the dc from the previous row.

Front Post Double Crochet 3 Together – when you do a front post double crochet 3 decrease together around the next 3 double crochet, decreasing them into one stitch.

Front Post Double Crochet 6 Together – when you do a front post double crochet 6 dc decrease together around the next 6 double crochet, decreasing them into one stitch.

Video Tutorials (Left Hand):

Front Post Double Crochet

Front Post 3 Together

Front Post 6 Together

Notes:
ch 3 counts as a dc
ch 2 counts as a stitch
alt ch 2 counts as a dc
fpdc3tog creates a decrease into 1 st
fpdc6tog creates a decrease into 1 st
scarf is done in a multiple of 3 + 2
for a wider scarf add multiples of 3


Gauge:
US I Crochet Hook or 5.5 mm
12 dc x 8 rows = 4”

Gauge Swatch:
US I Crochet Hook or 5.5 mm
Gauge Swatch only has 5 rows

**If you do not meet gauge, try going up or down a hook size**

R1:  ch 17, dc in 4th ch and each ch across.  turn (15 dc)

R2:  alt ch 2 or ch 3, dc in each st across. turn (15 dc)

R3:  alt ch 2 or ch 3, dc in next st, sk 3 st.  *shell in next st, sk 3.  rep from * once more.  dc in last 2 sts.  turn (4 dc & 2 shells)

R4:  alt ch 2 or ch 3, dc in next st.  fpdc3tog over the 1st 3 dc of shell, ch 2, sc in ch-2 sp of shell, ch 2.  fpdc6tog over the next 6 dc of shells.  ch 2, sc in ch-2 sp of shell, ch 2, fpdc3tog over the last 3 dc of shell.  2 dc in last 2 sts. turn (4 ch-2 sp, 2 sc, 2 fpdc3tog & 1 fpdc6tog)

R5:  alt 2 or ch 3, dc in next st. *shell in sc. rep from * once more, dc in last 2 sts. turn (4 dc & 2 shells)

Oyster Napkin Free Crochet Pattern

R1:  fdc 23.  turn  (23 dc)

Optional:  ch 26, dc in the 4th ch and each ch across.  turn (23 dc)

R2:  alt ch 2 or ch 3, dc in each st across.  turn (23 dc)

R3(WS):  alt ch 2 or ch 3, dc in next st, sk 3 sts.  *shell in next st, sk 3 sts.  rep from * 3 times, dc in last 2 sts. turn (4 dc & 4 shells)

R4(RS):  alt ch 2 or ch 3, dc in next st.  ch 1, fpdc3tog over the 1st 3 dc of shell, ch 2, sc in ch-2 sp of shell, ch 2.  *fpdc6tog over the next 6 dc of shells.  ch 2, sc in ch-2 sps, ch 2.  rep from * twice.   fpdc3tog over the last 3 dc of shell, ch 1. 2 dc in last 2 sts. turn (4 dc, 4 sc, 2 ch-1 sp, 8 ch-2 sps, 2 fpdc3tog & 3 fpdc6tog)

R5:  alt 2 or ch 3, dc in next st. *shell in sc. rep from * until last 2 st.  dc in last 2 sts. turn (4 dc & 4 shells)

R6:  alt ch 2 or ch 3, dc in next st.  ch 1, fpdc3tog over the 1st 3 dc of shell, ch 2, sc in ch-2 sp of shell, ch 2.  *fpdc6tog over the next 6 dc of shells.  ch 2, sc in ch-2 sps, ch 2.  rep from * twice.   fpdc3tog over the last 3 dc of shell, ch 1. 2 dc in last 2 sts. turn (4 dc, 4 sc, 2 ch-1 sp, 8 ch-2 sps, 2 fpdc3tog & 3 fpdc6tog)

R7-R10:  Rep R5 & R6 

R11:  alt ch 2 or ch 3, dc in next st, dc in ch-1 sp, dc in top of fpdc3tog , *dc in ch-2 sp, dc in sc, dc in ch-2 sp, dc in top of fpdc6tog.  rep from * until last fpdc3tog, dc in top of fpdc3tog, dc in ch-1 sp, dc in last 2 sts.  turn (23 dc)

R12:  alt ch 2 or ch 3, dc in each st  across.  (23 dc)

Fasten off and weave in ends.

I would LOVE to see your version!

That’s it!  You have completed your own Oyster Shell Napkin!  I would LOVE to see your version!  You can tag me at any of my Social Media Sites listed above using any of the hashtags below.

#oystershellnapkin @joeyleabaird @joscraftyhook @joscraftyhookdesigns @jo_bear38 


If you would like to receive more information about the events happening at Jo’s Crafty Hook and receive a FREE crochet pattern, why not Subscribe to my Newsletter at my website.


Lilac Cluster Stitch

I created this crochet stitch when I designed my Lilac Cluster Beanie and Lilac Cluster Cowl crochet patterns.  The original version of the Lilac Cluster Stitch is worked in the round.  You can find both of these crochet patterns at my Ravelry or LoveCrafts Stores.


Lilac Cluster Stitch Video Tutorials

The Lilac Cluster Stitch uses 2 main crochet stitches, the FPDC3TOG or the front post double crochet 3 together and the FPDC6TOG or the front post double crochet 6 together.

You can find a Left Handed Video Tutorial on my YouTube Channel for my Lilac Cluster Beanie Part 1 and Part 2, that shows you how the Lilac Cluster Stitch was originally used.

Lilac Cluster Beanie Video Tutorial Part 1

Lilac Cluster Beanie Video Tutorial Part 2

You can also find more of my Left Handed Video Tutorials on my YouTube Channel.


I always wanted to use the lilac cluster stitch in a design that works in rows.  The first crochet pattern I tried with the Lilac Cluster Stitch with rows was the Oyster Shell Scarf.  I loved using this stitch in rows so much that I had to make another crochet design with this crochet stitch!  


Oyster Shell Scarf


You can find the Oyster Shell Scarf as a free crochet pattern on my website.  You can also purchase an AD-Free premium copy from my Ravelry or LoveCrafts Store for a small fee.

Find me, Jo of Jo’s Crafty Hook at the places listed below.

Email:  j.o@joscraftyhook.com

Website

Facebook Group Jo’s Crafty Hookers

Facebook Group Jo’s Crafty Hook Designs

Facebook Page Jo’s Crafty Hook

Facebook Page:  Crochet Designer Community

Ravelry

LoveCrafts

Etsy

Instagram

YouTube

Pinterest

Donations Accepted

Loading

Mae’s Flower Free Crochet Pattern

Mae’s Flower Free Crochet Pattern
Day 7 – Blooming Flowers Wall Hanging CAL

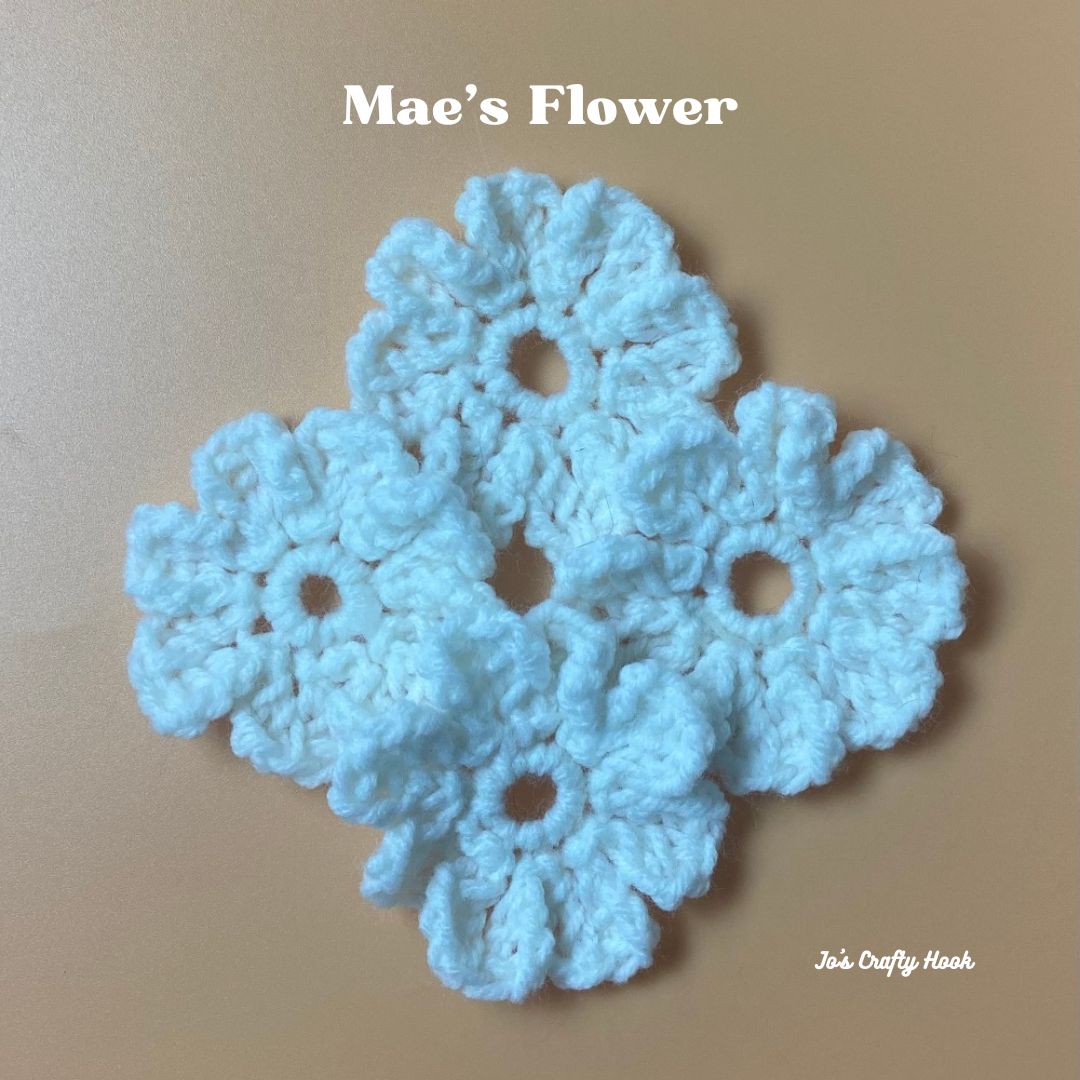
The Mae’s Flower Crochet Pattern was used as the focal piece in some of my other designs.  The FREE crochet pattern can be found below.

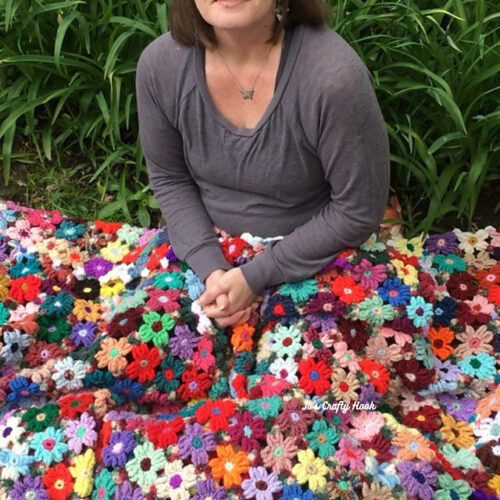
I made 4 of the Mae’s Flowers to add to my Blooming Flowers Wall Hanging.  You can make as many of the Mae’s Flowers as you like for your version of the wall hanging.

You will find the Mae’s Flower Crochet Pattern in my Blooming Flowers Wall Hanging eBook.  My eBook is on sale for the duration of the Blooming Flowers Wall Hanging CAL.  You can purchase the pattern for $3 at my Ravelry Store for $3 and work on the wall hanging at your own pace.

Come join in on the fun and share your WIPs with us inside the Crochet-A-Long with Us FB Group.

Find Crochet Patterns using the Mae’s Flower

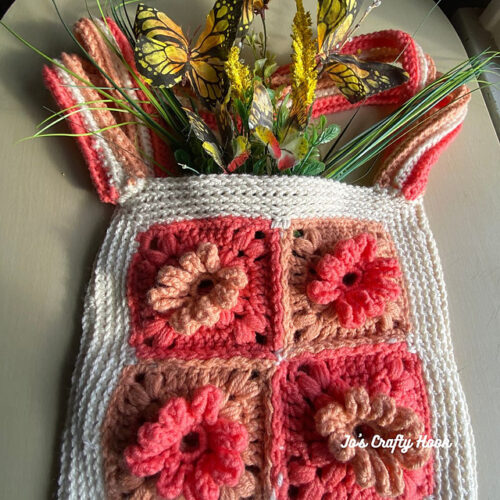
In today’s post I am sharing with you a FREE crochet pattern of my Mae’s Flower.  The Mae’s Flower is a simple and easy flower to crochet.  You can use the Mae’s Flower as an applique and add to headbands, pillows, purses, and more!  You can even used a lighter weight yarn for a smaller flower.

You can find some crochet patterns that I used the Mae’s Flower Crochet Pattern:

Granny Mae’s Purse
Mae’s Flower Garden Afghan

Blooming Flowers Wall Hanging


Mae’s Flowers Crochet Pattern Details:

I used a variety of yarns in a variety of colors.  The Mae’s Flowers can be made in solid or contrasting colors.  This crochet pattern is a great way to use up your scrap yarn.

Materials:
2-4 yds of 4 ply Worsted/Aran Weight Yarn
US H Crochet Hook or 5mm
Tapestry Needle
Scissors

Abbreviations/Stitches Used:
sc = single crochet
dc = double crochet
ch = chain
st = stitch
sl st = slip stitch
sp = space
rep = repeat
RS = Right Side

Flower Size: 3” x 3”

Notes:
Flowers can be made in a solid color or a variety of colors.
Below is a video tutorial for the making of the flowers left handed.

Video Tutorial:
Flowers Instructions

Mae’s  Flower Crochet Pattern in a Solid Color

Flower (Solid Color)

**It would be a great idea to weave in your ends as you go.  If you do not, you will spend a long time weaving them in after the afghan is complete**

R1: make a loose slip knot or a magic circle, ch 2, 8 sc in ch 1 or magic circle.  sl st in 1st sc to join.

R2:  ch 4, dc in ch 1 just made , ch 4, dc in 2nd ch 1 made, sl st in same sc.  *sl st in next sc, ch 4, dc in ch 1 just made, ch 4, dc in 2nd ch 1, sl st in same sc.  rep from * around.  sl st in 1st st to join.


Mae’s Flower Crochet Pattern in 2 Colors

Flowers (2 Colors)

**It would be a great idea to weave in your ends as you go.  If you do not, you will spend a long time weaving them in after the afghan is complete**

Center of Flowers

R1: make a loose sl knot or a magic circle, ch 2, 8 sc in ch-1 or magic circle.  sl st in 1st sc to join.

Fasten off and weave in ends.

R2:  attach another color of yarn with a sl st in any sc.  ch 4, dc in ch 1 just made, ch 4, dc in 2nd ch 1,  sl st in same sc.  *sl st in next sc, ch 4, dc in ch 1 just made, ch 4, dc in 2nd ch 1, sl st in same sc.  rep from * around.  sl st in 1st st to join.

Stores

You can find any of my Ad-Free Crochet Patterns at my Ravelry Store, Etsy Shop, or LoveCrafts.


Find me, Jo of Jo’s Crafty Hook at the places listed below.

Email:  jo@joscraftyhook.com
Linktree

Website

Facebook Group Jo’s Crafty Hookers

Facebook Group Jo’s Crafty Hook Designs

Facebook Page Jo’s Crafty Hook

Facebook Page:  Crochet Designer Community

Ravelry

LoveCrafts

Etsy

Instagram

YouTube

Pinterest

Donations Accepted

Loading

Sweet Dreams Preemie Blanket

Sweet Dreams Preemie Blanket


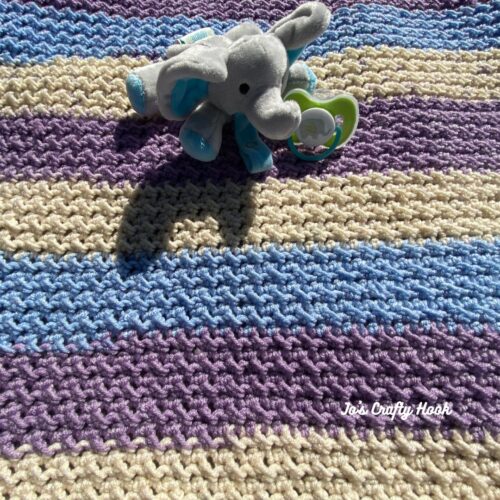
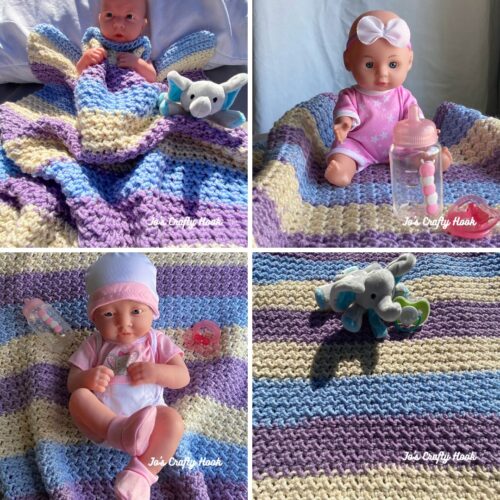
The Sweet Dreams Preemie Blanket Crochet Pattern is not just a preemie blanket crochet pattern.  There are also 3 additional sizes to choose from.  Inside the crochet pattern you will find sizes for a Cradle, a Stroller, and a Receiving blanket.

The Sweet Dreams Preemie Baby Blanket was originally designed for those who have had preemie babies or to make to donate to your local NICU wards in your local hospital.

Don’t forget while you are here to be sure to sign up for my Newsletter where you will receive news about my New Crochet Pattern Releases, My Upcoming Blog Hops, other Collaborations, and MORE!  For signing up you will also get a FREE crochet pattern!

You can find more of my designs for baby items, accessories in all size, just for men and more at my Ravelry Store and LoveCrafts.

Custom Orders Welcome

If you would like to have a Sweet Dreams Baby Blanket of your own, I do accept Custom Orders.  You can email me at j.o@joscraftyhook.com and I will be more than happy to crochet you your own Size of the Sweet Dreams Baby Blanket.


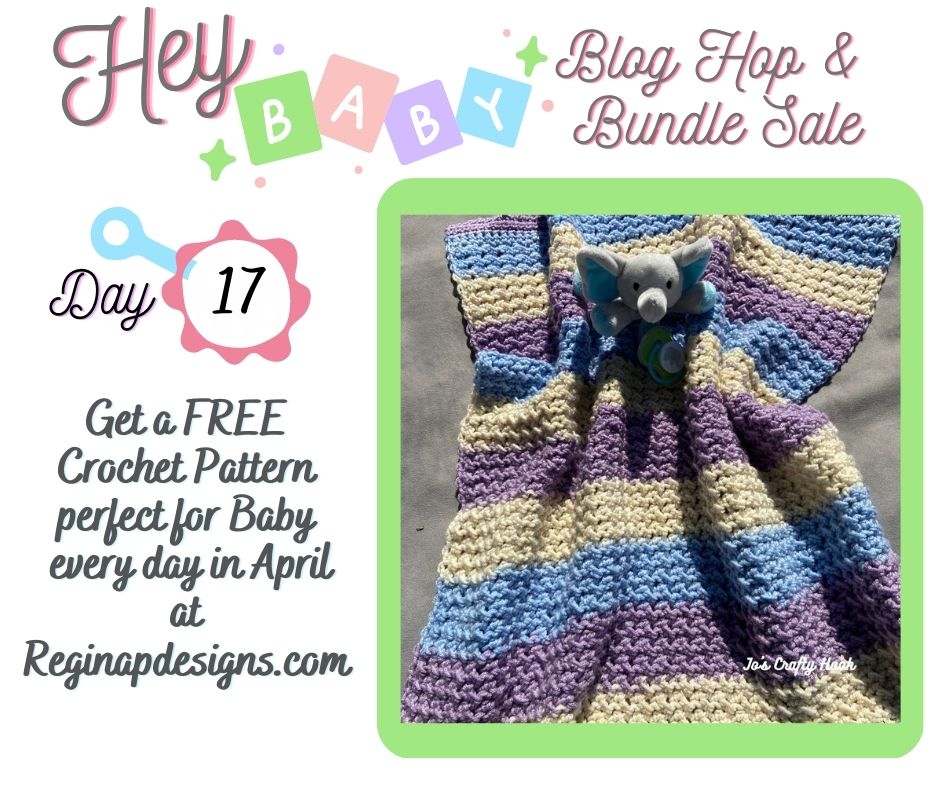
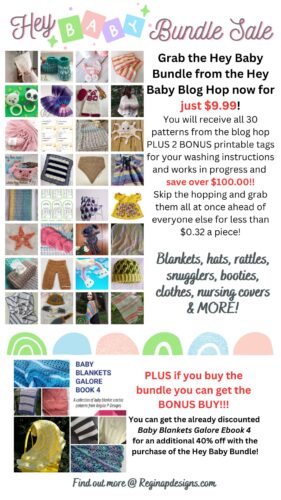
Hey Baby Blog Hop & Bundle Sale

You can “HOP” right over the event and purchase the  Hey Baby Bundle Sale & a Bonus Baby Blankets Galore Book 4 Bundle to find out more about what is inside.  There is also more about these Bundles below.

Hey Baby Blog Hop

Each day during the month of April, you will find a new FREE premium crochet pattern you can get from some awe-SOME crochet designers!  You can visit the Hey Baby Blog Hop’s Main Page Daily from 9a EST until 8:59a EST to get the day’s FREE crochet pattern!  Visit the main page daily or to find more!

Hey Baby Blog Hop


Hey Baby Bundle Sale & Bonus

If you would like to “Hop” right over all the Blog Hopping, but would love to have ALL 31 baby crochet pattern ALL in one place, you can purchase the Hey Baby Bundle for $9.99!  Click on the Button below to find out more or to purchase the Hey Baby Bundle.


As an added Bonus you can get the Baby Blankets Galore Book 4. for $11.99. This book contains 7 unique baby blanket patterns with color photos & handy charts.  Click on the image below to purchase the Bonus Buy or for more info.


How to get a FREE premium copy of my Sweet Dreams Preemie Blanket Crochet Pattern on April 15, 2023.


The Sweet Dreams Preemie Blanket Crochet Pattern will be FREE April 17, 2023 starting at 9a EST until April 18, 2023 8:59a EST.  The giving away of a FREE premium copy of the crochet pattern is part of Regina P Designs’ Hey Baby Blog Hop and Bundle Sale.  This event will be going on the whole month of April 2023.  More information about how you can get a FREE copy below.

Visit the Hey Baby Blog Hop Main Page at Regina P Design to get the Coupon Code needed to get my Sweet Dreams Preemie Baby Blanket from my Ravelry Store by Clicking on the Button Below.


Once you have the Coupon Code, you are ready to get your FREE premium copy of the Sweet Dreams Preemie Blanket.  Click on the Button below to visit my Ravelry Store.  Add the crochet pattern your Cart at Ravelry, use the Coupon Code you got from the main post and Checkout.  That’s it!


If you missed my day of the Hey Baby Blog Hop you will find the Preemie Size of the Sweet Dreams Baby Blanket below.  You can also purchase a Premium copy from my Ravelry or LoveCrafts Stores for a small fee.  The premium copy will have ALL 4 size patterns to choose from.


Don’t forget, each day, until the end of April, you can still get some fabulous FREE premium crochet patterns!!  Visit the Hey Baby Blog Hop each day by clicking on the button below.


Also as part of the Hey Baby Blog Hop & Bundle Sale, you can purchase the complete Hey Baby Bundle for $9.99 by clicking on the link below.  Inside the Hey Baby Bundle you will find ALL 31 premium crochet patterns ALL in 1 place!


Custom Orders Welcome

If you would like to have a Sweet Dreams Baby Blanket of your own, I do accept Custom Orders.  You can email me at j.o@joscraftyhook.com and I will be more than happy to crochet you your own Size of the Sweet Dreams Baby Blanket.


Information Needed for you to crochet my Sweet Dreams Preemie Blanket Crochet Pattern


Materials:
US I Hook or 5.5mm
490-550 yards of #4 Worsted Weight Yarn
I used 450 yards of Premier Sweet Roll

Abbreviations/Stitches Used:
ch = chain
st = stitch
sl st = slip stitch
hdc = half double crochet
fsc = foundation single crochet
CS = Crunch Stitch
rep = repeat 

Special Stitches:
Crunch Stitch  

  1. hdc in same stitch as ch 1 
  2. sl st st in the next  
  3. repeat until the end of the row, ch 1 and turn 
  4. NOTE- Each row will always start with a hdc and end with a slip stitch.

Size:
23” x 23”

Notes:
Each row will always start with a hdc and end with a sl st.
Ch 1 does not count as a stitch
Every yarn is different.  If you are having trouble try going up or down a hook size.

Gauge:
US I Hook or 5.5mm
16 st x 8 rows = 4”
7 CS x 8 rows = 4”

Gauge Swatch:
fsc 16 turn (16 fsc)
Optional:  ch 17, sc in 2nd ch from hook, sc across.  (16 sc)
R1:  ch 1, sc in each st across.  ch 1 turn (16 st)
R2:  *hdc  in the same st, sl st in next st*  rep from *  until the end of row. ch 1, turn.  (16 st)
R3-R8:  Repeat R2

Sweet Dreams Preemie Blanket Crochet Pattern


R1
:  fsc 74.  ch 1 and turn  (74 fsc)
Optional:  ch 75, sc in 2nd ch from hook, sc across.  (74 sc)

R2-R5: sc in same st and each st across.  ch 1,  turn.  (74, 80, 84, 92 sc)

R6-R44:  *hdc in same st, sl st in next st.  rep from * until end of the row, ch 1, turn.  (74, 80, 84, 92 hdc)

R45 – R49:  sc in same st, sc in each st across.  ch 1, turn.  (74 sc) 

Fasten off and weave in ends.

You can get 3 others sizes of the Sweet Dreams Preemie Blanket Crochet Pattern at Ravelry or LoveCrafts!

You can find more of my designs for baby items, accessories in all size, just for men and more at my Ravelry Store and LoveCrafts.


Don’t forget while you are here to be sure to sign up for my Newsletter where you will receive news about my New Crochet Pattern Releases, My Upcoming Blog Hops, other Collaborations, and MORE!  For signing up you will also get a FREE crochet pattern!


Find me, Jo of Jo’s Crafty Hook at the places listed below.

Email:  j.o@joscraftyhook.com

Website

Facebook Group Jo’s Crafty Hookers

Facebook Group Jo’s Crafty Hook Designs

Facebook Page Jo’s Crafty Hook

Facebook Page:  Crochet Designer Community

Ravelry

LoveCrafts

Etsy

Instagram

YouTube

Pinterest

Donations Accepted

Welsh Poncho Free Crochet Pattern

Welsh Poncho Free Crochet Pattern


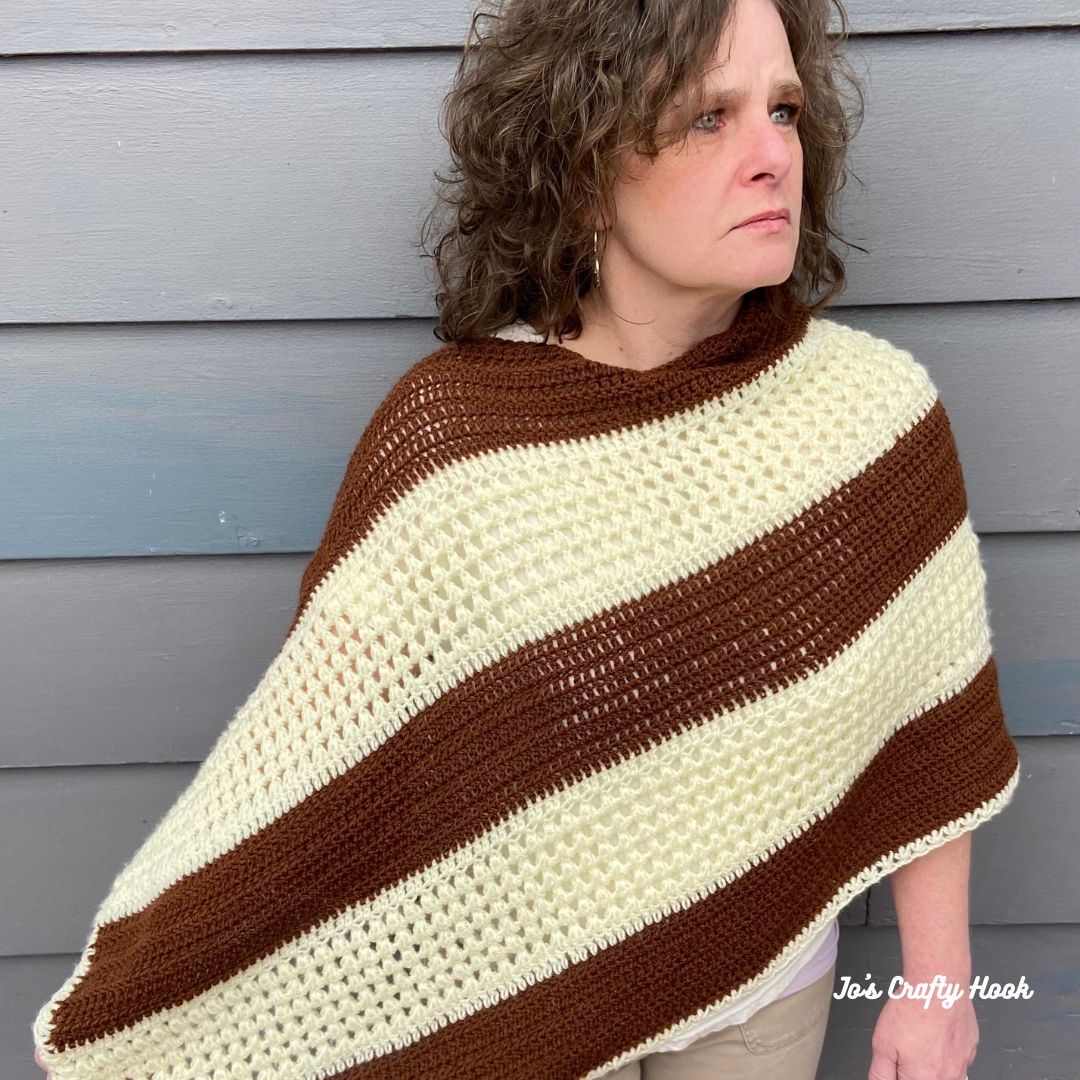
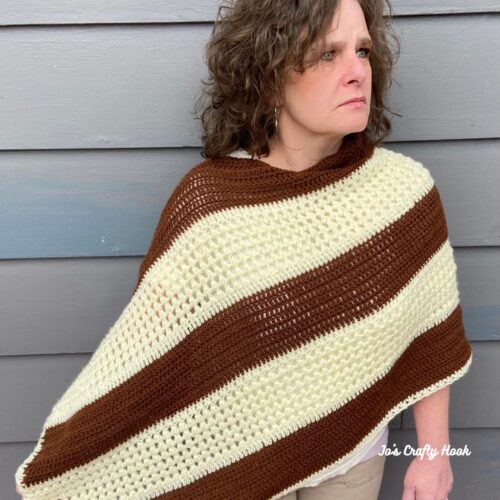
Are you looking to add a little luxury to your wardrobe?  Well, using the Welsh Poncho Free Crochet Pattern will help you achieve just that!

The Welsh Poncho Crochet Pattern uses a crochet stitch that I fell in love with last year, the Triad Stitch.  The Triad Stitch is just like a Puff Stitch, only it is done over 3 stitches.

The Triad Stitch has one meaning that I fell in love with, this is where I came up with it’s name Welsh.  Triad means a Welsh form of literary composition with an arrangement of subjects or statements in groups of three.

If you think about a crochet pattern it is made up of 3 things:

  • using crochet stitches to create the design
  • a composition of writing the crochet pattern
  • taking pictures to showcase the design

I first used the Triad Stitch in my Welsh Braided Cowl Crochet Pattern (see info below)  In the designing of the Welsh Braided Cowl I using another meaning of Triad, the braiding of three things together, this is where the Braided part of the design came in.  You can find out more about this below.

This kind of sounds like an English lesson, doesn’t it?!  lol

Handmade Wardrobe April

Today, April 10, 2023 you can get a premium copy of my Welsh Poncho crochet pattern at a discounted price, $3.50, this is 50% off the retail price as part of the Handmade Wardrobe April Blog Hop hosted by Fosbas Designs.

Click on the Button below to the Coupon Code needed to get the discounted price of my Welsh Poncho Crochet Pattern from my Ravelry Store.


Come back here and use the Coupon Code to use at my Ravelry Store at Checkout to get the Welsh Poncho Crochet Pattern for $3.50 by clicking on the Button below.


Click on the Button below to use your Coupon Code to get the Welsh Poncho Crochet Pattern at Checkout.


Handmade Wardrobe April Bundle

You can skip all the Blog Hopping and get a savings on all 15 crochet patterns for $9.99!  Click on the Button below for more information or to get the Handmade Wardrobe April Bundle for $9.99


If you missed my day as part of the Handmade Wardrobe April Blog Hop, you can purchase a premium copy of the Welsh Poncho Crochet Pattern for a small fee with all of the Picture and Video Tutorials inside.  You will find it at my Ravelry Store or LoveCrafts.

Information about the Welsh Poncho Crochet Pattern

The Welsh Poncho Crochet Pattern has 4 different sizes to choose from to make for Small, Medium, Large and XLarge.  Inside the Welsh Poncho Crochet Pattern you will find a size chart, step-by-step picture tutorials, and my Left Handed Triad Stitch Video Tutorial to help you every step of the way.

US Terminology

Skill Level: 
Advanced Beginner/ Intermediate

I used KnitPIcks Sport Weight Yarn (340 yds/100 g)
I used We Love Yarn Mega Ball (14.1 oz/400 g) 1312 yds/1200 m)

Materials:

US I Crochet Hook or 5.5 mm
MC –  Brown 550-680 yds of #3 ply Light/DK Weight Yarn
CC –   Cream 700-1200 yds of #3 ply Light/DK Weight Yarn
Scissors
Tapestry Needle

Abbreviations/Stitches Used:
ch = chain

st(s) = stitch
dc = double crochet

sk = skip
rep = repeat
YO = Yarn Over
MC = Main Color

CC = Contrasting Color

Notes:
alt ch 2 counts as a dc.
ch 3 counts as a dc.
ch 4 counts as a dc + ch 1.
The chain-1 sp counts as a st in the Triad Stitch.
There are helpful Picture Tutorials below to help you with the Triad Stitch.


Video Tutorial:

Triad Stitch – Left Handed

You can find more of my Left Handed Video Tutorials at my YouTube Channel


You can purchase a premium copy of the Welsh Poncho Crochet Pattern for a small fee with all of the Picture and Video Tutorials inside.  You will find it at my Ravelry Store or LoveCrafts.
Welsh Poncho Crochet Pattern

Using MC

R1:  fdc 192 turn (192 fdc) 

Optional:  ch 194 (210, 226, 242), dc in 4th ch from hook, dc across.  (192 dc)

R2-R8:  alt ch 2 or ch 3, dc across.  turn  (192 dc)

Fasten off and weave in ends.

Change to CC

R9:  alt ch 2 or ch 3, dc across.  turn  (192, 208, 224, 240) dc

R10:  Beginning Triad Stitch.  (see Special Stitches above).  rep from * across until last st.  dc in last st.  turn (95, 103, 111, 119) Triad Stitch & 2 dc

R11-R15:  Triad Stitch.  (see Special Stitches above).  rep from * across until last st.  dc in last st.  turn (95 Triad Stitch & 2 dc)

R16: alt ch 2 or ch 3, dc in each st across.  turn (192 dc)

Fasten off and weave in ends.

Change to MC

R17-R24:  alt ch 2 or ch 3, dc in each st across.  turn (192 dc)

Fasten off and weave in ends.

Change to CC

R25:  alt ch 2 or ch 3, dc across.  turn  (192 dc)

R26:  Beginning Triad Stitch.  (see Special Stitches above).  rep from * across until last st.  dc in last st.  turn (95 Triad Stitch & 2 dc)

R27-R31:  Triad Stitch.  (see Special Stitches above).  rep from * across until last st.  dc in last st. turn (95 Triad Stitch & 2 dc)

R32:  alt ch 2 or ch 3, dc in each st across.  turn (192 dc)

Fasten off and weave in ends.

Change to MC

R33-40:  alt ch 2 or ch 3, dc in each st across.  turn (192 dc)

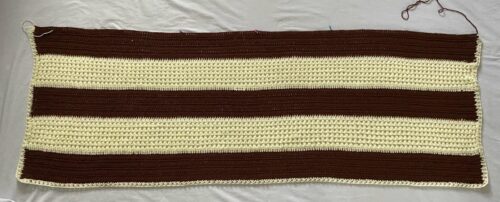
Leave a long tail of yarn for sewing Neck Opening closed.


Creating Neck Opening

Step 1:
Lay your long piece with the WS facing up

Step 2:

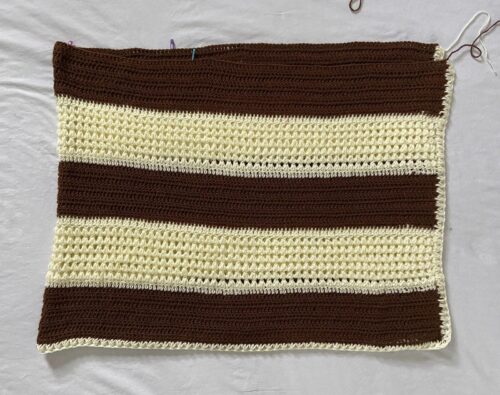
Fold from the longest side in half with the WS facing the WS. 


Step 3:

Measure 10” 11” 12” 13” or your desired neck opening from the opposite corner from where your long tail of yarn is at.

Step 4:

Count the number of stitches from the corner of each side of the poncho and place SM in each side.

Step 5:

Sew evenly across the top of both poncho pieces, using the Whip Stitch, until you come to your SM.

Fasten off and weave in ends.

@Jo’s Crafty Hook 2023

That’s it!  You have finished crocheting your Welsh Poncho!  

I would LOVE to see your version of the Welsh Poncho!!  You can tag me at any of the Social Media sites listed above using the hashtags:  

@joscraftyhook @jo_bear38 @joeyleabaird #welshponcho #welshponchocrochetpattern #welshponchopattern #joscraftyhook #joscraftyhookdesigns #jo_bear38

If you would like to receive more information about the events happening at Jo’s Crafty Hook and receive a FREE crochet pattern, why not Subscribe to my Newsletter at my website.

You can find some of my free crochet patterns at my website.

You can also find more of my premium crochet patterns at my Ravelry Store and LoveCrafts.


Welsh Braided Cowl Crochet Pattern


My Welsh Braided Cowl Crochet Pattern designed for a special purpose.  Ashley of Through the Loop Yarn Craft showcased me and this design in here Designer Spotlight in part with WeCrochet.

My Welsh Braided Cowl was excepted by WeCrochet and it became my very first published crochet pattern as part of their Independant Designer Partnership!  to sell on their platform.  This was a HUGE step forward for me as a crochet designer!  Needless to say I was and still am Over the Moon about this crochet pattern!  You can find my Welsh Braided Cowl Crochet Pattern here.


Find me, Jo of Jo’s Crafty Hook at the places listed below.

Email:  j.o@joscraftyhook.com

Website

Facebook Group Jo’s Crafty Hookers

Facebook Group Jo’s Crafty Hook Designs

Facebook Page Jo’s Crafty Hook

Facebook Page:  Crochet Designer Community

Ravelry

LoveCrafts

Etsy

Instagram

YouTube

Pinterest

Donations Accepted

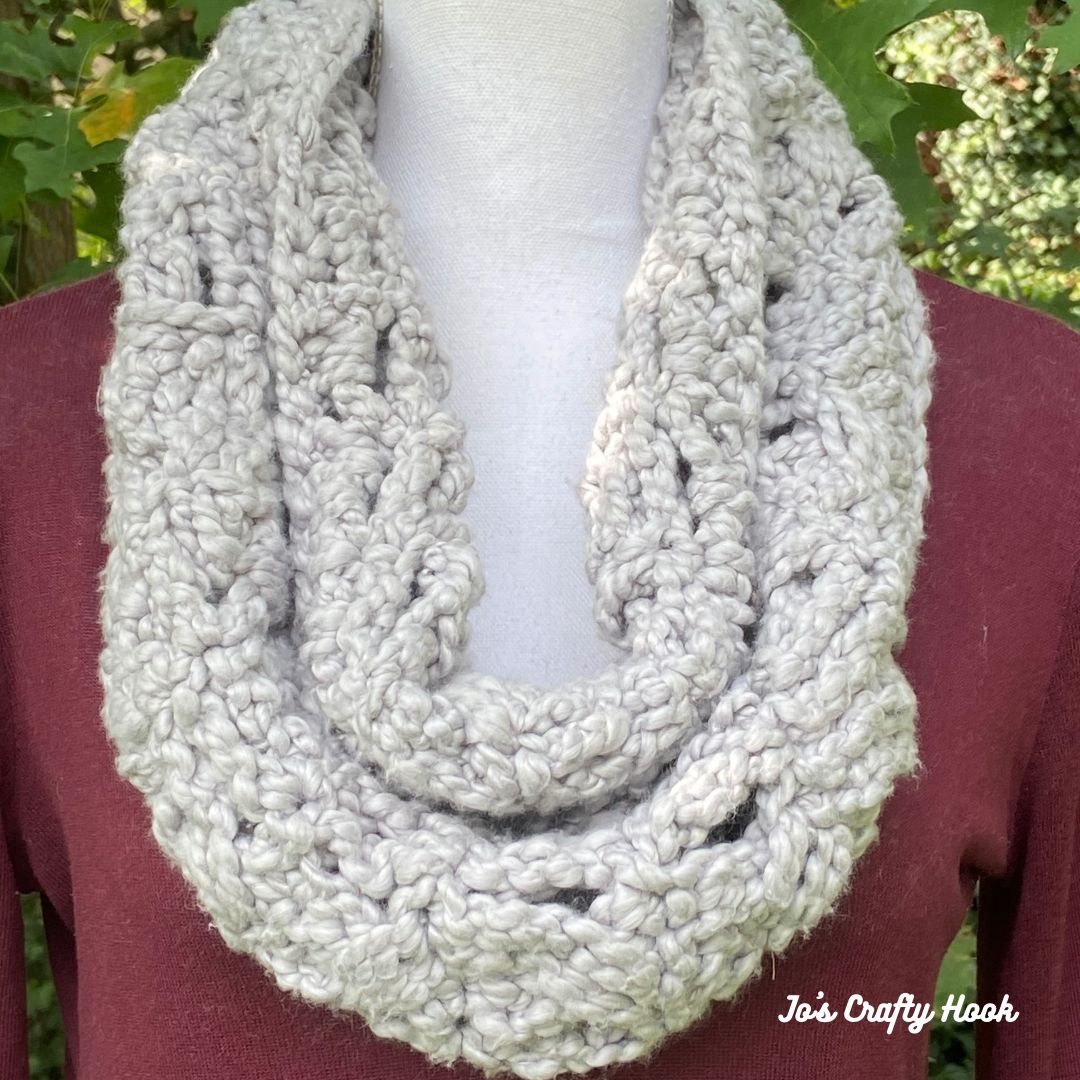
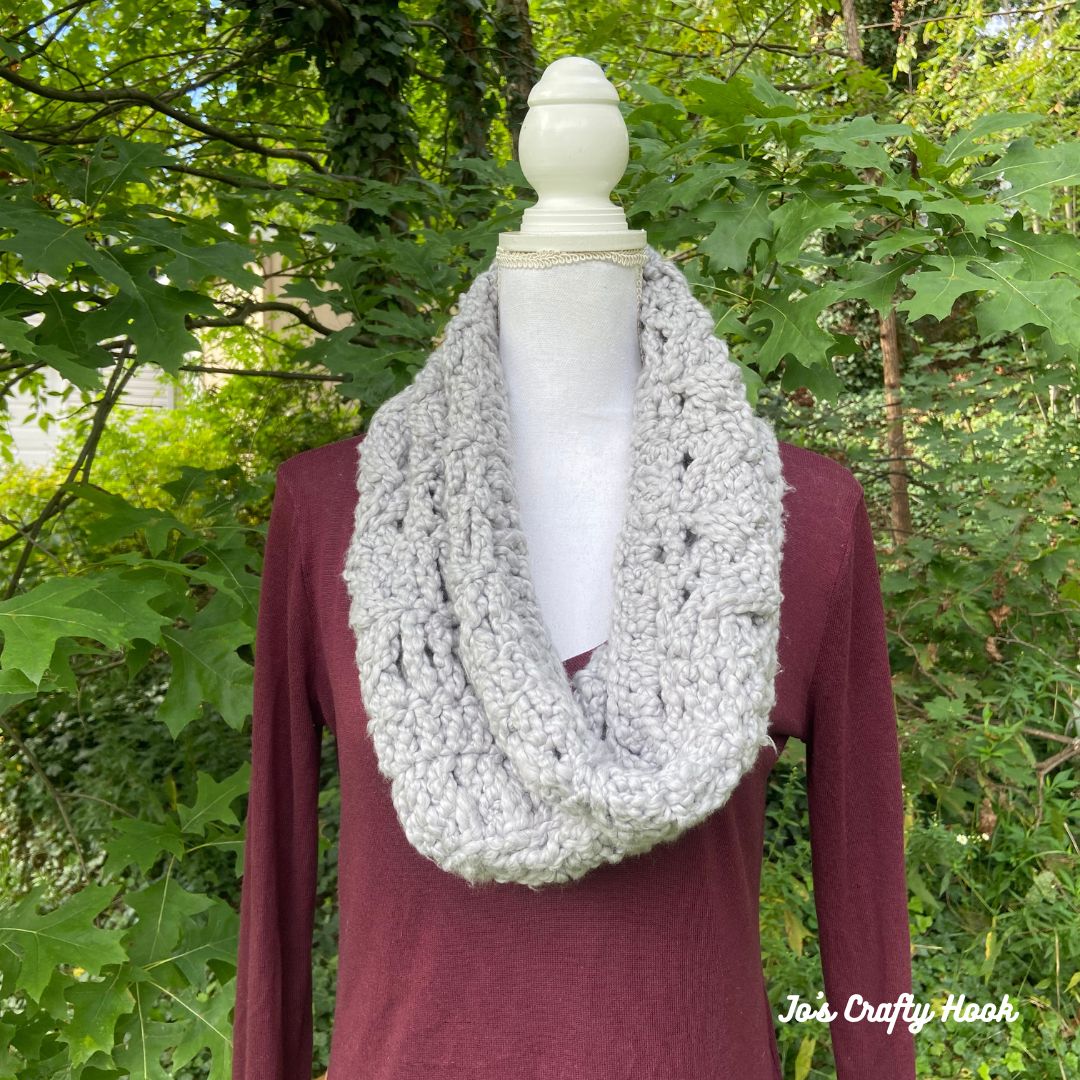
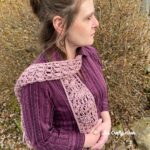
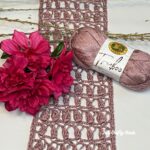
Lacey Scarf Crochet Pattern

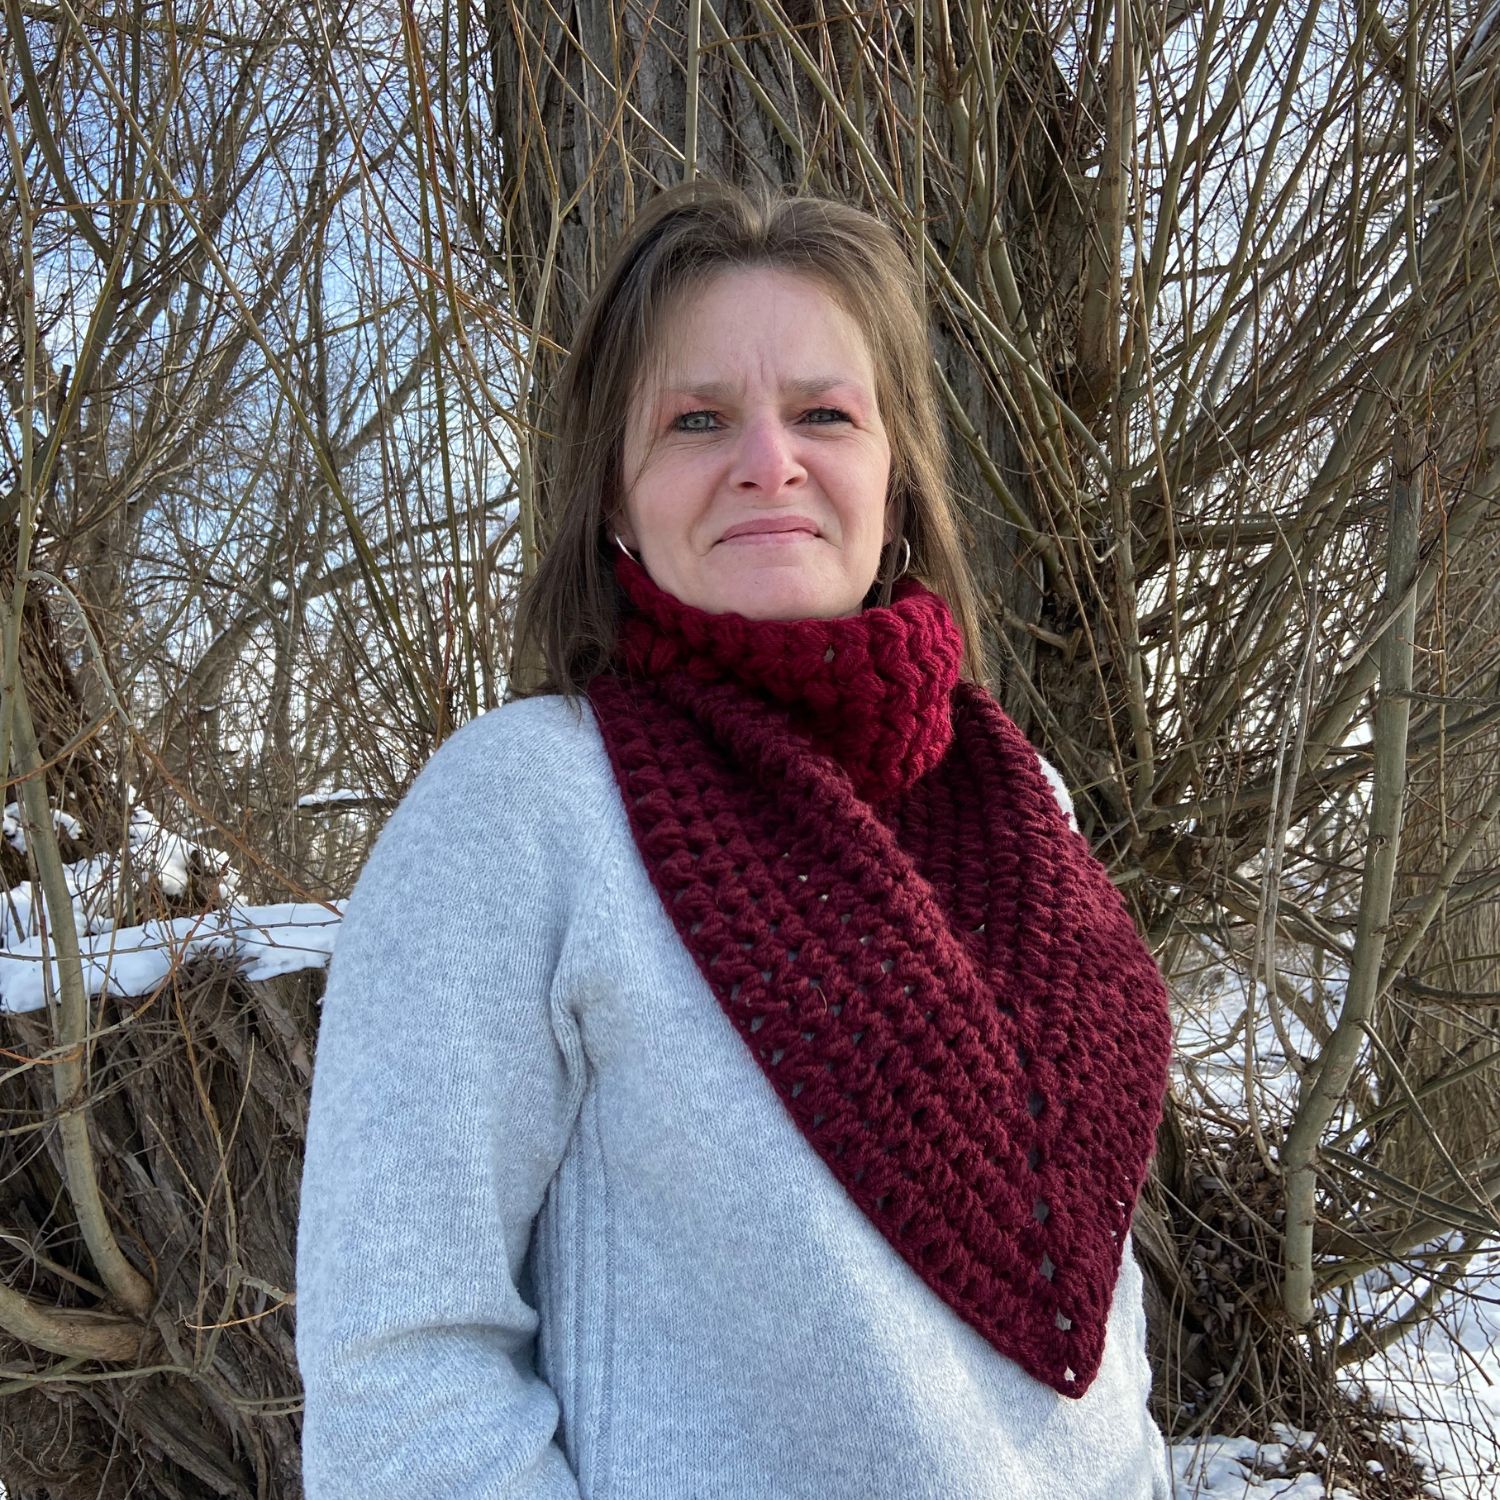
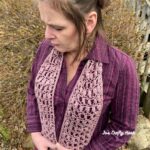
The Lacey Scarf Crochet Pattern is a new crochet pattern design that creates a nice lacy scarf that has a great drape.  It uses Truboo yarn from Lion Brand Yarn that creates a nice soft airy, lacy texture.  I am excited about this crochet design of the Lacey Scarf!

This post contains affiliate links.

March Events

Sign up for my Blooming Flowers Wall Hanging CAL.

Please wait...

Thank you for signing up!


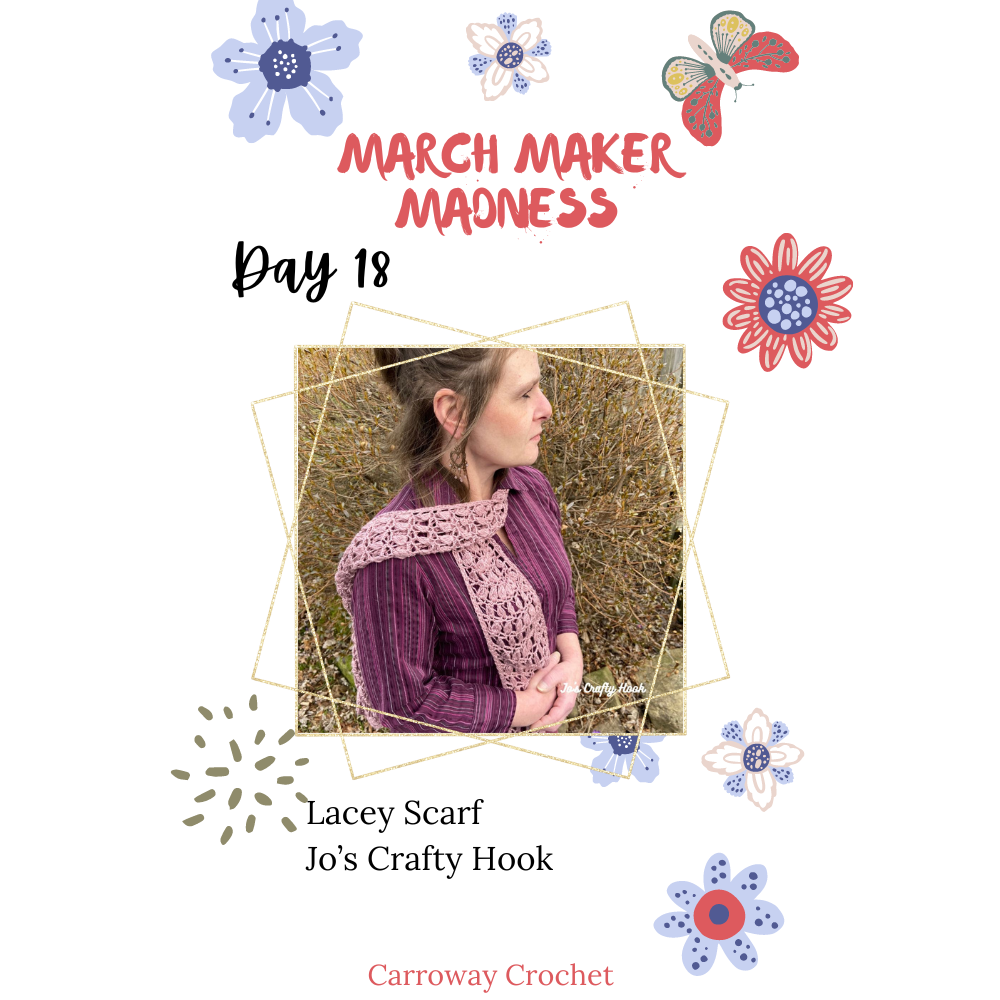
On March 18, 2024 starting at 10a EST until March 19, 2024 10a EST you can get a FREE premium copy Lacey Scarf Crochet Pattern as part of the March Maker Madness Free Pattern 2024 Hop hosted by Carroway Crochet.

If you missed any of the previous free crochet patterns or prefer to skip all the blog hopping, you can get the March Maker Madness Bundle for $9.99 with all of the 25 crochet patterns all in one place.


On March 18, 2024 you can get a FREE premium PDF of my Lacey Scarf Crochet Pattern.  You will need to visit the March Maker Madness to find the Coupon Code needed to use at Checkout for the FREE copy.


From 10a EST to 10a EST March 18-19, 2024 bring the Coupon Code back here to use it during Checkout from my Ravelry Store.  Enjoy the Lacey Scarf Crochet Pattern!


Be sure to visit the March Maker Madness daily to see each designer’s beautiful crochet pattern you can get that day for FREE!


Below you will find out more information about the stitches used in the Lacey Scarf Crochet Pattern and all the information needed to make your own version!

The Lacey Scarf Crochet Pattern uses a crochet stitch that I designed a couple of years ago, the Lilac Cluster Stitch.  The Lilac Cluster Stitch uses the DC6TOG, Double Crochet 6 Together and the DC3TOG, Double Crochet 3 Together.

Because of this stitch is also used in the Lacey Scarf Crochet Pattern I made a Video Tutorial specifically for this design using my DC6TOG, Double Crochet 6 Together.  Therefor the video demonstrates how to do this stitch specifically for the Lacey Scarf.


I also made a Video Tutorial demonstrating the DC3TOG, Double Crochet 3 Together specifically used in the Lacey Scarf Crochet Pattern.


Shop my Stores for the Lacey Scarf

You can find the premium copy of the Lacey Scarf Crochet Pattern from my Ravelry Store or my LoveCrafts Store for a small fee.


This crochet stitch was used in my Lilac Cluster Beanie Crochet Pattern and Lilac Cluster Cowl Crochet Pattern.

You can find the Lilac Cluster Beanie Crochet Pattern at my Ravelry and LoveCrafts Store.  Also you can find the Lilac Cluster Cowl Crochet Pattern at my Ravelry and LoveCrafts Stores.


I also used this stitch in my Oyster Shell Scarf Crochet Pattern.  You can find all of these crochet patterns at my Ravelry and LoveCrafts Stores for a small fee.  You can also find the Oyster Shell Scarf Crochet Pattern free on my website.


Information Needed for the Lacey Scarf Crochet Pattern

I used Lion Brand Truboo Yarn in 100% Rayon Yarn from Bamboo.  (3.5 oz/100 g) (241 yd/220 m)

Materials:
US J or 6 mm Crochet Hook
150 – 300 yds Light Weight Yarn
Scissors
Tapestry Needle


Abbreviations/Stitches Used:
ch = chain
st(s) = stitch(es)
sl st = slip stitch
sc = single crochet
dc = double crochet
dc3tog = double crochet 3 together
dc6tog = double crochet 6 together

Notes:
stitch count is a multiple of 3+2
scarf is worked in turning rows
ch 1 does NOT count as a stitch
ch 3 does NOT counts as a stitch
inside the crochet pattern there are 4 size to choose from.  Child, Teen, Small Adult and Large Adult consecutively

Gauge:
US J or 6 mm Crochet Hook
16 st x 8 rows = 4”


Special Stitches:

Double Crochet 3 Together

  • YO, insert hook into specified st, YO draw through 2 loops
  • YO, insert hook into same st, YO, draw through 2 loops
  • YO, insert hook into same st, YO, draw through 2 loops
  • YO, draw through all loops on hook

Double Crochet 6 Together

  • YO, insert hook into specified st, YO draw through 2 loops
  • YO, insert hook into same st, YO, draw through 2 loops
  • YO, insert hook into same st, YO, draw through 2 loops
  • YO, insert hook into same st, YO draw through 2 loops
  • YO, insert hook into same st, YO, draw through 2 loops
  • YO, insert hook into same st, YO, draw through 2 loops
  • YO, draw through all loops on hook


Shop my Stores for the Lacey Scarf

You can find the premium copy of the Lacey Scarf Crochet Pattern from my Ravelry Store or my LoveCrafts Store for a small fee.


Find me, Jo of Jo’s Crafty Hook at the places listed below.

Email:  jo@joscraftyhook.com

Website

Facebook Group Jo’s Crafty Hookers

Facebook Group Jo’s Crafty Hook Designs

Facebook Page Jo’s Crafty Hook

Facebook Page:  Crochet Designer Community

Ravelry

LoveCrafts

Instagram

YouTube

Pinterest


Sunflower Seed Headband Crochet Pattern

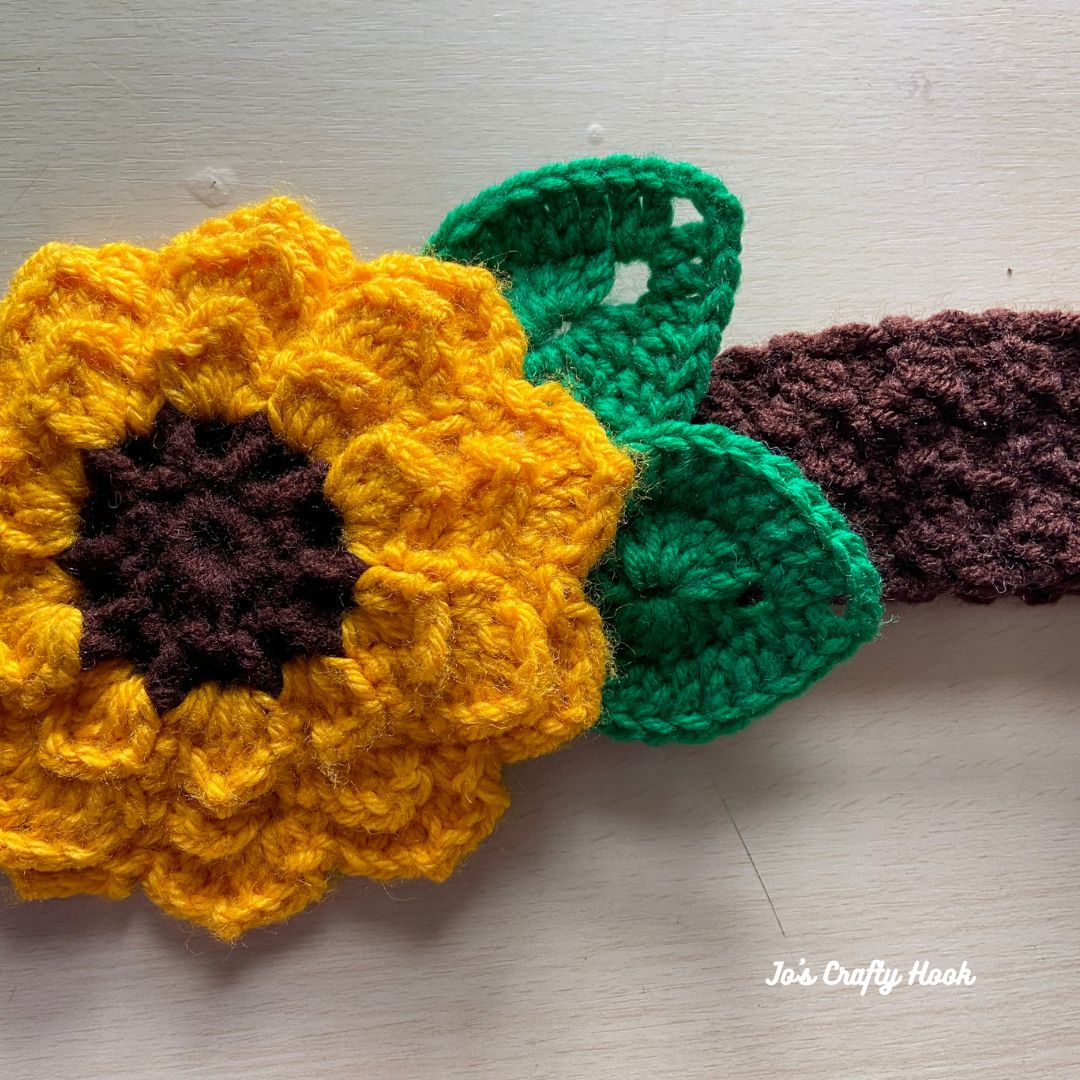
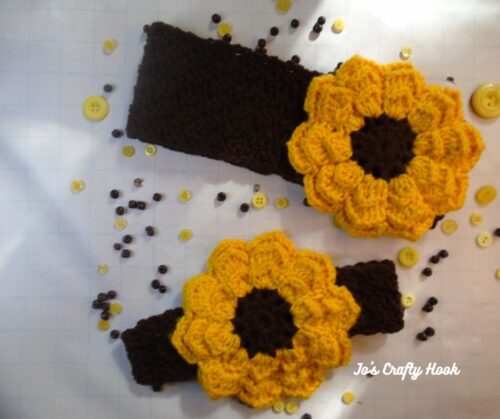
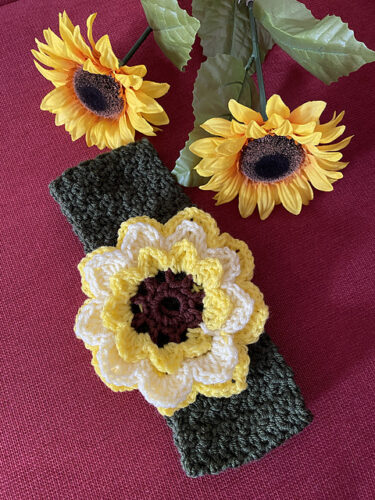
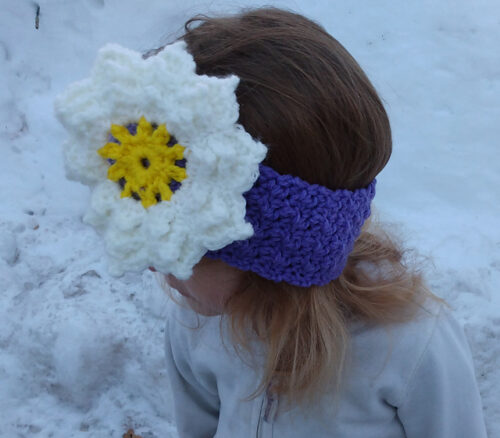
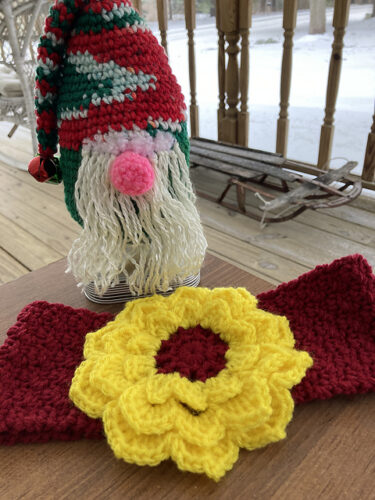
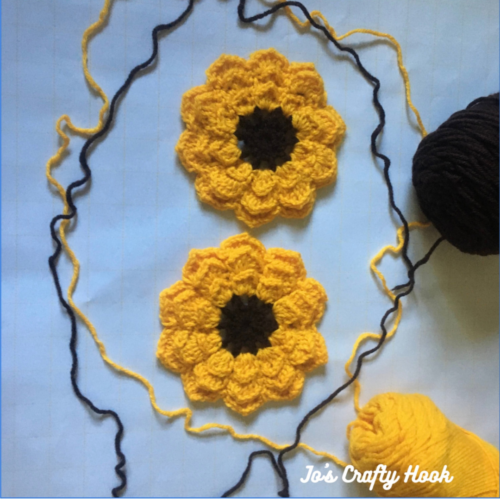
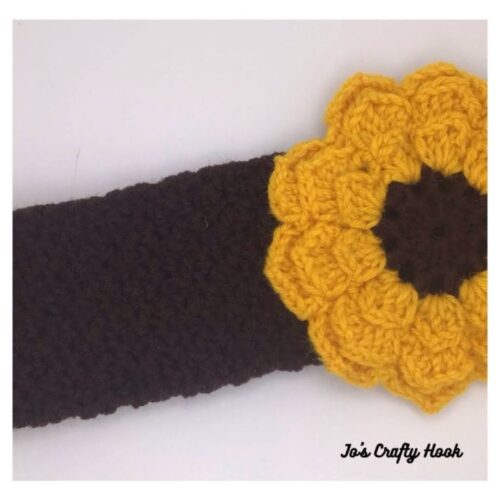
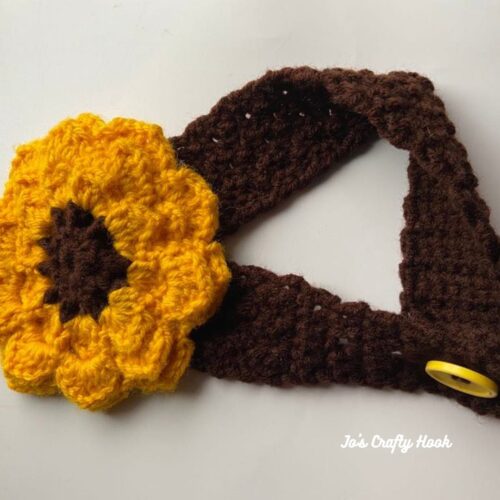
I love combining crochet stitches that I have previously used!  In the Sunflower Seed Headband Crochet Pattern, uses 2 of my previous crochet patterns and combined them together.  The Sunflower Seed Headband Crochet Pattern is a combination of 2 of my crochet patterns, the Sunflower Applique crochet pattern and the Seed Stitch Head Scarf crochet pattern.

The Seed Stitch is a very simple stitch.  The Seed Stitch creates a nice tight stitch that has a great texture.  It uses double crochet and single crochet.  That’s all you need to know for this easy crochet stitch and pattern.

You can find both of the Sunflower Applique crochet pattern and the Seed Stitch Head Scarf crochet pattern free on my website.

Be sure to subscribe to my Newsletter while you are here visiting.  You will be notified when a new crochet pattern is released; when I am in a collaborating event; and more!  As a Bonus, you will get a FREE premium crochet pattern for signing up!


sunflower applique seed headband sunflower seed


You can find some of my premium crochet patterns at my Ravelry and LoveCrafts Stores.


You can also find some FREE crochet patterns on my website.

Be sure to visit my Sales Page to see all the discounts you can take advantage of this month!  

**You can purchase the premium version of the Sunflower Seed Headband crochet pattern for a small fee from my Ravelry Store or my LoveCrafts Store.  Inside the premium crochet pattern you will find 4 sizes to choose from and step-by-step picture tutorials for the Sunflower Applique.  Inside the premium version you will also find a Bonus crochet pattern for a Leaf Applique**


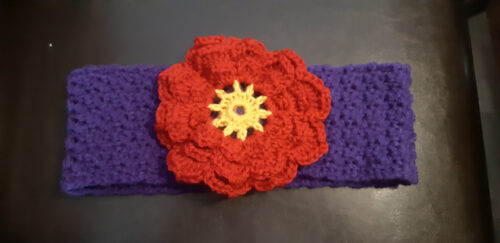
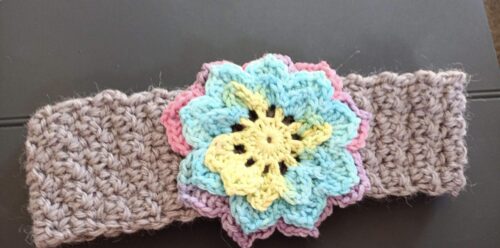
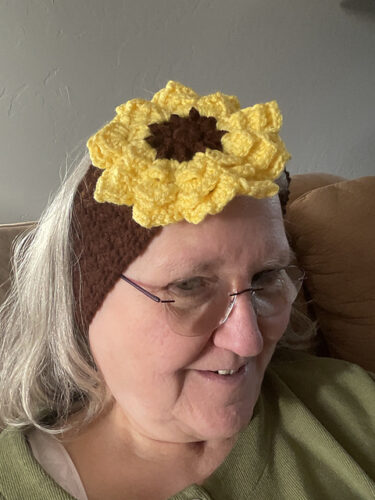
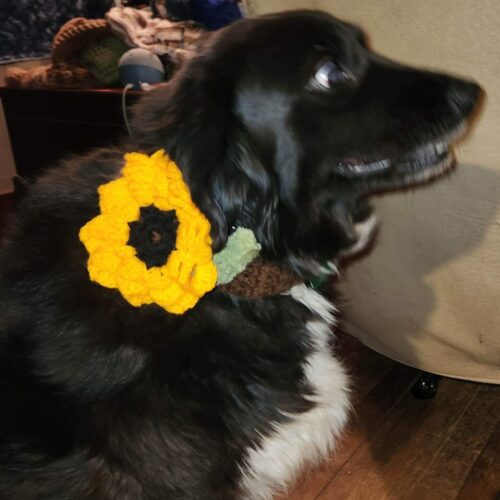
Look at all of my testers beautiful versions of the Sunflower Seed Headband!  Thank you Chandra Payan, Cheryl Cooke, Claire Parker, Connie Adams, Jenifer Smith, Mary Watson, and Tami Mascho.  Y’all are FAB-u-LOUS testers!!


Information Needed to make Sunflower Seed Headband Crochet Pattern

Materials:
50-75 yds of #4 ply Worsted/Aran Weight Yarn for Headband
15-20 yds of #4 ply Worsted/Aran Weight Yarn for Sunflower
US H or 5 mm Crochet Hook
Scissors
Tapestry Needle

Abbreviations/Stitches Used
ch = chain
sc = single crochet
dc = double crochet
alt ch 2 = alternate chain 2
st = stitch
sl st = slip stitch
sp = space
rep = repeat
MC = Main Color
CC = Contrasting Color
RS = Right Side
WS = Wrong Side

Notes:

Sunflower Applique is below the Headband Crochet Pattern.
The size of the headband is for size 5-10 years.
ch 3 counts as a dc
alt ch 2 counts as a dc

Special Stitches:

Alternate chain 2 – takes the place of a chain 3, creating a cleaner edge with no gaps.  It also counts as a dc.

Seed Stitch – consists of alternating sc and dc.  In the 2nd row you will switch and add a dc in a sc and a sc in a dc.

Gauge:
US H or 5mm Crochet Hook
12 st x 12 rows = 4”


Headband Crochet Pattern

5-10 years

R1:  fsc 9 turn  (9 sc)
Optional:  ch 10 sc in 2nd ch from hook, sc across.  turn  (9 sc)

R2 (RS):  ch 1, sc in same sp. *dc in next st, sc in next st.  rep from * until last st, sc in last st.  turn (9 st)

R3(WS):  alt ch 2 or ch 3, sc in the next st, *dc in the next st, sc in next st. rep from * until last st, dc in last st.  turn (9 st)

R4-R49:  Repeat R2-R3 or until you reach your desired head circumference

After R49 sl st to join.


**You can purchase the premium version of the Sunflower Seed Headband crochet pattern for a small fee from my Ravelry Store or my LoveCrafts Store.  Inside the premium crochet pattern you will find 4 sizes to choose from and step-by-step picture tutorials for the Sunflower Applique.  Inside the premium version you will also find a Bonus crochet pattern for a Leaf Applique designed by 13 year old Miss Smith**


Sunflower Applique Crochet Pattern:

Finished Flower Size:  5” x 5”

Sunflower Applique Sunflower Crochet Sunflower


Notes:
I used 2 colors for my flower, chocolate and gold.
The flower is worked in the round.
The flower petals are worked in the chain spaces.

If you would like to make a smaller sunflower, you can use #3 ply Lightweight or DK Weight Yarn.

For the smaller flower it is recommended to use a US F or 3.75 mm Crochet Hook.

Using CC

R1: Make a magic circle, ch 1, 20 sc in the magic circle, pull magic circle closed and sl st in 1st sc to join.  (20 sc)

Fasten off and weave in ends.

Change to CC

R2:  ch1, sc in same st, *ch 3, sk next st, sc in next st.  rep from * around. sl st into 1st sc to join.  (10 ch-3 sp)


Second layer of flower:

R4:  working behind the petals from the previous round *ch 5, sl st in sc of next petal. rep from * around until last petal. ch 5.  sl st in 1st ch-5 sp to join. (10 ch-5 sp)

R5:  ch 1 *(sc, 3 dc, ch 2, 3 dc, sc) all in the same sp. rep from * around. sl st in 1st st to join.  (10 Petals)


3rd layer of flower:

R6:  working behind the petals from the previous round *ch 6, sl st in sc of next petal. rep from * until last petal. ch 6.  sl st in 1st ch-6 sp. (10 ch-6 sp)

R7:  ch 1 *(sc, 4 dc, ch 2, 4 dc, sc) all in the same sp.  rep from * around. sl st in 1st st to join.

Fasten off and weave in ends.

Using a long tail of your flower center color of yarn, sew the Sunflower Applique to your desired placement.

Fasten off and weave in ends.


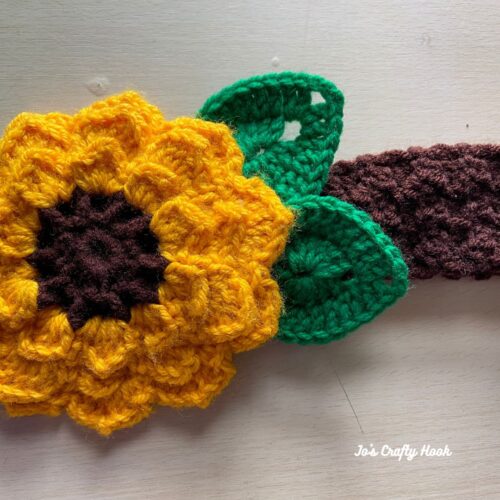
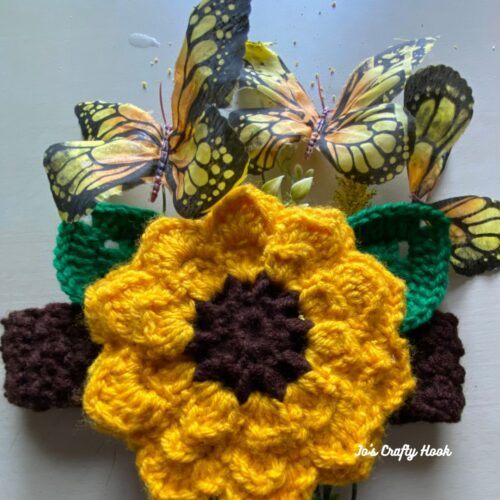
Sunflower Seed Headband Sunflower Applique Headband


Below are a couple of ways you can embellish the Sunflower Seed Headband.

I would LOVE to see your version of the Sunflower Seed Headband!  You can tag me using the hashtags below.

@joscraftyhook. @joscraftyhookdesigns @joeyleabaird #sunflowerseedheadband

Find me, Jo of Jo’s Crafty Hook at the places listed below.

Email:  j.o@joscraftyhook.com

Website

Facebook Group Jo’s Crafty Hookers

Facebook Group Jo’s Crafty Hook Designs

Facebook Page Jo’s Crafty Hook

Facebook Page:  Crochet Designer Community

Ravelry

LoveCrafts

Etsy

Instagram

YouTube

Pinterest

Donations Accepted


C2C Sun Square

I am SO excited to finally able to share my very 1st C2C crochet pattern, the C2C Sun Square!  I got to tell ya, I was SO freaked out when Helen of Sunflower Cottage Crochet first asked me to design one for the C2C Community Garden CAL!!


The Community Garden C2C Blanket CAL hosted by Sunflower Cottage Crochet that started back in September.  You can find out more about the CAL at the Main Roundup Page.


Community Garden CAL

If you have missed any of the premium crochet patterns that have been a part of the Community Garden CAL, you can get the eBook for $12.99 that has ALL the information you’ll need to make 20 C2C blanket squares.


Community Garden eBook


Today, October 5th is my day to share the FREE premium crochet pattern of my C2C Sun Square.  To get today’s Coupon Code needed to download the free PDF copy of the C2C Sun Square click on the Button below to visit the main blog hop page.


Bring the Coupon Code needed to get your free PDF copy of my Sunshine C2C premium crochet pattern.  Click the Button below to be directed to my Ravelry Store.  Enter the Coupon Code at Checkout.  Then you will receive your free PDF.


**********************************************************

Enjoy the Sun C2C Square Free Crochet Pattern  Below.


Colour Colour you are using No of Sts
Blue (B) 400
Yellow (Y) 225


Written Instructions:


Row 1 [RS]: (B) x 1 (1 square)

Row 2 [WS]: (B) x 2 (2 squares)

Row 3 [RS]: (B) x 3 (3 squares)

Row 4 [WS]: (B) x 4 (4 squares)

Row 5 [RS]: (B) x 2, (Y) x 1, (B) x 2 (5 squares)

Row 6 [WS]: (B) x 2, (Y) x 2, (B) x 2 (6 squares)

Row 7 [RS]: (B) x 3, (Y) x 1, (B) x 3 (7 squares)

Row 8 [WS]: (B) x 3, (Y) x 2, (B) x 3 (8 squares)

Row 9 [RS]: (B) x 4, (Y) x 1, (B) x 4 (9 squares)

Row 10 [WS]: (B) x 4, (Y) x 2, (B) x 4 (10 squares)

Row 11 [RS]: (B) x 5, (Y) x 1, (B) x 5 (11 squares)

Row 12 [WS]: (B) x 5, (Y) x 2, (B) x 5 (12 squares)

Row 13 [RS]: (Y) x 1, (B) x 12 (13 squares)

Row 14 [WS]: (B) x 12, (Y) x 2 (14 squares)

Row 15 [RS]: (B) x 1, (Y) x 2, (B) x 12 (15 squares)

Row 16 [WS]: (B) x 6, (Y) x 5, (B) x 1, (Y) x 2, (B) x 2 (16 squares)

Row 17 [RS]: (B) x 3, (Y) x 1, (B) x 1, (Y) x 7, (B) x 5 (17 squares)

Row 18 [WS]: (B) x 5, (Y) x 8, (B) x 5 (18 squares)

Row 19 [RS]: (B) x 5, (Y) x 9, (B) x 5 (19 squares)

Row 20 [WS]: (B) x 6, (Y) x 9, (B) x 5 (20 squares)

Row 21 [RS]: (B) x 6, (Y) x 9, (B) x 6 (21 squares)

Row 22 [WS]: (B) x 6, (Y) x 10, (B) x 6 (22 squares)

Row 23 [RS]: (B) x 7, (Y) x 9, (B) x 7 (23 squares)

Row 24 [WS]: (B) x 2, (Y) x 4, (B) x 1, (Y) x 10, (B) x 7 (24 squares)

Row 25 [RS]: (B) x 3, (Y) x 4, (B) x 1, (Y) x 9, (B) x 2, (Y) x 4, (B) x 2 (25 squares)

Corner at both sides 

Row 26 [WS]: (B) x 2, (Y) x 4, (B) x 1, (Y) x 10, (B) x 1, (Y) x 4, (B) x 2 (24 squares)

Row 27 [RS]: (B) x 2, (Y) x 4, (B) x 1, (Y) x 9, (B) x 7 (23 squares)

Row 28 [WS]: (B) x 6, (Y) x 10, (B) x 6 (22 squares)

Row 29 [RS]: (B) x 6, (Y) x 9, (B) x 6 (21 squares)

Row 30 [WS]: (B) x 5, (Y) x 9, (B) x 6 (20 squares)

Row 31 [RS]: (B) x 5, (Y) x 9, (B) x 5 (19 squares)

Row 32 [WS]: (B) x 5, (Y) x 8, (B) x 5 (18 squares)

Row 33 [RS]: (B) x 5, (Y) x 7, (B) x 5 (17 squares)

Row 34 [WS]: (B) x 3, (Y) x 1, (B) x 1, (Y) x 5, (B) x 6 (16 squares)

Row 35 [RS]: (B) x 11, (Y) x 2, (B) x 2 (15 squares)

Row 36 [WS]: (B) x 1, (Y) x 2, (B) x 11 (14 squares)

Row 37 [RS]: (B) x 11, (Y) x 2 (13 squares)

Row 38 [WS]: (Y) x 1, (B) x 4, (Y) x 2, (B) x 5 (12 squares)

Row 39 [RS]: (B) x 5, (Y) x 1, (B) x 5 (11 squares)

Row 40 [WS]: (B) x 4, (Y) x 2, (B) x 4 (10 squares)

Row 41 [RS]: (B) x 4, (Y) x 1, (B) x 4 (9 squares)

Row 42 [WS]: (B) x 3, (Y) x 2, (B) x 3 (8 squares)

Row 43 [RS]: (B) x 3, (Y) x 1, (B) x 3 (7 squares)

Row 44 [WS]: (B) x 2, (Y) x 2, (B) x 2 (6 squares)

Row 45 [RS]: (B) x 2, (Y) x 1, (B) x 2 (5 squares)

Row 46 [WS]: (B) x 4 (4 squares)

Row 47 [RS]: (B) x 3 (3 squares)

Row 48 [WS]: (B) x 2 (2 squares)

Row 49 [RS]: (B) x 1 (1 square)

**********************************************************

You will find some of my Premium crochet patterns , by visiting any of my stores, by clicking on any of the Buttons below.


If you would like me to crochet any of my designs for you or others, I do take Custom Orders.  Visit my Ravelry Store or LoveCrafts to see some ideas of what you would like to Custom Order.  You can email me with your order or any other questions at j.o@joscraftyhook.com.

Find me, Jo of Jo’s Crafty Hook at the places listed below.

Email:  j.o@joscraftyhook.com

Website

Facebook Group Jo’s Crafty Hookers

Facebook Group Jo’s Crafty Hook Designs

Facebook Page Jo’s Crafty Hook

Facebook Page:  Crochet Designer Community

Ravelry

LoveCrafts

Instagram

YouTube

Pinterest

Donations Accepted