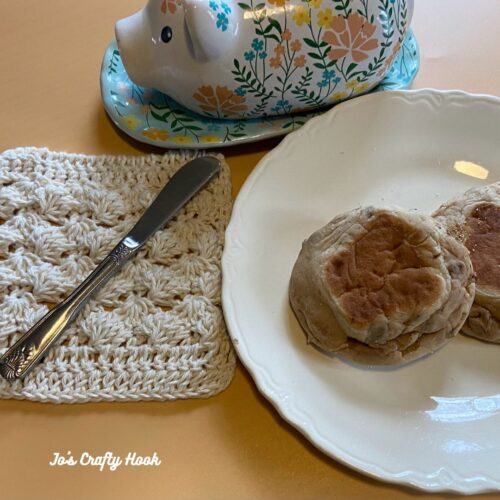
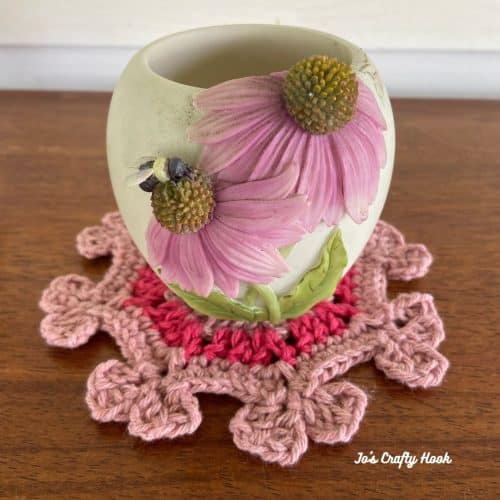
Who doesn’t like adding a little something special to our table settings? Because I do, I want to share with you the Oyster Shell Napkin Free Crochet Pattern with you free here on my website.
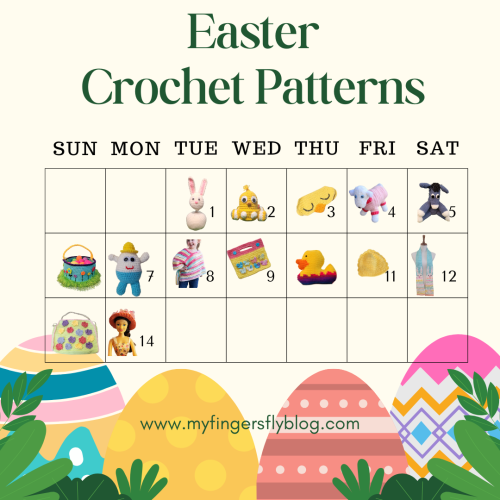
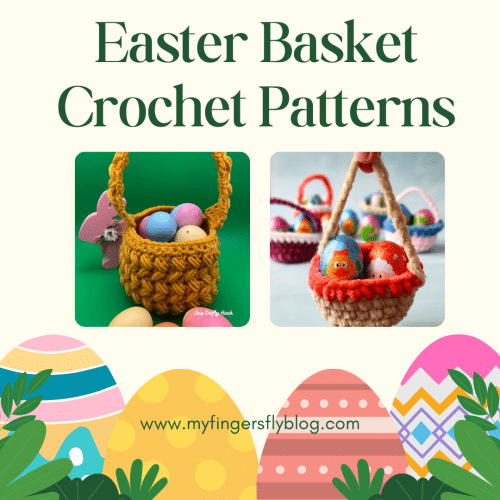
The Easter Advent Calendar Event runs from April 1-14, 2025 and features free crochet patterns for adorable and cute crochet patterns for Chicks, Easter Basket, Eggs and so much more!
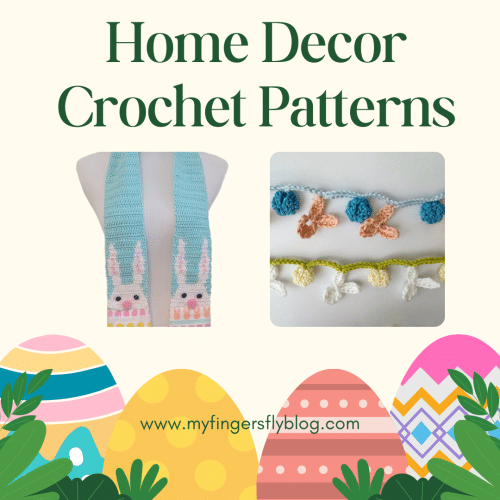
April 12th – Easter Advent FREE Home Decor Crochet Patterns
My Oyster Shell Napkin Crochet Pattern is being featured April 12th as part of the Home Decor day and the FREE crochet pattern can be found below.
You can find the Ad-Free premium copy of the Oyster Shell Napkin at my Ravelry Store for $2 during the Easter Advent Calendar Event.
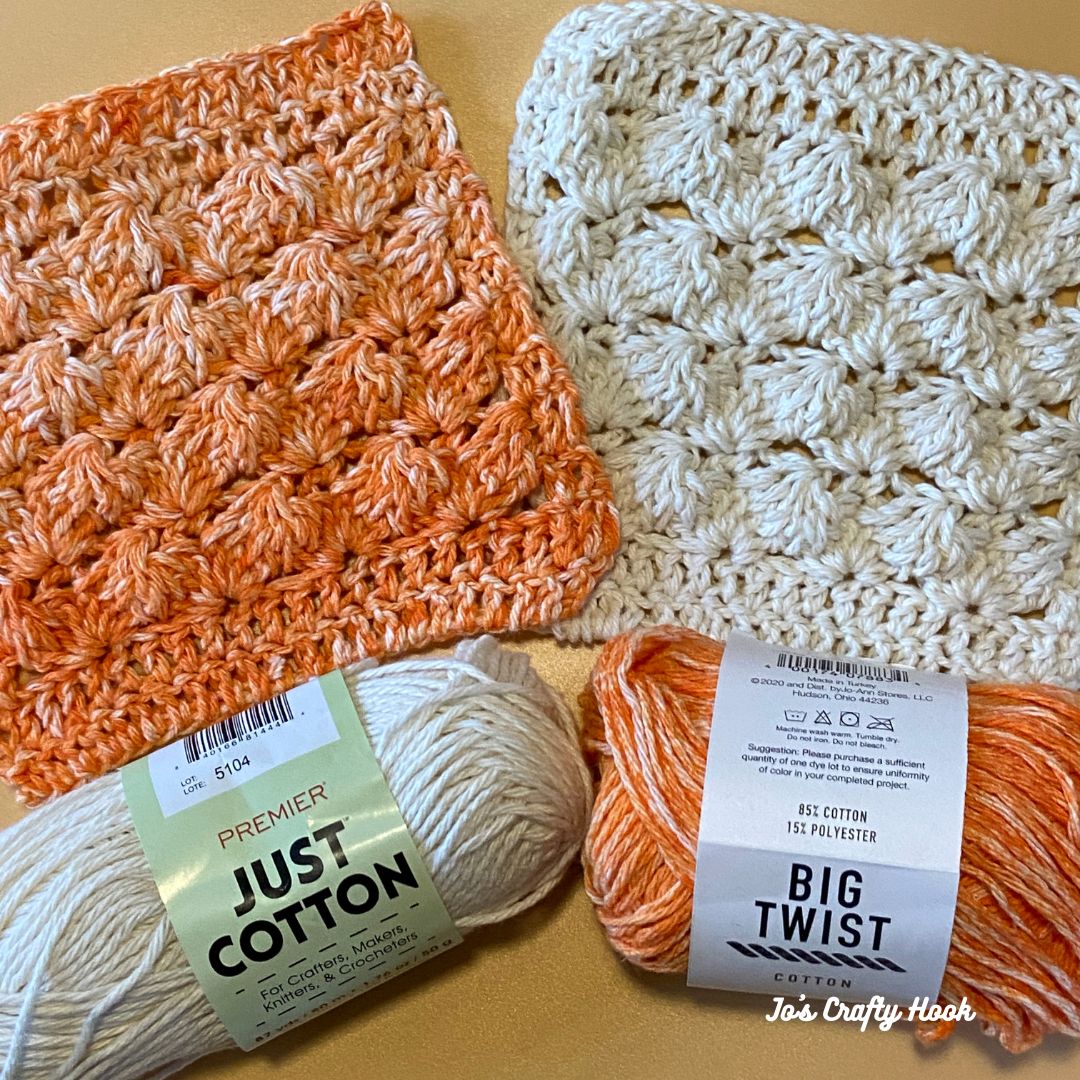
Oyster Shell Napkin Free Crochet Pattern
Information Needed
Terminology: US Terms
Skill Level: Advanced Beginner/Intermediate
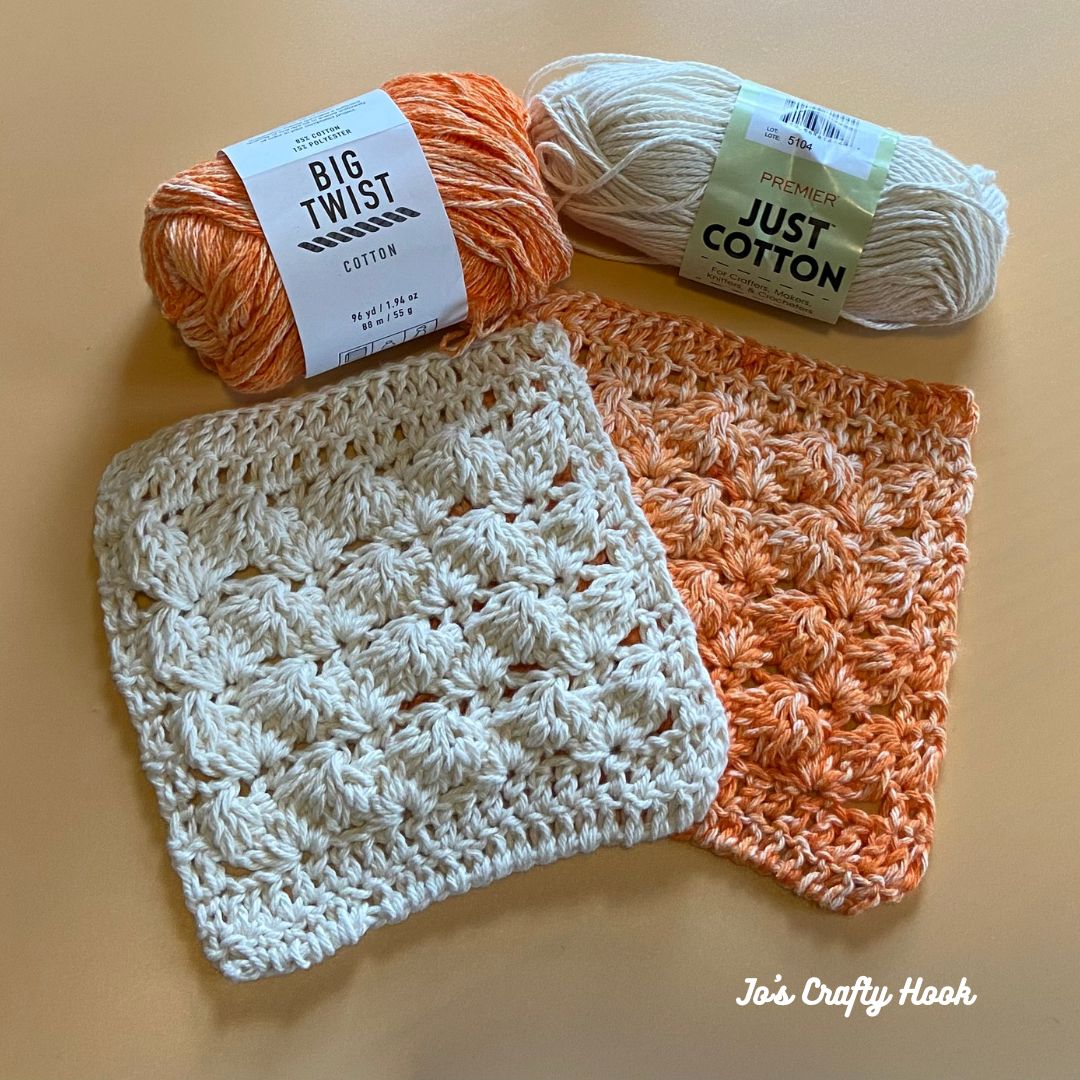
I used Big Twist #4 ply Medium Weight Cotton in Sherbert. (96 yds/1.94 oz) (88 m/55 g) I used Premier Just Cotton #4 ply Medium Weight Cotton in Cream. (87 yds/ 50 g) (1.76 oz/ 80 m)
Materials: US G or 4 mmCrochet Hook 40-50 yds #4 Medium Cotton Weight Yarn Scissors Tapestry Needle
Abbreviations/Stitches Used: ch = chain
st(s) = stitch(s)
sl st = slip stitch
R = Row
dc = double crochet
alt ch 2 = alternate chain 2
rep = repeat
sp(s) = space
sk = skip
fpdc = front post double crochet
fpdc3tog = front post double crochet 3 together
fpdc6tog = front post double crochet 6 together
Special Stitches:
Shell Stitch – when you crochet (3 dc, ch 2, 3 dc) all in the same stitch.
Alternate Chain 2 – is used in place of ch 3, this creates a smoother edge.
Front Post Double Crochet – double crochet going around the front post of the dc from the previous row.
Front Post Double Crochet 3 Together – when you do a front post double crochet 3 decrease together around the next 3 double crochet, decreasing them into one stitch.
Front Post Double Crochet 6 Together – when you do a front post double crochet 6 dc decrease together around the next 6 double crochet, decreasing them into one stitch.
Notes:
ch 3 counts as a dc
ch 2 counts as a stitch
alt ch 2 counts as a dc
fpdc3tog creates a decrease into 1 st
fpdc6tog creates a decrease into 1 st
scarf is done in a multiple of 3 + 2
for a wider scarf add multiples of 3
Gauge: US I Crochet Hook or 5.5 mm
12 dc x 8 rows = 4”
Gauge Swatch: US I Crochet Hook or 5.5 mm
Gauge Swatch only has 5 rows
**If you do not meet gauge, try going up or down a hook size**
R1: ch 17, dc in 4th ch and each ch across. turn (15 dc)
R2: alt ch 2 or ch 3, dc in each st across. turn (15 dc)
R3: alt ch 2 or ch 3, dc in next st, sk 3 st. *shell in next st, sk 3. rep from * once more. dc in last 2 sts. turn (4 dc & 2 shells)
R4: alt ch 2 or ch 3, dc in next st. fpdc3tog over the 1st 3 dc of shell, ch 2, sc in ch-2 sp of shell, ch 2. fpdc6tog over the next 6 dc of shells. ch 2, sc in ch-2 sp of shell, ch 2, fpdc3tog over the last 3 dc of shell. 2 dc in last 2 sts. turn (4 ch-2 sp, 2 sc, 2 fpdc3tog & 1 fpdc6tog)
R5: alt 2 or ch 3, dc in next st. *shell in sc. rep from * once more, dc in last 2 sts. turn (4 dc & 2 shells)
Oyster Napkin Free Crochet Pattern
R1: fdc 23. turn (23 dc)
Optional: ch 26, dc in the 4th ch and each ch across. turn (23 dc)
R2: alt ch 2 or ch 3, dc in each st across. turn (23 dc)
R3(WS): alt ch 2 or ch 3, dc in next st, sk 3 sts. *shell in next st, sk 3 sts. rep from * 3 times, dc in last 2 sts. turn (4 dc & 4 shells)
R4(RS): alt ch 2 or ch 3, dc in next st. ch 1, fpdc3tog over the 1st 3 dc of shell, ch 2, sc in ch-2 sp of shell, ch 2. *fpdc6tog over the next 6 dc of shells. ch 2, sc in ch-2 sps, ch 2. rep from * twice. fpdc3tog over the last 3 dc of shell, ch 1. 2 dc in last 2 sts. turn (4 dc, 4 sc, 2 ch-1 sp, 8 ch-2 sps, 2 fpdc3tog & 3 fpdc6tog)
R5: alt 2 or ch 3, dc in next st. *shell in sc. rep from * until last 2 st. dc in last 2 sts. turn (4 dc & 4 shells)
R6: alt ch 2 or ch 3, dc in next st. ch 1, fpdc3tog over the 1st 3 dc of shell, ch 2, sc in ch-2 sp of shell, ch 2. *fpdc6tog over the next 6 dc of shells. ch 2, sc in ch-2 sps, ch 2. rep from * twice. fpdc3tog over the last 3 dc of shell, ch 1. 2 dc in last 2 sts. turn (4 dc, 4 sc, 2 ch-1 sp, 8 ch-2 sps, 2 fpdc3tog & 3 fpdc6tog)
R7-R10: Rep R5 & R6
R11: alt ch 2 or ch 3, dc in next st, dc in ch-1 sp, dc in top of fpdc3tog , *dc in ch-2 sp, dc in sc, dc in ch-2 sp, dc in top of fpdc6tog. rep from * until last fpdc3tog, dc in top of fpdc3tog, dc in ch-1 sp, dc in last 2 sts. turn (23 dc)
R12: alt ch 2 or ch 3, dc in each st across. (23 dc)
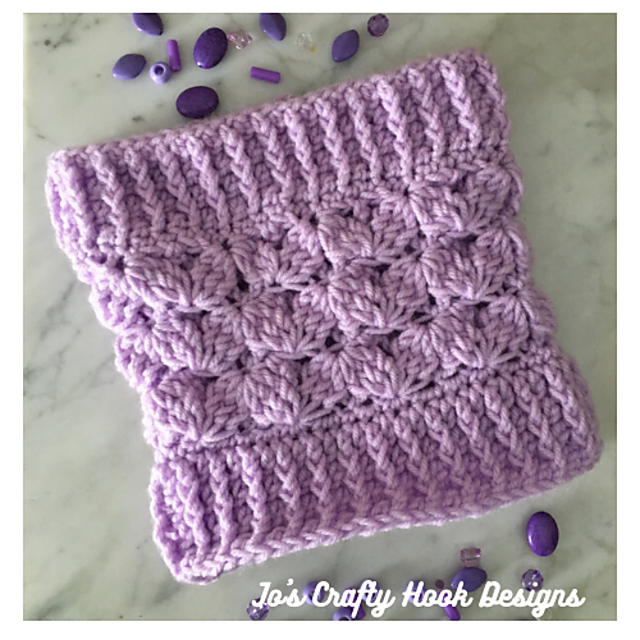
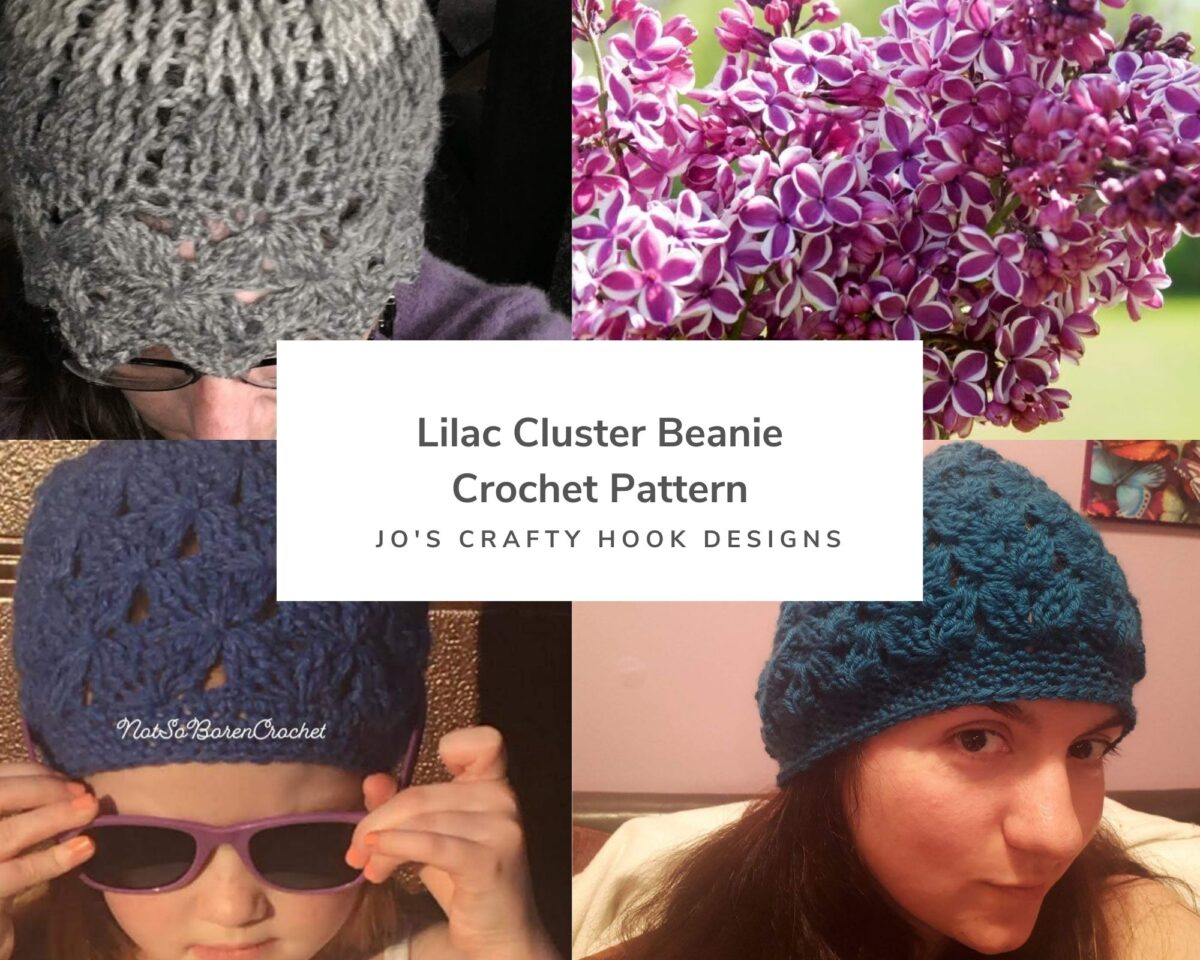
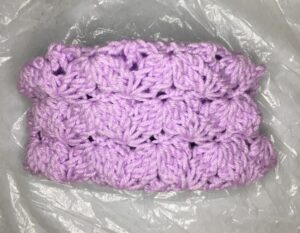
I created this crochet stitch when I designed my Lilac Cluster Beanie and Lilac Cluster Cowl crochet patterns. The original version of the Lilac Cluster Stitch is worked in the round. You can find both of these crochet patterns at my Ravelry or LoveCrafts Stores.
Lilac Cluster Beanie
Lilac Cluster Cowl
Lilac Cluster Stitch Video Tutorials
The Lilac Cluster Stitch uses 2 main crochet stitches, the FPDC3TOG or the front post double crochet 3 together and the FPDC6TOG or the front post double crochet 6 together.
You can find a Left Handed Video Tutorial on my YouTube Channel for my Lilac Cluster Beanie Part 1 and Part 2, that shows you how the Lilac Cluster Stitch was originally used.
Lilac Cluster Beanie Video Tutorial Part 1
Lilac Cluster Beanie Video Tutorial Part 2
You can also find more of my Left Handed Video Tutorials on my YouTube Channel.
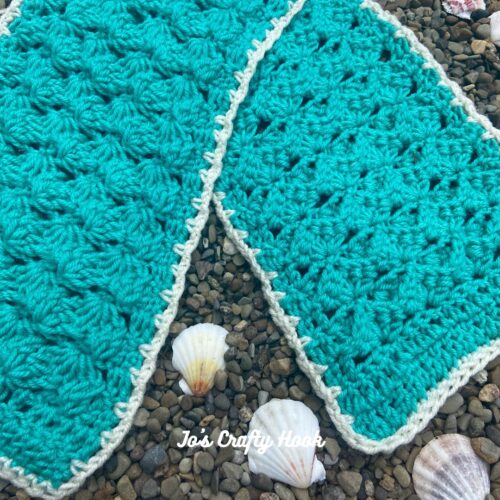
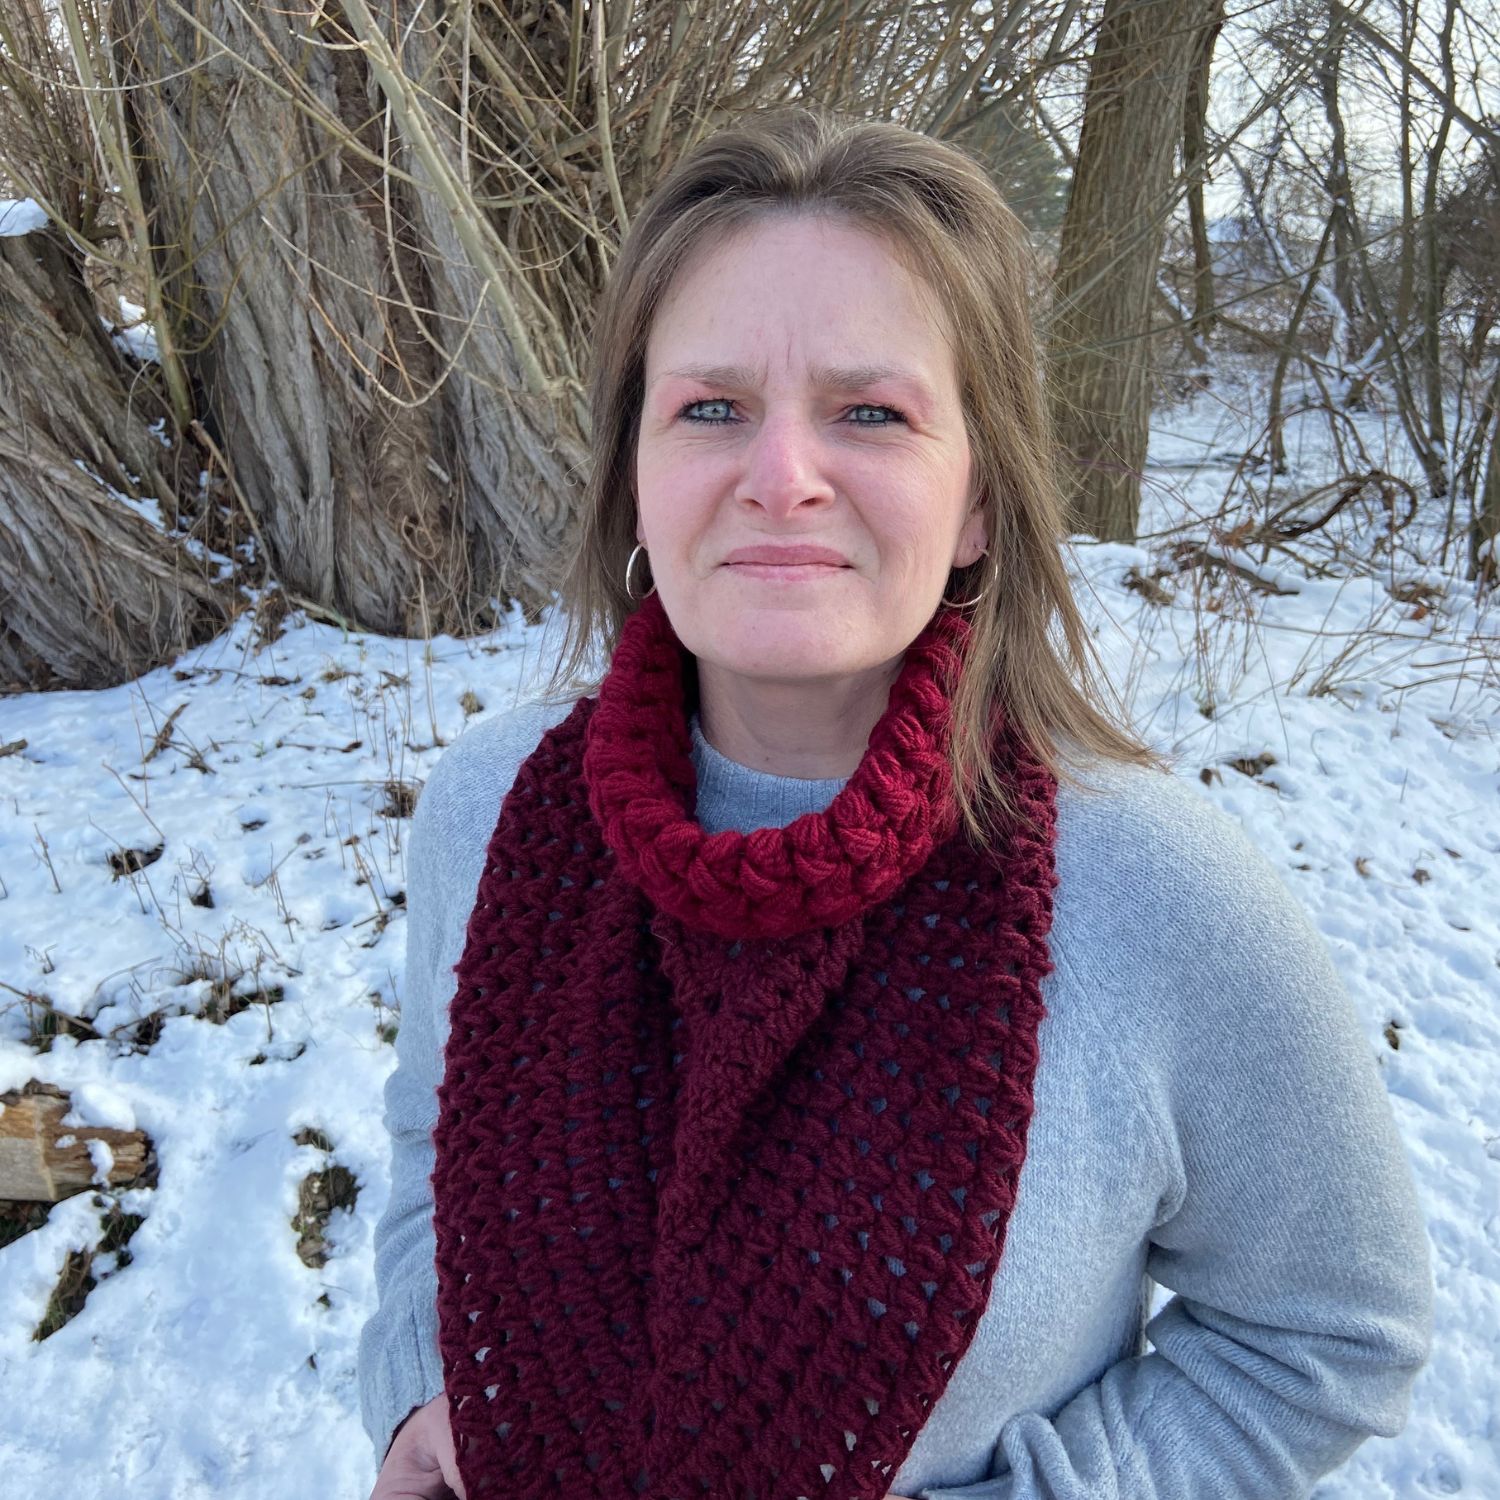
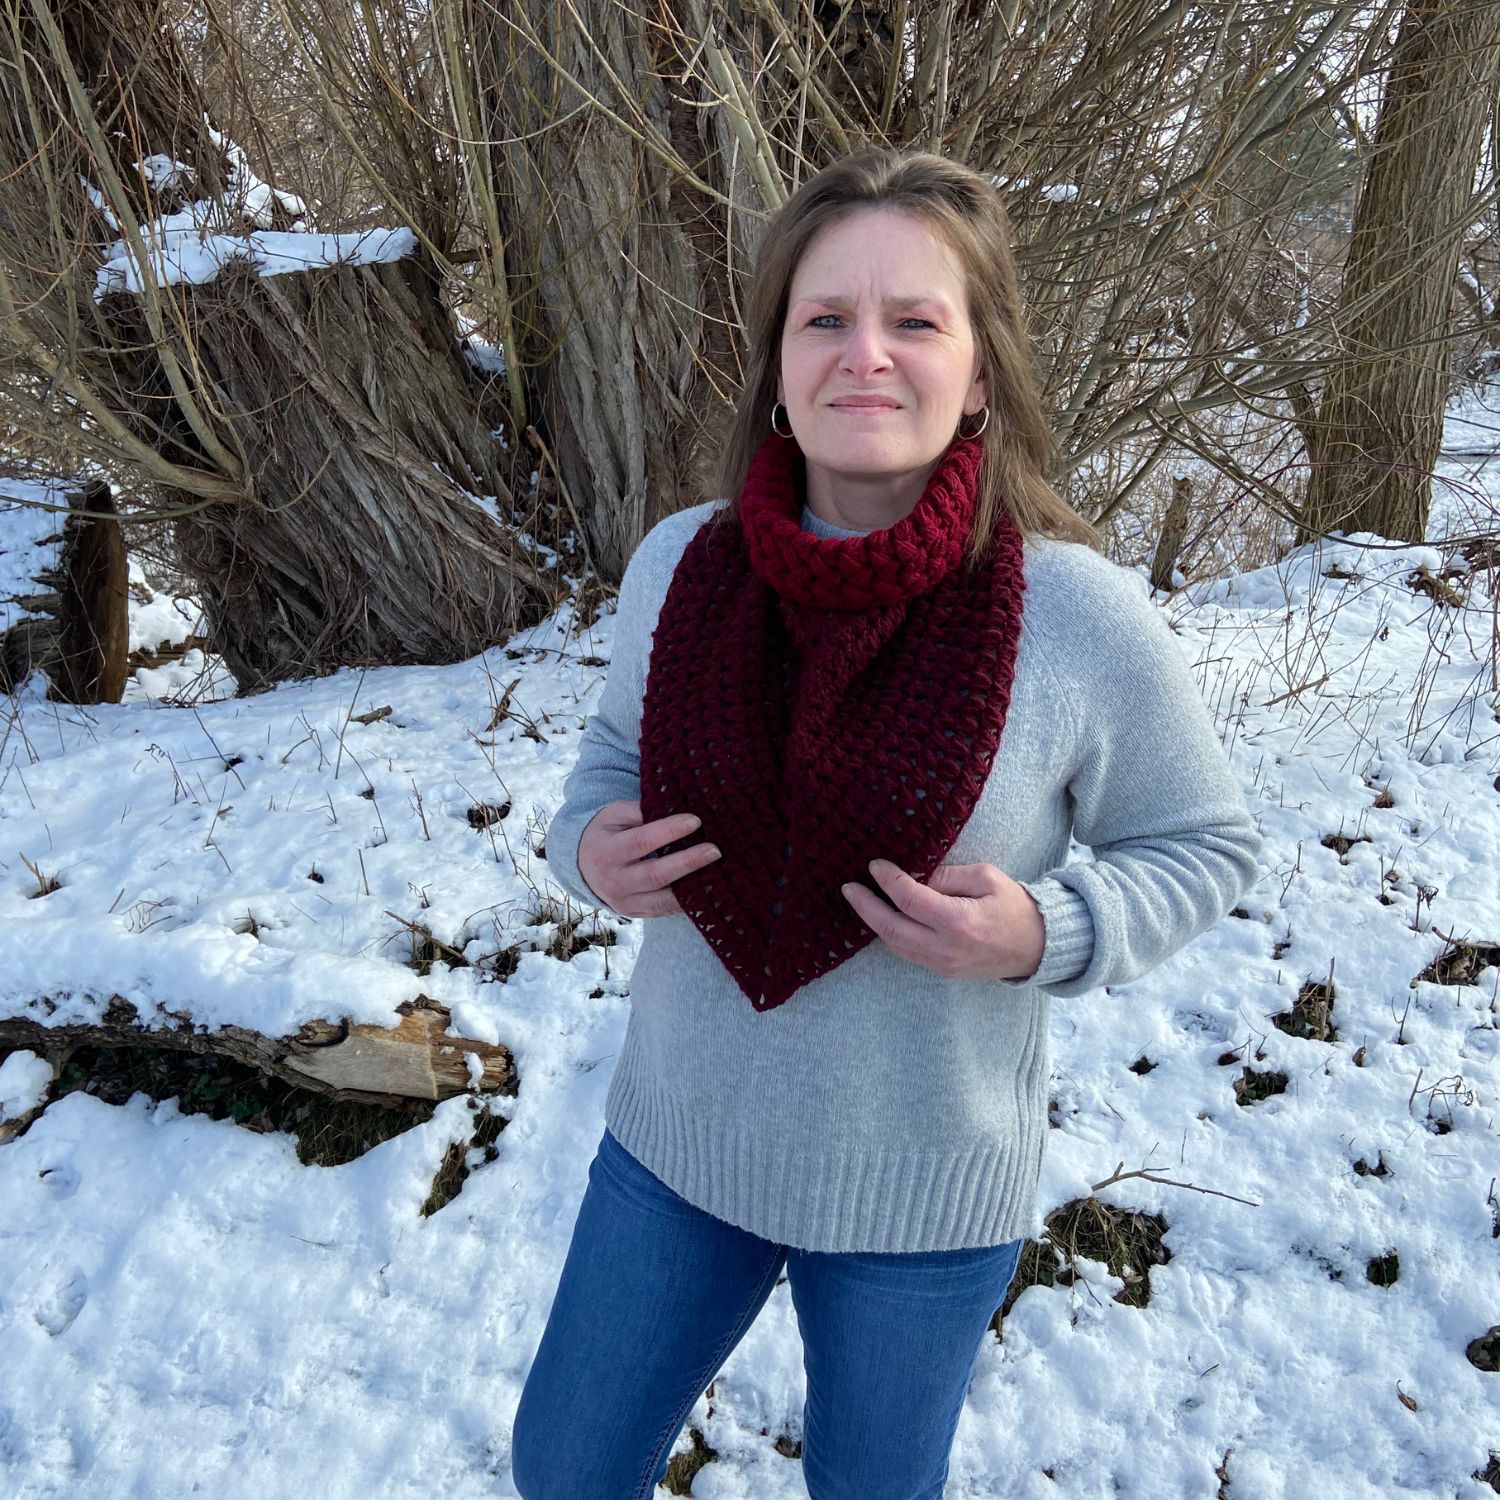
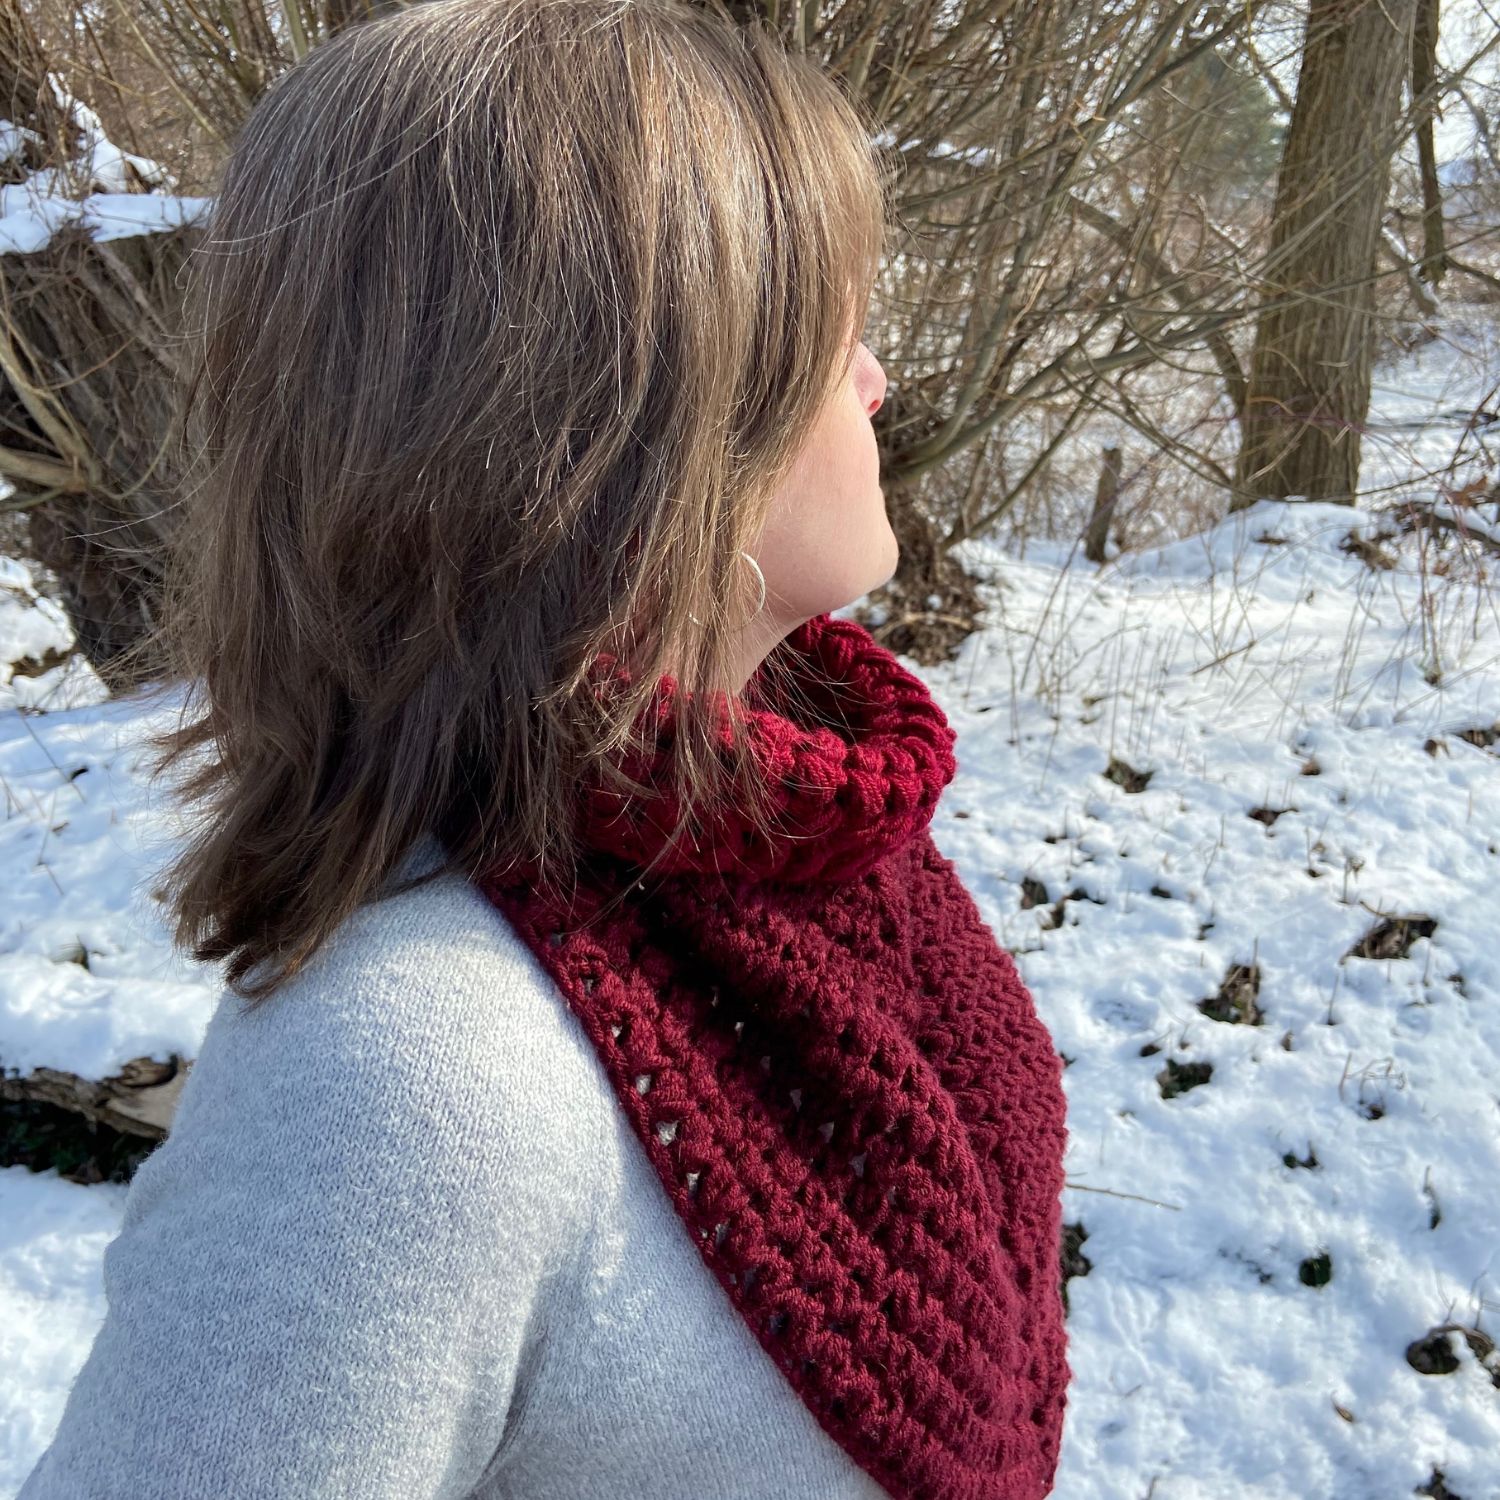
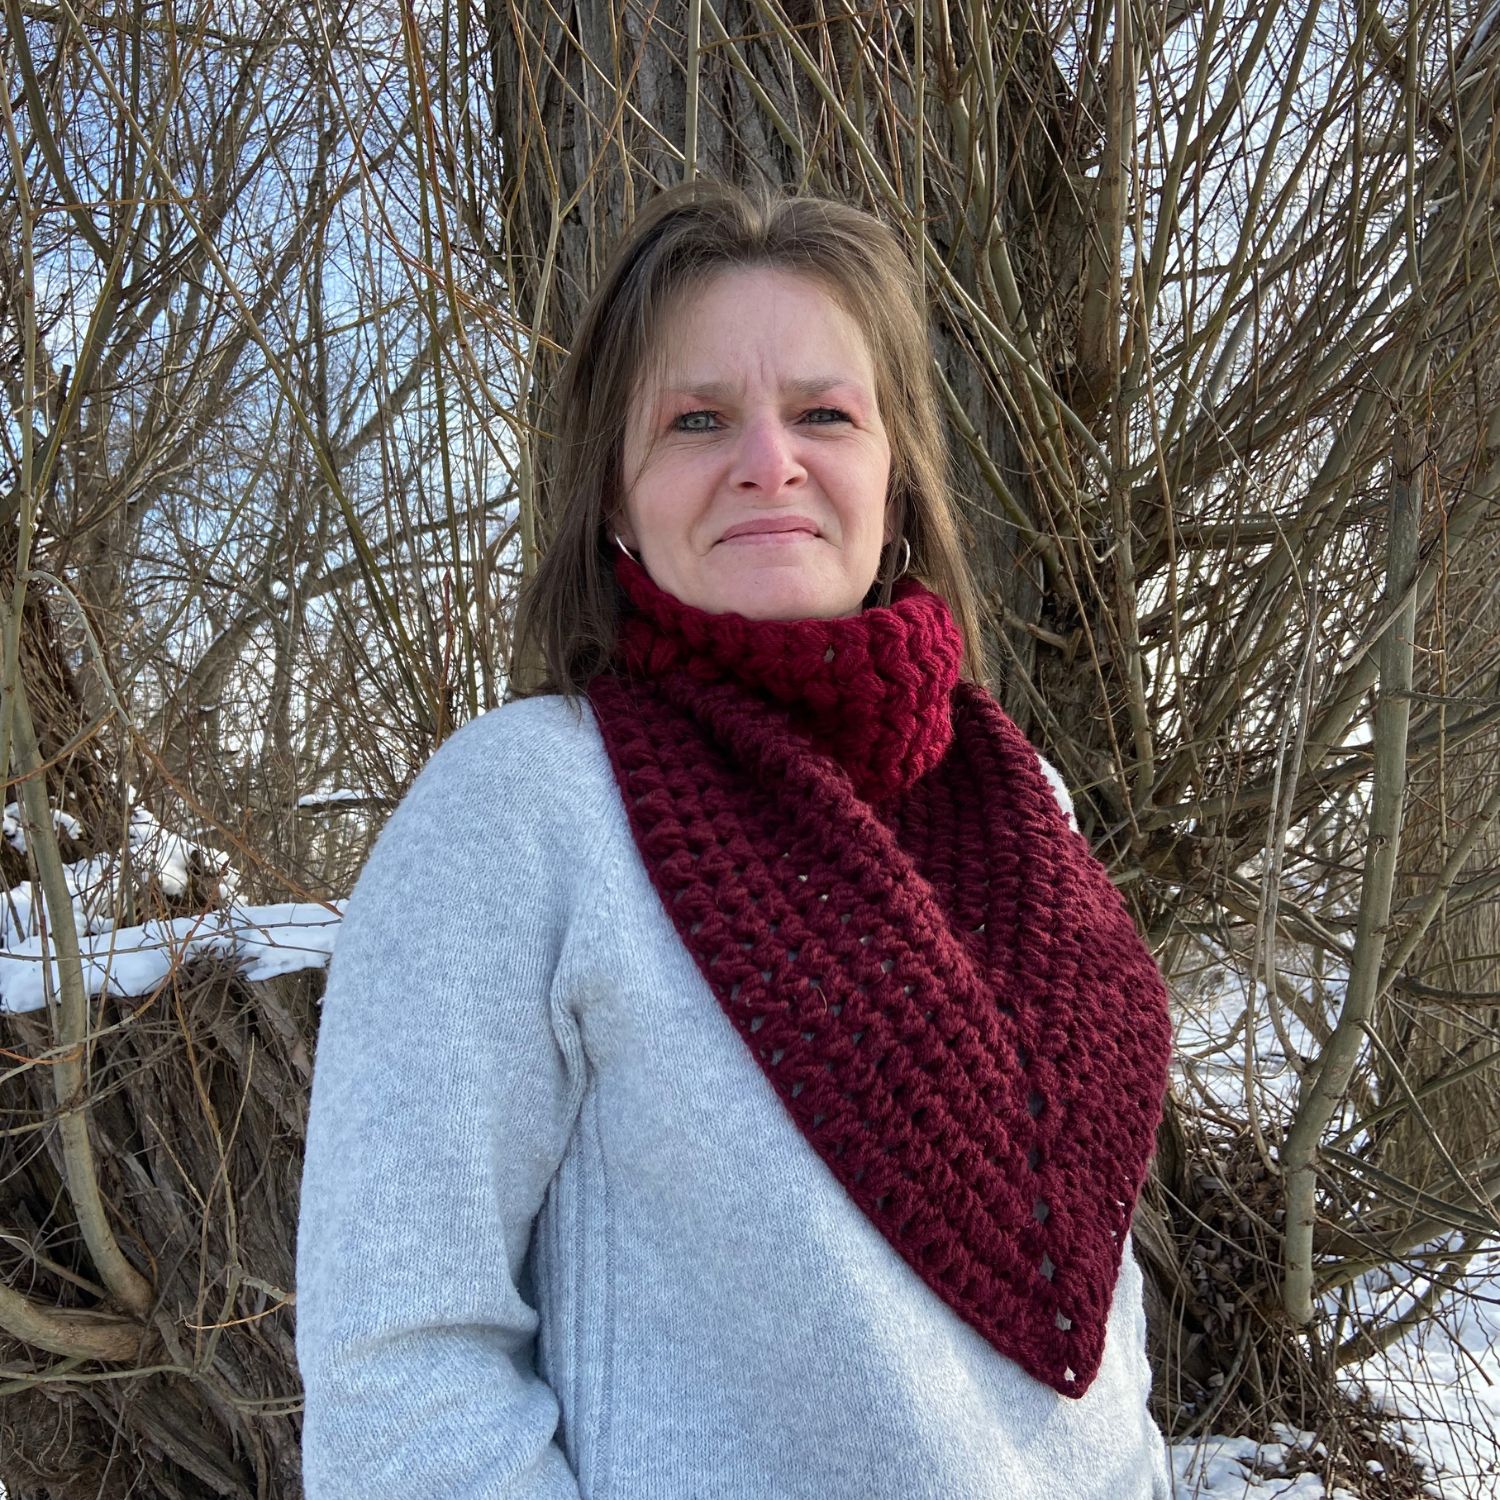
I always wanted to use the lilac cluster stitch in a design that works in rows. The first crochet pattern I tried with the Lilac Cluster Stitch with rows was the Oyster Shell Scarf. I loved using this stitch in rows so much that I had to make another crochet design with this crochet stitch!
Oyster Shell Scarf
You can find the Oyster Shell Scarf as a free crochet pattern on my website. You can also purchase an AD-Free premium copy from my Ravelry or LoveCrafts Store for a small fee.
Find me, Jo of Jo’s Crafty Hook at the places listed below.
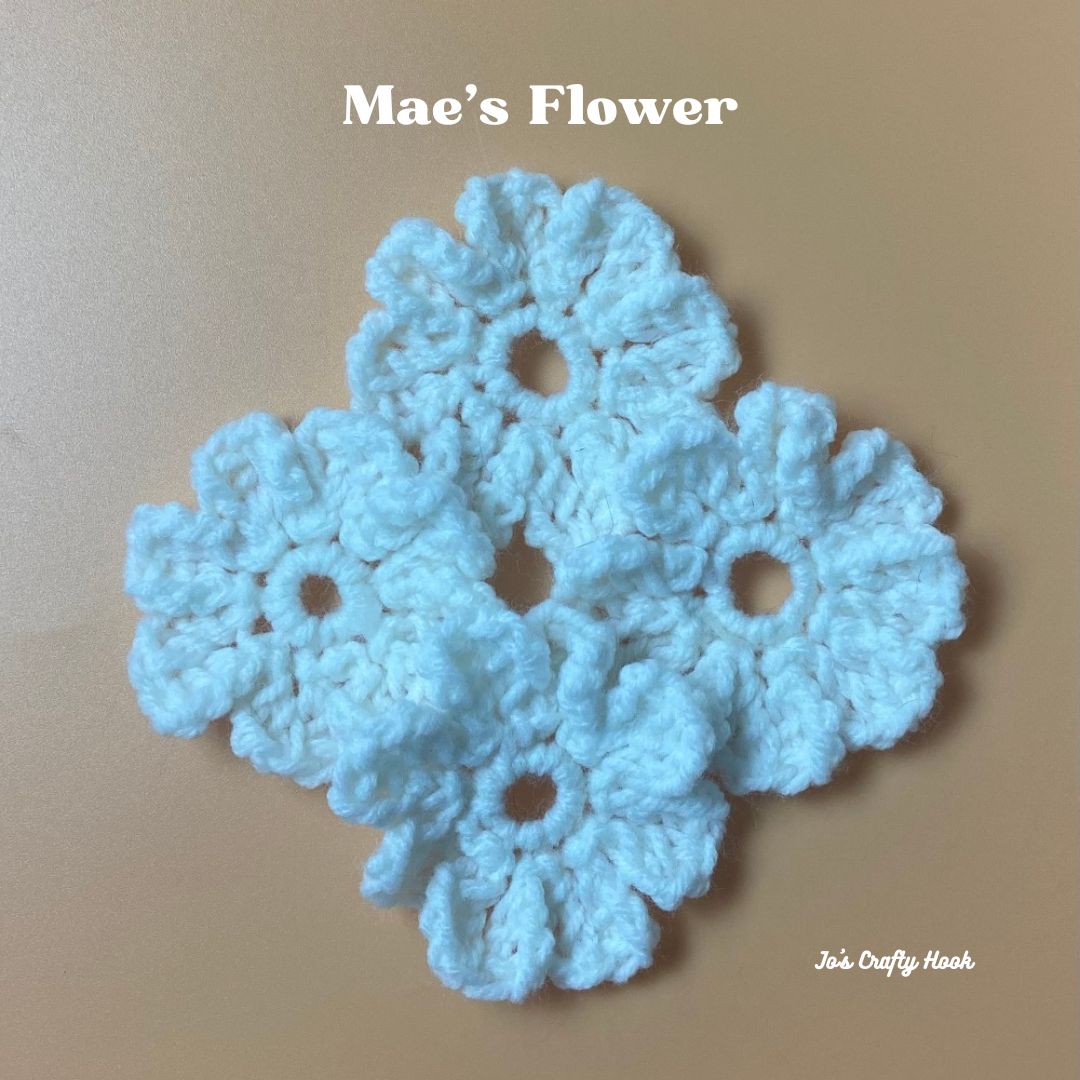
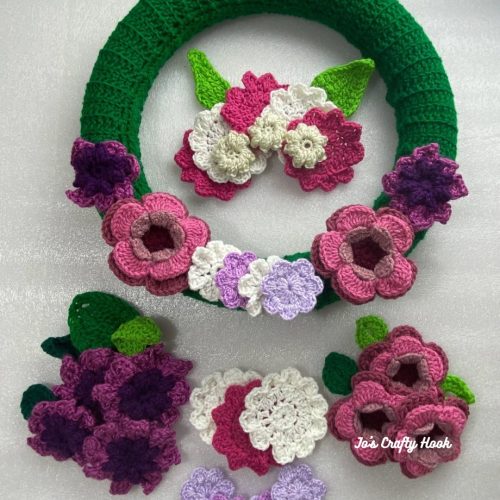
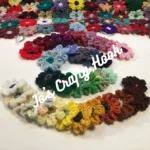
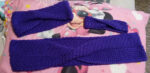
In today’s post I am sharing with you a FREE crochet pattern of my Mae’s Flower. The Mae’s Flower is a simple and easy flower to crochet.
You can use the Mae’s Flower as an applique that you can add to headbands, pillows, purses, and more! You can even used a lighter weight yarn for a smaller flower.
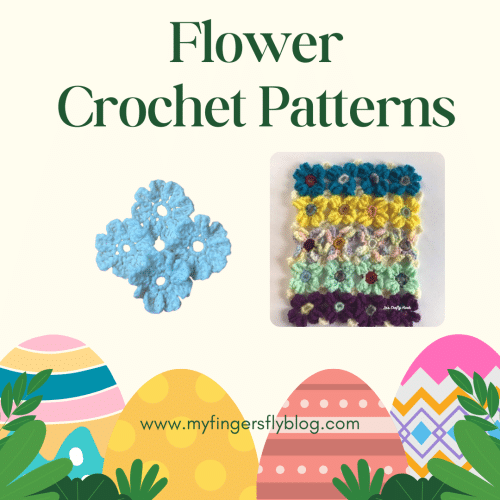
The Easter Advent Calendar Event runs from April 1-14, 2025 and features free crochet patterns for adorable and cute crochet patterns for Chicks, Easter Basket, Eggs and so much more!
April 13th – Easter Advent FREE Home Decor Crochet Patterns
My Mae’s Flowers Crochet Pattern is being featured April 13th as part of the Flowers day and the FREE crochet pattern can be found below.
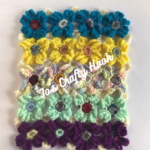
I made 4 of the Mae’s Flowers to add to my Blooming Flowers Wall Hanging. You can make as many of the Mae’s Flowers as you like for your version of the wall hanging.
You will find the Mae’s Flower Crochet Pattern in my Blooming Flowers Wall Hanging eBook. My eBook that was part of the Blooming Flowers Wall Hanging CAL.
I used a variety of yarns in a variety of colors. The Mae’s Flowers can be made in solid or contrasting colors. This crochet pattern is a great way to use up your scrap yarn.
Materials: 2-4 yds of 4 ply Worsted/Aran Weight Yarn
US H Crochet Hook or 5mm
Tapestry Needle
Scissors
Abbreviations/Stitches Used: sc = single crochet
dc = double crochet
ch = chain
st = stitch
sl st = slip stitch
sp = space
rep = repeat
RS = Right Side
Flower Size: 3” x 3”
Notes: Flowers can be made in a solid color or a variety of colors.
Below is a video tutorial for the making of the flowers left handed.
**It would be a great idea to weave in your ends as you go. If you do not, you will spend a long time weaving them in after the afghan is complete**
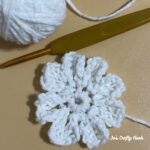
R1: make a loose slip knot or a magic circle, ch 2, 8 sc in ch 1 or magic circle. sl st in 1st sc to join.
R2: ch 4, dc in ch 1 just made , ch 4, dc in 2nd ch 1 made, sl st in same sc. *sl st in next sc, ch 4, dc in ch 1 just made, ch 4, dc in 2nd ch 1, sl st in same sc. rep from * around. sl st in 1st st to join.
Mae’s Flower Crochet Pattern in 2 Colors
Flowers (2 Colors)
**It would be a great idea to weave in your ends as you go. If you do not, you will spend a long time weaving them in after the afghan is complete**
Center of Flowers
R1: make a loose sl knot or a magic circle, ch 2, 8 sc in ch-1 or magic circle. sl st in 1st sc to join.
Fasten off and weave in ends.
R2: attach another color of yarn with a sl st in any sc. ch 4, dc in ch 1 just made, ch 4, dc in 2nd ch 1, sl st in same sc. *sl st in next sc, ch 4, dc in ch 1 just made, ch 4, dc in 2nd ch 1, sl st in same sc. rep from * around. sl st in 1st st to join.
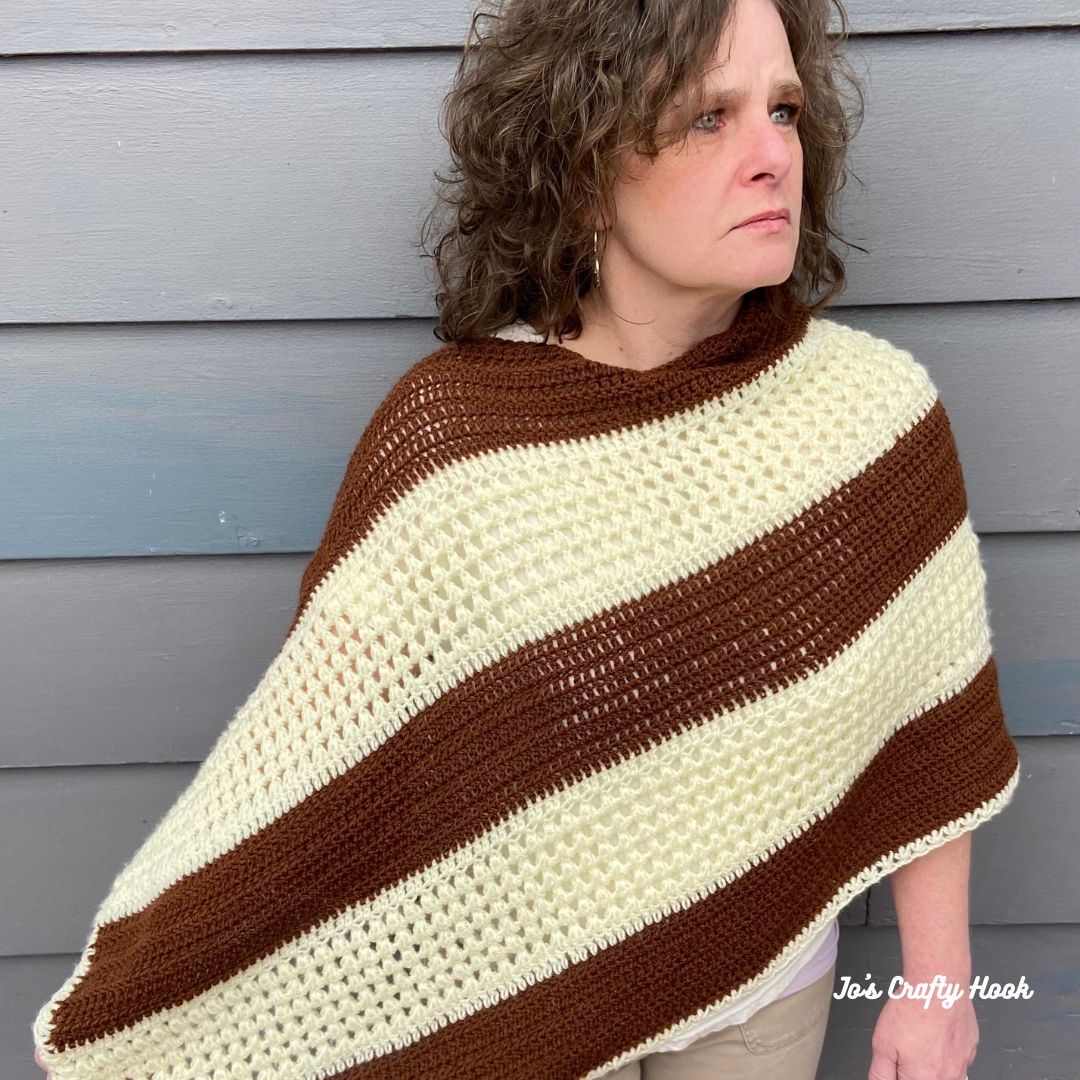
Are you looking to add a little luxury to your wardrobe? Well, using the Welsh Poncho Free Crochet Pattern will help you achieve just that!
The Welsh Poncho Crochet Pattern uses a crochet stitch that I fell in love with last year, the Triad Stitch. The Triad Stitch is just like a Puff Stitch, only it is done over 3 stitches.
The Triad Stitch has one meaning that I fell in love with, this is where I came up with it’s name Welsh. Triad means a Welsh form of literary composition with an arrangement of subjects or statements in groups of three.
If you think about a crochet pattern it is made up of 3 things:
using crochet stitches to create the design
a composition of writing the crochet pattern
taking pictures to showcase the design
I first used the Triad Stitch in my Welsh Braided Cowl Crochet Pattern (see info below) In the designing of the Welsh Braided Cowl I using another meaning of Triad, the braiding of three things together, this is where the Braided part of the design came in. You can find out more about this below.
This kind of sounds like an English lesson, doesn’t it?! lol
Handmade Wardrobe April
Today, April 10, 2023 you can get a premium copy of my Welsh Poncho crochet pattern at a discounted price, $3.50, this is 50% off the retail price as part of the Handmade Wardrobe April Blog Hop hosted by Fosbas Designs.
Click on the Button below to the Coupon Code needed to get the discounted price of my Welsh Poncho Crochet Pattern from my Ravelry Store.
Come back here and use the Coupon Code to use at my Ravelry Store at Checkout to get the Welsh Poncho Crochet Pattern for $3.50 by clicking on the Button below.
Click on the Button below to use your Coupon Code to get the Welsh Poncho Crochet Pattern at Checkout.
Handmade Wardrobe April Bundle
You can skip all the Blog Hopping and get a savings on all 15 crochet patterns for $9.99! Click on the Button below for more information or to get the Handmade Wardrobe April Bundle for $9.99
If you missed my day as part of the Handmade Wardrobe April Blog Hop, you can purchase a premium copy of the Welsh Poncho Crochet Pattern for a small fee with all of the Picture and Video Tutorials inside. You will find it at my Ravelry Store or LoveCrafts.
Information about the Welsh Poncho Crochet Pattern
The Welsh Poncho Crochet Pattern has 4 different sizes to choose from to make for Small, Medium, Large and XLarge. Inside the Welsh Poncho Crochet Pattern you will find a size chart, step-by-step picture tutorials, and my Left Handed Triad Stitch Video Tutorial to help you every step of the way.
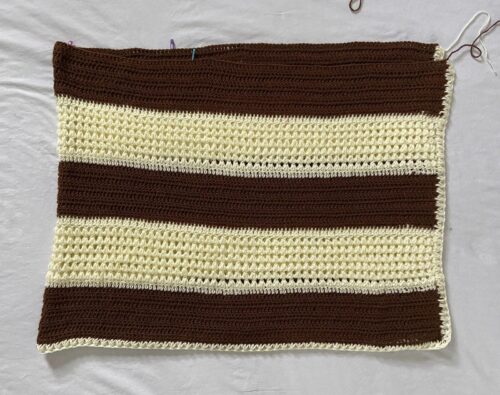
US Terminology Skill Level: Advanced Beginner/ Intermediate I used KnitPIcks Sport Weight Yarn (340 yds/100 g) I used We Love Yarn Mega Ball (14.1 oz/400 g) 1312 yds/1200 m)
Materials: US I Crochet Hook or 5.5 mm MC – Brown 550-680 yds of #3 ply Light/DK Weight Yarn CC – Cream 700-1200 yds of #3 ply Light/DK Weight Yarn Scissors Tapestry Needle
Abbreviations/Stitches Used: ch = chain st(s) = stitch dc = double crochet sk = skip rep = repeat YO = Yarn Over
MC = Main Color CC = Contrasting Color
Notes: alt ch 2 counts as a dc. ch 3 counts as a dc. ch 4 counts as a dc + ch 1. The chain-1 sp counts as a st in the Triad Stitch. There are helpful Picture Tutorials below to help you with the Triad Stitch.
You can find more of my Left Handed Video Tutorials at my YouTube Channel
You can purchase a premium copy of the Welsh Poncho Crochet Pattern for a small fee with all of the Picture and Video Tutorials inside. You will find it at my Ravelry Store or LoveCrafts.
Welsh Poncho Crochet Pattern
Using MC
R1: fdc 192 turn (192 fdc)
Optional: ch 194 (210, 226, 242), dc in 4th ch from hook, dc across. (192 dc)
R2-R8: alt ch 2 or ch 3, dc across. turn (192 dc)
Fasten off and weave in ends.
Change to CC
R9: alt ch 2 or ch 3, dc across. turn (192, 208, 224, 240) dc
R10: Beginning Triad Stitch. (see Special Stitches above). rep from * across until last st. dc in last st. turn (95, 103, 111, 119) Triad Stitch & 2 dc
R11-R15: Triad Stitch. (see Special Stitches above). rep from * across until last st. dc in last st. turn (95 Triad Stitch & 2 dc)
R16: alt ch 2 or ch 3, dc in each st across. turn (192 dc)
Fasten off and weave in ends.
Change to MC
R17-R24: alt ch 2 or ch 3, dc in each st across. turn (192 dc)
Fasten off and weave in ends.
Change to CC
R25: alt ch 2 or ch 3, dc across. turn (192 dc)
R26: Beginning Triad Stitch. (see Special Stitches above). rep from * across until last st. dc in last st. turn (95 Triad Stitch & 2 dc)
R27-R31: Triad Stitch. (see Special Stitches above). rep from * across until last st. dc in last st. turn (95 Triad Stitch & 2 dc)
R32: alt ch 2 or ch 3, dc in each st across. turn (192 dc)
Fasten off and weave in ends.
Change to MC
R33-40: alt ch 2 or ch 3, dc in each st across. turn (192 dc)
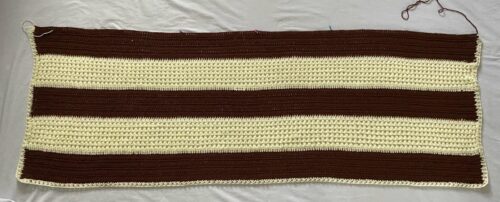
Leave a long tail of yarn for sewing Neck Opening closed.
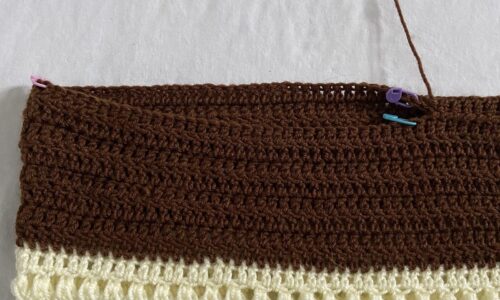
Creating Neck Opening
Step 1: Lay your long piece with the WS facing up
Step 2:
Fold from the longest side in half with the WS facing the WS.
Step 3:
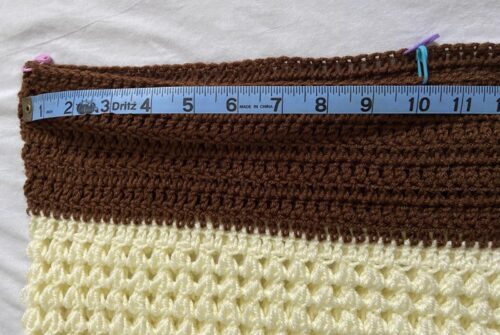
Measure 10” 11” 12” 13” or your desired neck opening from the opposite corner from where your long tail of yarn is at.
Step 4:
Count the number of stitches from the corner of each side of the poncho and place SM in each side.
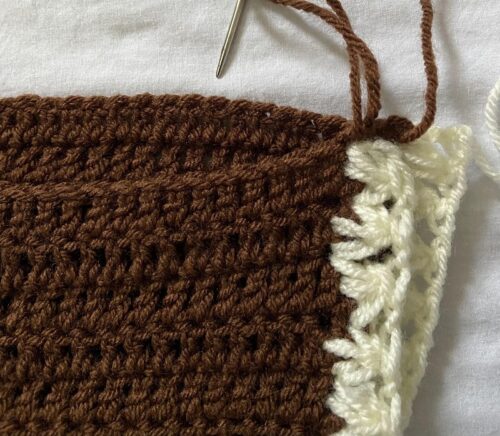
Step 5:
Sew evenly across the top of both poncho pieces, using the Whip Stitch, until you come to your SM.
Fasten off and weave in ends.
@Jo’s Crafty Hook 2023
That’s it! You have finished crocheting your Welsh Poncho!
I would LOVE to see your version of the Welsh Poncho!! You can tag me at any of the Social Media sites listed above using the hashtags:
If you would like to receive more information about the events happening at Jo’s Crafty Hook and receive a FREE crochet pattern, why not Subscribe to my Newsletter at my website. You can find some of my free crochet patterns at my website. You can also find more of my premium crochet patterns at my Ravelry Store and LoveCrafts.
Welsh Braided Cowl Crochet Pattern
My Welsh Braided Cowl Crochet Pattern designed for a special purpose. Ashley of Through the Loop Yarn Craft showcased me and this design in here Designer Spotlight in part with WeCrochet.
My Welsh Braided Cowl was excepted by WeCrochet and it became my very first published crochet pattern as part of their Independant Designer Partnership! to sell on their platform. This was a HUGE step forward for me as a crochet designer! Needless to say I was and still am Over the Moon about this crochet pattern! You can find my Welsh Braided Cowl Crochet Pattern here.
Welsh Braided Cowl
Find me, Jo of Jo’s Crafty Hook at the places listed below.
My Braided Basket Crochet Pattern is being featured during the Easter Advent Crochet Pattern Event hosted by My Fingers Fly.
You will also find free basket crochet patterns from Straight Hooked, Start Crochet, Concrete Gems, and My Fingers Fly.
Each day you will find FREE crochet patterns for Bunnies, Lambs, Eggs, Baskets and MORE.
You will find all of the FREE Easter Advent Crochet Patterns at My Fingers Fly.
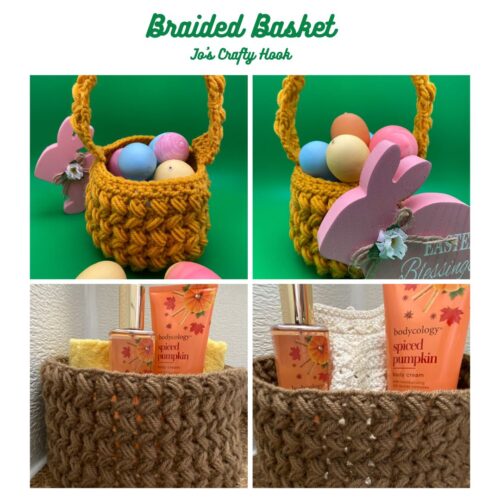
When my kids were little I loved filling in for the Easter Bunny by placing an Easter Basket at the end of my kids’ beds! I loved seeing the excitement on their faces when they woke up in the morning that would be the first thing they seen!
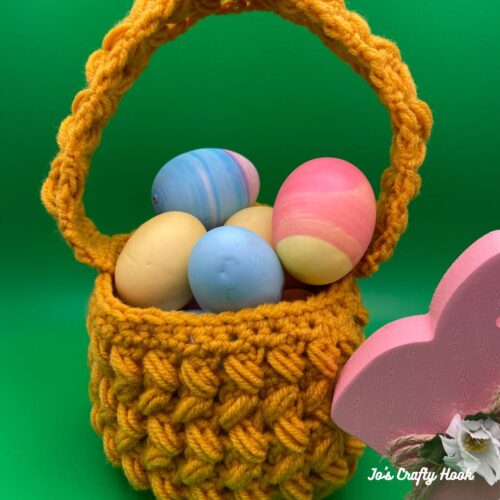
Easter Basket
I wanted to design a basket that actually looked like a woven basket so that is how I came up with the Braided Basket Crochet Pattern.
The free crochet pattern below has all the information you will need to make your own Easter Basket or a customized Braided Basket.
You can also find a premium copy of my Braided Basket Crochet Pattern at my Ravelry and LoveCrafts Stores and my Etsy Shop. The premium copy of my Braided Basket Crochet Pattern contains step-by-step picture tutorials and video tutorials all in one PDF.
Braided Basket Free Crochet Pattern Below
Easter Basket
Customized Basket
I used Red Heart Super Saver in Gold. 100 % Acrylic. 198 g/7 oz (364 yards/215 m)
Materials: 100-125 yds of #4 ply Worsted/Aran Weight Yarn US H Crochet Hook or 5 mm Scissors Tapestry Needle Stitch Marker
Abbreviations/Stitches Used:
st = stitch
sl st = sl stitch
ch = chain
dc = double crochet
ps = puff stitch
rep = repeat
alt ch 2 = alternate chain 2
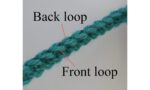
blo = back loop only
SM = Stitch Marker
RS = Right Side
Finished Size: 4″ x 4″ Handle: 12″ x 1/2″
Special Stitches:
Invisible Join: instead of slip stitching to the top of the first stitch of that row, you’ll instead place a stitch marker and keep on crocheting without joining.
Notes: The bottom of the basket is worked in the round. The basket itself is also worked in the round with turning rows. The handle is worked in rows. The stitch count is a multiple of 8. ch 1 counts as a stitch as part of the Puff Stitch. ch 2 counts as a dc. alt ch 2 counts as a dc.
Gauge: US H Crochet Hook or 5 mm 16 dc x 8 rows = 4”
My Left Handed Video Tutorials:
Puff Stitch Example
Puff Stitch: YO, insert hook into indicated st. YO, pull up loop. (YO, insert hook into the same st, YO, pull up loop) 2 times. YO, pull through 7 loops on the hook.
Braided Puff Stitch – Left Handed
Example of Back Loop Only
Back Loop Only – Left Handed
You can get the Premium Braided Basket Crochet Pattern with step-by-step picture tutorials from my Ravelry Store, my Etsy Shop, and LoveCrafts.
Braided Basket Crochet Pattern:
Notes: Use the Invisible Join at the beginning of each round. Place a SM in 1st stitch at the beginning of every round. Every round will increase by 8 stitches.
Bottom of Basket
R1: MC, 8 sc in magic circle (8 sc) R2: 2 sc in each sc around. (16 sc) R3: 2 sc in 1st, sc in next st. *2 sc in next st, sc in next. rep from * around. (24 sc) R4: 2 sc in 1st, sc in next 2 st. *2 sc in next st, sc in next 2 st. rep from * around. (32 sc) R5: 2 sc in 1st, sc in next 3 st. *2 sc in next st, sc in 3 st next. rep from * around. (40 sc) R6: 2 sc in 1st, sc in next 4 st. *2 sc in next st, sc in 4 next. rep from * around. (48 sc) R7: sc in each st around. (48 sc) R8: 2 dc in 1st st, dc in blo only around. (49 dc)
Basket Note: ch 1 counts as a st for R2-R6
R1: alt ch 2 or ch 2, *sk next st, dc in next st, ps in sk st, ch 1. rep from * around until last st. dc in last st. sl st in 1st st to join. turn (24 dc & 24 ps) R2-R6: alt ch 2 or ch 2, *sk next st (ch-1 sp), dc in next dc, ps in sk st, ch 1. rep from * around until last st. dc in last st. sl st in 1st st to join. turn (24 dc & 24 ps)
Do NOT turn after R6
R7: ch 1, sc in same st, *sc in ch-1 sp, sc in next dc. rep from * around. sl st in 1st st to join. turn (48 sc) R8: ch 1, sc in same st, sc around. (48 sc)
Fasten off and weave in ends.
Handle of Basket
12” long x 1 ½” wide
**you can adjust the length to fit your desired size**
Note: ch 1 counts as a st for R5-R23
Leave a long enough tail of yarn to sew the handle to the basket.
R1: fsc 6 turn (6 sc) Optional: ch 7, sc in 2nd ch from hook, sc across. turn (6 sc) R2: ch 1, sc in same sp, sc across. turn (6 sc) R3: alt ch 2 or ch 2, dc across. turn (6 dc) R4: alt ch 2 or ch 2, *sk next st (ch-1 sp), dc in next st, ps in sk st, ch 1. rep once more. dc in last st. turn (2 dc & 2 ps) R5-R22: alt ch 2 or ch 2, *sk next st (ch-1 sp), dc in next st, ps in sk st, ch 1. rep once more. dc in last st. turn (2 dc & 2 ps) R23: alt ch 2 or ch 2, dc in ch-1 sp, dc in dc. rep once more. turn (6 dc) R24-R25: ch 1, sc in same sp, sc across. turn (6 sc)
Leave a long enough tail of yarn to sew the handle to the basket.
Fasten off and weave in ends.
Handle Assembly:
Step 1: Place a SM in same st as closing. Count over 6 st and place a SM in same st. Count over 19 st and place a SM in same st. Count over 6 st and place a SM in same st.
Step 2: Place RS of 1 end of the handle to RS of the basket at the 1st set of SM. Using your long tail of yarn, whip stitch the handle to the basket.
Step 3: Repeat Step 2 to sew the handle to the other side of the basket.
Fasten off and weave in ends.
That’s it! You have completed your own Braided Basket! I would LOVE to see your version!
Find me, Jo of Jo’s Crafty Hook at the places listed below.
The Floret Mobius Cowl Crochet Pattern uses basic crochet stitches that helps you create a beautiful seamless infinity cowl
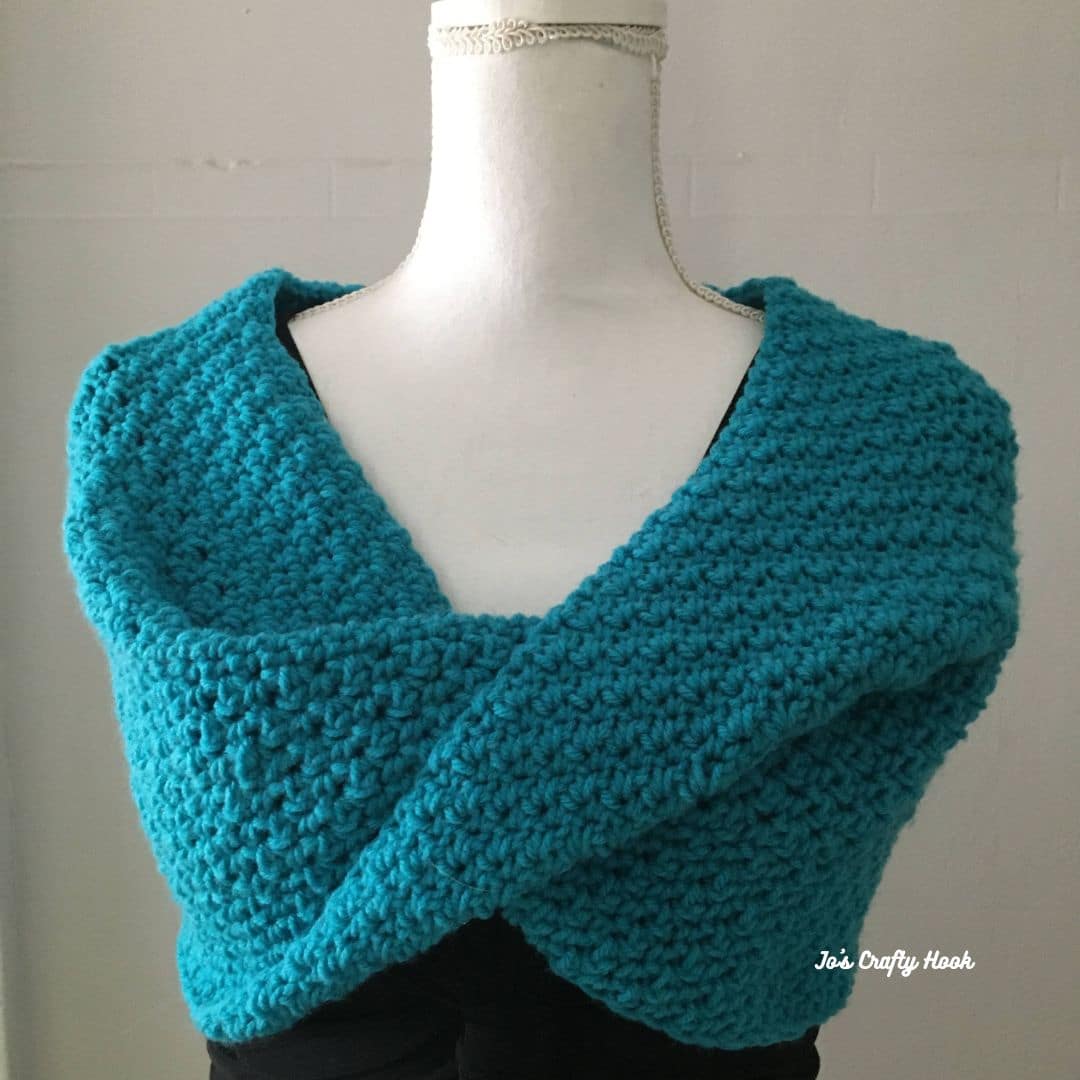
The Mobius part of the crochet pattern means it has only one continuous side that creates a 180° twist that creates a long narrow cowl. The pattern is called Floret for the floret stitch used to create the design.
Below you will find a FREE version of my Floret Mobius Cowl Crochet Pattern for 12 years to Adult.
This page contains affiliate links
Be sure to sign up for my Newsletter and receive a FREE premium copy of my Rolling Shells Infinity Scarf Crochet Pattern. You will also receive messages about New Crochet Pattern Releases; FREE Crochet Patterns; Collaborations and more!
Visit the Landing Page below. Once you subscribe you will receive a Thank You email with the link to the crochet pattern sent right to your inbox!
My newest crochet design, the Posted Beanie Crochet Pattern is being featured in this great blog hop!
From now until December 30, 2026 you can take advantage of daily FREE crochet patterns during the Bundle Up Blog Hop 2026 hosted by The Crochet Village.
My Featured Day is January 18-19, 2026
For 24 hours you can get a FREE premium copy of my Floret Mobius Cowl Crochet Pattern as part of the Bundle Up Blog Hop 2026!
On my Featured Day visit the Bundle Up Blog Hop 2026 to get the Coupon Code needed to get a FREE premium copy of my Floret Mobius Cowl Crochet Pattern.
Be sure to check back daily for another FREE premium crochet pattern during the Bundle Up Blog Hop 2026 until December 30, 2026!
Floret Mobius Cowl FREE Crochet Pattern.
There is a FREE version of my Floret Mobius Cowl below.
You can also find a premium copy of the Floret Mobius Cowl crochet pattern with 7 sizes to choose from at my Ravelry and LoveCrafts Store.
Also, you can find a premium copy of the Floret Mobius Set at my Ravelry Store or LoveCrafts for a small fee. You can also find each crochet pattern of the Floret Mobius Set sold separately from my Ravelry and LoveCrafts Stores.
Floret Mobius Set
Floret Mobius Cowl Free Crochet Pattern
Floret Mobius Cowl
Information Needed
I used Red Heart Super Saver in Turquoise- 7 oz/364 yds (198 g/333 m)
Materials:
650 yds of #4 ply Worsted/Aran Weight Yarn
US H or 5 mm Crochet Hook
Scissors
Tapestry Needle
Stitch Marker
Abbreviations/Stitches Used:
ch = chain
st = stitch
sc = single crochet
dc = double crochet
fs = floret stitch
alt ch 2 = alternate chain 2
sl st = slip stitch
SM = Stitch Marker
Notes: Stitch count is multiple of 2 Alt ch 2 counts as a double crochet Size: 12-adult Beginning stitch count is 92 st Ending stitch counts after Round 1 is 184 st The crochet pattern has step-by-step picture tutorials for Round 1.
The size found in the free crochet pattern of the Floret Mobius Cowl, listed below is for 12 years to Adult.
Special Stitches: Floret Stitch (fs) = alternating sc and dc then when you go to start the next round you add a dc in the sc and a sc in the dc.
Mobius = causes your cowl to twist as shown in the picture above. The twist will continue throughout the pattern as you work in a continuous circle. To achieve the ‘mobius’ effect there are 4 steps to R1
Step 1: twisting or rotating the chain Step 2: crocheting along the bottom (or backside) of the chain Step 3: crocheting along the foundation row Step 4: working in a continuous circle
Gauge:
US H or 5mm Crochet Hook
12 st x 12 rows = 4″
Gauge Swatch: R1: ch 13, sc in 2nd ch from hook, dc in next st, *sc in next st, dc in next st. rep from * across. turn (12 st) R2-R12: ch 1, sc in same st, dc in next st, sc in next st. rep from * across. turn (12 st)
Floret Mobius Cowl
Floret Mobius Cowl
Floret Mobius Cowl
Floret Mobius Cowl Free Crochet Pattern
Round 1
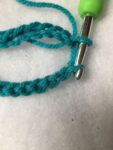
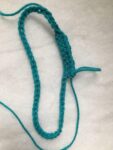
Step 1: ch 56 (62, 68, 74, 80, 86, 92) twist ch and sl st in the bottom of beginning ch to join.
**most patterns tell you to be careful NOT to twist your chain when you join, but here you want to twist to create the continuous circle of the Mobius.**
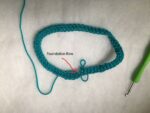
Step 2: ch 1, sc in same st and sc across the bottom of the ch until you come to the 1st sc. Do NOT join.
Step 3: then sc across the foundation row of ch until you come to the last st. Do NOT join.
Step 4: Place a stitch marker in 1st sc. Ending st count 112 (124, 136, 148, 160, 172, 184)
R2: sc in the 1st st and dc in the next st (floret stitch made). fs around to the 1st sc where you placed your stitch marker. Do NOT join.
Repeat R2 eleven more times or until your desired height is reached.
Fasten off and weave in your ends.
@Jo’s Crafty Hook 2025
That’s it! Have created your own version of the Floret Mobius Cowl! I would love to see what you created!
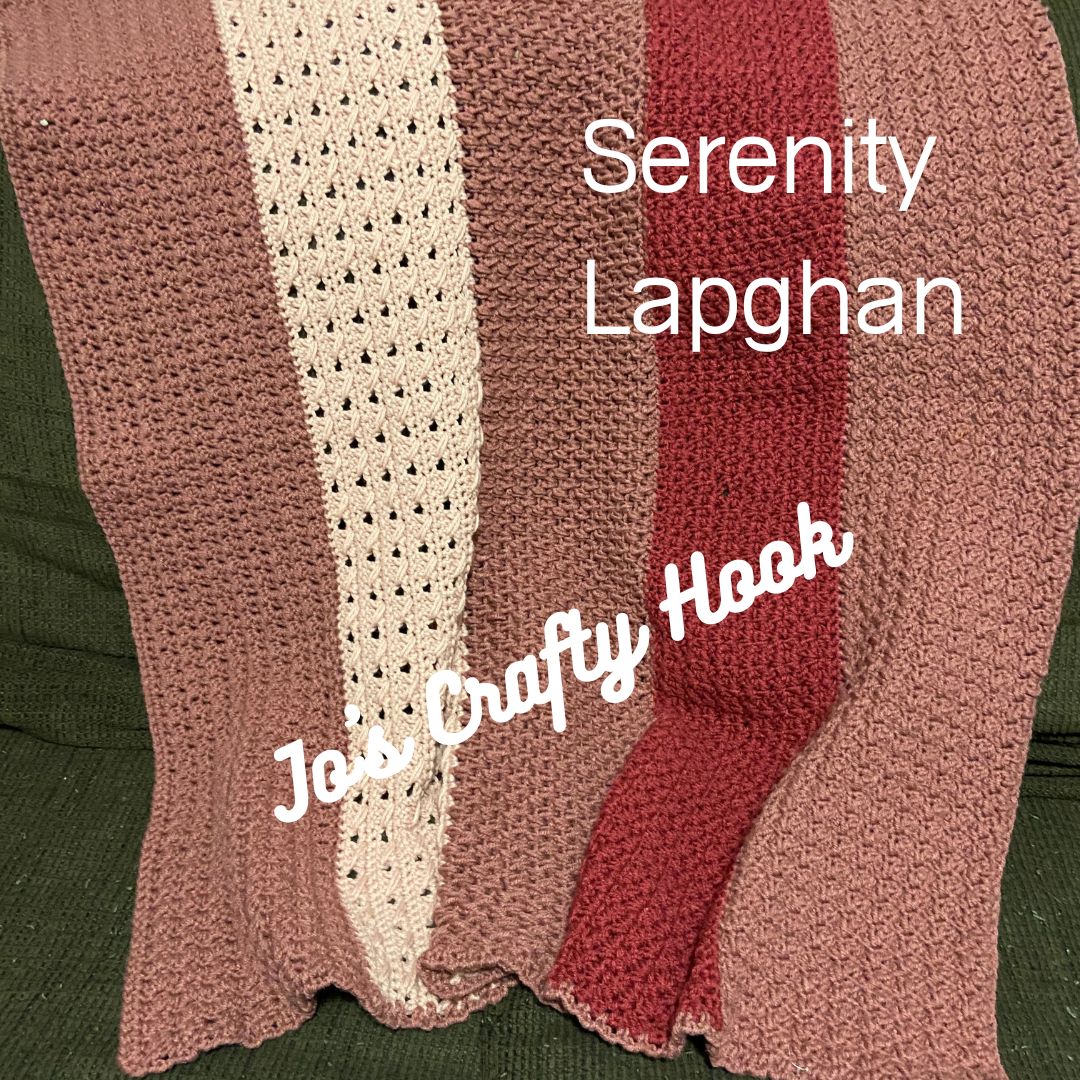
Below I am sharing a FREE copy of my Serenity Lapghan Crochet Pattern.
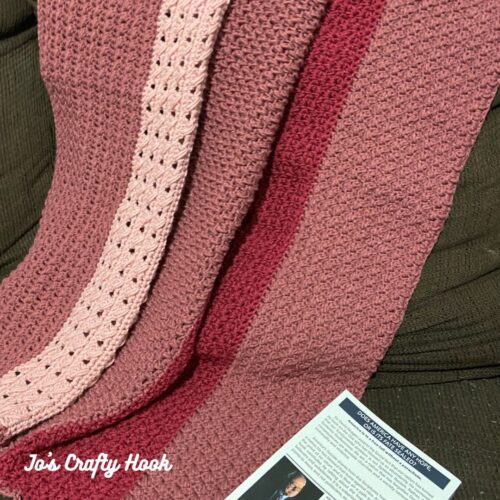
The Serenity Lapghan crochet pattern uses 5 different basic crochet stitches that add different textures to the design. The crochet stitches used are the:
Suzette Stitch Half Double Crochet V-Stich Elizabeth Stitch Crossover Stitch Single Crochet & Double Crochet
**Be sure to Subscribe to my Newsletter by clicking SUBSCRIBE in the top right hand corner. You will receive a FREE crochet pattern for signing up! You will also receive more information about these events, Jo’s Crafty Hook’s News and more by signing up**
Serenity Lapghan Crochet Pattern
You can find the Serenity Lapghan premium crochet pattern, for a small fee, at my Ravelry and LoveCrafts Stores.
Information about the Serenity Lapghan Crochet Pattern
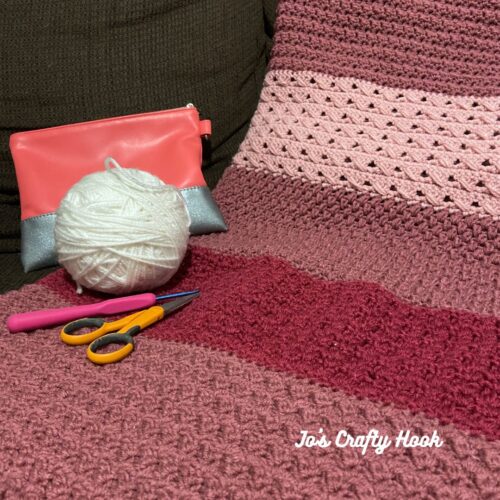
Inside the Serenity Lapghan Crochet Pattern you will find a Child Size Lapghan. Also the Serenity Lapghan Crochet Pattern can be customized using the Gauge inside the pattern. Also, each color block has it’s own gauge that will help you customize the Lapghan as well.
Materials:
US H or 5 mm Crochet Hook
MC – 700 yds #4 ply Worsted/Aran Weight Yarn
CC – 150 yds #4 ply Worsted/Aran Weight Yarn
CC1 – 150 yds #4 ply Worsted/Aran Weight Yarn
Tapestry Needle
Scissors
MC = Main Color
CC = Contrasting Color
CC1 = 2nd Contrasting Color
Size:
36″ x 30″
Gauge:
US H or 5 mm Crochet Hook
12 st x 8 rows = 4″
Notes:
I used 3 different colors, but you can use as many as you like.
Each color block measures 6″
Each color block has a different gauges you can also follow to customize the Lapghan.
The row counts will vary due to the different stitches used.
There are pictures inside the pattern to show you what the different stitches look like.
Serenity Lapghan Crochet Pattern
Serenity Lapghan Free Crochet Pattern
Size: 36″ x 30″
Suzette Stitch 145 st x 18 rows = 6”
Using MC
R1: ch 145, sc in 2nd ch from hook, dc in same st, sk st. *(sc, dc) in same st, sk st. rep until last ch, sc in last ch. ch 1, turn (145 st)
R2: (sc, dc) in 1st sc, sk next st. *(sc, dc) in next sc, sk st. rep from * until last sc. sc in last sc. ch 1, turn (145 st)
R3-R18: Repeat R2. turn after R18
fasten off and weave in ends.
***********************************
Change to CC Half Double Crochet V-Stitch 144 st x 14 rows = 6”
R1 (RS): attach yarn with a sl st in 1st st, ch 1, sc in same sp, sk next st, sc in each rem st across. turn (144 st)
R2: alt ch 2 or ch 2, (counts as a hdc) sk next st (hdc, ch 1, hdc) all in same st (hdc v-st made) *sk next st, hdc v-st in next st. rep from * until last 2 st. sk next st, hdc in last st. turn (2 hdc & 70 V-St)
R3-R13: alt ch 2 or ch 2. (hdc, ch 1, hdc) all in ch-1 sp across until last st. hdc in last st. turn (2 hdc & 70 V-St)
R14: alt ch 2 or ch 2, hdc in next hdc, hdc in ch-1 sp (counts as a st), hdc in next hdc. hdc in each hdc across until last hdc v-st. hdc in next hdc, hdc in ch-1 (counts as a st) hdc in last 2 hdc. turn (144 st)
Fasten off and weave in ends.
***********************************
Elizabeth Stitch 144 st x 19 rows = 6”
Special Stitches Bean Stitch (bs) : insert hook into next st, YO, pull up a loop, YO, insert hook into same st (3 loops on hook) YO, pull through all 4 loops.
Using MC
R1(RS): attach yarn with a sl st in 1st st, ch 1, sc in same st, sc in each st across. turn (144 sc)
R2: ch 1, sc in same st *bs in next st, ch 1, sk 1 st. rep from * until last st. sc in last st. turn (2 sc & 71 bs)
R3: ch 1, sc in same st, *bs in ch-1 sp, ch 1. rep from * across until last 2 st. sk next st, sc in last st. turn (2 sc & 71 bs)
R4-R19: Repeat R3. turn
fasten off and weave in ends.
***********************************
Cross Over Stitch 142 st x 14 rows = 6”
Using CC1 R1: attach yarn with a sl st in 1st st, ch 1, sc in same st, sk next st, sc in each st across until last 2 st. sk next st, sc in last st. turn (142 sc)
R2: alt ch 2 or ch 3 (counts as a dc) *sk next st, dc in next 3 st, dc in sk st. rep from * across until last st. dc in last st. turn (142 dc)
R3: ch 1, sc in same st, sc in each st across. turn (142 sc)
R4: alt ch 2 or ch 3, *sk next st, dc in next 3 st, dc in sk st. rep from * across until last st. dc in last st. turn (142 dc)
R4-R14: Repeat R3-R4
fasten off and weave in ends.
***********************************
SC & HDC Stitch 144 st x 19 rows = 6”
Using MC
R1(RS): attach yarn with a sl st in 1st st, sc in 1st sc, 2 sc in next st, *sc across until last 2 st. 2sc in next st, sc in last st. turn (144 sc)
R2: ch 1, sc in 1st st, sk st, *(sc, hdc) all in same st. sk st. rep from * sc in last st. turn (144 st)
R3: ch 1, sc in 1st st, (sc, hdc) in next sc. rep from * across until last sc. sc in last sc. turn (144 st)
R4-R19: Repeat R3. You will end on the WS after completing R19. Do not fasten off unless changing colors.
***********************************
Border:
Step 1: turn slightly. *sc in next st, ch 2. rep from * until last st. (sc, ch 2, sc) in last st.
Step 2: turn to work across the bottom. sc in each st until last st. (sc, ch 2, sc) in last st.
Step 3: Repeat Step 1.
R4: turn to work across the top. sc in each st across until last st. (sc, ch 2, sc) in last st. sl st to join.
fasten off and weave in ends.
Again you can find the Serenity Lapghan premium crochet pattern at my Ravelry and LoveCrafts Stores.
**Be sure to Subscribe to my Newsletter by clicking SUBSCRIBE in the top right hand corner. You will receive a FREE crochet pattern for signing up! You will also receive more information about new crochet pattern releases, events I will be collaborating in, also Jo’s Crafty Hook’s News and more by signing up**
Find me, Jo of Jo’s Crafty Hook at the places listed below.
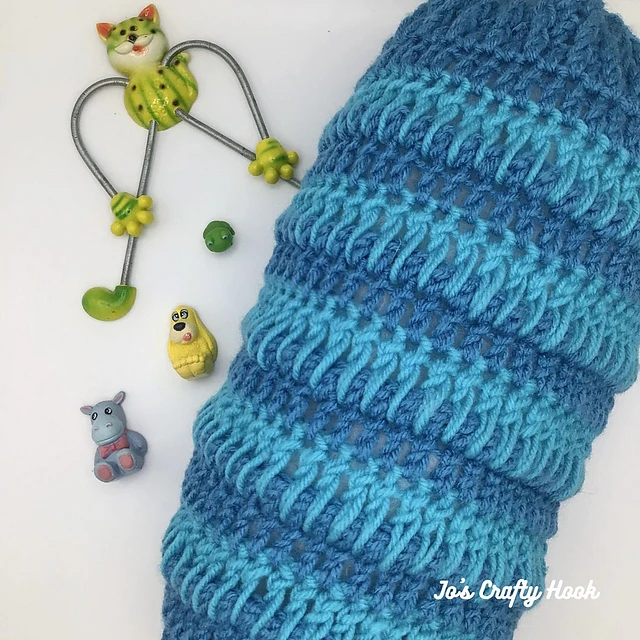
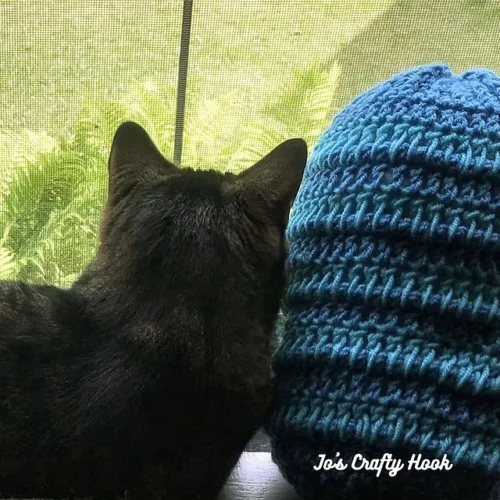
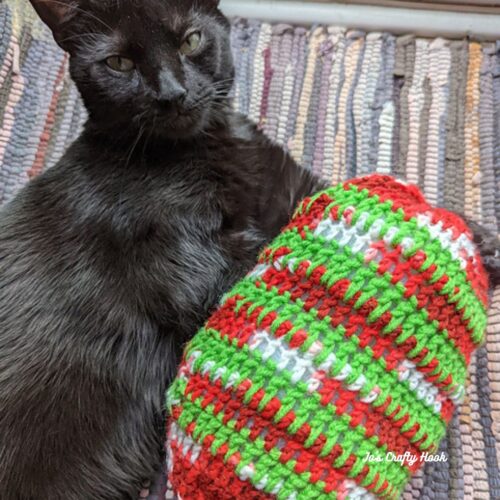
Does your cat like to curl up on your clothes, your current WIP or anything else they can find? Well, I decided to design a crochet pattern for a cat toy that they can play with or even cuddle up with. Below you will find the Maze’s Cat Toy Free Crochet Pattern. The cat toy crochet pattern can be customized for any size cat. You can even make this for your puppy or dog.
This post contains affiliate links that help me raise money to allow me to share more information with you.
Info Needed for Maze’s Cat Toy
I used Red Heart Super Saver for both colors. Contents: 100% acrylic Skein Weight: 7 oz. / 198 g. Yardage: 364 yd. / 333 m
Materials: US H Crochet Hook or 5 mmCrochet Hook MC – 120-130 yds #4 Worsted/Aran Weight Yarn CC – 15-20 yds #4 Worsted/Aran Weight Yarn Scissors Tapestry Needle .4-.6 oz Dacron/Pillow Stuffing
Finished Size: 6” x 12”
Customize to your size
Abbreviations/Stitches Used: ch = chain sl st = slip stitch fdc = foundation double crochet fpdc = front post double crochet ldc = long double crochet rep = repeat
Special Stitches: Front Post Double Crochet – Double crochet around the front post of the dc from the previous row. Long Double Crochet – Yarn over, insert hook in the double crochet 2 rows down, yarn over, pull up a loop to the height of the previous stitch, [yarn over, draw through 2 loops on hook] 2 times.
Special Notes:
Ch 3 counts as a dc.
Stitch count is a multiple of 3.
Gauge and Size are not 100% necessary for the cat toy, so size may be different than gauge.
If you would like a bigger or smaller size use a multiple of 3. You can also add or decrease the rows stated.
Video Tutorials: You can find all of the Video Tutorials on my YouTube Channel
Gauge: US G Crochet Hook or 4.5 mm Crochet Hook 16 st x 8 rows = 4” **Due to different thicknesses in yarn, gauge does not need to be met**
Premium Copy Available
You can find a premium version of my Maze’s Cat Toy crochet pattern at my Ravelry or LoveCrafts or Etsy stores. The premium pattern has Step-by-Step Pictures and all the Video Tutorials inside.
Using MC Leave a long tail of yarn to sew the top of the toy closed. R1: fdc 48 sl st in top of 1st st to join. Sew foundation row closed. 48 fdc Optional: ch 48 sl st in 1st st to join, being sure not to twist the chain. ch 3 and dc around. sl st in 1st st to join. 48 dc R2-R4: ch 3, fpdc in the next st *dc in the next st, fpdc in the next st* rep from * around. sl st in 1st st to join. 48 st Using your tapestry needle and the Running Stitch, weave your yarn through each stitch. Pull yarn tight to close the bottom of the cat toy and fasten off. Running Stitch
Pull tightly to close.
R5-R6: ch 3, dc in each st around. sl st in 1st st to join. 48 dc
Change to CC
R7: ch 3, ldc in next st and in each st around. sl st in 1st st to join. 48 ldc
Change to MC
R8-R9: ch 3, dc in each st around. sl st in 1st st to join. 48 dc
Change to CC
R10: ch 3, ldc in next st and in each st around. sl st in 1st st to join. 48 dc
R11-R21: Rep R8-10
Change to MC
R22-R24: ch 3, fpdc in the next st *dc in the next st, fpdc in the next st. rep from * around. sl st in 1st st to join. 48 st
R25: ch 3, dc in next st and in each st around. sl st in 1st st to join. 48 dc
Leave a long tail of yarn to sew the pillow closed.
Stuff the cat pillow with as much dacron/pillow as you’d like to have a firm toy.
Adding Dacron
Using your tapestry needle and the Running Stitch, weave your yarn through each stitch. Pull yarn tight to close the top of the cat toy and fasten off.
You can find a premium version of my Maze’s Cat Toy crochet pattern at my Ravelry or LoveCrafts or Etsy stores. The premium pattern has Step-by-Step Pictures and all the Video Tutorials inside.
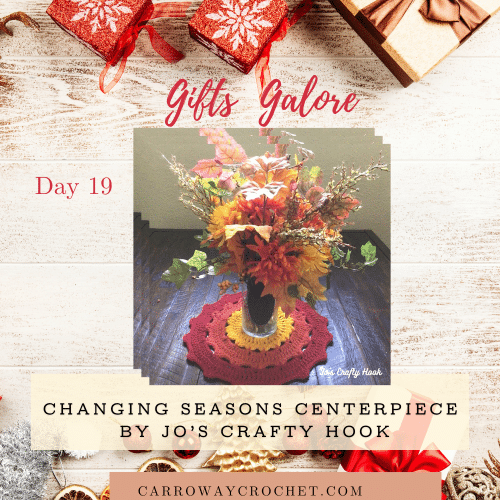
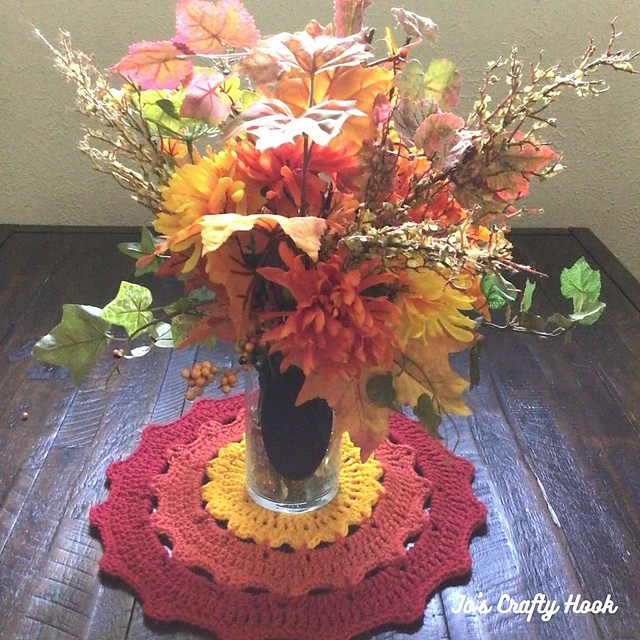
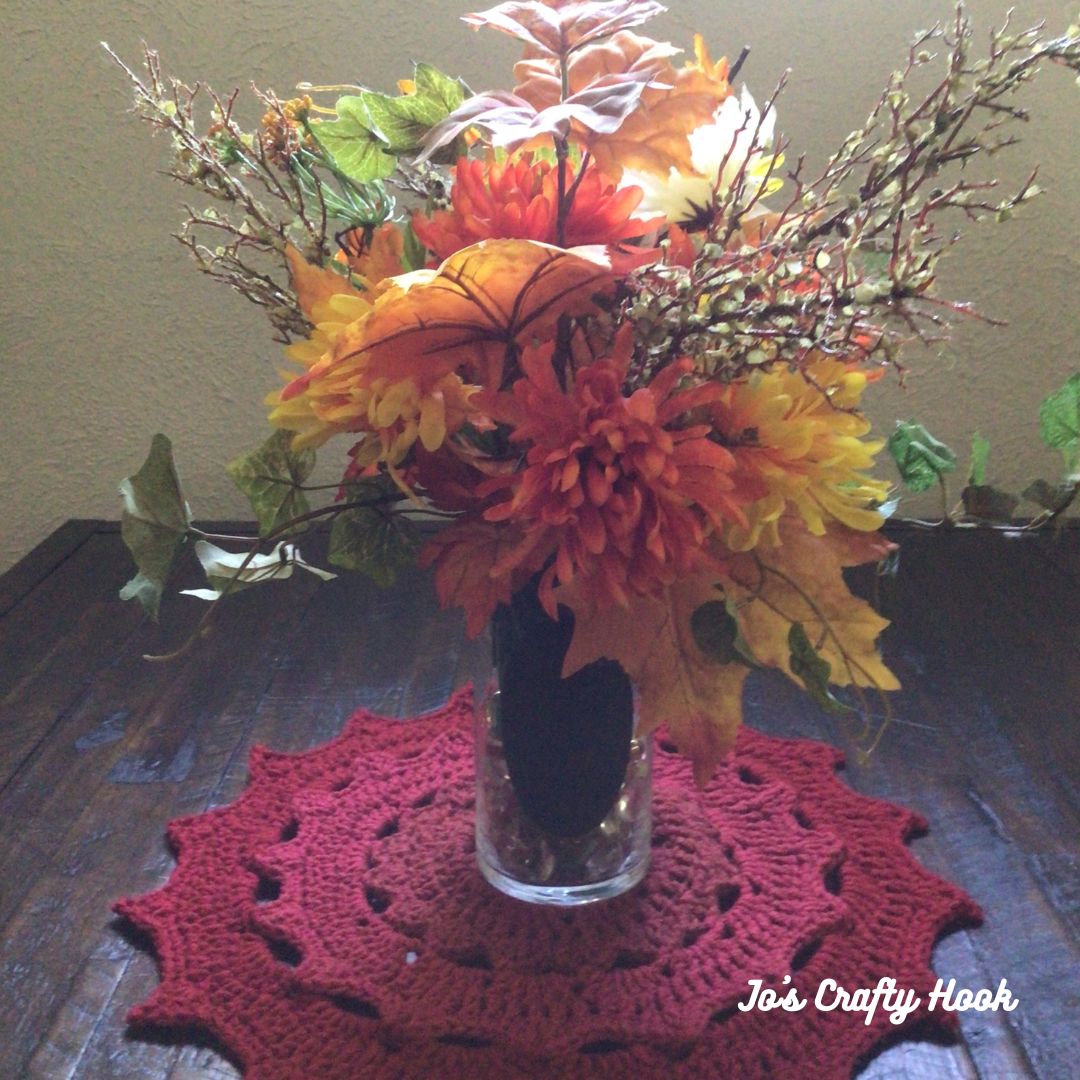
I love to decorate my home for the different seasons. Fall is my favorite time of year. I love seeing the different flowers in bloom and all tree leaves change colors! Inside this post you will find the Changing Seasons Centerpiece Free Crochet Pattern, with 2 versions to choose from.
You can decorate your end tables, coffee tables, and use them on your dining room table to add a festive touch! The centerpiece is a great scrap busting crochet pattern that can be used to decorate your home any time of year!
Also you can find the matching Changing Coasters Crochet Pattern FREE on my website.
This post contains affiliate links.
While you are there be sure to sign up for my Newsletter. You will receive news about my New Crochet Pattern Releases, Collaborations, and MORE! For signing up you will also get a FREE crochet pattern!
My Changing Seasons Centerpiece Crochet Pattern is being featured in Carroway Crochet’s 2025 Gifts Galore Blog Hop
My Day is November 25th-November 26th and you can get a FREE premium copy of my Changing Seasons Centerpiece Crochet Pattern!
My Day
From November 25th-26th visit the 2025 Gifts Galore Blog Hop to get the Coupon Code needed to get a FREE premium copy of my Changing Seasons Centerpieces Crochet Pattern. Once you have the code, click on the button below and use the code at checkout.
In the mean time you will find 24 days of FREE premium crochet patterns in the 2025 Gifts Galore Blog Hop!
Below you will find a FREE crochet pattern below with 2 versions to choose from!
Version 1
Version 2
Information Needed
I used Lion Brand Basic Stitch #4 Medium Weight Yarn. (3.5oz, 100g) (185 yds, 170 m)
Materials: US H Crochet Hook or 5 mm Crochet Hook
200-250 yards of #4 ply Worsted/Aran Weight Yarn
Scissors
Tapestry Needle
Abbreviations/Stitches Used: ch = chain
st = st
sc = single crochet
sp = space
dc = double crochet
sl st = slip stitch
alt ch 2 = alternate chain 2
beg shell = beginning shell
inc = increase
rep = repeat
rem = remaining
Special Stitches:
alternate chain 2 = takes the place of the ch 3 for a cleaner edge. beginning shell = (alt ch 2 or ch 2, dc in same st, ch 2, 2 dc) all in the same space. shell = (2 dc, ch 2, 2 dc) all in the same space. beginning picot shell = alt ch 2 or ch 2, dc in same st, ch 4, sl st in 1st ch of ch 4, 2 dc) all in the same space. picot shell = 2 dc, ch 4, sl st in 1st ch of ch 4, 2 dc) all in the same space.
Notes:
Table cover is worked in the round.
There are 2 versions to choose from.
alt ch 2 or ch 2 does count as a half double crochet.
alt ch 2 takes the place of a chain 2 or chain 3.
I changed colors after a certain amount of rounds, but you don’t have to.
Be sure to use the same thickness of yarn.
Finished Size: 20” x 20” Version 1 22” x 22” Version 2
Gauge: Hook US H Crochet Hook or 5 mm Crochet Hook
Gauge Swatch is worked in the round.
4 shells x 4 rows = 4”
Gauge Swatch: Swatch is worked in the round.
R1-R3 of Base
R1: ch 3 and 8 dc in 1st ch. sl st in 1st dc to join. (8 dc) Optional: Make a Magic Circle adding 8 dc. sl st in 1st st to join. (8 dc) R2 (inc): alt ch 2 (or ch 2), dc in same st and 2 dc in each st around. sl st in 1st st to join. (16 dc) R3: beg shell, sc in next st, *shell in next st, sc in next st. rep from * around. sl to join in 1st st to join. (8 Shells)
Fasten off and weave in ends.
Change Color
R4: attach yarn with a sl st in ch-2 sp, ch 1 and sc in ch-2 sp *ch 5, sc in next ch-2 sp of shell. rep from * around. sl st into 1st st to join. (8 ch-5 sp) R5: alt ch 2 (or ch 2) and 4 dc all in ch-5 sp *5 dc in each ch-5 sp around. sl st in 1st st to join. (40 dc) R6: alt ch 2 (or ch 2) in 1st st, dc in each st around. sl st in 1st st to join. (40 dc) R7: beg shell, sc in 1st st, shell *sc in next 2 st, shell, sc in next st, shell. rep from * around until last 2 st. sc in last 2 st. sl st in 1st st to join. (16 shells & 24 sc)
Fasten off and weave in ends.
Change color R8: attach yarn with a sl st in ch-2 sp, ch 1 and sc in ch-2 sp *ch 5, sc in next ch-2 sp of shell. rep from * around. sl st into 1st st to join. (16 ch-5 sp) R9 (inc): alt ch 2 (or ch 2) and 4 dc all in ch-5 sp *5 dc in each ch-5 sp around. sl st in 1st st to join. (80 dc) R10: alt ch 2 (or ch 2) in 1st st, dc in each st around. sl st in 1st st to join. (80 dc) R11: ch 1, sc in same st, next st. shell in next st *sc in next 4 st, shell. rep from * around until last 2 st. sc in last 2 st. sl st in 1st st to join. (16 Shells & 64 sc)
Change color
R12: attach yarn with a sl st in ch-2 sp, ch 1 and sc in ch-2 sp *ch 7, sc in next ch-2 sp of shell. rep from * around. sl st into 1st st to join. (16 ch-7 sp) R13 (inc): alt ch 2 (or ch 2) and 6 dc all in ch-7 sp *7 dc in next ch-7 sp. rep from * around. sl st in 1st st to join. (112 dc) R14: alt ch 2 (or ch 2) in 1st st, dc in each st around. sl st in 1st st to join. (112 dc) R15: ch 1, sc in same st, sc in next 2 st, shell in next st *sc in next 6 st, shell. rep from * around until last 3 st. sc in last 3 st. sl st in 1st st to join. (16 Shells & 96 sc)
Fasten off and weave in ends.
Make a Matching Set
If you like this crochet pattern, you can find the matching Changing Seasons Centerpiece Free Crochet Patterns HERE on my website or for a small fee, you will find it at Ravelry, LoveCrafts, or Etsy.
Changing Seasons Centerpiece Crochet Pattern – Version 2
Using MC
R1: ch 3 and 8 dc in 1st ch. sl st in 1st dc to join. (8 dc)
Optional: Make a Magic Circle adding 8 dc. sl st in 1st st to join. (8 dc) R2 (inc): alt ch 2 (or ch 2), dc in same st and 2 dc in each st around. sl st in 1st st to join. (16 dc) R3: beg shell, sc in next st, *shell in next st, sc in next st. rep from * around. sl to join in 1st st to join. (8 Shells)
Fasten off and weave in ends
Change Color
R4: attach yarn with a sl st in ch-2 sp, ch 1 and sc in ch-2 sp *ch 5, sc in next ch-2 sp of shell. rep from * around. sl st into 1st st to join. (8 ch-5 sp) R5: alt ch 2 (or ch 2) and 4 dc all in ch-5 sp *5 dc in each ch-5 sp around. sl st in 1st st to join. (40 dc) R6: alt ch 2 (or ch 2) in 1st st, dc in each st around. sl st in 1st st to join. (40 dc) R7: beg shell, sc in 1st st, shell *sc in next 2 st, shell, sc in next st, shell. rep from * around until last 2 st. sc in last 2 st. sl st in 1st st to join. (16 shells & 24 sc)
Fasten off and weave in ends.
Change color
R8: attach yarn with a sl st in ch-2 sp, ch 1 and sc in ch-2 sp *ch 6, sc in next ch-2 sp of shell. rep from * around. sl st into 1st st to join. (16 ch-6 sp) R9 (inc): alt ch 2 (or ch 2) and 4 dc all in ch-6 sp *5 dc in each ch-6 sp around. sl st in 1st st to join. (80 dc) R10: alt ch 2 (or ch 2) in 1st st, dc in each st around. sl st in 1st st to join. (80 dc) R11: ch 1, sc in same st, next st. shell in next st *sc in next 4 st, shell. rep from * around until last 2 st. sc in last 2 st. sl st in st to join. (16 Shells & 64 sc)
Fasten off and weave in ends.
Change color
R12: attach yarn with a sl st in ch-2 sp, ch 1 and sc in ch-2 sp *ch 7, sc in next ch-2 sp of shell. rep from * around. sl st into 1st st to join. (16 ch-7 sp) R13 (inc): alt ch 2 (or ch 2) and 6 dc all in ch-7 sp. *7 dc in each ch-7 sp around. sl st in 1st st to join. (112 dc) R14: alt ch 2 (or ch 2) in 1st st, dc in each st around. sl st in 1st st to join. (112 dc)
Edging
R15: ch 1 sc in same st, sc in next 2 st. picot shell *sc in next 6 st, picot shell. rep from * around until last 3 st. sc in last 3 st. sl st in top of beg shell to join. (16 Picot Shells & 96 sc)
Fasten off and weave in ends.
Make the Matching Coaster Set
If you like this crochet pattern, you can find the matching Changing Seasons Coasters Free Crochet Patterns HERE on my website or for a small fee, you will find it at Ravelry, LoveCrafts, or Etsy.
TESTIMONIAL from Catherine Henderson
Joey Lea Baird of Jo’s Crafty Hook has created another stunning pattern she called ” The Changing Seasons Centerpiece.
She has created this centerpiece using basic stitches with several different finishes.
I was so excited & grateful for being part of her test team!
I worked on my version for a weekend This amazing centerpiece works up so fast, and changes with every new row. The pattern works great for either a left or right handed crocheter. With comprehensive easy to understand instructions and photos for reference.
I had so much fun making it, that I found myself rushing through my housework so I could sit down to work on my creation. I used Value Ball Kringle Sparkle Yarn 8ply, in fall colors, with a 3.5mm hook. You can find this fantastic pattern!
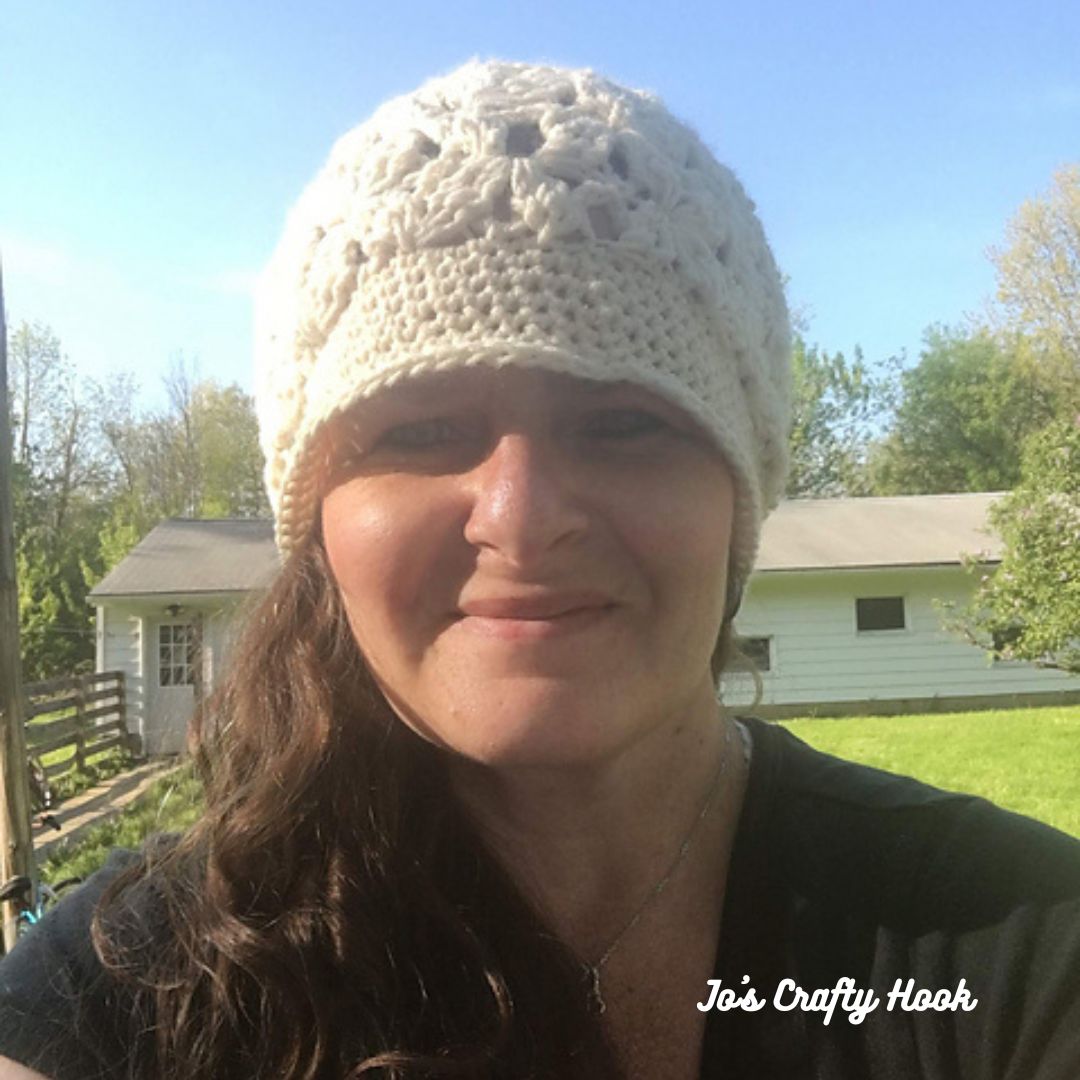
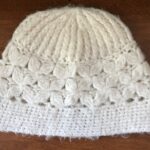
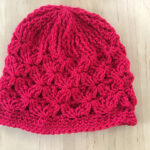
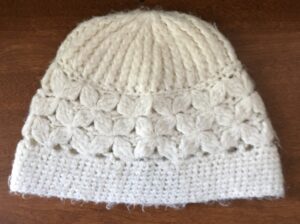
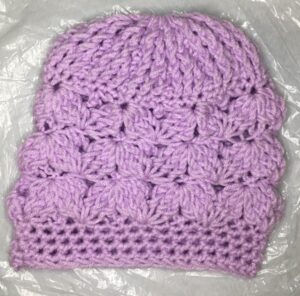
In today’s post I will be sharing the Lilac Cluster Beanie FREE Crochet Pattern. I am so excited to be sharing this free crochet pattern with you for a number of reasons. The main one is that I looked at a store bought hat and was able to create a crochet pattern from it! Another reason is that it is a Beautiful design and a Great Beanie! lol The last reason is the flower clusters look like Lilacs, which is my ALL time favorite flower. I just LOVE their smell!
Found Hat
Lilacs
Karen Reinhart
This post contains affiliate links. You can make a purchase using these links that I provide where I may receive compensation (at no added cost to you.) Purchases you make will help keep my website, Etsy Shop, and my Ravelry Store going and provide quality designs just for you!
My son found a hat and gave it to me last year. When it was taken out of storage this past winter I was like “I NEED to copy this pattern!” I took a real good look at it and wanted to see if I could crochet it because it said on the label “Crocheted.” Well I finally worked out a pattern and I hope you love it as much as I do!
Found Hat
You can get an Ad Free PDF Version with Step-by-Step pictures and Video Tutorials. The crochet pattern contains 8 sizes. You can find the ad free pdf crochet pattern at the places listed below.
If you liked what you have seen here at my website, be sure to sign up for my Newsletter. You will be notified when I release a new pattern, have a giveaway, have a sale and more.
[yikes-mailchimp form=”1″]
************************************************
Information about Lilac Cluster Beanie:
Skill Level:
Advanced Beginner/Intermediate US Terms
Yarn Used:
**I used Lion Brand Mandala Yarn 3 ply light weight yarn or DK weight yarn. (5.3 oz/590 yds)**
Materials:
US Hook K or 6.5 mm 200-500 yds of 3 ply Light Weight or DK Weight Yarn Scissors Tapestry Needle
Gauge:
US K Hook or 6.5 mm 16 fpdc x 12 rows = 4”
Gauge Swatch:
R1: Chain 10, dc in 4th st from hook and remaining 7 st. Turn. R2: Ch 3, fpdc in the next 7 st. Turn R3-R12: Repeat R2
Abbreviations:
ch = Chain sl st = Slip Stitch mc = Magic Circle dc = Double Crochet sp = Space fpdc = Front Post Double Crochet fpdc3tog = Front Post Double Crochet 3 Together-Decrease fpdc6tog = Front Post Double Crochet 6 Together-Decrease
Notes:
ch 2 does NOT count as a stitch ch 3 counts as a dc Stitch count is multiples of 6, so if your brim is too tight or too loose try going up or down in hook size before you adjust the stitch count. Pattern written for: 0-6mth (6-12 mth, 12-24 mth, 2-5 yrs, 5-10 yrs, Teen/Sm Adult, Med Adult, Lg Adult) The Crown will Increase every other Row as the Sizes increase every other Row. The Increase will be done every other Row. 24 (36, 48, 60, 72, 84) will be your ending row count after you complete the increases for your size. This Beanie can be made into a Slouchy Hat. You can add more Rows during the Shells & Clusters by doing R3-R4 and ending with R3 . You can also add more Rows to the Brim, that will work too to make a Slouchy Hat.
Special Stitches:
Front Post Double Crochet– Double Crochet going around the Front Post of the DC in the Previous Row. Cluster Stitch or Front Post Double Crochet 6 Together – when you front post double crochet 6 dc together, you are taking what were six double crochet stitches and turning them into just one front post double crochet stitch or one cluster stitch by using the first 3dc, skip (ch2, sc, ch2) then using the following 3 dc. Beginning Shell Stitch – when you (ch 3, 2 dc, ch 2, 3 dc) all in the same stitch. Shell Stitch – when you crochet (3 dc, ch 2, 3 dc) all in the same stitch.
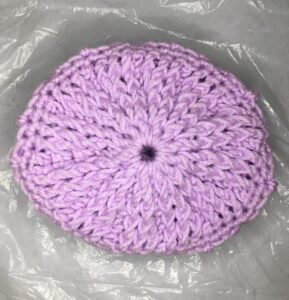
R1: Make a Magic Circle. Ch 2 and add 24 dc to the circle. Ss into 1st dc to join. (24 dc)
**Or you can chain 5 sl s in the 1st stitch to join. Ch 3, dc 23 into the hole. (24 dc)**
R2: Ch 2 and dc in same space. *2 fpdc in the next dc, dc in the next dc.* Repeat * around ending with 2 fpdc in the last st. Ss into to join. (36 dc)
R3: Ch 2 and dc in the same space. *fpdc around the next 2 st, dc in the next dc.* Repeat * around. Ending with fpdc around the last 2 stitches. Ss into 1st dc to join. (36 dc) 0-6 mths STOP here and go to Shells & Clusters
You can get an Ad Free PDF Version with Step-by-Step pictures and Video Tutorials. The crochet pattern contains 8 sizes. You can find the ad free pdf crochet pattern at the places listed below.
R1: Ch 1, sc in the same sp, and each stitch around. sl st into 1st sc to join. 36
R2: Beg Shell (ch 3, 2 dc, ch 2, 3 dc all in the same stitch) *ch 2, skip 2 st, sc in the next st, ch 2, sk 2, Shell (3 dc, ch 2, 3 dc all in the same stitch)*. Repeat * around ending with ch 2, sk 2, sc in the next st, ch 2, sk 2. sl st in top of Ch 3 of the Beg Shell to Join. 6 Shells
R3: ch 2, fpdc3tog around the next 3 st, *ch 1 ( be sure to chain loosely. In the next row you will add a Shell in that ch 1), sc in ch 2 sp of Shell in previous row, ch 1, fpdc6tog around the next 6 st.* Repeat * around. End with fpdc3tog, sl st loosely into fpdc3tog. 6 Clusters
R4: Beg Shell in the ss of the fpdc3tog just made in the last row. *ch 2, sc in the sc, ch 2, Shell in the ch 1 sp of Cluster.* Repeat * around. End with ch 2. sl st in top of ch 3 of the Beg Shell. 6 Shells.
Ages 0-6 mth
R5-R7: Repeat R3-R4 once, then add R3 once more. (Since you are using #3 yarn, you may need to add R3-R4 once more.) Go to the Brim
Brim: **If Brim is too tight, try going Up a hook size. If the Brim is too loose, try going Down a hook size.**
R1: Ch1, sc in same space. *Sc in sc, sc in ch 1, 2 sc in side of fpdc3tog/fpdc6tog, sc in ch 1.* Repeat around.
R2-R5: Ch 1, sc in same space. Sc in each sc around. **If you would like your Brim to be longer, repeat this row until you are satisfied.**
Fasten off and weave in ends with Tapestry Needle.
If you liked what you have seen here at my website, be sure to sign up for my Newsletter. You will be notified when I release a new pattern, have a giveaway, have a sale and more.
[yikes-mailchimp form=”1″]
Find me, Jo of Jo’s Crafty Hook, at the places listed below.
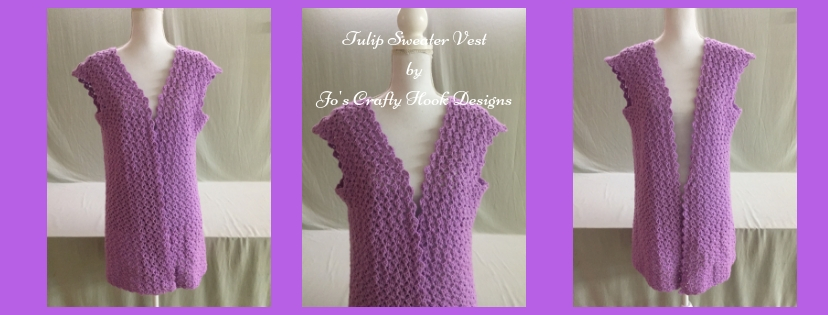
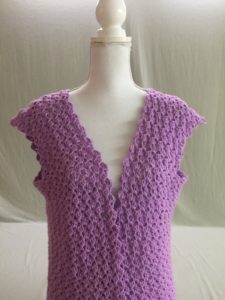
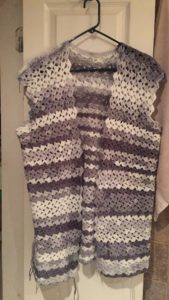
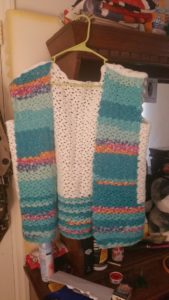
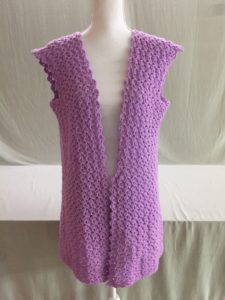
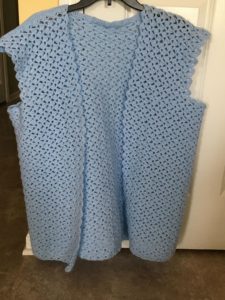
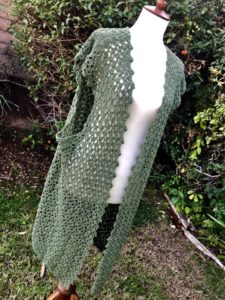
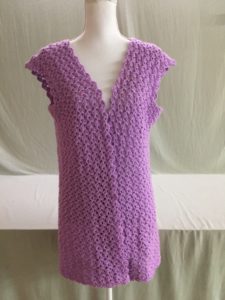
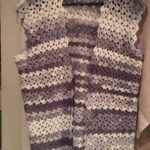
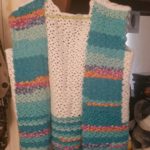
Today’s post is all about the new design I have created and sharing it with your for FREE! This post is titled “Tulip Sweater Vest Free Crochet Pattern” because YES, I am sharing it with you for FREE!
This post contains affiliate links. If you make a purchase using these links I may receive compensation (at no added cost to you.)
I designed the Tulip Sweater Vest earlier this year and I finally got it tested and uploaded to my Etsy Shop and my Ravelry Store!
Tulip Sweater Vest Crochet Pattern
Jo’s Crafty Hook Designs
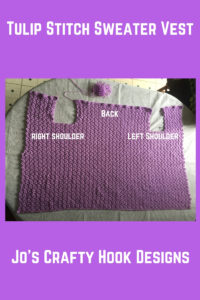
Tulip Stitch Sweater Vest Crochet Pattern
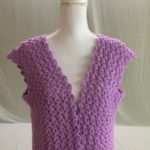
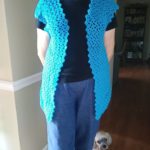
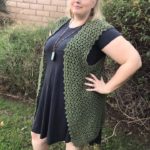
Tulip Sweater Vest
Tulip Sweater Vest
Jo’s Crafty Hook Designs
Tulip Sweater Vest
Tulip Sweater Vest
Tulip Sweater Vest
Materials Needed
F 3.75 mm Crochet Hook
Light Weight #3 yarn (1200-2000 yards)
Scissors
Tapestry Needle
Stitches Used/Abbreviations
DC – Double Crochet
SC – Single Crochet
CH – Chain
Join – Slip Stitch to first st made
Special Stitches
Beginning Shell = dc in 4th ch from hook, 2 dc, ch 2, 1 dc all in the same stitch as 1st dc
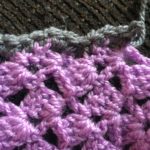
Shell = 3 dc, ch 2, 1 dc all in the same stitch
Gauge
2” = 2 Shells x 4 Rows
Swatch
Ch 20.
R1: [dc in 4th ch from hook, 2 dc, ch 2, dc all in the same stitch as 1st dc (Beg Shell made)] Skip 3 stitches 3dc ch 2, dc all in same stitch (Shell made). *skip 3 st, Shell in next st* Repeat from * to * 1 more time.
R2-R5: turn, Beg Shell, * skip 4 st, Shell in next st.*. Repeat from * to * 2 more times.
Pattern Notes
Pattern is written in U.S. Crochet Terms.
Beginning chain 3 does count as a stitch.
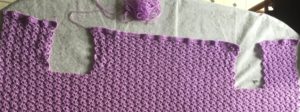
The Sweater Vest is crocheted as 1 Panel.
This pattern is worked from the bottom up.
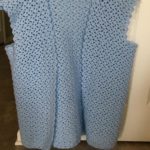
In the pattern I broke each section of the panel down so you can get an idea of what the Tulip Stitch Vest will look like once the back and front sections are sewn together.
Size
XS
S
M
L
XL
2X
3X
4X
5X
To fit Bust (in):
28-31
32-35
36-39
40-43
44-47
48-51
52-55
56-59
60-62
Armhole Up (in):
3×17
4×18
5×19
6×20
7×21
8×22
9×23
10×24
11×25
Panel Width
37”
38”
39”
40”
41”
42”
43”
44”
45”
Panel Height
22”
23”
24”
25”
26”
27”
28”
29”
30”
Est. Yardage
900
910
920
930
940
950
960
970
980
DK Paintbox Yarn
3
3.5
4
4.5
5
5.5
6
6.5
6.5
Tulip Sweater Vest Free Crochet Pattern
Tulip Sweater Vest
XSmall
Chain 164 turn
Bottom of Sweater
R1: [dc in 4th ch from hook, 2 dc, ch 2, dc all in the same stitch as 1st dc (Beg Shell made)] [skip 3 st, 3dc, ch 2, dc (Shell made)] *skip 3 st, Shell* repeat from * to * across (1 Beg Shell, 40 Shells)
R2-R37: turn. Beg Shell in ch 2 sp of Shell in previous row, *skip 4 st, Shell in ch 2 sp of Shell in previous row.* Repeat from * to * across. (1 Beg Shell, 40 Shells)
First Armhole
R38-R46: turn. Beg Shell in ch 2 sp of Shell in previous row, *skip 4 st, Shell in ch 2 sp of Shell in previous row.* Repeat from * to * 5 times. (1 Beg Shell, 6 Shells)
R47: turn. Ch 3, dc in each st across to end. (35 dc) Note: There are a total of 6 stitches in each Shell.
Fasten off.
Back Section
R1: Skip 4 Shells from 1st Armhole, slip stitch in the ch 2 of the 5th Shell, Beg Shell *skip 4 st, Shell in ch 2 sp of Shell in previous row. * Repeat from * to * 16 times. Leave remaining Shells unworked. (1 Beg Shell, 18 Shell)
R2-R9: Beg Shell, *skip 4 st, Shell in ch 2 sp of Shell in previous row.* Repeat from * to * 16 more times. (1 Beg Shell, 18 Shell) Leave Remaining Shells unworked.
R10: turn. Ch 3, dc in each st across to end. (114 dc) Note: There are a total of 6 stitches in each Shell.
Fasten Off.
Second Armhole
R1: Skip 4 Shells from Back Section, slip stitch in the ch 2 of the 5th Shell, Beg Shell *skip 4 st, Shell in ch 2 sp of Shell in previous row. * Repeat from * to * 5 times. (1 Beg Shell, 6 Shells)
R2-9: Beg Shell*skip 4 st, Shell in ch 2 sp of Shell in previous row. * Repeat from * to * 5 times. (1 Beg Shell, 6 Shells)
R10: turn. Ch 3, dc in each st across to end. (35 dc) Note: There are a total of 6 stitches in each Shell. Fasten Off. Use Tapestry Needle to Weave in Ends.
Edging
Jo’s Crafty Hook Designs
First Shoulder & Second Shoulder
Fold in the front panels from the Arm Hole. Line them up to the back. Whip Stitch together the front and back panels from the arm holes to chest. Fasten off.
Use Tapestry Needle and weave in any loose ends.
Sleeves
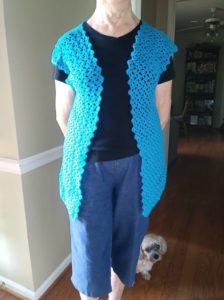
I left my Sleeves undone. I LOVE the look of them with the Tulip Stitches leaving little Scallops. IF you would like to add Sleeves, follow these instructions.
Join with sl st to bottom of arm hole in ch 2 space of Shell.
Bottom of Armhole
Side of Armhole
R1: ch 1, sc in same st, *sc in the next 4 dc, 1 sc in ch 2 sp.* Repeat from * to * along the bottom of Armhole. 2 sc in the end row along the side of the Armhole, sc in dc, sc in dc.* Repeat from * to * in the remainder of the end rows. Join in 1st sc.
R2: Beg Shell in same st as join, *skip 3 st, Shell in next st.* * Repeat from * to * around.
R3-R6: Slip st in top of ch 3 and in the next 3 st, ch 3 and turn. Beg Shell in same st as join, skip the next 4 st, Shell in ch 2 sp of Shell from previous row.* Repeat from * to * around.
R1: [dc in 4th ch from hook, 2 dc, ch 2, dc all in the same st as 1st dc (Beg Shell made)] [skip 3 st, 3dc, ch 2, dc (Shell made)] *skip 3 st, Shell* repeat from * to * across (1 Beg Shell, 40 Shells)
R2-R38: turn. Beg Shell in ch 2 sp of Shell in previous row, *skip 4 st, Shell in ch 2 sp of Shell in previous row.* Repeat from * to * across. (1 Beg Shell, 40 Shells)
First Armhole
R39-R48: turn. Beg Shell in ch 2 sp of Shell in previous row, *skip 4 st, Shell in ch 2 sp of Shell in previous row.* Repeat from * to * 5 times. (1 Beg Shell, 6 Shells)
R49: turn. Ch 3, dc in each st across to end. (42 dc) Note: There are a total of 6 stitches in each Shell.
Fasten off.
Back Section
R1: Skip 4 Shells from 1st Armhole, slip stitch in the ch 2 of the 5th Shell, Beg Shell *skip 4 st, Shell in ch 2 sp of Shell in previous row. * Repeat from * to * 18 times. Leave remaining Shells unworked. (1 Beg Shell, 19 Shell)
R2-R10: Beg Shell *skip 4 st, Shell in ch 2 sp of Shell in previous row. * Repeat from * to * 18 times. Leave remaining Shells unworked. (1 Beg Shell, 19 Shell)
R11: turn. Ch 3, dc in each st across to end. (120 dc) Note: There are a total of 6 stitches in each Shell.
Fasten Off.
Second Armhole
R1: Skip 4 Shells from Back Section, slip stitch in the ch 2 of the 5th Shell, Beg Shell *skip 4 st, Shell in ch 2 sp of Shell in previous row. * Repeat from * to * 5 times.
R2-R10: Turn. Beg Shell *skip 4 st, Shell in ch 2 sp of Shell in previous row. * Repeat from * to * 5 times.
R11: turn. Ch 3, dc in each st across to end. (42 dc) Note: There are a total of 6 stitches in each Shell.
Fasten Off. Use Tapestry Needle to Weave in Ends
Edging
Jo’s Crafty Hook Designs
First Shoulder
Fold in the front panels from the Arm Hole. Line them up to the back. Whip Stitch together the front and back panels from the arm holes to chest. Fasten off.
Second Shoulder
Fold in the second front panel from the Armhole to the Front. Line them up to the back. Whip Stitch together the front and back panels from the arm holes to chest. Fasten off.
Use Tapestry Needle and weave in any loose ends.
Sleeves
I left my Sleeves undone. I LOVE the look of them with the Tulip Stitches leaving little Scallops. IF you would like to add Sleeves, follow these instructions.
Bottom of Armhole
Side of Armhole
Join with sl st to bottom of arm hole in ch 2 space of Shell.
R1: ch 1, sc in same st, sc evenly around. Join in 1st sc.
R2: Beg Shell in 1st sc of previous row. *Skip 2 st, Shell in next st.* Repeat from * to * around. Join in ch 3 of Beg Shell.
R3: turn. ss to ch 2 sp of last Shell made in previous row. Beg Shell in ch 2 sp, *Shell in ch 2 sp of Shell in previous row.* Repeat from * to * around.
R4-R6: turn. Beg Shell in ch 2 sp, *Shell in ch 2 sp of Shell in previous row.* Repeat from * to * around.
Repeat R1-R6 in the 2nd Armhole.
Finish off & weave in ends
Medium
Medium
Chain 172 turn
Bottom of Vest
R1: [dc in 4th ch from hook, 2 dc, ch 2, dc all in the same st as 1st dc (Beg Shell made)] [skip 3 st, 3dc, ch 2, dc (Shell made)] *skip 3 st, Shell* repeat from * to * across (1 Beg Shell, 42 Shells)
R2-R39: turn. Beg Shell in ch 2 sp of Shell in previous row, *skip 4 st, Shell in ch 2 sp of Shell in previous row.* Repeat from * to * across. (1 Beg Shell, 42 Shells)
First Armhole
R40-R50: turn. Beg Shell in ch 2 sp of Shell in previous row, *skip 4 st, Shell in ch 2 sp of Shell in previous row.* Repeat from * to * 5 times. (1 Beg Shell, 6 Shells)
R51: turn. Ch 3, dc in each st across to end. (42 dc) Note: There are a total of 6 stitches in each Shell.
Fasten off.
Back Section
R1: Skip 4 Shells from 1st Armhole, ss in the ch 2 of the 5th Shell, Beg Shell *skip 4 st, Shell in ch 2 sp of Shell in previous row. * Repeat from * to * 19 times. Leave remaining Shells unworked. (1 Beg Shell, 20 Shell)
R2-R11: Beg Shell *skip 4 st, Shell in ch 2 sp of Shell in previous row. * Repeat from * to * 19 times. Leave remaining Shells unworked. (1 Beg Shell, 20 Shell)
R12: turn. Ch 3, dc in each st across to end. (126 dc) Note: There are a total of 6 stitches in each Shell.
Fasten Off.
Second Armhole
R1: Skip 4 Shells from Back Section, ss in the ch 2 of the 5th Shell, Beg Shell *skip 4 st, Shell in ch 2 sp of Shell in previous row. * Repeat from * to * 5 times.
R2-R11: Beg Shell *skip 4 st, Shell in ch 2 sp of Shell in previous row. * Repeat from * to * 5 times.
R12: turn. Ch 3, dc in each st across to end. (42 dc) Note: There are a total of 6 stitches in each Shell.
Fasten Off. Use Tapestry Needle to Weave in Ends.
Edging
Jo’s Crafty Hook Designs
First Shoulder
Fold in the front panels from the Arm Hole. Line them up to the back. Whip Stitch together the front and back panels from the arm holes to chest. Fasten off.
Second Shoulder
Fold in the second front panel from the Armhole to the Front. Line them up to the back. Whip Stitch together the front and back panels from the arm holes to chest. Fasten off.
Use Tapestry Needle and weave in any loose ends.
Sleeves
I left my Sleeves undone. I LOVE the look of them with the Tulip Stitches leaving little Scallops. IF you would like to add Sleeves, follow these instructions.
Bottom of Armhole
Side of Armhole
Join with sl st to bottom of arm hole in ch 2 space of Shell.
R1: ch 1, sc in same st, sc evenly around. Join in 1st sc.
R2: Beg Shell in 1st sc of previous row. *Skip 2 st, Shell in next st.* Repeat from * to * around. Join in ch 3 of Beg Shell.
R3: turn. ss to ch 2 sp of last Shell made in previous row. Beg Shell in ch 2 sp, *Shell in ch 2 sp of Shell in previous row.* Repeat from * to * around.
R4-R6: turn. Beg Shell in ch 2 sp, *Shell in ch 2 sp of Shell in previous row.* Repeat from * to * around.
Repeat R1-R6 in the 2nd Armhole.
Finish off & weave in ends
Large
Large
Chain 176 turn
First Front Section
R1: dc in 4th ch from hook, 2 dc, ch 2, dc all in the same st as 1st dc (Beg Shell made)] [skip 3 st, 3dc, ch 2, dc (Shell made)] *skip 3 st, Shell* repeat from * to * across (1 Beg Shell, 43 Shells)
R2-R40: turn. Beg Shell in ch 2 sp of Shell in previous row, *skip 4 st, Shell in ch 2 sp of Shell in previous row.* Repeat from * to * across. (1 Beg Shell, 43 Shells)
First Armhole
R41-R52: turn. Beg Shell in ch 2 sp of Shell in previous row, *skip 4 st, Shell in ch 2 sp of Shell in previous row.* Repeat from * to * 5 times. Leave the remaining stitches unworked. (1 Beg Shell, 6 Shells)
R53: turn. Ch 3, dc in each st across to end. (35 dc) Note: There are a total of 6 stitches in each Shell.
Fasten off.
Back Section
R1: Skip 4 Shells from 1st Armhole, ss in the ch 2 of the 5th Shell, Beg Shell *skip 4 st, Shell in ch 2 sp of Shell in previous row. * Repeat from * to * 19 times. Leave remaining stitches unworked. (1 Beg Shell, 21 Shell)
R2-R12: Turn.Beg Shell *skip 4 st, Shell in ch 2 sp of Shell in previous row. * Repeat from * to * 19 times. Leave remaining stitches unworked. (1 Beg Shell, 21 Shell)
R13: turn. Ch 3, dc in each st across to end. (132 dc) Note: There are a total of 6 stitches in each Shell.
Fasten Off.
Second Armhole
R1: Skip 4 Shells from Back Section, ss in the ch 2 of the 5th Shell, Beg Shell *skip 4 st, Shell in ch 2 sp of Shell in previous row. * Repeat from * to * 5 times.
R2-R12: Turn. Beg Shell *skip 4 st, Shell in ch 2 sp of Shell in previous row. * Repeat from * to * 5 times.
R13: turn. Ch 3, dc in each st across to end. (35 dc) Note: There are a total of 6 stitches in each Shell.
Fasten Off. Use Tapestry Needle to Weave in Ends.
Edging
Jo’s Crafty Hook Designs
First Shoulder
Fold in the front panels from the Arm Hole. Line them up to the back. Whip Stitch together the front and back panels from the arm holes to chest. Fasten off.
Second Shoulder
Fold in the second front panel from the Armhole to the Front. Line them up to the back. Whip Stitch together the front and back panels from the arm holes to chest. Fasten off.
Use Tapestry Needle and weave in any loose ends.
Sleeves
I left my Sleeves undone. I LOVE the look of them with the Tulip Stitches leaving little Scallops. IF you would like to add Sleeves, follow these instructions.
Bottom of Armhole
Side of Armhole
Join with sl st to bottom of arm hole in ch 2 space of Shell.
R1: ch 1, sc in same st, sc evenly around. Join in 1st sc.
R2: Beg Shell in 1st sc of previous row. *Skip 2 st, Shell in next st.* Repeat from * to * around. Join in ch 3 of Beg Shell.
R3: turn. ss to ch 2 sp of last Shell made in previous row. Beg Shell in ch 2 sp, *Shell in ch 2 sp of Shell in previous row.* Repeat from * to * around.
R4-R6: turn. Beg Shell in ch 2 sp, *Shell in ch 2 sp of Shell in previous row.* Repeat from * to * around.
Repeat R1-R6 in the 2nd Armhole.
Finish off & weave in ends
XLarge
Chain 180 turn
Bottom of Sweater
R1: [dc in 4th ch from hook, 2 dc, ch 2, dc all in the same st as 1st dc (Beg Shell made)] [skip 3 st, 3dc, ch 2, dc (Shell made)] *skip 3 st, Shell* repeat from * to * across (1 Beg Shell, 45 Shells)
R2-R41: turn. Beg Shell in ch 2 sp of Shell in previous row, *skip 4 st, Shell in ch 2 sp of Shell in previous row.* Repeat from * to * across. (1 Beg Shell, 45 Shells)
First Armhole
R41-R53: turn. Beg Shell in ch 2 sp of Shell in previous row, *skip 4 st, Shell in ch 2 sp of Shell in previous row.* Repeat from * to * 6 times. Leave the remaining stitches unworked. (1 Beg Shell, 7 Shells)
R54: turn. Ch 3, dc in each st across to end. (48 dc) Note: There are a total of 6 stitches in each Shell.
Fasten off.
Back Section
R1: Skip 4 Shells from 1st Armhole, ss in the ch 2 of the 5th Shell, Beg Shell *skip 4 st, Shell in ch 2 sp of Shell in previous row. * Repeat from * to * 20 times. Leave remaining stitches unworked. (1 Beg Shell, 21 Shell)
R2-R13: Turn. Beg Shell *skip 4 st, Shell in ch 2 sp of Shell in previous row. * Repeat from * to * 20 times. Leave remaining stitches unworked. (1 Beg Shell, 21 Shell)
R14: turn. Ch 3, dc in each st across to end. (132 dc) Note: There are a total of 6 stitches in each Shell.
Fasten Off.
Second Armhole
R1: Skip 4 Shells from Back Section, ss in the ch 2 of the 5th Shell, Beg Shell *skip 4 st, Shell in ch 2 sp of Shell in previous row. * Repeat from * to * across.
R2-13: Turn. Beg Shell *skip 4 st, Shell in ch 2 sp of Shell in previous row. * Repeat from * to * across.
R14: turn. Ch 3, dc in each st across to end. (48 dc) Note: There are a total of 6 stitches in each Shell.
Fasten Off. Use Tapestry Needle to Weave in Ends.
Edging
Jo’s Crafty Hook Designs
First Shoulder
Fold in the front panels from the Arm Hole. Line them up to the back. Whip Stitch together the front and back panels from the arm holes to chest. Fasten off.
Second Shoulder
Fold in the second front panel from the Armhole to the Front. Line them up to the back. Whip Stitch together the front and back panels from the arm holes to chest. Fasten off.
Use Tapestry Needle and weave in any loose ends.
Sleeves
I left my Sleeves undone. I LOVE the look of them with the Tulip Stitches leaving little Scallops. IF you would like to add Sleeves, follow these instructions.
Bottom of Armhole
Side of Armhole
Join with sl st to bottom of arm hole in ch 2 space of Shell.
R1: ch 1, sc in same st, sc evenly around. Join in 1st sc.
R2: Beg Shell in 1st sc of previous row. *Skip 2 st, Shell in next st.* Repeat from * to * around. Join in ch 3 of Beg Shell.
R3: turn. ss to ch 2 sp of last Shell made in previous row. Beg Shell in ch 2 sp, *Shell in ch 2 sp of Shell in previous row.* Repeat from * to * around.
R4-R6: turn. Beg Shell in ch 2 sp, *Shell in ch 2 sp of Shell in previous row.* Repeat from * to * around.
R1: [dc in 4th ch from hook, 2 dc, ch 2, dc all in the same st as 1st dc (Beg Shell made)] [skip 3 st, 3dc, ch 2, dc (Shell made)] *skip 3 st, Shell* repeat from * to * across (1 Beg Shell, 47 Shells)
R2-R42: turn. Beg Shell in ch 2 sp of Shell in previous row, *skip 4 st, Shell in ch 2 sp of Shell in previous row.* Repeat from * to * across. (1 Beg Shell, 47 Shells)
First Armhole
R43-R56: turn. Beg Shell in ch 2 sp of Shell in previous row, *skip 4 st, Shell in ch 2 sp of Shell in previous row.* Repeat from * to * 6 times. Leave the remaining stitches unworked. (1 Beg Shell, 7 Shells)
R57: turn. Ch 3, dc in each st across to end. (48 dc) Note: There are a total of 6 stitches in each Shell.
Fasten off.
Back Section
R1: Skip 5 Shells from 1st Armhole, ss in the ch 2 of the 6th Shell, Beg Shell *skip 4 st, Shell in ch 2 sp of Shell in previous row. * Repeat from * to * 20 times. Leave remaining stitches unworked. (1 Beg Shell, 21 Shell)
R2-14: Turn. Beg Shell, *skip 4 st., Shell in ch 2 sp of Shell in previous row.* Repeat from * to * 20 times. (22 Shells)
R15: turn. Ch 3, dc in each st across to end. (132 dc) Note: There are a total of 6 stitches in each Shell.
Fasten Off.
Second Armhole
R1: Skip 5 Shells from Back Section, ss in ch 2 sp of Shell in previous row, Beg Shell *skip 4 st, Shell in ch 2 sp of Shell in previous row.* Repeat from * to * 6 more times. Leave the remaining stitches unworked. (1 Beg Shell, 7 Shells)
R2-14: Turn. Beg Shell, *skip 4 st., Shell in ch 2 sp of Shell in previous row.* Repeat from * to * 6 times. (1 Beg Shell, 7 Shells)
R15: turn. Ch 3, dc in each st across to end. (48 dc) Note: There are a total of 6 stitches in each Shell.
Fasten Off. Use Tapestry Needle and Weave in Ends.
Edging
Jo’s Crafty Hook Designs
First Shoulder
Fold in the front panels from the Arm Hole. Line them up to the back. Whip Stitch together the front and back panels from the arm holes to chest. Fasten off.
Second Shoulder
Fold in the second front panel from the Armhole to the Front. Line them up to the back. Whip Stitch together the front and back panels from the arm holes to chest. Fasten off.
Use Tapestry Needle and weave in any loose ends.
Sleeves
I left my Sleeves undone. I LOVE the look of them with the Tulip Stitches leaving little Scallops. IF you would like to add Sleeves, follow these instructions.
Bottom of Armhole
Side of Armhole
Join with sl st to bottom of arm hole in ch 2 space of Shell.
R1: ch 1, sc in same st, sc evenly around. Join in 1st sc.
R2: Beg Shell in 1st sc of previous row. *Skip 2 st, Shell in next st.* Repeat from * to * around. Join in ch 3 of Beg Shell.
R3: turn. ss to ch 2 sp of last Shell made in previous row. Beg Shell in ch 2 sp, *Shell in ch 2 sp of Shell in previous row.* Repeat from * to * around.
R4-R6: turn. Beg Shell in ch 2 sp, *Shell in ch 2 sp of Shell in previous row.* Repeat from * to * around.
R1: [dc in 4th ch from hook, 2 dc, ch 2, dc all in the same st as 1st dc (Beg Shell made)] [skip 3 st, 3dc, ch 2, dc (Shell made)] *skip 3 st, Shell* repeat from * to * across (1 Beg Shell, 49 Shells)
R2-R43: turn. Beg Shell in ch 2 sp of Shell in previous row, *skip 4 st, Shell in ch 2 sp of Shell in previous row.* Repeat from * to * across. (1 Beg Shell, 49 Shells)
First Armhole
R44-R58: turn. Beg Shell in ch 2 sp of Shell in previous row, *skip 4 st, Shell in ch 2 sp of Shell in previous row.* Repeat from * to * 6 times. Leave the remaining stitches unworked. (1 Beg Shell, 7 Shells)
R59: turn. Ch 3, dc in each st across to end. (48 dc) Note: There are a total of 6 stitches in each Shell.
Fasten off.
Back Section
R1: Skip 5 Shells from 1st Armhole, ss in the ch 2 of the 6th Shell, Beg Shell *skip 4 st, Shell in ch 2 sp of Shell in previous row. * Repeat from * to * 20 times. Leave remaining stitches unworked. (1 Beg Shell, 23 Shell)
R2-15: Turn, ss in the ch 2 of the 6th Shell, Beg Shell *skip 4 st, Shell in ch 2 sp of Shell in previous row. * Repeat from * to * 20 times. Leave remaining stitches unworked. (1 Beg Shell, 23 Shell)
R16: turn. Ch 3, dc in each st across to end. (144 dc) Note: There are a total of 6 stitches in each Shell.
Fasten Off.
Second Armhole
R1: Skip 5 Shells from Back Section, Beg Shell *skip 4 st, Shell in ch 2 sp of Shell in previous row. * Repeat from * to * across.
R2-15: ss in the ch 2 of the 5th Shell, Beg Shell *skip 4 st, Shell in ch 2 sp of Shell in previous row. * Repeat from * to * across.
R16: turn. Ch 3, dc in each st across to end. (48 dc) Note: There are a total of 6 stitches in each Shell.
Fasten off. Use Tapestry Needle to weave in ends.
Edging
Jo’s Crafty Hook Designs
First Armhole
Fold in the front panels from the Arm Hole. Line them up to the back. Whip Stitch together the front and back panels from the arm holes to chest. Fasten off.
Second Armhole
Fold in the second front panel from the Armhole to the Front. Line them up to the back. Whip Stitch together the front and back panels from the arm holes to chest. Fasten off.
Use Tapestry Needle and weave in any loose ends.
Sleeves
I left my Sleeves undone. I LOVE the look of them with the Tulip Stitches leaving little Scallops. IF you would like to add Sleeves, follow these instructions.
Bottom of Armhole
Side of Armhole
Join with sl st to bottom of arm hole in ch 2 space of Shell.
R1: ch 1, sc in same st, sc evenly around. Join in 1st sc.
R2: Beg Shell in 1st sc of previous row. *Skip 2 st, Shell in next st.* Repeat from * to * around. Join in ch 3 of Beg Shell.
R3: turn. ss to ch 2 sp of last Shell made in previous row. Beg Shell in ch 2 sp, *Shell in ch 2 sp of Shell in previous row.* Repeat from * to * around.
R4-R6: turn. Beg Shell in ch 2 sp, *Shell in ch 2 sp of Shell in previous row.* Repeat from * to * around.
Repeat R1-R6 in the 2nd Armhole.
Finish off & weave in ends
4X Large
Chain 208 turn
Bottom of Sweater
R1: [dc in 4th ch from hook, 2 dc, ch 2, dc all in the same st as 1st dc (Beg Shell made)] [skip 3 st, 3dc, ch 2, dc (Shell made)] *skip 3 st, Shell* repeat from * to * across (1 Beg Shell, 51 Shells)
R2-R44: turn. Beg Shell in ch 2 sp of Shell in previous row, *skip 4 st, Shell in ch 2 sp of Shell in previous row.* Repeat from * to * across. (1 Beg Shell, 51 Shells)
First Armhole
R45-R60: turn. Beg Shell in ch 2 sp of Shell in previous row, *skip 4 st, Shell in ch 2 sp of Shell in previous row.* Repeat from * to * 6 times. Leave the remaining stitches unworked. (1 Beg Shell, 8 Shells)
R61: turn. Ch 3, dc in each st across to end. (40 dc) Note: There are a total of 6 stitches in each Shell.
Fasten off.
Back Section
R1: Skip 6 Shells from 1st Armhole, ss in the ch 2 sp of the 7th Shell, Beg Shell *skip 4 st, Shell in ch 2 sp of Shell in previous row. * Repeat from * to * 22 times. Leave remaining stitches unworked. (1 Beg Shell, 23 Shell)
R2-16: Turn. Beg Shell *skip 4 st, Shell in ch 2 sp of Shell in previous row. * Repeat from * to * 22 times. Leave remaining stitches unworked. (1 Beg Shell, 23 Shell)
R17: turn. Ch 3, dc in each st across to end. (110 dc) Note: There are a total of 6 stitches in each Shell.
Fasten Off.
Second Armhole
R1: Skip 6 Shells from Back Section, ss in the ch 2 of the 7th Shell, Beg Shell *skip 4 st, Shell in ch 2 sp of Shell in previous row. * Repeat from * to * across.
R2-R16: Turn.Beg Shell *skip 4 st, Shell in ch 2 sp of Shell in previous row. * Repeat from * to * across.
R17: turn. Ch 3, dc in each st across to end. (40 dc) Note: There are a total of 6 stitches in each Shell.
Fasten off. Use Tapestry Needle to Weave in Ends.
Edging
Jo’s Crafty Hook Designs
First Shoulder
Fold in the front panels from the Arm Hole. Line them up to the back. Whip Stitch together the front and back panels from the arm holes to chest. Fasten off.
Second Shoulder
Fold in the second front panel from the Armhole to the Front. Line them up to the back. Whip Stitch together the front and back panels from the arm holes to chest. Fasten off.
Use Tapestry Needle and weave in any loose ends.
Sleeves
I left my Sleeves undone. I LOVE the look of them with the Tulip Stitches leaving little Scallops. IF you would like to add Sleeves, follow these instructions.
Bottom of Armhole
Side of Armhole
Join with sl st to bottom of arm hole in ch 2 space of Shell.
R1: ch 1, sc in same st, sc evenly around. Join in 1st sc.
R2: Beg Shell in 1st sc of previous row. *Skip 2 st, Shell in next st.* Repeat from * to * around. Join in ch 3 of Beg Shell.
R3: turn. ss to ch 2 sp of last Shell made in previous row. Beg Shell in ch 2 sp, *Shell in ch 2 sp of Shell in previous row.* Repeat from * to * around.
R4-R6: turn. Beg Shell in ch 2 sp, *Shell in ch 2 sp of Shell in previous row.* Repeat from * to * around.
Repeat R1-R6 in the 2nd Armhole.
Finish off & weave in ends
5X Large
Chain 216 turn
Bottom of Sweater
R1: [dc in 4th ch from hook, 2 dc, ch 2, dc all in the same st as 1st dc (Beg Shell made)] [skip 3 st, 3dc, ch 2, dc (Shell made)] *skip 3 st, Shell* repeat from * to * across (1 Beg Shell, 53 Shells)
R2-R45: turn. Beg Shell in ch 2 sp of Shell in previous row, *skip 4 st, Shell in ch 2 sp of Shell in previous row.* Repeat from * to * across. (1 Beg Shell, 53 Shells)
First Armhole
R46-R62: turn. Beg Shell in ch 2 sp of Shell in previous row, *skip 4 st, Shell in ch 2 sp of Shell in previous row.* Repeat from * to * 6 times. Leave the remaining stitches unworked. (1 Beg Shell, 8 Shells)
R63: turn. Ch 3, dc in each st across to end. (54 dc) Note: There are a total of 6 stitches in each Shell.
Fasten off.
Back Section
R1: Skip 6 Shells from 1st Armhole, ss in the ch 2 of the 7th Shell, Beg Shell *skip 4 st, Shell in ch 2 sp of Shell in previous row. * Repeat from * to * 20 times. Leave remaining stitches unworked. (1 Beg Shell, 23 Shell)
R2-R17: Turn. Beg Shell *skip 4 st, Shell in ch 2 sp of Shell in previous row. * Repeat from * to * 20 times. Leave remaining stitches unworked. (1 Beg Shell, 23 Shell)
R18: turn. Ch 3, dc in each st across to end. (144 dc) Note: There are a total of 6 stitches in each Shell.
Fasten Off.
Second Armhole
R1: Skip 6 Shells from Back Section, ss in the ch 2 of the 7th Shell, Beg Shell *skip 4 st, Shell in ch 2 sp of Shell in previous row. * Repeat from * to * across.
R2-R17: Turn. Beg Shell *skip 4 st, Shell in ch 2 sp of Shell in previous row. * Repeat from * to * across.
R18: turn. Ch 3, dc in each st across to end. (54 dc) Note: There are a total of 6 stitches in each Shell.
Edging
Jo’s Crafty Hook Designs
First Shoulder
Fold in the front panels from the Arm Hole. Line them up to the back. Whip Stitch together the front and back panels from the arm holes to chest. Fasten off.
Second Shoulder
Fold in the second front panel from the Armhole to the Front. Line them up to the back. Whip Stitch together the front and back panels from the arm holes to chest. Fasten off.
Use Tapestry Needle and weave in any loose ends.
Sleeves
I left my Sleeves undone. I LOVE the look of them with the Tulip Stitches leaving little Scallops. IF you would like to add Sleeves, follow these instructions.
Bottom of Armhole
Side of Armhole
Join with sl st to bottom of arm hole in ch 2 space of Shell.
R1: ch 1, sc in same st, sc evenly around. Join in 1st sc.
R2: Beg Shell in 1st sc of previous row. *Skip 2 st, Shell in next st.* Repeat from * to * around. Join in ch 3 of Beg Shell.
R3: turn. ss to ch 2 sp of last Shell made in previous row. Beg Shell in ch 2 sp, *Shell in ch 2 sp of Shell in previous row.* Repeat from * to * around.
R4-R6: turn. Beg Shell in ch 2 sp, *Shell in ch 2 sp of Shell in previous row.* Repeat from * to * around.
Repeat R1-R6 in the 2nd Armhole.
Finish off & weave in ends
This pattern has been tested by experienced crocheters. I thank each one of them for their time and devotion to testing my Tulip Sweater Vest crochet pattern! Thank you Kelly Vicchione, Nichole Tanner, Tambra Nalley, Amanda Corniello, and Cassandra Hillary!
Kelly Vicchione
Nichole Tanner
Tambra Nalley
Amanda Corniello
Cassandra Hillary
From the Designer:
Thank you for trying the Tulip Sweater Vest Pattern! Check out my other GREAT patterns at my Etsy Shop OR at the Ravelry Store under Jo’s Crafty Hook OR at my website joscraftyhook.com! While you are at my website be sure to add your email address for my Mailing List and Newsletter. This way you will be notified when I release another pattern or blog post! If you have any questions or concerns about any pattern find me at Jo’s Crafty Hook Designs on Facebook!
You are free to sell or gift the Tulip Sweater Vest. Please forward anyone who would like to do one of my patterns or purchase this pattern at my Etsy shop, the Ravelry Store, or to my website. The web addresses for any place to connect with me are listed below.
Every purchase of my patterns helps! It allows me to buy more yarn so I can create and design more Handmade Crocheted Creations for you to enjoy.
I would LOVE to see your version of my Tulip Sweater Vest! You can “Hook It” to my Ravelry Store Jo’s Crafty Hook Designs OR add a pic on my Facebook Page Jo’s Crafty Hook Designs OR at anyone of the places below that allows you to connect with me! Pictures, Comments, Feedback, etc. are ALWAYS welcome at my website www.joscraftyhook.com!
Find me, Joey Lea Baird, Jo of Jo’s Crafty Hook Designs at any one of these places listed below!