
Do you have Scoliosis? Do you know someone who does? Well in today’s post I am going to share some basic Scoliosis Treatments you or someone you know can be made aware of. But please before you do anything consult a doctor for medical advice.
Category: Crochet
Scoliosis Exercises and the Berry Topper
In today’s post I will be showing you some Scoliosis Exercises and I will also be sharing a FREE Crochet Pattern with you called the Berry Topper!
This post contains affiliate links. You can make a purchase using these links that I provide where I may receive compensation (at no added cost to you.) Purchases you make will help keep my website, Etsy Shop, and my Ravelry Store going and provide quality designs just for you!
Hi! My name is Jo and I have Scoliosis
I wonder if they have Scoliosis Awareness Month in June because it is a time of year Scoliosis sufferers get a little break from the chronic pain that goes along with it? This is a silly question that makes you think. Hi my name is Jo and I have Scoliosis.
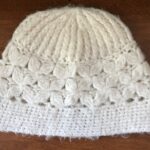
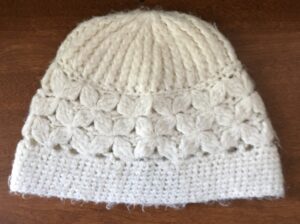
Lilac Cluster Beanie Free Crochet Pattern
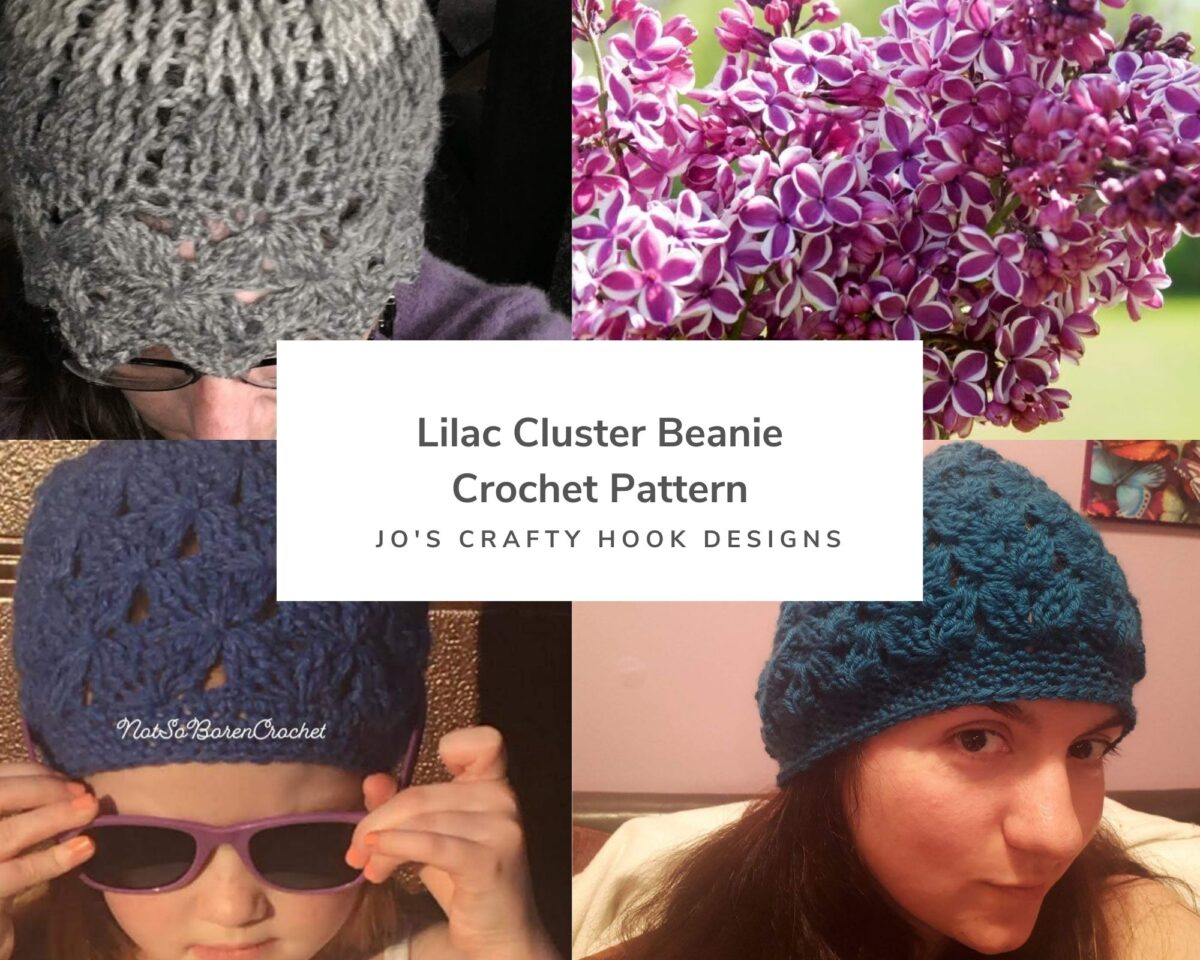


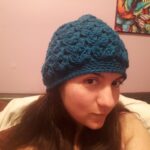

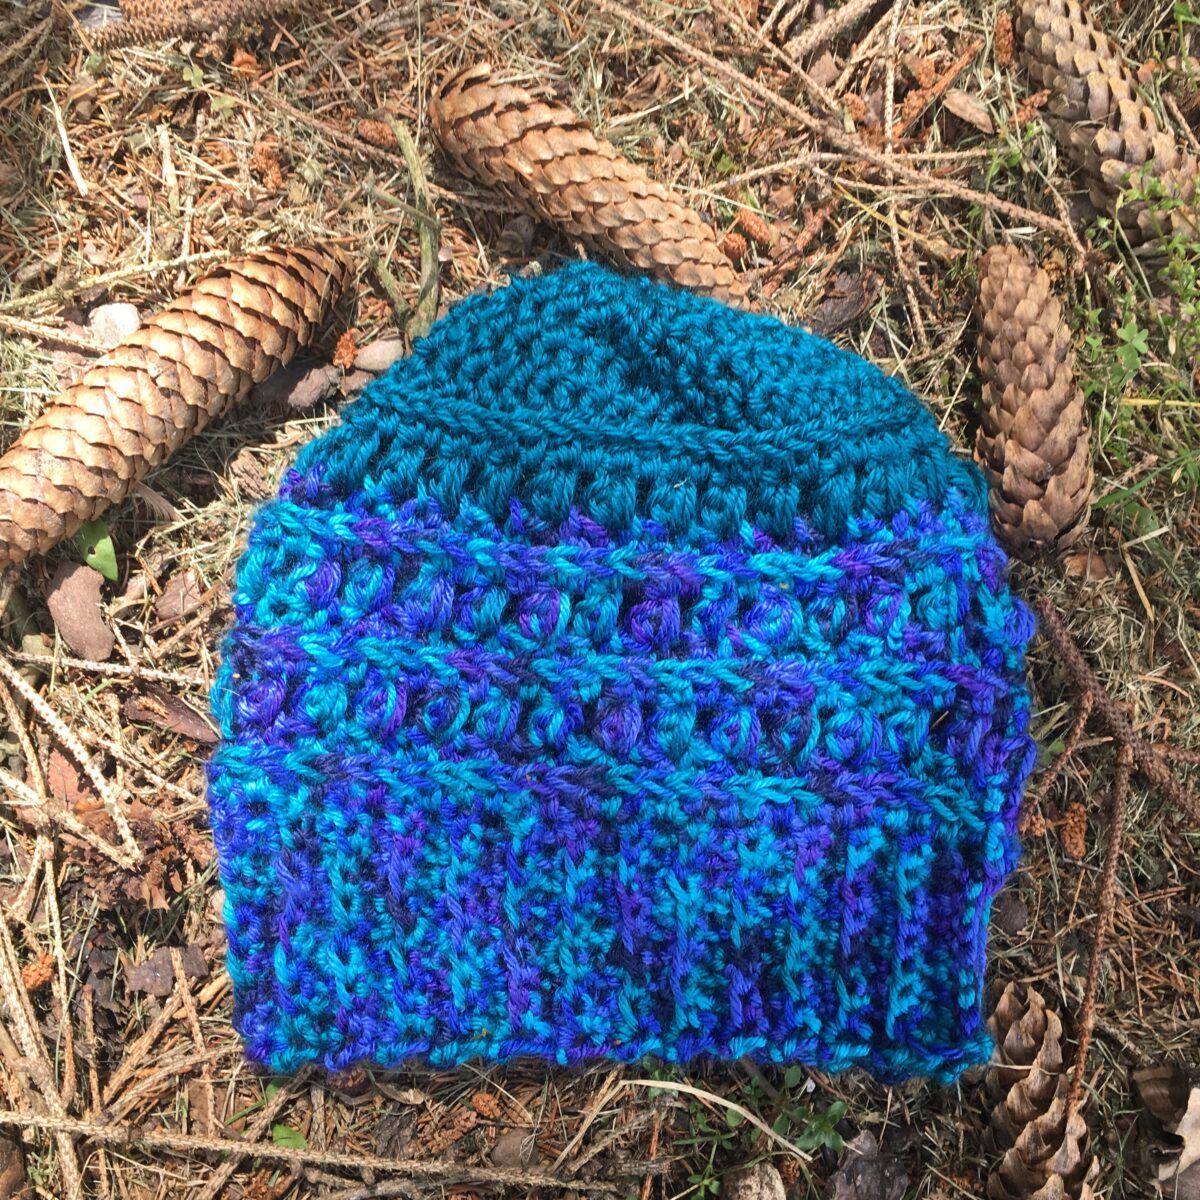
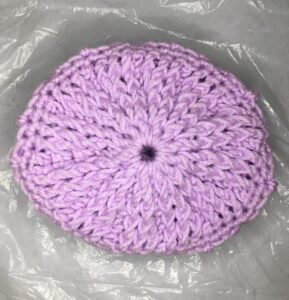
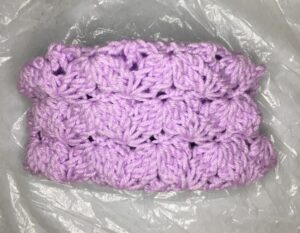
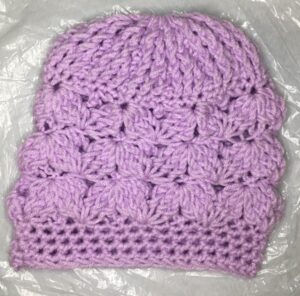
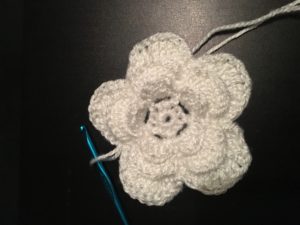
In today’s post I will be sharing the Lilac Cluster Beanie FREE Crochet Pattern. I am so excited to be sharing this free crochet pattern with you for a number of reasons. The main one is that I looked at a store bought hat and was able to create a crochet pattern from it! Another reason is that it is a Beautiful design and a Great Beanie! lol The last reason is the flower clusters look like Lilacs, which is my ALL time favorite flower. I just LOVE their smell!
This post contains affiliate links. You can make a purchase using these links that I provide where I may receive compensation (at no added cost to you.) Purchases you make will help keep my website, Etsy Shop, and my Ravelry Store going and provide quality designs just for you!
My son found a hat and gave it to me last year. When it was taken out of storage this past winter I was like “I NEED to copy this pattern!” I took a real good look at it and wanted to see if I could crochet it because it said on the label “Crocheted.” Well I finally worked out a pattern and I hope you love it as much as I do!
You can get an Ad Free PDF Version with Step-by-Step pictures and Video Tutorials. The crochet pattern contains 8 sizes. You can find the ad free pdf crochet pattern at the places listed below.
https://www.ravelry.com/patterns/library/lilac-cluster-beanie https://designers.lovecrafts.com/#/design/5edeac395faf9e5915586eba https://www.etsy.com/listing/691010744/crochet-pattern-lilac-cluster-beanie
If you liked what you have seen here at my website, be sure to sign up for my Newsletter. You will be notified when I release a new pattern, have a giveaway, have a sale and more.
[yikes-mailchimp form=”1″]
************************************************
Information about Lilac Cluster Beanie:
Skill Level:
Advanced Beginner/Intermediate
US Terms
Yarn Used:
**I used Lion Brand Mandala Yarn 3 ply light weight yarn or DK weight yarn. (5.3 oz/590 yds)**
Materials:
US Hook K or 6.5 mm
200-500 yds of 3 ply Light Weight or DK Weight Yarn
Scissors
Tapestry Needle
Gauge:
US K Hook or 6.5 mm
16 fpdc x 12 rows = 4”
Gauge Swatch:
R1: Chain 10, dc in 4th st from hook and remaining 7 st. Turn.
R2: Ch 3, fpdc in the next 7 st. Turn
R3-R12: Repeat R2
Abbreviations:
ch = Chain
sl st = Slip Stitch
mc = Magic Circle
dc = Double Crochet
sp = Space
fpdc = Front Post Double Crochet
fpdc3tog = Front Post Double Crochet 3 Together-Decrease
fpdc6tog = Front Post Double Crochet 6 Together-Decrease
Notes:
ch 2 does NOT count as a stitch
ch 3 counts as a dc
Stitch count is multiples of 6, so if your brim is too tight or too loose try going up or down in hook size before you adjust the stitch count.
Pattern written for: 0-6mth (6-12 mth, 12-24 mth, 2-5 yrs, 5-10 yrs, Teen/Sm Adult, Med Adult, Lg Adult)
The Crown will Increase every other Row as the Sizes increase every other Row. The Increase will be done every other Row.
24 (36, 48, 60, 72, 84) will be your ending row count after you complete the increases for your size.
This Beanie can be made into a Slouchy Hat. You can add more Rows during the Shells & Clusters by doing R3-R4 and ending with R3 . You can also add more Rows to the Brim, that will work too to make a Slouchy Hat.
Special Stitches:
Front Post Double Crochet – Double Crochet going around the Front Post of the DC in the Previous Row.
Cluster Stitch or Front Post Double Crochet 6 Together – when you front post double crochet 6 dc together, you are taking what were six double crochet stitches and turning them into just one front post double crochet stitch or one cluster stitch by using the first 3dc, skip (ch2, sc, ch2) then using the following 3 dc.
Beginning Shell Stitch – when you (ch 3, 2 dc, ch 2, 3 dc) all in the same stitch.
Shell Stitch – when you crochet (3 dc, ch 2, 3 dc) all in the same stitch.
Left Handed Video Tutorials:
Video Tutorial Part 1: fpdc
Video Tutorial Part 2: fpdc3tog
Video Tutorial Part 3: fpdc6tog
********************************************************
Lilac Beanie Pattern
Crown
R1: Make a Magic Circle. Ch 2 and add 24 dc to the circle. Ss into 1st dc to join. (24 dc)
**Or you can chain 5 sl s in the 1st stitch to join. Ch 3, dc 23 into the hole. (24 dc)**
R2: Ch 2 and dc in same space. *2 fpdc in the next dc, dc in the next dc.* Repeat * around ending with 2 fpdc in the last st. Ss into to join. (36 dc)
R3: Ch 2 and dc in the same space. *fpdc around the next 2 st, dc in the next dc.* Repeat * around. Ending with fpdc around the last 2 stitches. Ss into 1st dc to join. (36 dc) 0-6 mths STOP here and go to Shells & Clusters
You can get an Ad Free PDF Version with Step-by-Step pictures and Video Tutorials. The crochet pattern contains 8 sizes. You can find the ad free pdf crochet pattern at the places listed below.
https://www.ravelry.com/patterns/library/lilac-cluster-beanie https://designers.lovecrafts.com/#/design/5edeac395faf9e5915586eba https://www.etsy.com/listing/691010744/crochet-pattern-lilac-cluster-beanie
Flower Shells & Clusters
R1: Ch 1, sc in the same sp, and each stitch around. sl st into 1st sc to join. 36
R2: Beg Shell (ch 3, 2 dc, ch 2, 3 dc all in the same stitch) *ch 2, skip 2 st, sc in the next st, ch 2, sk 2, Shell (3 dc, ch 2, 3 dc all in the same stitch)*. Repeat * around ending with ch 2, sk 2, sc in the next st, ch 2, sk 2. sl st in top of Ch 3 of the Beg Shell to Join. 6 Shells
R3: ch 2, fpdc3tog around the next 3 st, *ch 1 ( be sure to chain loosely. In the next row you will add a Shell in that ch 1), sc in ch 2 sp of Shell in previous row, ch 1, fpdc6tog around the next 6 st.* Repeat * around. End with fpdc3tog, sl st loosely into fpdc3tog. 6 Clusters
R4: Beg Shell in the ss of the fpdc3tog just made in the last row. *ch 2, sc in the sc, ch 2, Shell in the ch 1 sp of Cluster.* Repeat * around. End with ch 2. sl st in top of ch 3 of the Beg Shell. 6 Shells.
Ages 0-6 mth
R5-R7: Repeat R3-R4 once, then add R3 once more. (Since you are using #3 yarn, you may need to add R3-R4 once more.) Go to the Brim
Brim:
**If Brim is too tight, try going Up a hook size. If the Brim is too loose, try going Down a hook size.**
R1: Ch1, sc in same space. *Sc in sc, sc in ch 1, 2 sc in side of fpdc3tog/fpdc6tog, sc in ch 1.* Repeat around.
R2-R5: Ch 1, sc in same space. Sc in each sc around. **If you would like your Brim to be longer, repeat this row until you are satisfied.**
Fasten off and weave in ends with Tapestry Needle.
**************************************************
You can find more of my crochet patterns at the links below.
**************************************************
If you liked what you have seen here at my website, be sure to sign up for my Newsletter. You will be notified when I release a new pattern, have a giveaway, have a sale and more.
[yikes-mailchimp form=”1″]
Find me, Jo of Jo’s Crafty Hook, at the places listed below.
Website: www.joscraftyhook.com
Ravelry: https://www.ravelry.com/designers/jos-crafty-hook
LoveCraft: https://www.lovecrafts.com/en-gb/user/maker/1bee78ea-a464-4c9b-b781-59cfc74b1a6c
Etsy Shop: www.etsy.com/shop/JosCraftyHook
Facebook: www.facebook.com/JosCraftyHook
Facebook: www.facebook.com/JosCraftyHookDesigns
Instagram: www.instagram.com/joscraftyhook
Pinterest: www.pinterest.com/baird0095
Twitter: www.twitter.com/joscraftyhook
YouTube: https://www.youtube.com/channel/UCk-6IB36bg4gkvaawn3xfdg
Donations Accepted: https://paypal.me/joscraftyhook
********************************************************
Patchwork Mystery CAL Schedule
Patchwork Mystery CAL Schedule

This post contains affiliate links. You can make a purchase using these links that I provide where I may receive compensation (at no added cost to you.) Purchases you make will help keep my website, Etsy Shop, and my Ravelry Store going and provide quality designs just for you!
Joann Fabric Sale
Up to 30% Off Entire Stock Yarn! Valid 5/13-5/22.
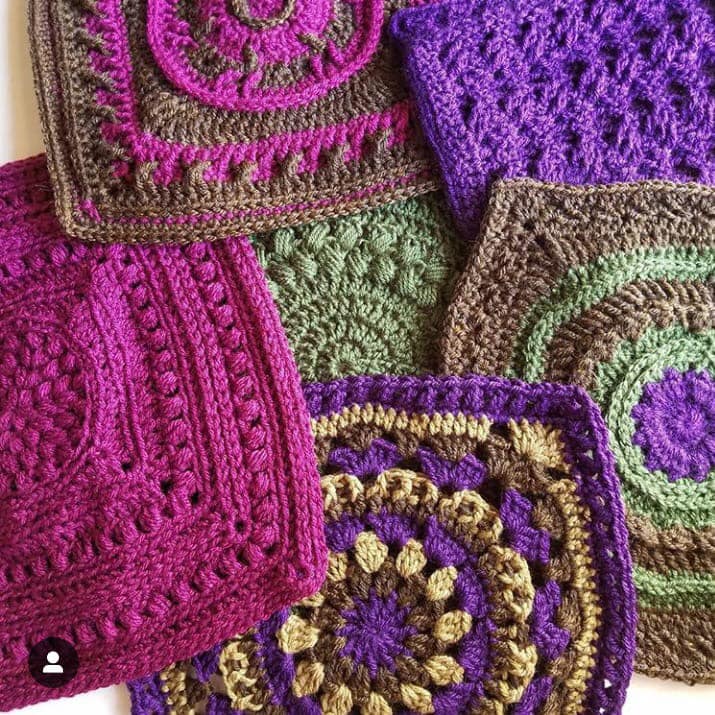
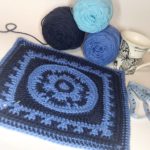
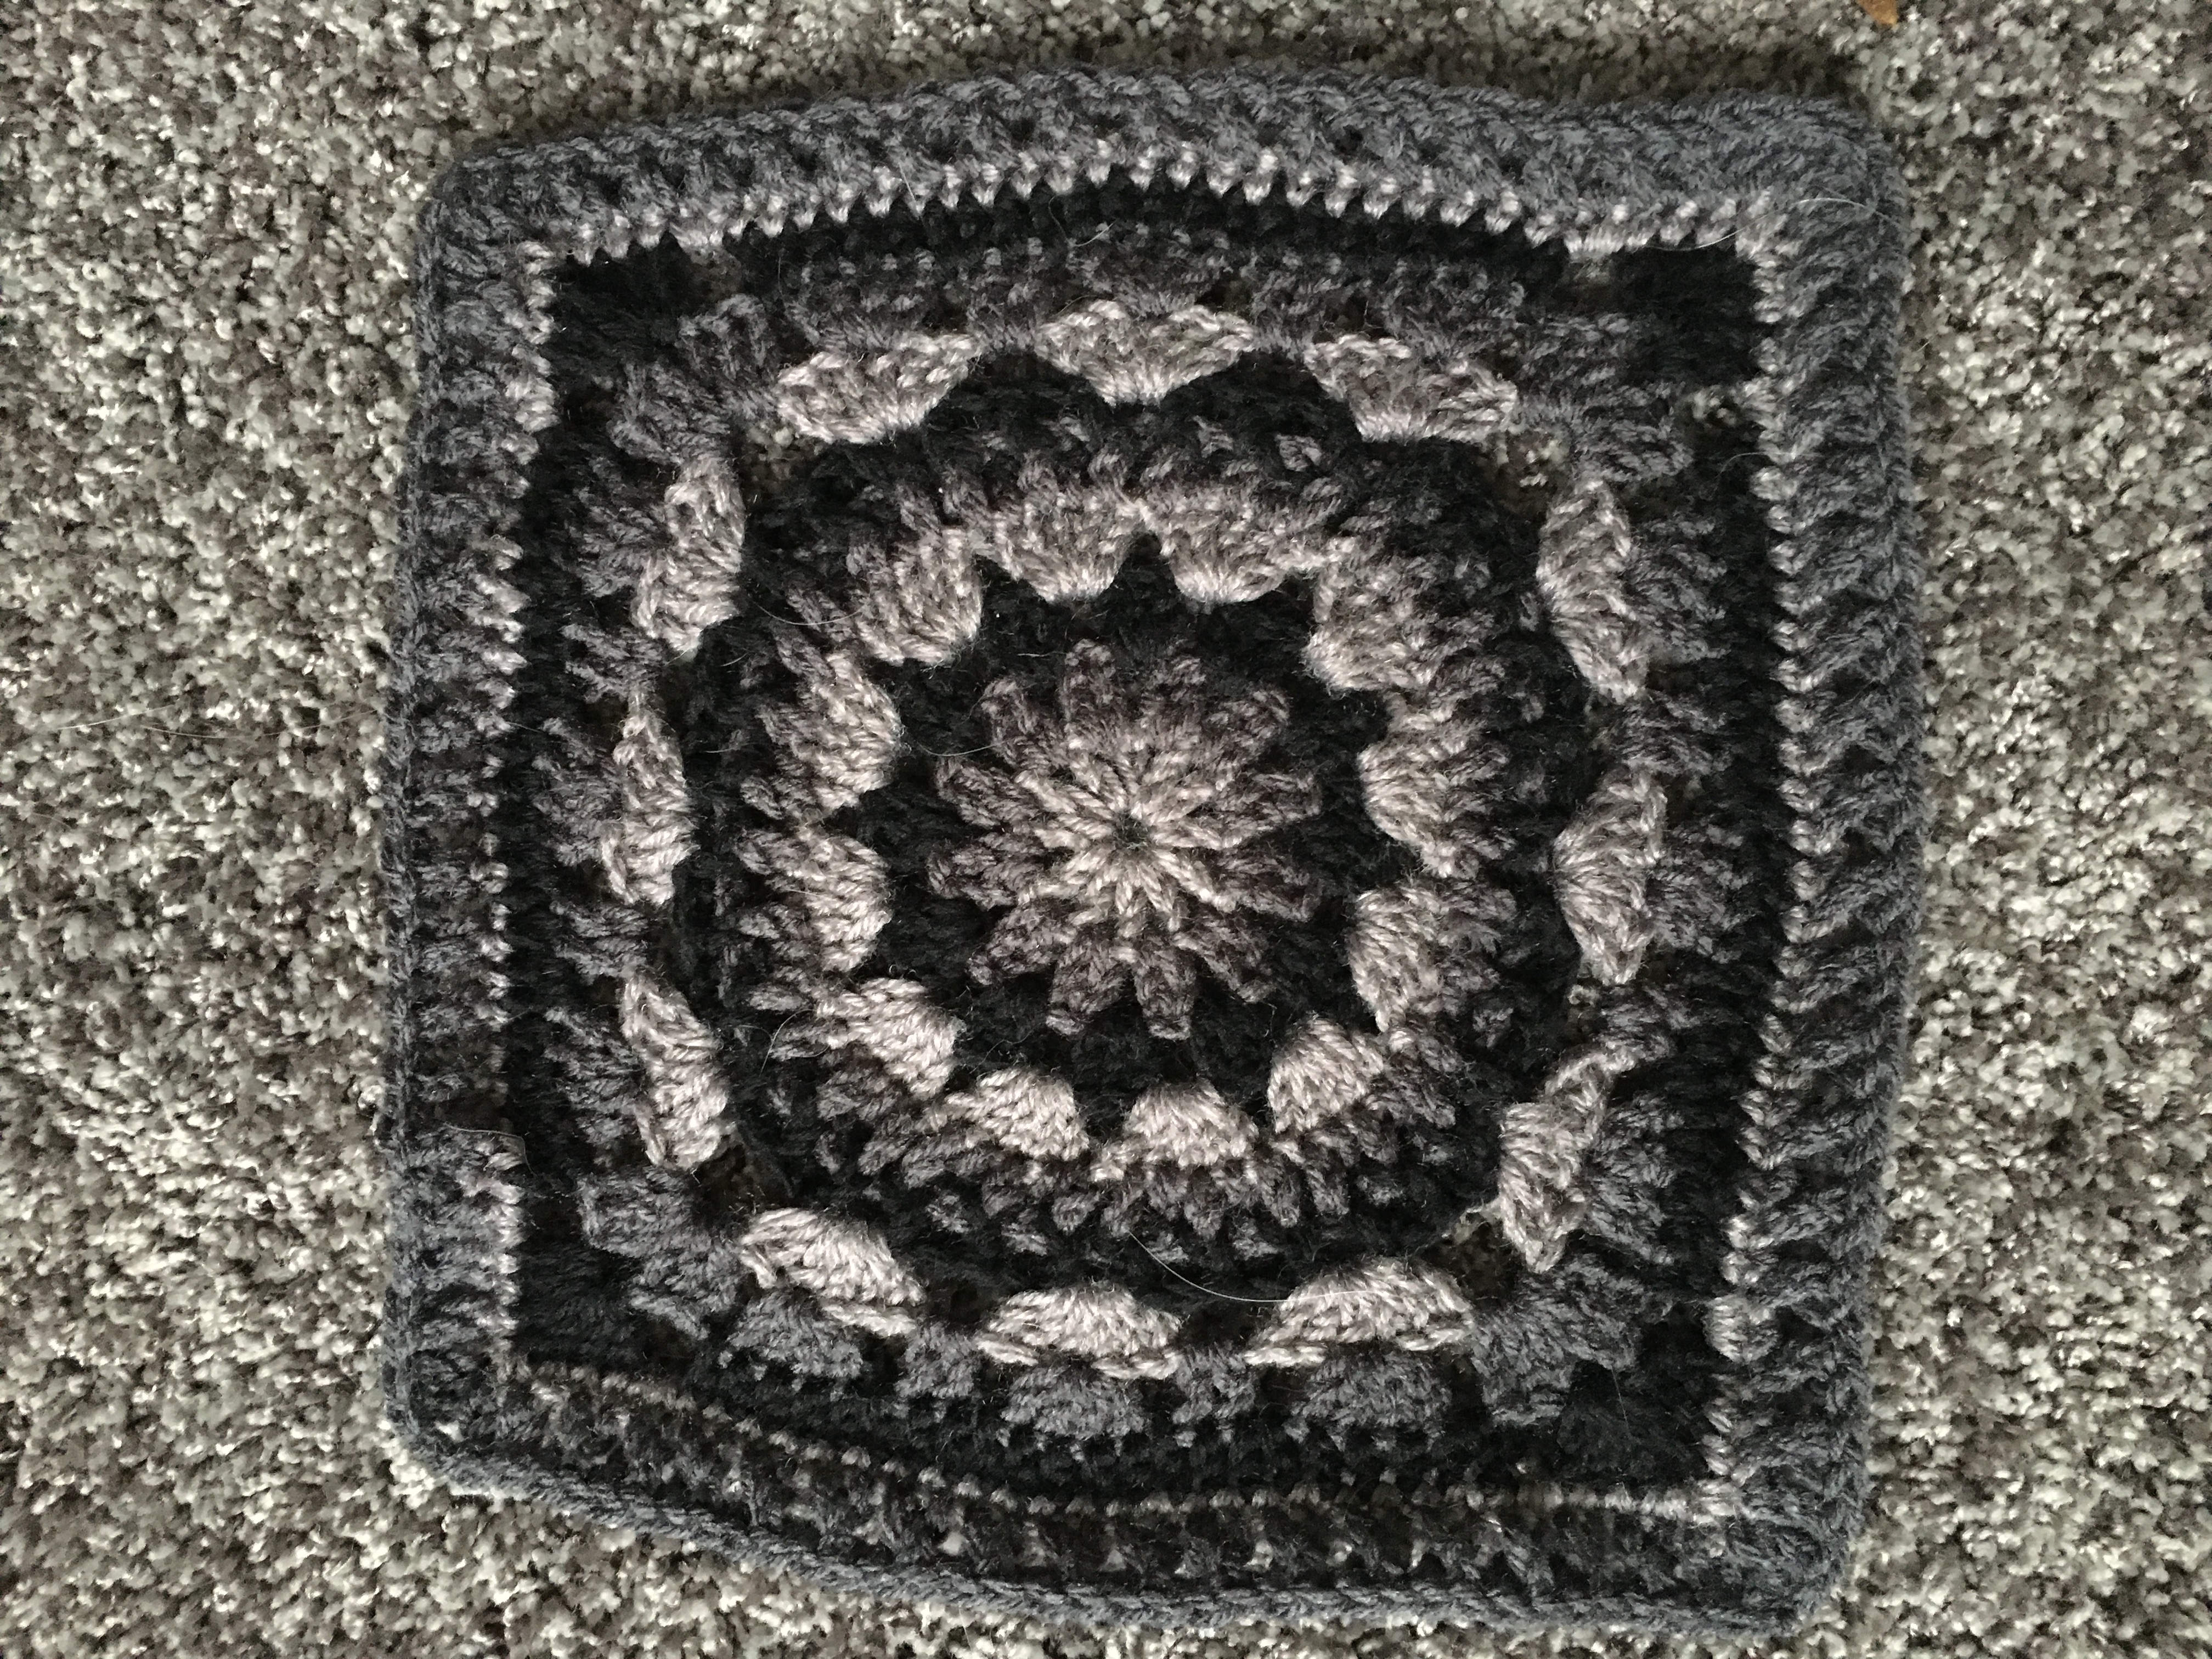
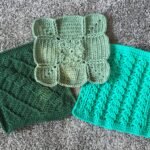
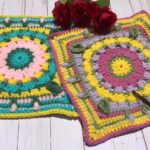
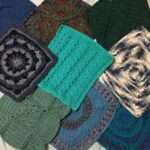
At the first of the year I was asked to join a Facebook Group, called the Patchwork Mystery CAL. The Patchwork Mystery CAL started April 15, 2019 and lasts until July 7, 2019. Below you will find the Patchwork Mystery CAL Schedule which will be 12 weeks long. Also at the end of the schedule I talk about crochet giving you hope!
The Facebook Group consists of me and 11 other fiber artist designing a 12″ x 12″ Square for their mystery CAL. All of the designs were to be and are to held a secret until each artist’s Square is revealed. Also when we were creating our square there had to be a meaning behind the design. Therefore each of us 12 fiber artists have a story to tell when our Square is published.
Learn to Tunisian Crochet Online Class at Annie’s
The purpose of the group’s 12 squares is to create an amazing work of art by joining the 12 squares and creating an Afghan. The creation of the Afghan has you joining 3 Squares across by 4 Squares long. You can arrange your 12 squares any way you prefer or join them in the order of the CAL.
Even though it is week 2 of the CAL, you will have plenty of time to join us and crochet a Square. Today is the release of Square #2. I will be adding to this post weekly, as the next fiber artist’s square is revealed. So if you have want to join our CAL you can do so here. Check out the Announcement section of the group for ALL the information you need to start crocheting your Squares! Also, be sure to subscribe to my email list and you will receive the next Patchwork Mystery Square when it is released!
1 – Find out the design of the new Square each week!
2 – Also, find out every week the story behind the design of each artist’s Square!
Click here to save 10%! Alien and Predator Dallas (Alien)from Eaglemoss!
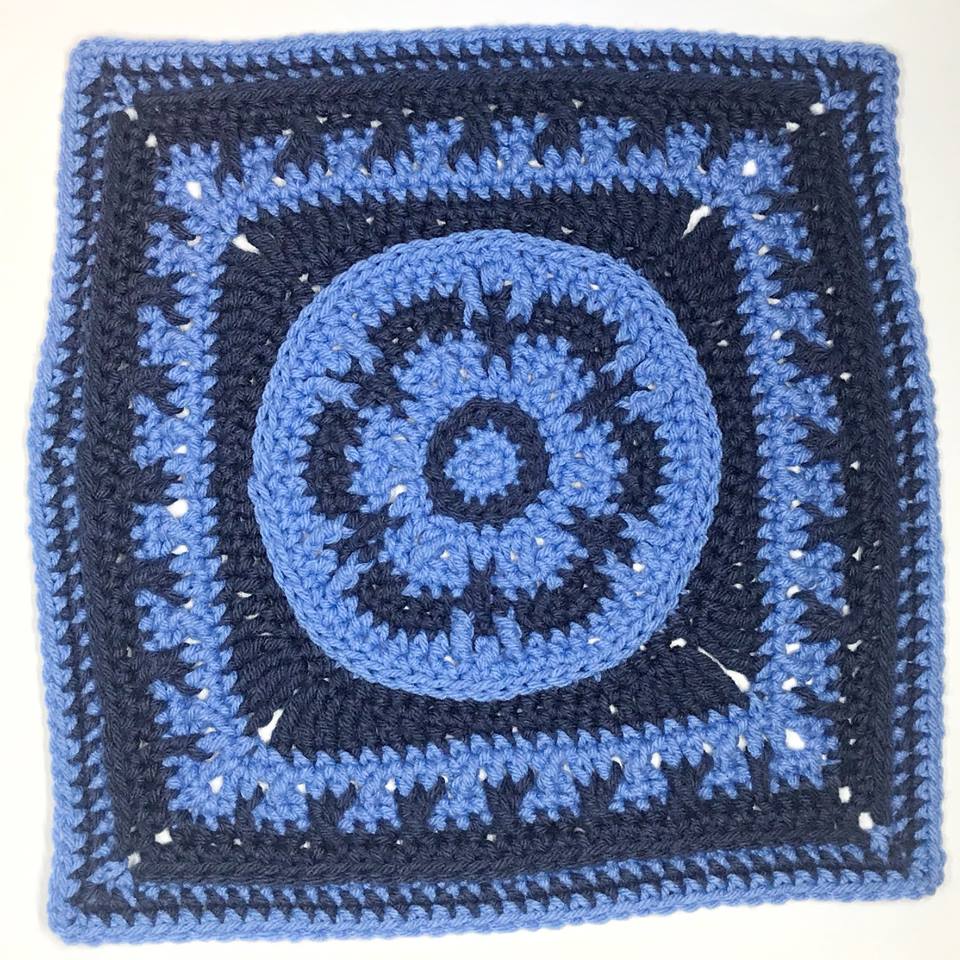
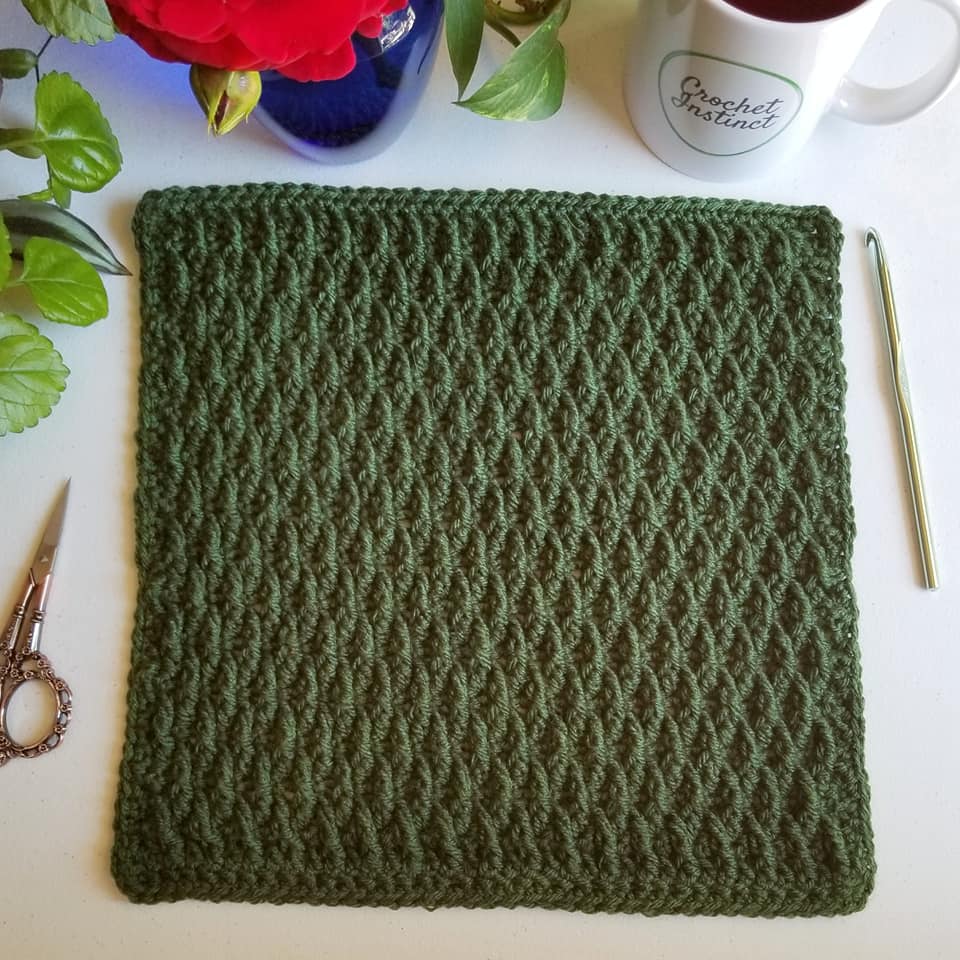
April 15, 2019 WEEK 1 by Crochet Instinct
* Show your support by following Stephanie Ware on her Blog, Facebook & Instagram
Free UK Delivery On All Orders from the Geek Store.
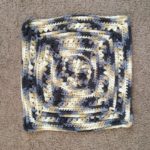
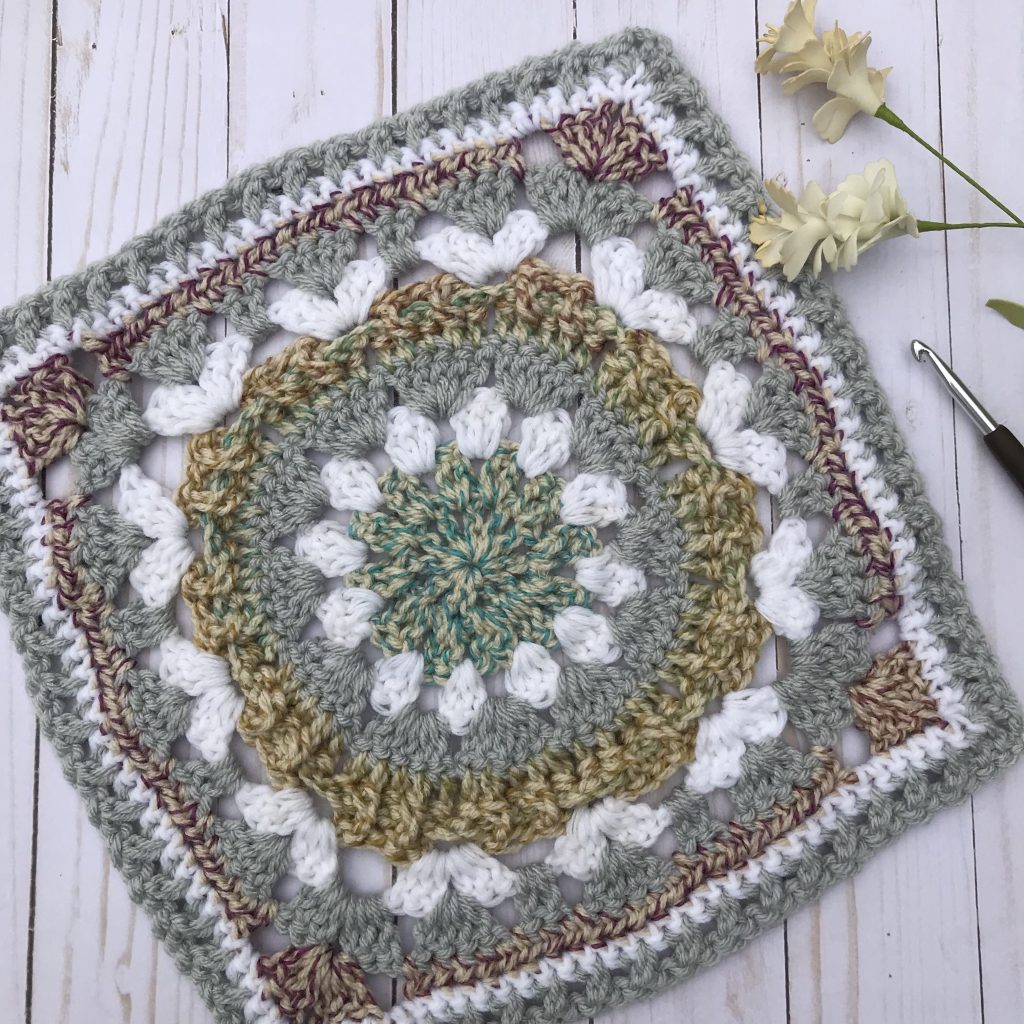
· April 22, 2019: WEEK 2 by Crochet Anything
* Show your support by following Jessica Beres on her Blog, & Instagram
·
10% off baby essentials Goumikids.com. Use Code:GK10
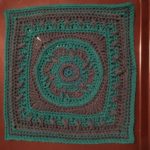
April 29, 2019: WEEK 3 by Made With Love & Yarn
* Show your support by following Courtney Lang on her Blog, Facebook, & Instagram
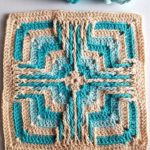
· May 6, 2019: WEEK 4 by Sunset Knots
* Show your support by following Marianne Hamil on her Blog, Facebook, & Instagram
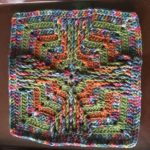
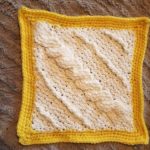
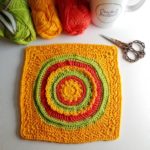
· May 13, 2019: WEEK 5 by Shelby Shea’s Stitches
* Show your support by following Shelby Shea on her Blog, Facebook, & Instagram
Shelby Shea supplied a Video Tutorial for her Pasha Square and you can find it here!
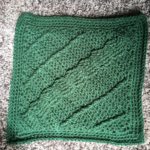
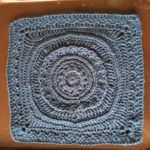
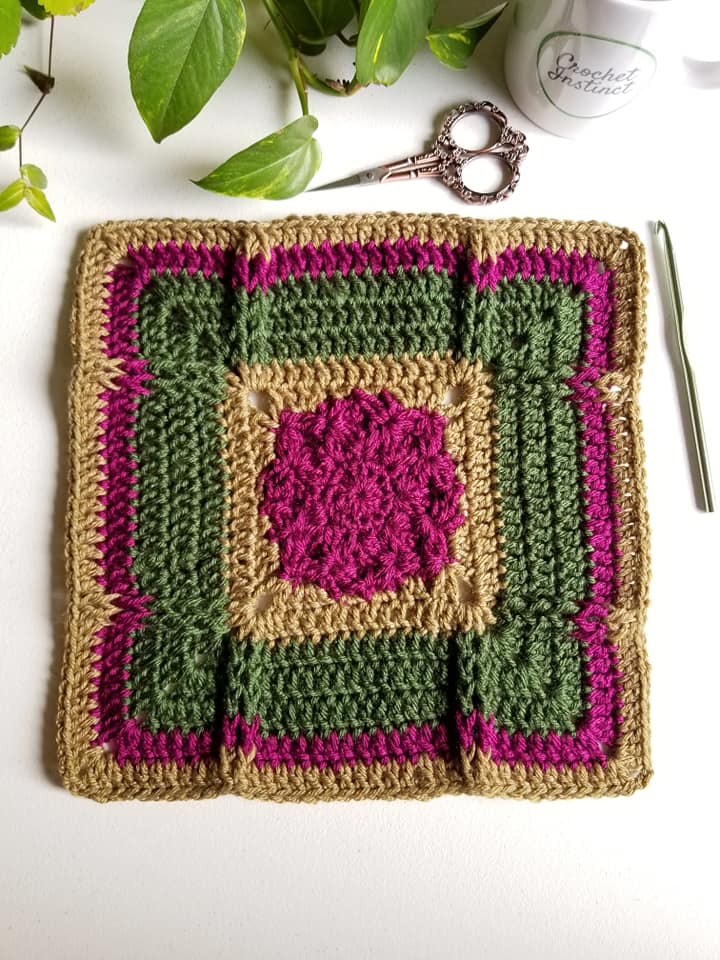
· May 20, 2019: WEEK 6 by Tangerine Door Creations
* Show your support by following Desiree Krahn on her Blog & Facebook

You can find the story behind Desiree’s story about her Garden Gate Square here!
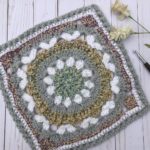
· May 27, 2019: WEEK 7 by Journey Chanel Designs
* Show your support by following Anastasia Smith on her Blog, Facebook, & Instagram
Find out the story behind Anastasia’s Fairy Wings Square here!
· June 3, 2019: WEEK 8 by Crochetaladia
* Show your support by following Claudia Martin on her Instagram
Patchwork Mystery CAL Schedule
Week 8 is a little different today. Find Claudia Martin’s Post on her Spring Pathways Square @crochetaladia on Instagram.
Find her free pattern at Ravelry here!

· June 10, 2019:
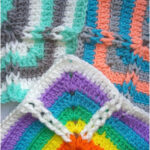
WEEK 9 is a collaborated effort by Sunset Knots & Tangerine Door Creations
* Show your support by following Marianne Hamil of Sunset Knots and Desiree Krahn of Tangerine Door Creations above. The Square is titled: Belle’s Enchanted Garden Square.
For convenience, you will find the full pattern and all links for this week on both blogs. Be sure to visit both to get our thoughts about the square. 🥳
👉🏻 https://

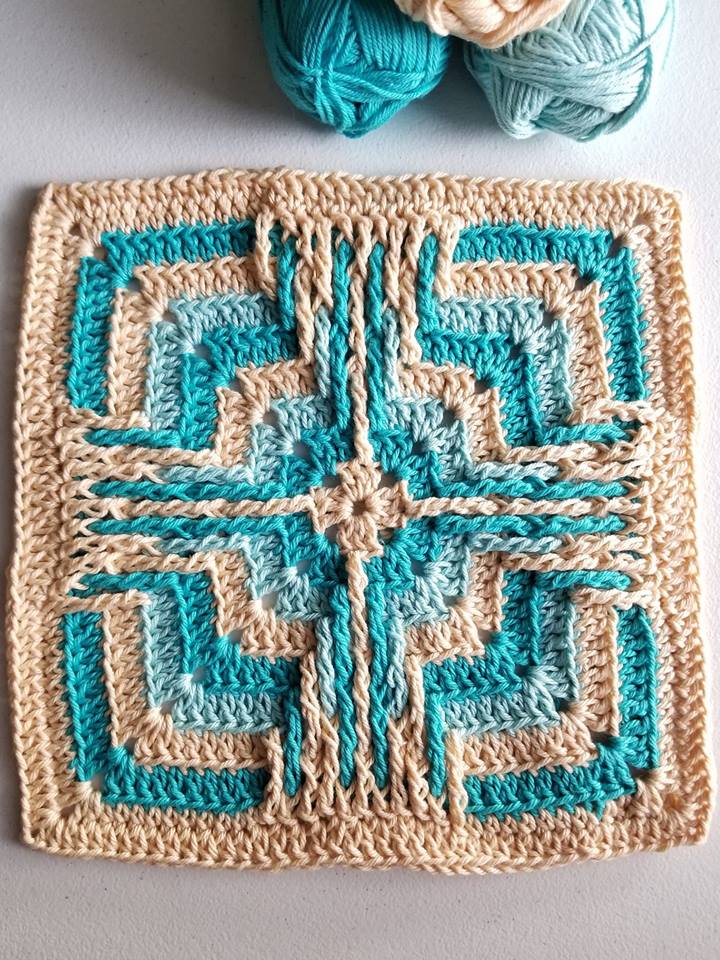
· June 17, 2019: WEEK 10 by Rich Textures Crochet
* Show your support by following Sarah Thomson on her Blog, Facebook, & Instagram
Here is what Sarah of Rich Textures Crochet had to say about her Rip Tides Square:
“Good morning everyone! Welcome to week 10 of the Patchwork Mystery CAL! Thank you so much for joining 🙂
This week I bring you the Rip Tides Afghan Square. I look forward to seeing your progress and creativity.
Find the free pattern here —> https://richtexturescrochet.com/…/the-rip-tides-square-fre…/
YouTube Tutorial (don’t forget to subscribe! This channel is updated weekly with free crochet patterns and stitch tutorials ![]() ) —> https://youtu.be/LhaPBUVVSlk
) —> https://youtu.be/LhaPBUVVSlk
PDF on Etsy ($2.50 CAD): https://etsy.me/2ImZ0Ug
PDF on Ravelry ($2.50 CAD): https://www.ravelry.com/pat…/library/rip-tides-afghan-square
Be sure to upload your progress photos in the album. Note: I recently had a baby (he is now one week old) 🙂 I will be stopping in as I can, but he is the one dictating my schedule at the moment so it’s a little sporadic 🙂”
Happy Crocheting!!
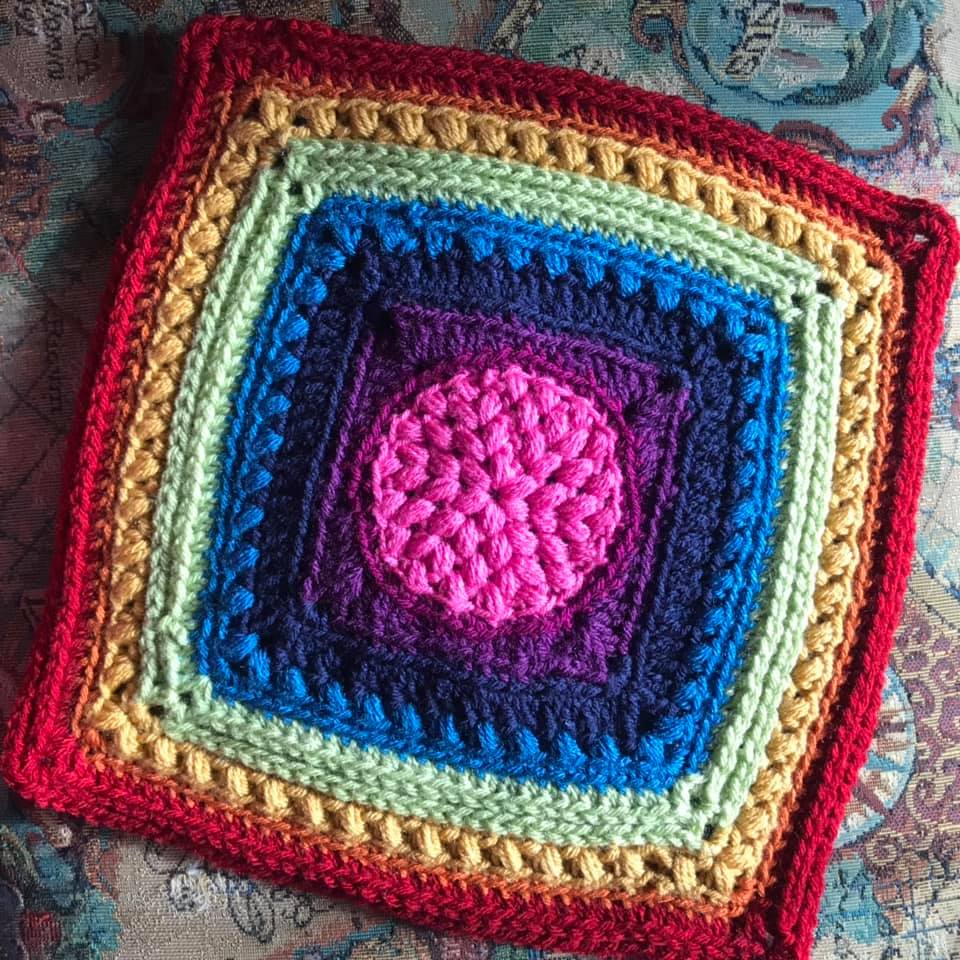
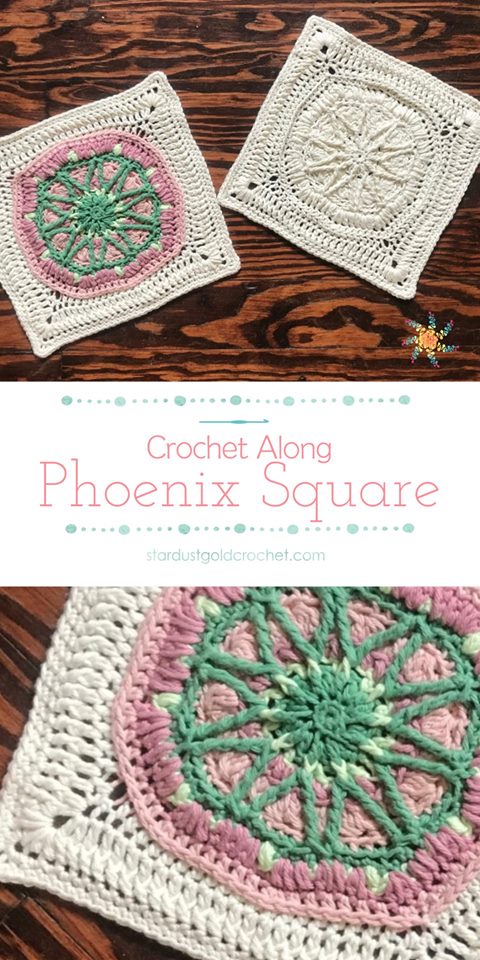
· June 24, 2019: WEEK 11 by Stardust Gold Crochet
* Show your support by following Tasha Reynolds on her Blog, Facebook, & Instagram
Good morning and evening everyone! Welcome to week 11 of the Patchwork Mystery CAL!
Thank you so much for joining 🙂! My name is Tasha and I am the designer behind Stardust Gold Crochet. I am so excited to be hosting this CAL and I hope you all enjoy creating it. I cannot wait to see all your beautiful colors!
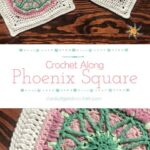
This weeks square is called the The Phoenix Afghan Square.
⭐ – PATTERN WILL GO LIVE AT 7:30 AM CST ON THE BLOG, AND THE LINK IS:
⭐ – Links for the free photo free PDF & YouTube Tutorial are in the blog post. 😍
⭐– The YouTube tutorial is not live yet. It will be uploaded around 5:30 pm CST (central standard time).
In the meantime, the blog post does have photos for you to work through some of the more difficult rounds. 🤩
Be sure to upload your progress photos in the album so I can see and help you along!
Happy Hooking! 🤗
Much love, 💖
Tasha
· July 1, 2019: WEEK 12 (LAST WEEK) by Jo’s Crafty Hook
* Show your support by following Joey Lea Baird on her Blog, Facebook, & Instagram
As I like to remind everyone who is like me, this CAL would be the perfect crochet project for you to do! If you suffer from Chronic Pain, Anxiety, Depression, or any other debilitating disease like Scoliosis this CAL can help you cope by giving you hope!
Just think, you have 12 weeks to crochet 12 squares. At the end of that time you will have 12 awesome designs to join together and create an Afghan! How awesome is that! Crochet is my Lifeline! Crochet gives me hope because it helps me cope. At the end of the day, week, month, I have created something amazing that gave me purpose! So be sure to join me these next 12 weeks where I will be coping with my Scoliosis, Chronic Pain, Anxiety and Depression.
Find me, Jo of Jo’s Crafty Hook Designs at any one of these places listed below! Subscribe to my email; follow me on Etsy, Instagram and Twitter; favorite my patterns at Ravelry; and watch and subscribe to my video tutorials on YouTube!
Website: www.joscraftyhook.com
Etsy Shop: www.etsy.com/shop/JosCraftyHook
Facebook: www.facebook.com/JosCraftyHook
Facebook: www.facebook.com/JosCraftyHookDesigns
Ravelry: https://www.ravelry.com/designers/jos-crafty-hook
Instagram: www.instagram.com/joscraftyhook
Instagram: www.instagram.com/jo_bear38
Pinterest: www.pinterest.com/baird0095
Twitter: www.twitter.com/joscraftyhook
Twitter: www.twitter.com/jo_baird
YouTube: https://www.youtube.com/channel/UCk-6IB36bg4gkvaawn3xfdg
Be sure to leave a Comment or ask a question or just visit my Social Media sites listed above! Be sure to stop back by to see what Handmade Crocheted Creations my Crafty Hook has created next!
Save the Song Birds with Scrap Yarn
Save the Song Birds with Scrap Yarn
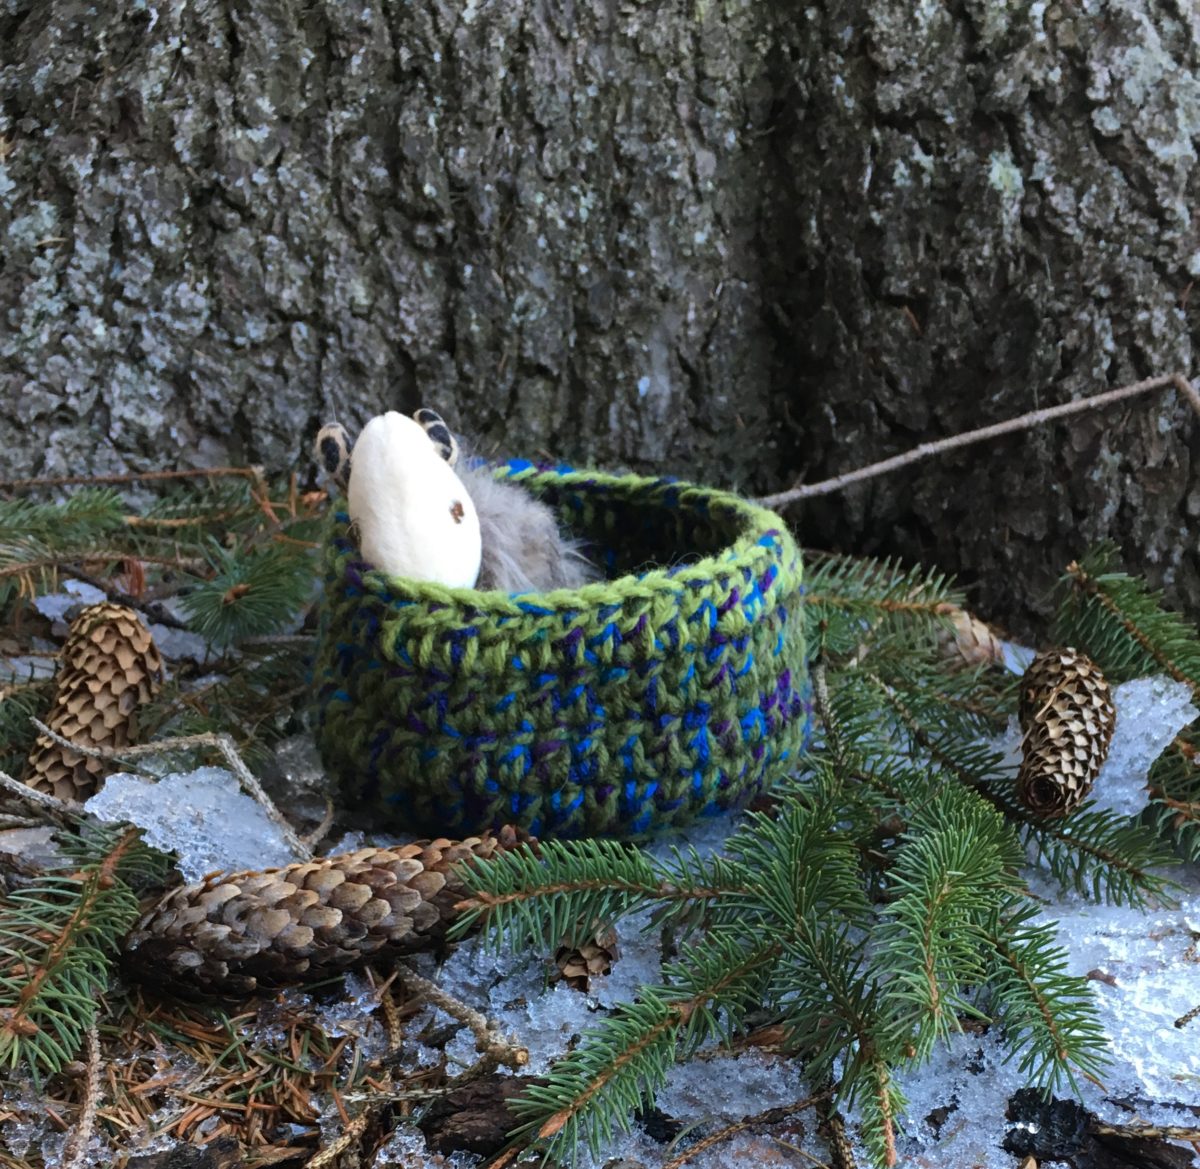
As my family will tell you, I LOVE Birds! I love Blue Jays, Cardinals, Woodpeckers, Cat Birds, and more! I could go on and on about the different types of Birds I love, but I won’t. But I do want YOU crocheters or knitters out there to LOVE Song Birds so much that you make the baby birds a Nest with YOUR talent!
This post contains affiliate links. You can make a purchase using these links that I provide where I may receive compensation (at no added cost to you.) Purchases you make will help keep my website, Etsy Shop, and my Ravelry Store going and provide quality designs just for you!

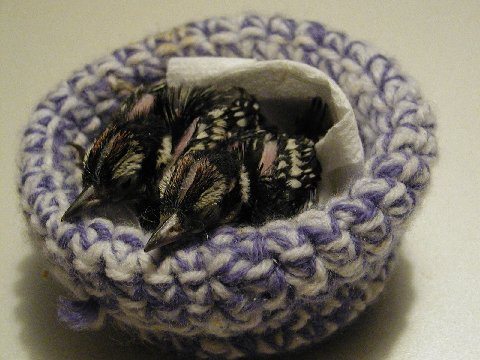
My adopted daughter,Victoria Dunn, brought this idea to my attention, I LOVED this idea SO much that I want to get YOU involved! I found a pattern last night in my Gram’s old crochet patterns that I thought would be perfect for all of us to crochet for the baby song birds. SO I am sharing it right here on my Blog AND inside my FB Group Jo’s Crafty Hook Designs! So be sure to crochet a basket (or 4), share it with us in my FB Group and I will share your pics on my website!
For those of you like me, Chronic Pain sufferer or Scoliosis Survivor, this Crochet/Knit pattern is right up your alley! It takes very little yarn, very little time, and leaves you with a HUGE sense of accomplishment!! Here is the original post and the related post as well. You can even watch a video about the group that use these nests. For those of you that would like to mail in your nest when finished, here is the address to sent it to:
Carolina Waterfowl Rescue
CWR
Po box 1484
Indian Trail NC 28079
You can use 2 strands of your Scrap Yarn! 1-1.5 ounces of each color is all you need! I know I have made 8 so far and I haven’t even put a dent in my scrap yarn.
Join shareasale.com, Earn Cash!
Materials:
#4 Worsted Weight Yarn (1-3 oz)
#4 Worsted Weight 100% Cotton Yarn (1-3 oz)
US Hook J or 5.75 mm if needing tighter stitches
US Hook K or 6.50 mm
**You will use 2 strands at one time. We want the stitches to be nice and tight, so the cold air doesn’t hurt the baby birds.**
Nest will measure 3″ wide x 3″ tall

Pattern:
ch 4
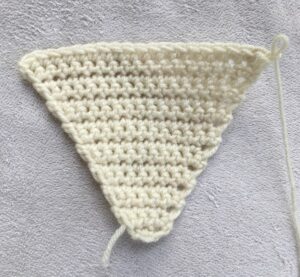
R1: 11 dc in the 4th ch from hook. Join with ss in to top of ch 3. (12 dc)
R2: Ch 3, 1 dc in the same space, 2 dc in the each stitch around. ss to join (24 stitches)
R3: Ch 3, *2 dc in the next st, 1 dc in the next st.* Repeat * around (36 st)
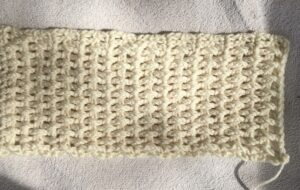
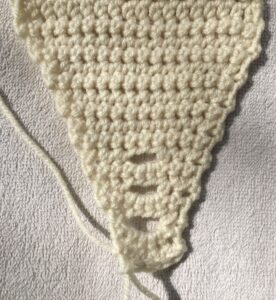
R4: Ch 3, 1 dc in the back loop only of each st around. (36 st)
R6-R8: Ch 3, 1 dc in each dc around.. (36 st)
**The ladies of the organization provided a Crochet and Knit Pattern, but the above Crochet Pattern is my own design.**
Knitted Artificial Bird Nest
Directions:
On size 5 dpn’s cast on 54 stitches using 2 or 3 strands of yarn so the nests are tightly knit and will stand up in a bowl shape on their own! (divide sts up into 18 sts/needle). Work in knit (stockingette is automatic on dpn’s) stitch for approximately 3 inches. Begin decreasing for the crown as follows:
Next row: *K 7, k 2 tog* repeat to end
Next row: *K 6, k 2 tog* repeat to end
Next row: *K 5, k 2 tog* repeat to end
Nest row: *K 4, k 2 tog* repeat to end
Next row: *K 3, k 2 tog* repeat to end
Next row: *K 2, k 2 tog* repeat to end
Next row: *K 1, k 2 tog* repeat to end
Clip off yarn leaving a tail of about 6 inches.
Using yarn needle, slide yarn needle under all stitches on needles, and draw tight to close up the end. Knot
Make sure the nest can stand up in a bowl shape on its own!
From the Designer:
- While you are at my website be sure to subscribe to my Mailing List and Newsletter. This way you will be notified when I release another crochet pattern or blog post and be alerted to Sales, Coupons, and more! Also be sure to subscribe to my new YouTube Channel to receive alerts when I upload a new Video Tutorial here!
- If you have any questions or concerns about the Ribbon Ear Warmer Crochet Pattern or any other pattern please email me at jo@joscraftyhook.com. You will find my other crochet patterns here at my website. I just posted a couple of my new crochet pattern designs, you will find them under Free Crochet Patterns.
- You are free to sell or gift the Ribbon Ear Warmers. If you sell them please reference me as the designer and where you found the Ribbon Ear Warmers Crochet Pattern. If they would like to crochet the pattern themselves, please refer them back to my here website.
- If you would like to purchase ad free pdf versions of any of my patterns, visit my Etsy Shop Items here at my website or at the Ravelry Store here. Every purchase of my patterns helps! The money earned allows me to buy more yarn so I can create and design more Handmade Crocheted Creations and crochet patterns for you to enjoy.
- I would LOVE to see your version of my Ear Warmers! You can “Hook It” at the Ravelry Store under Jo’s Crafty Hook Designs here. You can also share them at my Facebook Page Jo’s Crafty Hook Designs here! You can also post your version at any of my Social Media sites listed below! If you share your version please use the hashtag #ribbonearwarmers or #twistedearwarmers or #jostwisted. Thank you!
- Comments, Questions, and Feedback are always welcome here at my website, at my FB Pages & Group, and any of my Social Media Sites.
Thank you for scrolling down here to see who our Facebook Group Crochet-A-Long with Us’s next CAL will be and who will be doing it! Natalia Johnson of nataliscrochet will be hosting her CAL 4/6 -4/13/2019. You can check her out ahead of time by finding her here on Facebook and her crochet patterns here at the Ravelry Store.
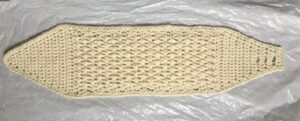
Ribbon Ear Warmers Free Crochet Pattern
In today’s post I’d like to share with you the Ribbon Ear Warmers Free Crochet Pattern. It is called Ribbon because the ear warmers design used a version of the Rib Stitch or Waffle Stitch.
This post contains affiliate links. You can make a purchase using these links that I provide where I may receive compensation (at no added cost to you.) Purchases you make will help keep my website, Etsy Shop, and my Ravelry Store going and provide quality designs just for you!
You can find my Ribbon Ear Warmers in the Crochet Flower Roundup. You can find crocheted flowers from 10 other crochet designers on my website. You will find either free or paid patterns from these 10 designers. Click on the image below and you will be directed to the Crochet Flower Roundup!

In this pattern you will find left handed video and picture tutorials to go along with this pattern. I even designed the flower that is attached to my version of my pattern. I hope you enjoy it!
**If you like what you have read here, be sure to sign up for my Newsletter. You will be notified the next time I release a post, have a crochet pattern sale or giveaway, and more. Sign up below.**
[yikes-mailchimp form=”1″]
Now, let’s get started!

Materials:
US Hook I/5.50 mm
US Hook H/5 mm
150 yards of 5 ply Bulky Yarn
25 yards of 4 ply Worsted Weight Yarn
1 inch Button
Scissors
Tapestry Needle
Size:
5” Height
21.5”-22.5” Length
Gauge:
US Hook I/5.50 mm
4 HDC x 2 Rows = 1 inch
Abbreviations:
CH = Chain
SL ST = Slip Stitch
SC = Single Crochet
SC2TOG = Single Crochet 2 Together
FPDC = Front Post Double Crochet
BPDC = Back Post Double Crochet
WS = Waffle Stitch
Notes:
Ch 1 does NOT count as a stitch
Ch 2 does NOT count as a stitch
SC2TOG instructions on YouTube here.
FPDC & BPDC instructions on YouTube here.
Special Stitches:
Front Post Double Crochet – Double Crochet going around the Front Post of the DC in the Previous Row.
Back Post Double Crochet – Double Crochet going around the Back of the DC in the Previous Row.
SC2TOG – Crochet 2 single crochets together.
Waffle Stitch – Alternating FPDC and BPDC
My Left Handed Video Tutorials:
Front Post Double Crochet
Ear Warmers Pattern:
R1: ch 2, 3 sc in 2nd ch from hook (3 sc) Turn
R2: ch 1, 2 sc in 1st st, sc, 2 sc in last st. (5 sc) Turn
R3: ch 1, sc across. (5 sc) Turn
R4: ch 1, 2 sc in 1st st, sc in next 3 st, 2 sc in last st. (7 sc) Turn
R5: ch 1, sc across. (7 sc) Turn
R6: ch 1, 2 hdc in 1st st, hdc in next 5 st, 2 hdc in last st. (9 sc) Turn
R7: ch 1, sc across. (9 sc) Turn
R8: ch 1, 2 hdc in 1st st, hdc in next 7 st, 2 hdc in last st. (11 sc) Turn
R9: ch 1, sc across. (11 sc) Turn
R10: ch 1, 2 hdc in 1st st, hdc in next 9 st, 2 hdc in last st. (13 sc) Turn
R11: ch 1, sc across. (13 sc) Turn
R12: ch 1, 2 hdc in 1st st, hdc in next 11 st, 2 hdc in last st. (15 sc) Turn
R13: ch 1, sc across. (15 sc) Turn
R14: ch 1, 2 hdc in 1st st, hdc in next 13 st, 2 hdc in last st. (17 sc) Turn
R15: ch 1, sc across. (17 sc) Turn
R16: ch 1, 2 hdc in 1st st, hdc in next 15 st, 2 hdc in last st. (19 sc) Turn
R17: ch 1, sc across. (19 sc) Turn
Should Measure 5 inches before R18.
R18: ch 1, hdc in each st across. Turn (19 hdc)
R19: ch 1, dc in each st across. Turn (19 dc)
R20: ch 2, dc in first 2 st, *fpdc in next st, bpdc in next st (Waffle Stitch made)* Repeat from * to * across to last 2 st, dc in last 2 dc. Turn (19 st)
R21: ch 2, dc in first 2 st, *alernate WS from previous Row.* Repeat from * to * across to last 2 st, dc in last 2 dc. Turn (19)
Repeat Waffle Stitch in R20-21 or until the Waffle Stitch measures 11.5 inches. End with R21.
Ribbed Stitches should measure 11.5 inches from R18.
Decrease Rows
R1: ch 1, dc in each st across. Turn (19 dc)
R2: ch 1, hdc in each st across. Turn (19 hdc)
R3: ch 1, sc in each st across. Turn (19 sc)
R4: ch 1, sc2tog, sc in next 15 st, sc2tog. Turn (15 sc + 2 sc2tog)
R5: ch 1, sc in each st across. Turn (17 sc)
Making of Button Holes
R6: ch 1, sc2tog, sc in next 13 st, sc2tog. Turn (13 sc + 2 sc2tog)
R7: ch 1, sc in each st across. Turn (15 sc)
R8: ch 1, sc2tog, sc in next 11 st, sc2tog. Turn (11 sc + 2 sc2tog)R9: ch 1, sc in each st across. Turn (13 sc)
R9: ch 1, sc2tog, sc in next 9 st, sc2tog. Turn (9 sc + 2 sc2tog)
R10: ch 1, sc in each st across. Turn (11 sc)
R11: ch 1, sc2tog, sc in next 2 st, ch 3, sk 3 st, sc in next 2, sc2tog. Turn (4 sc + 2 sc2tog + ch 3)
R12: ch 1, sc in next 3 st, place 3 sc across ch 3, and sc in last 3 st. Turn (9 sc)
R13: ch 1, sc2tog, sc in next sc, ch 3, sk 3 st, sc in next sc, sc2tog. Turn (2 sc + 2 sc2tog + ch 3)
R14: ch 1, sc in next 2 sc, place 3 sc across ch 3, sc in last 2 sc. Turn (7 sc)
R15: ch 1, sc2tog, ch 3, sk 3 st, sc2tog. Turn (2 sc2tog + ch 3)
R16: ch 1, sc in 1st sc, sc across ch 3, sc in last sc. Turn (5 sc)
R17: ch 1, sc across. (5 sc) Do NOT turn
Should measure 5 inches from the body of the ear warmers when finished.
Border
Ch 1, sc in each end row and stitch evenly around the ear warmers.
sl st in 1st sc made.
Fasten off and weave in ends with Tapestry Needle.
Sew a button onto R2-R3 at beginning of Ear Warmers, being sure to line up with Button Holes made at R6-R18 of Decrease Rows
Below you will find a crochet pattern for a Flower. You can attach it to the Ear Warmers or leave it off, it is up to you.
Ribbon Ear Warmers Flower Pattern
Materials:
US Hook H/5.00 mm
25 yards of 4 ply Worsted Weight Yarn
1 inch Button
Scissors
Tapestry Needle
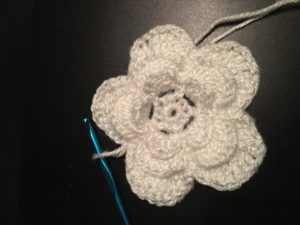
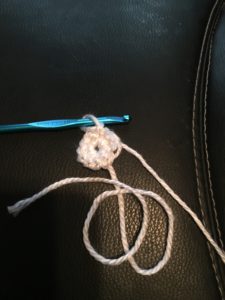
1st Layer of Flower
R1: Make a Slip Knot, leaving a long tail for attaching to Ear Warmers. Ch 1, 10 sc in the ch 1 loop, ss in 1st sc to join. 10 sc
R2: ch1, sc in the same stitch, *ch 3, skip the next stitch, sc in the next st* Repeat from * to * until you have 5 Ch 3 spaces, ss into 1st sc. You will work in the ch 3 loops in R3.
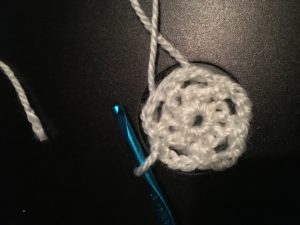
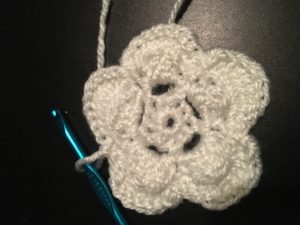
R3: *sc in ch 3, hdc, 2 dc, hdc, sc in the ch 3 space* Repeat from * to * until you have 5 petals. Ss in sc to join.
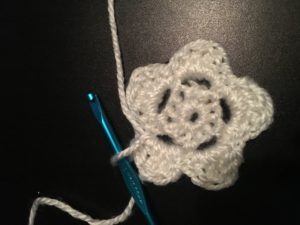
2nd layer of flower
R4: Ch 5, *sc in 1st sc on next petal, ch 5* Repeat from * to * until you have 5 chain 5 spaces. Ss in 1st ch 5 space.
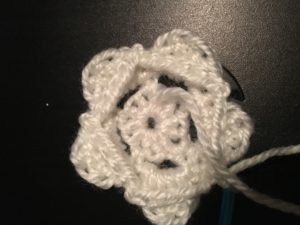
R5: *ch 1, *sc, 2 hdc, 5 dc, 2 hdc, sc in the chain 5.* Repeat from * to * until you have 5 petals. Ss in 1st sc.
3rd layer of flower
R6: ch 1 *ss in 1st sc of petal, ch 6* Repeat from * to * until you have 5 ch 6 spaces. Ss in 1st ch 6 to join.
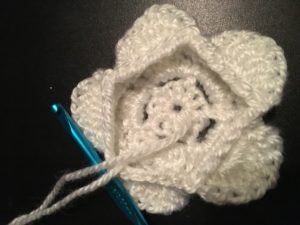
R7: ch 1 *sc, 1 hdc, 2 dc, 7 tc, 2 dc, 1 hdc, sc in the chain 6 space.* (1st petal made) Repeat from * to * until you have 5 petals. Ss in 1st sc to join. Leave a long tail for attaching to Ear Warmers.
Leave a long tail for attaching to Ribbon Ear Warmers. Fasten Off.
Attach Flower to Ribbon Ear Warmers.
Sew 1″ Button to the starting end of the ear warmers.

Thank you for your interest in the Ribbon Ear Warmers Crochet Pattern! If you haven’t already, be sure to sign up for my Newsletter! I have so much more I want to share with you! Please sign up below.
[yikes-mailchimp form=”1″]
You can find all of the crochet patterns at any of the locations below:
Find me, Jo of Jo’s Crafty Hook Designs at any one of these places listed below!
Website: www.joscraftyhook.com
Ravelry: https://www.ravelry.com/designers/jos-crafty-hook
LoveCraft: https://www.lovecrafts.com/en-gb/user/maker/1bee78ea-a464-4c9b-b781-59cfc74b1a6c
Etsy Shop: www.etsy.com/shop/JosCraftyHook
Facebook Group: Jo’s Crafty Hook-ers
Facebook Page: www.facebook.com/JosCraftyHook
Facebook Page: www.facebook.com/JosCraftyHookDesigns
Instagram: www.instagram.com/joscraftyhook
Pinterest: www.pinterest.com/baird0095
Twitter: www.twitter.com/joscraftyhook
YouTube: https://www.youtube.com/channel/UCk-6IB36bg4gkvaawn3xfdg
If you would like to make a donation to Jo’s Crafty Hook and help me with the costs of running my website, crocheting new designs I would greatly appreciate it!
From the Designer:
- While you are at my website be sure to subscribe to my Newsletter. This way you will be notified when I release another crochet pattern or blog post and be alerted to Sales, Coupons, and more! Also be sure to subscribe to my new YouTube Channel to receive alerts when I upload a new Video Tutorial here!
[yikes-mailchimp form=”1″]
- If you have any questions or concerns about the Ribbon Ear Warmer Crochet Pattern or any other pattern please email me at jo@joscraftyhook.com. You will find my other crochet patterns here at my website. I just posted a couple of my new crochet pattern designs, you will find them under Free Crochet Patterns.
- You are free to sell or gift the Ribbon Ear Warmers. If you sell them please reference me as the designer and where you found the Ribbon Ear Warmers Crochet Pattern. If they would like to crochet the pattern themselves, please refer them back to my here website.
- You can find all of the crochet patterns at any of the locations below:Ravelry
Lovecraft
EtsyEvery purchase of my patterns helps! The money earned allows me to buy more yarn so I can create and design more Handmade Crocheted Creations and crochet patterns for you to enjoy. - I would LOVE to see your version of my Ear Warmers! You can “Hook It” at the Ravelry Store under Jo’s Crafty Hook Designs here. You can also post your version at any of my Social Media sites listed above! If you share your version please use the hashtag #ribbonearwarmers or #ribbonheadband #twistedearwarmers or #jostwisted. Thank you!
- Comments, Questions, and Feedback are always welcome here at my website or at any of my Social Media Sites.
Wrapped In Love Set Crochet Pattern
The Wrapped In Love Set is being a part of the Warm my Heart Blog Hop being hosted by Fosbas Designs and Frankie Kate. We are wanting to share free premium crochet patterns that your loved ones can feel love, warmth, and security.
The Warm my Heart Blog Hop will run from December 1 – 20, 2022. Each day you will find 2 new free crochet patterns you can take advantage of.
This post contains affiliate links. If you make a purchase using these links I may receive compensation (at no added cost to you.)

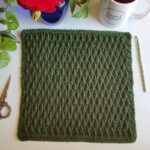
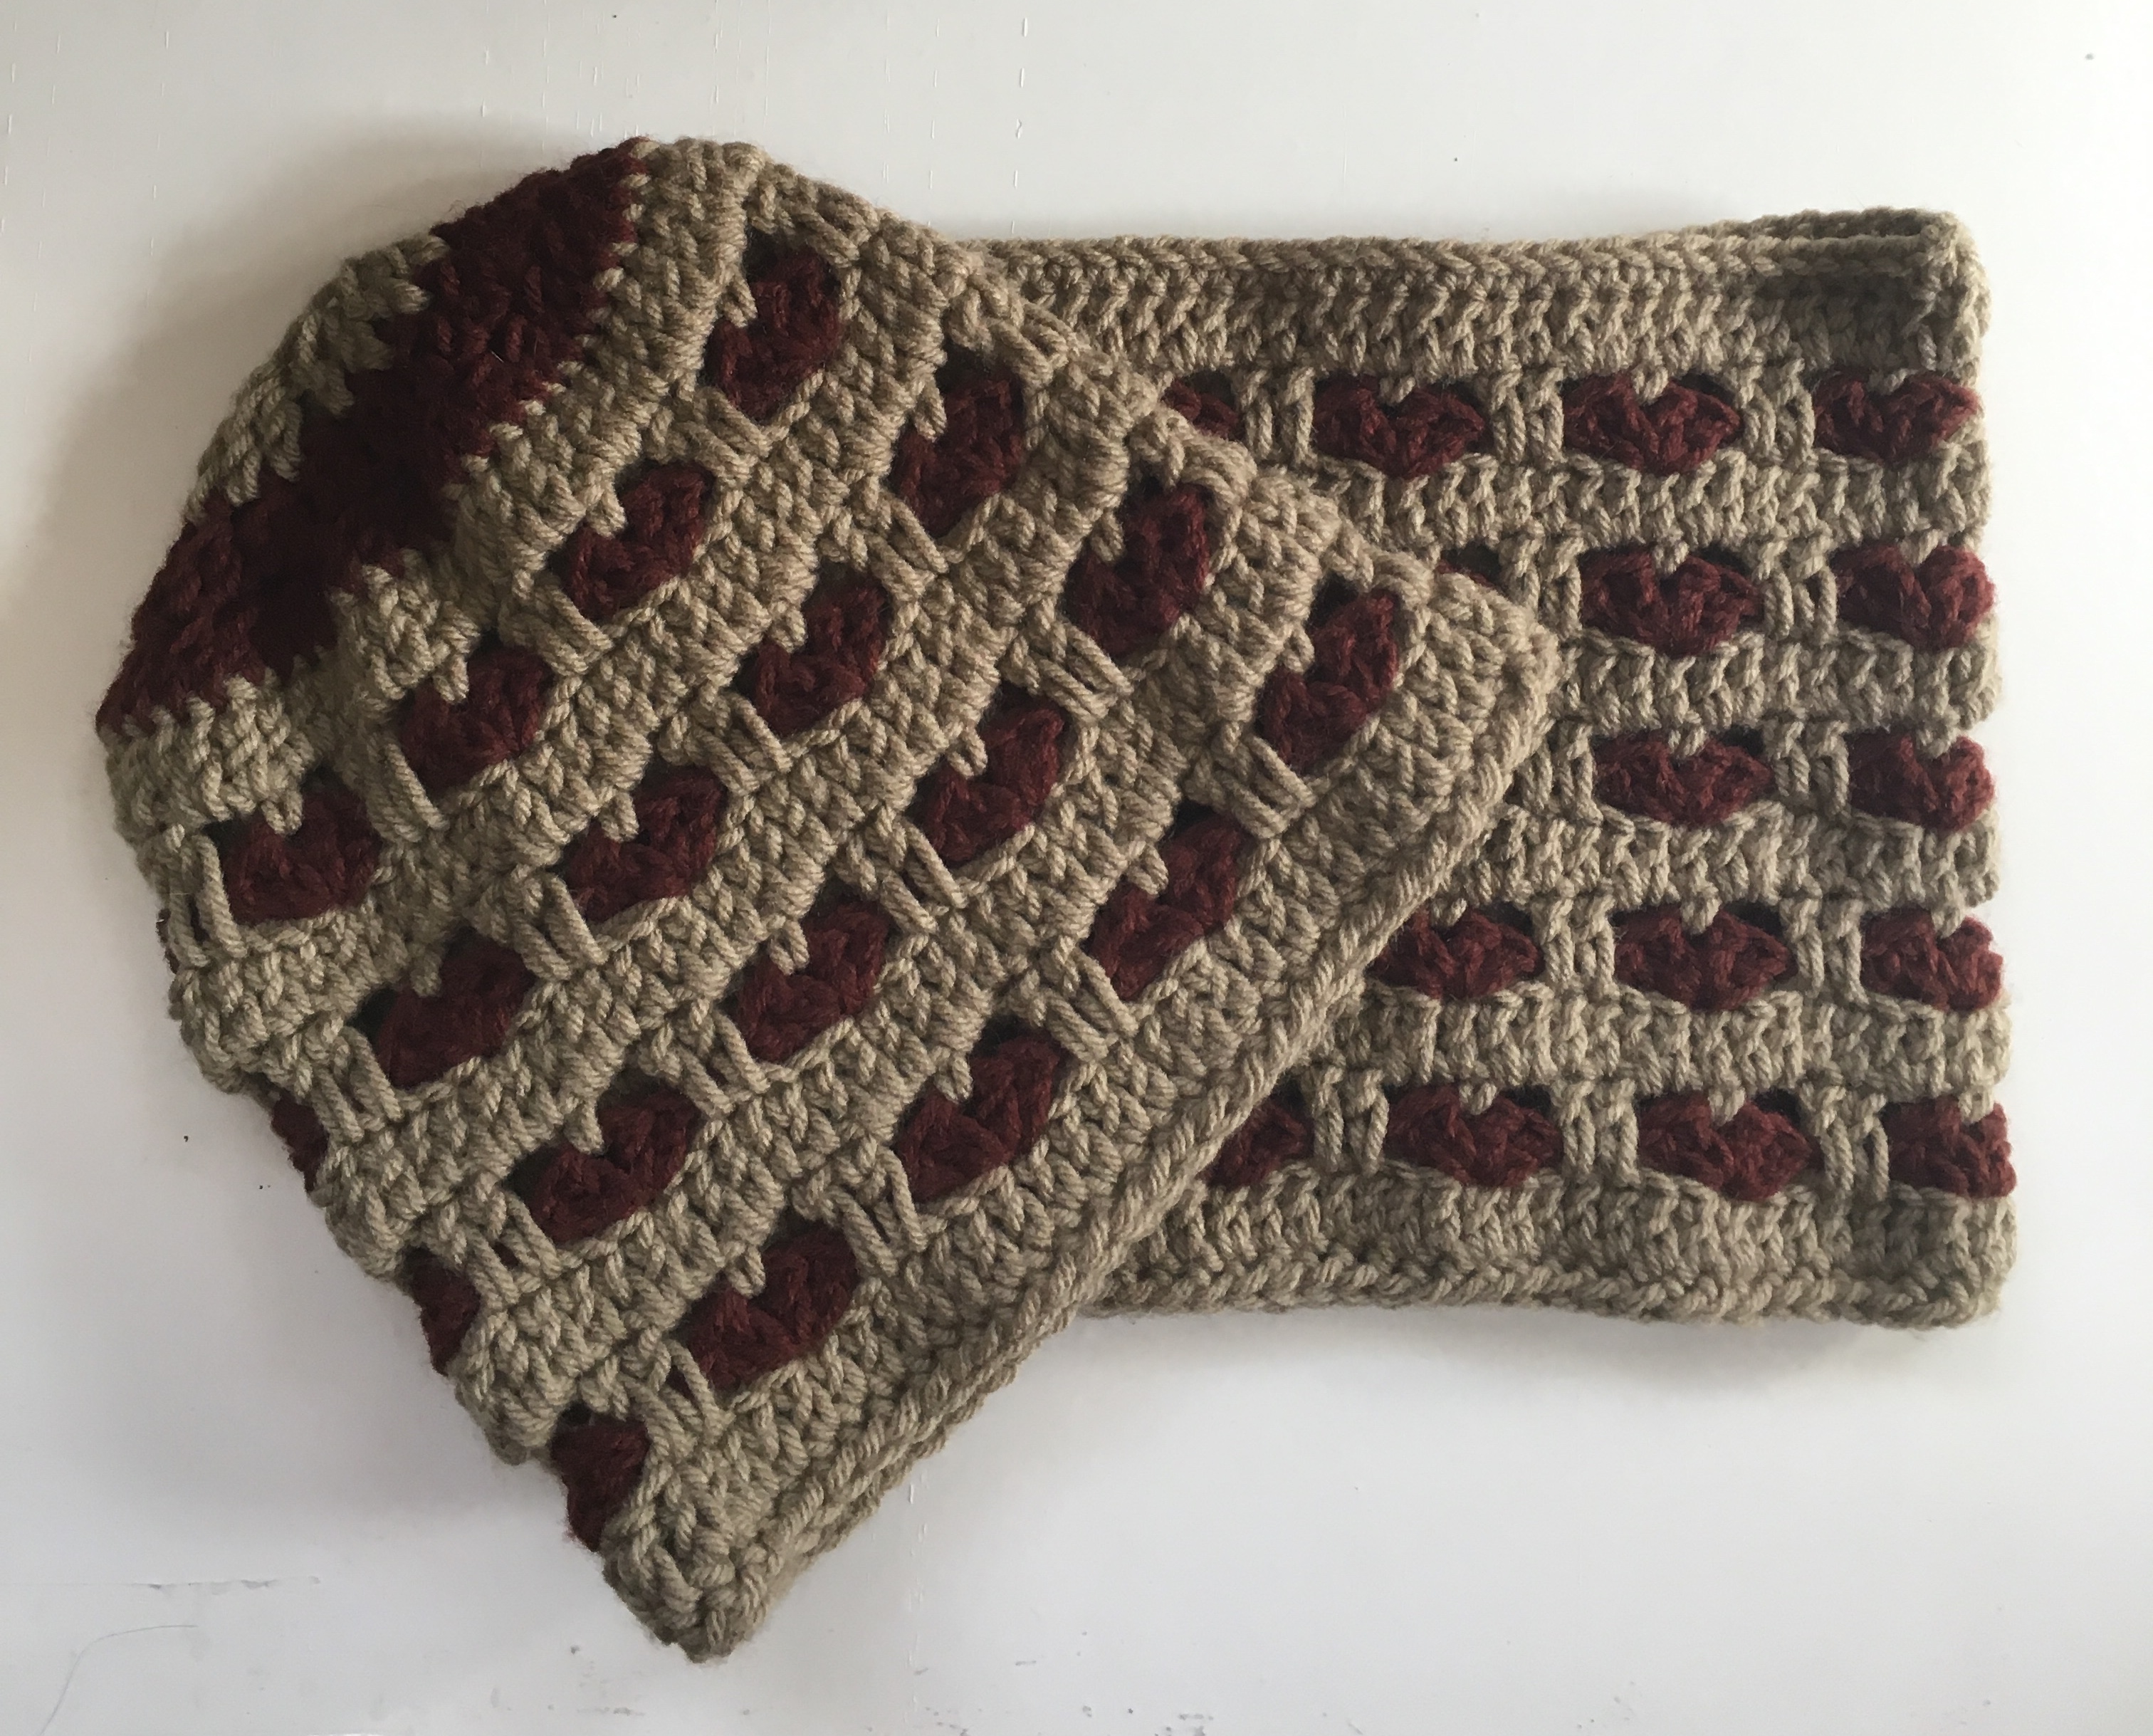
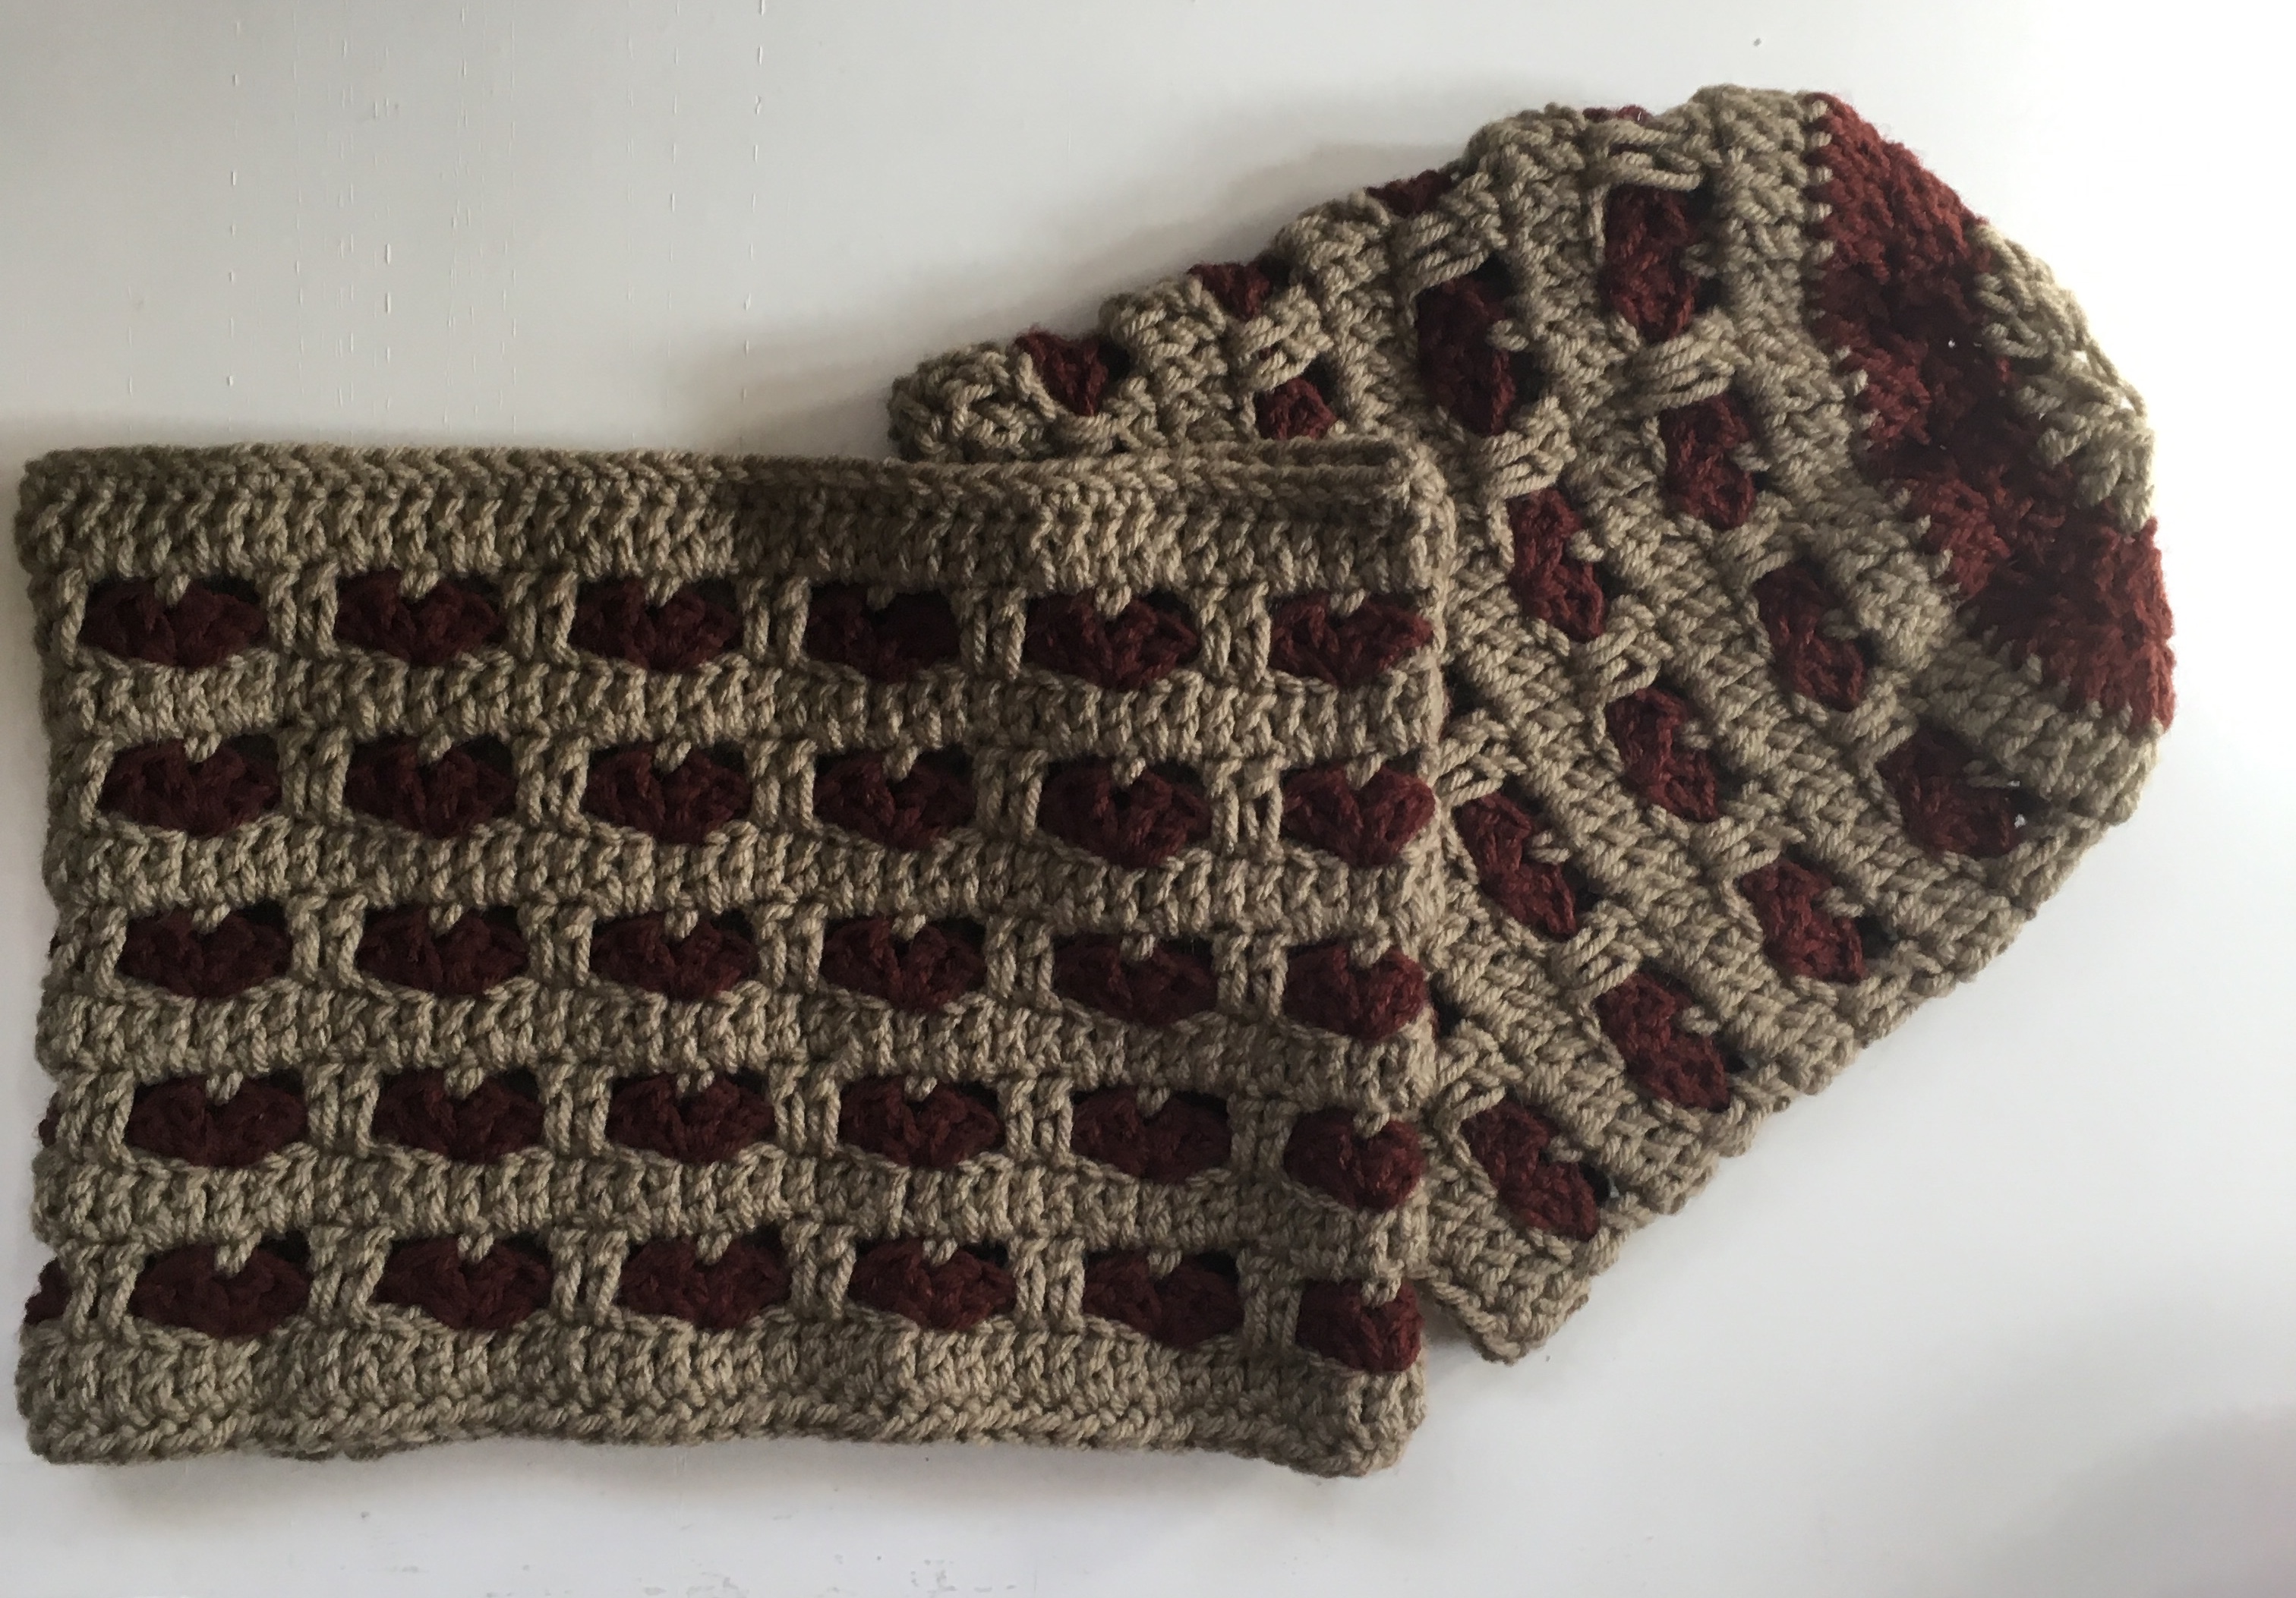
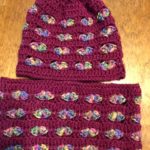
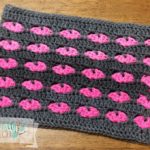
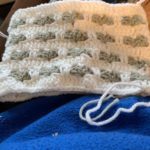
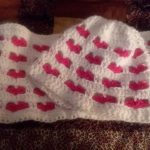
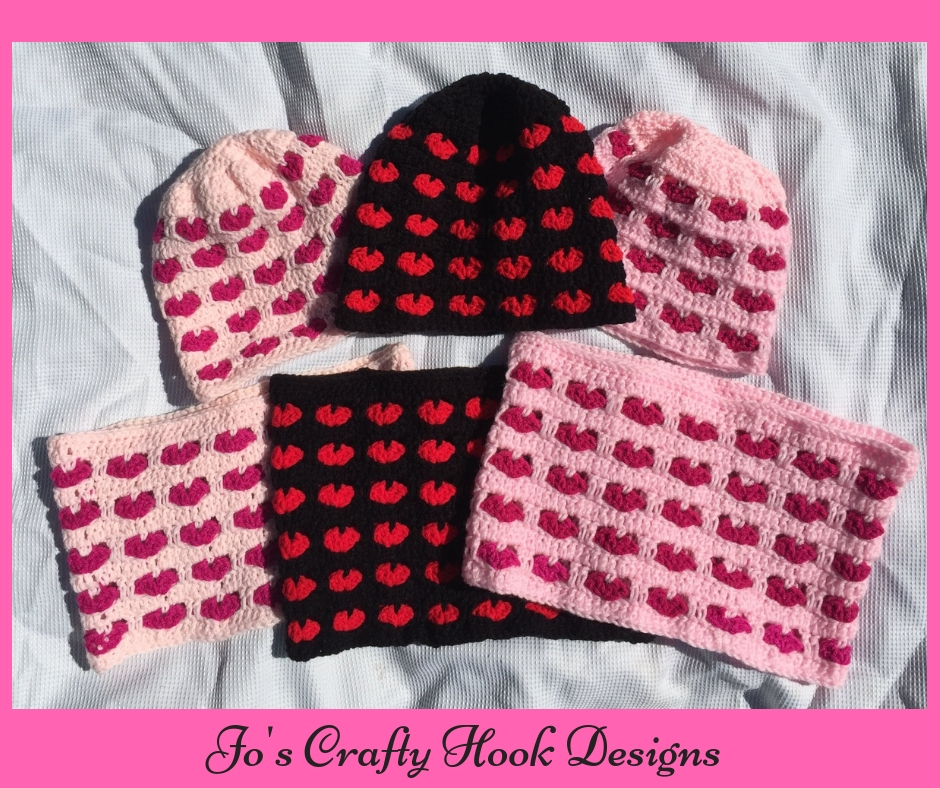
You can get a free PDF copy of the premium crochet pattern for my Wrapped in Love Set on December 20, 2022. My Wrapped in Love Set contains a Beanie and a Cowl crochet patterns that you can wrap them in love and warmth. There are 3 sizes to choose from: Child, Women, and Men.
Inside the premium crochet pattern you will find helpful Video Tutorial for every round/row of the Child Size Hat on my YouTube Channel below.
My Wrapped In Love Set crochet pattern has been a hit since it was designed in 2019. Because of this I designed the Wrapped in Love eBook. I have added patterns can find multiple sized patterns for fingerless gloves; headband, tank tops and more. You also can check them out individually at my Ravelry Store.

During the month of December you can take advantage of my Wrapped in Love eBook for $10. You will get 7 premium crochet patterns that each contain multiple sizes to choose from. Take advantage of the 50% off discount as part of the Warm my Heart Blog Hop.
In the mean time you can find a FREE crochet pattern below of the Child Size Hat & Cowl of the Wrapped In Love Set.
Materials:
US Hook H or 5.0 mm
150 yards of MC #4 Worsted Weight Yarn
75 yards of CC #4 Worsted Weight Yarn
Scissors
Tapestry Needle
Gauge Swatch:
Hook U.S. H/5.0 mm
16 DC x 7 Rows = 4”
Size:
Crown = 5″
Width = 7″
Height = 7″
Circumference = 23″
Abbreviations & Stitches Used:
MC = Main Color
CC = Contrasting Color Chain 18. R1: DC in 4th ch from Hook
Ch Sp = Chain Space and in each st across. Turn (16 DC)
St = Stitch R2-R7: Ch 3, dc in each st across. (16 DC)
SC = Single Crochet When you finish the 7 Rows your Swatch
DC = Double Crochet should be 4 inches wide by 4 inches in height.
SS = Slip Stitch
FSC = Foundation Single Crochet (YouTube video here.)
LDC = Long Double Crochet (YouTube has GREAT instructional videos!)
DC2TOG = Double Crochet 2 Together (click on YouTube for instructions)
Beg Shell = Ch 3, DC, ch 1, 2 DC all in the same stitch
Shell = 2 DC, ch 1, 2 DC all in same stitch
***Drop Stitch = DS (YouTube has a video here.)
Notes:
Hat and Cowl are worked in the Round. Slip stitch into the 1st stitch, the chain space or stitch specified.
Ch 3 does count as a DC
Shells made create the Heart
This hat and cowl are Reversible and can be worn either way.
There will be a Gap between Hearts on R3.
*** If you do NOT want them to be Reversible, you can use the Drop Stitch technique
Hat–Child Size:
When making slip knot leave a 3” tail for sewing FSC row closed.
R1: With MC FSC 63. S s in top of ch 3 to join. (63 FSC)
R2: ch 3, dc in each st around. (63 DC) With a Tapestry Needle sew the FSC row closed.
Change to CC to make Shells/Hearts or Use the Drop Stitch
R3: Attach Hot Pink in top of ch 3. [Ch 3, dc, ch 1, 2 dc all in same stitch. (Beg Shell) made] ch 2, skip 6 st, 2 dc, ch 1. 2 dc all in the same stitch. (Shell made). *Ch 2, skip 6 st, Shell in next st.* Repeat from * to * 7 more times. Ch 2 and ss in top of ch 3 of Beg Shell. (9 Shells)
Change to MC or Use the Drop Stitch
R4: ss in ch 1 sp of Beg Shell, ch 1, sc in same st., *ch 2, skip 2 dc from previous row, 1 ldc in next 2 st of previous Row, ch 2, sc in ch 1 space of next Shell.* Repeat from * to * 7 more times. Ss in sc to join.
R5: ch 3, dc in each st around. (63 DC)
Change to CC to make Shells/Hearts or Use the Drop Stitch
R6-R14: Repeat R3-R5 ending with R4 and Light Pink Yarn.
R15-R17: ch 3, dc2tog around. Ss in top of ch 3 to join.
Fasten off. Leave a long piece of yarn and weave R16 closed. Use Tapestry Needle to weave in ends.
Cowl–Child Size:
When making slip knot leave a 3” tail for sewing FSC row closed.
R1: With MC and H Hook FSC 84. Ss in top of ch 3 to join. (84 FSC)
R2: ch 3, dc in each st around. (84 DC) With a Tapestry Needle sew the FDC row closed.
Change to CC to make Shells/Hearts or Use the DS
R3: Attach CC in top of ch 3. [Ch 3, dc, ch 1, 2 dc all in same stitch. (Beg Shell) made] ch 2, skip 6 st, 2 dc, ch 1. 2 dc all in the same stitch. (Shell made). *Ch 2, skip 6 st, Shell in next st.* Repeat from * to * 10 more times. Ch 2 and ss in top of ch 3 of Beg Shell. (12 Shells)
Change to MC or Use the DS
R4: ss in ch 1 sp of Beg Shell, ch 1, sc in same st., *ch 2, skip 2 dc from previous row, 1 ldc in next 2 st of previous row, ch 2, sc in ch 1 space of next Shell.* Repeat from * to * 10 more times. Ss in sc to join. (12 Shells)
R5: ch 3, dc in each st around. (84 DC)
Change to CC to make Shells/Hearts or Use the DS
R6-R17: Repeat R3-R5 ending with R5 and MC.
R18: ch 1, sc in same st and each st around, ss in 1st sc to join. (84 sc)
Fasten off.
Use Tapestry Needle to weave in ends.
Wrapped In Love CAL 2019

As a Scoliosis Survivor I want to help you to be able to crochet or find some kind of activity that you can do to help YOU cope. Crocheting helps with Anxiety, Depression, OCD, and many other diseases. Most of my crochet patterns are created and designed to be quick and easy to give you a way to help you feel a great sense of accomplishment!
Find me, Jo of Jo’s Crafty Hook at the places listed below.
Email: j.o@joscraftyhook.com
Facebook Group Jo’s Crafty Hookers
Facebook Group Jo’s Crafty Hook Designs
Facebook Page Jo’s Crafty Hook
Facebook Page: Crochet Designer Community
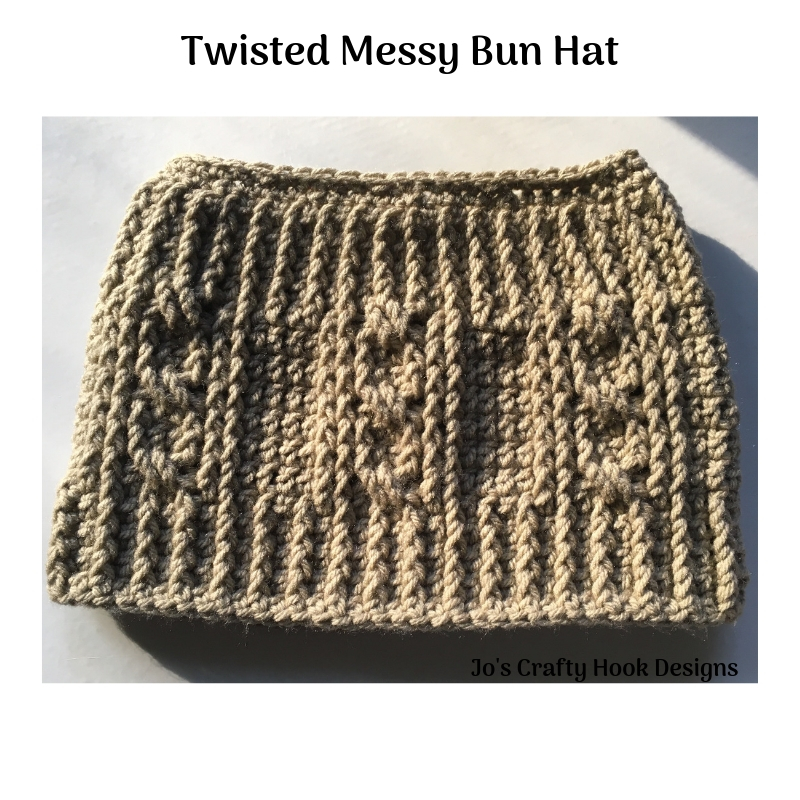
Twisted Messy Bun Hat Crochet Pattern
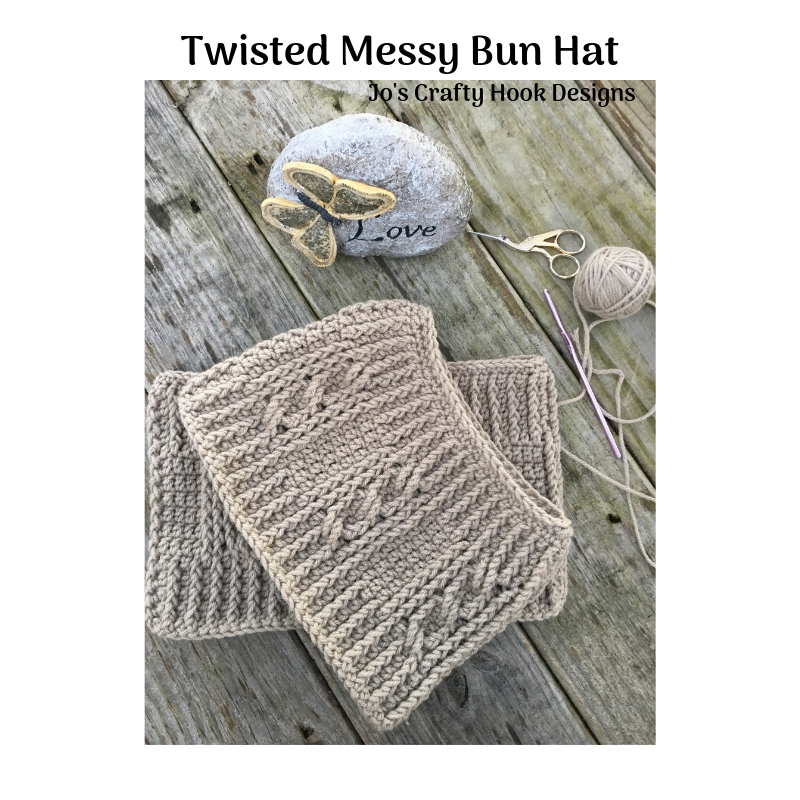
Today I will be sharing with you my Twisted Messy Bun Hat Crochet Pattern. I am SO excited about bringing you one of the designs in my Twisted Head Gear Line! That’s right, ONE of the head gear of my Twisted line.
This post contains affiliate links. If you make a purchase using these links I may receive compensation (at no added cost to you.)
This is a FREE crochet pattern from my Twisted Head Gear Line. This line of Head Gear will be Unisex patterns. I know what you are thinking “A messy bun hat for Men?!?” Yes, absolutely! Any Men with long hair can wear this and any of the crochet patterns in my Twisted Head Gear Line. I have designed 5 so far and the next 6 are in production (in my head lol)!
So right now you can take advantage of this FREE version of the Twisted Messy Bun Hat in size Tween or Small Adult. You can find the rest of my designs the for this hat or any of my patterns at the Ravelry Store here. The sizes in this crochet pattern range from Newborn to Large Adult.
I have made a Video Tutorial that goes along with this pattern. You can find my Video Tutorial for the Tween or Adult Small Messy Bun Hat at my YouTube Channel. There are 3 Video Tutorials for this hat. R1-R4 are available below.
This hat would also be good for chronic pain sufferers or those with Scoliosis to do. It is not a very long pattern and it would give those who deal with chronic pain from Scoliosis, like me, a feeling of accomplishment. Crocheting is a Great tool to use if you suffer from Anxiety, Depression, OCD, and Chronic Pain. It really helps me keep my mind off of pain and it leaves me with a sense that I can still be productive.
With that being said, let’s get started! Scroll down and you will find the pattern.

Materials:
US Hook H/5.0 mm
US Hook G/4.5 mm
2.5 – 3.5 ounces of #4 Worsted Weight Yarn
Scissors
Tapestry Needle
Gauge:
US Hook H/5 mm
US Hook G/4.25 mm
US Hook H/5 mm 15 FPDC = 4 inch
Abbreviations: Notes:
CH = Chain Ch 1 does NOT count as a stitch
SS = Slip Stitch Ch 3 does count as a DC (Double Crochet)
SC = Single Crochet FPDC instructions on YouTube here.
FDC = Foundation Double Crochet FDC instructions on YouTube here.
FPDC = Front Post Double Crochet FPDC instructions on YouTube here.
FPTRC = Front Post Triple Crochet FPTRC instructions on YouTube here.
SC2TOG = Single Crochet 2 Together. SC2TOG instructions on YouTube here
FPDC & DC DEC = Front Post Double Crochet and Double Crochet Decrease.
Special Stitches:
Front Post Double Crochet – Double Crochet going around the Front Post of the DC in the Previous Row.
Front Post Triple Crochet – Front Post Triple or Treble Crochet–Yarn over (YO) hook two times. Insert hook behind post of stitch (st). YO hook, pull up a loop, four loops on hook. YO hook, pull through 2 loops, 3 loops on hook. YO hook, pull through 2 loops, 2 loops on hook. YO hook, pull through last two loops.
Single Crochet 2 Together – sc2tog also stands for Single Crochet Decrease. – insert hook into next stitch, yarn over and pull up a loop, insert hook into next stitch, yarn over and pull up a loop, yarn over and pull through all 3 loops on hook.
Front Post Double Crochet and Double Crochet Decrease – yarn over, fpdc around the next fpdc, yarn over and pull through leaving 2 loops on hook, yarn over, insert hook into the next dc, yarn over and pull through leaving 2 loops on hook, yarn over and pull through all 3 loops.
Special Notes:
- Stitch multiple after the band is 12, so if your band is too tight or too loose try going up or down in hook size instead of adjusting stitch count.
- Pattern written for: Teen/Sm Adult
- Hat Band Lengths: 19”
Small Adult Messy Bun Hat
Band: Using H Hook
R1: Fdc 72 join.
R2: Ch 3, fpdc in the next st *dc in the next st, fpdc in the next st* Repeat from * to * around. ss to join. 72 st
R3-R5: Repeat the last round (dc in dc and fpdc in fpdc). Ss to join. 72 st
Below is Part 2 Video Tutorial of the Twisted Cindy Messy Bun Hat. It contains R5-R8.
R6: Ch 3, dc in next st, *fpdc in next 2 st, skip 2 st, fptrc in the next 2 st, fptrc in each of the previous 2 skipped stitches, fpdc in next 2 st, dc in next 4 st.* Repeat from * to * around. Dc in last 2 st. ss to join. 72 st
R7-R8: Ch 3, dc in next st, *fpdc in next 3 st, dc in next 2 st, fpdc in next 3 st, dc in next 4 st.* Repeat from * to * around. Dc in last 2 st. ss to join 72 st
Below is the Part 3 of the Twisted Cindy Messy Bun Hat. It is the final Video Tutorial needed to Finish the Messy Bun Hat.
R9: Ch 3, dc in next st, *fpdc in next 2 st, skip 2 st, fptrc in the next 2 st, fptrc in each of the previous 2 skipped stitches, fpdc in next 2 st, dc in next 4 st.* Repeat from * to * around. Dc in last 2 st. ss to join. 72 st
R10-R11: Ch 3, dc in next st, *fpdc in next 3 st, dc in next 2 st, fpdc in next 3 st, dc in next 4 st.* Repeat from * to * around. Dc in last 2 st. ss to join 72 st
R12: Ch 3, dc in next st, *fpdc in next 2 st, skip 2 st, fptrc in the next 2 st, fptrc in each of the previous 2 skipped stitches, fpdc in next 2 st, dc in next 4 st.* Repeat from * to * around. Dc in last 2 st. ss to join. 72 st
Switch to G Hook
R13-R15: Ch 3, fpdc in the next st *dc in the next st, fpdc in the next st* Repeat from * to * around. ss to join. 72 st
Decrease Row
R16: Ch 3, fpdc in fpdc and dc in dc 2 times, fpdc and dc dec, *fpdc in fpdc and dc in dc in the next 10 st, fpdc and dc dec* Repeat from * to * around. Ss to join.
Top of the Hat:
R1-R2: ch 1, sc in same sp and in the next 3 st, sc2tog, *sc in the next 4 st., sc2tog,* Repeat from * to * around. Ss to join
Fasten off and weave in ends.

You can find my crochet patterns at these locations listed below.
Find me, Jo of Jo’s Crafty Hook Designs at any one of these places listed below!
Website: www.joscraftyhook.com
Facebook: www.facebook.com/JosCraftyHook
Facebook: www.facebook.com/JosCraftyHookDesigns
Instagram: www.instagram.com/joscraftyhook
Pinterest: www.pinterest.com/baird0095
Twitter: www.twitter.com/joscraftyhook
YouTube: https://www.youtube.com/channel/UCk-6IB36bg4gkvaawn3xfdg
- From the Designer:
- Thank you for checking out the Twisted Messy Bun Hat Crochet Pattern! Check out my other GREAT patterns listed above. While you are at my website be sure to subscribe to my Newsletter. This way you will be notified when I release another pattern, have a sale, or write a blog post!
[yikes-mailchimp form=”1″]
- If you have any questions or concerns about this pattern or any other pattern please email me at jo@joscraftyhook.com
- You are free to sell or gift the hat, please do NOT claim this design as your own. Please forward anyone who would like to do the Twisted Messy Bun Hat crochet pattern or any of my patterns to my Etsy shop, the Ravelry Store, or to my website. The web addresses for any place to connect with me are listed below.
- Every purchase of my patterns helps! It allows me to buy more yarn so I can create and design more Handmade Crocheted Creations for you to enjoy.
- I would LOVE to see your version of my Twisted Messy Bun Hat! You can “Hook It” at my Ravelry Jo’s Crafty Hook Designs here OR add a pic on my Facebook Page Jo’s Crafty Hook Designs OR at anyone of the places below that allows you to connect with me using #jostwisted, #twistedmessybunhat #twistedheadgear
- Comments, Feedback, etc. are ALWAYS welcome at my website www.joscraftyhook.com!
My Wrapped In Love Set is Being Shared
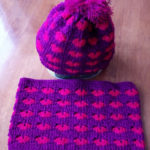
My Wrapped In Love Set is Being Shared! I am SO excited! My CAL will be starting soon and I would LOVE for you to join me, but first I have a couple of questions I would like to ask you about this Valentine’s Day. Here they are:
- Are you looking for something different to give to your Valentine this year?
- Are you looking for something different to crochet for yourself or a loved one?
- Are you wanting to make something to wrap your loved one in?
- Do you suffer from Scoliosis or Chronic Pain?
- Are you wanting to crochet, but are afraid you can’t because you think the pattern is too long?
(This post contains affiliate links. If you make a purchase using these links I may receive compensation (at no added cost to you.)
Well I have the solution right here! Join me, Joey Lea Baird or Jo of Jo’s Crafty Hook when I will hosting a CAL or Crochet-A-Long starting January 25th and sharing my Wrapped In Love Set!

The CAL I will be hosting is in the Facebook Group called Crochet-A-Long with Us. The group consists of 20 up and coming crochet pattern designers from around the world and has over 1100 members. Me and the other 19 designers got together because we wanted to share our crochet patterns with you in one place.
The pattern I will be sharing is my Wrapped In Love Set in the Crochet-A-Long with Us Group. You can read more about the story behind it here. For 10 days we will be crocheting the Hat & Cowl that I have designed specifically for that set.

Does this sound interesting? Wondering what will be going on during my Crochet A Long? Well let me tell ya:
- Discount on my pattern when you purchase it from Ravelry.
- Instructional videos in the FB Group and on YouTube for those who need Closed Caption.
- Contests throughout the CAL.
- Prizes awarded at the end of the CAL.
 Find a sponsor for your web site. Get paid for your great content. shareasale.com.
Does this sound like fun? Does this sound like something you would be interested in doing? Does this sound like something a friend would like to do? Wondering what you and/or a friend need to do to join me January 25 – February 3, 2019? Well here’s what:
- Join our Facebook Group Crochet-A-Long with Us here.
- Purchase my Wrapped In Love Set pattern from Ravelry here so you can have your supplies ready.
- Use the Coupon Code LOVECAL here.
- During January 25th and February 3rd join me and some of the other members as we crochet the Wrapped In Love Hat & Cowl together!

If you suffer from Scoliosis or Chronic Pain, joining a Facebook Group like ours would be beneficial to you as well. By joining the 20 designers and over 1100 members, you can share your work, have some fun, and maybe win some prizes along the way. Crocheting together is a way to help you cope with some of the anxiety or depression that goes along with Scoliosis and Chronic Pain. You can read more about my struggles with Scoliosis and Chronic Pain here on my website.
From Jo:
- While you are at my website be sure to subscribe to my Mailing List and Newsletter. This way you will be notified when I release another crochet pattern or blog post and be alerted to Sales, Coupons, and more!