This post contains affiliate links that appear at no cost to you.
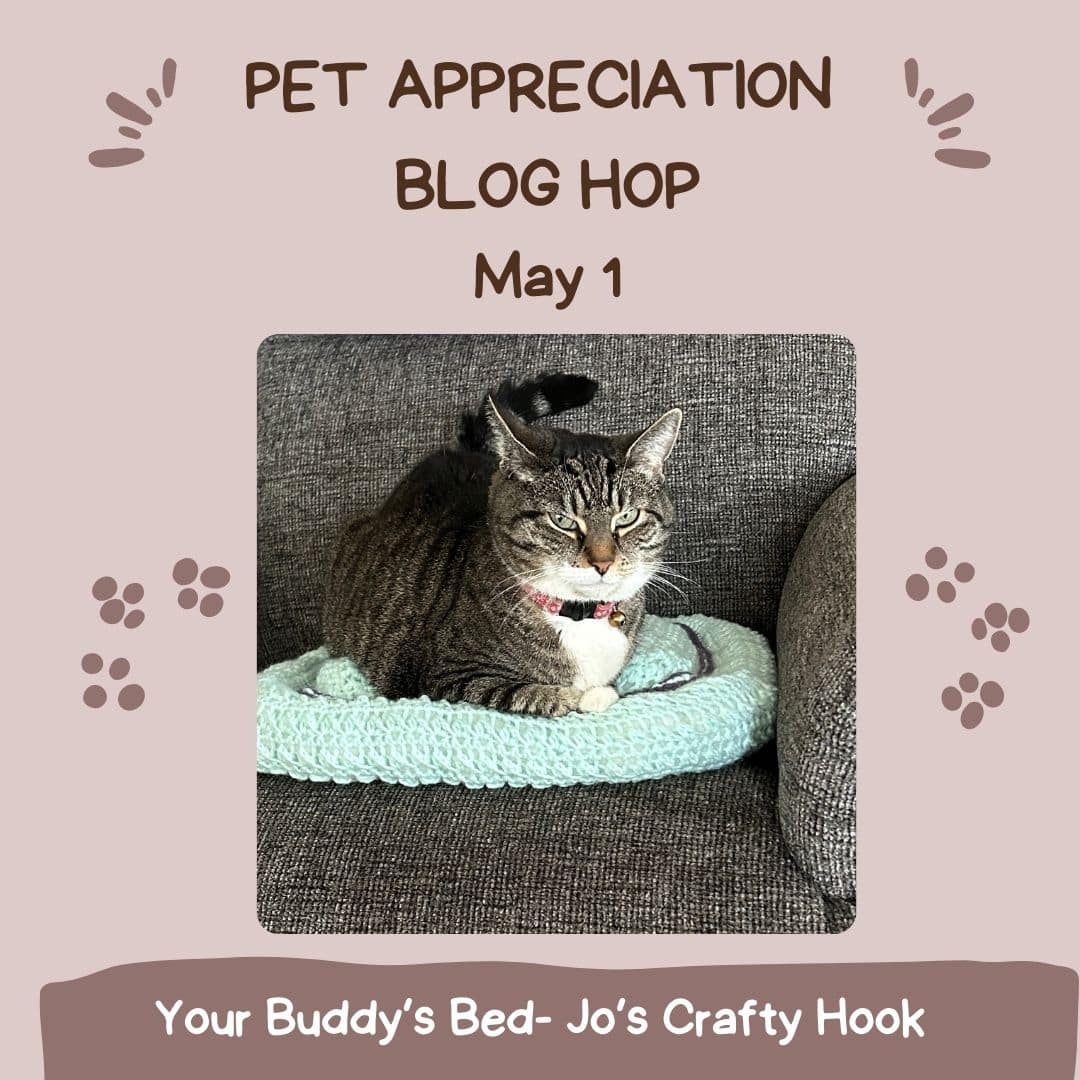
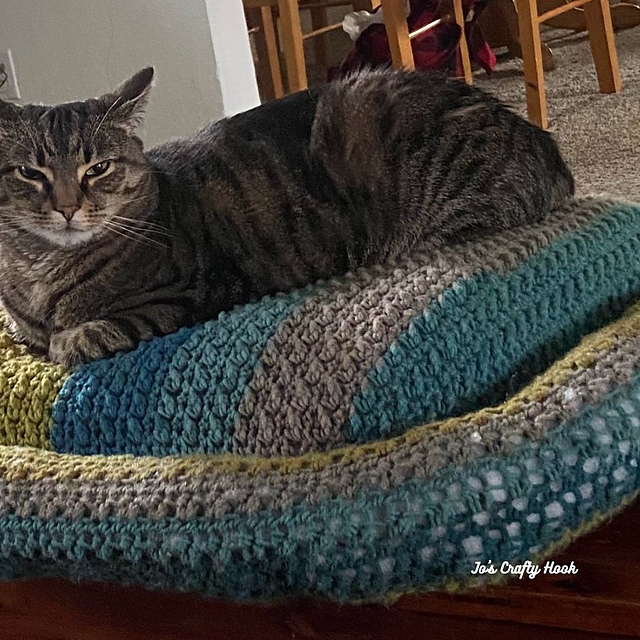
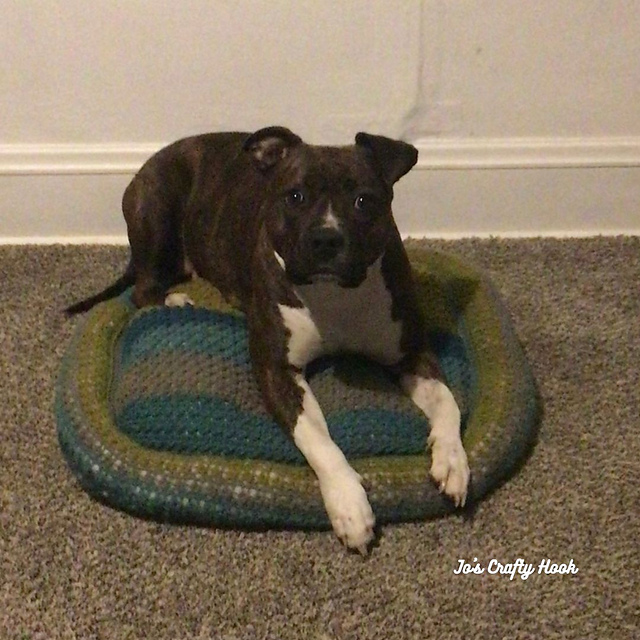
Does your cat or dog take up the whole bed? You can make Your Buddy’s Bed Crochet Pattern for Cats & Dogs and get a better night’s sleep.
When my grand-furry Freyja comes over to spend the night, she takes up the WHOLE bed! I am left with the very edge of the bed and no covers!! When I finally kick Freyja off the bed, she will curl up and sleep on her own bed.
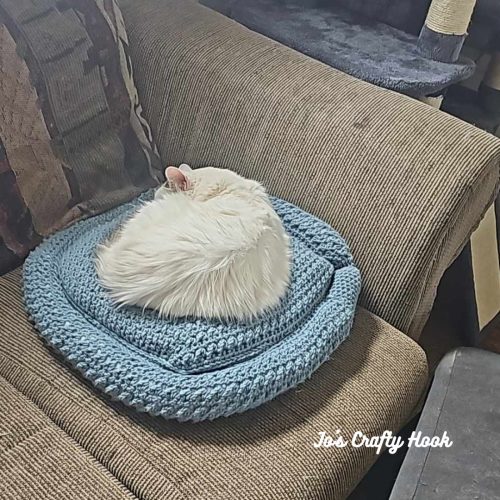
Also, when my cat Maze sleeps in the bed with she is either curled up behind my knees or she lays on top of my feet. I can now lay her bed next to my bed and I get a better nights sleep.
So I designed the Your Buddy’s Bed Crochet Pattern to help me and you get a better nights sleep.
About Your Buddy’s Bed Crochet Pattern
Your Buddy’s Bed Crochet Pattern is designed just for the cute little furry friends you have in your life. It is a woof-ing great make for your dog or cat to have a bed of their very own. There are 2 sizes to choose from, for a purr-fect fit.
I used Caron One Pound 100% Acrylic Yarn. (16 oz/453.6 g) (812 yds/742 m) in Azure for the 20” x 20” I also used Caron Big Cakes 100% Acrylic Yarn (10.5 oz/300 g) (603 yds/551 m) for the 24” x 24”
Materials: 800-1100 yards of #4 Worsted Weight Yarn US H or 5mm Crochet Hook 16 oz Pillow Stuffing
Finished Sizes: 20” x 20” 24” x 24”
The Your Buddy’s Bed Crochet Pattern uses the N-Stitch. The N-Stitch uses the basic crochet stitches, the single crochet stitch and the half double crochet stitch.
Because you are only using the single crochet and the half double crochet, the combination of stitches create a nice beautiful texture. It is also a close stitch which will keep it’s shape and will help keep the Pillow Stuffing inside.
You can find a Left Handed Version of the N-Stitch on my YouTube Channel
Ad-Free Crochet Pattern
You can find an Ad-Free Premium Copy of the Your Buddy’s Bed Crochet Pattern at my Ravelry Store and LoveCrafts for a small fee.
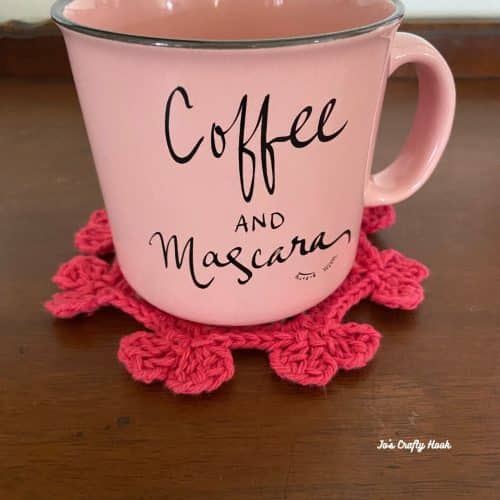
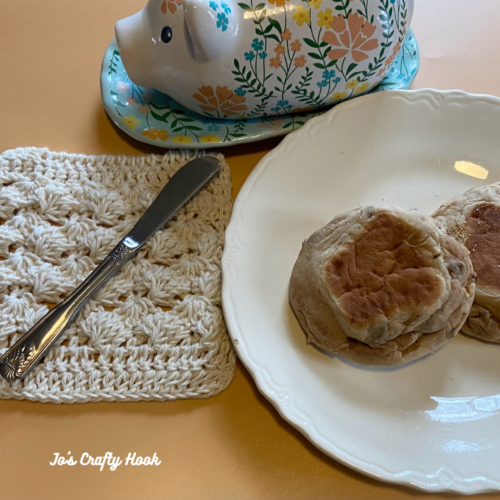
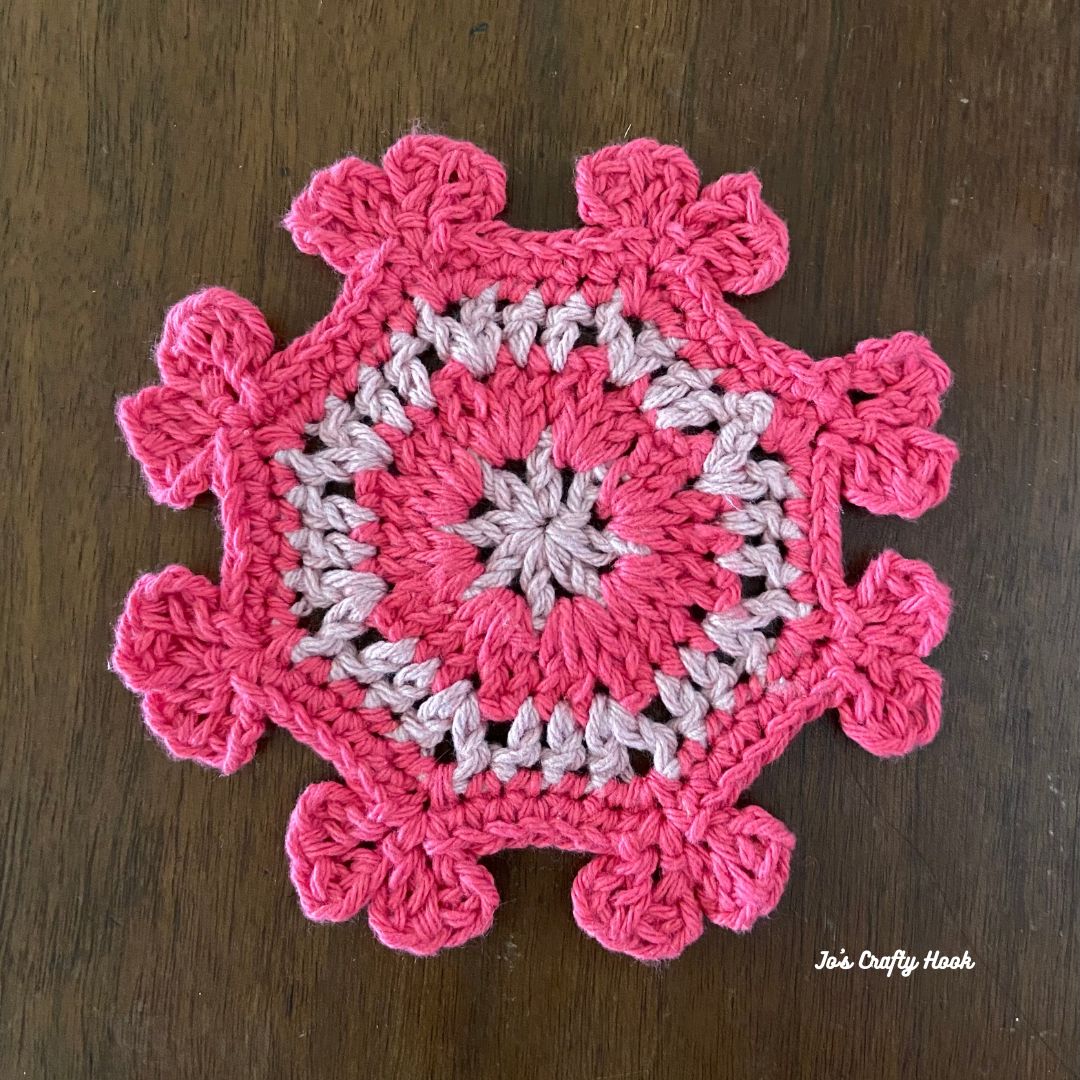
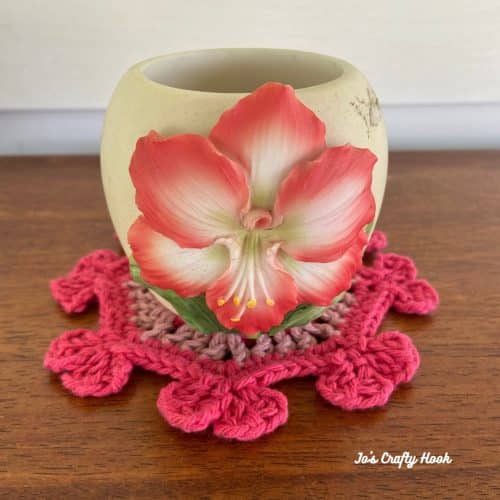
The 8 of Hearts Coaster Crochet Pattern is a great make for Easter, Mother’s Day, Valentine’s Day, or to decorate your home for every season.
The 8 of Hearts Coaster Crochet Pattern makes a great decorative piece for your home where you want to add a little splash of color. This design would make a great scrap busting project, it takes very little yarn. You could even use Worsted Weight Yarn and make a great centerpiece!
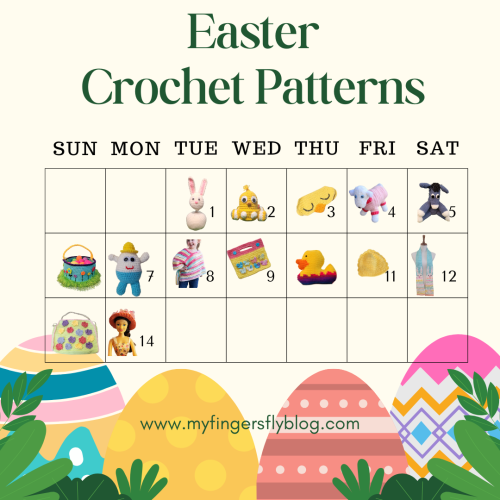
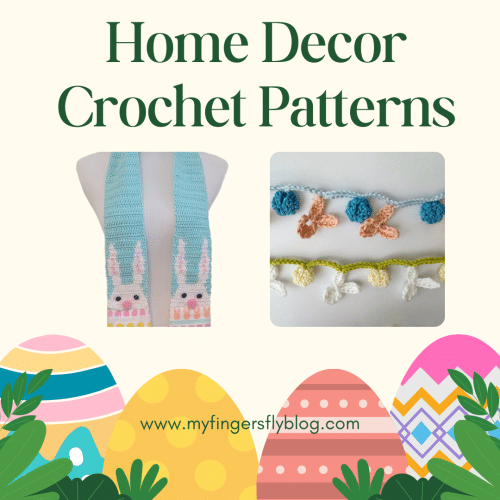
The Easter Advent Calendar Event runs from April 1-14, 2025 and features free crochet patterns for adorable and cute crochet patterns for Chicks, Easter Basket, Eggs and so much more!
April 12 – Easter Advent Home Decor Crochet Patterns
My 8 of Hearts Coaster Crochet Pattern is being featured April 12th as part of the Home Decor day and the FREE crochet pattern can be found below.
You can get an Ad-Free version of the 8 of Hearts Crochet Pattern for a small fee from my Ravelry Store for $2.
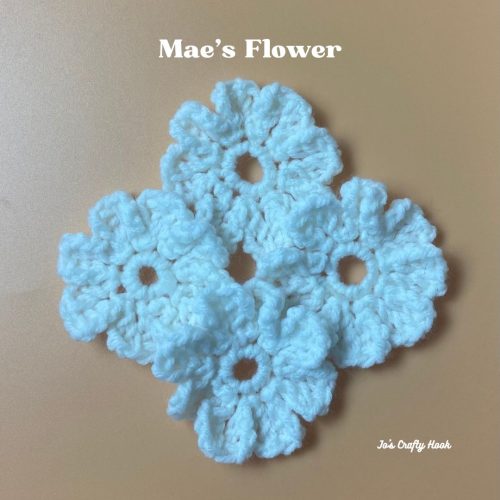
The design has 8 hearts using a special stitch I designed for my Mae’s Flower Crochet Pattern.
There are helpful Step-by-Step Picture Tutorials to help you master the Heart Stitch.
There is a Video Tutorial on my YouTube Channel that would be great to help you with the Heart Stitch used in my Mae’s Flowers
You can find the FREE crochet pattern for my Mae’s Flower HERE on my website.
Mae’s Flower
The post contains affiliate links that appear at no cost to you.
Shop LoveCrafts and find some beautiful yarns you can use to make the 8 of Hearts Coasters.
Information Needed to make the 8 of Hearts Coasters
I used Premier Just Cotton. 100% Cotton. #4 ply Medium Weight Yarn (50 g/1.76 oz) (80m /87 yds)
Materials: MC = 5-10 yds #4 ply Medium Weight Cotton Yarn CC = 5-10 yds #4 ply Medium Weight Cotton Yarn US G or 4.5mm Crochet Hook Tapestry Needle Scissors
Abbreviations/Stitches Used: sc = single crochet dc = double crochet ch = chain st = stitch
sl st = slip stitch rep = repeat
MC = Main Color CC = Contrasting Color
Finished Size: 6” x 6”
Notes: the coaster is worked in the round ch 3 counts as a st ch 4 counts as a dc + ch 1
due to different thickness of yarn, you may need to go up or down a hook size to meet gauge
Gauge: US G Hook or 4.5mm Crochet Hook 3 rounds = 4” Gauge Swatch: Follow the instructions for R1-R3 of pattern.
Special Notes: The Heart Stitch will be placed in each ch-2 sp of R5
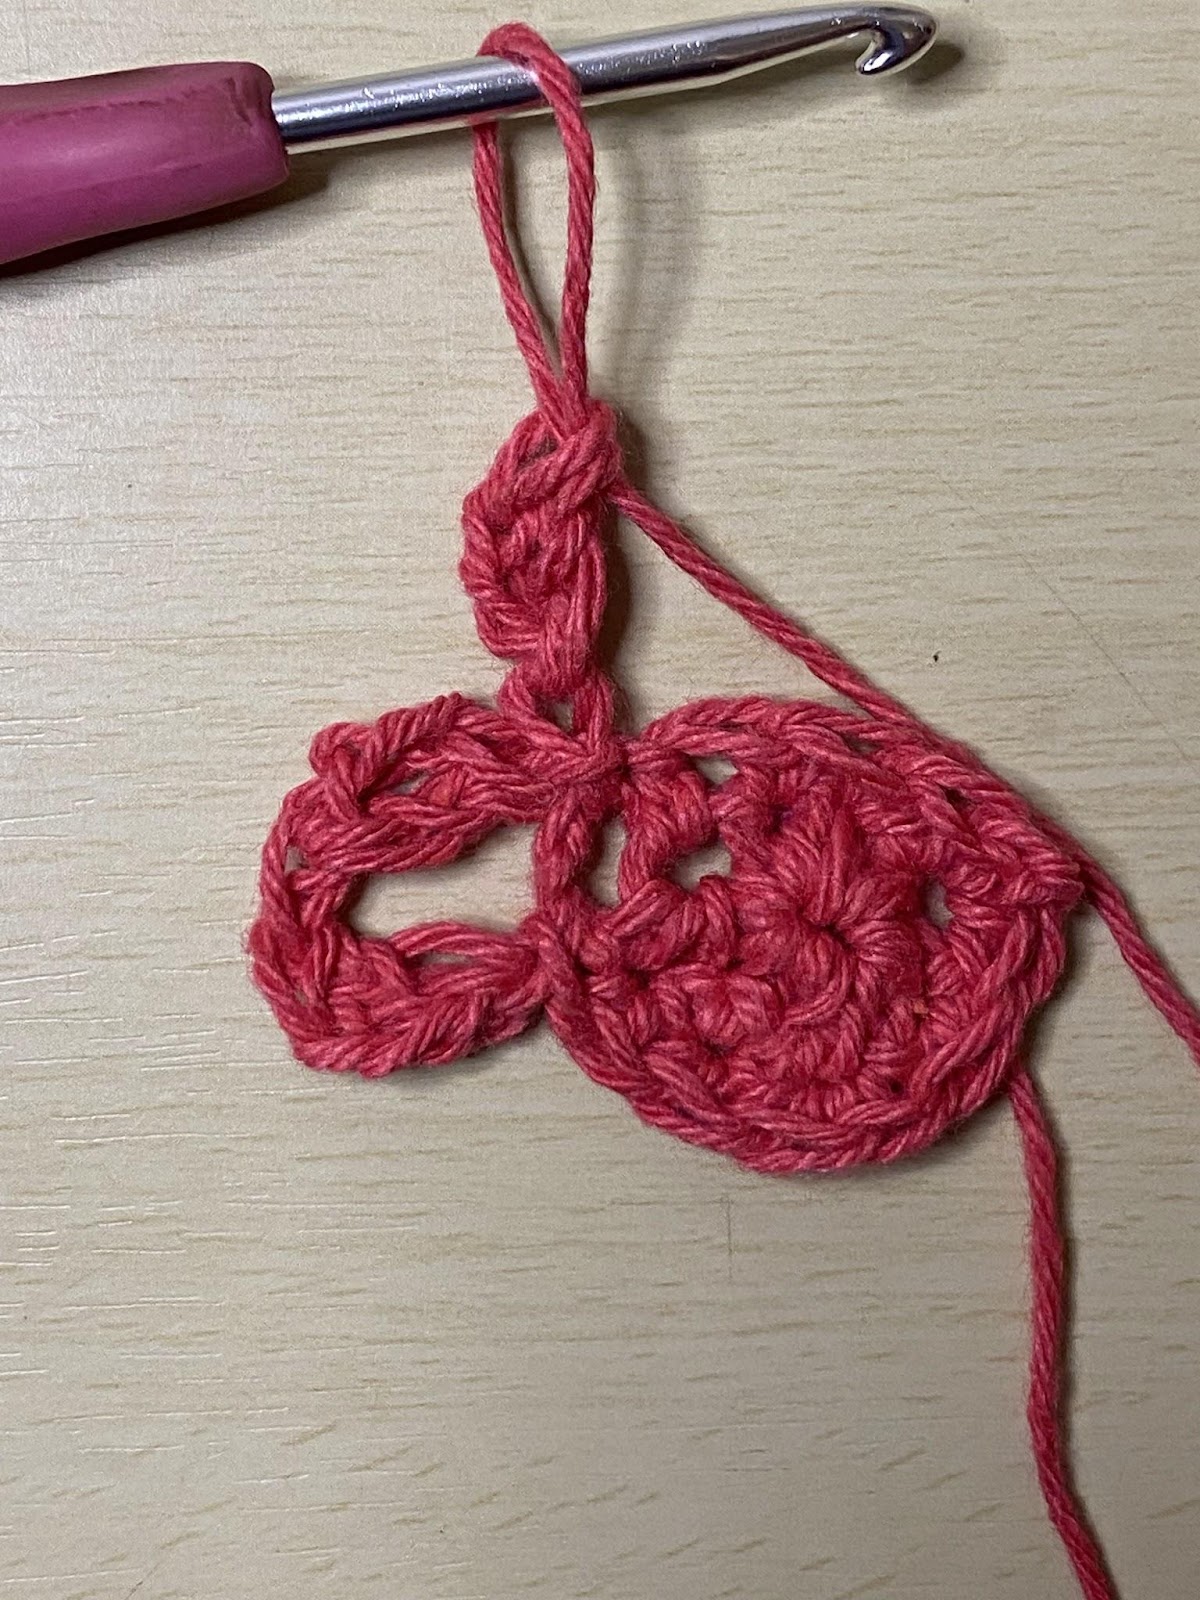
Special Stitch: Heart Stitch
ch 4, dc in 1st ch
ch 4, dc in 1st ch of ch 4 just made, sl st in ch-2 sp
ch 4, dc in 1st ch
ch 4, dc in 1st ch of ch 4 just made, sl st in ch-2 sp
The Step-by-Step Pictures for the Heart are an example only
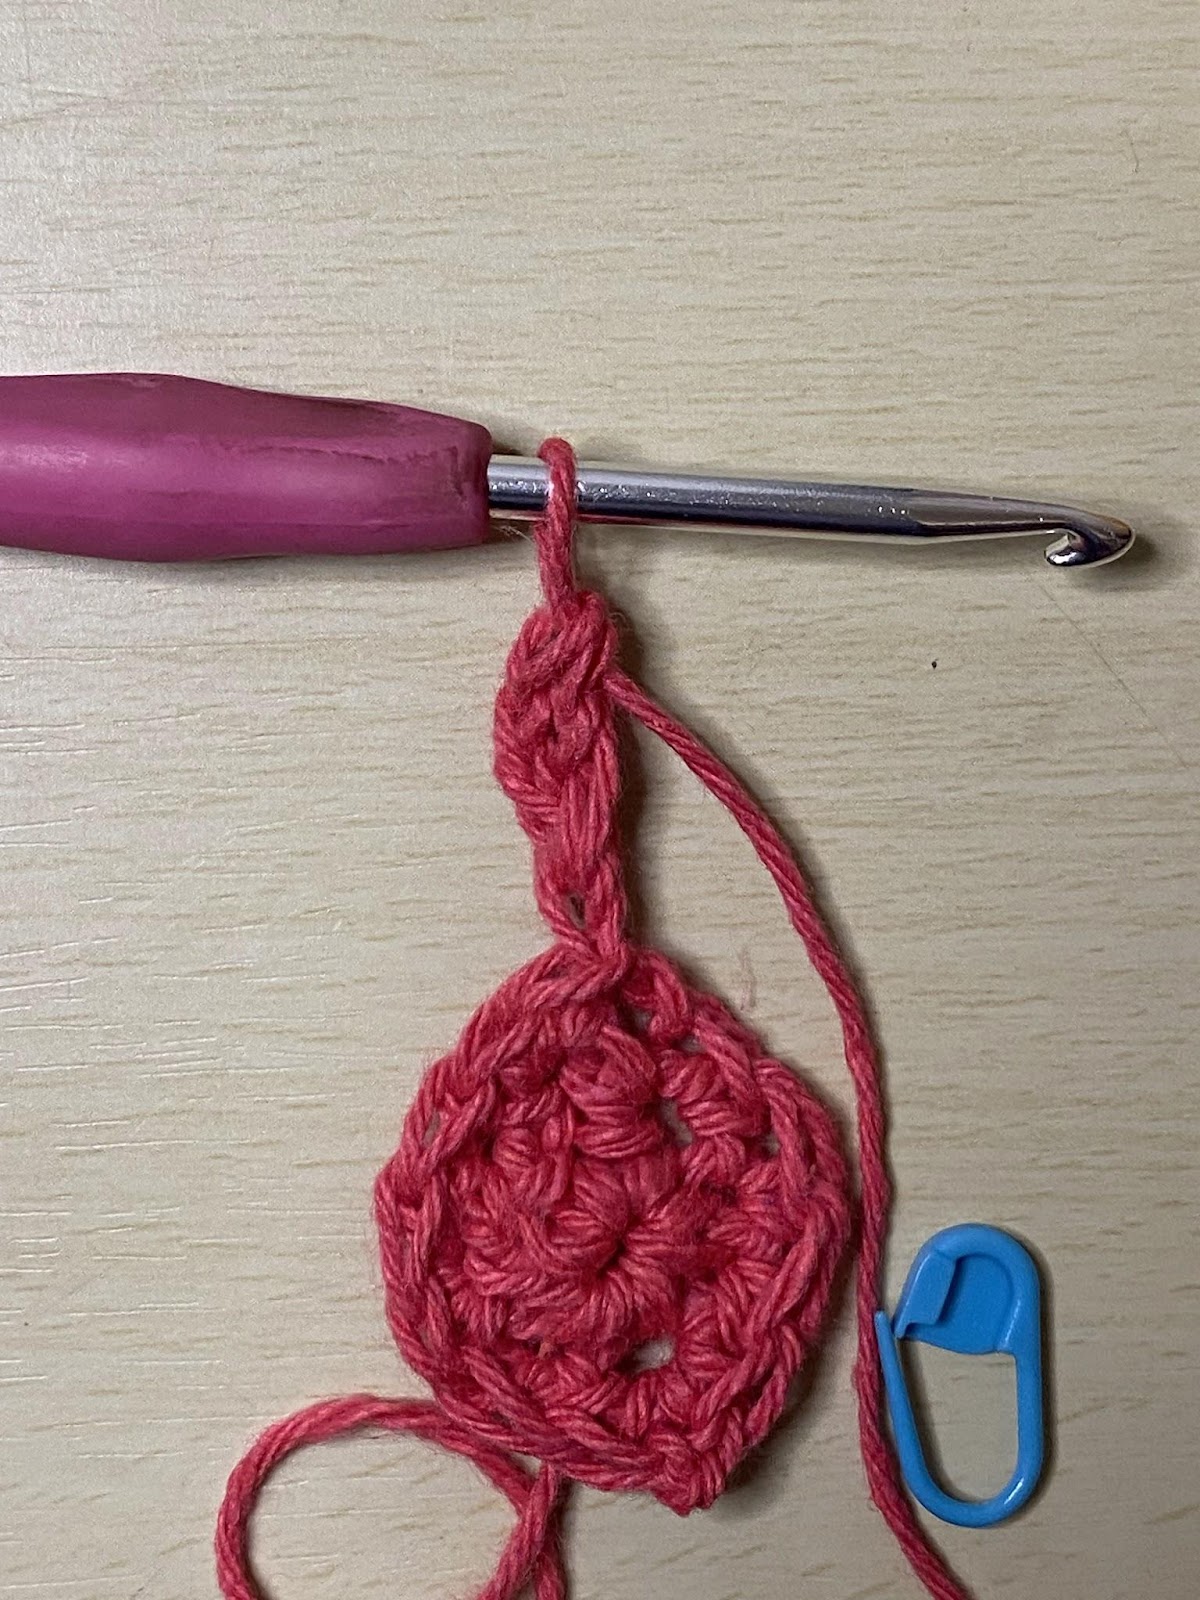
Step 1:
ch 4, dc in 1st ch
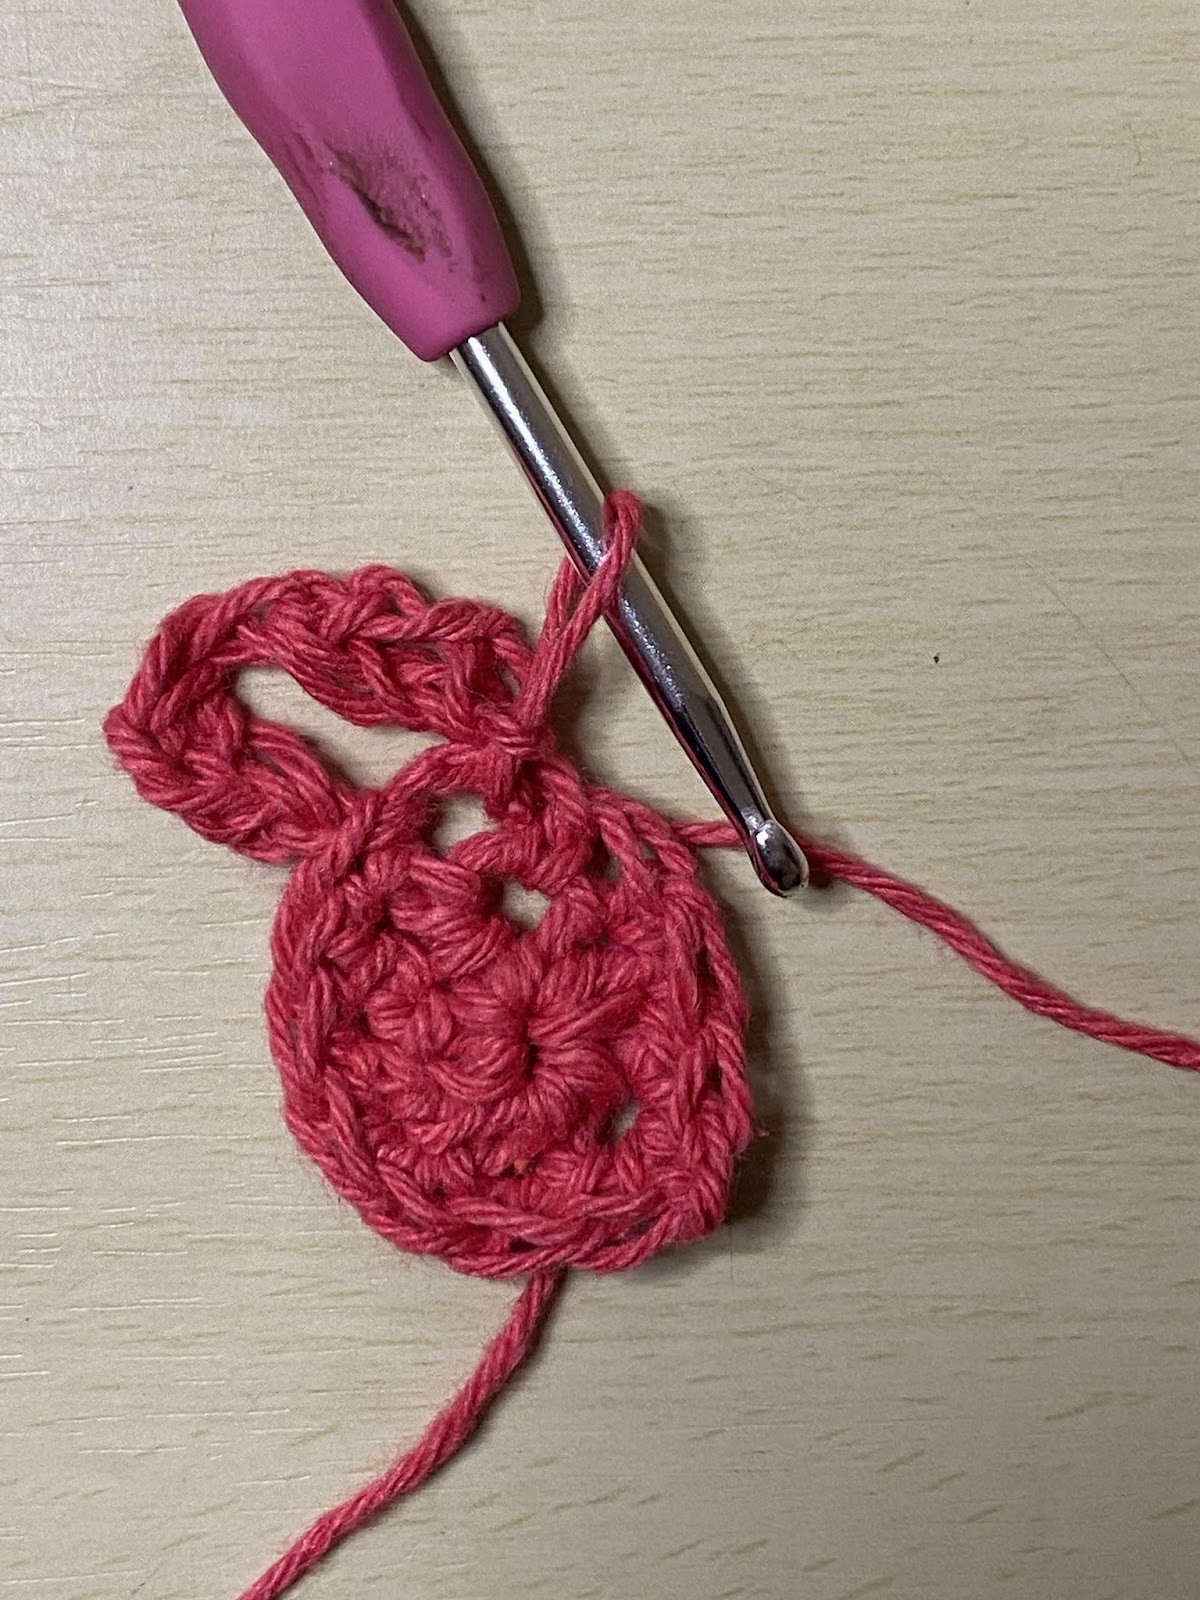
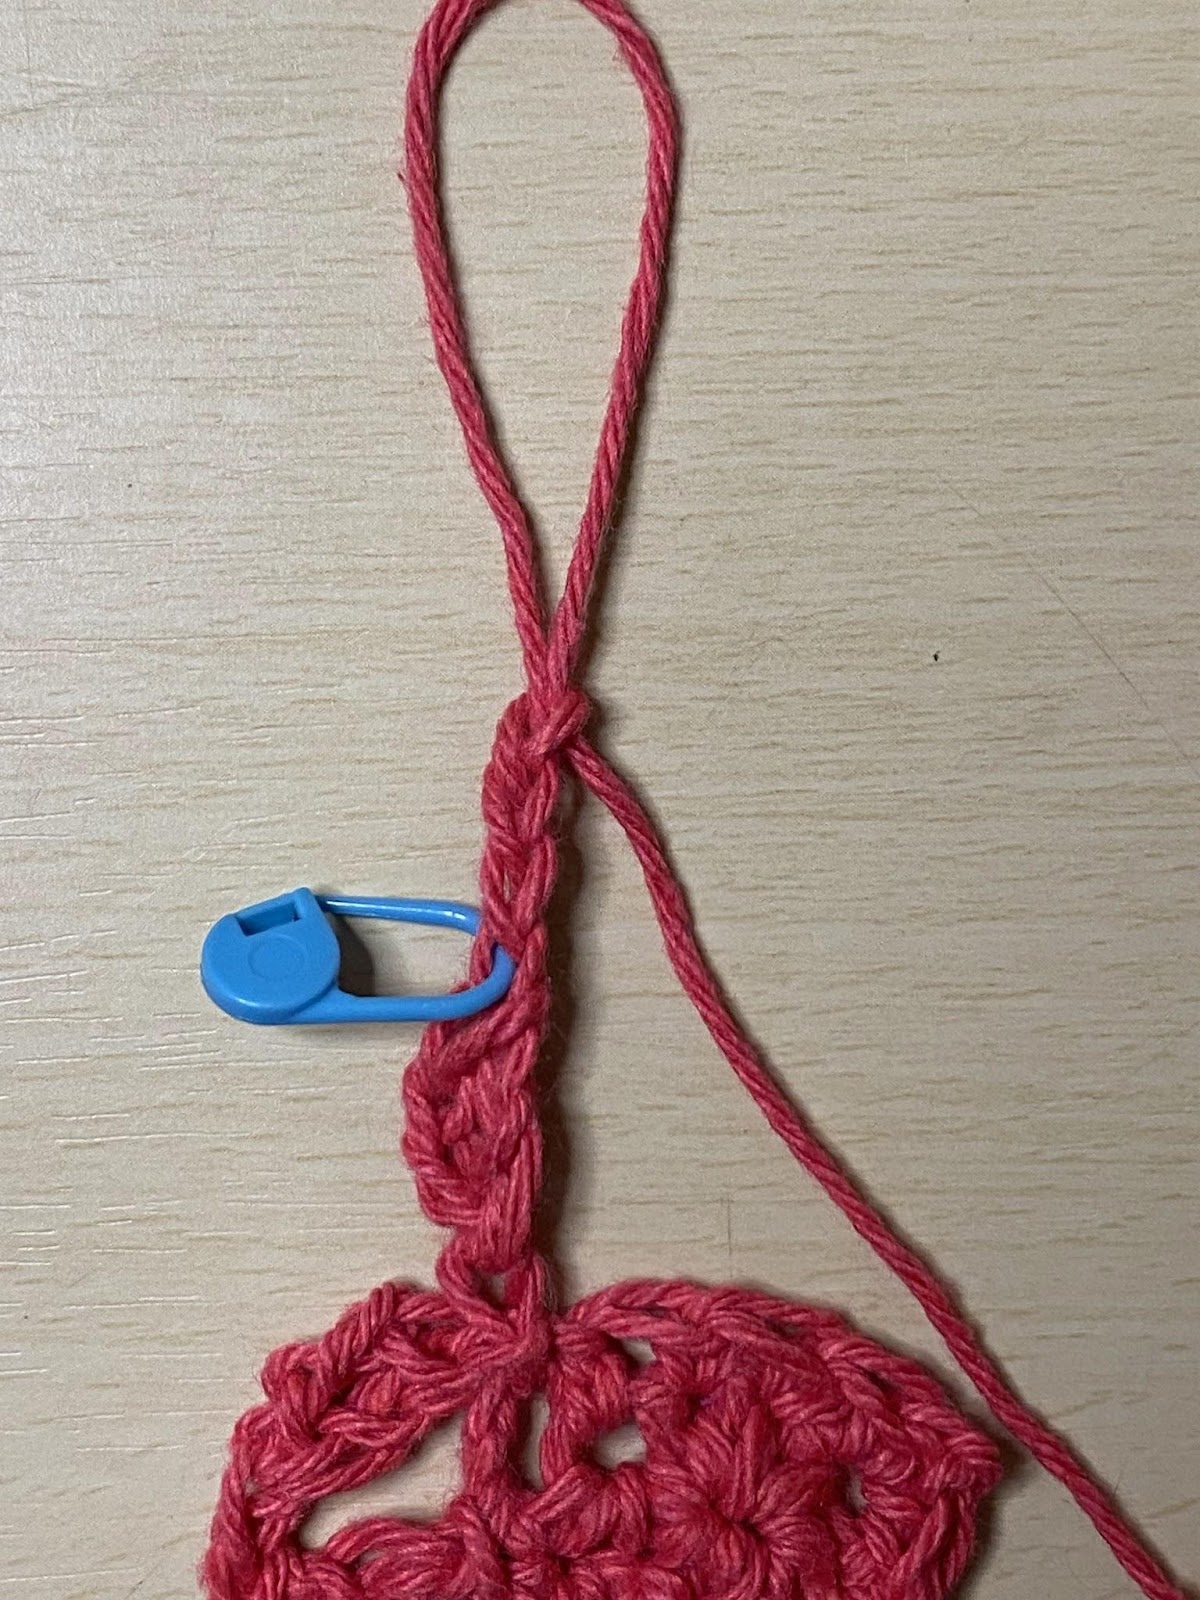
Step 2
ch 4, dc in 1st ch of ch 4 just made
sl st in ch-2 sp
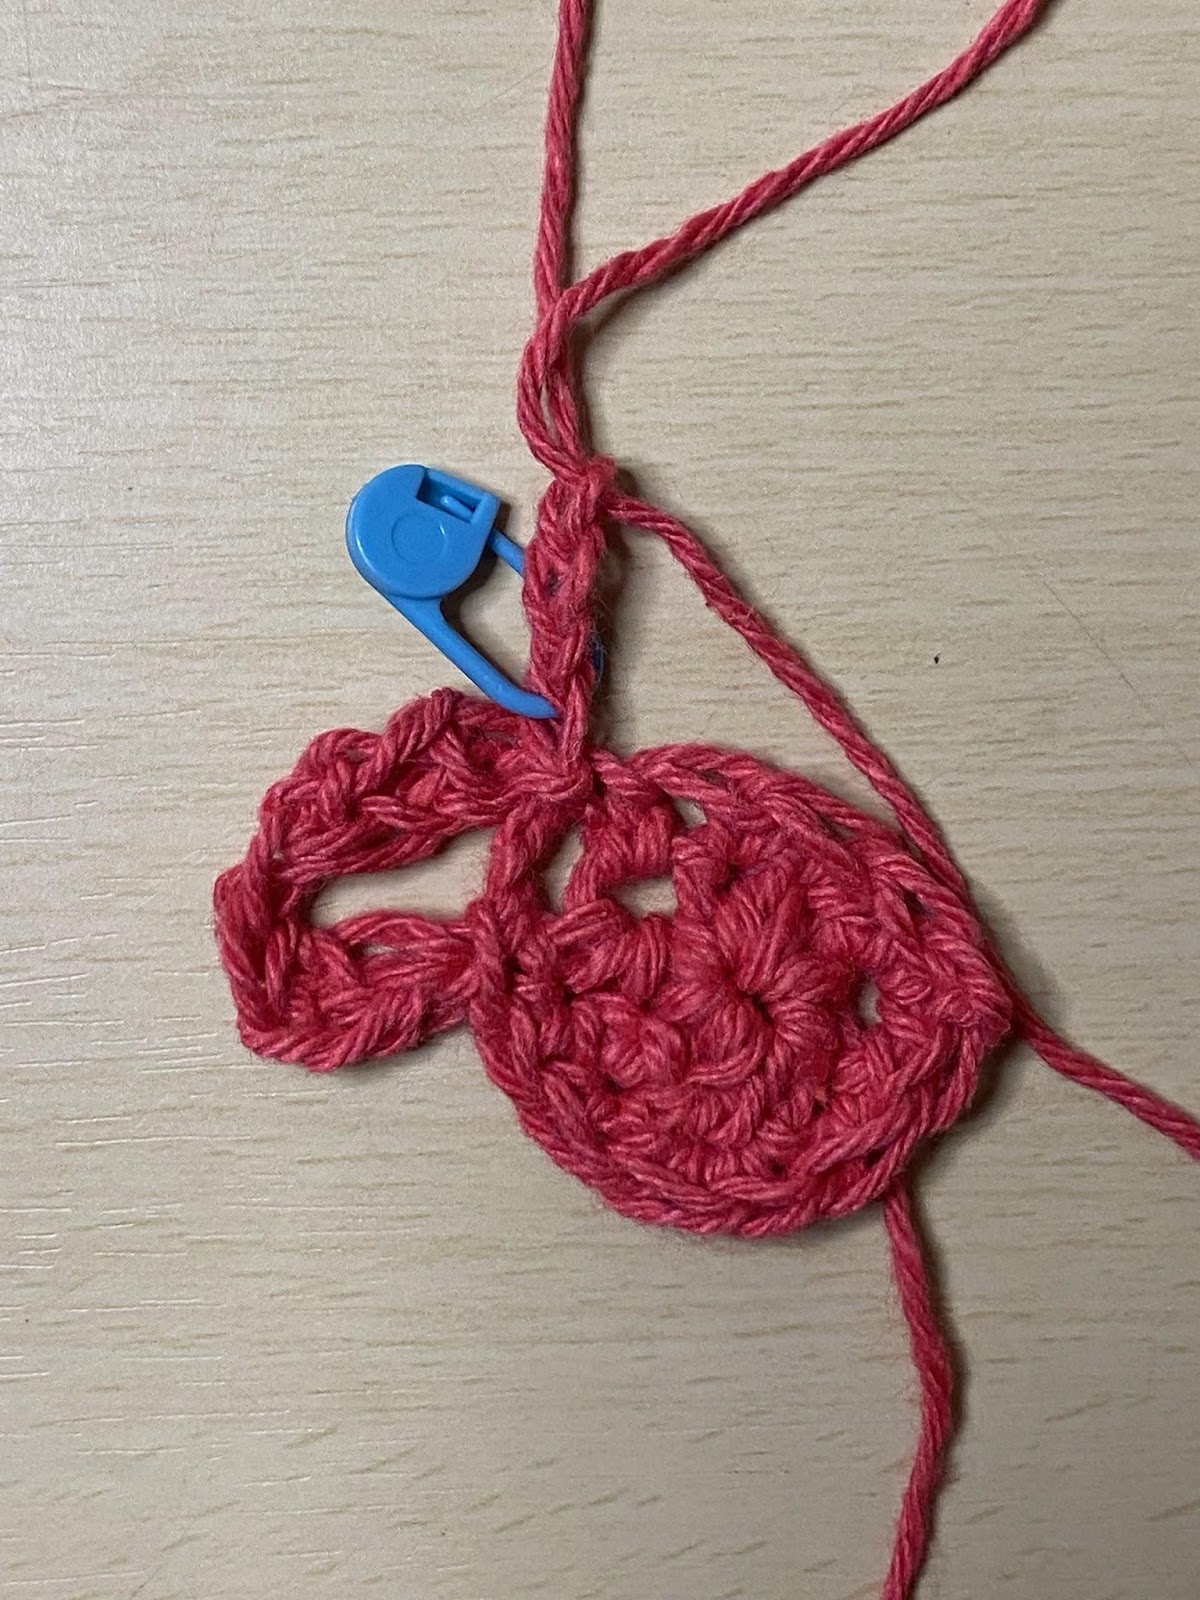
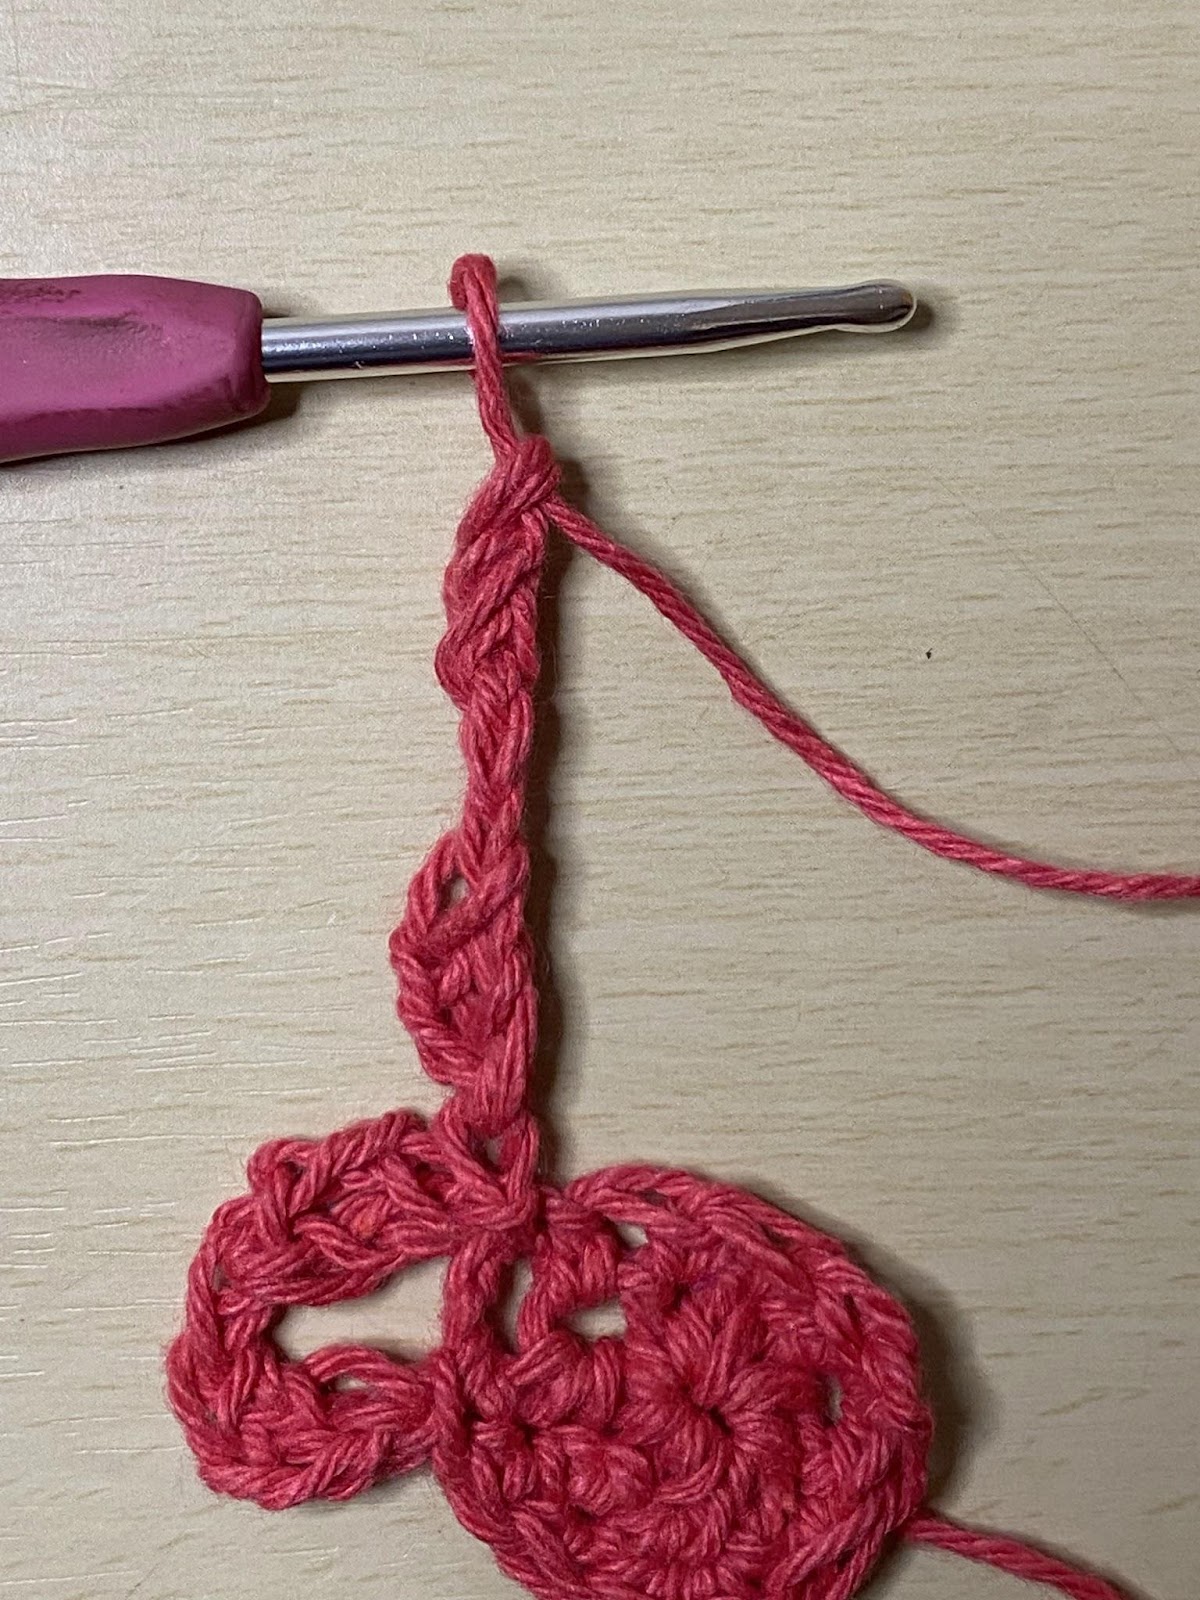
Step 3:
ch 4, dc in 1st ch
Step 4:
ch 4, dc in 1st ch of ch 4 just made
sl st in same ch-2 sp
Where to find Ad-Free 8 of Hearts Crochet Pattern
You can get an Ad-Free version of the 8 of Hearts Crochet Pattern for a small fee from my Ravelry Store and LoveCrafts.
8 of Hearts Free Crochet Pattern
Using MC R1: make magic circle. ch 4, *(dc, ch 1) 7x in magic circle. Pull yarn tight to close magic circle. sl st in top of ch 3 to join. (8 dc, 8 ch-1 sp)
Fasten off and weave in ends.
Using CC R2: attach yarn with a sl st in any ch-1 sp. (ch 3, dc, ch 1, 2 dc) all in ch-1 sp. *(2 dc, ch 1, 2 dc) in each ch-1 sp around. sl st in top of ch-3 to join. (32 dc & 8 ch-1 sp)
Fasten off and weave in ends.
Using MC R3: attach yarn with a sl in any ch-1 sp. (ch 4, dc) all in same ch-1 sp, sk next st, dc in next 2 st, sk next st, *(dc, ch 1, dc) all in ch-1 sp, sk next st, dc in next 2 st, sk next st. rep from * around until ch 3. sl st in top of ch-3 to join. (32 dc & 8 ch-1 sp)
Fasten off and weave in ends.
Using CC R4: attach yarn with a sl st in any ch-1 sp, *(sc, ch 2, sc) all in ch-1 sp, sc in next 4 st. rep from * around. sl st in 1st sc to join. (48 sc & 8 ch-2 sp)
R5: ch 1, sc in same st, Heart Stitch (see Example above), *sc in next 6 st, Heart Stitch. rep from * around until last 5 st. sc in last 5 st. sl st in 1st st to join. (8 Hearts & 48 sc)
That’s it! You have made your version of the 8 of Hearts Coaster! You can make this crochet pattern in so many colors and decorate your home for every season! The coaster would even make a beautiful centerpiece using Worsted Weight Yarn!
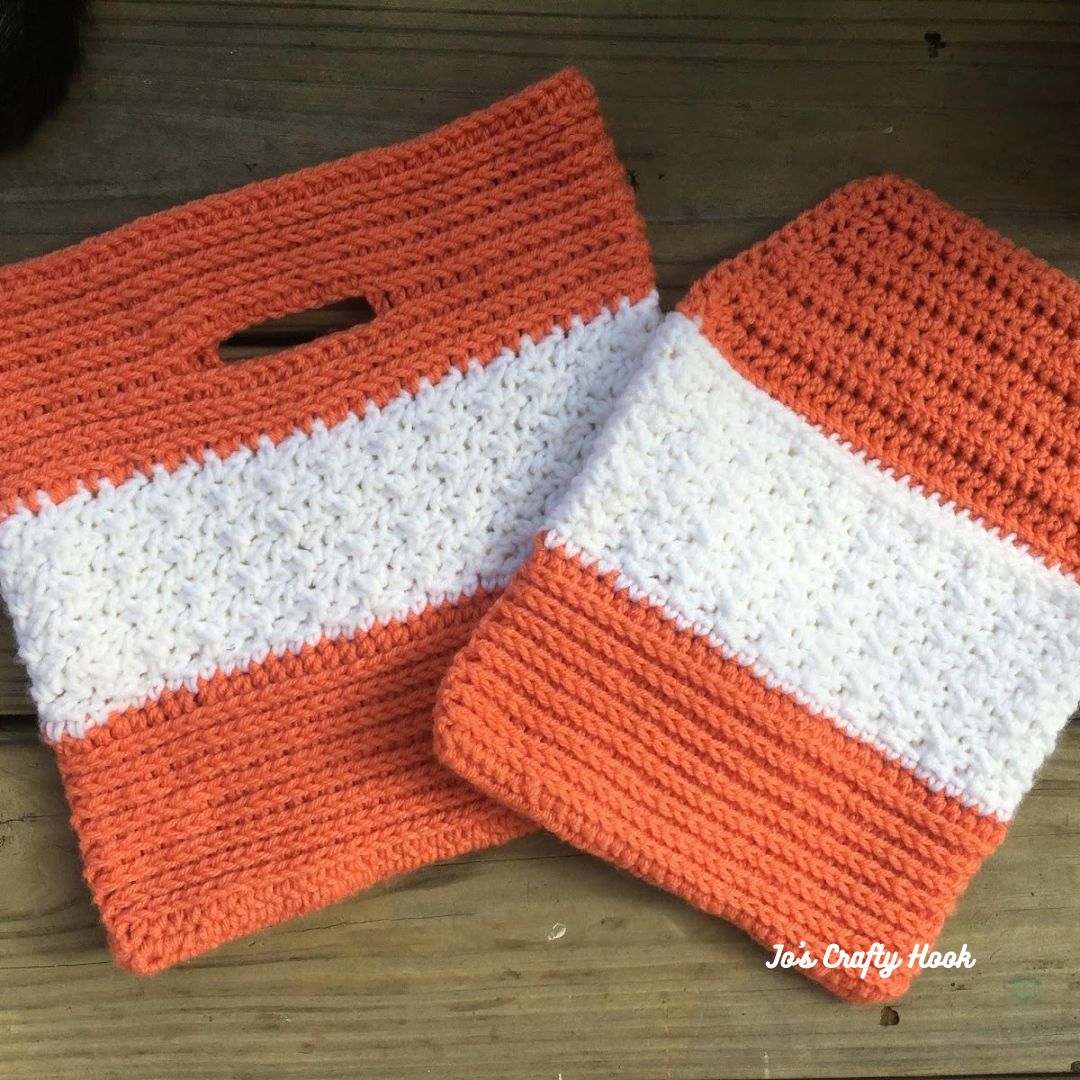
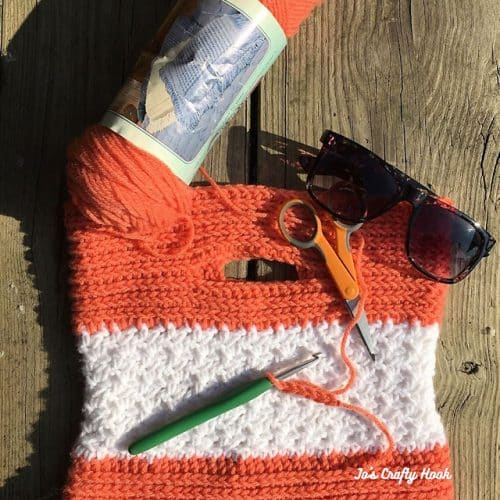
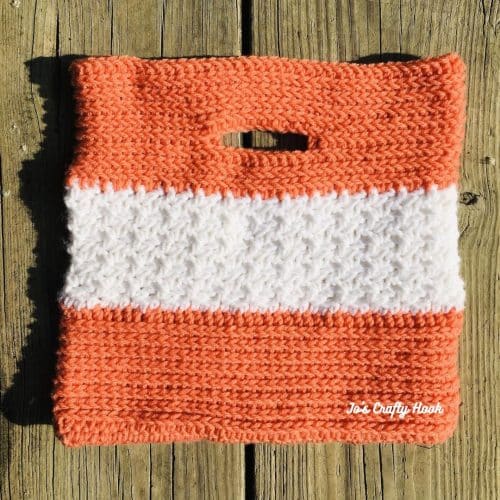
The Cream Pop Handbag Crochet Pattern is a design of mine that makes me think time spent as a kid eating ice cream pushups; hot summer days by the pool; picnics on the beach.
The Cream Pop Handbag Crochet Pattern is the perfect accessory to carry all of your essentials when go to the beach, are working on a crochet project, for a trip the gym and so much more!
There is even a little clutch you can make to keep your most important beach items in, like your sunglasses, lip balm, phone and many other smaller essentials.
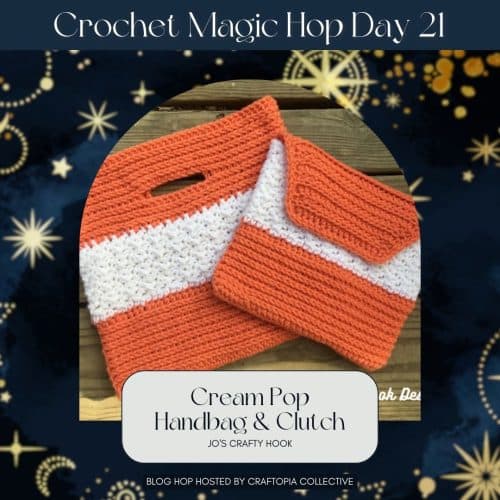
Cream Pop Handbag & Clutch
The post contains affiliate links that appear at no cost to you.
Shop LoveCrafts and find some beautiful yarn to create your own Cream Pop Handbag in your favorite colors.
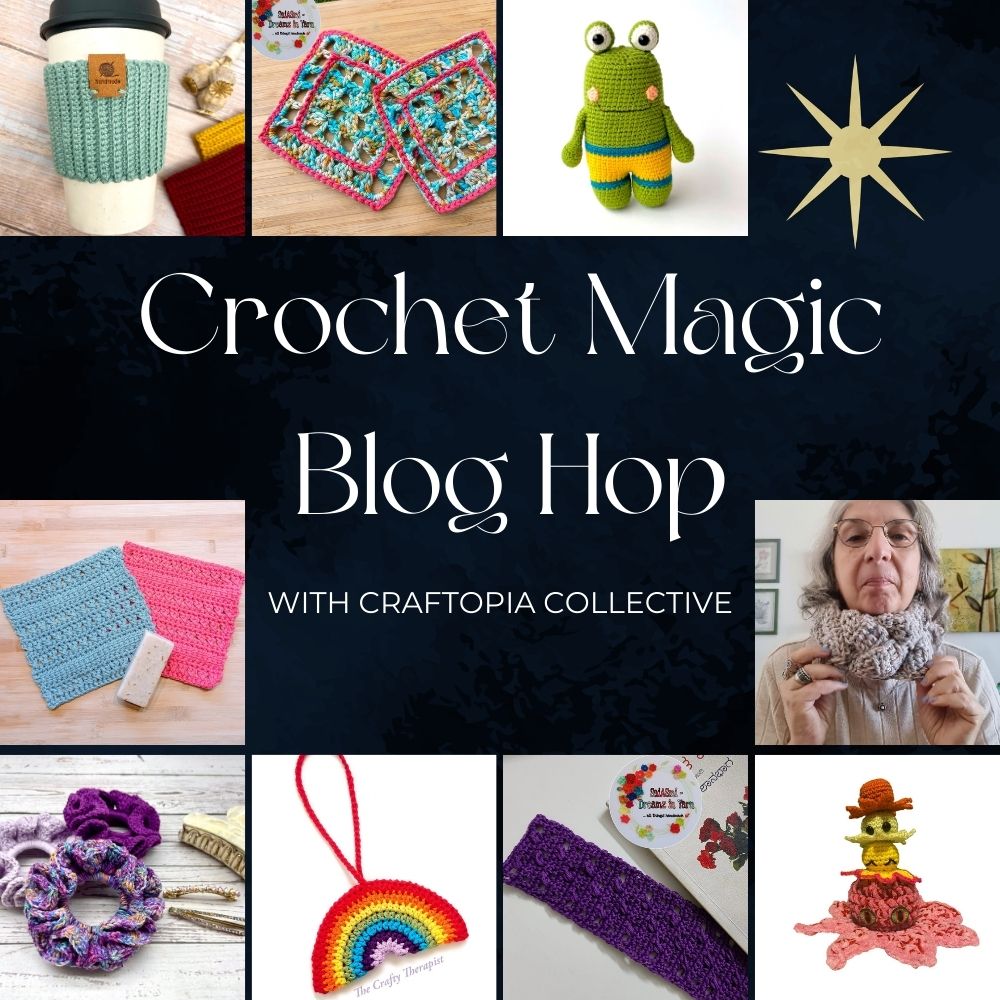
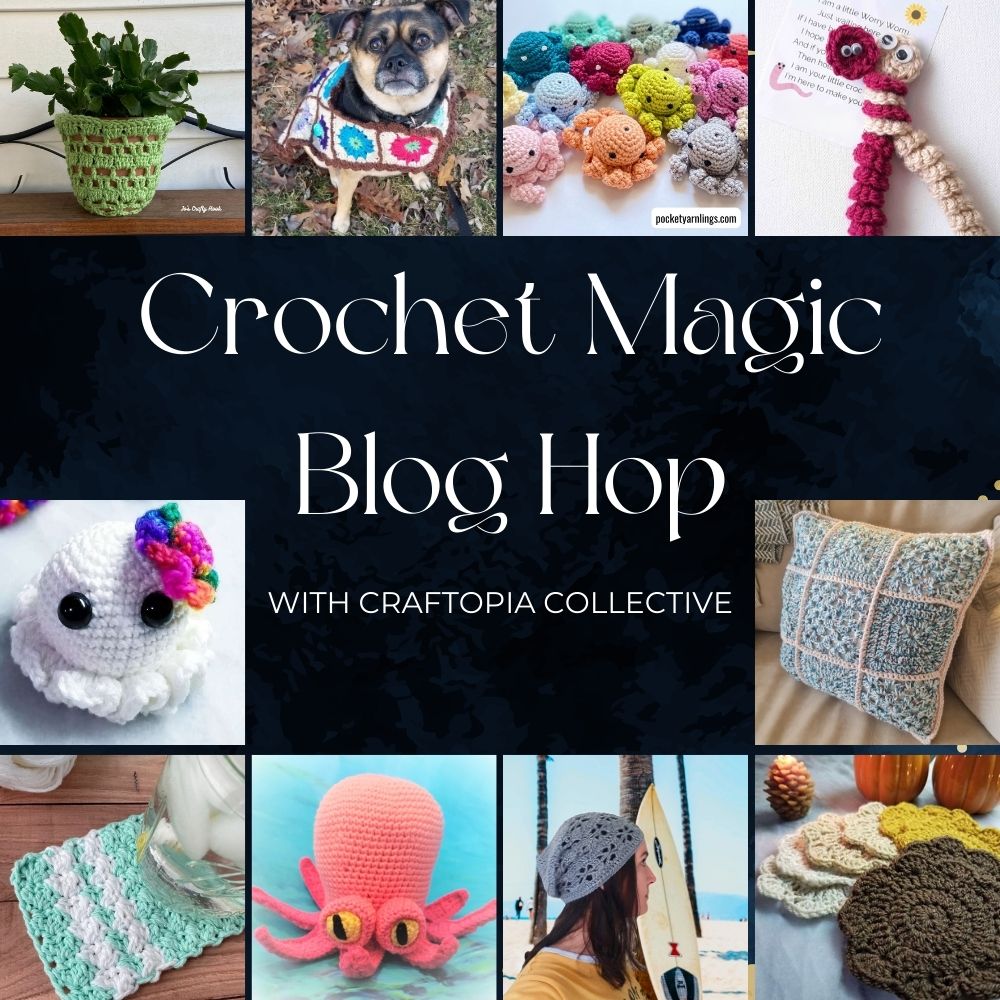
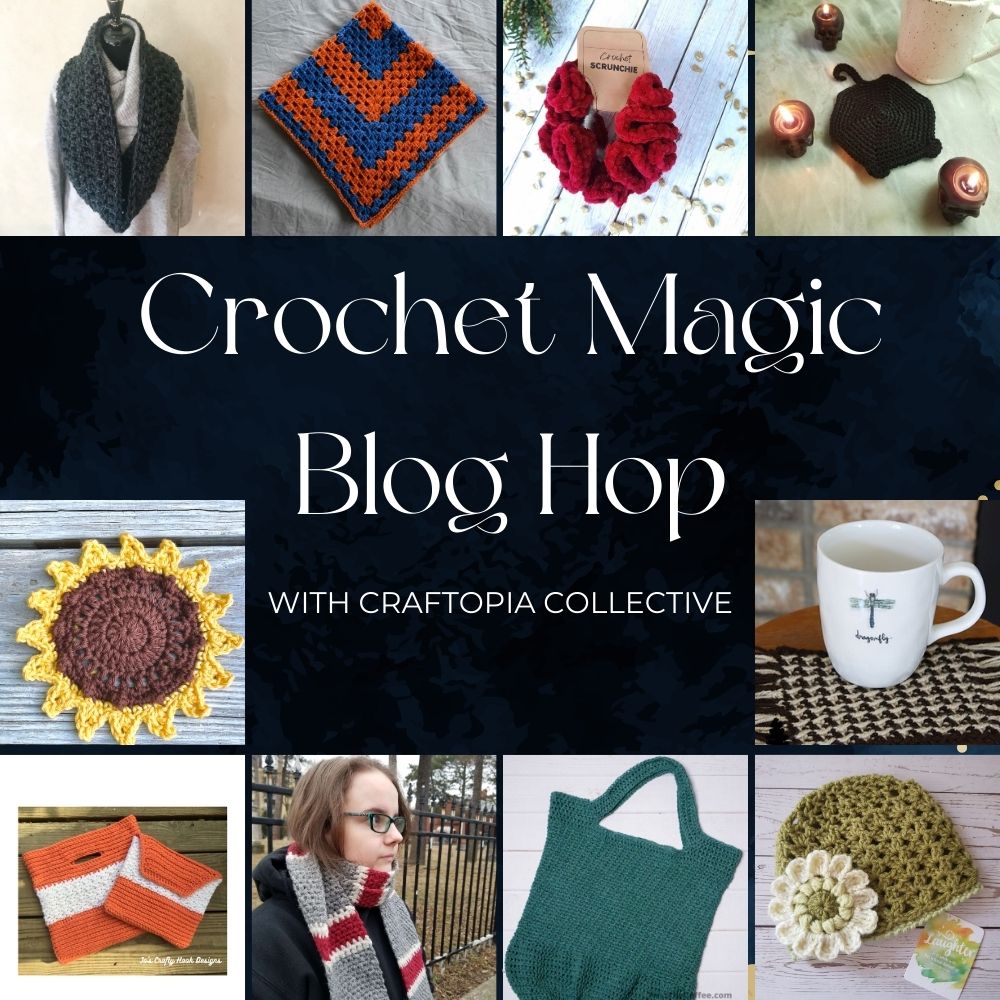
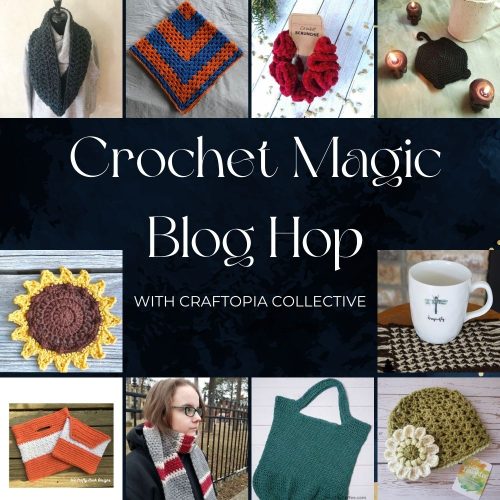
My Cream Pop Handbag & Clutch Crochet Pattern is being featured in the Crochet Magic Blog Hop. You can get a FREE pdf on April 21, 2024.
Scroll down to find out how you can a free PDF and to find more Free and Discounted premium crochet patterns from this great blog hop!
Get an Ad-Free premium copy
You can find a premium copy the Cream Pop Handbag Crochet Pattern with the Cream Pop Clutch at my Ravelry Store, Etsy Shop or LoveCrafts for a small fee.
Information Needed to make the Cream Pop Handbag
Cream Pop Handbag
I used 100 yards of Caron Premium Acrylic Yarn in Apricot (3oz/85g)
I also used 50 yards of Caron One Pound in White (454g / 16 oz, 742 meters / 812 yards)
Materials: 100 yards of 4 Ply Worsted Weight Yarn 50 yards of 4 Ply Worsted Weight Yarn US I or 5.5 mm Crochet Hook Scissors Tapestry Needle
Stitches Used/Abbreviations: ch = chain sc = single crochet hdc = half double crochet hdc in 3rd loop = half double crochet in 3rd loop hdc2tog = half double crochet 2 together sp = space ws = wattle stitch MC = Main Color CC = Contrasting Color
Notes:
handbag is worked in the round
ch 2 counts as a hdc
alt ch 2 counts as a hdc
Size: 11” tall x 12” wide
Special Stitches: Wattle Stitch – consists of (sc, ch 1, dc) all in the same stitch. Alternate Chain 2 – takes the place of a chain 2 at the beginning of a row and counts as a half double crochet. Half Double Crochet 2 Together – used as a way to decrease row count. Half Double Crochet in the 3rd Loop – working in the 3rd loop of a half double crochet creates a knit like look.
From April 1-30, 2024 you will find 30 days of FREE and Discounted premium crochet patterns from some great crochet designers! These crochet patterns are geared toward Beginners, but are a perfect make for any level of crocheters.
On April 21-22, 2024 get a FREE copy of my Cream Pop Handbag & Clutch Crochet Pattern!
Click on the Button below to visit the Crochet Magic Blog Hop and get the Coupon Code needed to get a FREE copy of the Cream Pop Handbag & Clutch Crochet Pattern on April 21-22, 2024
Get the Coupon Code
Once you have the Coupon Code, click on the Button below and use the Coupon Code at Checkout from my Ravelry Store.
Add Coupon Code at Checkout
If you missed the Free premium copy of the Cream Pop Handbag & Clutch Crochet Pattern, you can find it at my Ravelry Store, Etsy Shop or LoveCrafts for a small fee.
Cream Pop Handbag FREE Crochet Pattern
Cream Pop Handbag
With MC
R1: Chain 37, sc in 2nd chain from hook, sc in same space. 2 sc in next st, sc in the next 32 sts, 2 sc in next st, 2 sc in the last st. (on the other side of the chain) 2 sc in 1st of new round, 2 sc in next st, sc in the next 32 sts, 2 sc in the next st, and 2 sc in the last st. (bottom of 1st sc). sl st in 1st st to join. (80 sc) total
R2: ch 1 and alt ch 2 in same st. hdc in each remaining st around. sl st in 1st st to join. (80 hdc)
R3-R10: ch 1 and alt ch 2 in same st. hdc in 3rd loop in next st until last st, hdc in last st. sl st in 1st st to join. (80 hdc)
Change to CC
R11: attach yarn with a sl st in alt ch 2 sp. ch 1, sc in the same st and each remaining st around. sl st in 1st st to join. (80 sc)
R12: ch 1 and(sc, ch 1, dc) all in the same st (ws made), *sk 2 st, ws in next st* Repeat from * to * until the last 2 st. sk 2 st and sl st in 1st sc to join. (27 ws & 81 st)
**your st count will increase by 1 after R12**
R13: ch 1, turn, and ws in 1st ch-1 sp. ws in each ch-1 sp around. sl st in 1st st to join. (27 ws & 81 st)
R14-R20: Repeat R13
**Do not turn after R20**
Change to MC
R21: attach yarn with a sl st in 1st sc from previous row. ch 1, alt ch 2 and hdc in the same st. hdc in each remaining st around. sl st in 1st st to join. (80 hdc)
R22-R24: ch 1 and alt ch 2 in same st. hdc in 3rd loop in the next st until last hdc. hdc in the last st. sl st in 1st st to join. (80 hdc)
Making Handle:
R25: alt ch 2 in 1st st, hdc in 3rd loop in next 13 sts, hdc in the next st. ch 10, skip 10 sts, hdc in next st, hdc in 3rd loop in the next 29 sts. ch10, skip 10 sts, hdc in 3rd loop in the next st until the last hdc. hdc in last st. sl st in 1st st to join. (60 hdc & 2 ch-10 sp)
R26: alt ch 2 in 1st st, hdc in 3rd loop in the next 14 sts, hdc in each ch of ch-10 sp, hdc in 3rd loop in the next 30 sts, hdc in each ch of ch-10 sp, hdc in 3rd loop in the next st until the last hdc. hdc in last st. sl st in 1st st to join. (80 hdc)
**If you prefer a wider handle hole, add chain count in multiples of 4, being sure to subtract that number from hdc st counts on both sides of the round.**
R27-R28: alt ch 2 in 1st st, hdc in 3rd loop in the next st until last hdc, hdc in last st. sl st in 1st st to join. (80 hdc)
**If you prefer the top of the handle to less bulky, decrease row count by 2s. If you prefer a thicker handle, add rows in multiples of 2**
Fasten off and weave in your ends.
That’s it! You have made your own Cream Pop Handbag!
Thanks for stopping by Jo’s Crafty Hook!
You can find more of my FREE crochet patterns on my website HERE.
You can find a premium copy the Cream Pop Handbag Crochet Pattern with the Cream Pop Clutch at my Ravelry Store, Etsy Shop or LoveCrafts for a small fee.
Cream Pop Handbag & Clutch
You can find my Premium Crochet Patterns at any of my Stores listed below.
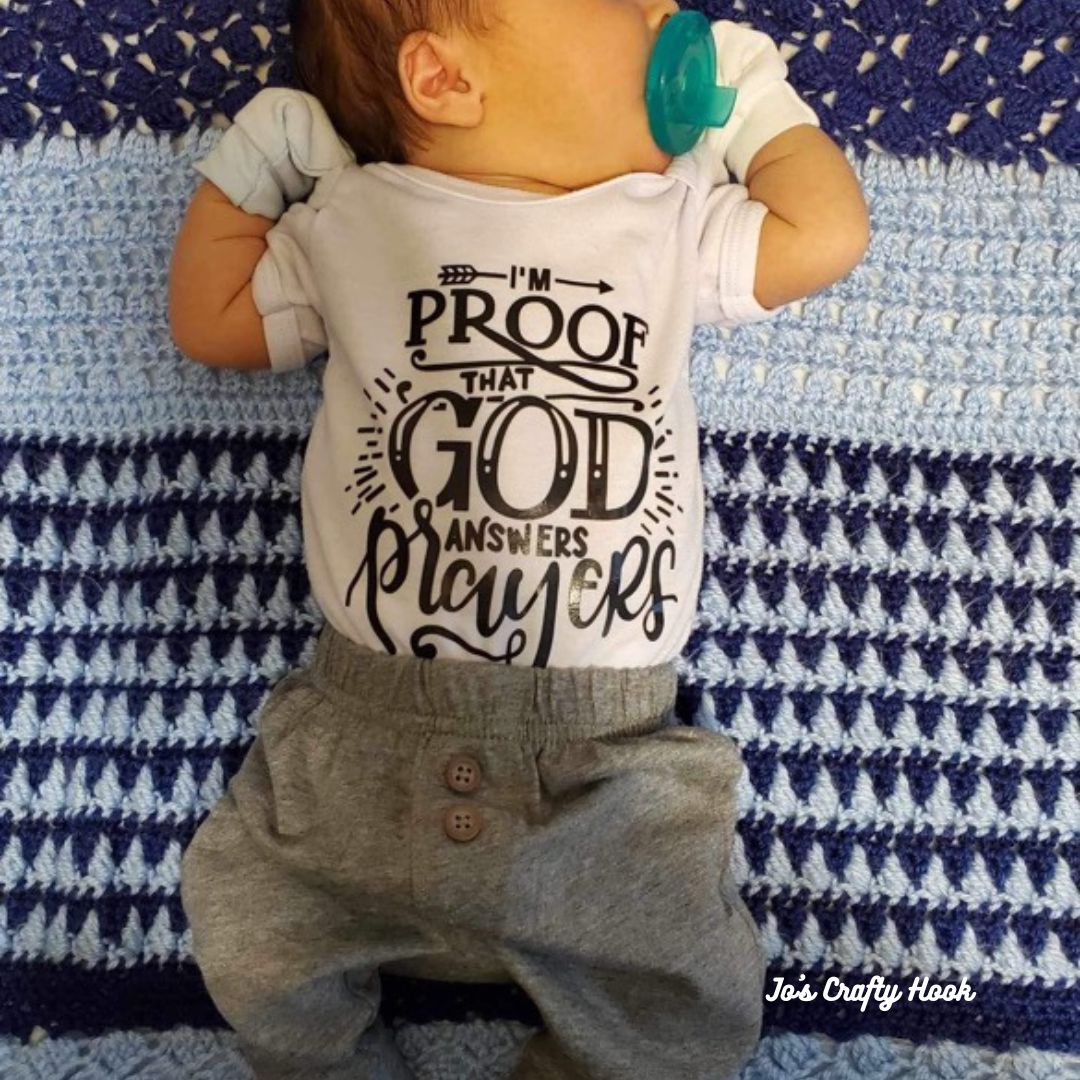
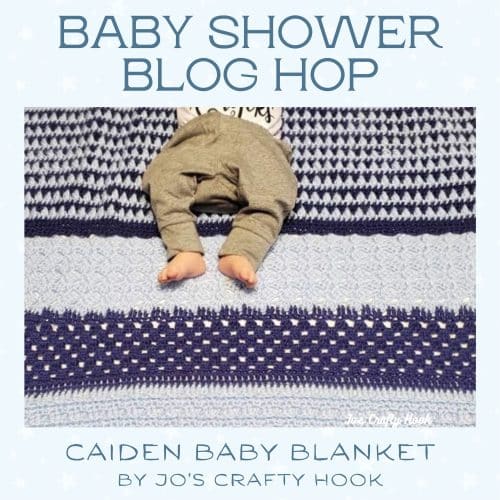
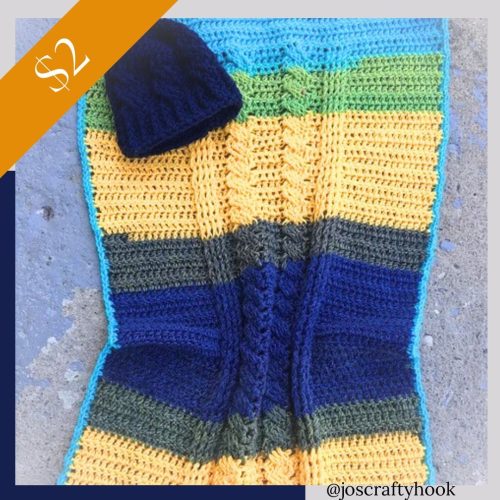
The Caiden Baby Blanket Crochet Pattern is one of my Handmade Crocheted Creations designs that is near and dear to my heart. I was so blessed in taking part in the raising of my niece. She was the 1st baby where I got to listen to every coo and cry; hear her 1st words spoken; watching her 1st steps; and growing up to be a beautiful person inside and out.
Every stitch, every row, all the trials and tribulations with the design were an outpouring of my love for my niece, her husband and of course her baby.
My niece and her husband had been trying for years to have a baby. There were many prayers prayed; so many things that they had to endure. Finally, after almost 10 years of trying they were blessed with a baby boy, Caiden.
The post contains affiliate links that appear at no cost to you.
Shop LoveCrafts and find some beautiful yarns you can use to make the Caiden Baby Blanket.
My Caiden Baby Blanket Crochet Pattern is being featured in the Baby Shower Blog Hop & Bundle Sale hosted by Ambassador Crochet.
Scroll down for more information about the Baby Shower Blog Hop & Bundle Sale.
Information about the Caiden Baby Blanket Crochet Pattern
The Caiden Baby Blanket Crochet Pattern uses a multiple of crochet stitches. used in 9 sections that make up the baby blanket. Some of the stitches used are the X-Stitch, the Granny Stitch, the Tulip Stitch and other great crochet stitches.
I used Bernat Softee Baby #3 Ply/DK Weight Yarn in Navy and Light Blue. 100% Acrylic Yarn. (5 oz/ 40 g) (362 yds/331 m)
Materials Used: US H or 5 mm Crochet Hook US I or 5.5 mm Crochet Hook MC – 900-1000 yds of #3 ply or DK Weight Yarn CC – 900-1000 yds of #3 ply or DK Weight Yarn Scissors Tapestry Needle
Inside the Caiden Baby Blanket Crochet Pattern there are Gauge Swatches for each section, Helpful Picture and Video Tutorials to help you along the way.
You can get a premium copy of the Caiden Baby Blanket Crochet Pattern at my Ravelry Store for a small fee.
From April 14th until May 11th you can find Free and Discounted Premium Crochet Patterns at the Baby Shower Blog Hop!
There are so many cute crochet patterns for Blankets, Clothing, and more!
Click on the button below to find out more!
You can get 50% off of my Caiden Baby Blanket Crochet Pattern on April 17th as part of the Baby Shower Blog Hop.
On April 17-18, 2024 visit the Baby Shower Roundup (button above) to get the Coupon Code needed to get my Caiden Baby Blanket Crochet Pattern for 50% off.
Once you have the Coupon Code needed, visit my Ravelry Store and use the Coupon Code at Checkout to get your 50% off discount.
If you missed any free or discounted pattern, you can purchase the Baby Shower Crochet Pattern Bundle for $12. You will find 27 other beautiful crochet patterns that are perfect gifts for Baby Showers.
You can find more of my Premium Crochet Patterns for Babies at my Stores listed below.
Find me, Jo of Jo’s Crafty Hook at the places listed below.
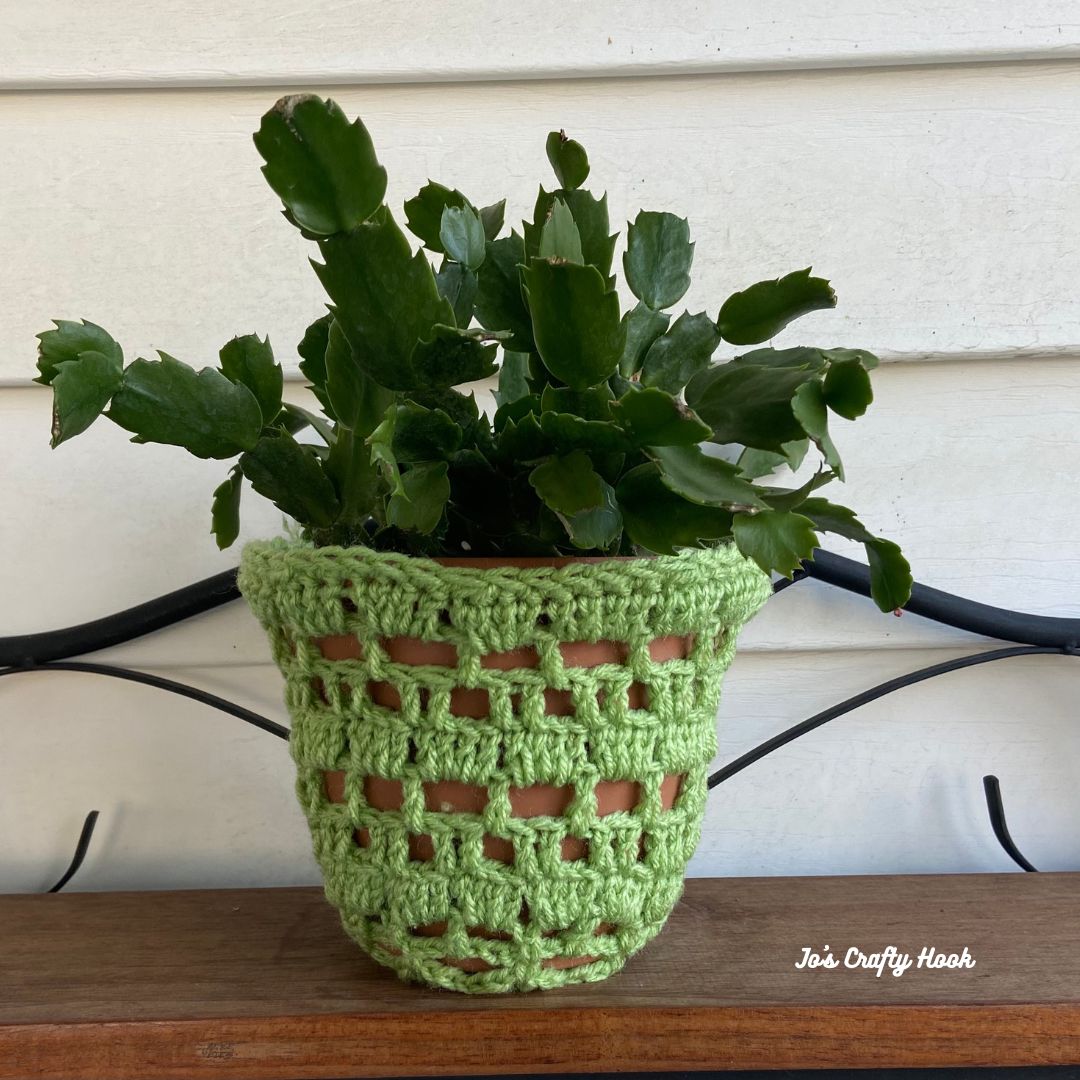
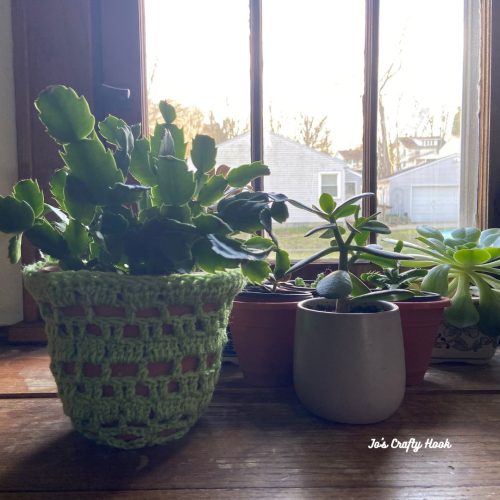
Looking for a versatile crochet pattern that will fit over any size plant or flower pot? My Flower Lace Plant Covers Crochet Pattern creates a beautiful lacy design that will cover just about any size flower pot.
Below is for a smaller sized plant pot using my Flower Lace Plant Covers Crochet Pattern. The pattern can also be customized to fit over a taller sized flower pot.
The post contains affiliate links that appear at no cost to you.
Shop LoveCrafts and find some beautiful yarn to match all the beautiful plants or flowers you put inside your planter cover.
The Easter Advent Calendar Event runs from April 1-14, 2025 and features free crochet patterns for adorable and cute crochet patterns for Chicks, Easter Basket, Eggs and so much more!
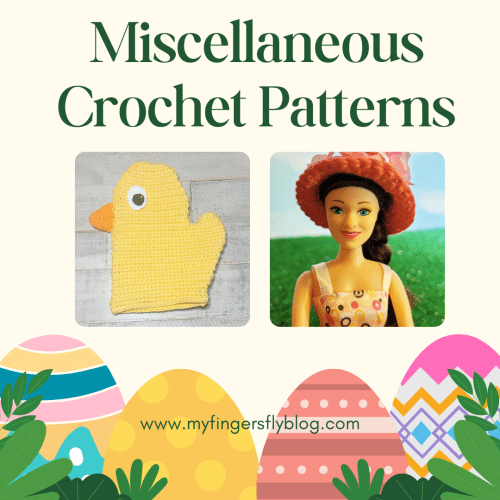
April 12th – Easter Advent FREE Miscellaneous Crochet Patterns
My Flower Lace Plant/Flower Pot Cover Crochet Pattern is being featured April 14th as part of the Miscellaneous day and the FREE crochet pattern can be found below.
You can find more FREE Miscellaneous Crochet Patterns as part of the Easter Advent Calendar Event from My Fingers Fly.
Ad- Free Premium Copy
You will find my Flower Lace Plant Covers Crochet Pattern, that has 2 sizes to choose from, on sale for $2 at my Ravelry Store during the month of April 2025.
I used Caron One Pound 100% Acrylic Yarn. (16 oz/453.6 g) (812 yds/742 m)
Materials: US H or 5 mm Crochet Hook US K or 6.5 mm Crochet Hook 50-100 yards of #4 ply Worsted Weight Yarn Scissors Tapestry Needle
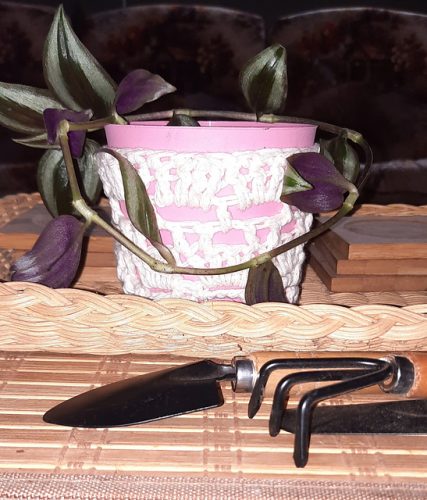
Sizes: Small = 4” x 5”
Abbreviations/Stitches Used: ch = chain st = stitch
sp = space
sc = single crochet
hdc = half double crochet
dc = double crochet
sl st = slip stitch sc2tog = single crochet 2 together sc3tog = single crochet 3 together rep = repeat
Special Stitches: sc2tog – decrease over 2 stitches sc3tog – decrease over 3 stitches Shell – (2 dc, ch 1, 2 dc) all in same space
Notes: pattern is worked in the round ch 3 counts as a dc
Gauge: US H or 5 mm Crochet Hook 4 shells x 4 rows = 4”
Gauge Swatch: R1: make a magic ring. 8 hdc in magic ring. Pull tight to close ring. (8 hdc)
Optional: ch 3, 8 hdc in 1st ch. sl st in 1st st to join. (8 hdc)
R2: ch 3, dc in same st. 2 dc in each st around. sl st in 1st st to join. (16 dc)
R3: (ch 3, dc, ch 1, 2 dc) all in the same st, sc in next st, *(2 dc, ch 1, 2 dc) all in the next st, sc in next st rep from * around. sl st in 1st st to join. (8 Shells)
R1: make a magic ring. 8 hdc in magic ring. Pull tight to close ring. (8 hdc)
Optional: ch 3, 8 hdc in 1st ch. sl st in 1st st to join. (8 hdc)
R2: ch 3, dc in same st. 2 dc in each st around. sl st in 1st st to join. (16 dc)
R3: (ch 3, dc, ch 1, 2 dc) all in the same st, sc in next st, *(2 dc, ch 1, 2 dc) all in the next st, sc in next st rep from * around. sl st in 1st st to join. (8 Shells)
R4: sl st over to ch-1 sp. ch 1, sc in same sp *ch 6, sc in next ch-1 sp. rep from * around. sl st into 1st st to join. (8 ch-6 sp)
R5: ch 1, sc in same sp, ch 3, dc in next ch-6 sp, ch 3 *sc in next sc, ch 3, dc in next ch-6 sp, ch 3. rep from * around. sl st in 1st st to join. (8 dc, 8 sc, 16 ch-3 sp)
Creating the Sides
R6: sl st over to ch-3 sp. ch 3, 3 dc in same ch-3 sp. 4 dc in each ch-3 sp around. sl st in 1st st to join. (64 dc)
R7: ch 3, dc in next st, *ch 1, sk 2 st, dc in next 2 st. rep from * around until the last 2 dc. ch 1. sl st in top of ch-3 to join. (30 dc and 15 ch-1 sp)
R8: ch 6, dc in next ch-1 sp, *ch 3, dc in next ch-1 sp. rep from * around until last ch-1 sp. ch 3. sl st in 3rd ch to join. (16 dc and 16 ch-3 sp)
R9: ch 3, 3 dc in same st. *sk next st, 4 dc in next ch-3 sp. rep from * around. sl st in top of ch-3 to join. (64 dc)
*if you would like a taller cover, repeat R7-R9*
R10: ch 1, sc in same sp, sc2tog, sc in the next 5 st *sc3tog, sc in the next 5 st. rep from * around. sl st in 1st st to join. (sc)
Fasten off and weave your ends.
That’s it! You made your own Small Flower Lace Planter Cover!
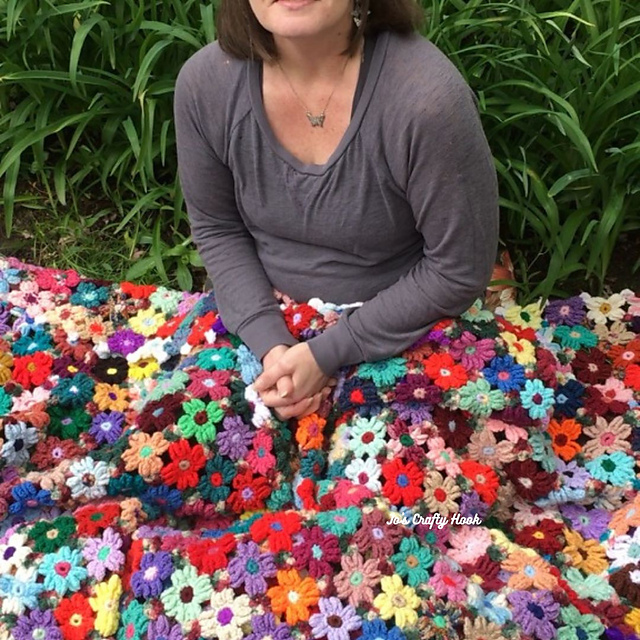
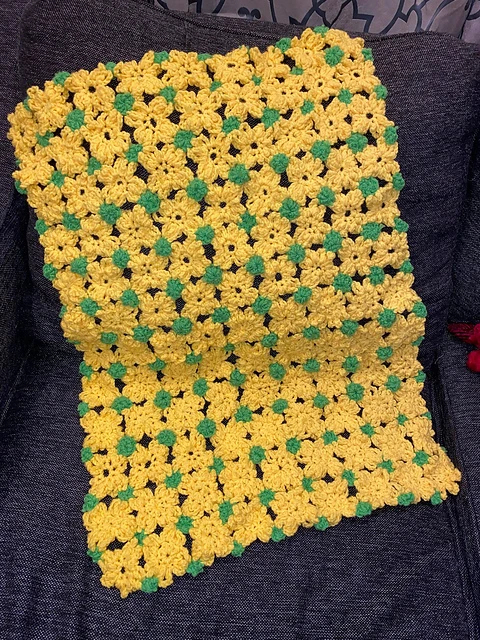
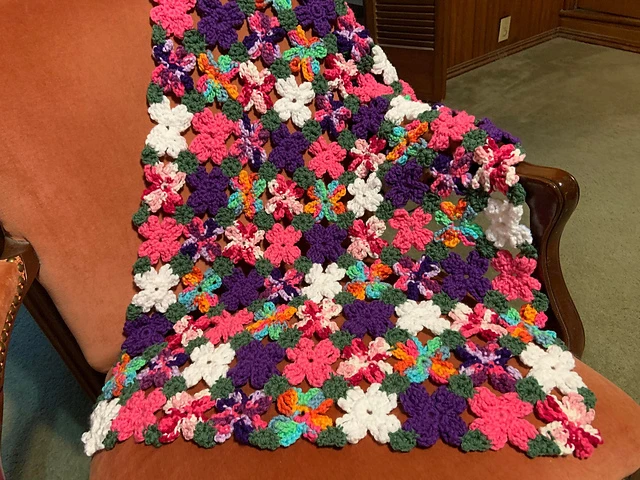
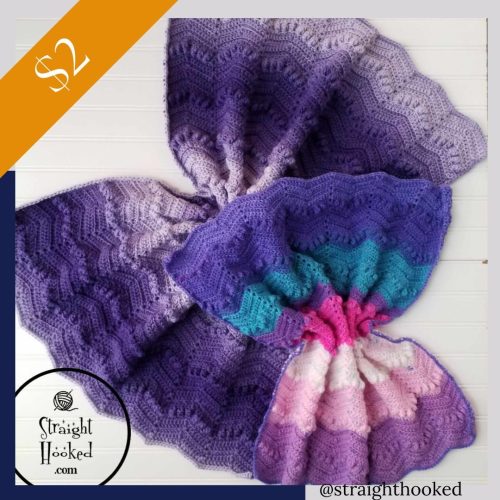
The Mae’s Flower Garden Afghan was designed with love and appreciation for the people who influence us with our love of crochet and for the legacy they leave behind.
This post contains affiliate links.
In this post, I am sharing a FREE crochet pattern of the Mae’s Flower Garden Afghan.
Story Behind the Design
Thank you for your interest in my Mae’s Flowers Crochet Pattern. This is a project that has been in the works for over 25 years. My gram started making these flowers for an Afghan back in 1994. I inherited the Afghan when she passed away about 20 years ago. It moved from house to house, taken out every once in a while, and I always said I was going to finish it and I have.
I decided I would write out the steps she did and turn it into a crochet pattern. I took the flowers apart to learn the stitches she used, so I could make my own. This pattern is dedicated to Gram. She was a very important part of my life. I hope you enjoy making the Mae’s Flowers too!
The FREE crochet pattern of the Mae’s Flower Garden Afghan below is for a Throw Size. I do have a premium copy of the Mae’s Flower Garden Crochet Pattern for $5 at my Ravelry Store. It contains:
2 Sizes to Choose from – Throw or Lapghan
Step-by-Step Picture Tutorials
Video Tutorials of Flowers and Assembly
Brittney
Kimberly
Lourdes Bernatte
Sally
Crochet Pattern Details
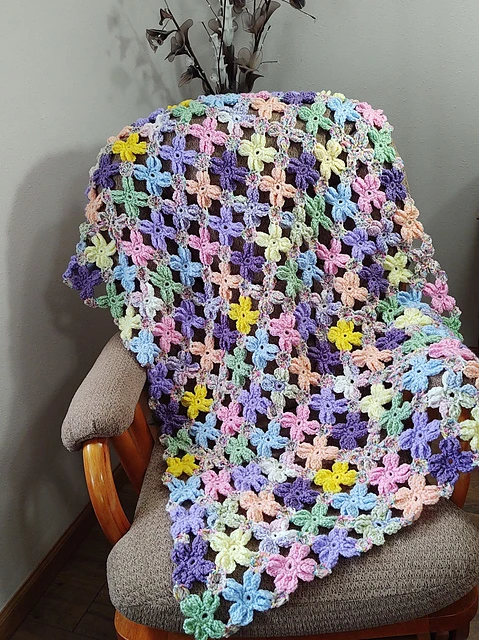
I used a variety of yarns in a variety of colors. The Mae’s Flowers can be made in solid or contrasting colors. This crochet pattern is a great way to use up your scrap yarn.
Materials: 2-4 yds of 4 ply Worsted/Aran Weight Yarn US H Crochet Hook or 5mm Tapestry Needle Scissors
Abbreviations/Stitches Used: sc = single crochet dc = double crochet ch = chain st = stitch sl st = slip stitch sp = space rep = repeat RS = Right Side
Flower Size:3” x 3” Flowers Needed: 176
Throw Afghan Size: 48″ x 60″
Notes: It would be a great idea to weave in your ends as you go. If you do not, you will spend a long time weaving them in after the afghan is complete
Mae’s Flower Video Tutorial
Mae’s Flower Free Crochet Pattern
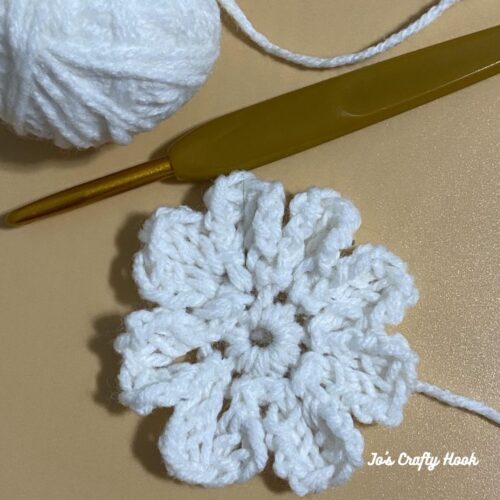
Mae’s Flower
R1: make a loose slip knot or a magic circle, ch 2, 8 sc in ch 1 or magic circle. sl st in 1st sc to join.
R2: ch 4, dc in ch 1 just made , ch 4, dc in 2nd ch 1 made, sl st in same sc. *sl st in next sc, ch 4, dc in ch 1 just made, ch 4, dc in 2nd ch 1, sl st in same sc. rep from * around. sl st in 1st st to join.
Rep R2 until you have 8 flower petals.
Fasten off and weave in ends.
Continue these steps until you have 180 flowers ************************************************
Border Pieces
ch 1, 4 dc in ch-1 sp. sl st in 1st dc to join. 4 dc
Fasten off and weave in ends.
rep until you have 50 Edgers.
Connection Pieces
ch 1, 8 dc in ch-1 sp. sl st in 1st dc to join. 8 dc
Fasten off and weave in ends.
rep until you have 180 Connectors.
************************************************
The Mae’s Flower Garden Afghan Assembly
The assembly of the afghan is simple, but it is better explained in my Assembly Instructions Video Tutorial found on my YouTube Channel.
You can purchase the premium copy of the Mae’s Flower Garden Afghan Crochet Pattern for $5 at my Ravelry Store.
Inside the premium copy of the Mae’s Flower Garden Afghan crochet pattern there are a lot of extra goodies. You get:
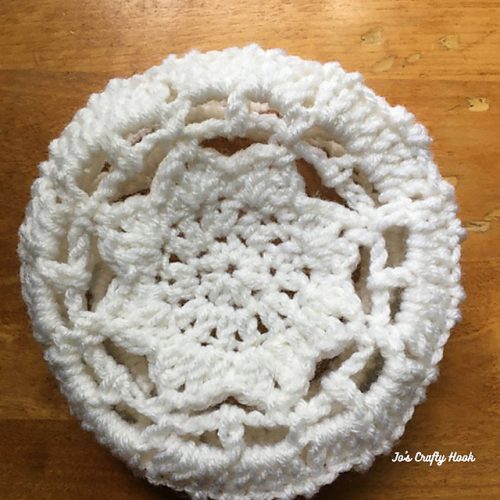
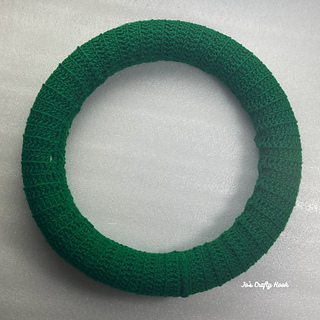
The Styrofoam Ring Cover Crochet Pattern is a great design that you can use to add a little something extra to your Home Decor.
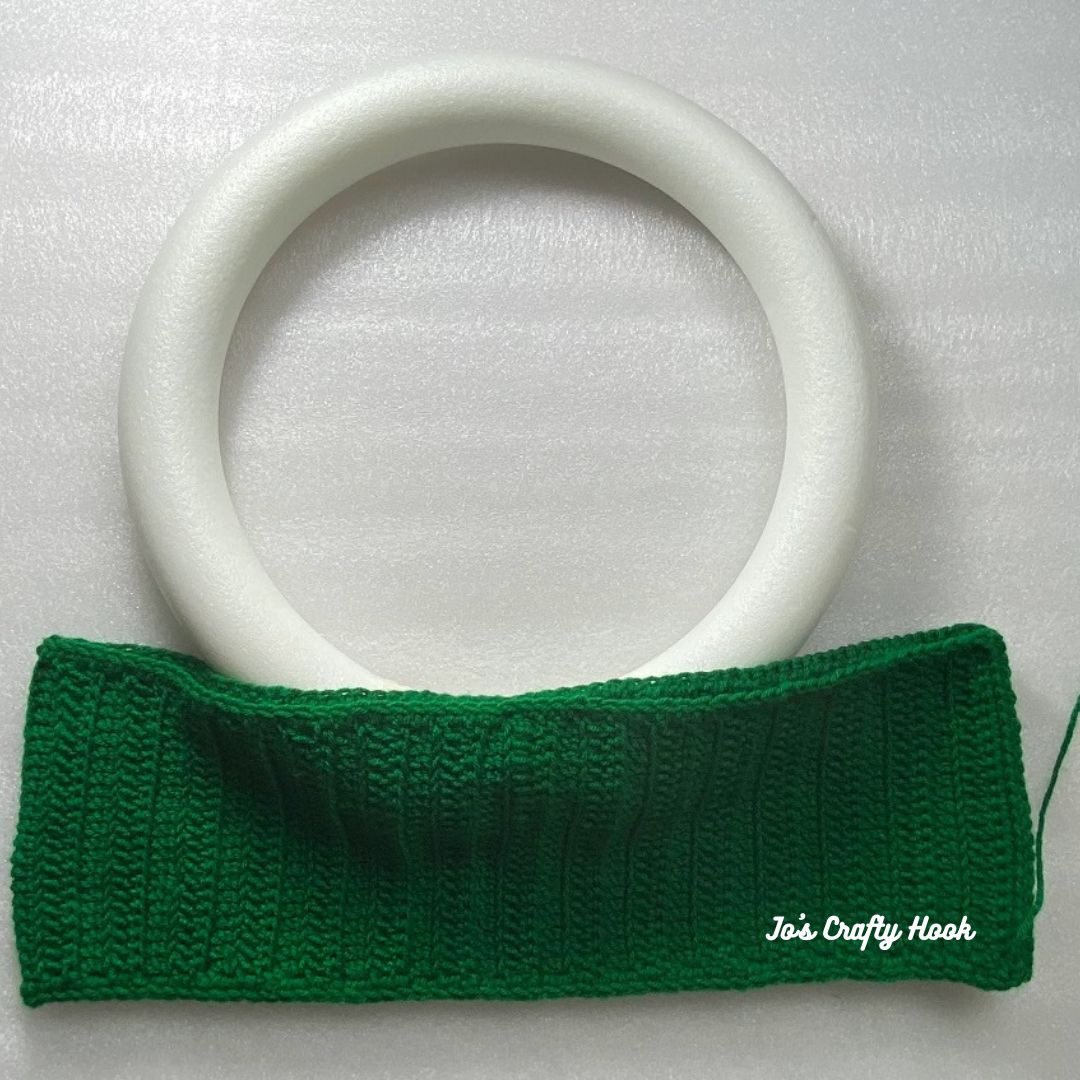
The crochet pattern is designed to wrap around a 16″ x 2″ Styrofoam Ring. The crochet pattern can easily be customized to fit just about any size of a Styrofoam Ring.
The post contains affiliate links that appear at no cost to you.
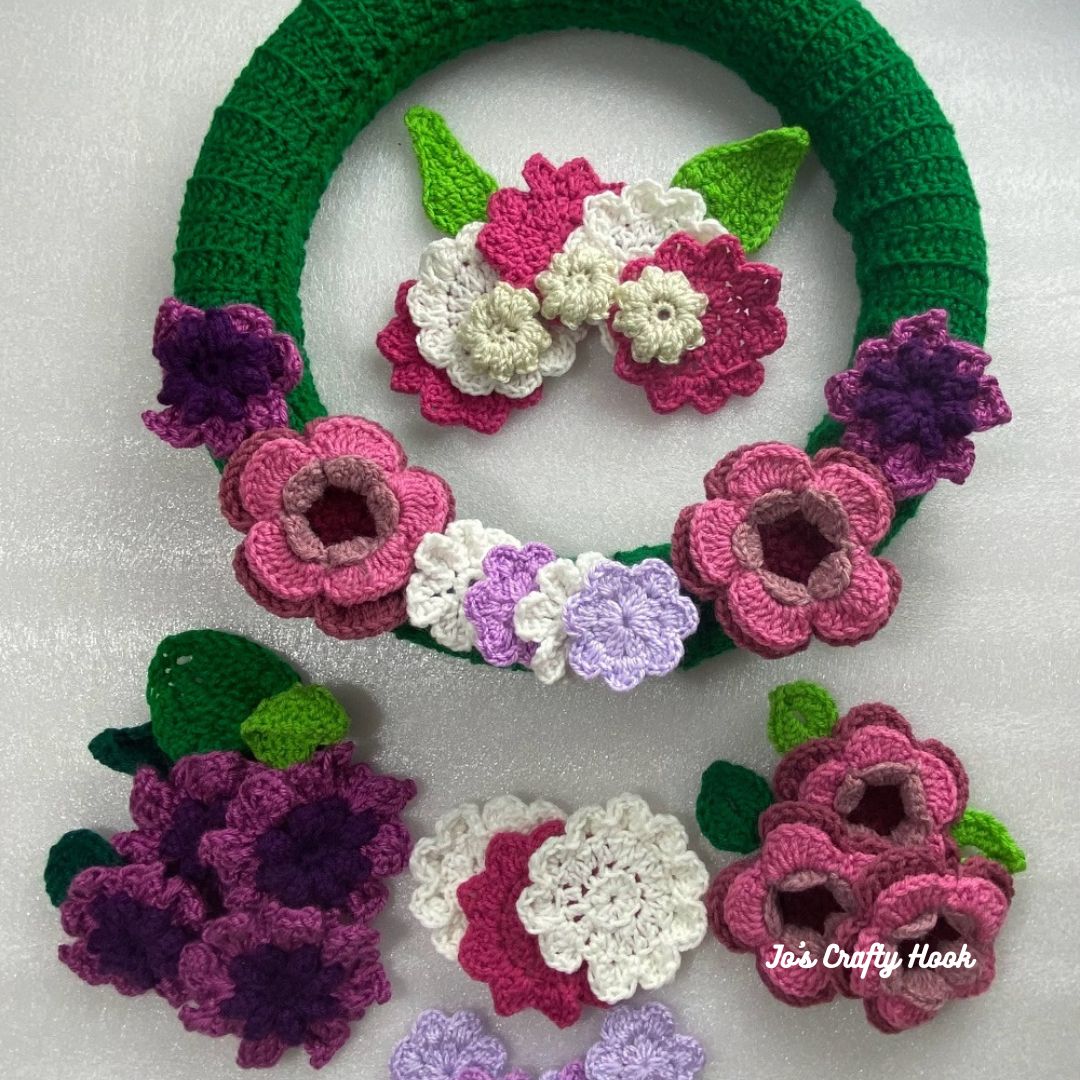
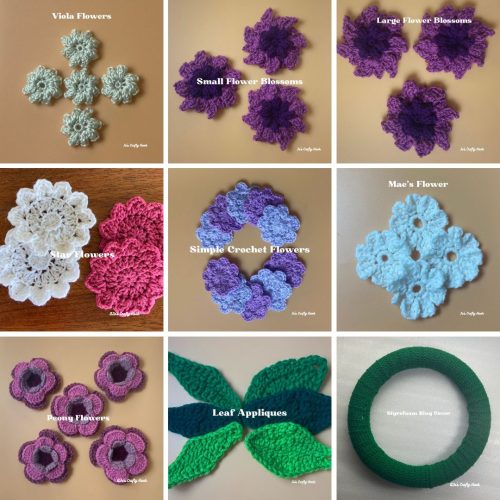
For the last 9 days I have shared 7 of my crochet flower crochet patterns that you can add to your wall hanging. Now it is time to make your ring cover so you can start adding your flowers and leaf appliques.
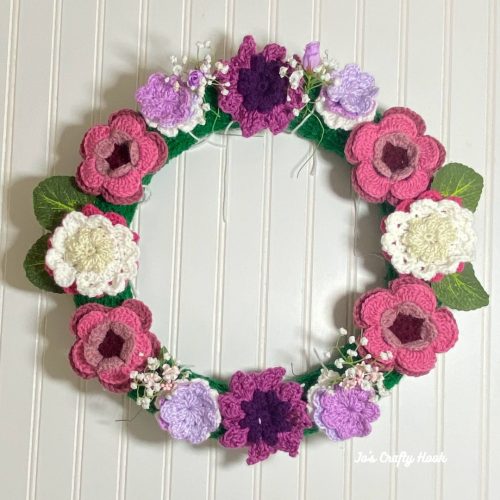
My finished Blooming Flowers Wall Hanging
Find all of the FREE crochet patterns HERE on my website and make your own Blooming Flowers Wall Hanging.
If you haven’t started or if you would like to make your own Blooming Flowers Wall Hanging, I have and eBook that contains all of the flower crochet patterns, a leaf applique crochet pattern with 2 versions and the ring cover crochet pattern all inside. The Blooming Flowers Wall Hanging eBook can be found at my Ravelry Store.
This is a pattern you can use this to decorate your home for the holidays, birthdays, as gift. There are so many great uses for this.
Below you will find a FREE version of the Styrofoam Ring Cover Crochet Pattern.
There are a lot of great yarns you can use for the wall hanging at LoveCrafts. You can use my affiliate link and check out their wonderful selection of yarns.
Information Needed to Crochet the Styrofoam Ring Cover
I used Caron One Pound 100% Acrylic Yarn. (16 oz/453.6 g) (812 yds/742 m) in Azure.
Materials Used: 75-100 yds of #4 ply or Worsted/Aran Weight Yarn US H or 5mm Crochet Hook 16” x 2” Styrofoam Wreath Tapestry Needle Scissors
Abbreviations/Stitches Used: ch = chain sc = single crochet dc = double crochet dcblo = double crochet back loop only dcflo = double crochet front loop only sl st = slip stitch RS = Right Side WS = Wrong Side
Size of Panel: 6” x 32”
Notes: this crochet pattern is designed to cover a 16” x 2” styrofoam ring. the crochet pattern is double the size of the ring because it wraps around the ring. ch 3 counts as a dc. there are some picture tutorials below to help with cover assembly.
Customizing: The crochet pattern is double the size due to the ring’s Circumference and Diameter.
Example Ring Sizes: 8” 10” 12” 15”
Gauge: US H or 5mm Crochet Hook 16 st x 8 rows = 4”
Gauge Swatch: US H or 5mm Crochet Hook R1: ch 19, dc in 4th ch from hook, dc across. ch 3, turn (16 dc) R2-R8: dc across. ch 3, turn (16 dc)
Styrofoam Ring Cover Crochet Pattern
Finished Cover
Cover before attaching
R1: ch 25, sc in 2nd ch from hook, sc across. turn (24 sc)
R2: ch 3, dcblo across until last st. dc in last st. turn (24 dc)
R3: ch 3, dcflo across until last st. dc in last st. turn (24 dc)
rep R2-R3 until the panel fits the total circumference of your ring.
Do NOT fasten off. Move to the Border
Border
Across the Top (RS): being sure you turned your work after R63, ch 1, (sc, ch 1, sc) all in same st, sc across until last st. (sc, ch 1, sc) all in last st.
Down the Side: turn slightly, sc in next st. 2 sc in each dc until last st. (sc, ch 1, sc) all in last st.
Across the Bottom: turn slightly, sc in each st across the bottom until last st. (sc, ch 1, sc) all in last st.
Up the Side: turn slightly, 2 sc in each dc up the side until 1st st. sl st in 1st st to join.
Across the Top: With WS face WS, ch 1, sl st in each st across, going through both the foundation row and last row worked.
Fasten off, leaving a long tail of yarn to close the panel around the ring.
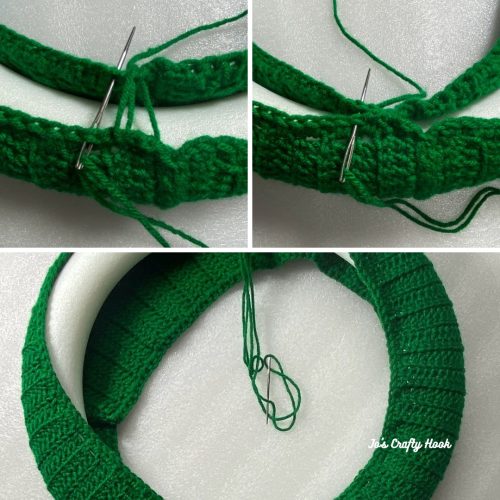
Closing Panel
Step 1: With WS to WS of panel border. Whip Stitch (or whatever sewing stitch you prefer) the sides of the panel closed around the styrofoam ring.
Fasten off and weave in ends.
That’s it! You made your own Styrofoam Ring Cover! I would love to see your version! You can tag me at @joscraftyhook and in my FB Group Jo’s Crafty Hook Designs
You can decorate it as a Wall/Door Hanging for the Holidays or even add a little extra to your Home Decor.
I just love flowers! There’s nothing like bringing fresh blooms inside the house, but sometimes that’s not possible here in NE Ohio.
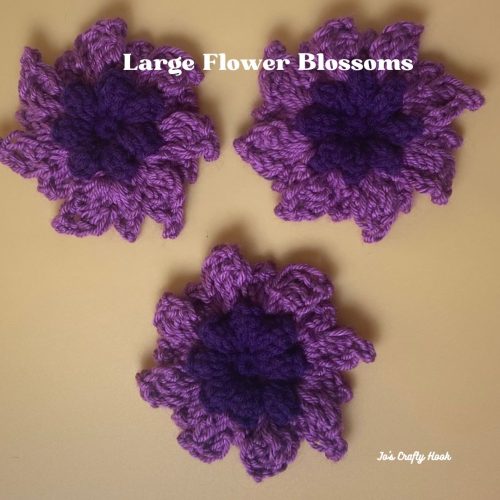
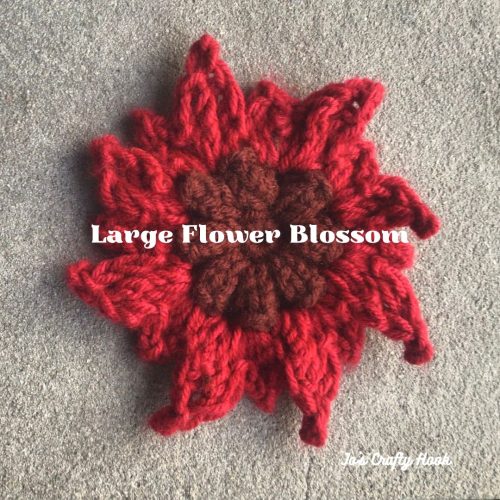
The Large Flower Blossom Crochet Pattern will help you keep fresh flower blooms inside your home in any color for any season. I hope you love making your own Large Blossoms.
Today we are making the Large Flower Blossoms I used in my version of the Blooming Flowers Wall Hanging.
Yesterday we made the Small Flower Blossoms.
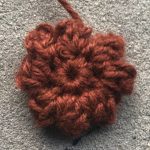
The center of the Large Flower Blossom uses the Viola Flower as it’s center. There are 2 petals created in 1 space around the Viola Flower.
Below you will find a FREE version of the Flower Blossom Crochet Pattern with Step-by-Step Picture Tutorials and my Left Handed Video Tutorial for the Viola Flower, which creates the center of the Flower Blossom.
This page contains affiliate links.
Shop LoveCrafts and find beautiful colors of yarn to use for your flowers!
Large Flower Blossom Crochet Pattern.
You can find an Ad-Free Premium Copy of my Flower Blossoms Crochet Pattern that has both the Small and Large Flower Blossoms. There are step-by-step Picture and Video Tutorials inside the pattern. You will find them at all of my stores.
I used #4 ply Worsted/Aran Weight Yarn in a wide variety of colors.
Materials: 5-10 yds of Brown #4 ply Worsted/Aran Weight Yarn 25-50 yds of CC #4 ply Worsted/Aran Weight Yarn US I or 5.5mm Crochet Hook US J or 6 mm Crochet Hook Scissors Tapestry Needle
US Terminology
Skill Level: Advanced Beginner
Abbreviations/Stitches Used:
ch = chain sc = single crochet hdc = half double crochet dc = double crochet trc = triple (treble) crochet alt ch 2 = alternate chain 2 or alternate starting chain rep = repeat CC = Contrasting Color
Notes: the flower is worked in the round ch 1 counts as a stitch (except where indicated) ch 2 counts as a stitch
Gauge: Gauge is not that important in this design due to the different thicknesses of yarn.
Sizes: Large Flower = 5” x 5”
My Left Handed Video Tutorials:
You can find my Viola Flower Crochet Pattern Video Tutorial on my YouTube Channel
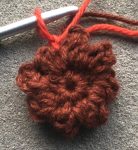
R1: make a magic circle, 8 sc in magic circle. pull magic circle closed. (8 sc)
Optional: ch 2, 8 sc in ch 1. sl st in 1st sc to join. (8 sc)
R2: ch 1 (does not counts as a st) *5 dc in same st, turn to WS, sl st in 1st dc, turn to RS, ch 2. rep from * around. sl st in 1st ch-2 sp to join. (8 center parts)
Fasten off and weave in ends.
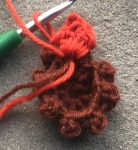
Large Flower Petals
Attaching CC Yarn Tip:
It is sometimes easier to weave in your ends as you go when adding another color to a design. Below you will find a Picture Tutorial to show you how.
Using CC & US J Crochet Hook
Step 1: attach yarn with sl st in any ch-2 sp, (hdc, dc, ch 2, sl st in 1st ch of ch 2 just made, dc, hdc, sl st) all in ch-2 sp. in the same ch-2 sp, (sc, 2 trc, ch 3, sl st in 1st ch of ch 3 just made, 2 trc, sc)
attach yarn with a sl st
Step 2: in the next ch-2 sp (hdc, dc, ch 2, sl st in 1st ch of ch 2 just made, dc, hdc, sl st). in the same ch-2 sp, (sc, 2 trc, ch 3, sl st in 1st ch of ch 3 just made, 2 trc, sc)
repeat Step 2 around until 1st ch-2 sp. sl st in 1st ch-2 sp to join.
Fasten off and weave in ends.
That’s it! You made your very own version of the Large Flower Blossom!
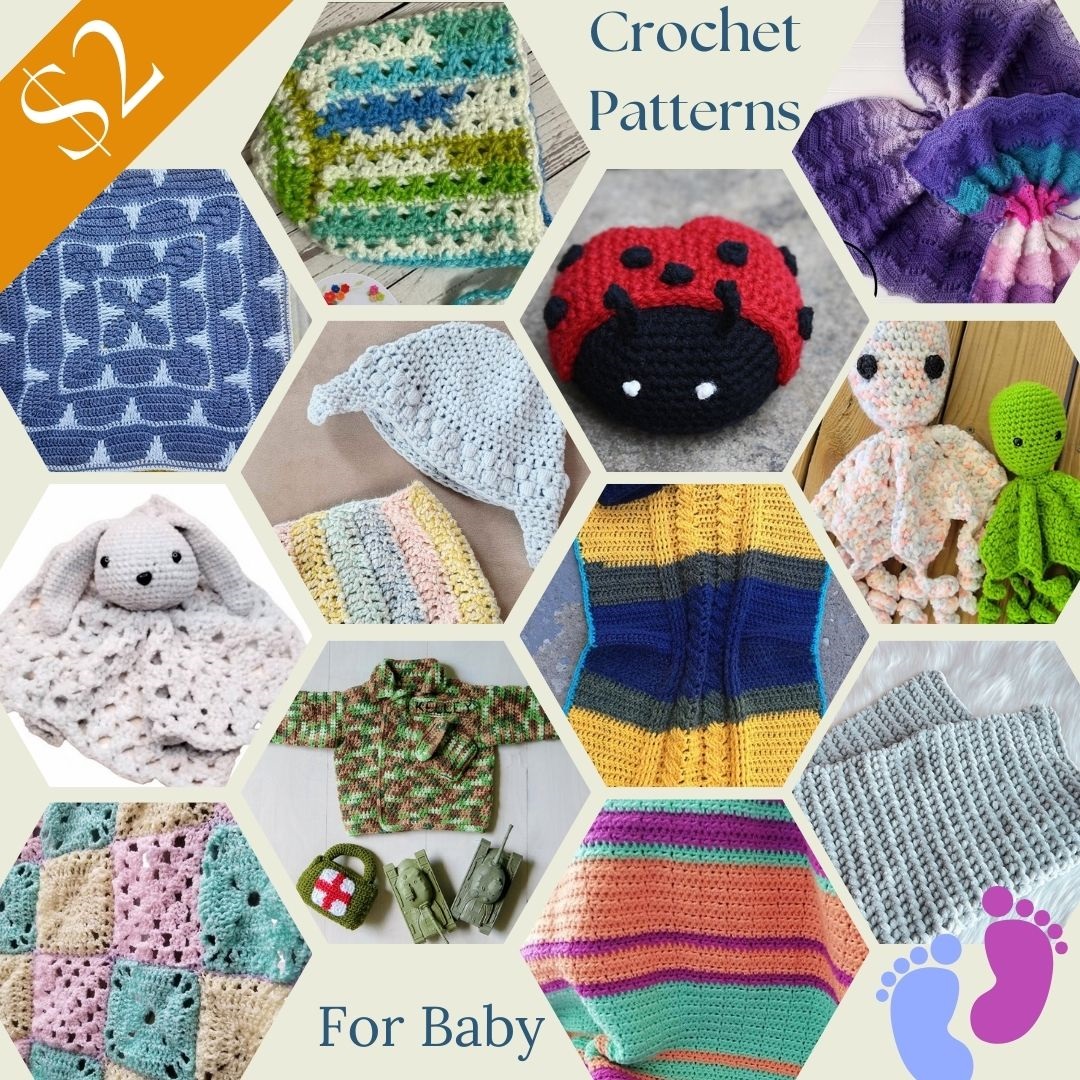
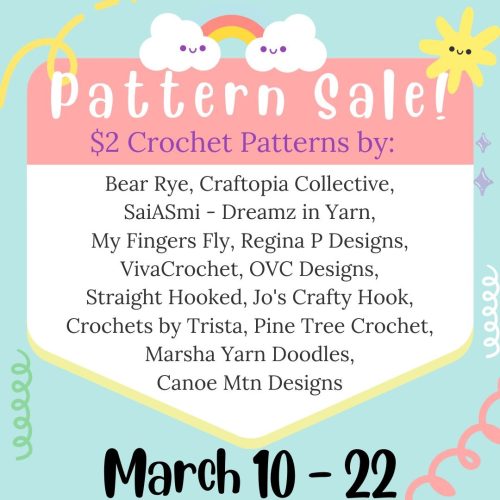
If you are looking for crochet patterns just for babies, the New Arrivals $2 Crochet Pattern Sale is just for you!
From March 10-22, 2024 you will find 13 premium crochet patterns on sale for $2 from 13 different crochet designers.
This post contains affiliate links.
Shop LoveCrafts and find so many colors for all of these adorable baby crochet patterns.
Oh Baby Baby $2 Crochet Patterns Sale
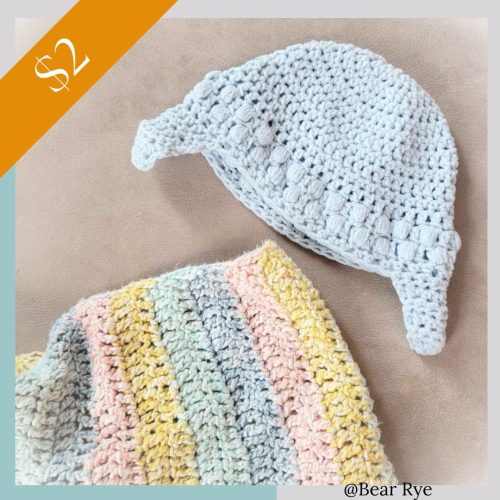
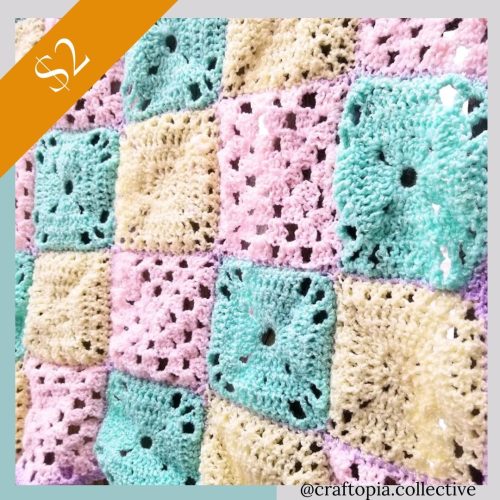
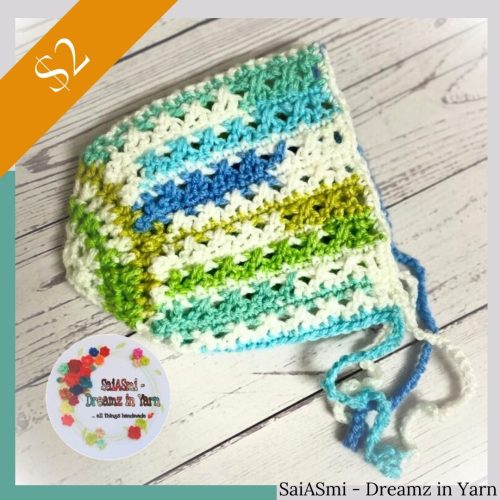
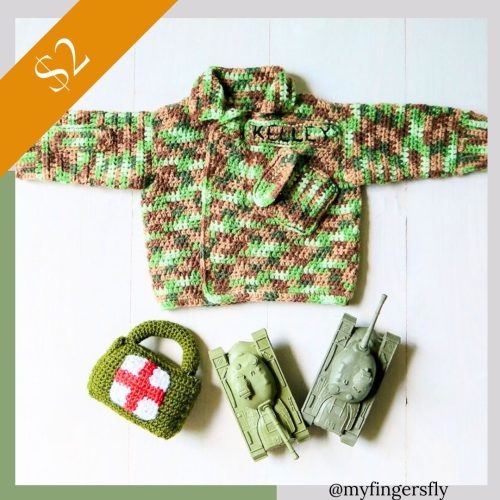
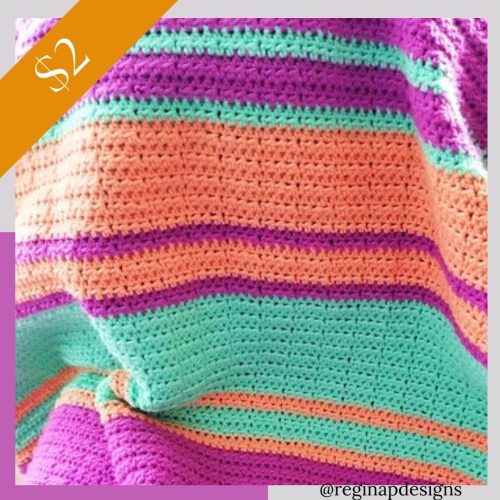
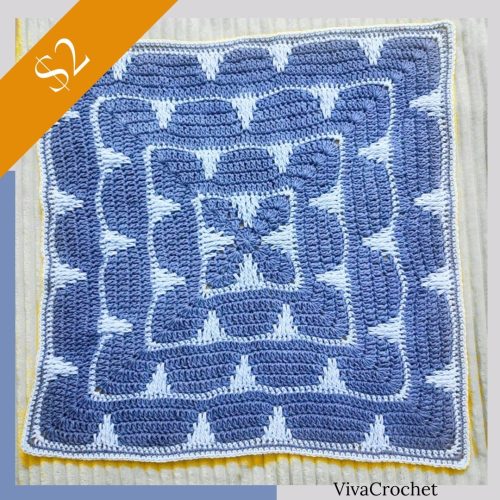
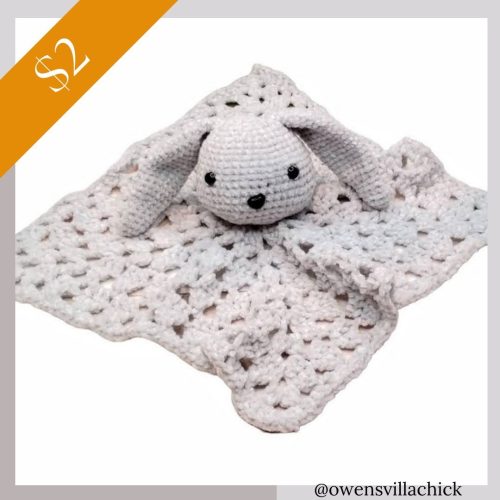
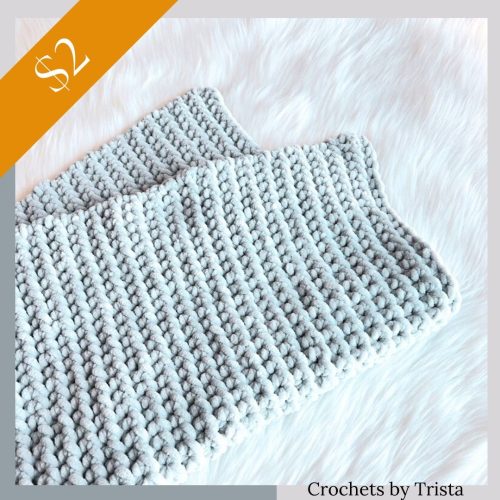
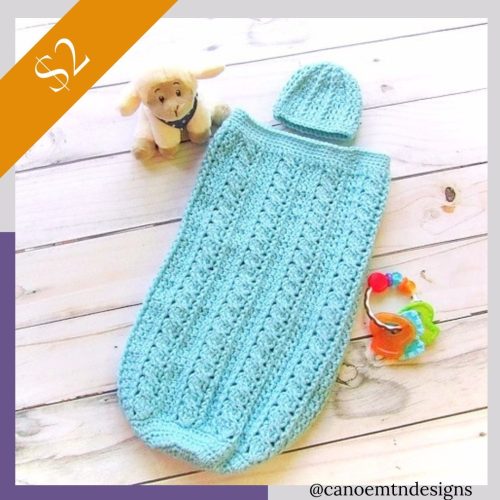
Little Boy Blue Hat from Bear RyeJudy’s Blanket (with bonus Chai the Cat plushie) from Craftopia CollectiveSweet Baby Bonnet from SaiASmi – Dreamz in YarnMilitary Baby Sweater from My Fingers FlySweet Snuggles Baby Blanket from Regina P DesignsIcicle Dance Car Seat Cover Blanket from Viva CrochetVelvet Bunny Lovey from OwensVillaChick DesignsKenzie Blanket from Straight HookedJacob’s Ladder Kradle Blanket from Jo’s Crafty HookRolling Hills Baby Blanket from Crochets by TristaOzzy Octopus Lovey from Marsha YarnDoodlesLittle Lady from Pine Tree CrochetCable Cocoon & Hat from Canoe Mtn Designs
Thank you for stopping by to shop these great new arrival premium crochet patterns for $2!
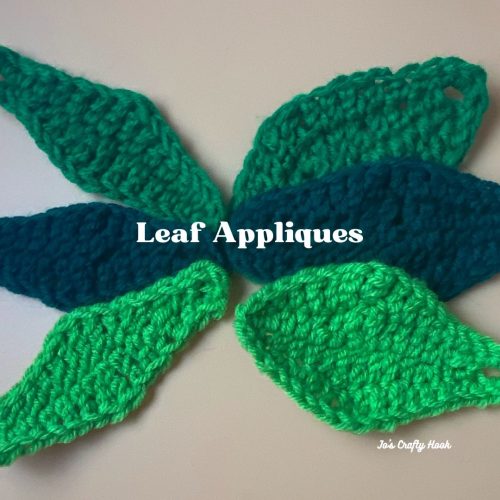
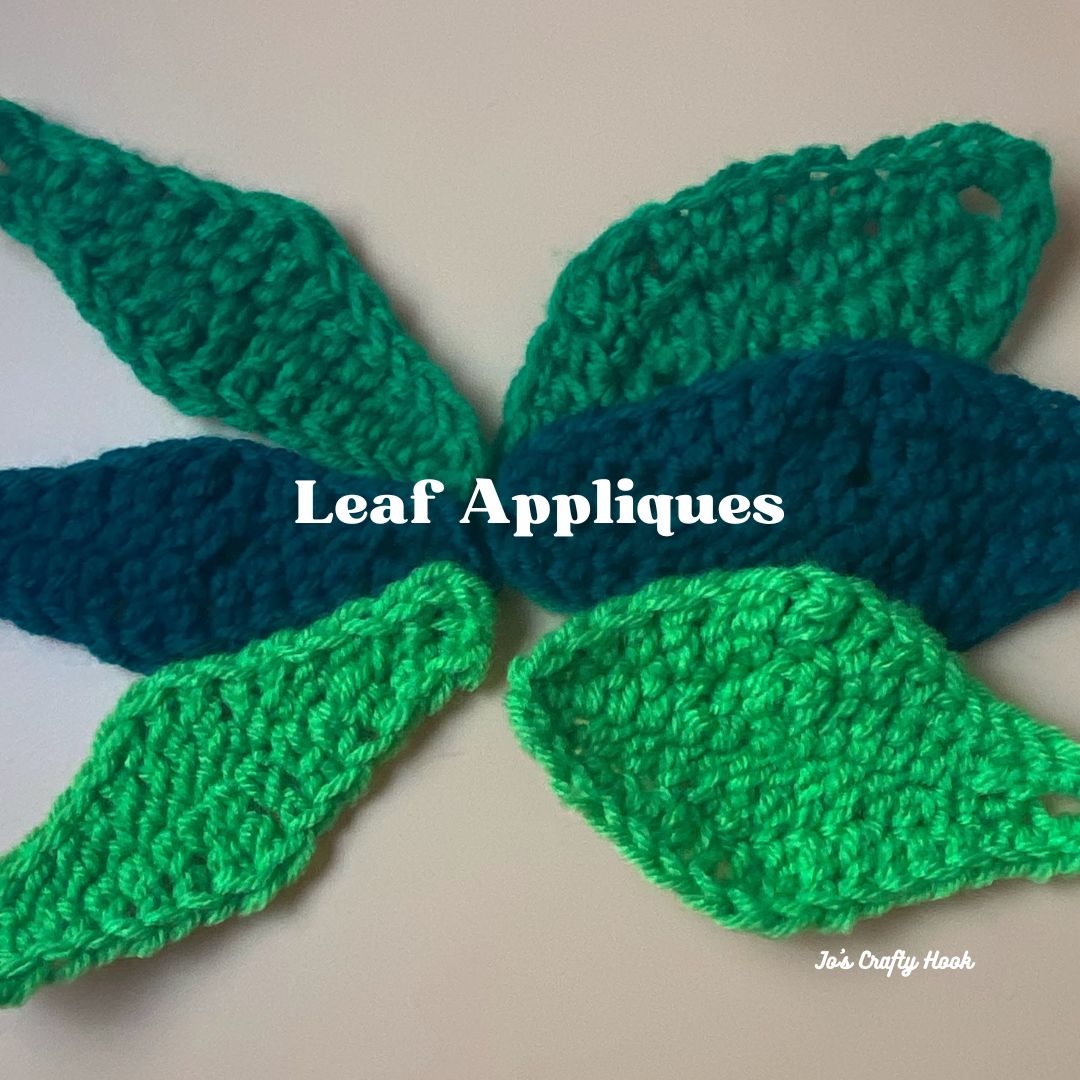
The Leaf Applique Crochet Pattern has 2 different leaf crochet patterns inside. I have used these appliques to embellish flower crochet patterns and used them in my Blooming Flowers Wall Hanging CAL.
I made my leaf appliques in 3 different colors. In total I made 6 of the smaller leaves and 6 of the larger leaves. You can make as many of these leaf appliques to add as many leaves as you’d like for your version of the Blooming Flowers Wall Hanging.
This post contains affiliate links. If you make a purchase using these links I may receive compensation (at no added cost to you.)
I have a Blooming Flowers Wall Hanging eBook. It contains all 7 flowers crochet patterns, a leaf appliques crochet pattern with 2 versions and the Styrofoam Ring Cover Crochet Pattern. The eBook can be found at my Ravlery Store for a reduced price of $3.
Below you will find a FREE version of the 2 Leaf Appliques Crochet Patterns.
Shop LoveCrafts and find beautiful green colors for your leaves!
Information Needed
I used #4 ply Worsted/Aran Weight Yarn in a wide variety of colors.
Materials: US I or 5.5 mm Crochet Hook 10-15 yds of Worsted/Aran Weight Yarn SM – Stitch Marker Scissors Tapestry Needle
US Terminology Skill Level: Beginner
Abbreviations/Stitches Used: ch = chain sc = single crochet hdc = half double crochet dc = double crochet trc = triple (treble) crochet rep = repeat SM = Stitch Marker
Notes: row 1 of the leaves are worked on both sides of the starting chain There are 2 steps to row 1 to help make the stitches on both sides of the starting chain
Gauge: Gauge is not that important in this design due to the different thicknesses of yarn.
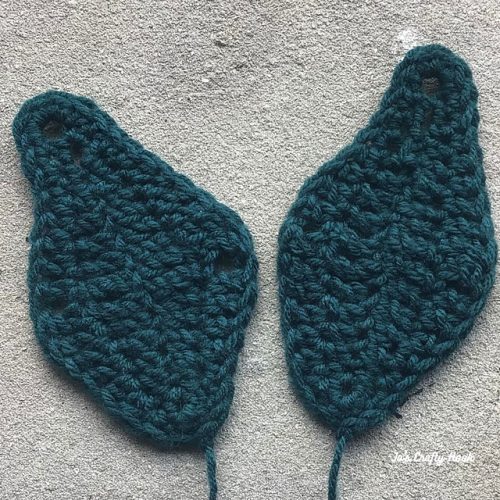
Sizes: Small Leaf = 4” x 2” Large Leaf = 4” x 4”
My Left Handed Video Tutorial Used in my Triple Crochet Box Stitch:
1st Leaf Applique Crochet Pattern
If you would like a firmer leaf, try going down a hook size or 2.
R1: If you are attaching these to your flowers leave a long tail of yarn (4” or so) ch 15.
NOTE: R2 has 2 steps
Step 1:
2 sc in 2nd ch from hook (place SM in the 1st st) sc in next st, hdc in next 2 st, dc in next 2 st , trc in next 2 st, dc in next 2 st , hdc in next 2 st, sc in next st, 2 sc in last st (16 st)
turn to crochet on the other side of the foundation chain.
Step 2:
2 sc in 1st st, sc in next st, hdc in next 2 st, dc in next 2 st, trc in next 2 st, dc in next 2 st, hdc in next 2 st, sc in next st, sc in last st. sl st in 1st st to join. (15 st)
Fasten off and weave in your ends.
2nd Leaf Appliques Crochet Pattern
If you would like a firmer leaf, try going down a hook size or 2.
R1: ch 15
NOTE: R2 has 2 steps
Step 1:
sc in 2nd ch from hook (place SM in 1st st), sc in next st, hdc in next 2 st, dc in next 2 st , trc in next 2 st, dc in next 2 st , hdc in next 2 st, sc in next st, 2 sc in last st. (15 st)
turn to crochet on the other side of the foundation chain.
Step 2:
ch 4, 2 sc in 1st st, sc in next st, hdc in next 2 st, dc in next 2 st, trc in next 2 st, dc in next 2 st, hdc in next 2 st, sc in next st,( 15 st & ch-4 sp)
R3: sc in st where you placed your SM, sc in next 2 st, hdc in next 2 st, dc in 2 st, trc in next 2 st, dc in next 2 st, hdc in next 2 st, sc in next 3 st. 4 sc in ch-4 sp, sc in next 3 st, hdc in next 2 st, dc in next 2 st, trc in next 2 st, dc in next 2 st, hdc in next 2 st, sc in last 3 st. sl st in the next 2 st to join. (35 st) Tip: If you are attaching these to your flowers, leave a long tail of yarn 4” – 6” Fasten off and weave in ends.


 I have a Blooming Flowers Wall Hanging eBook. It contains all 7 flowers crochet patterns, a leaf appliques crochet pattern with 2 versions and the Styrofoam Ring Cover Crochet Pattern. The eBook can be found at my