What an exciting year 2020 is turning out to be for me! I will be featured with 13 other Crochet Designers in a FREE Pattern Giveaway Train, in honor of Valentine’s Day, on Facebook! How exciting for me and for YOU! There will be all kinds of goodies from all designers featured on the Train! Below is what will be posted on my Facebook Page Jo’s Crafty Hook Designs and you can find the link here!
***FREE PATTERN GIVEAWAY***
Thank you for joining the Give Away Train at Jo’s Crafty Hook Designs! Fourteen amazing Crochet Designers have joined in the pattern giveaway. Please follow the link at the end of the post to the next Designer and pattern/patterns.
I will be giving away a copy of my Wrapped in Love eBook which contains 12 crochet patterns of gloves, hats, and more!
The winner will be chosen on Feb 15 in the morning. I will pick 2 winners!
How to enter (post all answers in one comment):
1. Which pattern will you crochet first if you win.
Be sure to grab your seat on the train and win some FREE patterns from me and 13 other Crochet Designers! You can grab your seat right here and visit the other exciting patterns from all of 13 Fiber Artists!
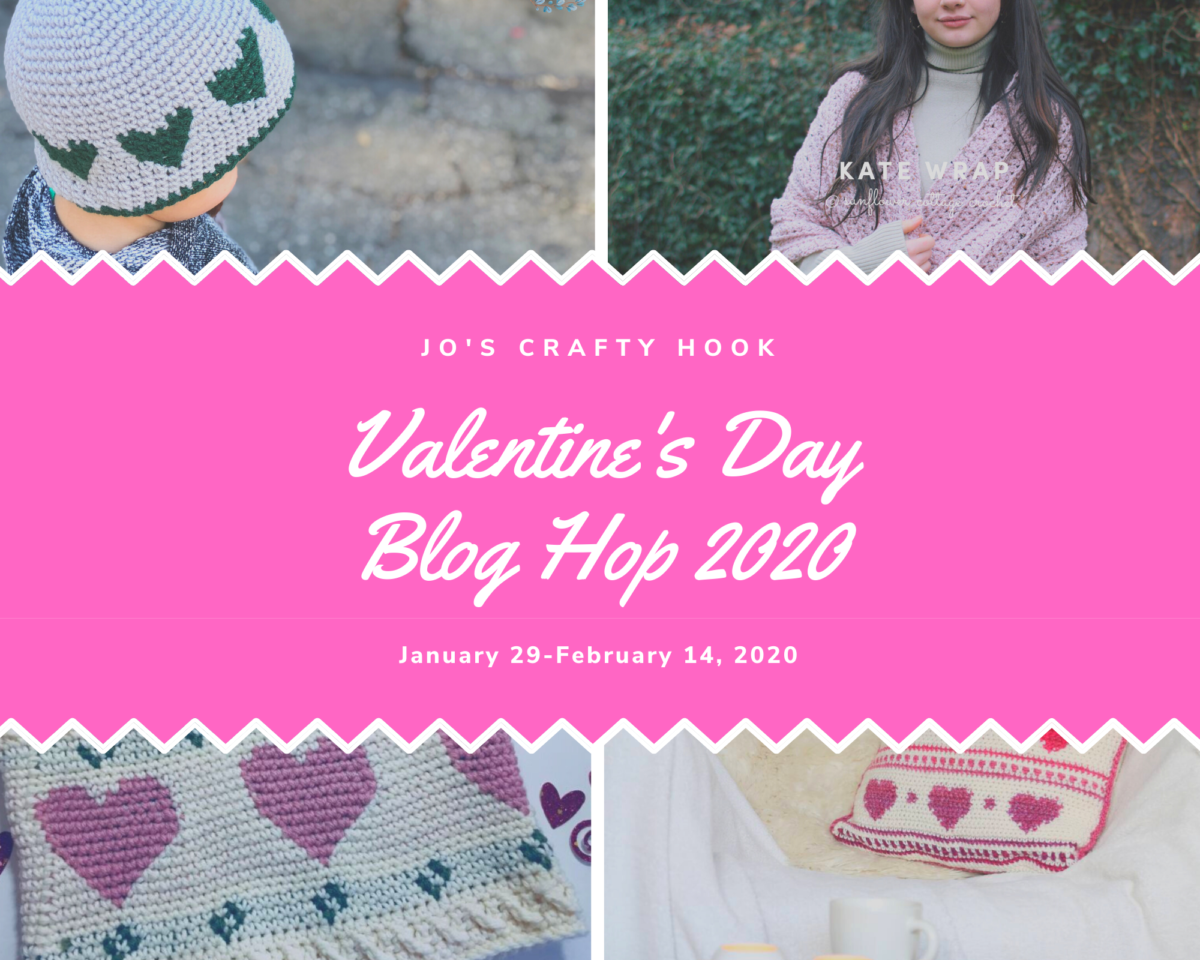
My Valentine’s Day Blog Hop 2020 has been a hit, so far! Be sure to read about my Valentine’s Day Blog Hop 2020 here. The giving away of patterns, of discounted patterns and FREE patterns from the featured fiber artists has gone WAY over what I expected! The GOOD thing…………it is NOT over! The Valentine’s Day Blog Hop 2020 lasts until 2/14/2020!
Thank you for reading my post! Any comments, feedback our suggestions would be greatly appreciated. If you have any thing you would like to see from Jo’s Crafty Hook, please feel free to leave a comment here or email me at jo@joscraftyhook.com. I would LOVE to hear from you.
Happy New Year! I hope this post finds you well and excited for a New Year in crocheting! 2020 is a new year with new goals. One goal I am SO excited about is to be Hosting my very first blog hop, the Valentine’s Day Blog Hop 2020! I will be sharing with you Valentine’s Day crochet patterns from myself and 5 Amazing fiber artists.
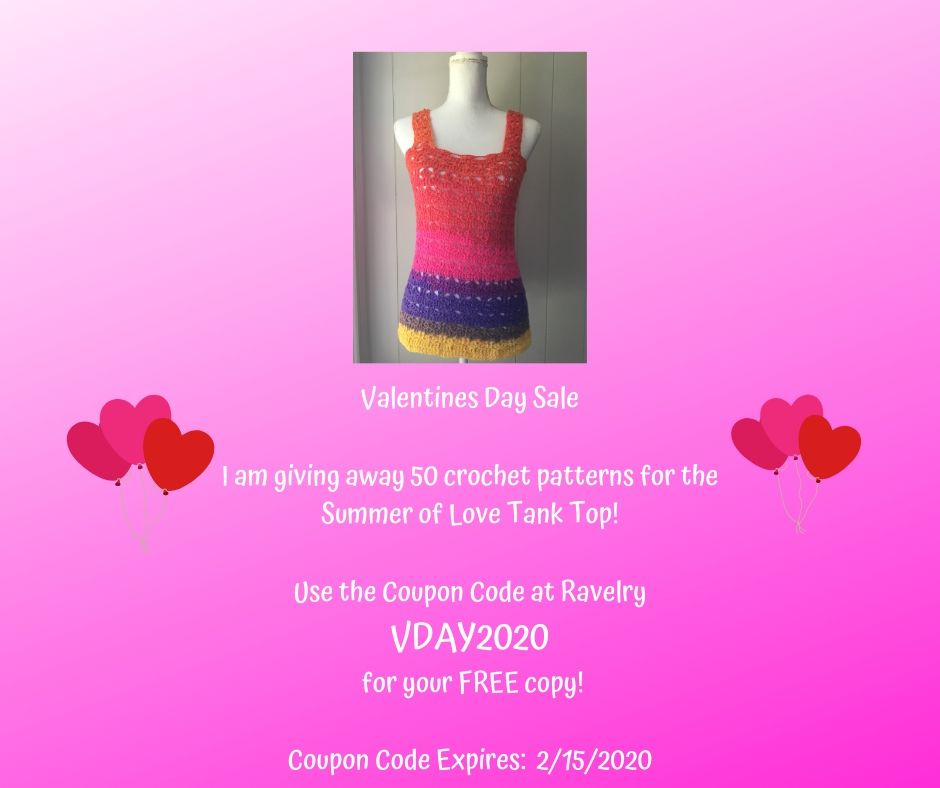
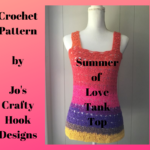
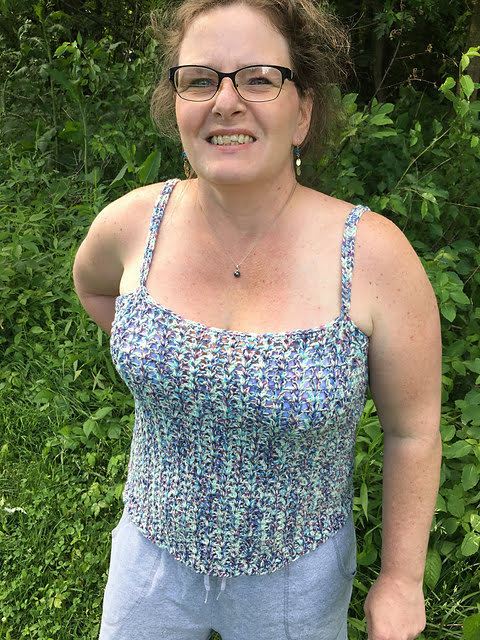
To get things started I want to share with you my own Valentine’s Day crochet pattern which features my Summer of Love Tank Top. You will find it free here on my website in 6 sizes. The awesome thing I will be doing for Valentine’s Day is giving away 50 Ad-Free PDF copies of my tank top crochet pattern! The PDF has an extra crochet pattern inside for a Crop Top!
You read me right! I will be giving away 50 copies of these 2 crochet patterns until 2/15/2020. In order for you to get your copy, you need to be one of the first 50 people to head over to Ravelry and download the pattern. To grab your copy of the Ad-Free PDF crochet patterns download it here from Ravelry and use the Coupon Code: VDAY2020!
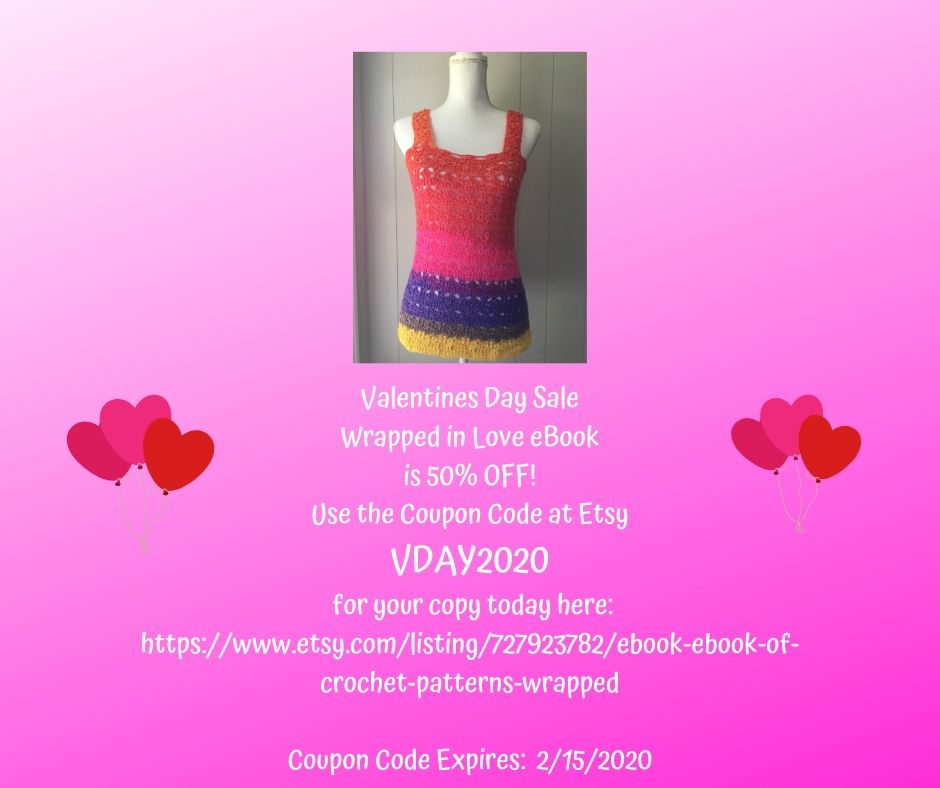
Another goal I am so excited about is my very first eBook, my Wrapped In Love eBook! Because I am so excited, I want to share the excitement with you by offering a discount on my Wrapped In Love eBook from my Etsy Shop here! The eBook contains 12 crochet patterns that I designed for Valentine’s Day and Cancer Awareness. You will find crochet patterns for Hats, Tank Tops and more! Use the Coupon Code VDAY2020 and receive 50% off the Wrapped In Love eBook from my Etsy Shop Jos Crafty Hook!
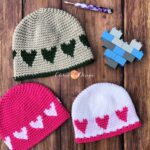
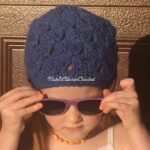
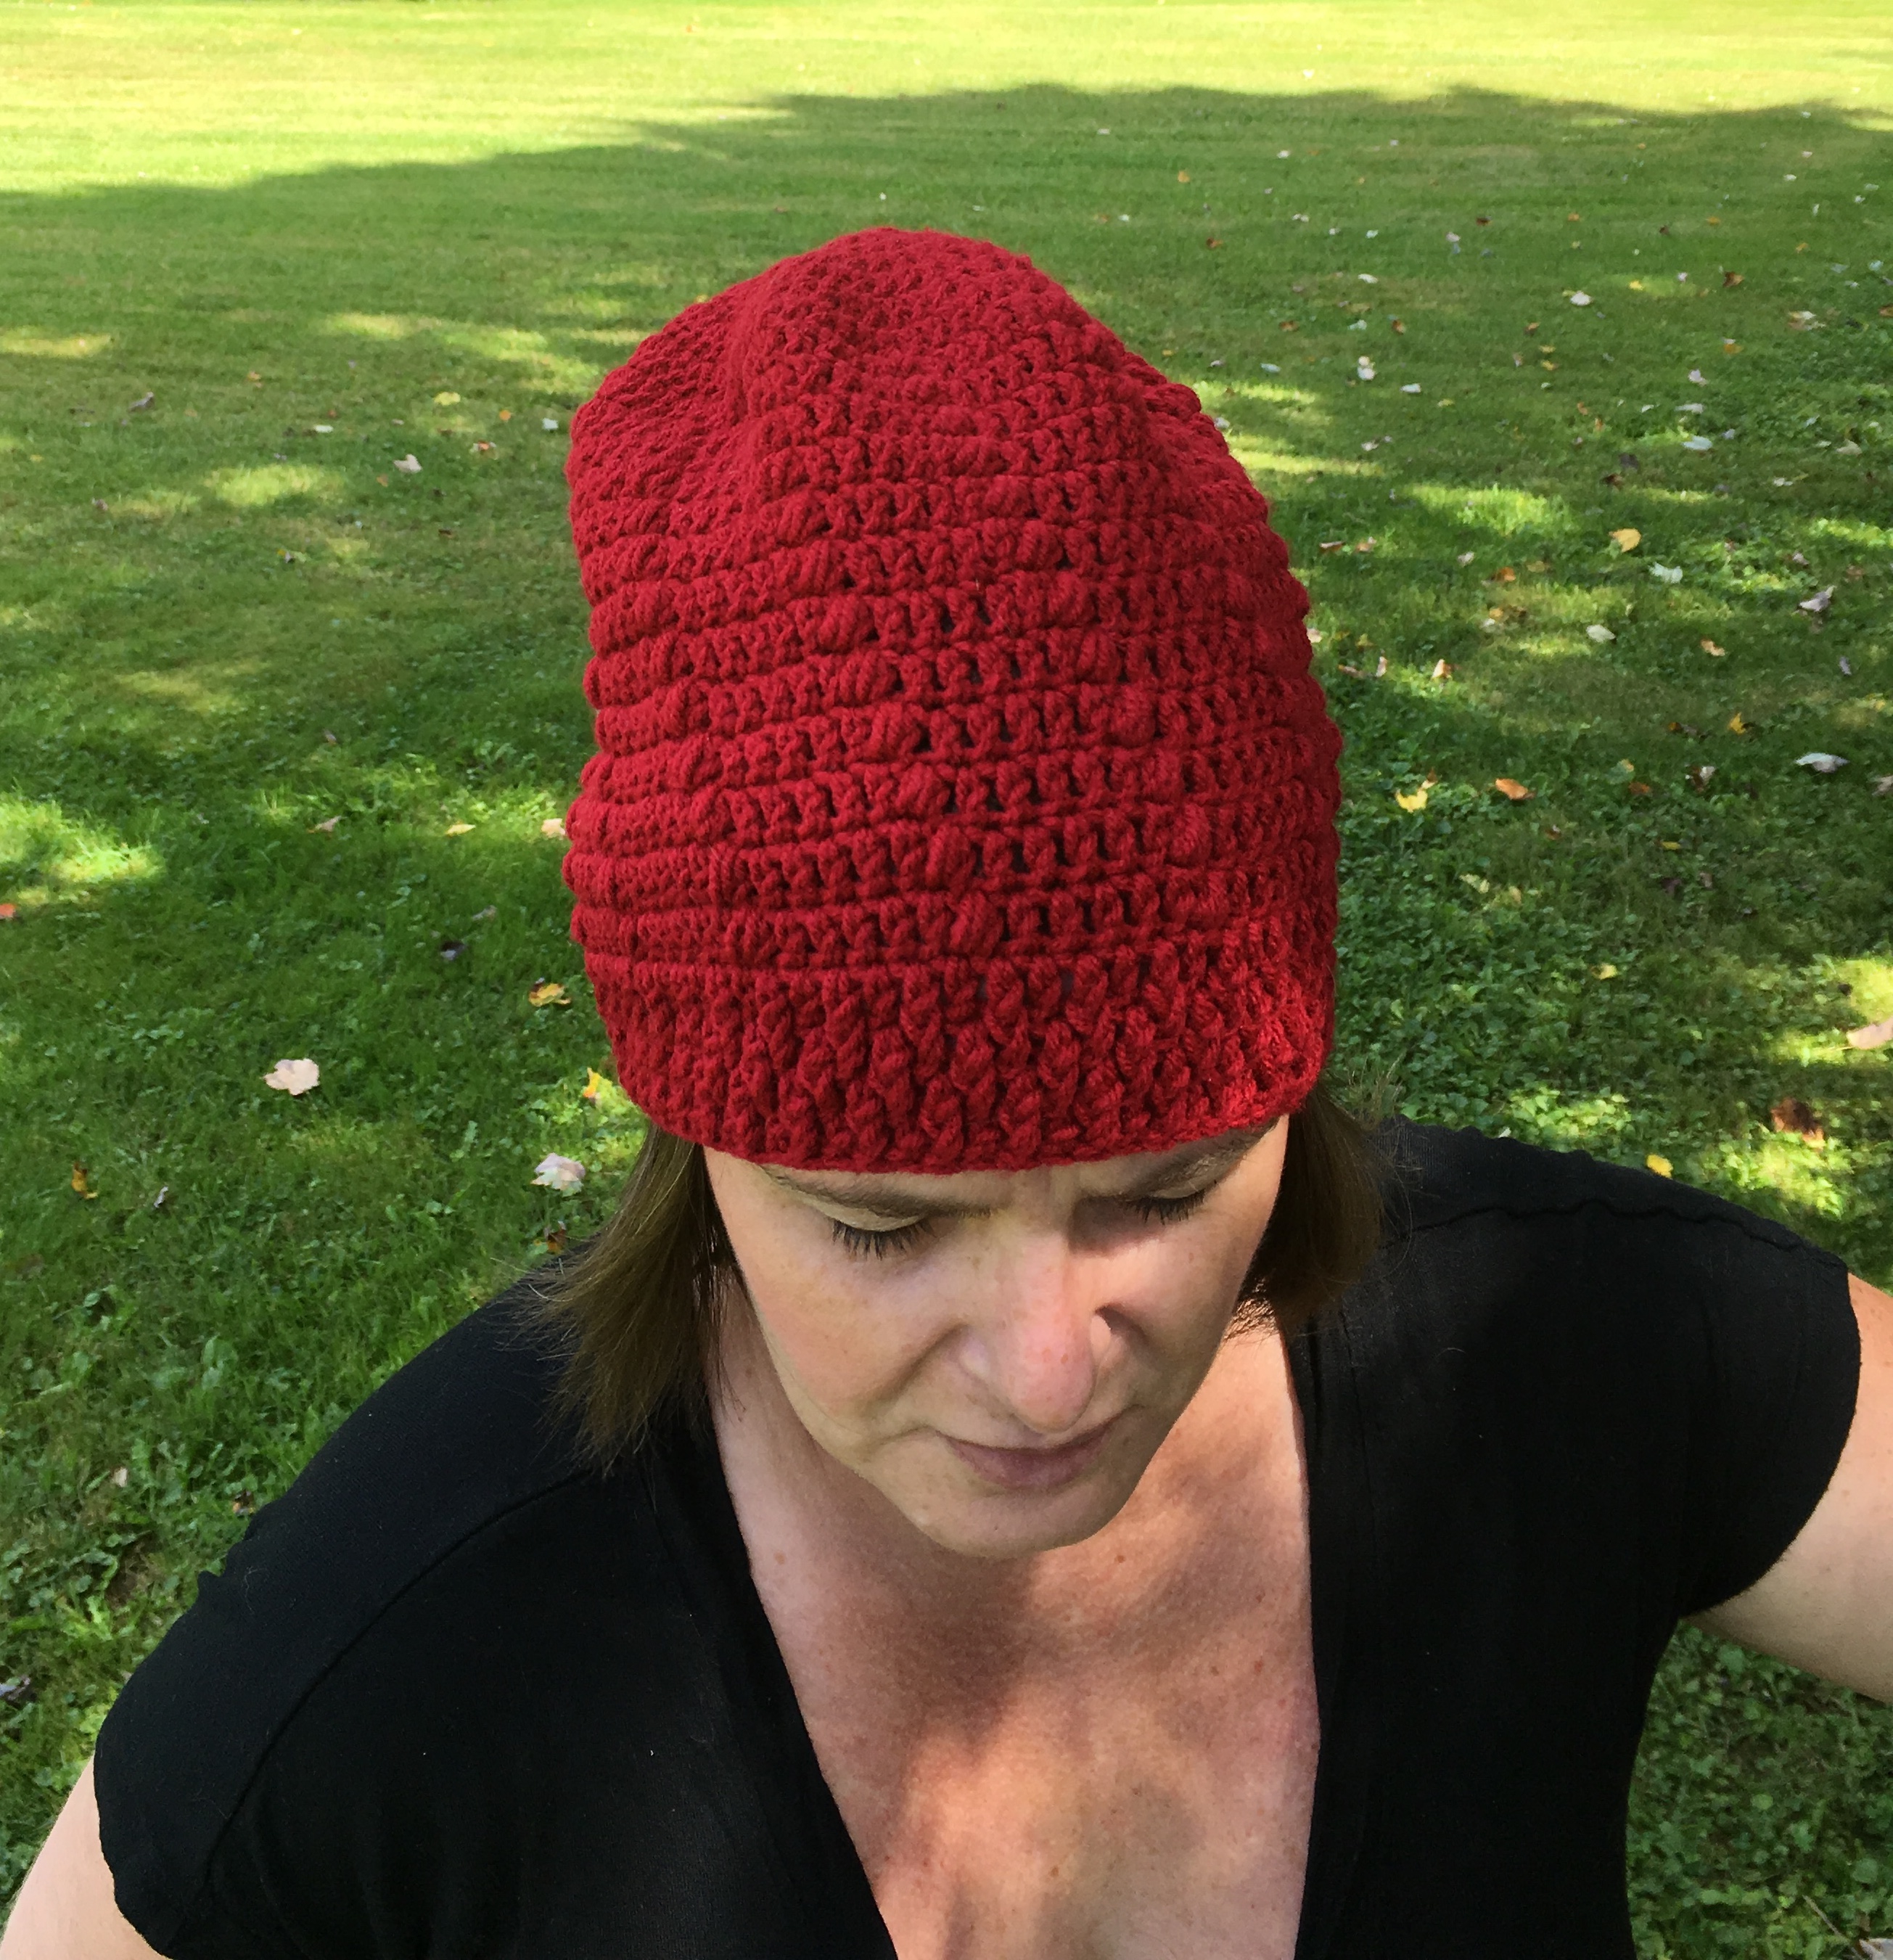
For my first featured fiber artist is Crystal Marin Long of ChristaCoDesign and her Sweetheart Hats. I have got to say I LOVE her designs! Crystal was one of the first designers that I started testing for back in April 2018. So let’s hear from Crystal:
Crystal Marin Long
Sweetheart Hats
Hi, I’m Crystal, the designer and blogger at ChristaCoDesign.com. I love creating easy and beautiful designs for the family. I have 4 little ones so when I’m not crocheting or knitting I’m usually enjoying them.
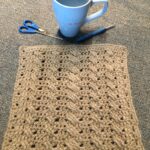
The design I’m sharing today was created using tapestry crochet techniques to achieve the heart shapes-photos included to help you along. The Sweetheart Hat comes in 7 sizes-baby though child. Personally I love the gray/green version I made for my son. I hope you enjoy the pattern and are able to share your Sweetheart Hats with those you love.
Now let us Hop on over to ChristaCoDesign and find her pattern and blog post below.
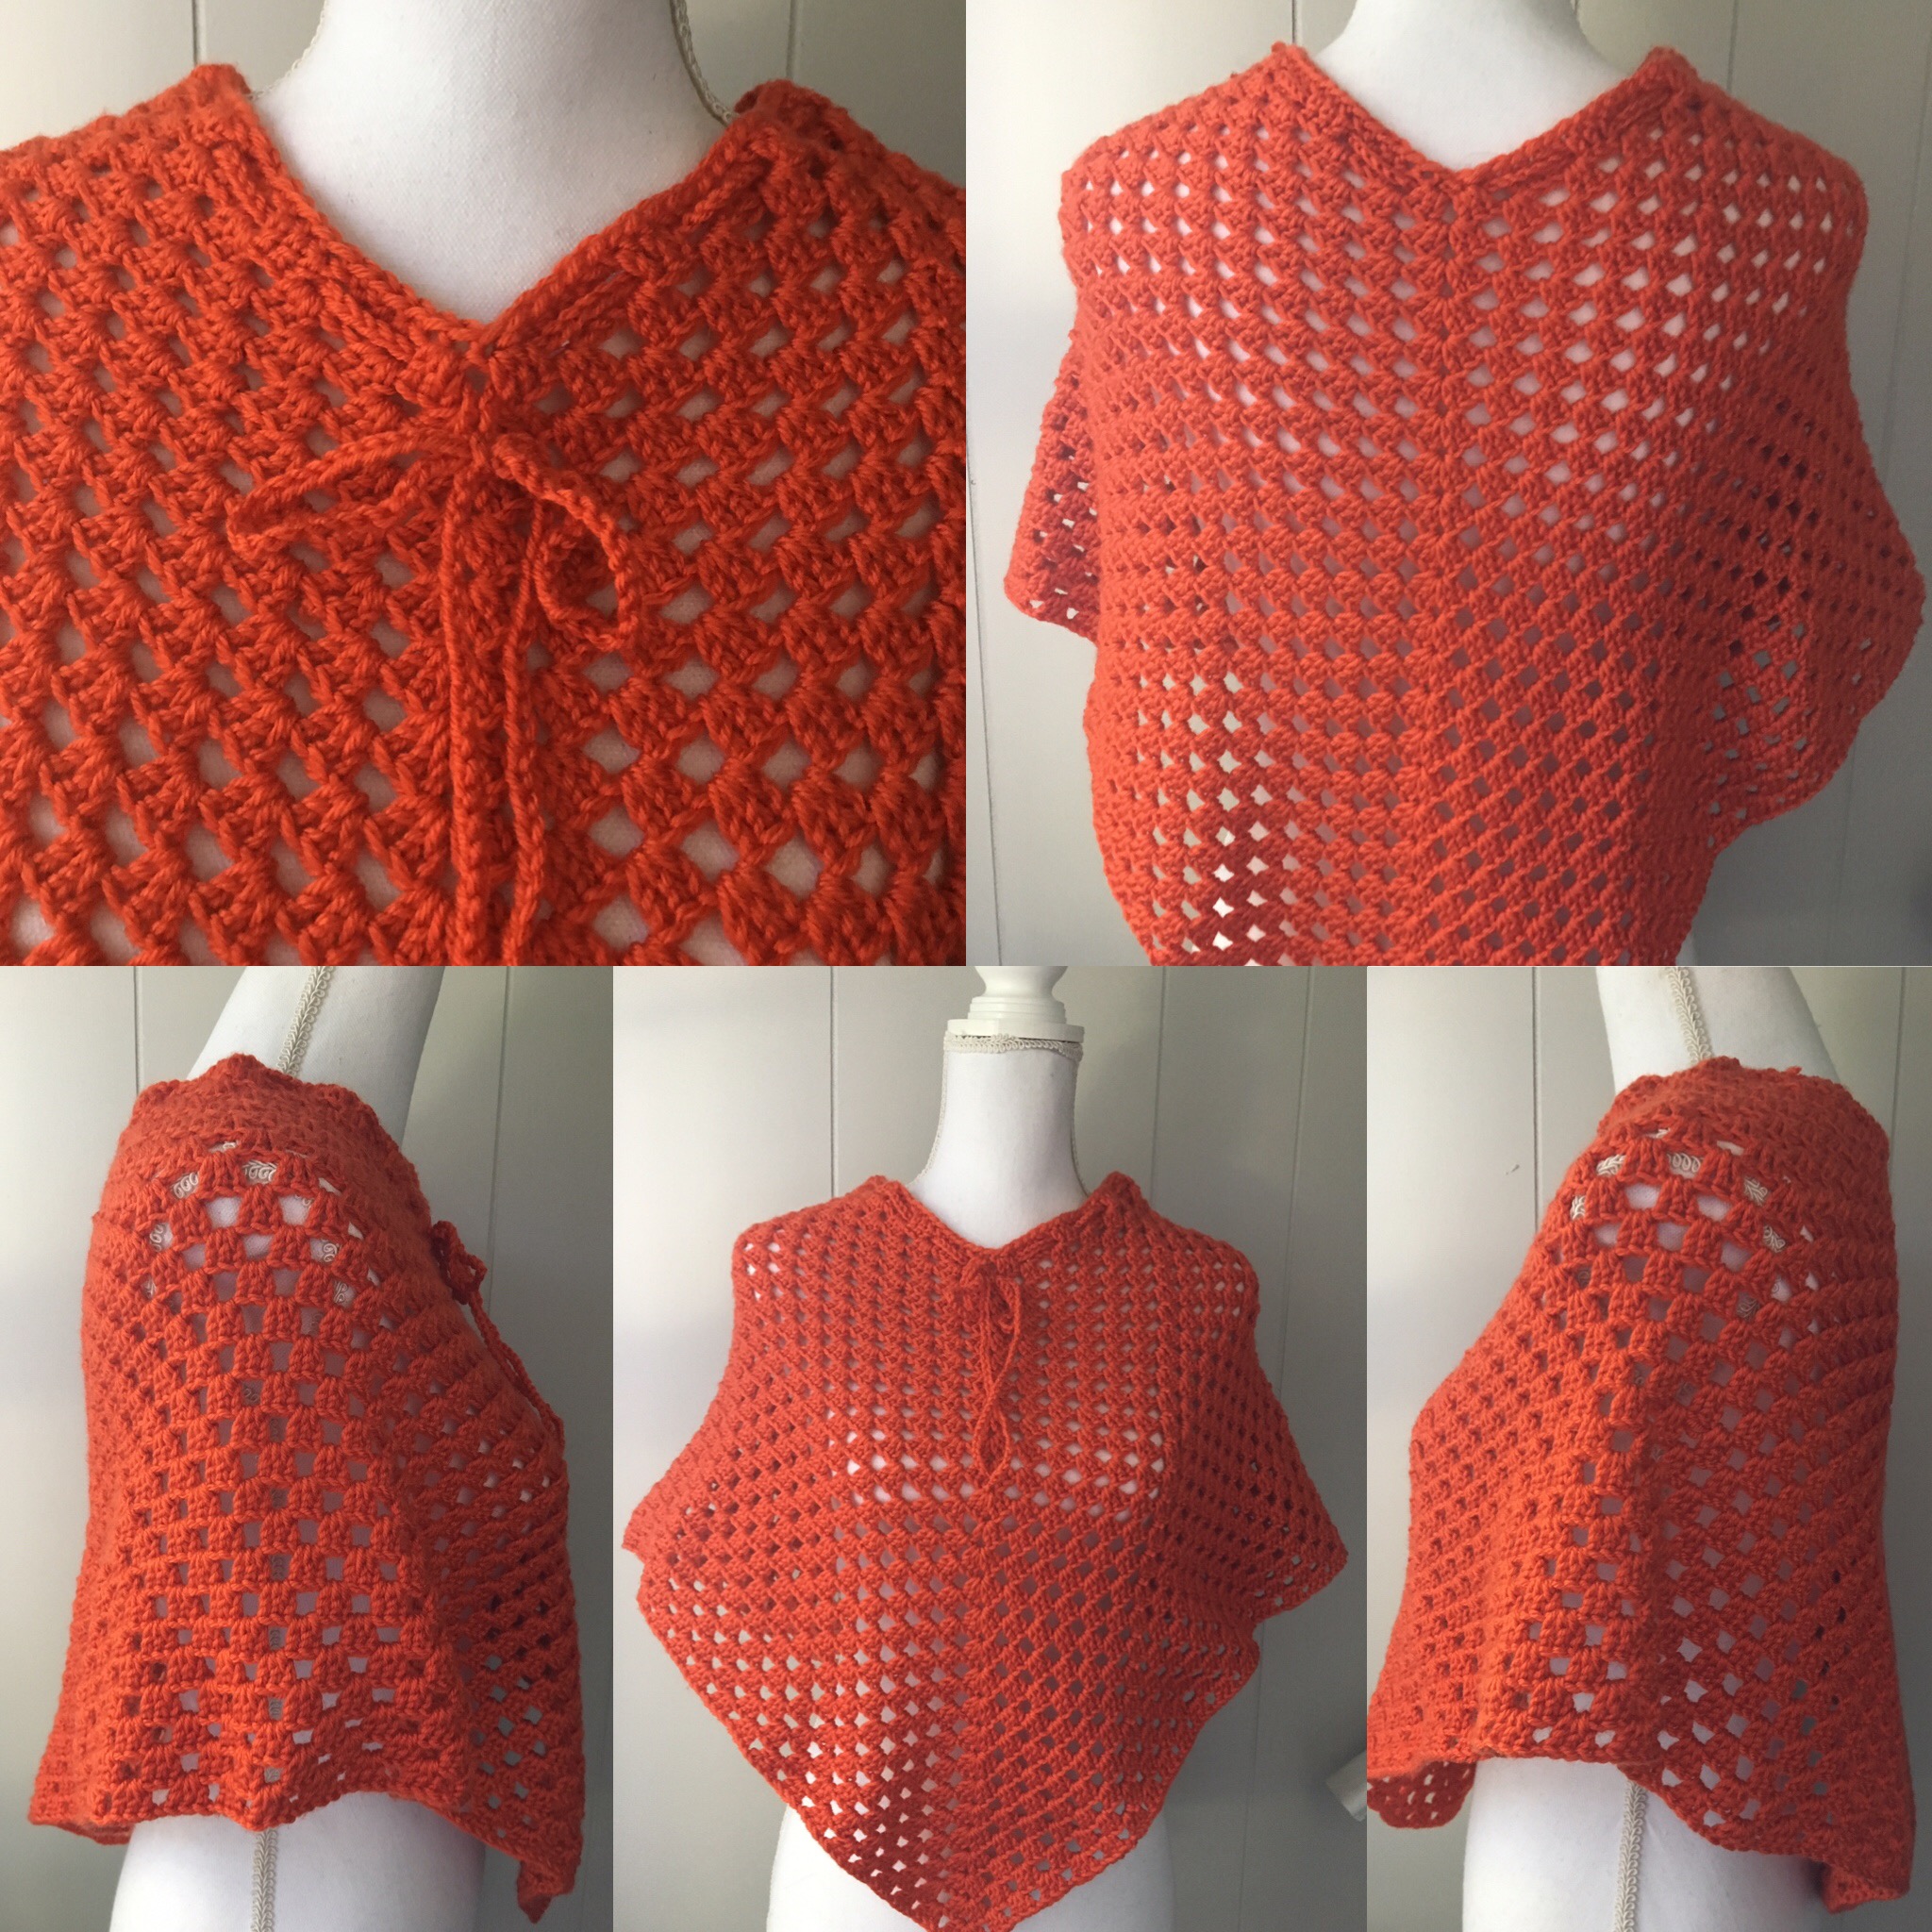
Next you will find 2 fiber artists I want to feature are with one company, Sunflower Cottage Crochet and consists of Helen and Sara. Let’s hear what they have to say as they feature their Kate Wrap.
Helen
Sara
Kate Wrap
Here is what they have to say:
Sara is from the US and Helen is from the UK. We met while testing for another designer and became firm friends. We love to create a range of designs with a modern twist on vintage country chic which is very glamorous and elegant – everything for you, your family and your home!
The Kate wrap is elegant and warm and such and easy but effective stitch combination! If you are new to front post double crochet we will have a YouTube video coming very soon. This stitch combo gives you the perfect way to learn something new and you will be surprised how quickly you pick it up!
We decided to offer a discount, 50 % off, for this Valentine’s Day Blog Hop of our pattern at Ravelry. The Coupon Code is: LOVE20 for the Kate Wrap here.
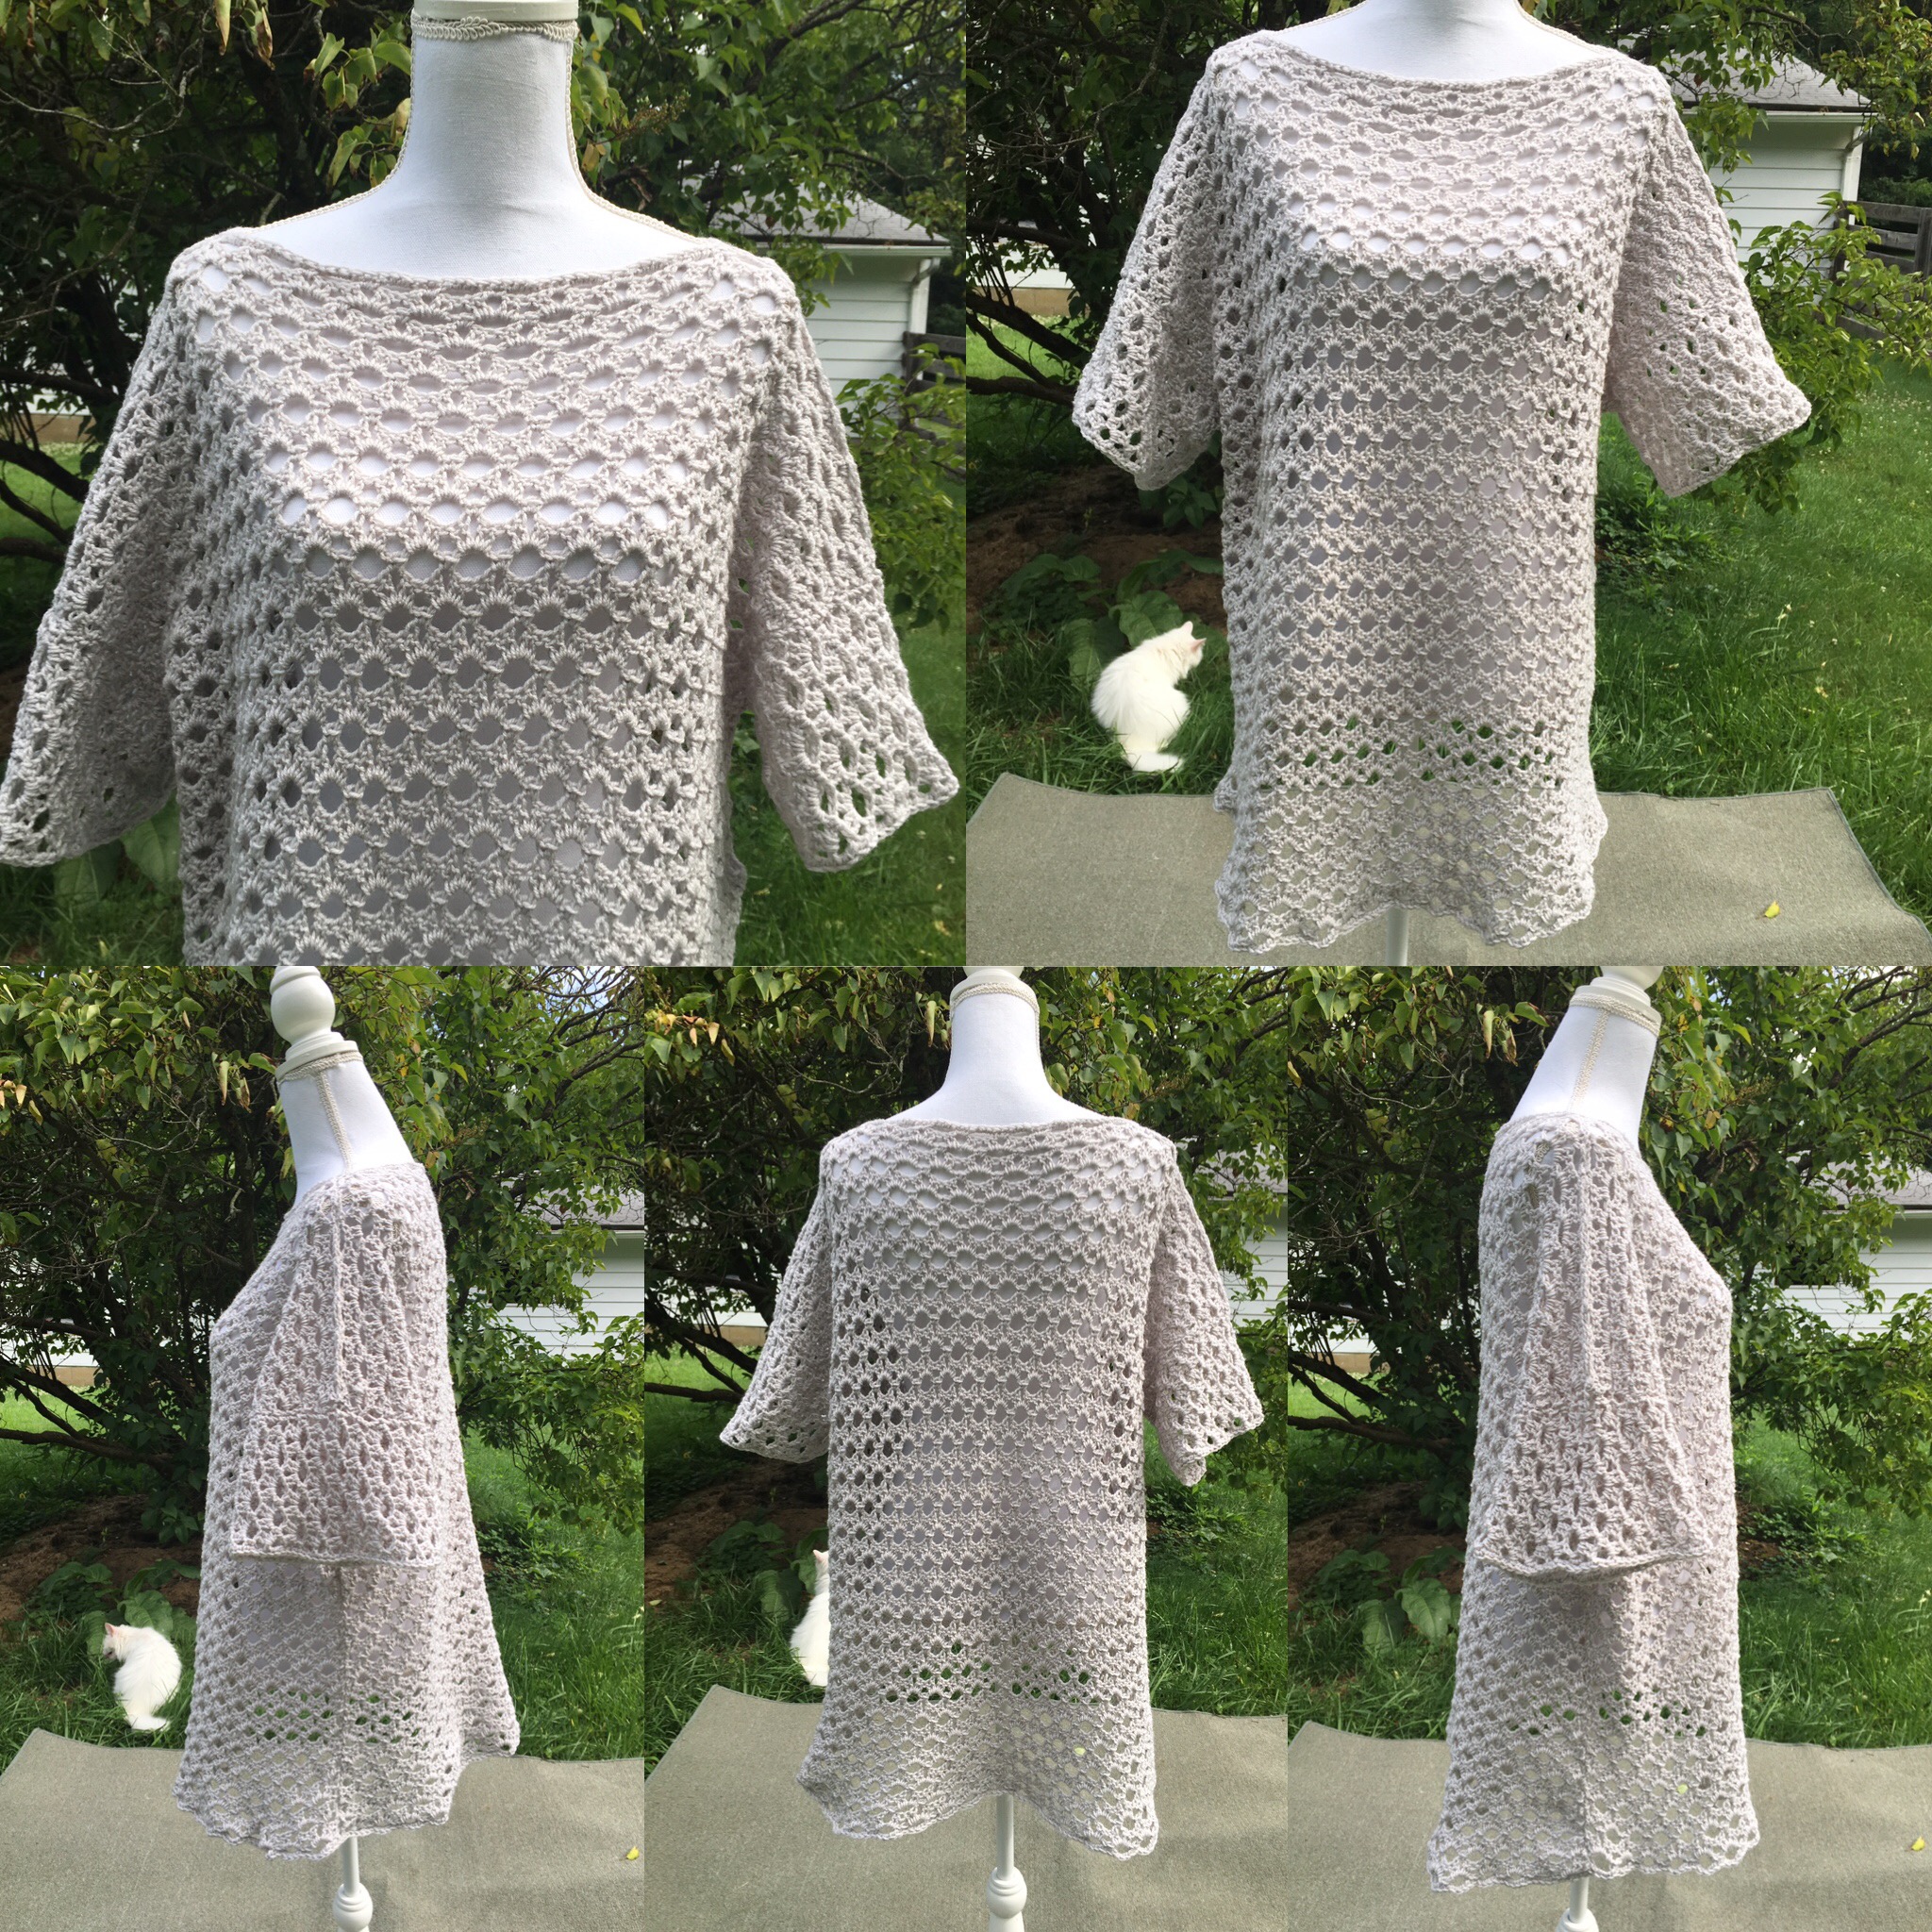
I just LOVE that all of my features guests are from all around the world. Another featured fiber artist is Sarah from Rich Textures Crochet. I met Sarah on Instagram, falling in love with her designs! Let’s see what Sarah has to say and bring out the link to her Sweetheart Cowl.
Sarah of Rich Textures Crochet
Sweetheart Cowl
Hi! My name is Sarah from Rich Textures Crochet! Thank you so much for stopping by, and a big thank you to Jo for allowing me to visit today! I was born and raised in Nova Scotia, Canada, but am now residing in Rural Southwestern Ontario. I am a wife and a mom to four energetic children and an equally energetic border collie.
In crochet I love to play with texture. I also love to learn new stitches and play with colour, although in my crochet I tend to gravitate to more earthy tones. My favourite crochet hooks are wooden and I love to work with super bulky weight yarn.
On my blog you’ll find a mix of patterns, from afghans to baby blankets, hats, mitts, scarves and cowls such as the one featured here for Valentines Day. I’m so glad you stopped by and I look forward to connecting with you on Facebook, Instagram and YouTube! Happy Crocheting!
For the last but not least featured artist for the Blog Hop is Catherine Venner of Crochet Cloudberry. Below you will meet Cat and find the links to her Hygge Heart Cushion Cover and the discounts she is giving for here pillow cover. So with out further ado, meet Cat:
My name is Cat and I absolutely love crochet. I picked up a hook for the first time a couple of years ago and have never looked back. With in weeks of learning to crochet, it became an obsession and I started spending every spare minute with a hook and some yarn. Sound familar?
Over time, I started developing my own patterns and ideas of what can be made using crochet techniques. In 2019 I made a new year’s resolution to start my own crochet blog to share tha patterns that I have devised as well as the ideas behind them.
The hygge heart cushion has been inspired by scandi cosiness. As a student I spent the summers living and working in Denmark and so I became familar with the concept of hygge and wanted to bring it into my designs. The Danes frequently use the heart motives in their handicrafts and using self-striping yarn adds to the hygge effect.
For the Valentines promotion – I am submitting to you the Hygge Heart Cushion Cover. I have set up a 20% discount code in Etsy and Ravelry for it. It runs until Feb 16th and starts today. The code is “BEMINE2020”.
You can also hop on over to Cat’s blog post about this Valentine’s Day Blog Hop: https://crochetcloudberry.co.uk/crochet-journal/valentines-day-blog-hop/
I want to thank all of the fiber artists who joined me for my very first blog hop, the Valentine’s Day Blog Hop 2020! I want to thank you, the readers as well! Be sure to Hop on over to all the websites listed above so you can crochet their loved designs for your loved ones!
Happy Valentine’s Day and Happy Crocheting!
From Jo Baird:
While you are here at my website be sure to add your email address to my Mailing List and Newsletter. This way you will be notified when I release another pattern, blog post or give away Coupons! If you would like to find out more about me, you can follow any of the links listed below.
Every purchase of my patterns helps tremendously! It allows me to keep my website and my Etsy Shop going. It also allows me to buy more yarn so I can create and design more Handmade Crocheted Creations for you to enjoy.
Comments, Feedback, Suggestions, etc. are ALWAYS welcome at my website www.joscraftyhook.com! Leave one or more below. You can also email me at jo@joscraftyhook.com!
Find out more about me, Joey Lea Baird of Jo’s Crafty Hook & Jo’s Crafty Hook Designs at any one of these places listed below!
I am so excited to be bringing to you another CAL, the Flower Cluster Beanie CAL! This CAL or Crochet-A-Long features my Flower Cluster Beanie or as I call it my Lilac Beanie crochet pattern! My CAL will begin January 2, 2020 it will last 4 days and will end on January 5, 2020! What a way to bring in the New Year!
Suzanne Boren
This post contains affiliate links. You can make a purchase using these links that I provide where I may receive compensation (at no added cost to you.) Purchases you make will help keep my website, Etsy Shop, and my Ravelry Store going and provide quality designs just for you!
Last year I did my very first CAL, the Wrapped In Love Set, inside a Facebook Group called Crochet-A-Long with Us. The group has 13 other crochet pattern designers. They perform their CALs inside our Facebook Group too. If you haven’t already joined our Facebook Group then you need to join me for my CAL inside our group Crochet-A-Long with Us here.
If you have been to my website in the past, then you know you can find the Flower Cluster or Lilac Beanie as free crochet pattern on my website here. The FREE crochet is for sizes 0-6 months. What you may not know is there are some great step by step picture tutorials and video tutorials inside the Ad-Free PDF version of my crochet pattern.
You can find the Ad-Free version 50% off now and during my CAL January 2-5, 2020. You will find the crochet pattern in my Etsy Shop here and use the Coupon Code FLOWERCAL50. You will also find the crochet pattern in my Ravelry Store here. You can also use the Coupon Code FLOWERCAL50 at my Ravelry Store. Again, the Ad-Free PDF version contains great step by step picture tutorials inside and step by step video tutorials from my YouTube Channel here.
FLOWERCAL50
Once you join me for my CAL inside the FB Group, you and the other 5000 members have access to all of our past CALs and future CALs. This is awesome because in the year we’ve been a group we have done over 15 CALs! How GREAT is that! So join me and our 5000 members from January 2, 2020 until January 5, 2020 for my Flower Cluster Beanie CAL! I am excited! How about you?!
Thank you for reading my post! Any comments, feedback our suggestions would be greatly appreciated. If you have any thing you would like to see from Jo’s Crafty Hook, please feel free to leave a comment here or email me at jo@joscraftyhook.com. I would LOVE to hear from you.
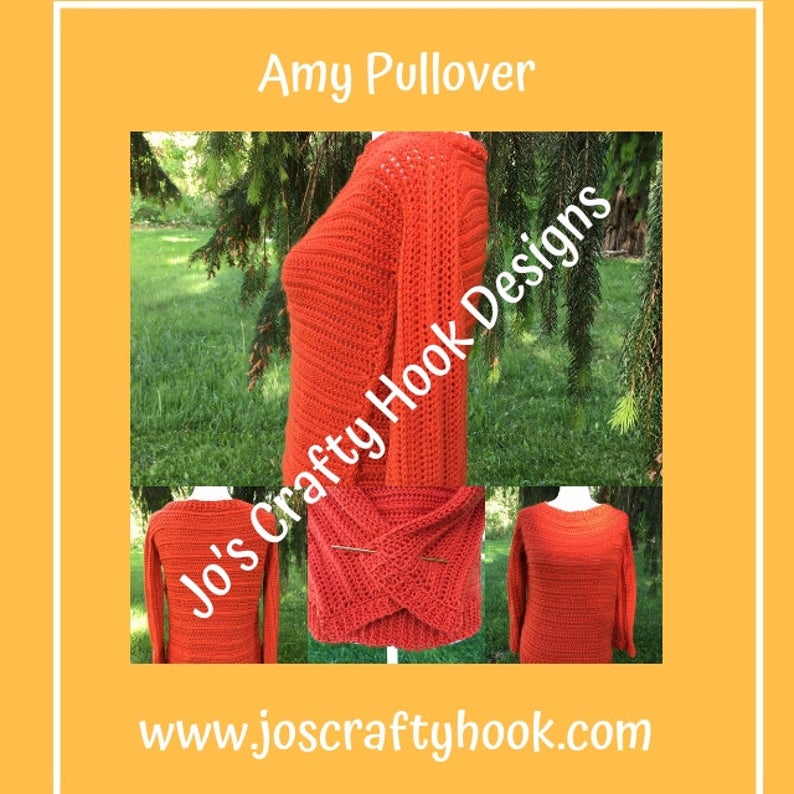
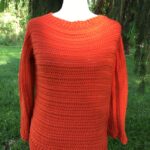
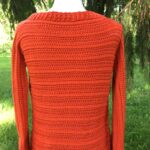
This post contains my Amy Pullover FREE Crochet Pattern. I designed the pullover back in November of 2018. It took me a while to get it just right and now I have and I get to share it with You! I couldn’t have done it without my pattern testers. Thank you Lindsay Silvestrini, Sally Hayes, Sherry Dickenson, Jennifer Secord and Tara Smith.
With the colder months already here, this would be a GREAT project to do while you are cooped up in the house. You can binge watch Netflix or Hulu while crocheting the Amy Pullover.
This post contains affiliate links. You can make a purchase using these links that I provide where I may receive compensation (at no added cost to you.) Purchases you make will help keep my website, Etsy Shop, and my Ravelry Store going and provide quality designs just for you!
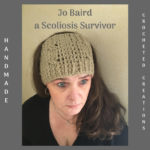
As a Scoliosis Survivor I have a lot of free time on my hands. Because I suffer with Chronic Pain I sit or recline on the couch crocheting and watching Netflix. Since I watch a lot of TV I got the idea for the Amy Pullover from Season 7 of American Horror Story. Weird right? lol
Sarah Paulson
Sarah Paulson wore roomy, comfy and warm looking tops a lot in Season 7, like the image above. Yes, you may find this silly or funny, but I loved the way they look SO much so I designed a crochet pattern around her wardrobe. The images below depict my version of her tops. I hope you find it roomy, warm and comfy as much as I do!
Sara Paulson also reminds me of my sister, Amy. Amy was in town while I was designing the Pullover. She isn’t into crochet and she actually didn’t like the color of the top. lol My sister wears the latest fashion and I can see her in this roomy, warm, and comfy Pullover. That is another reason I named the pullover after my sister, Amy. I have been waiting to share this post because Amy’s birthday is in December. I wanted to give her a gift and to let her know how much her support means to me. Thank you and Happy Birthday Amy.
I hope you enjoy my Amy Pullover. The Amy Pullover Free Crochet pattern has 6 sizes to choose from. I hope you share your version of the Amy Pullover with me. You can post your version at any of my social media sites listed below the pattern. I’d love to hear from you, so be sure to comment here at my website. If you have any questions, please feel free to reach out to me at jo@joscraftyhook.com.
If you would like to purchase the PDF pattern you can do so from my Esty Shop here or from my Ravelry Store here. This pattern is a long one, so if you’d like a pdf version, please stop by my Etsy Shop or Ravelry Store.
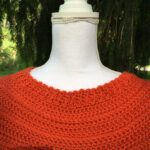
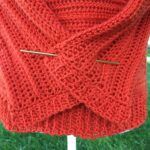
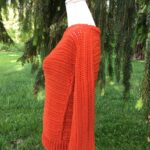
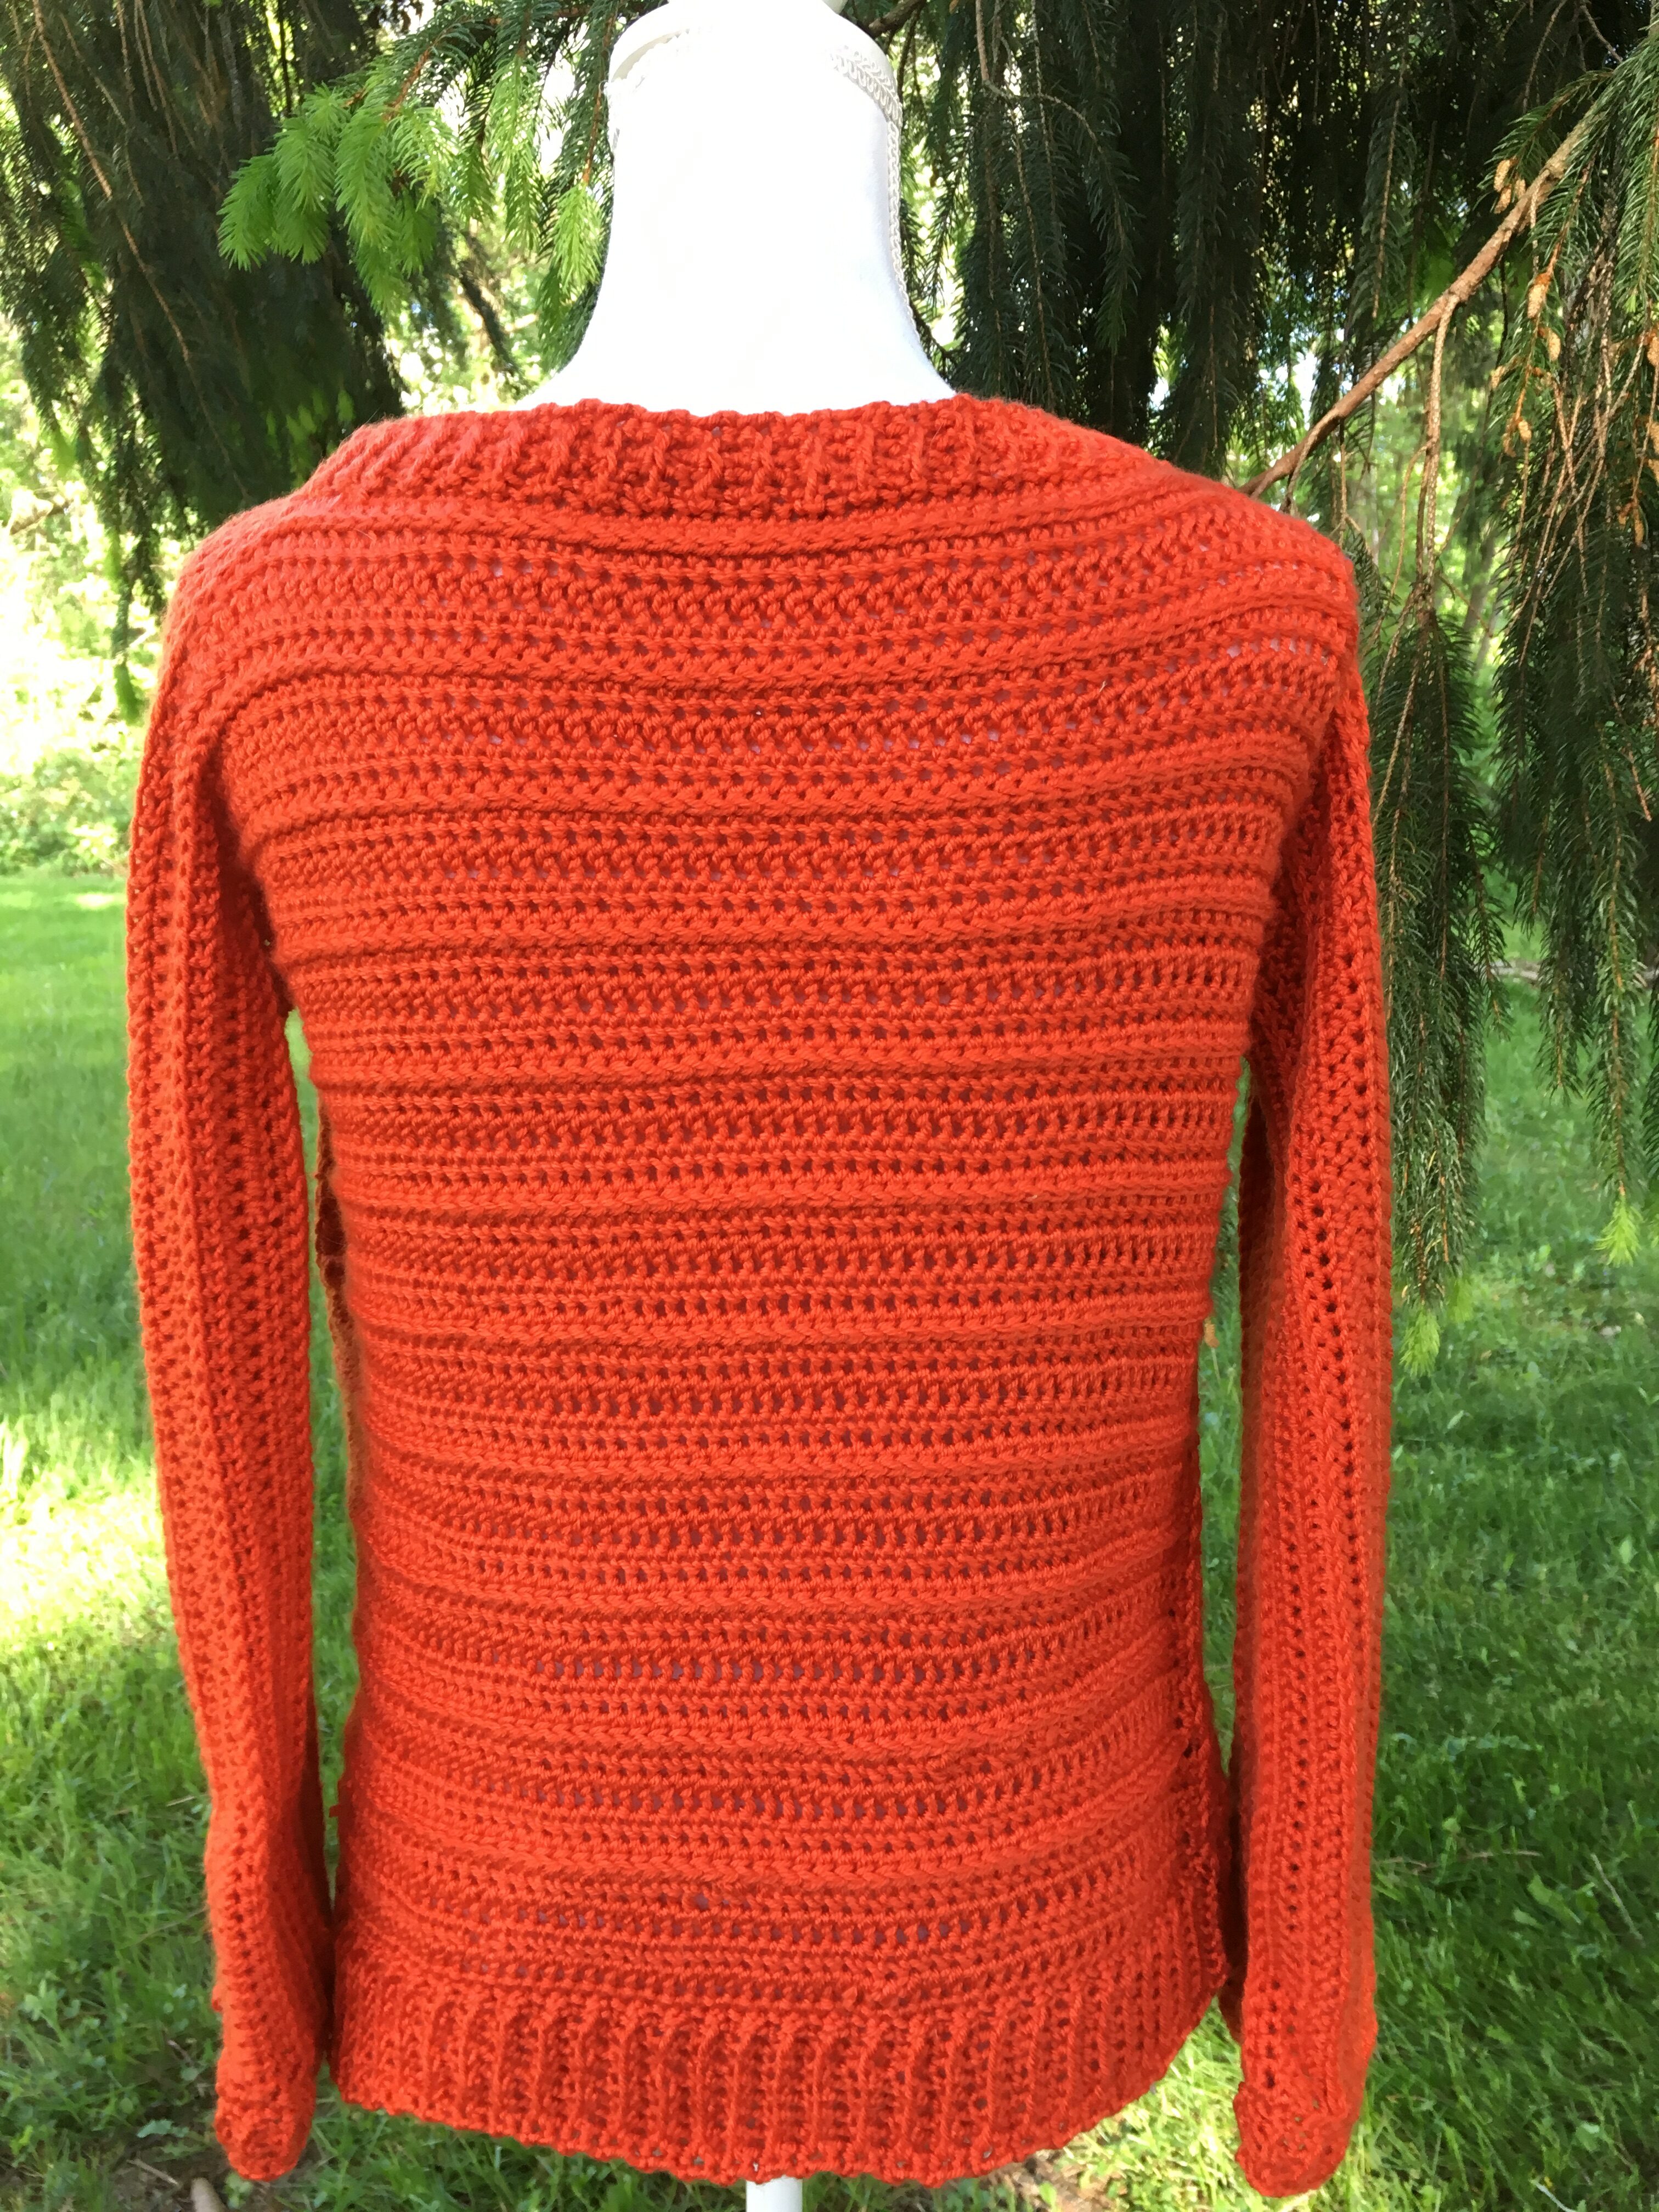
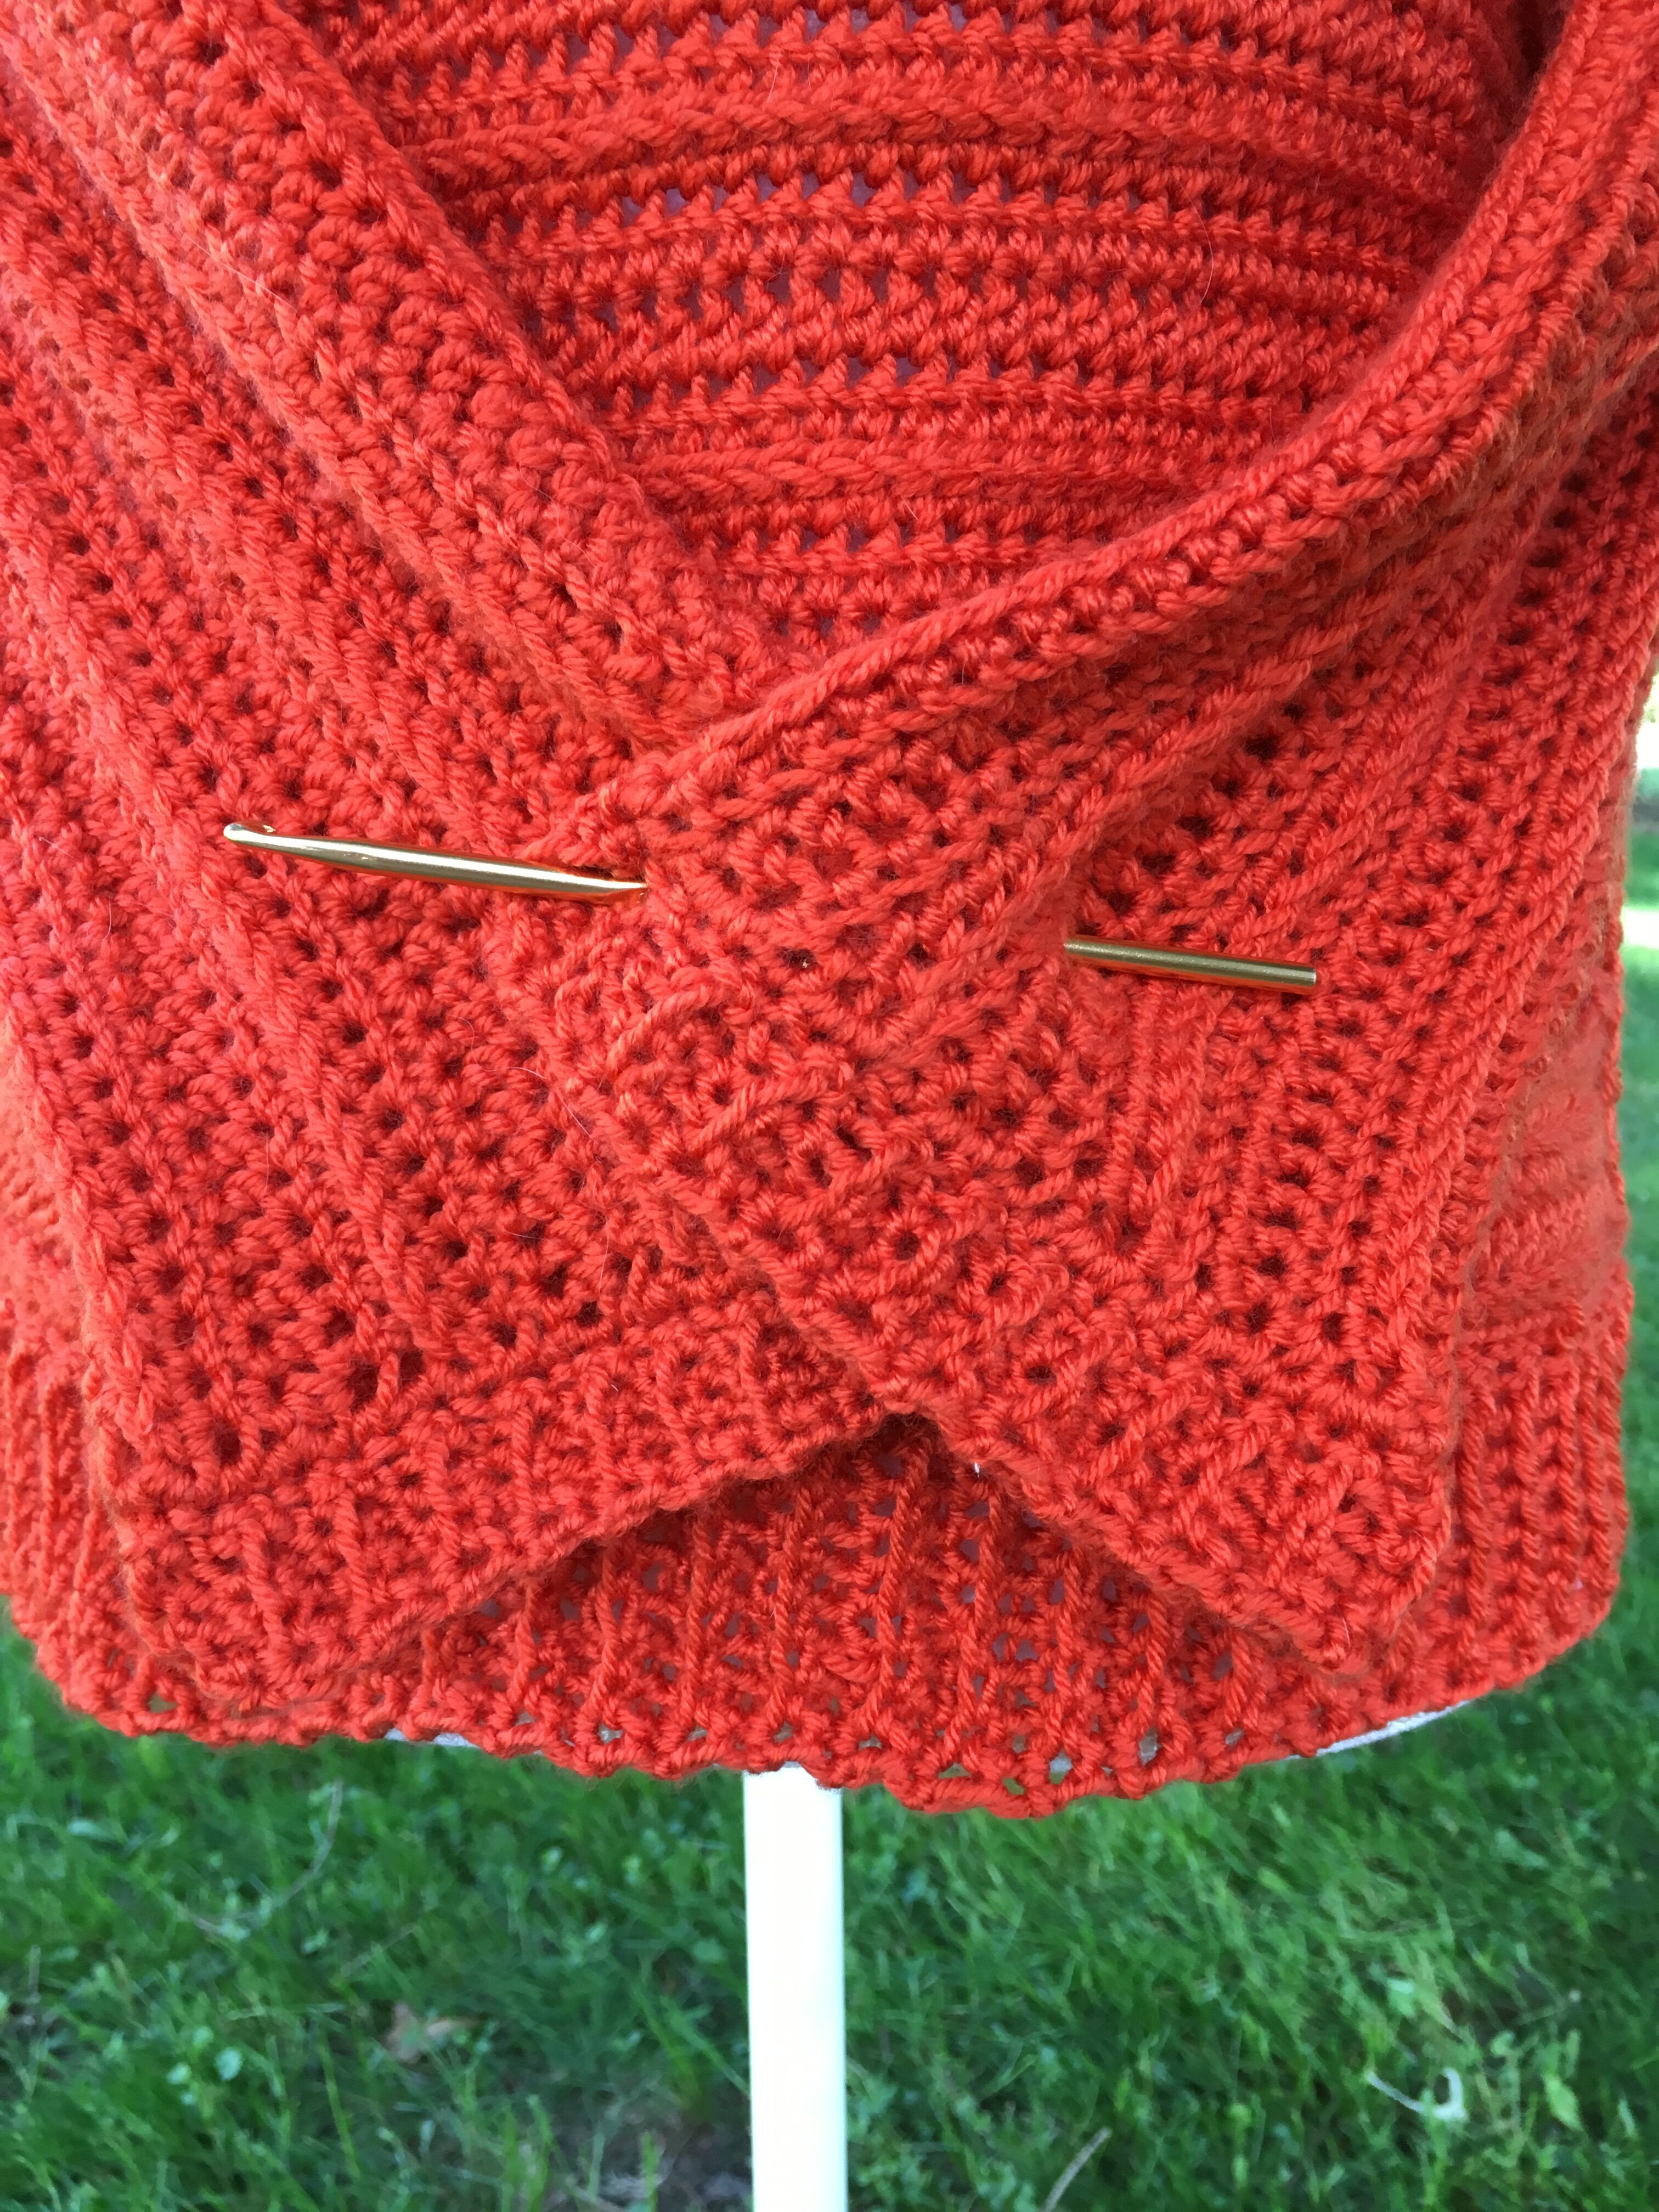
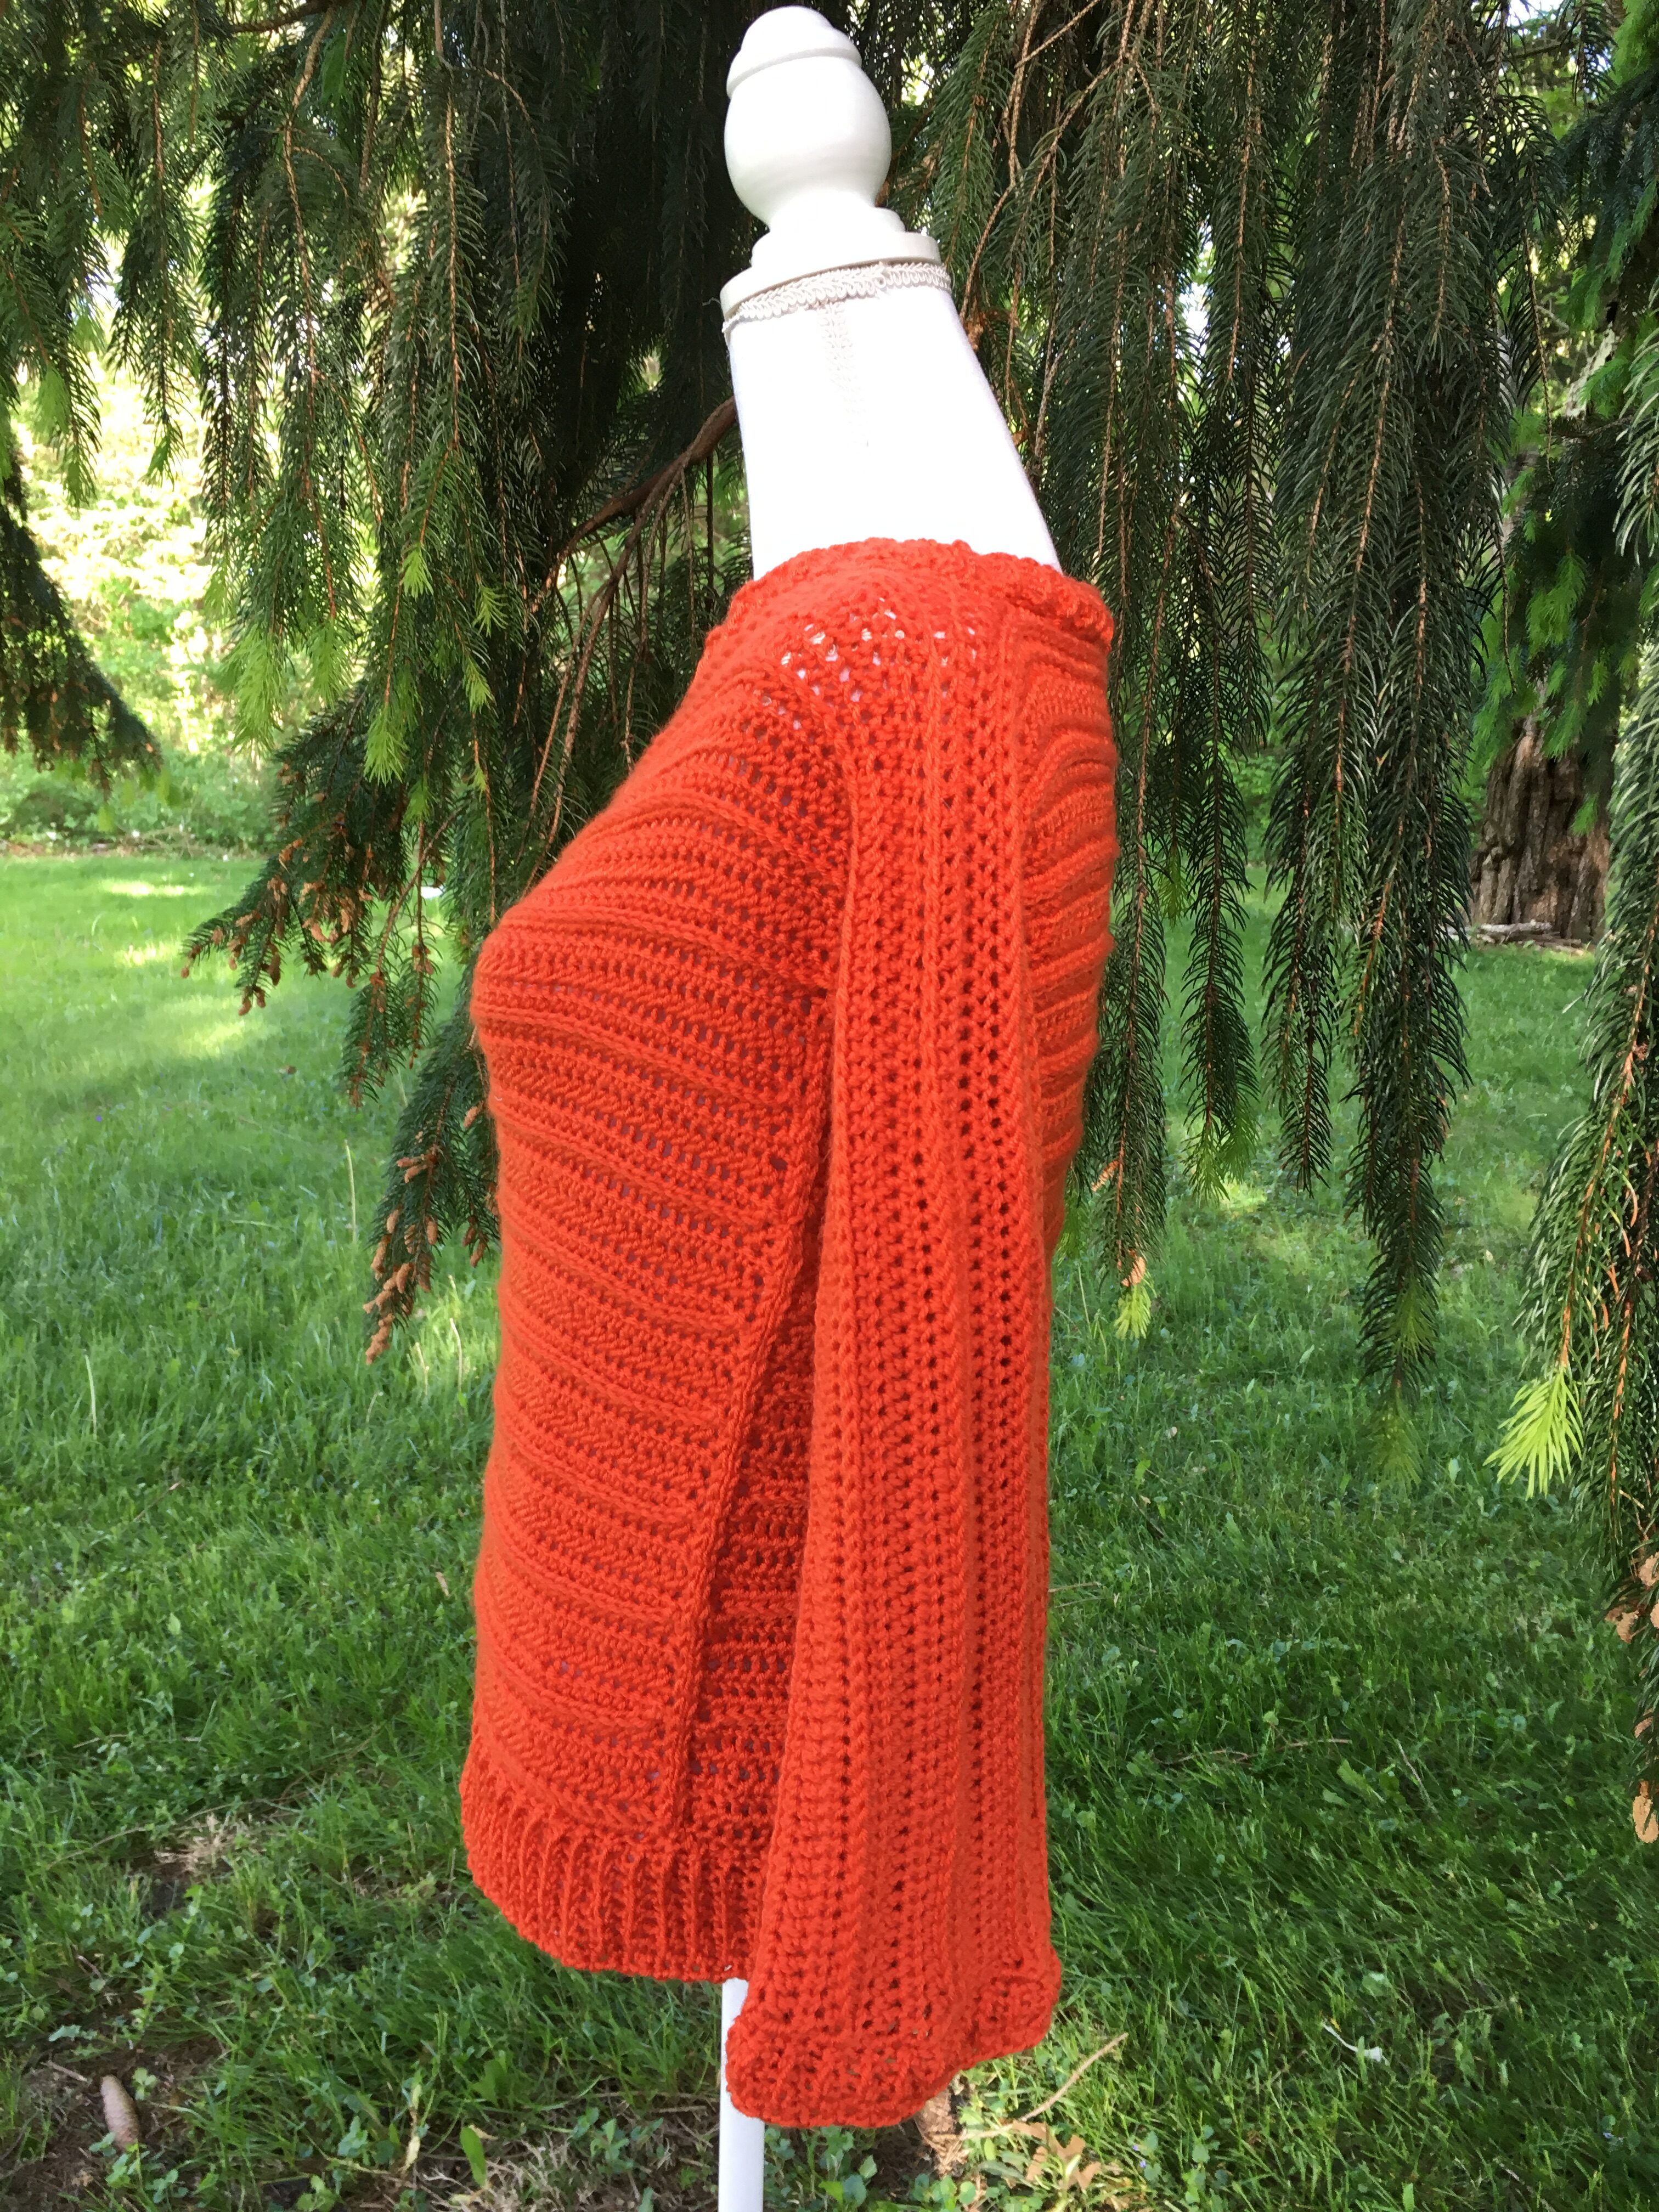
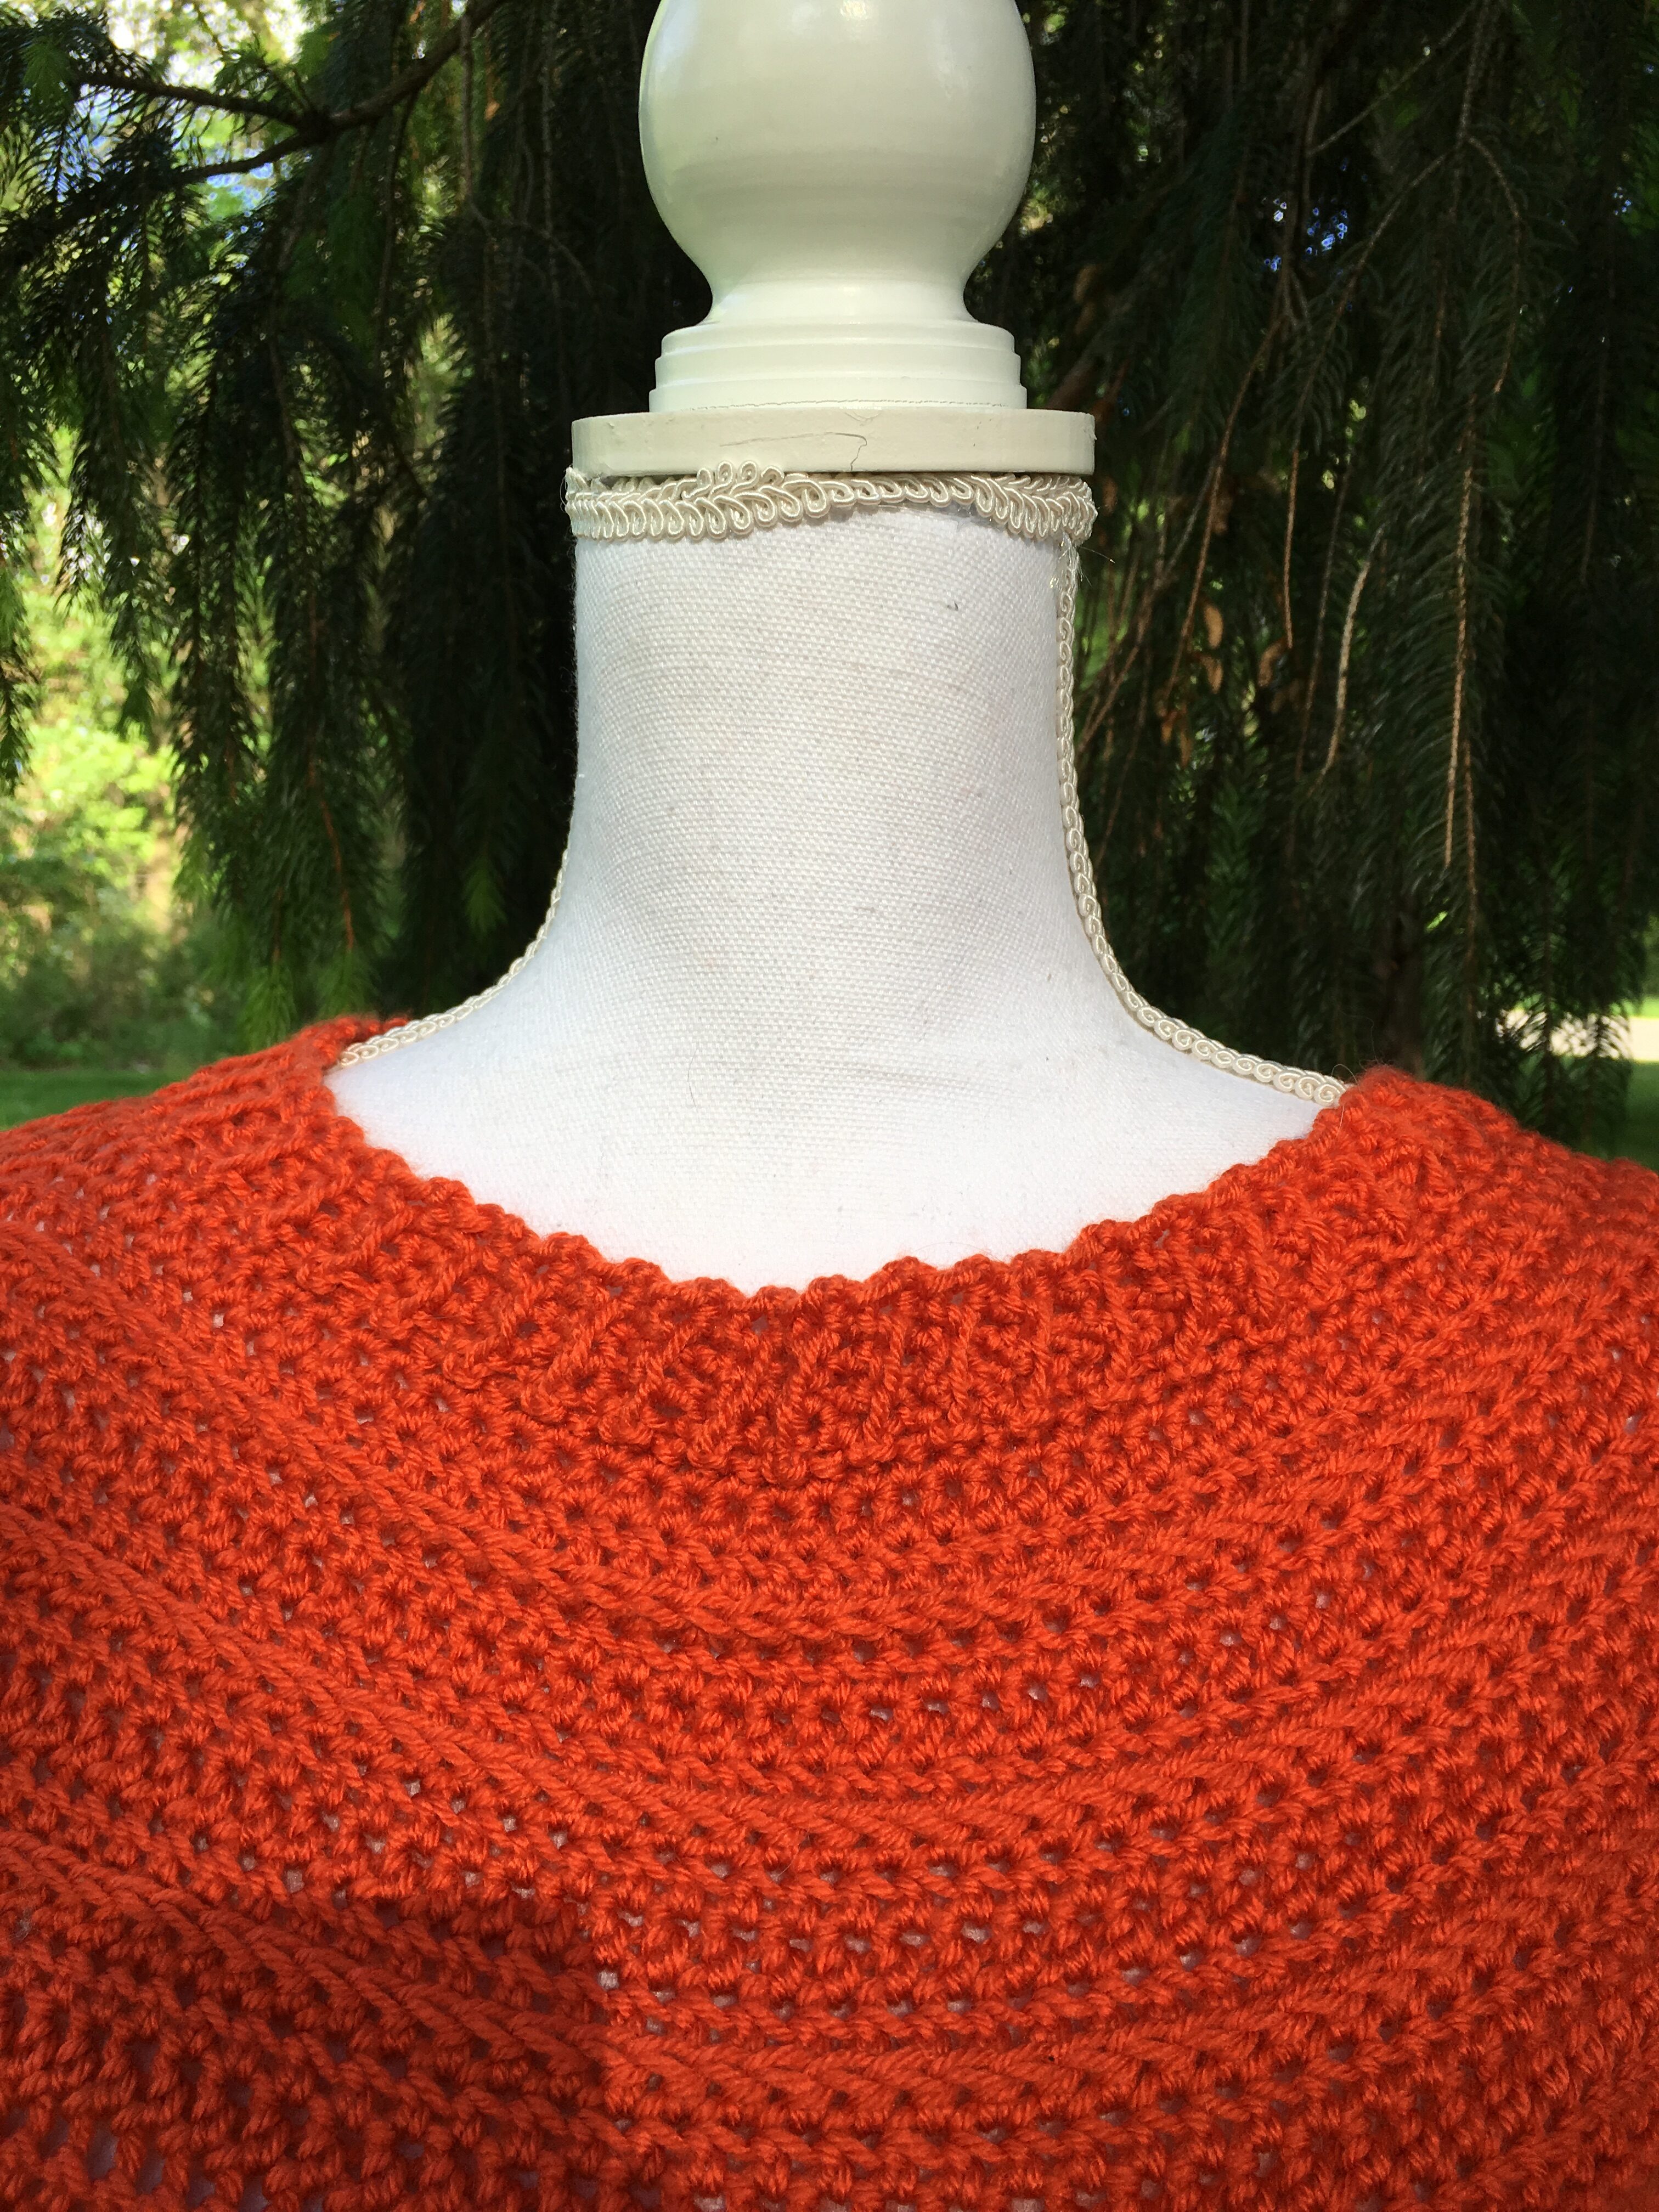
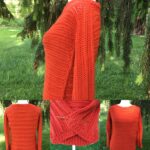
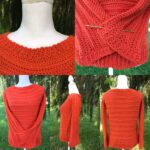
Front of Pullover
Back of Pullover
Neck of Pullover
Wrist & Bottom Ribbing
Side Edging
Materials:Gauge:
US Hook I/5.5 or 5.5 mmUS Hook I/5.5 or 5.5 mm 14-22 ounces of #4 Worsted Weight Yarn
6 HDC x 6 Rows = 2 inch US Hook G/4.5 or 4.5mm Scissors Tapestry Needle Stitch Markers
Abbreviations:Notes:
CH = ChainCh 1 does NOT count as a stitch SS = Slip Stitch
SC = Single Crochet DC = Double Crochet
FHDC = Foundation Half Double Crochet
Special Notes *Sizes range from S, M, L, XL, 2X, and 3X *The Top is crocheted from the Bottom to Top and back down again. *The top is crocheted as One Piece except for when attaching the other Sleeve. *1st Sleeve will be added at the end of the Row. *Other Sleeve adds a FHDC row
These are Measurements BEFORE the Ribbing is Added
Bust Size
38
42
46
50
52
54
Sizes
Small
Medium
Large
X-Large
2X
3X
Sleeves Height
5”
6.5”
8”
9.5”
11”
12.5”
Neck Opening
11”
12.5”
14”
15.5”
17”
18.5”
Body before Sleeves
11.5”
13”
14.5”
16”
17.5”
19”
Sleeves
16”
18”
20”
22”
24”
26”
Total Height Before Ribbing
17.5”
19”
20.5”
22”
23.5”
25”
Total Width Before Ribbing
20”
21.5”
23”
24.5”
26”
27.5”
This Ribbed Crop Top is supposed to be Loose and Comfy. This is why the measurements are so different from a fitted top.
Using I Hook
FHDC 57, 63, 69, 75, 81, 87 Fasten off and lay aside (this is your 2nd Sleeve)
Starting at the Bottom of the Top
For Bottom of the Top FHDC 68, 74, 80, 86, 92, 98 OR Chain 70, 76, 82, 88, 94, 100 HDC in the 3rd chain from hook and each ch across. 68 (74, 80, 86, 92, 98) HDC
R1-R3: Turn. Ch 1, HDC in the next 68 (74, 80, 86, 92, 98) st.
R1: Ch 1, FHDC in the first st. FHDC 56 (62, 68, 74, 80, 86) more times.
R2: Turn. Ch 1, HDC in the next 57 (63, 69, 75, 81, 87) st. HDC in the next 68, (74, 80, 86, 92, 98) st. Attach the FHDC Row by HDC in 1st st, HDC in the remaining 56 (62, 68, 73, 79, 85) st.
R3: Turn. HDC in the next 182 (200, 218, 234, 252, 270) st.
R4: Turn. Ch 2, HDC in the 1st st, HDC in the 3rd loop of ea st until the last st, hdc in last st. 182 (200, 218, 234, 252, 270) st
R5-R7: Turn. Ch 1 and HDC in the next 182 (200, 218, 234, 252, 270) st.
R8: Turn. Ch 1, HDC in the 1st st, HDC in the 3rd loop of ea st until the last st, hdc in last st. 180 (200, 218, 234, 252, 270) st
Repeat R5-R8 until your Sleeves measure 5”, 6.5”, 8”, 9.5”, 11”, 12.5” tall.
R1: Once the front part of your Sleeves measure5”, 6.5”, 8”, 9.5”, 11”, 12.5” tall turn and place hdc in the next 68 (74, 80, 86, 92, 96) st, ch 44, 47, 50, 53, 56, 59 and skip the next 44 (47, 50, 53, 56, 59)st. Hdc in the next 68 (74, 80, 86, 92, 96) st.
R2-R3: Turn. Ch 1 and HDC in the each st across. 182 (200, 218, 234, 252, 270) st.
R4: Turn. Ch 1, HDC in the 1st st, HDC in the 3rd loop of ea st until the last st, hdc in last st. 180 (200, 218, 234, 252, 270) st
R5-R7: Turn. Ch 1 and HDC in the each st across. 182 (200, 218, 234, 252, 270) st
R8: Turn. Ch 1, HDC in the 1st st, HDC in the 3rd loop of ea st until the last st, hdc in last st. 180 (200, 218, 234, 252, 270) st
Repeat R5-R8 until the back part of your Sleeves measure5”, 6.5”, 8”, 9.5”, 11”, 12.5” tall.
Turn. Place sleeves RS to RS and Slip Stitch the Sleeve you just finished. (57, 63, 69, 75, 81, 87). Do not turn. Place hdc in the next 68, 74, 80, 86, 92, 98 st. Leave the remaining Sleeve undone. Turn
Back of Crop Top
Back R1-R3: Ch 1 and HDC in the next 68, (74, 80, 86, 92, 98) st.
R4: Ch 1 and hdc in first st, HDC in the 3rd Loop in the next 66, 72, 78, 84, 90, 96 and hdc in the last st.
Repeat R1-R4 until Back measures 17.5”, 19” 20.5” 22” 23.5” ending with R3.
Wrist’s Cuffs
2nd Sleeve
Adding Sleeve Video Tutorial below
Use your Tapestry Needle and sew the Foundation Row of the Sleeve together.
Place sleeves RS to RS and Slip Stitch the Sleeve from the wrist to the armpit. (57, 63, 69, 75, 81, 87). Do NOT fasten off or turn.
Edging
Sewing Sides Video Tutorial below
Turn Sleeve right side out. Slip stitch into the 1st st of the Side. Place 1 sc in evenly in each side st until you come to the bottom of the Top. Place 1 sc in each st of the Foundation Row until you come to the other side of the Top. Place 1 sc evenly across the other side of the Top until you come to the Armpit. Place 1 sc evenly across the Side until you come to the Bottom of the Top. Place 1 sc in each st of the Foundation Row until you come to the other Side. Place 1 sc evenly across the Side of the Top until you come to the Armpit.
Turn Top inside out. Sew the Sides together until you come to the Bottom Corner. Fasten Off and sew the other Sides together until you come to the Bottom Corner. Fasten Off. Weave in ends and fasten off.
Step 1: With Sleeves right side out, SC evenly around the wrist. Join with a ss into the 1st sc.
Chain 5, turn and sc in 2nd chain from hook and in the next 3 st.
Step 2: SS into the next sc of sleeve twice. Ch 1, turn and sc in blo of the next 3 st, sc in both loops of the last st. Turn.
Step 3: Ch 1, sc in the 1st, sc in the blo of the next 3 st. ss into the next sc of sleeve twice. Ch 1, turn and sc in the blo of the next 3 st, sc in both loops of the last st. Turn
Repeat Steps 2 & 3 until you work your last sc of the Wrist. SS into the next 4 st of the beginning Trim. Fasten off and repeat these Steps on the other Wrist.
Neck of Crop Top
Neck with G Hook
Step 1: With Top right side out, SC evenly around the Neck. Join with a ss into the 1st sc.
Chain 5, turn and sc in 2nd chain from hook and in the next 3 st.
Step 2: SS into the next sc of Neck twice. Ch 1, turn and sc in blo of the next 3 st, sc in both loops of the last st. Turn.
Step 3: Ch 1, sc in the 1st, sc in the blo of the next 3 st. ss into the next sc of sleeve twice. Ch 1, turn and sc in the blo of the next 3 st, sc in both loops of the last st. Turn
Repeat Steps 2 & 3 until you work your last sc of the Neck. SS into the next 4 st of the beginning Trim. Fasten off and weave in ends.
Bottom Ribbing
Bottom with G Hook
Step 1: With Top right side out, attach yarn with a ss into the 1st sc of either Side seam. Chain 5, turn and sc in 2nd chain from hook and in the next 3 st.
Step 2: SS into the next sc of Bottom twice. Ch 1, turn and sc in blo of the next 3 st, sc in both loops of the last st. Turn.
Step 3: Ch 1, sc in the 1st, sc in the blo of the next 3 st. ss into the next sc of Bottom twice. Ch 1, turn and sc in the blo of the next 3 st, sc in both loops of the last st. Turn
Repeat Steps 2 & 3 until you work your last sc of the Bottom. SS into the next 4 st of the beginning Trim. Fasten off and weave in ends.
If you got this far, CONGRATULATIONS! You have finished the Amy Pullover! Again, I would really LOVE to see your version! You can find all the ways to connect with me below. Thank you for crocheting the Amy Pullover!
Find me, Joey Lea Baird, Jo of Jo’s Crafty Hook’s at any one of these places listed below! I would love to hear from you. You can connect with me by going to any of the social media sites below!
It seems like everyone is having a Black Friday and Cyber Monday Sale. So, I decided to have one as well! Starting tomorrow November 28, 2019 until December 2, 2019.
This post contains affiliate links. You can make a purchase using these links that I provide where I may receive compensation (at no added cost to you.) Purchases you make will help keep my website, Etsy Shop, and my Ravelry Store going and provide quality designs just for you!
My whole inventory at my Etsy Shop will be discounted, 30% off! You can purchase some of the items I have made in the past, like Clothing and Digital Patterns. To take advantage of the sale at my Etsy Shop JosCraftyHook, you will need a coupon code, BLACKFRIDAY30 which can only be found at my website.
Lindsay Silvestrini
Jo’s Crafty Hook Designs
Jo of Jo’s Crafty Hook
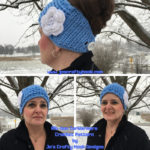
Rib-bon EarWarmers Twisted
Jo of Jo’s Crafty Hook
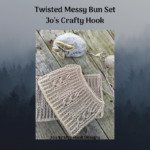
Twisted Cindy Messy Bun & Cowl
Wrapped In Love Set
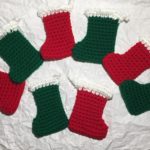
Mini Stocking Ornaments
$50 Unisex Striped Cardigan
I am also offering 30% off my crochet patterns from my Ravelry Store Jo’s Crafty Hook. You can shop all of my crochet patterns that I have designed. To take advantage of my Ravelry Store items, no coupon code will be necessary. You can find my store here.
Thank you for stopping by my website! I hope you take advantage of my Black Friday and Cyber Monday deals! Don’t forget, everything in my Etsy Shop JosCraftyHook is 30% off until Monday and you need the Coupon Code BLACKFRIDAY30. Also you can find all of my crochet pattern designs at my Ravelry Store Jo’s Crafty Hook here.
Find me, Joey Lea Baird, Jo of Jo’s Crafty Hook’s at any one of these places listed below!
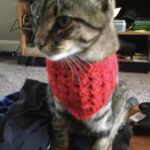
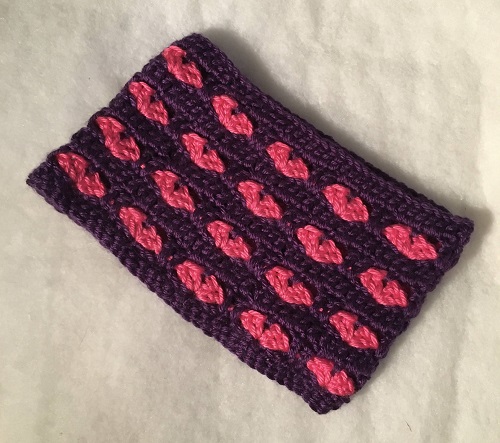
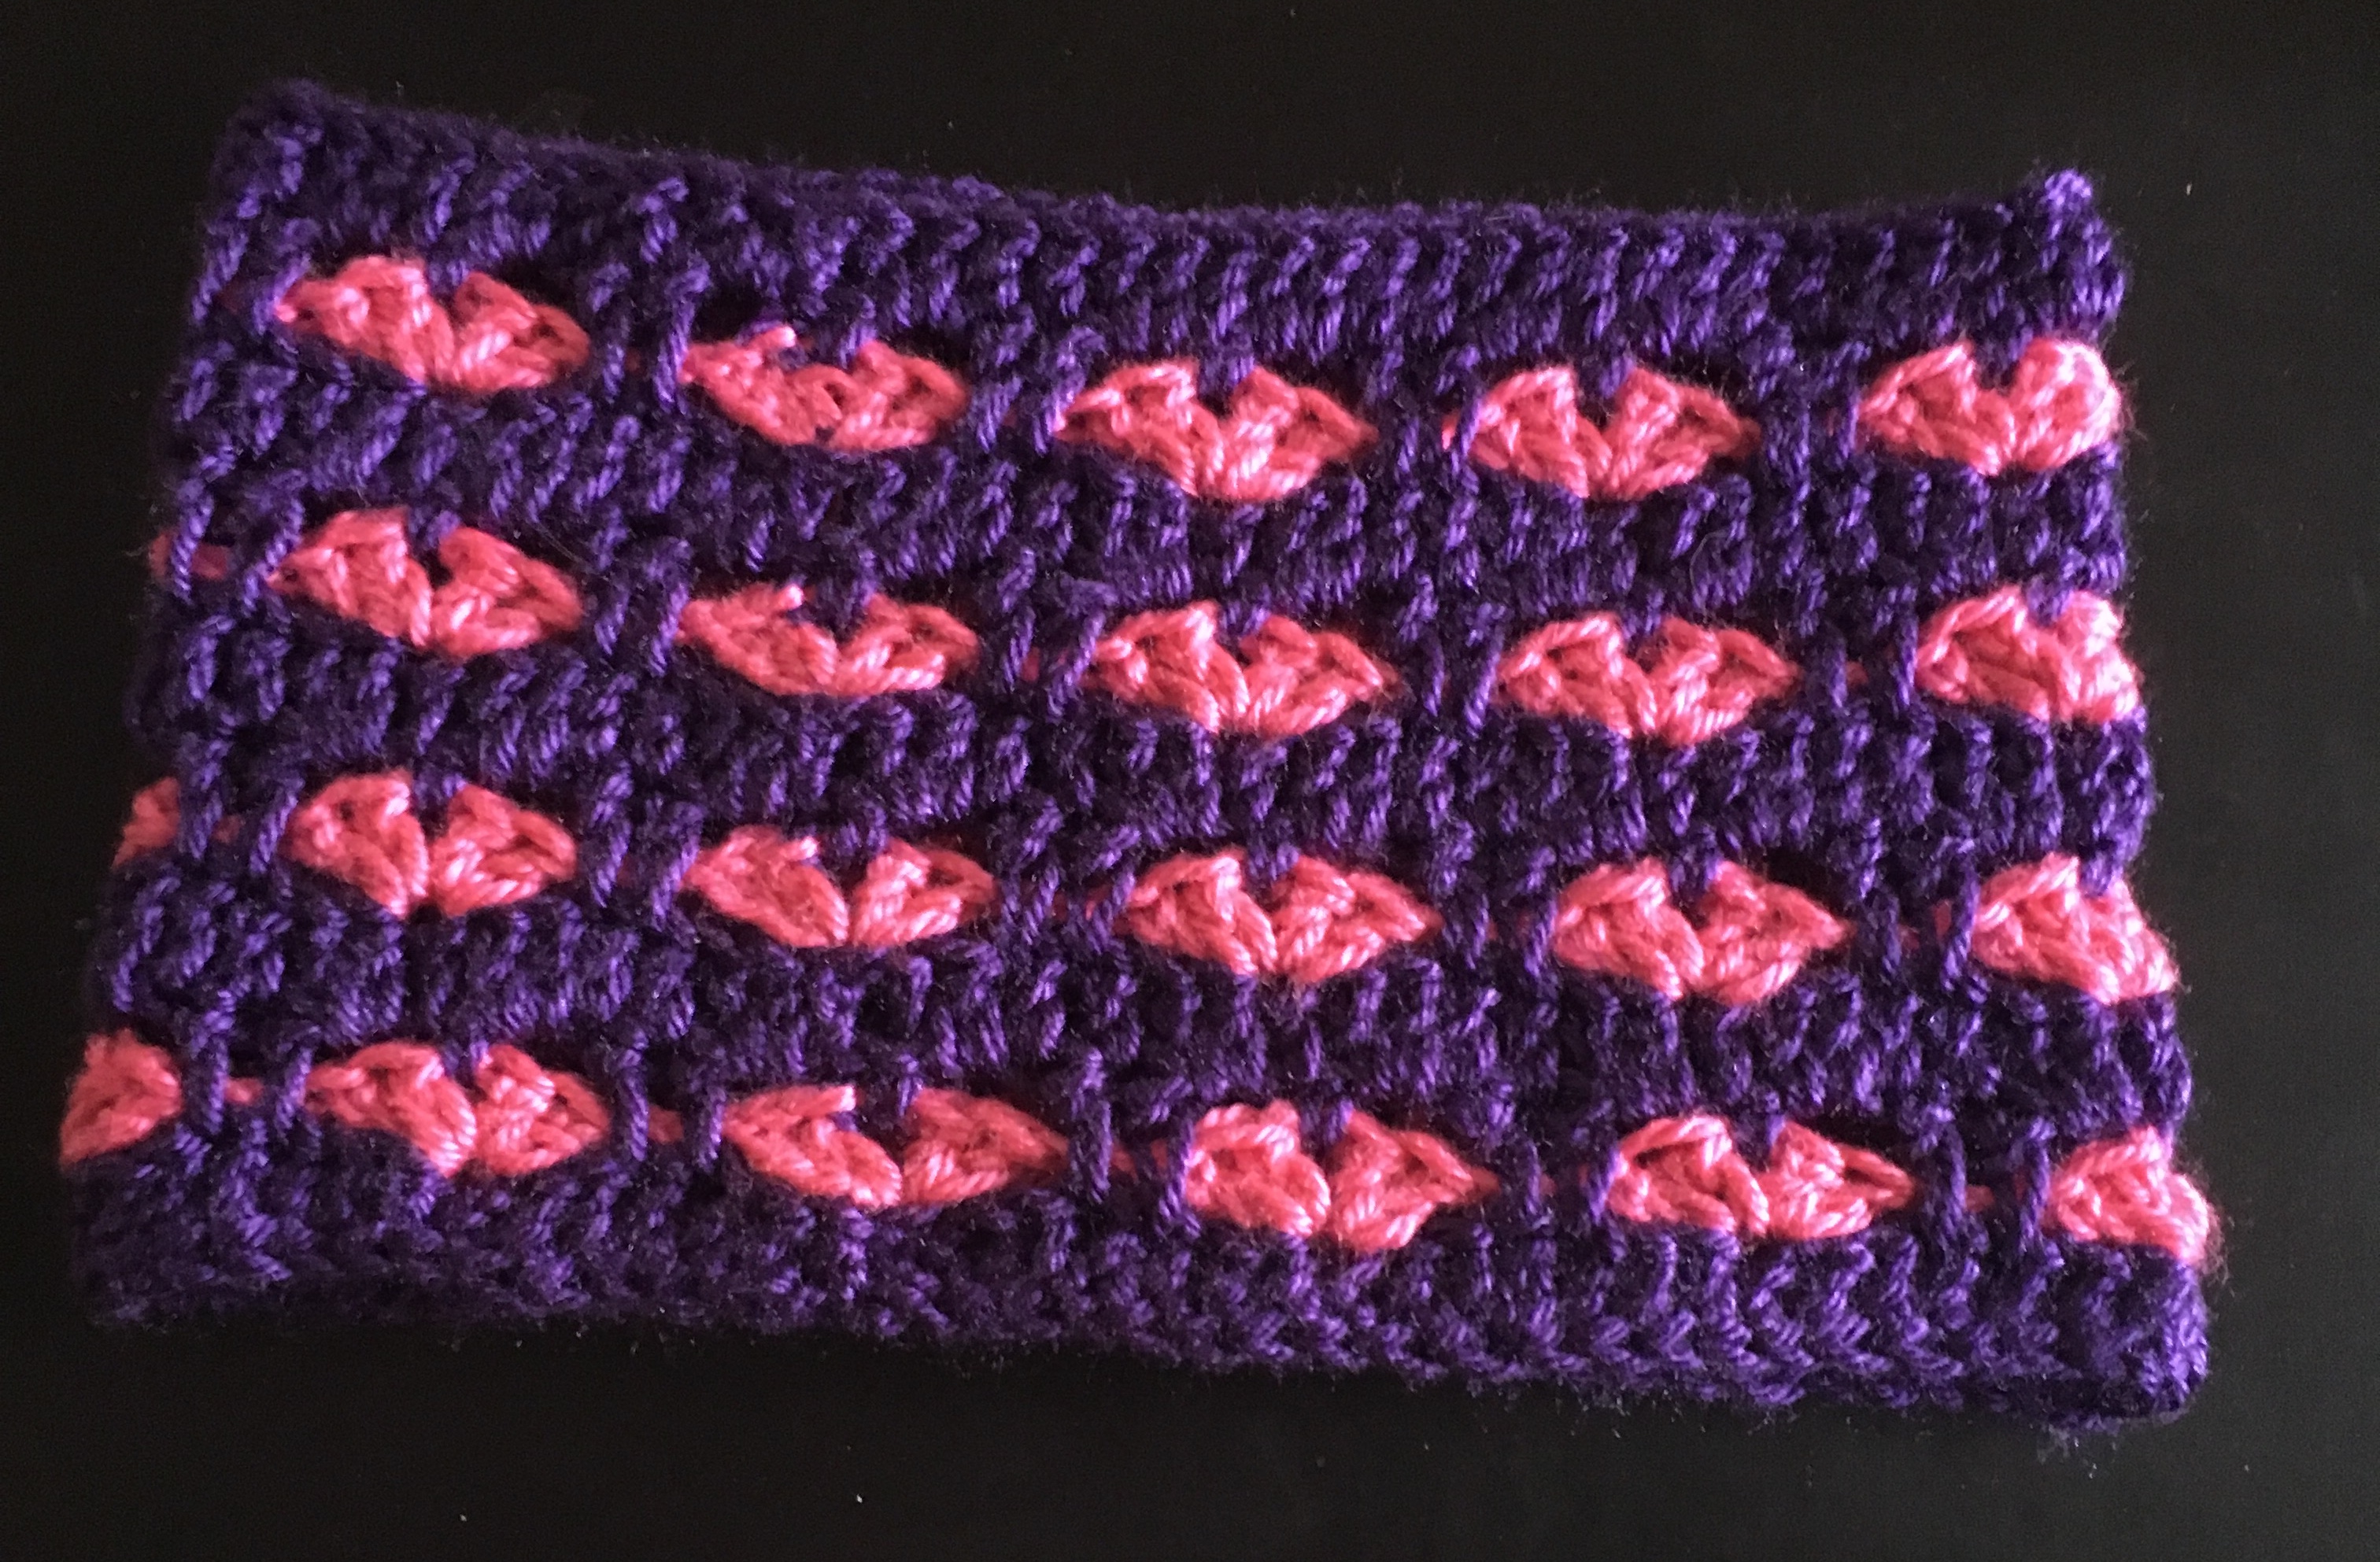
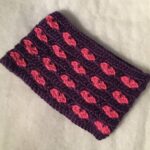
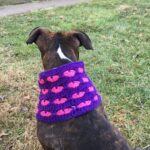
Although I designed the Wrapped in Love Headband Crochet Pattern in mind, it would make a perfect gift for Valentine’s Day or Sweetheart’s Day. You can crochet this for the ones you love, whether it is a person or an animal, as you can see by the picture below. lol
Headband with Freya
You can find the free crochet pattern for the Child Size version of the Wrapped in Love Headband below. I don’t want to take away from the importance of Cancer Awareness.
October is Cancer Awareness Month and the Wrapped in Love Headband Crochet Pattern was designed specifically for Cancer Awareness Month. There are a number of crochet patterns in the Wrapped In Love Line (see below) that are dedicated to the women in my family who have faced one type of cancer or another and SURVIVED! I am SO thankful to God for delivering them from this horrible disease!
Wrapped In Love Headband
This post contains affiliate links. You can make a purchase using these links that I provide where I may receive compensation (at no added cost to you.) Purchases you make will help keep my website and crochet pattern stores going and provide quality designs just for you!
As a Scoliosis Survivor, I know some of the struggles cancer patients go through. I deal with chronic pain, anxiety, depression and more. Cancer patients may go through these things as well. Surviving Scoliosis is an ongoing battle, that is why I am so thankful the women in my family battled cancer and survived!
The Wrapped in Love Headband uses the same technique found in the Wrapped in Love Hat and Cowl set crochet patterns that can be found on my website here. There are a number of Video Tutorials from my YouTube Channel here that do Row by Row with you. If you would like to receive the FREE PDF version of this pattern you can find it at any of my stores listed below.
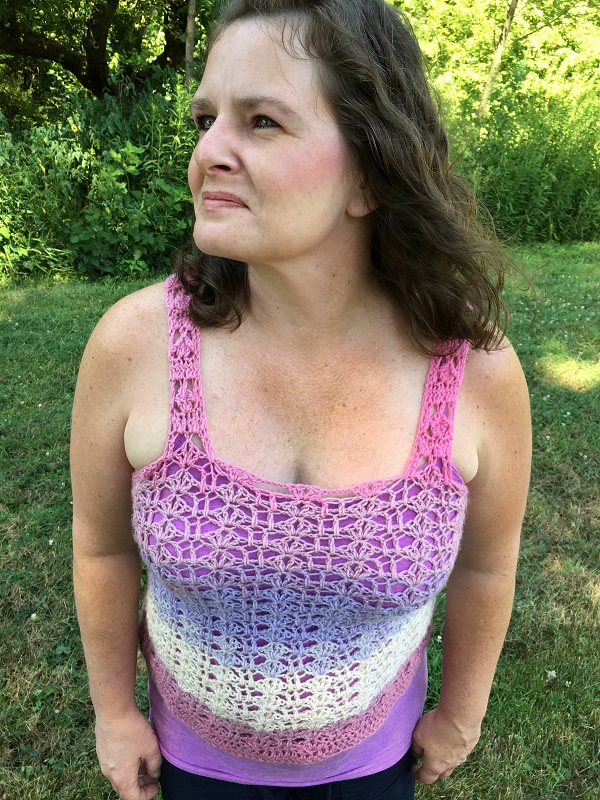
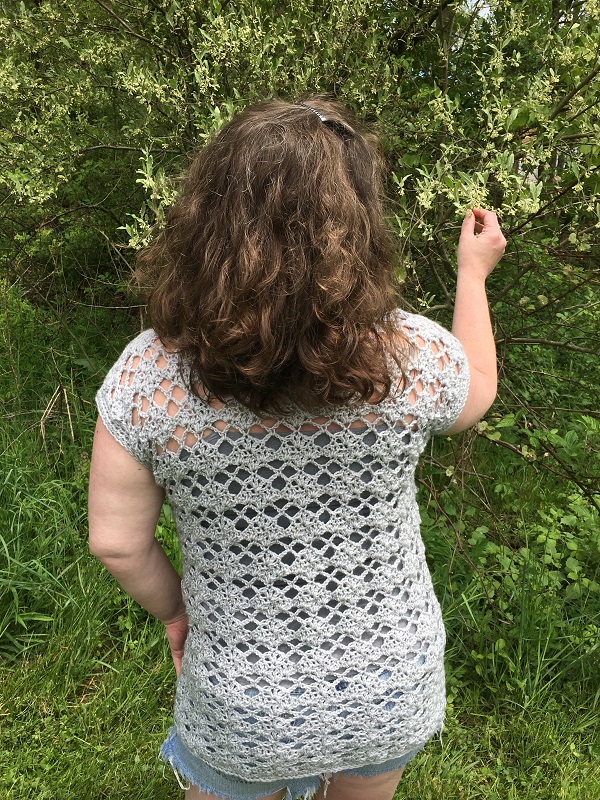
You can also find the Summer of Love Tank Top crochet pattern here on my website as well. The Summer of Love Tank Top uses the same Video Tutorials as the hat, cowl, and headband. You can find the Video Tutorials at my YouTube channel here as well.
The Wrapped In Love Headband and Summer of Love Tank Top are just some of the crochet patterns you can find in the Wrapped In Love Line. The Wrapped In Love Headband crochet pattern is another quick one that those with Scoliosis or chronic pain sufferers or anyone can do because it is a ‘short and sweet’ pattern. lol So scroll down and let’s get started!
Wrapped In Love Set
Summer of Love Tank Top
Wrapped in Love Headband Crochet Pattern
Materials:
US Hook I or 5.5 mm 200-500 yards of Main Color #4 Worsted Weight Yarn100-400 yards of 100-200 yards of Contrasting Color #4 Worsted Weight Yarn Scissors Tapestry Needle
Stitches Used:
Ch = Chain St = Stitch SC = Single Crochet DC = Double Crochet SS = Slip Stitch FDC = Foundation Double Crochet (My YouTube video here.) LDC = Long Double Crochet (My YouTube video here.) Beg Shell = Ch 3, DC, ch 1, 2 DC all in the same stitch (YouTube Video here.) Shell = 2 DC, ch 1, 2 DC all in same stitch (YouTube Video here.)
Gauge:
Hook U.S. I/5.5 mm 8 DC x 4 Rows = 2”
Gauge Swatch:
Ch 14, R1: dc in the 4th st from Hook. Turn (12 dc) R2-R4: Ch 3 and dc in each st across. Turn (12 dc)
Notes:
Headband is worked in the Round. Slip stitch into the 1st stitch, the chain space or stitch specified.
Ch 3 does count as a DC
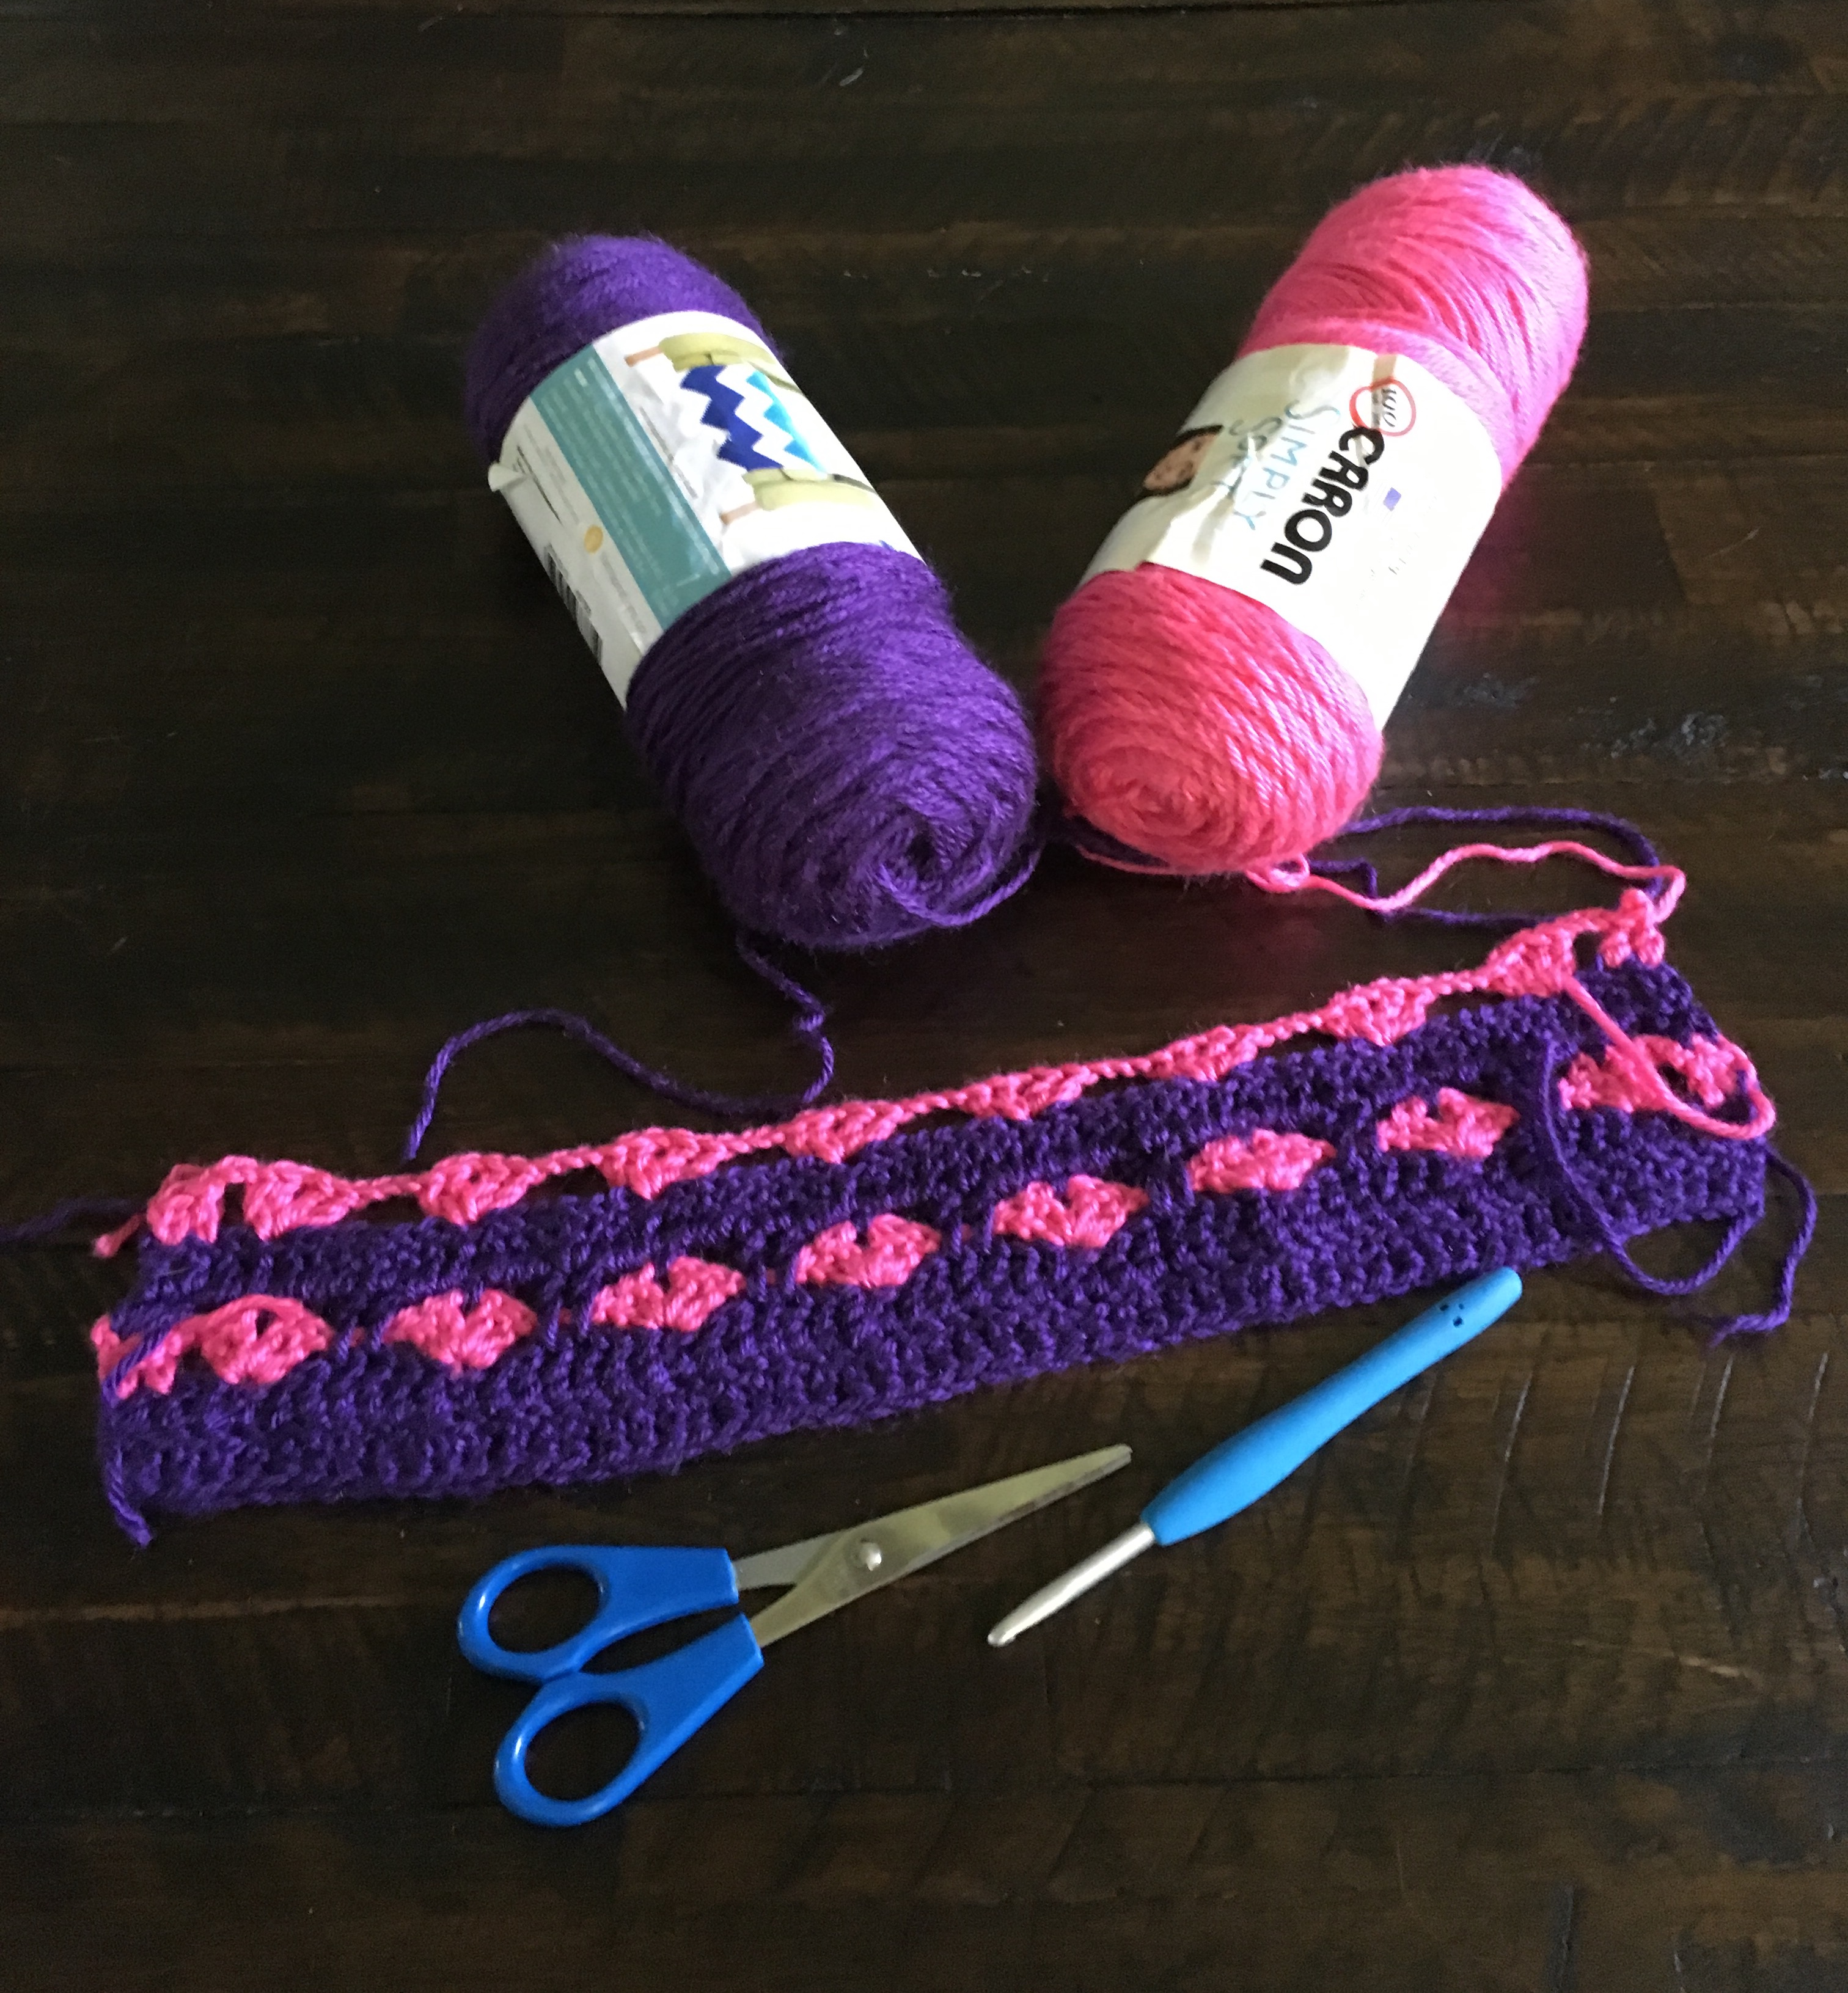
Shells made create the Heart
The Headband is Reversible and can be worn either way.
Sizes are for 0-12 months, 1-4 year, 5-10 year and Teen/Small Adult, Medium Adult, and Large Adult.
Headband can be worked in 1 Color as well.
Wrapped In Love Headband
Headband:
R1: With Main Color FDC 49, 56, 63, 70, 77. Sl st in beginning fdc to join. 49 (56, 63, 70, 77) FDC
Use Tapestry Needle to close FDC.
Change to Contrasting Color to make Hearts
R2: Attach Hot Pink in 1st fdc. [Ch 3, dc, ch 1, 2 dc all in same stitch. (Beg Shell) made] ch 2, skip 6 st, 2 dc, ch 1. 2 dc all in the same stitch. (Shell made). *Ch 2, skip 6 st, Shell in next st.* Repeat from * to * around. Ch 2 and ss in top of ch 3 of Beg Shell. (7, 8, 9, 10, 11 Shells)
Change to Main Color
R3: ss in ch 1 sp of Beg Shell, ch 1, sc in same st., *ch 2, skip 2 dc from previous row, 1 ldc in next 2 st, ch 2, sc in ch 1 space of next Shell.* Repeat from * to * around. Ss in sc to join.
R4: ch 3, dc in each st around. (49, 56, 63, 70, 77 DC)
Newborn to 12 months Stop Here
1-4 years Repeat R2-R4 ending with R4 or until Headband measures 2-3”
5 to 10 years Repeat R2-R4 ending with R4 until Headband measures 3-4”
Teen/Small Adult R5-R11: Repeat R2-R4 ending with R4 or until Headband measures 5-6”
Medium to Large Adult R5-R14: Repeat R2-R4 ending with R4 or until Headband measures 7-8”
Fasten off. Use Tapestry Needle to weave in ends.
Designing crochet patterns is something I enjoy. Designing crochet patterns with my loved ones in mind, I have created an eBook that contains 12 crochet patterns designed specifically for Cancer Awareness Month. Part of the proceeds collected from the sale of the Wrapped in Love Line eBook will be donated to the American Cancer Society in recognition of my family members who fought and won the battle with cancer. You can find the eBook in my Etsy Shop here.
Here are a few of the crochet patterns included in the Wrapped in Love Line eBook.
Wrapped In Love Set
Summer of Love Tank Top
Wrapped In Love Headband
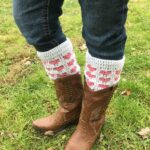
Wrapped in Love Boot Cuffs
Headband with Freya
Headband with Freya
From the Designer:
You are free to sell or give as a gift, the Wrapped in Love Headband. Please forward any one who would like to do this crochet pattern or any one of my crochet patterns to my Etsy shop, Ravelry, or to my website. There are more than one place to connect with me below. “
Every purchase of my crochet patterns helps! It allows me to keep my website going and to buy more yarn so I can create and design more Handmade Crocheted Creations for you to enjoy. Donations are accepted as well as the purchase of my patterns.
Thank you for purchasing the Wrappen in Love Headband Crochet Pattern! Check out my other GREAT patterns at my Etsy Shop JosCraftyHook OR my website joscraftyhook.com OR at Ravelry under Jo’s Crafty Hook Designs! If you have any questions or concerns about any pattern find me at Jo’s Crafty Hook Designs on Facebook!
I would LOVE to see your version of my Wrapped in Love Headband! You can “Hook It” to my Ravelry account Jo’s Crafty Hook OR at my Facebook Page Jo’s Crafty Hook OR at anyone of the places below that allows you to connect with me! Please use #wilheadband or #jostwisted when sharing on Social Media. Pictures, Comments, Feedback, etc. are ALWAYS welcome at my website www.joscraftyhook.com!
Find me, Joey Lea Baird, Jo of Jo’s Crafty Hook’s at any one of these places listed below!
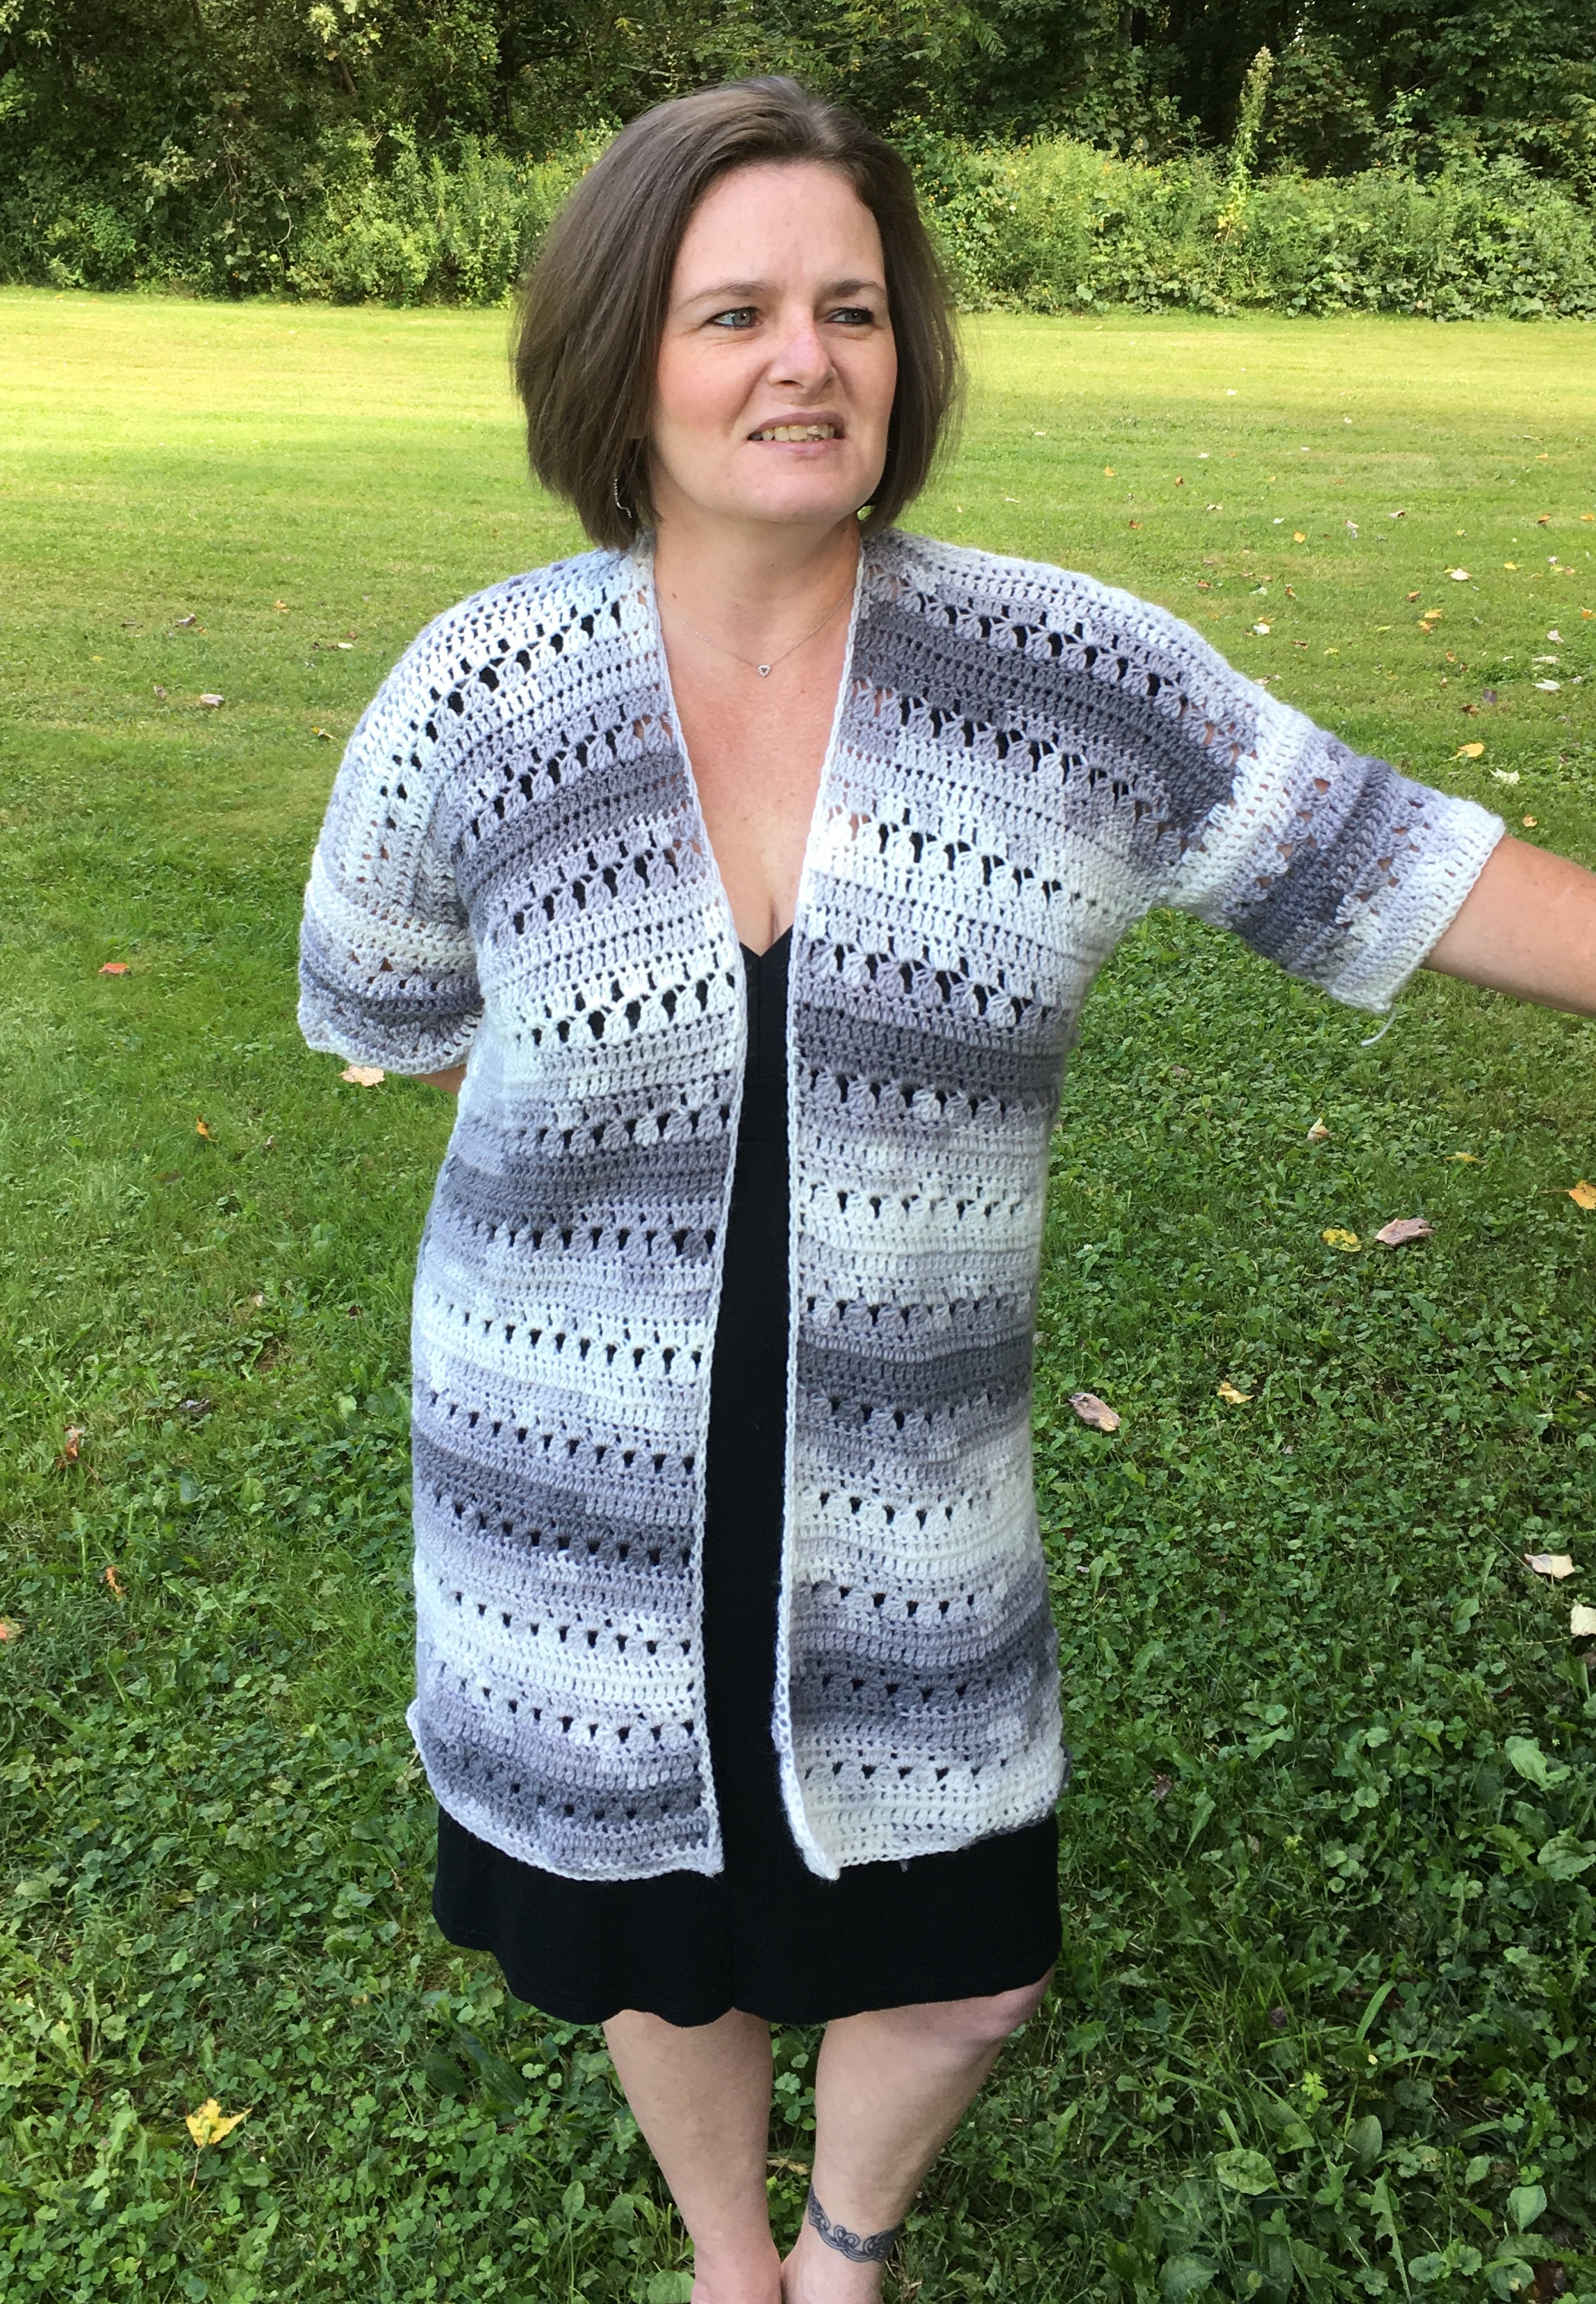
With the hotter weather upon us, below you will find just a couple of crochet patterns that were recently added to my Etsy Shop. All you need to do is click on the name under the pic and you will be taken directly to the pattern at my Etsy Shop. If you would like to see the other items available at my Etsy Shop you can click here.
This page contains affiliate links. You can make a purchase using these links that I provide where I may receive compensation (at no added cost to you.) Purchases you make will help keep my website, Etsy Shop, and my Ravelry Store going and provide quality designs just for you!
I do take Custom Orders on any of my patterns, just in case you see something you would love to see in YOUR style, size, and color! If you have any questions, feel free to email me at jo@joscraftyhook.com
Please sign up for my Newsletter. In doing so you will be notified when a new crochet pattern has been released, when I add FREE crochet patterns to my website, or when I am taking part in a pattern giveaway, and more.
[yikes-mailchimp form=”1″]
With the cooler weather approaching my area, I am adding more stock to my Etsy Shop JosCraftyHook. These Etsy Hightlights are my latest work from the Summer months preparing for the cooler. I hope you like them as much as I do!
Jacob’s Ladder Baby Blanket
The Jacob’s Ladder Baby Blanket will fit a Kraddle, a Bassinet, and a Crib. It measures 18 inches wide and 33 inches long. This is a perfect blanket for those Newborn babies. You can find the Kraddle Blanket at my Etsy Shop here.
If you would like to crochet the Jacob’s Ladder baby blanket yourself, you can do this too. I have the crochet pattern in my Etsy Shop as well here.
Baby Growth Chart Blanket
The Baby Growth Chart Blanket is for Newborns, so you can keep track of baby’s first 12 months. My friend, Jessica Cooper of Crochet It Creations, designed the blanket and let me test it for her. Jessica and more of her designs can be found here. You can find the Baby Growth Chart Blanket in my Etsy Shop here.
Unisex Infinity Scarf
Unisex Cowl
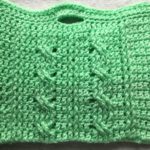
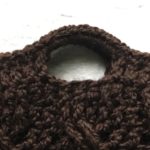
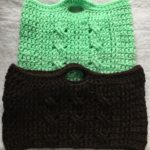
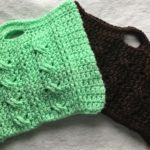
The Unisex Infinity Scarf can be purchased from my Etsy Shop here. The Unisex Cowl can be purchased here from my Etsy Shop. You can find out more about the designer there as well. I found this really easy crochet video on YouTube, I decided to make 2! One in light green and the other in brown, white and gray.
Kid Poncho
This crochet poncho is for a child, ranging in sizes 8-12. This is a perfect addition to my Etsy Shop because of the color and it being back to school time. This would make the perfect addition to any child’s wardrobe.
Slouchy Puffs Beanie
The Slouchy Puffs Beanie is my own design! I live in Ohio, so hats can be worn any time of year. You can purchase the Beanie here or if you want to crochet one for yourself, you can find that here! The Slouchy Puffs Beanie comes in a wide range of sizes, so Custom Orders are welcome! You can email me at jo@joscraftyhook.com to place a Custom Order.
Kaycee Tunic
The Kaycee Tunic was designed by my friend Jessica Cooper, who can be found at www.crochetitcreations.com. I tested the crochet pattern for the Kaycee Tunic in Adult One Size Fits All. You can find the tunic here from my Etsy Shop.
Summer’s End Kimono
You can purchase the Summer’s End Kimono from my Etsy Shop here. The Summer’s End Kimono’s crochet pattern can be found on Crystal Marin Long’s website at www.christacodesign.com.
There are plenty more items to be found in my Etsy Shop. These Etsy Highlights are just the tip of the iceberg, as they say! You can find more in my Etsy Shop by visiting www.etsy.com/shop/JosCraftyHook and seeing what my Crafty Hook has been up to.
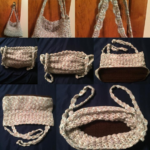
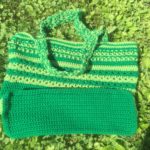
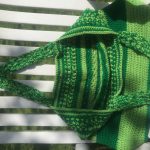
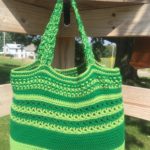
Don’t forget to take advantage of the Sale going on inside my Etsy Shop right now. You can read more about it here! Take 50% OFF ALL of my Etsy Shop’s PDF Bag Crochet Patterns by clicking of the link below! Sale ends September 13, 2019. No Coupon Code Needed to purchase Jo’s Boat Tote, Brown Bag It Tote, Storage Bag Cozy, Sharon Bags, and the Garden Tote crochet patterns.
While you are at my website be sure to subscribe to my Mailing List and Newsletter. This way you will be notified when I release another pattern or blog post!
If you have any questions or concerns about this pattern or any other pattern please find me at Jo’s Crafty Hook Designs on Facebook or email me at jo@joscraftyhook.com
You are free to sell or gift the Ombre Waves Tank Top, but Please forward anyone who would like to do this crochet pattern or any of my patterns to my Etsy shop, the Ravelry Store, or to my website. The web addresses for any place to connect with me are listed below.
Every purchase of my patterns helps! It allows me to buy more yarn so I can create and design more Handmade Crocheted Creations for you to enjoy.
I would LOVE to see your version of my Ombre Waves Tank Top! You can “Hook It” at my Ravelry Jo’s Crafty Hook Designs OR add a pic on my Facebook Page Jo’s Crafty Hook Designs OR at anyone of the places below that allows you to connect with me! Please use the hashtags: #ombrewaves or#jostwisted. Pictures, Comments, Feedback, etc. are ALWAYS welcome at my website www.joscraftyhook.com or my Facebook Page Jo’s Crafty Hook Designs.
Find me, Jo of Jo’s Crafty Hook Designs at any one of these places listed below!
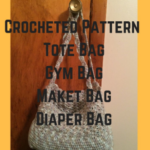
It is that time of year again! It is time for the kids to go Back to School! Yes, some of you are groaning like I used to and others, like my sister are jumping for joy! I did not enjoy getting up early when my kids were in school, but it can be a Great time of year for you right now because I am having a Back to School sale or as I call it a BAG2SCHOOL50 Sale!
This post contains affiliate links. You can make a purchase using these links that I provide where I may receive compensation (at no added cost to you.) Purchases you make will help keep my website, Etsy Shop, and my Ravelry Store going and provide quality designs just for you! You can also use the PayPal donate button above to donate to my site!
The BAG2SCHOOL50 is a sale I am having at my Etsy Shop JosCraftyHook! You can get 50% off ALL 5 of my Bag Crochet Patterns. The BAG2SCHOOL sale expires September 13, 2019, so be sure to stop by and take advantage of the 50% OFF! The best part about these Bag Crochet Patterns is you can crochet them in the color and style YOU choose OR you can have ME crochet them (more later) in the color(s) and style you choose! These bags can be used for as book bags, lunch bags, gym bags and if you don’t have kids in school you can use them for market bags or any type of bag you choose! Below are the 5 Bag Crochet Patterns that are on Sale for 50% off.
Brown Bag It Tote Crochet Pattern
Storage Bag Cozy Crochet Pattern
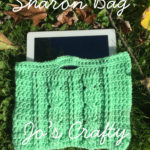
Sharon Bag Crochet Pattern
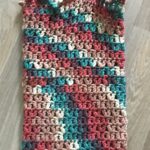
Garden Tote Crochet Pattern
Jo’s Boat Tote would be perfect for books, clothes, or even groceries. The great thing about ALL of my bag designs is that they are to be made with Acrylic Yarn because it can be washed and dried over and over again and the yarn used is nice and sturdy! You can find the Jo’s Boat Tote crochet pattern here.
Did you know Red Heart has been added to Yarnspirations? Shop them below!
The Brown Bag It Tote Crochet Pattern would be perfect for a Lunch Bag, a Gym Bag, or an Overnight Bag. These crochet tote patterns for Bags would be perfect for what YOU want it to be. You can find the Brown Bag It Tote here from my Etsy Shop.
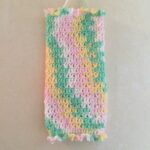
Storage Bag Cozy Crochet Pattern
Storage Bag Cozy Crochet Pattern
The Storage Bag Cozy crochet pattern can be used to store those pesky plastic bags you get from the grocery store. They can be placed just about anywhere around the house, like how I use them, by the litter box. They can be placed in your gym locker or your child’s locker. They great thing about the Storage Bag Cozy is it can be stuffed and stuffed because of the way the yarn stretches! You can find the Storage Bag Cozy Crochet Pattern right here from my Etsy Shop JosCraftyHook.
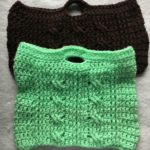
Sharon Bag Crochet Pattern
Sharon Bag Crochet Pattern
Sharon Bag Crochet Pattern
Sharon Bag Crochet Pattern
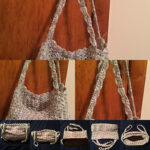
My Sharon Bag Crochet Pattern has been my most popular crochet pattern and it has a Small and Large version! You can actually find the crochet pattern for the Sharon Bag FREE here on my website! If you would like to purchase the Ad Free PDF version you can do so here. The Sharon Bag is a perfect carrying case for your iPad or Tablet or can be used as a Purse.
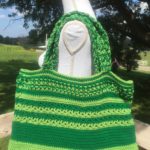
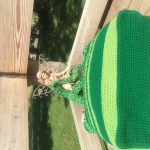
Garden Tote Crochet Pattern
Garden Tote
Garden Tote Crochet Pattern
Garden Tote
Garden Tote
Garden Tote Crochet Pattern
The Garden Tote Crochet Pattern would be a perfect School Bag, Gym Bag or Market Bag. Like ALL of these crocheted bags, they can be washed and tumble dried and they can be folded up and stored while not in use. The Garden Tote Crochet Pattern can be found at my Etsy Shop here.
Brown Bag It Tote Crochet Pattern
Storage Bag Cozy Crochet Pattern
Sharon Bag
Garden Tote Crochet Pattern
I hope you take part in the BAG2SCHOOL50 50% off sale of ALL of the crochet patterns for my Bag Collection. My Bag Collection contains the Jo’s Boat Tote, the Brown Bag It Tote, the Storage Bag Cozy, the Sharon Bag and the Garden Tote.
If you are reading this and say to yourself “I don’t have time to crochet a bag right now, but I need one.” This is the BEST part of this post………I can crochet the bag or bags you want! You can have ME crochet any of these bags in YOUR style and color(s)! The cost of me crocheting you YOUR handmade crocheted creation starts at $10 pus shipping! If you are interested in placing a Custom Order please email me at jo@joscraftyhook.com. When placing your order please supply me with the Bag Name and the Color(s) you would like. I will get in touch with you as soon as I can. Thank you for stopping by to see what Jo’s Crafty Hook is up to!
Thank you for stopping by Jo’s Crafty Hook! I hope you pick 1 or 5 of the crochet patterns that are 50% Off! You can get 50% off ALL 5 of my Bag Crochet Patterns. The BAG2SCHOOL sale expires September 13, 2019, so be sure to stop by and take advantage of the 50% OFF! Be sure to shop the BAG2SCHOOL50 before the month is up!
From the Designer:
Thank you again for stopping by Jo’s Crafty Hook! Be sure to shop the BAG2SCHOOL50 at my Etsy Shop JosCraftyHook before the month is up!
While you are at my website be sure to subscribe to my Mailing List and Newsletter. This way you will be notified when I release another pattern or blog post!
If you have any questions or concerns about this pattern or any other pattern please find me at Jo’s Crafty Hook Designs on Facebook or email me at jo@joscraftyhook.com
You are free to sell or gift the Ombre Waves Tank Top, but Please forward anyone who would like to do this crochet pattern or any of my patterns to my Etsy shop, the Ravelry Store, or to my website. The web addresses for any place to connect with me are listed below.
Every purchase of my patterns helps! It allows me to buy more yarn so I can create and design more Handmade Crocheted Creations for you to enjoy.
I would LOVE to see your version of my Ombre Waves Tank Top! You can “Hook It” at my Ravelry Jo’s Crafty Hook Designs OR add a pic on my Facebook Page Jo’s Crafty Hook Designs OR at anyone of the places below that allows you to connect with me! Please use the hashtags: #ombrewaves or#jostwisted. Pictures, Comments, Feedback, etc. are ALWAYS welcome at my website www.joscraftyhook.com or my Facebook Page Jo’s Crafty Hook Designs.
Find me, Jo of Jo’s Crafty Hook Designs at any one of these places listed below!
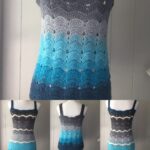
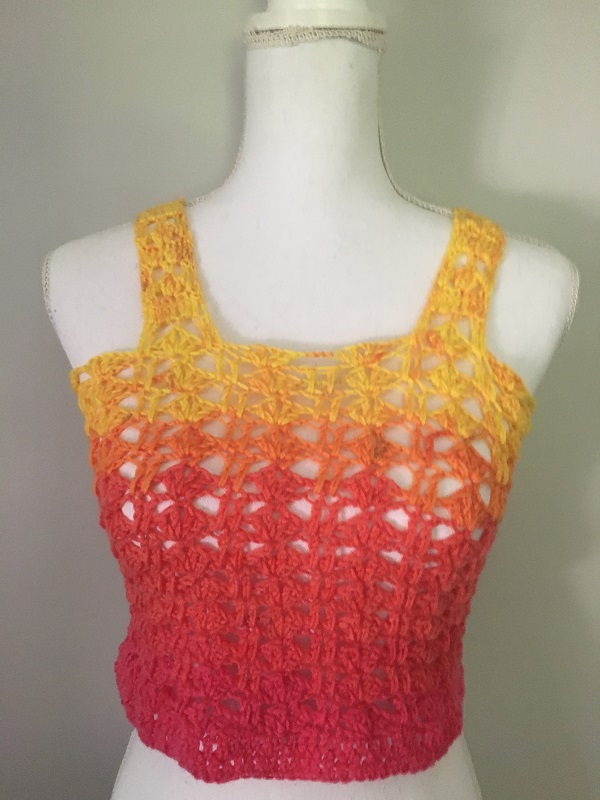
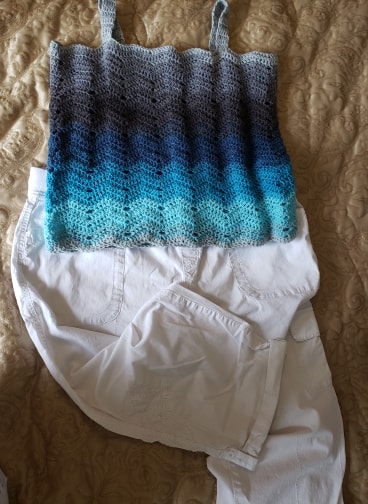
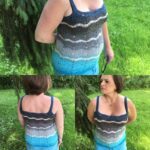
Oh boy are you in for a Treat! The Ombre Waves is a FREE Crochet Pattern just for you! Me and my testers absolutely LOVE this design and I am sharing it with you FREE! There are 6 sizes to choose from, from Small to 3X! I hope you LOVE it as much as we do! Thank you Lindsay Silvestrini, Laura Poulsen, Tara Smith, April Pendleton, and Sammi Leighton for testing the Ombre Waves Tank Top!
This post contains affiliate links. You can make a purchase using these links that I provide where I may receive compensation (at no added cost to you.) Purchases you make will help keep my website, Etsy Shop, and my Ravelry Store going and provide quality designs just for you! You can also use the PayPal donate button above to donate to my site!
Ombre Waves Tank Top
April Pendleton’s Version
Ombre Wave Tank Top
Tara Smith’s Tank Top
Laura Poulsen’s Tank Top
Ombre Waves Tank Top
If you would like the Ad Free PDF Pattern, you can visit my Etsy Shop here or my Ravelry Store here.
I designed the Ombre Waves Tank Top around this time last year, but I only offered it in 1 size. One of my crochet pattern testers said she would LOVE to do the tank top, but I didn’t offer a Small. I heard the same thing about sizes from others, so I decided to add 5 more sizes to the pattern. So now YOU can take advantage of these changes as well!
When you are finished with YOUR version of the Ombre Waves Tank Top I would LOVE, LOVE, LOVE to see it! You can stop by my Facebook Group Jo’s Crafty Hook Designs here!
If you have ANY questions or concerns while you are crocheting your own Handmade Crocheted Creations, you can email me at jo@joscraftyhook.com or find me at my Facebook Group Jo’s Crafty Hook Designs here.
If you would like the Ad Free PDF Pattern, you can visit my Etsy Shop here or my Ravelry Store here.
Jo’s Crafty Hook Designs
Ombre Waves Tank Top
Ombre Waves Tank Top
Laura Poulsen’s Tank Top
Ombre Waves Tank Top
Chart has the measurements needed for the corresponding sizes.
Size
FSC
Width
Height
Rows
Straps
Small
101
30
12
30
6
Medium
109
32
14
32
6
Large
117
34
16
34
8
XL
125
36
18
36
8
2X
133
38
20
38
10
3X
141
40
22
40
10
Materials:
US Hook G/4.5 mm 450-1200 yards of #3 Lightweight Yarn Scissors Tapestry Needle 4 Stitch Markers
Gauge: Hook US G/4.5 mm 4 DC x 2 rows = 1 inch
Gauge Swatch:
R1: Ch 8, dc in 4th ch from hook and in each st across. Turn R2-R4: ch 3 and dc in each st across.
Abbreviations: ch = chain sl st = slip stitch fsc = foundation single crochet dc = double crochet RS = Right Side
3 DC will always be put in the 2nd DC of the 3 DC group from previous row.
The Ombre Waves Tank Top will start from the bottom of the tank top and it will work its way up to the top. Straps will be attached separately.
The Tank Top will be worked in the Round.Sizes are for Small, Medium, Large, XLarge, 2XLarge, and 3XLarge.
Bottom of the Tank Top:
R1: fsc 101 (109, 117, 125, 133 and 141) and ss into 1st fsc to join. Turn
(RS) R2: Ch 1 and dc in 2nd ch from hook, dc in the next 3 st, *3 dc in next st, sc in next 8 st.** repeat from * to ** until the last 5 st, then 3 dc in next st, dc in the last 4 st. Join and turn
R3: Ch 1 and skip 1 st, *dc in the next 4 st, 3 dc in next st, dc in the next 4 st, sk 2 st.** repeat from * to ** join and turn
(RS) R4: Ch 2, skip next 2 st, dc in the next 3 st, *3 dc in next st, dc in the next 3 st, skip 4 st, dc in next 3 st** repeat from * to ** skip last 2 st. join and turn
R5: ch 1, dc in the next 4 st, *3 dc in next st, dc in the next 8 st** repeat from * to ** join and turn
R6-30 (33, 36, 39, 42, 45): Repeat Rows 3-5 until you have the needed Rows for your size. You can continue repeating R3-R5 if you desire a longer length.
Fasten off and Weave in ends.
If you would like the Ad Free PDF Pattern, you can visit my Etsy Shop here or my Ravelry Store here.
Straps:
Make 4 – 2 on each side
Placing of Stitch Markers: With (RS) facing you, fold the shirt in ½, making sure the Waves line up correctly and count over 2 Waves from the Left and 2 Waves from the Right. Find the 3 dc group in the center of the wave and count over 1 stitch and put your stitch marker in that place. This will be where you start the strap.
Notes:
You will follow Placing of Stitch Markers 4 times. 2 Straps on the Front of the Tank and 2 Straps on the Back of the Tank. If the Straps are not long enough for your size, feel free to add as many Rows as you need.
Once you have completed attaching the Straps, using your Tapestry Needle sew the straps together using the Back Stitch or the Invisible Stitch.
Use your Tapestry Needle to weave in loose ends and trim off.
Sizes Small and Medium
R1: Attach yarn with a slip stitch; ch 3 and dc in the next 4 st. ch 3 and turn. [5 dc]
R2-6: dc in the next 4 st. ch 3 and turn. At the end of Row 8 leave enough yarn to sew Straps together.
Sizes Large and XLarge
R1: Attach yarn with a slip stitch; ch 3 and dc in the next 4 st. ch 3 and turn. [5 dc]
R2-8: dc in the next 4 st. ch 3 and turn. At the end of Row 8 leave enough yarn to sew Straps together.
Sizes 2Xlarge and 3XLarge
R1: Attach yarn with a slip stitch; ch 3 and dc in the next 4 st. ch 3 and turn. [5 dc]
R2-10: dc in the next 4 st. ch 3 and turn. At the end of Row 8 leave enough yarn to sew Straps together.
From the Designer:
Thank you for purchasing my Ombre Waves Tank Top Crochet Pattern! I would LOVE to see your finished crocheted Ombre Waves Tank Top! Send me a pic of your finished Ombre Waves Tank Top or you wearing your new Ombre Waves Tank Top!
While you are at my website be sure to subscribe to my Mailing List and Newsletter. This way you will be notified when I release another pattern or blog post!
If you have any questions or concerns about this pattern or any other pattern please find me at Jo’s Crafty Hook Designs on Facebook or email me at jo@joscraftyhook.com
You are free to sell or gift the Ombre Waves Tank Top, but Please forward anyone who would like to do this crochet pattern or any of my patterns to my Etsy shop, the Ravelry Store, or to my website. The web addresses for any place to connect with me are listed below.
Every purchase of my patterns helps! It allows me to buy more yarn so I can create and design more Handmade Crocheted Creations for you to enjoy.
I would LOVE to see your version of my Ombre Waves Tank Top! You can “Hook It” at my Ravelry Jo’s Crafty Hook Designs OR add a pic on my Facebook Page Jo’s Crafty Hook Designs OR at anyone of the places below that allows you to connect with me! Please use the hashtags: #ombrewaves or #jostwisted. Pictures, Comments, Feedback, etc. are ALWAYS welcome at my website www.joscraftyhook.com or my Facebook Page Jo’s Crafty Hook Designs.
Find me, Jo of Jo’s Crafty Hook Designs at any one of these places listed below!
In today’s post I will be sharing how to join afghan or blanket squares and adding a border to your afghan or blanket.
Below you will find some helpful Video Tutorials on how to join squares you used in making an Afghan or Blanket. Also you will find a Video Tutorial I made using the Lollipop technique when I added my border.
The original post was from when I took part in the Patchwork Mystery CAL, but these techniques can be used in joining any squares or adding a border when making an afghan or blanket.
The technique I used in joining my squares was crocheting them together using the double crochet stitch.
I also have a helpful Video Tutorial on joining squares using the Running Stitch which you can watch below.
************************************************
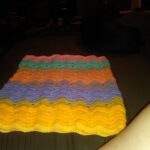
This is it, the end of the Patchwork Mystery CAL, well it’s ALMOST over! In today’s post I will be sharing the Joining Squares and Adding a Border for the Patchwork Mystery CAL Afghan that I did. Don’t worry because if you just joined us for the CAL or are behind, the schedule will stay up in the group and our patterns will remain FREE on our websites or blogs! If you are just coming across our CAL, you can find our Facebook Group Patchwork Mystery CAL here!
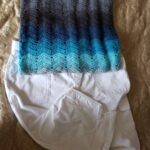
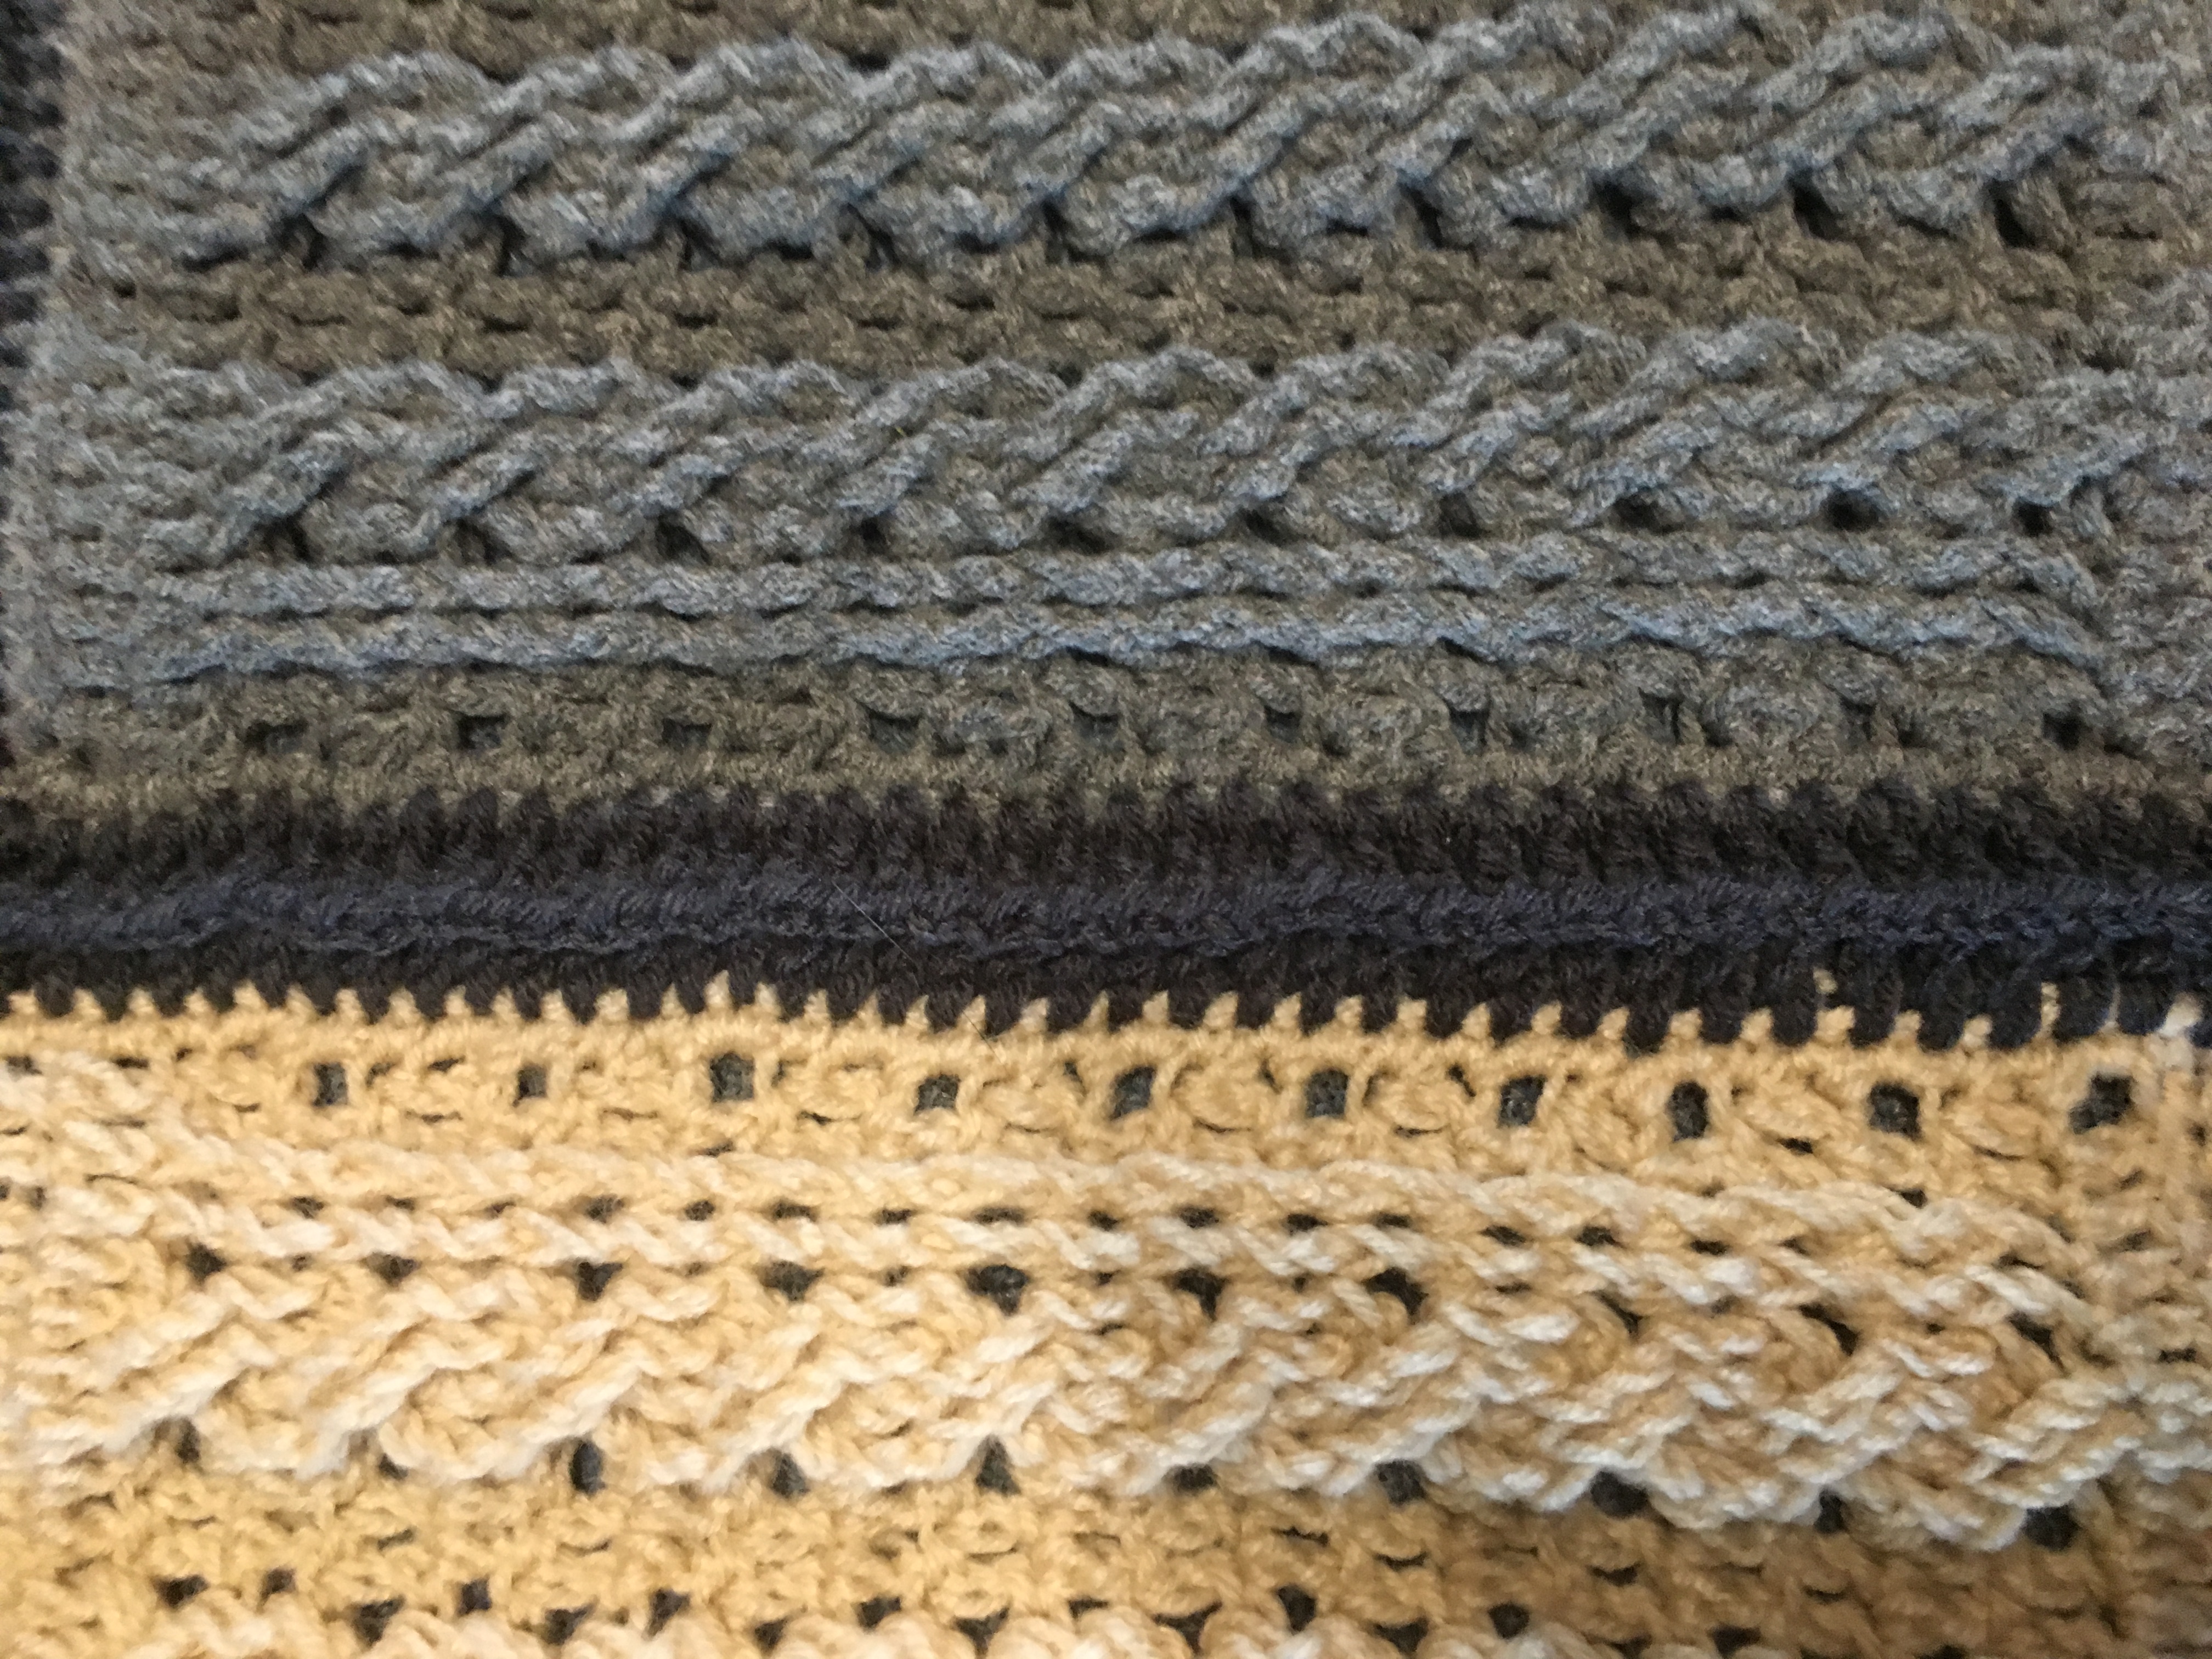
Joining my Afghan Squares was a challenge, with SO many different techniques out there it was hard to choose from, but I find one perfect for mine! I used a DC techniques to Join my afghan squares. Below is a picture on my Join and a Video Tutorial to show you exactly what I did.
DC JoinDC Border around whole Afghan
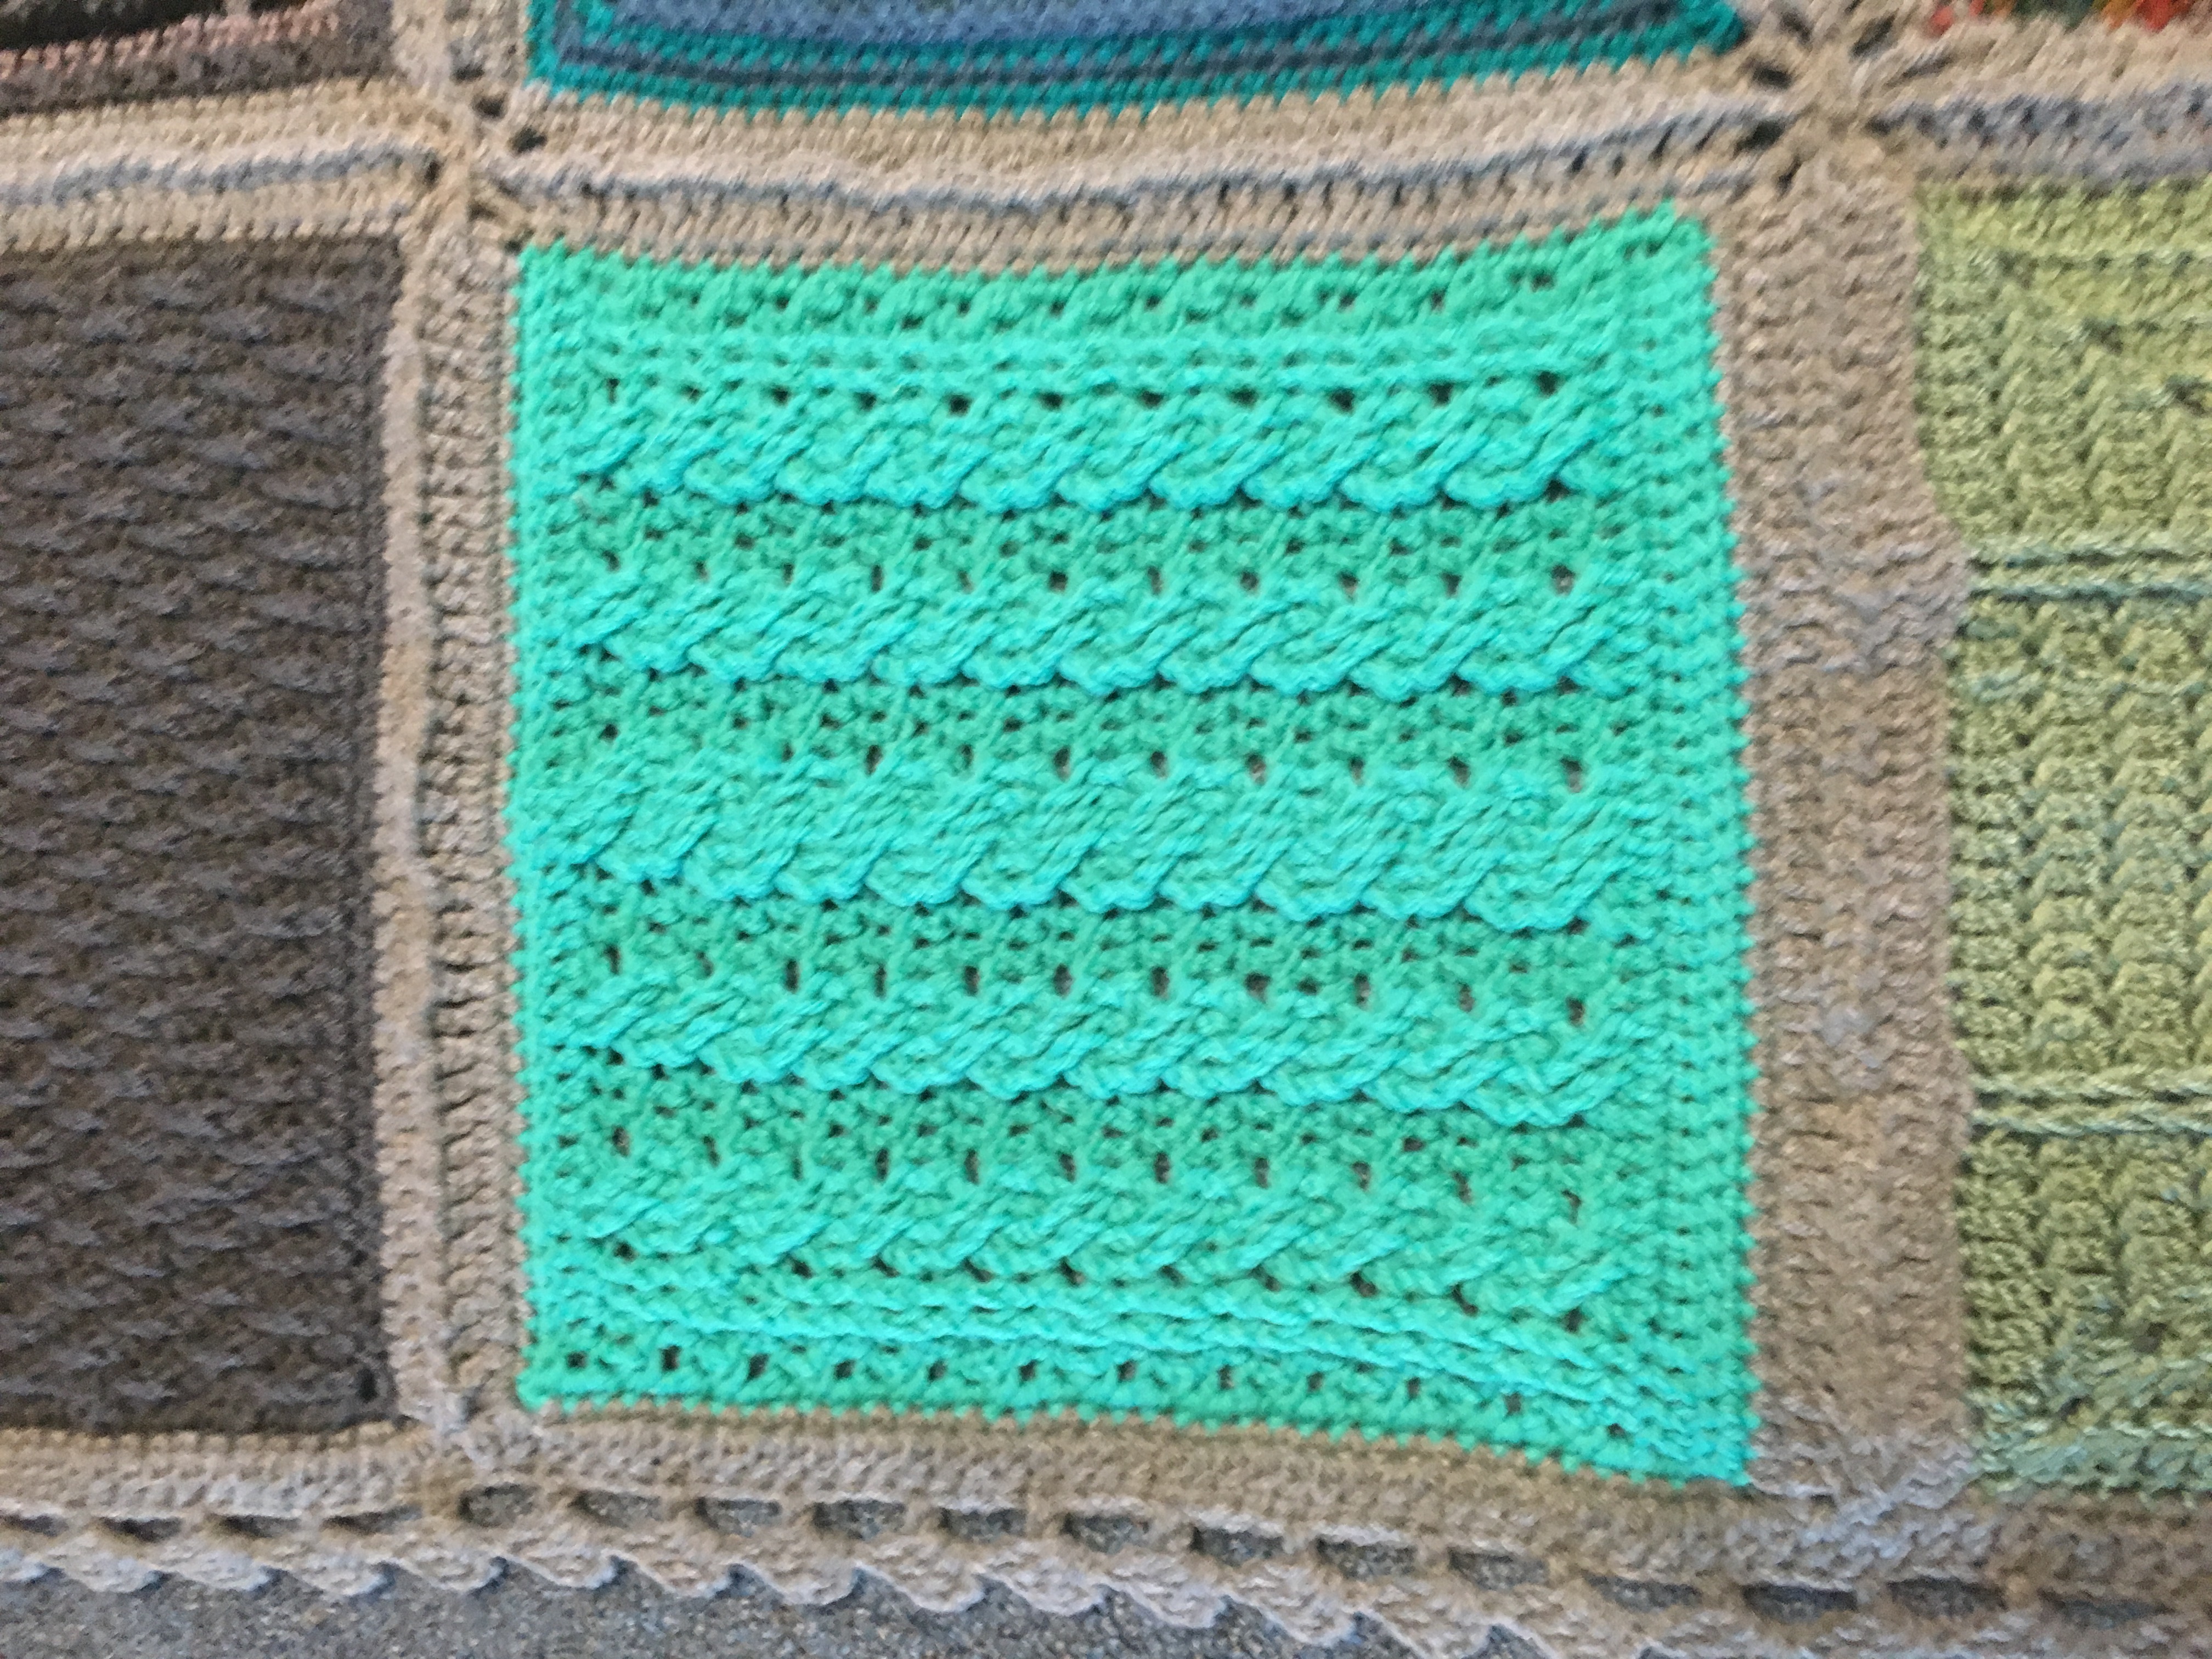
Once I joined all of my Afghan Squares, I added a DC Border around the whole Afghan. After I did this I searched and searched Pinterest until I found the perfect decorative border I was looking for. I call it the “Lollipop” technique. lol The actual pattern came from My Crafts which can be found here.
I also made a Video Tutorial of my “Lollipop” Border and you can find it below which is from my YouTube Channel.
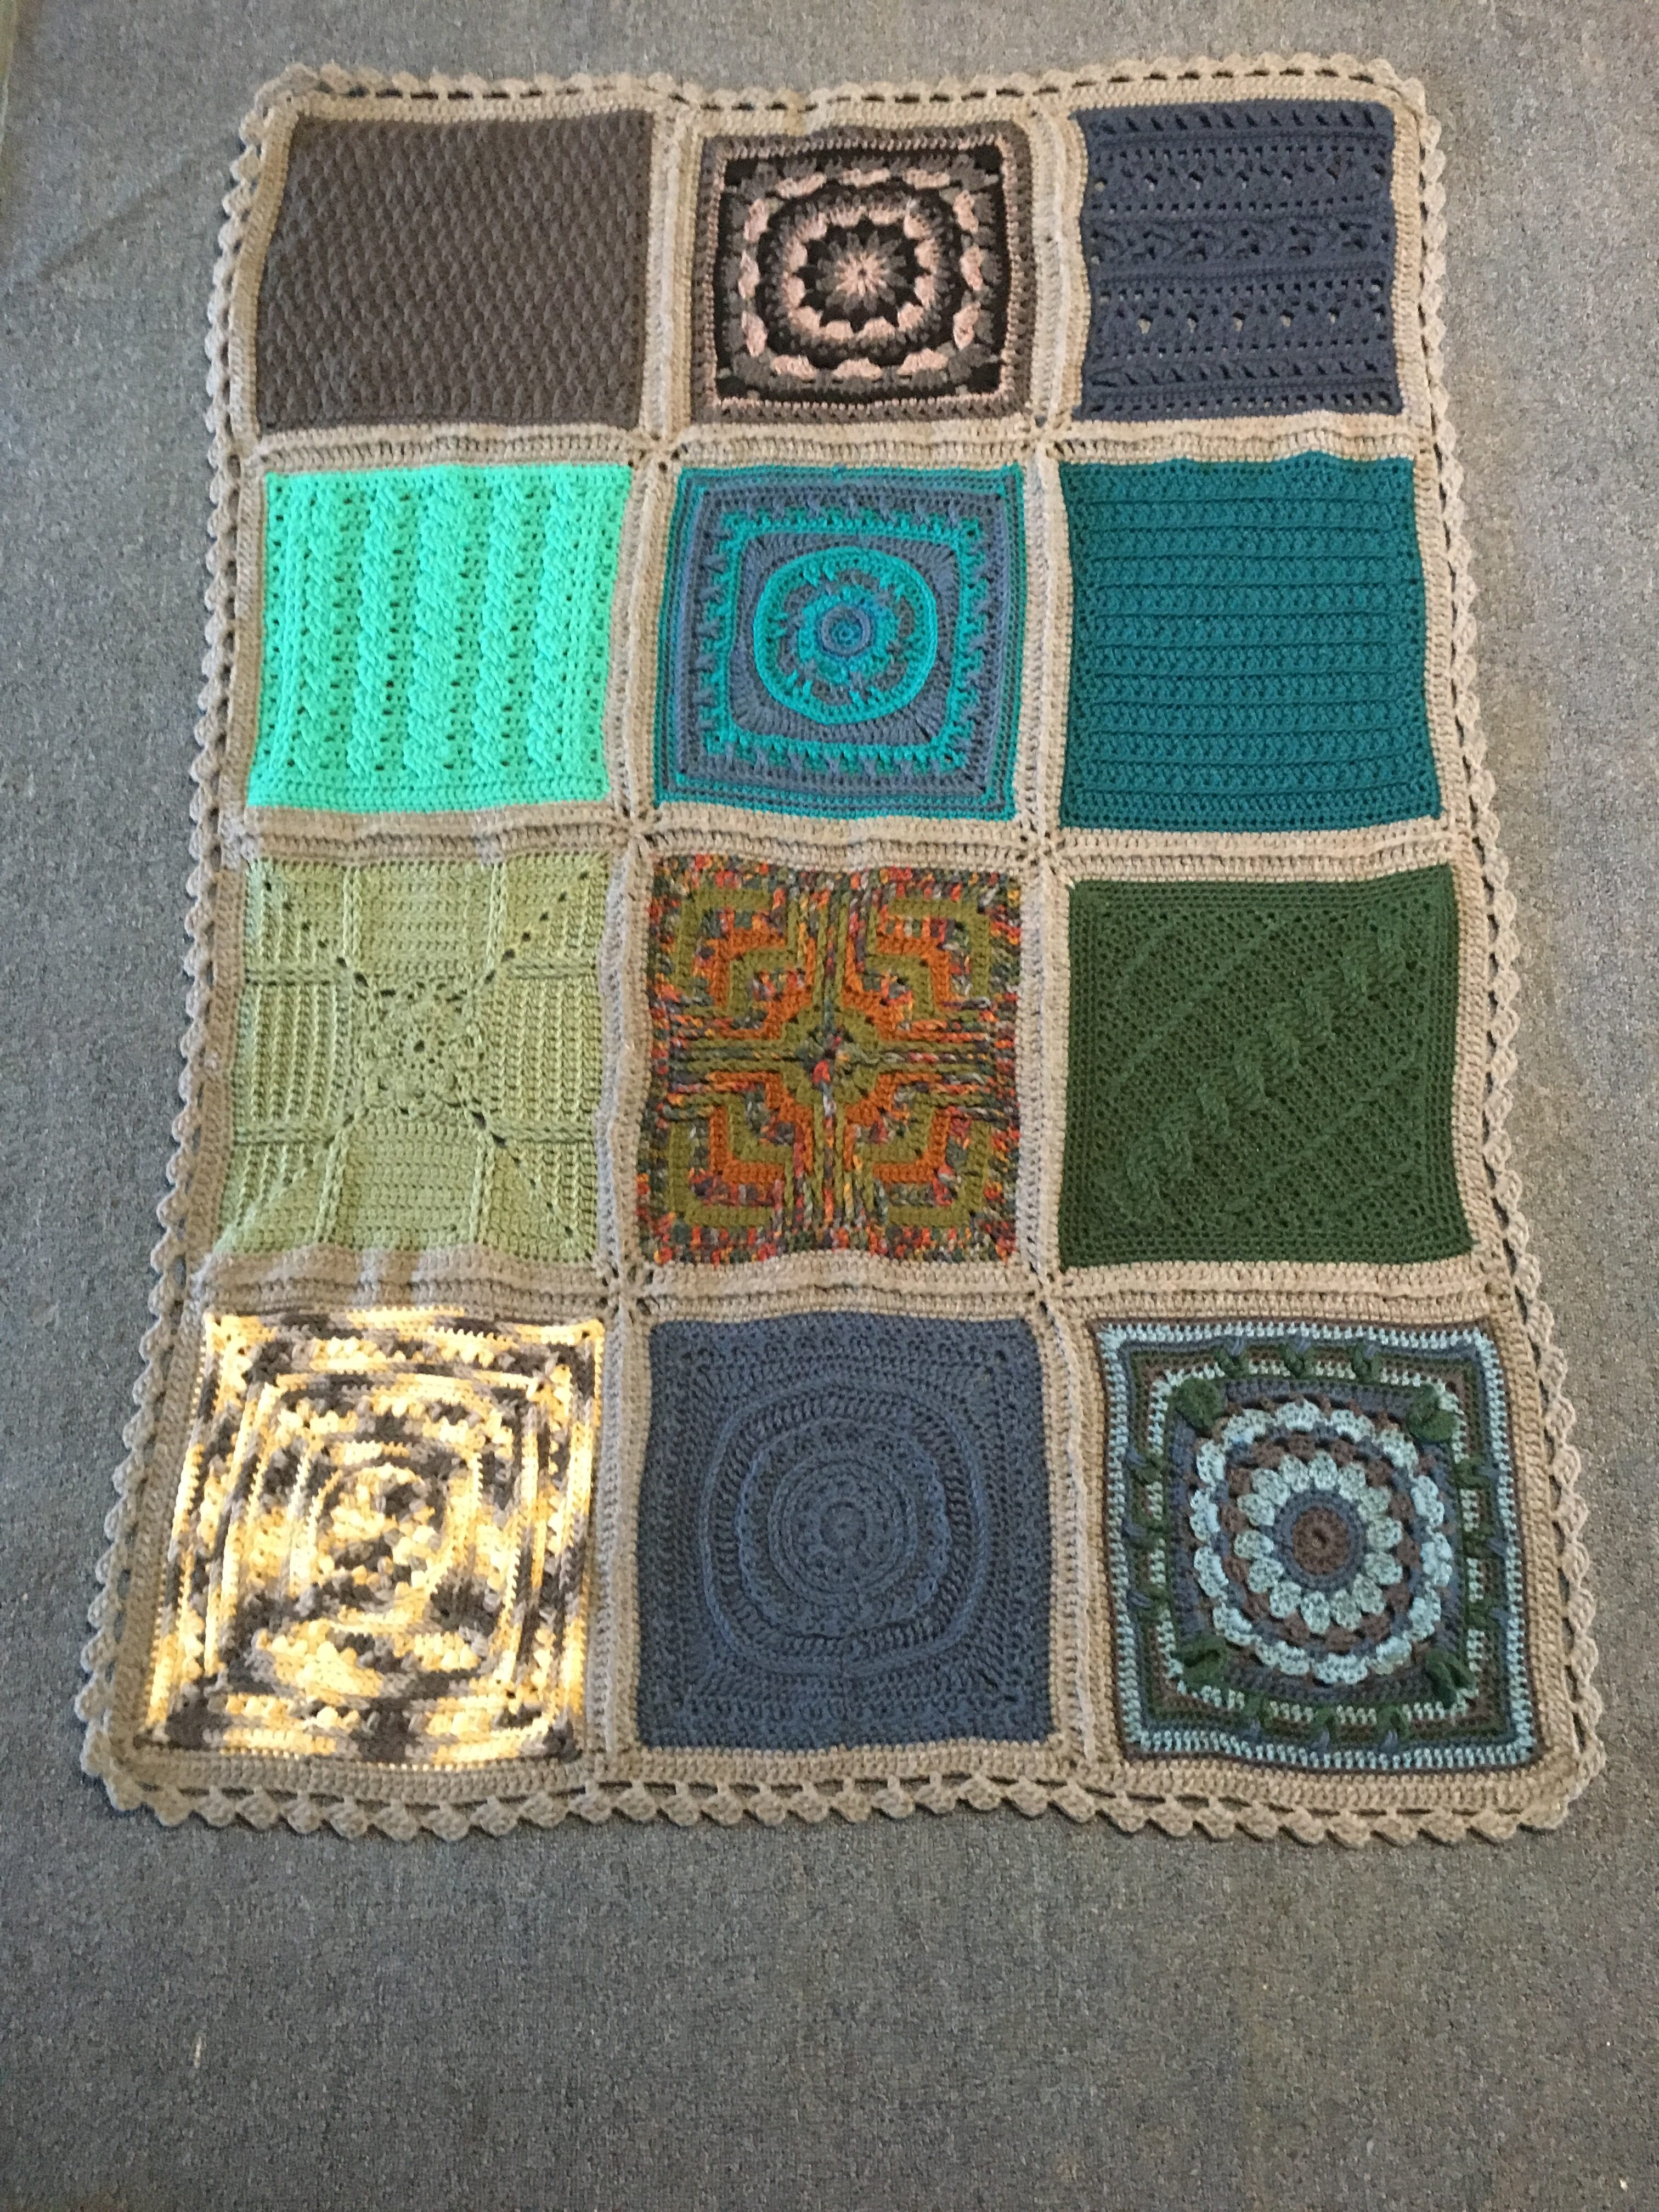
And here is my finished Patchwork Mystery CAL Afghan! I hope you like it and are able to find the perfect Join and Border for your Patchwork Mystery CAL Afghan! Be sure to finish your Afghan and enter it in our Contest for a chance to win prizes! You can find more about the Contest inside our Facebook Group Patchwork Mystery CAL here!
Jo’s Crafty Hook’s Patchwork Mystery CAL Afghan
Thank you for joining us these past 12 weeks! It has been an amazing journey for all of us. Most are new Fiber Artists and being asked to participate in this awesome CAL has been a Fabulous Ride! I can’t wait to watch these designers as they create more Fiber Art for all of us to enjoy! (Myself Included) lol I am VERY thankful I got to be a part of your lives as well! Thank you!
Here are links to a few of the other designers in the group that posted how they joined their blankets:
Find me, Jo of Jo’s Crafty Hook Designs at any one of these places listed below! Subscribe to my email; follow me on Etsy, Instagram and Twitter; favorite my patterns at Ravelry; and watch and subscribe to my video tutorials on YouTube!
If you would like to make a donation to Jo’s Crafty Hook and help me with the costs of running my website, crocheting new designs I would greatly appreciate it!
From the Designer:
Thank you for stopping by my website! Check out some of my patterns at my Ravelry Store Jo’s Crafty Hook Designs or LoveCraft or Etsy Shop JosCraftyHook or get free crochet patterns at my website joscraftyhook.com! While you are at my website be sure to subscribe to my Newsletter. This way you will be notified when I release another pattern or giveaway or blog post!
If you have any questions or concerns about this pattern or any other pattern please find me at Joey Lea Baird on Facebook or email me at jo@joscraftyhook.com
You are free to sell or gift the item you make from my website, please do NOT claim any of my designs as your own. If you share your finished product, please acknowledge me as the designer. Please forward any one who would like to do this crochet pattern or any of my patterns to the Ravelry Store or to LoveCraft or to my Etsy shop, or to my website. The web addresses for any place to connect with me are listed below.
Every purchase of my patterns helps! It allows me to buy more yarn so I can create and design more Handmade Crocheted Creations for you to enjoy.
I would LOVE to see your version of my designs! You can “Hook It” at my Ravelry Jo’s Crafty Hook Designs OR add a pic using the hashtag of the design at anyone of the places below that allows you to connect with me! Comments, Feedback, etc. are ALWAYS welcome at my website www.joscraftyhook.com!