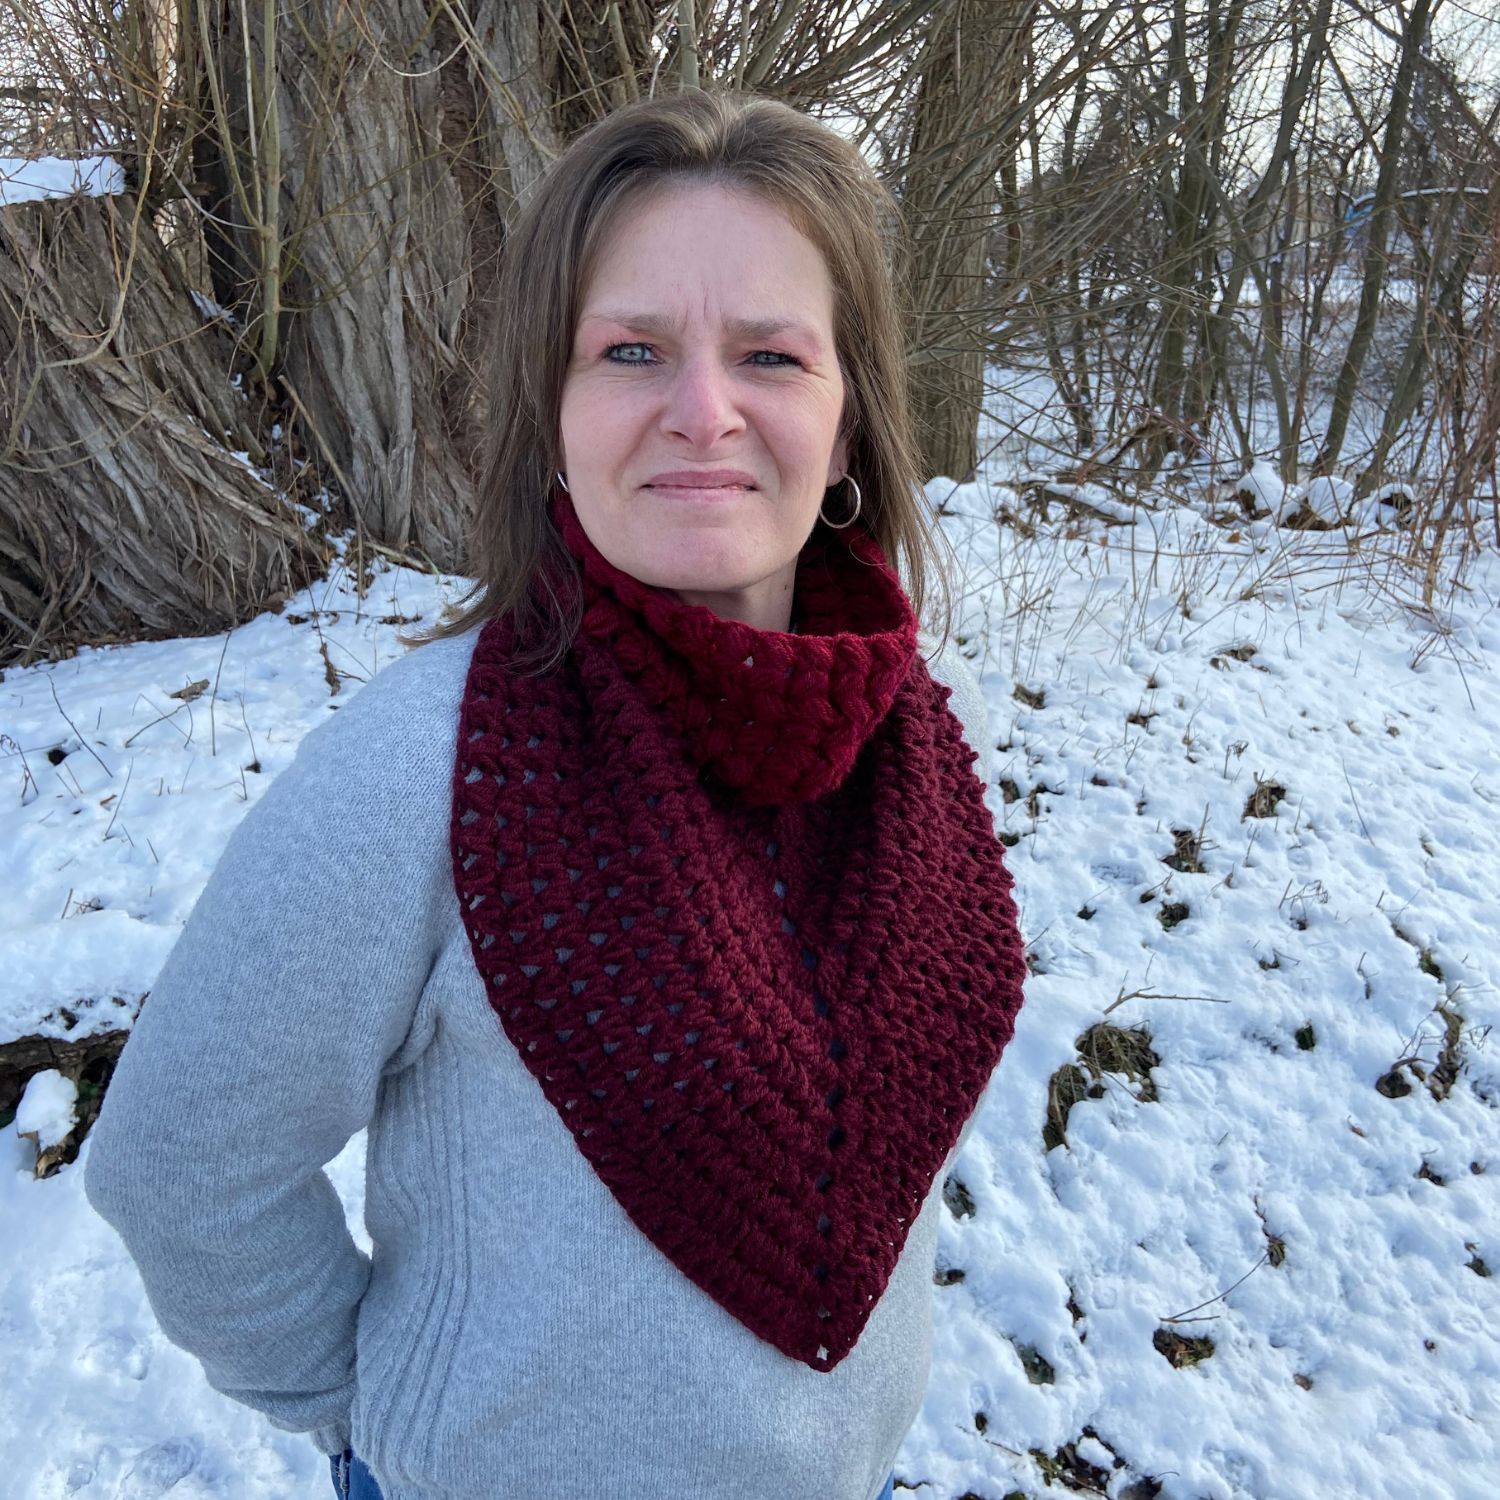
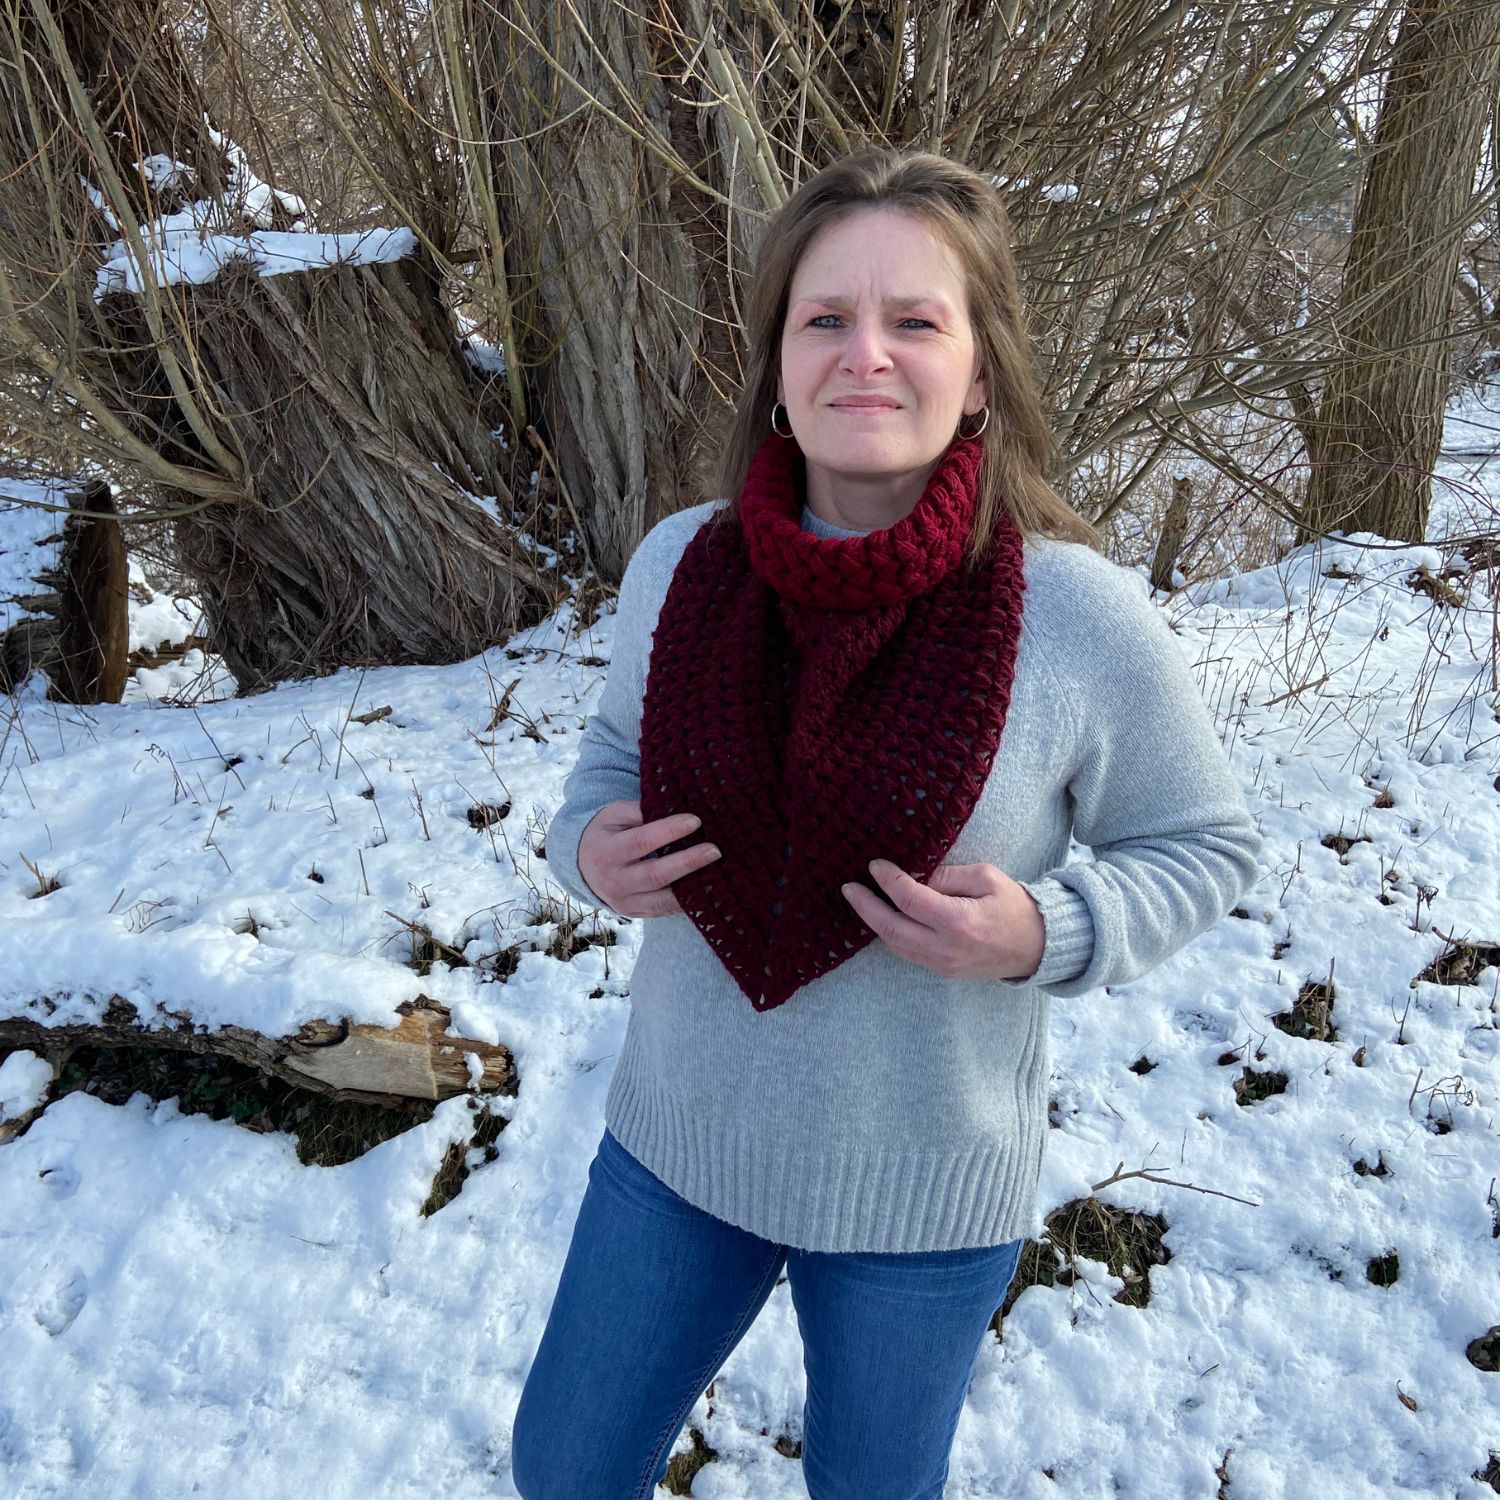
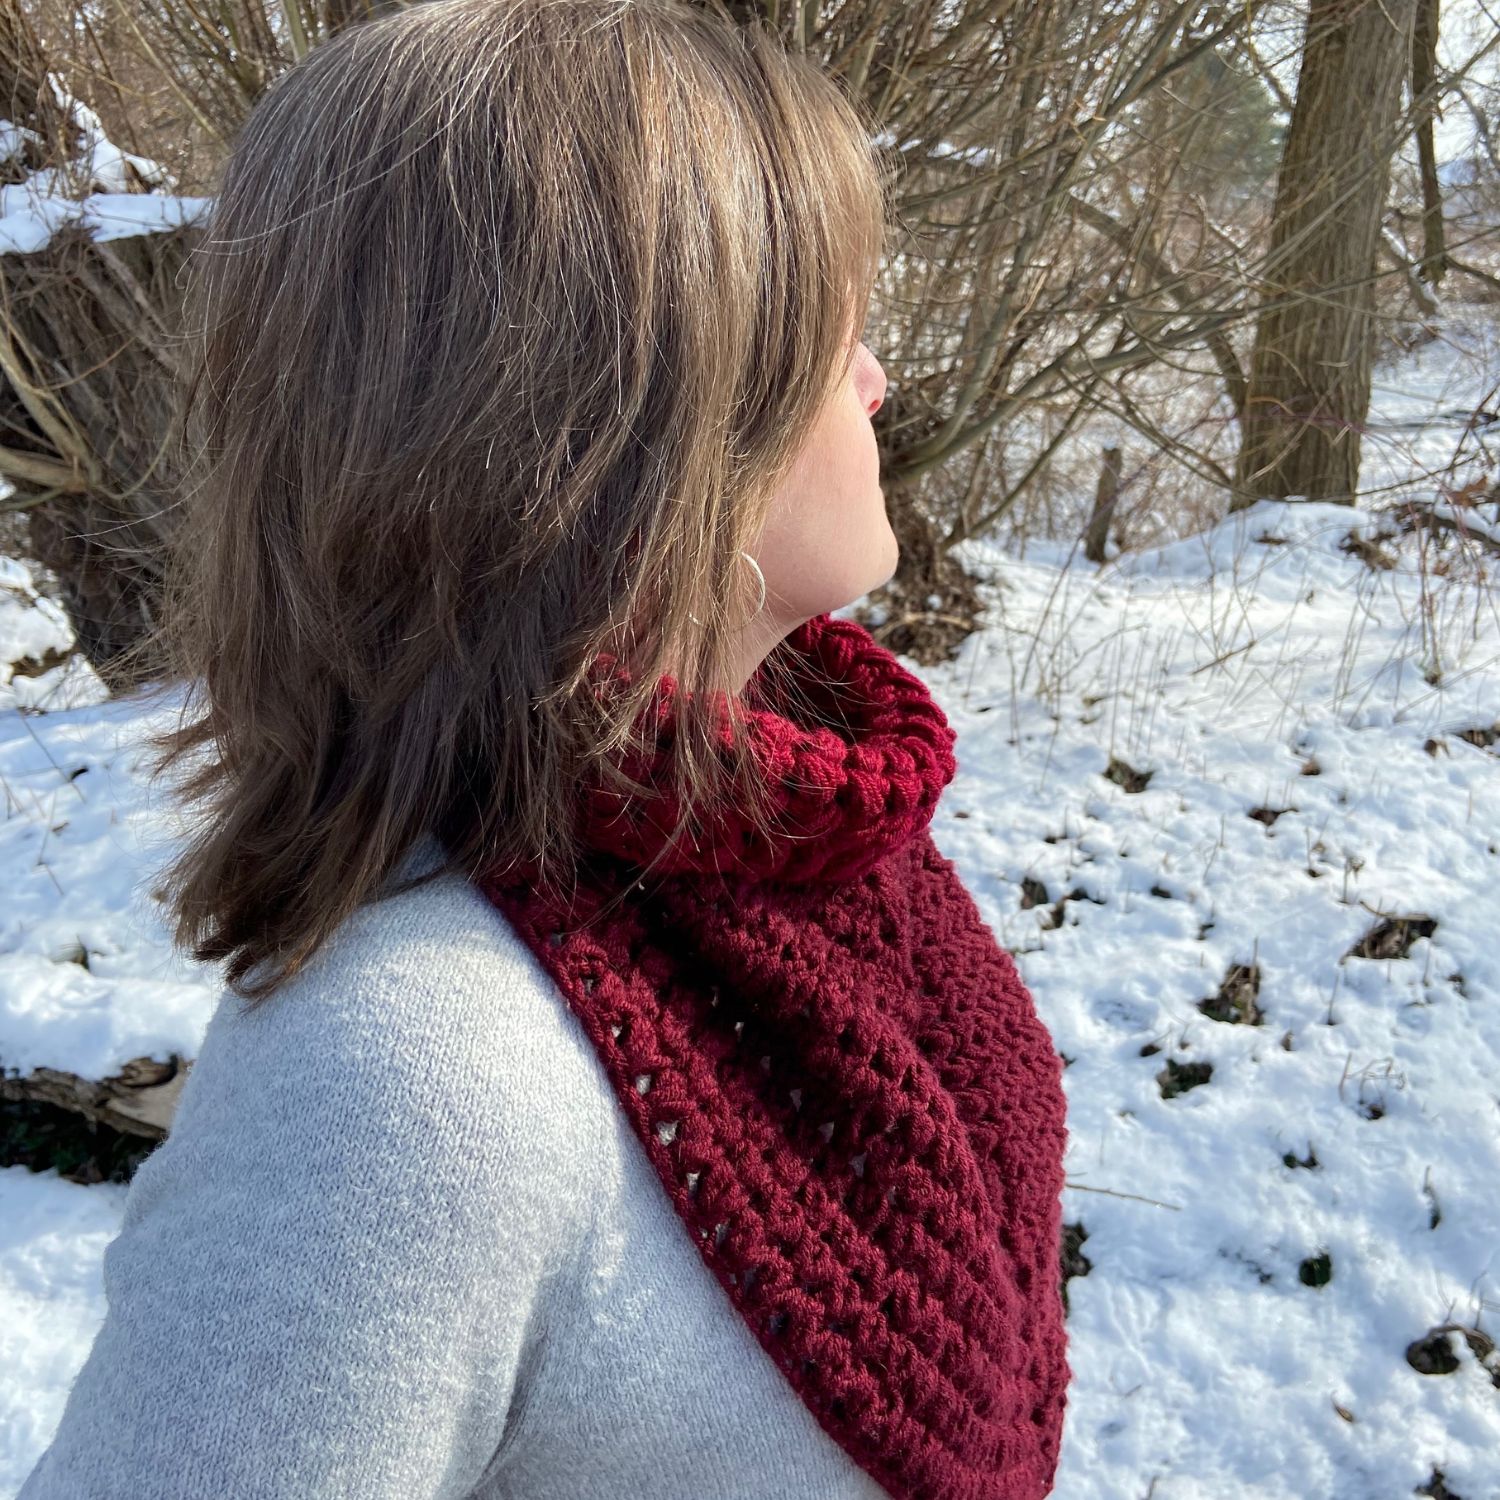
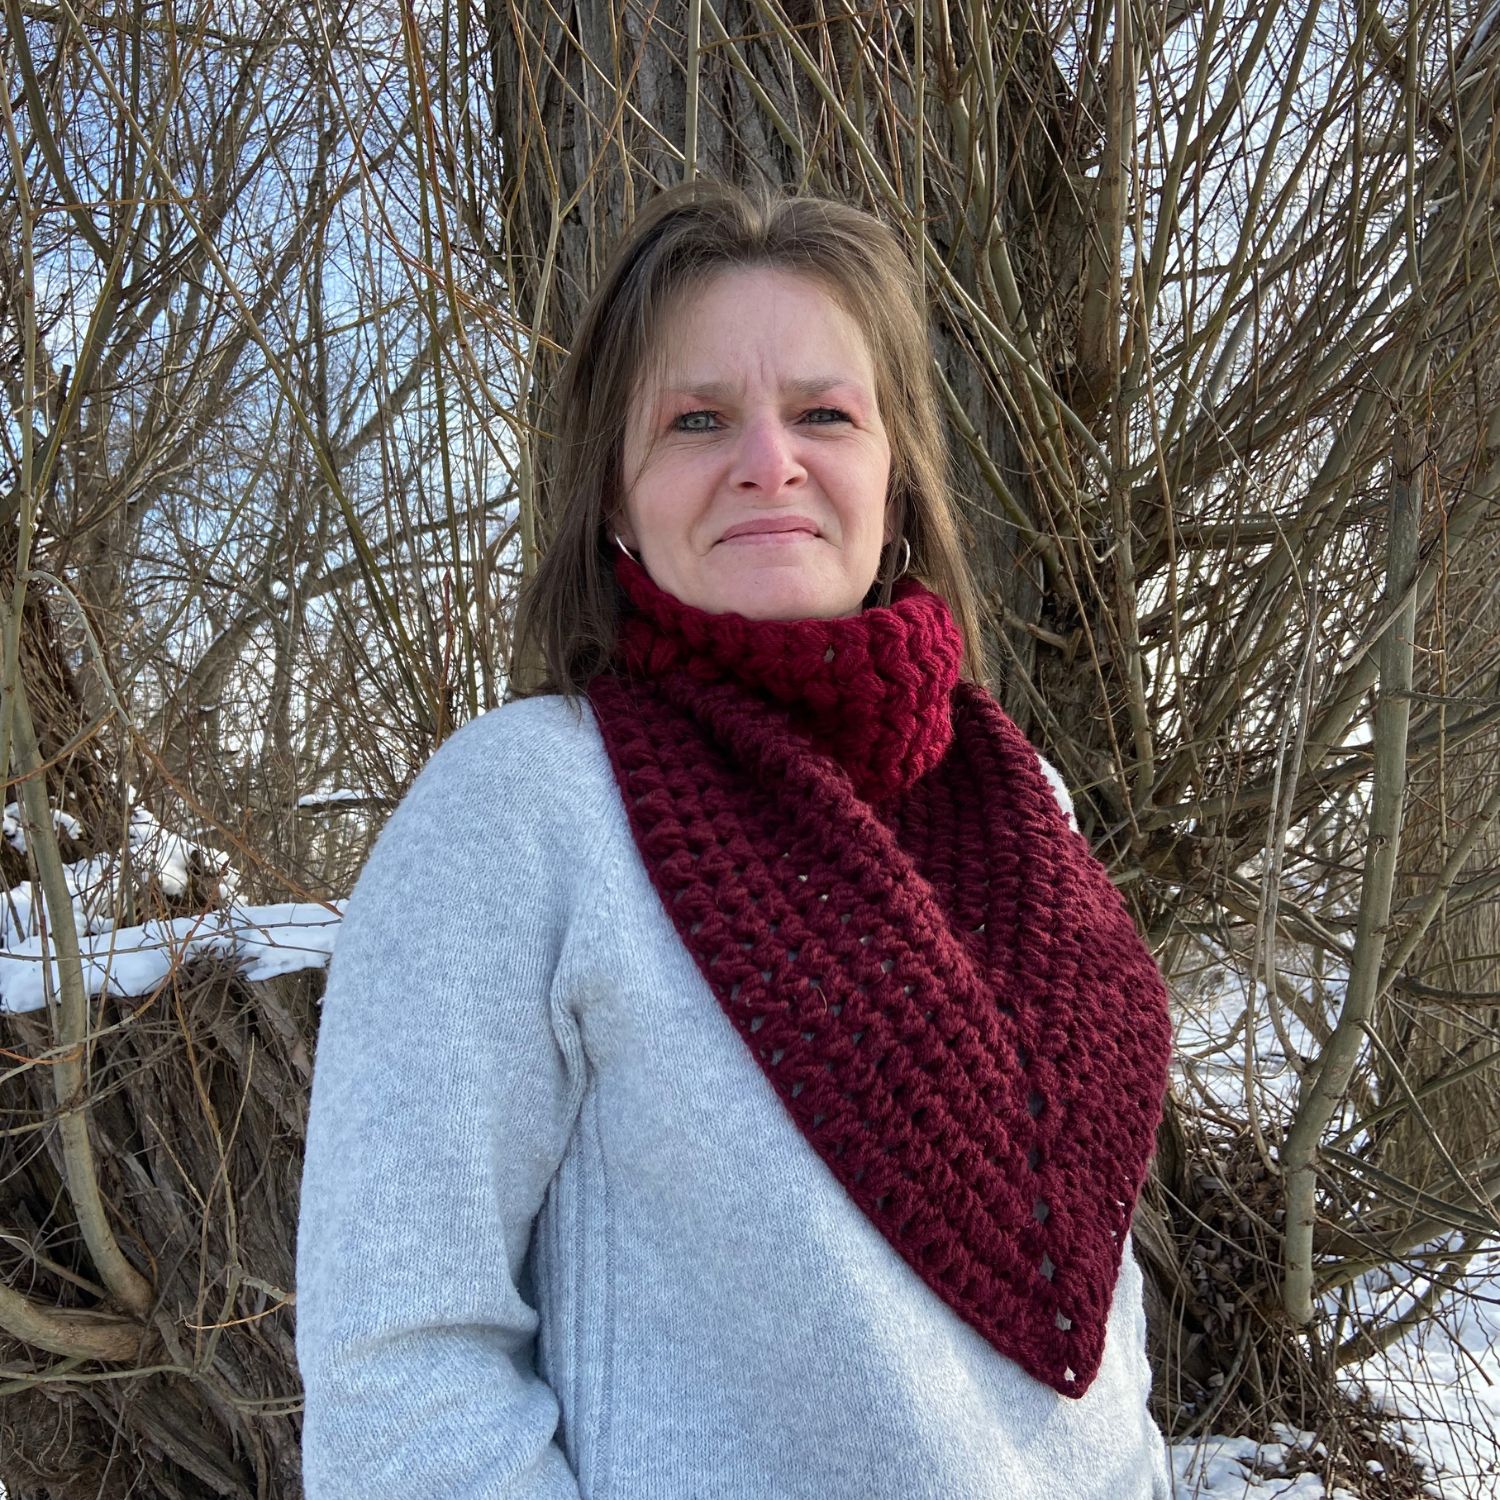
Jimmy Beanie Free Crochet Pattern

Jimmy Beanie Crochet Pattern

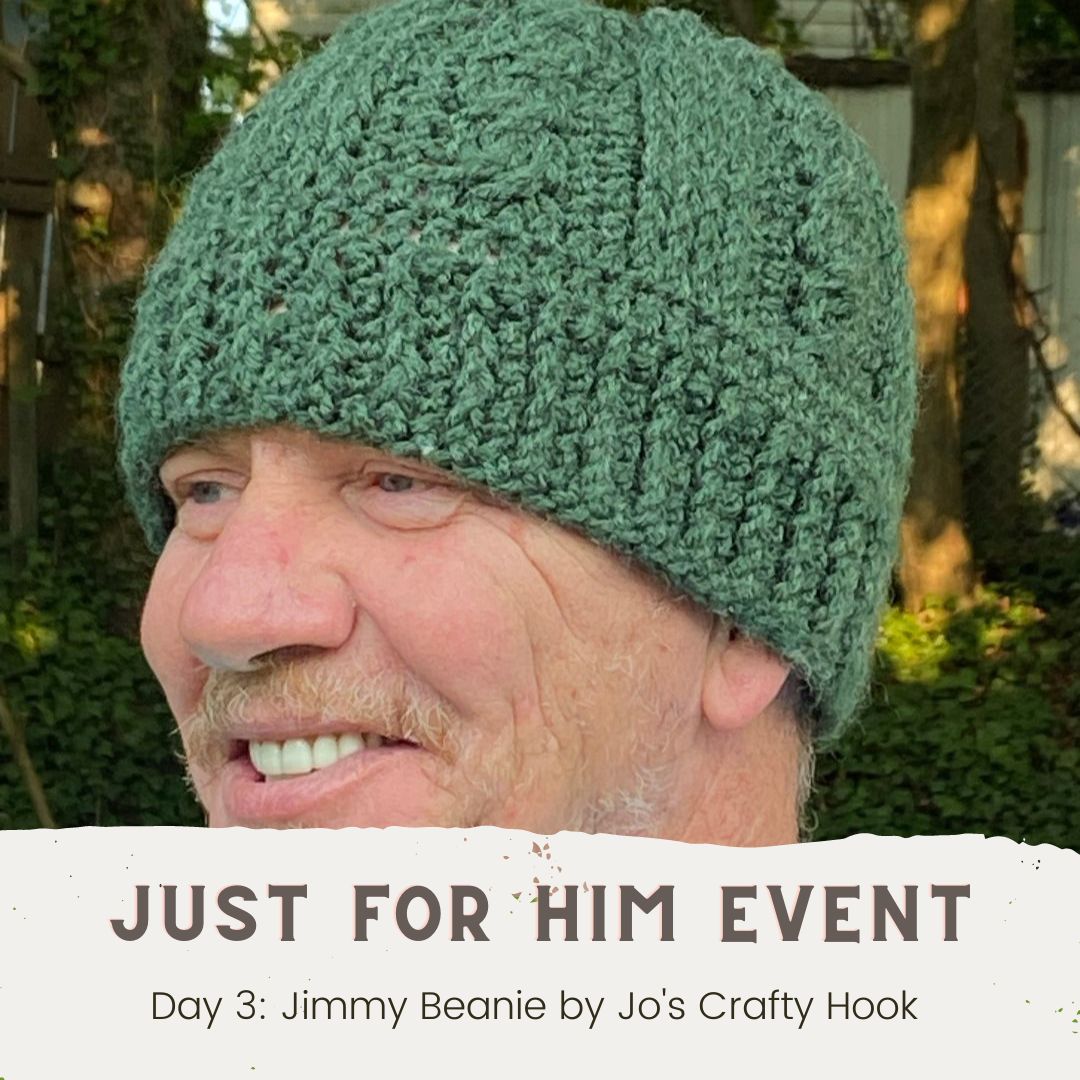
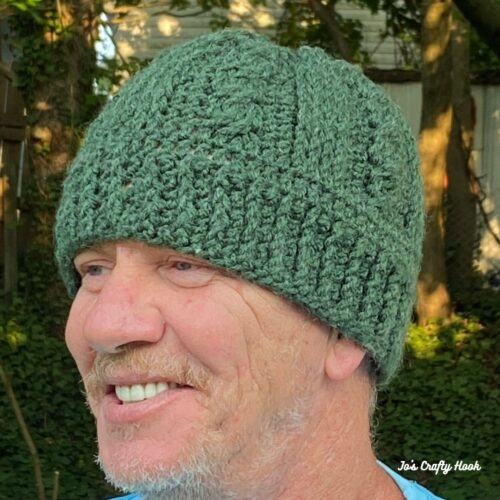
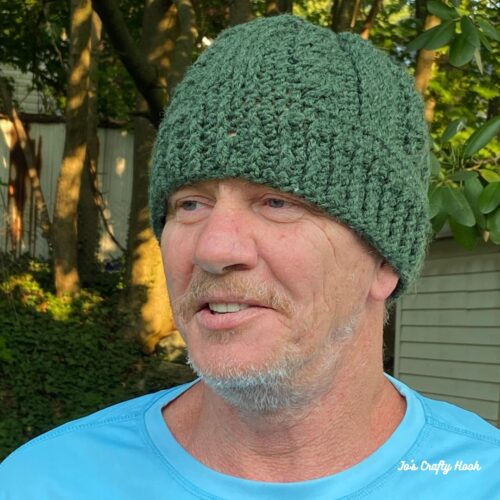
If you love to do the Cable Stitch or you would love to learn how, then my Jimmy Beanie is the perfect crochet pattern for you!  This pattern is named after my hubby Jim, but it is also a perfect Unisex Beanie.  

This post contains affiliate links that help me raise money to allow me to share more information with you. 

**While you are here why not sign up for my Newsletter by using the Subscribe button in the Right Hand Corner**

Just for Him Blog Hop & Bundle

Do you have a hard time finding crochet patterns that are made just for men?  Maybe you see a lot of crochet patterns that you think would work, but you are unsure how they would look like on him.

Well, Michelle of Two Brothers Blanket and Helen of Sunflower Cottage Crochet has put together and Blog Hop and Bundle Sale with crochet patterns that are designed especially for Him!


Starting September 1-21, 2023 you can take advantage of daily FREE crochet patterns in the Just for Him Blog Hop using the Button below.


OR

Starting September 1-21, 2023 you can purchase a copy of the Just for Him Crochet Pattern Bundle for $14.99 with 21 premium crochet patterns all in one place!  Click on the button below and check it out!


On September 3, 2023 starting at 6a EST until September 4, 2023 6a EST you can get a FREE pdf of the Jimmy Beanie Crochet Pattern.

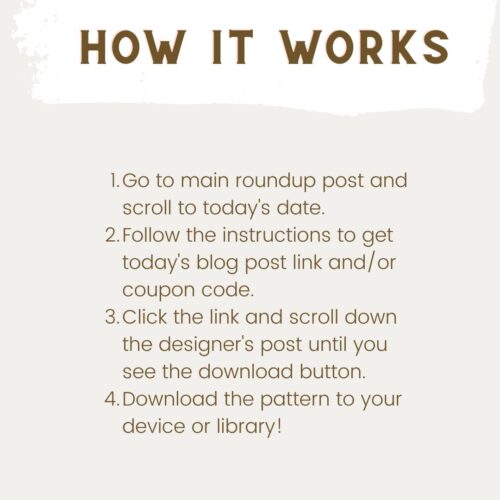
Visit the Just for Him Blog Hop using the Button below to get the Coupon Code needed to download your FREE pdf from my Ravelry Store.


Once you have the Coupon Code, click on the Button below to add it to your Ravelry Cart, use the code, checkout.  That’s it!


Be sure to stop back by the Just for Him Blog Hop daily, starting at 6a EST for each day’s FREE crochet pattern!


Information Needed to Crochet the Jimmy Beanie

Materials:
US H or 5 mm Crochet Hook
US I or 5.5 mm Crochet Hook
75-200 yds of #4 ply Worsted/Aran Weight Yarn
Scissors
Tapestry Needle
Stitch Marker

Abbreviations/Stitches Used:
ch = chain
st = stitch(es)
sc = single crochet
dc = double crochet
fpdc = front post double crochet
bpdc = back post double crochet
fptrc = front post triple crochet
alt ch 2 = alternate ch 2 or alternate turning chain
dc2tog = double crochet 2 together
sk = skip
rep = repeat
SM = Stitch Marker


Special Stitches:

Double Crochet 2 Together – decreasing 2 dc into 1 dc
Alternate Chain 2 – takes the place of a double crochet and creates a nice closed stitch
Front Post Double Crochet 
– double crochet going around the front post of the dc in the previous row.
Back Post Double Crochet – double crochet going around the back post of the dc in the previous row..
Front Post Triple Crochet 
* YO twice, Insert hook behind post indicated st
* YO, pull up a loop (4 loops on hook)
* YO, pull through 2 loops (3 loops on hook)
* YO, pull through 2 loops (2 loops on hook)
* YO, pull through last 2 loops on hook

Left Hand Video Tutorials:                        Right Hand Video Tutorials:

alternate ch 2 or alternate turning chain                alternate chain 2 or alternate turning chain
front post double crochet                                front post double crochet
back post double crochet                                back post double crochet
front post triple crochet                                front post triple crochet
double crochet 2 together                                double crochet 2 together
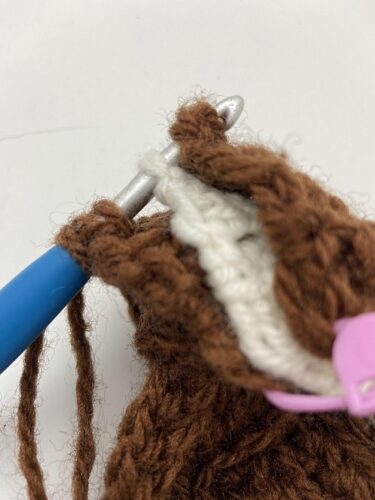
invisible join                                                invisible join

Notes:
ch 3 counts as a dc
alt ch 2 counts as a dc
the beanie is worked in the round
the beanie the invisible join in the round
place a SM in 1st st of each round of beanie

Special Notes:
st count is a multiple of 12
2-4 yrs, 5-10 yrs, Teen, Sm Adult, Large Adult consecutively
Hat Band Circumference: 16” (17” 19” 20” 21”)

Gauge:
US I or 5.5 mm Crochet Hook
16 dc x 8 rows = 4”

Gauge Swatch:
R1:  ch 18, dc in 4th ch from hook, dc across.  (16 dc)
R2-R8:  ch 3, dc across.  (16 dc)

Size Chart

Size

Height

Circumference

Crown Width

2 years – 4 years

6.5” – 6.75”

16” -17”

5” – 5.5”

5 years – 10 years

6.75” – 7.5”

17” – 19”

5.5” – 6”

Teenager

7.5” – 8”

19” – 20”

6” – 6.25”

Small Adult

8” – 8.5”

20” – 21”

6.25” – 6.75”

Large Adult

9” – 9.5”

21” – 22”

6.75” – 7”


Jimmy Beanie Crochet Pattern

Band

2-4 yr, 5-10 yr, Teen, Sm & Large Adult

Using H or 5 mm Hook
**Note:  be sure to place SM in 1st st of each round**

R1:  fdc 60 (60, 60, 72, 84)  Do NOT join.

R2: dc in 1st st, fpdc in the next st *dc in the next st, fpdc in the next st*  rep from * around.  Do NOT join. (60, 60, 60, 72, 84) st

2-4 yrs

R3-R4: dc in each dc and fpdc in each fpdc. (60, 60, 60, 72, 84) st

Remaining Sizes

R3-R5: dc in each dc and fpdc in each fpdc. (60, 60, 60, 72, 84) st

Do not fasten off

Beanie


Switch to I or 5.5 mm Crochet Hook
**Note:  be sure to place SM in 1st st of each round**

Place a SM in 1st st of each round of beanie.

R1-R2:  dc in each st around.  (60, 60, 72, 84) dc

R3:  fpdc in next 2 st, dc in next 2 st, sk 2 st, fptrc in the next 2 st, fptrc in 2 sk st, dc in next 2 st. *fpdc in next 4 st.  dc in next 2 st, skip 2 st, fptrc in the next 2 st, fptrc in 2 sk st.  dc in next 2 st. rep from * around until last 2 st.  fpdc in last 2 st.. (60, 60, 72, 84) st

R4:   fpdc in next 2 st, dc in next 2 st, fpdc in next 4 st, dc in next 2 st. *fpdc in next 4 st, dc in next 2 st.  rep from * around until last 2 st. fpdc in last 2 st.  (60, 60, 60, 72, 84) st

rep R3-R4 ending with R7 until beanie measures 6.5” 7” 7” 7.5” 8” or until you reach your desired height.

Crown


R1:  fpdc in next 2 st, dc2tog, sk 2 st, fptrc in the next 2 st, fptrc in 2 sk st, dc2tog. *fpdc in next 4 st.  dc2tog, skip 2 st, fptrc in the next 2 st, fptrc in 2 sk st.  dc2tog next 2 st. rep from * around until last 2 st.  fpdc in last 2 st.. (48, 48, 48, 60, 72)  st

R2:  fpdc in next 2 st, dc in next st, fpdc in next 4 st, dc in the next st, fpdc in the next st, dc in next st. rep from * until last 2 st. pdc2tog,  rep from * around.  (48, 48, 48, 60, 72)  st

R3:  dc2tog, *dc in the next st, skip 2 st, fptrc in the next 2 st, fptrc in 2 sk st, dc in the next st, dc2tog twice.  rep from * around until last 2 st.  dc2tog.  sl st in 1st st to join.  (38, 38, 38, 50, 62) st  

Do NOT fasten off.

Leave a long tail, weave the crown closed.


**If you are wanting a Messy Bun Hat instead of a Beanie, do NOT use a long tail to weave in the ends.  The beanie can be left open here to make a Messy Bun Hat.** 


Fasten off and weave in ends.

Sewing Crown Closed

Step 1:
Using your long tail of yarn, weave yarn in each st around the top of the beanie.
Step 2:
Once you have come back to where you started, pull the yarn tight to close the crown.
Fasten off and weave in ends.

That’s it!  You have made your own version of the Jimmy Beanie!

I would LOVE to see your finished version!  Share your pics with me at any of my social media sites above using the hashtags below.  You can find all of my social media sites at the beginning of the pattern.

@joscraftyhook @joeyleabaird @jo_bear38 or at my FB Group Jo’s Crafty Hook Designs

You can find some of my free crochet patterns at my website.

You can also find more of my premium crochet patterns at my Ravelry Store and LoveCrafts or Etsy.


Find me, Jo of Jo’s Crafty Hook at the places listed below.

Email:  j.o@joscraftyhook.com

Website

Facebook Group Jo’s Crafty Hookers

Facebook Group Jo’s Crafty Hook Designs

Facebook Page Jo’s Crafty Hook

Facebook Page:  Crochet Designer Community

Ravelry

LoveCrafts

Etsy

Instagram

YouTube

Pinterest

Donations Accepted

Loading

Pet Bandana Free Crochet Pattern

Pet Bandana Free Crochet Pattern

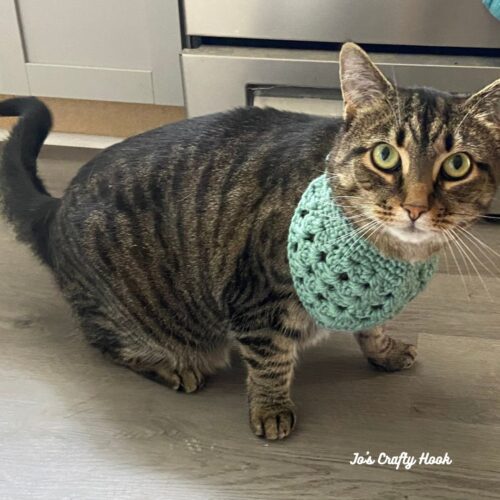
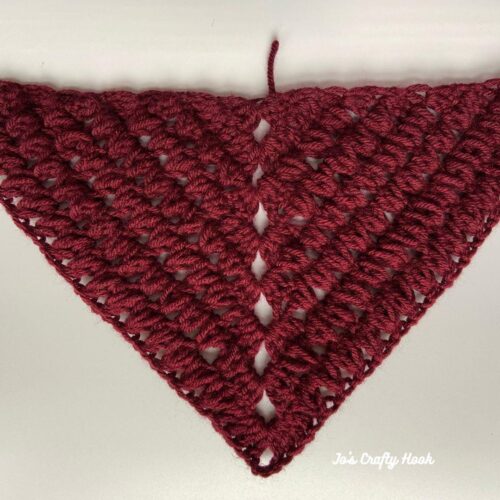
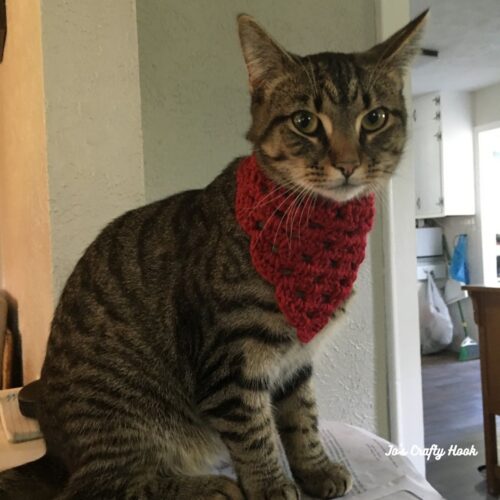
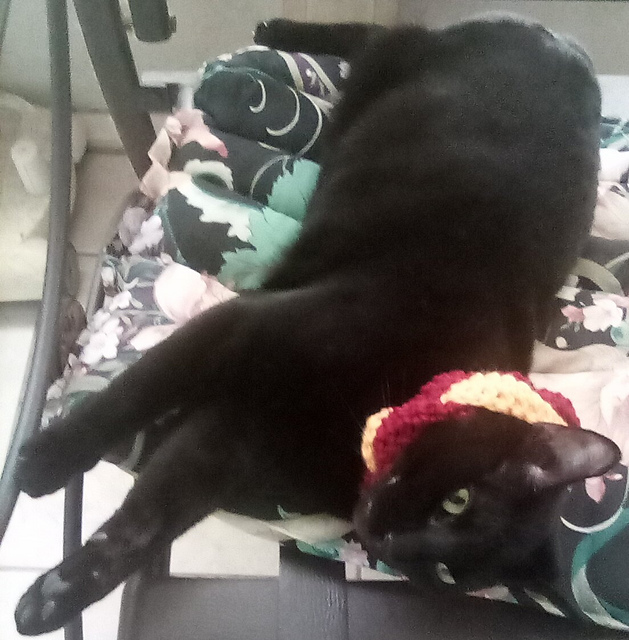
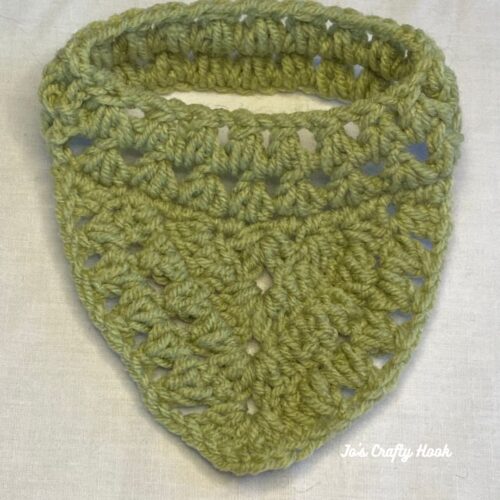
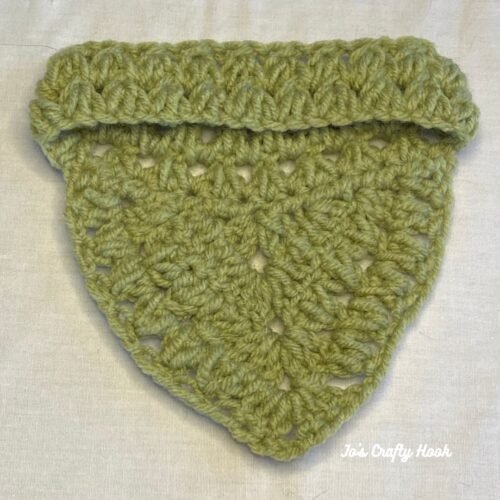
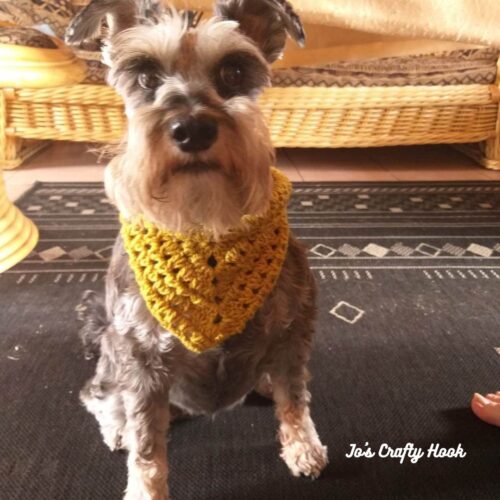
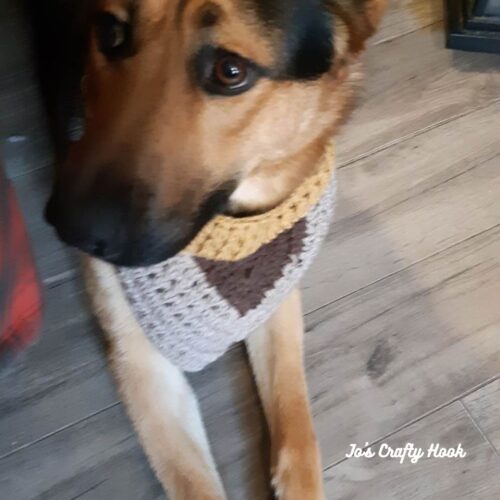
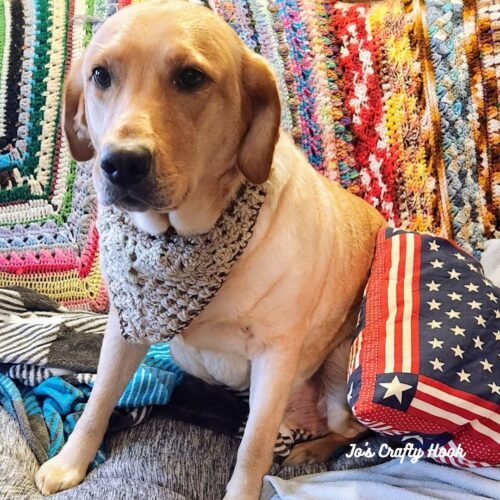
Today I want to share with you the Pet Bandana Free Crochet Pattern.  Doesn’t my Maze look beautiful wearing her bandana?

Pets can seem like our babies and part of the family.  You add accessories to your outfits and your family’s outfits, so why not accessorize your pet as well with the Pet Bandana.  Use your scrap yarn and make these in every color of the rainbow.  The pet bandana free crochet pattern has 3 sizes you can choose from.


My beautiful kitty, Maze was a rescue.  My son worked in a factory that used heavy machines and equipment.  My son knew how much I loved animals, so he called me upset telling me what happened and asked me to take her in because she was starving.

My hubby wasn’t too happy with me at the time, As soon as he seen my son holding her his heart melted and he fell in love with her!  Maze is more his cat than mine, but she is loved and appreciated just the same.

My Maze, and I am sure your pet too, brings me so much comfort and joy.  She curls up in my lap and as soon as I touch her, my heart just melts.  I pray your pets sooth you as they burrow into your hearts as well.

This post contains affiliate links that help me raise money to allow me to share more information with you. 

The Pet Bandana Free Crochet Pattern is below.  You can also find an Ad-Free Premium copy of the Pet Bandana Crochet Patterns at:

Ravelry
LoveCrafts
Etsy


Info needed for the Pet Bandana Free Crochet Pattern


Materials
:
US I or 5.5 mm Crochet Hook
50-150 yds of #4 ply Worsted/Aran Weight Yarn
Scissors
Tapestry Needle
SM

Abbreviations/Stitches Used:
ch = chain
sc = single crochet
dc = double crochet
sl st = slip stitch
sp = space
alt ch 2 = alternate chain 2
SM = Stitch Marker

Notes:
ch 3 counts as a dc
alt ch 2 counts as a dc
ch 1 does not count as a st
sizes range from Small, Medium, Large
st count is a multiple of 6
each row will increase by 6 st
the collar will be worked in the round

Gauge
US I or 5.5 mm Crochet Hook
16 dc x 8 rows = 4”

Video Tutorials
Invisible Join – Right Handed

Invisible Join – Left Handed


Pet Bandana Free Crochet Pattern


Small 


ch 4, sl st into 1st st to create a circle.

R1:  ch 3, 2 dc, ch 2, 3 dc.  turn (6 dc)

R2: alt ch 2 or ch 3, 2 dc in same st, ch 1, (3 dc, ch 2, 3 dc) all in ch-2 sp, ch 1, 3 dc in last dc.  turn (12 dc)

R3:  alt ch 2 or ch 3, 2 dc in same st, ch 1, 3 dc in ch-1 sp, ch 1, (3 dc, ch 2, 3 dc) all in ch-2 sp, ch 1, 3 dc in next ch-1 sp, ch 1, 3 dc in last dc.  turn (18 dc)

R4:  alt ch 2 or ch 3, 2 dc in same st, ch 1, 3 dc in ch-1 sp, ch 1, 3 dc in ch-1 sp, ch 1, (3 dc, ch 2, 3 dc) in ch-2 sp, ch 1, 3 dc in next ch-1 sp, ch 1, 3 dc in next ch-1 sp, 3 dc in last dc. turn (24 dc)

R5:  alt ch 2 or ch 3, 2 dc in same st, ch 1, *3 dc in ch-1 sp, ch 1.  rep from * twice more.  (3 dc, ch 2, 3 dc) in ch-2 space, ch 1, **3 dc in next ch-1 sp  rep from ** to twice more and 3 dc in last dc.  turn (30 dc)

Do not fasten off

Move to Collar


Medium

Rep R1-R5

R6:  alt ch 2 or ch 3, 2 dc in same st, ch 1, *3 dc in ch-1 sp, ch 1. rep from * 3 more times.  (3 dc, ch 2, 3 dc) in ch- 2 sp, ch 1, **3 dc in next ch-1 sp, ch 1.  rep from  ** 3  more times.  3 dc in last dc.  turn (36 dc)

R7:  alt ch 2 or ch 3, 2 dc in same st, ch 1, *3 dc in ch-1 sp, ch 1. rep from * 4 more times.  (3 dc, ch 2, 3 dc) in ch-2 sp, ch 1.  **3 dc in ch-1 sp, ch 1.  rep from  ** 4 more times. 3 dc in last dc. turn  (42 dc)

Do not fasten off

Move to Collar


Large

Rep R1-R7

R8:  alt ch 2 or ch 3, 2 dc in same st, ch 1, *3 dc in ch-1 sp.  rep from * 5 more times.  (3 dc, ch 2, 3 dc) inch-2 sp, ch 1.  **3 dc in ch-1 sp.  rep from  **5 more times and  3 dc in last dc.  turn (48 dc)

R9:  alt ch 2 or ch 3, 2 dc in same st, ch 1. *3 dc in ch-1 sp.  rep from * 6 more times.  (3 dc, ch 2, 3 dc) in ch-2 sp, ch 1, **3 dc in ch-1  sp.  rep  from * 6 more times.  3 dc in last dc.   turn (54 dc)

Do not fasten off

Move to Collar

Collar

Collar Circumference:

Small 4”  Medium 6”  Large 8”  


sc evenly across turning rows
Step 1:

sc evenly across the turning rows; being sure to sc in each st, and side posts of dc.  be sure to end with an even number.

The Collar is worked in the round. This makes it easier to slip over your pet’s head.

Note:  It might be a good idea to measure your pet’s neck to reach your desired circumference.  The stitch count below may need to be adjusted for a smaller or larger pet.  

place SM in 1st st to create an invisible join.

R1:  ch 18 (26, 32) sl st in 1st st, sc in each st around.  

R2:  sc in 1st st and each st around.

Repeat R2 until your desired height of your collar.  sl st in 1st st to join.

Fasten off and weave in ends.

@Jo’s Crafty Hook 2023

You can find an Ad-Free Premium copy of the Pet Bandana Crochet Patterns at:

Ravelry
LoveCrafts
Etsy

That’s it!  You have made your own Pet Bandana!

I would LOVE to see your finished version!  Share your pics with me on Instagram on my FB Page or in my FB Group.

@joscraftyhook @joscraftyhookdesigns @joeyleabaird @jo_bear38

Find me, Jo of Jo’s Crafty Hook at the places listed below.

Email:  jo@joscraftyhook.com

Website
Linktree

Facebook Group Jo’s Crafty Hookers

Facebook Group Jo’s Crafty Hook Designs

Facebook Page Jo’s Crafty Hook

Facebook Page:  Crochet Designer Community

Ravelry

LoveCrafts

Etsy

Instagram

YouTube

Pinterest

Donations Accepted

Loading

Freyja Nordic Necklace

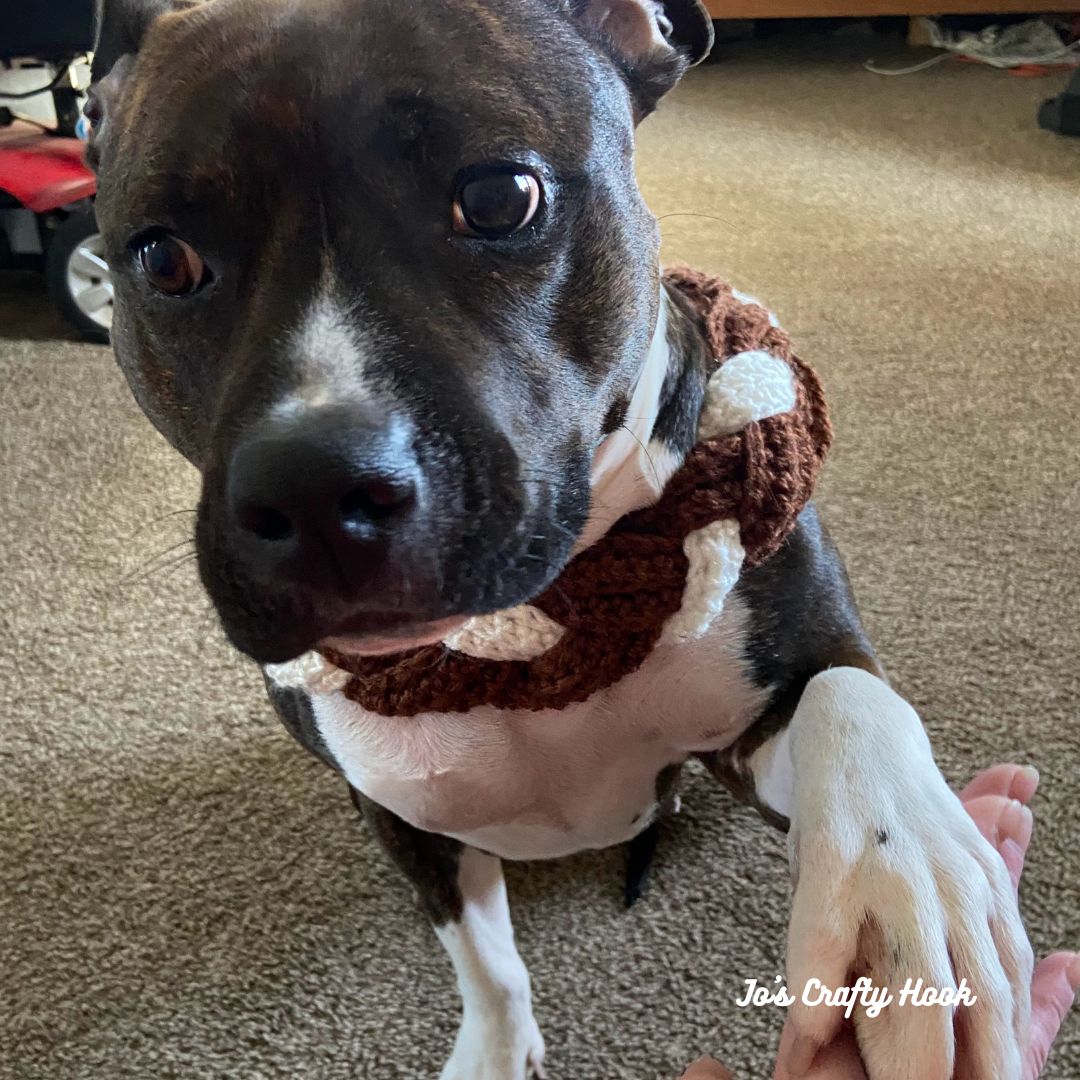
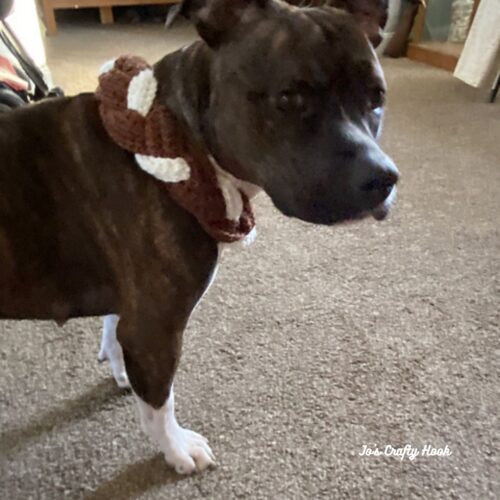
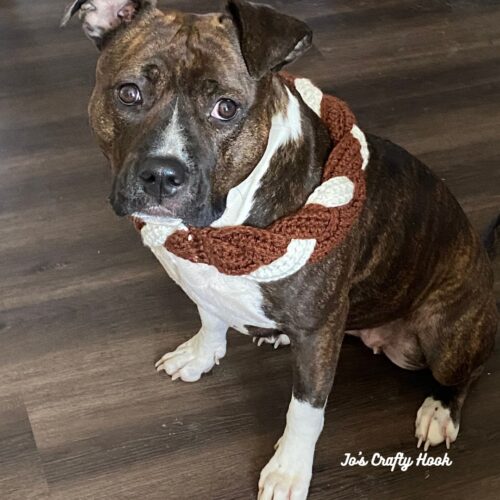
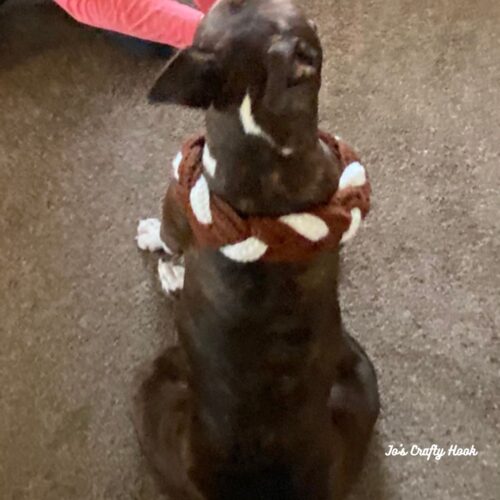
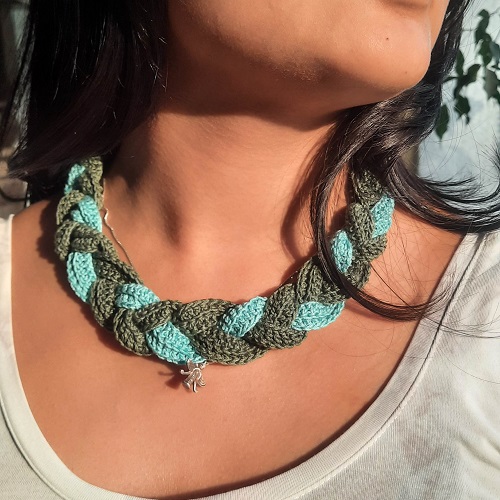
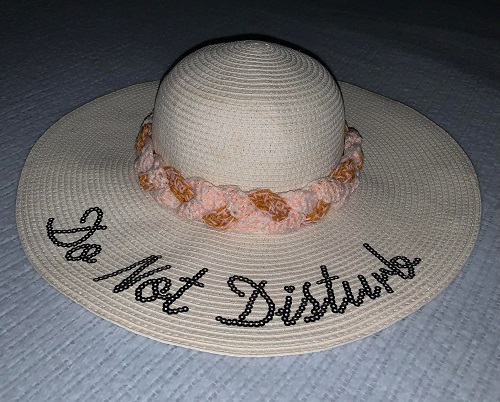
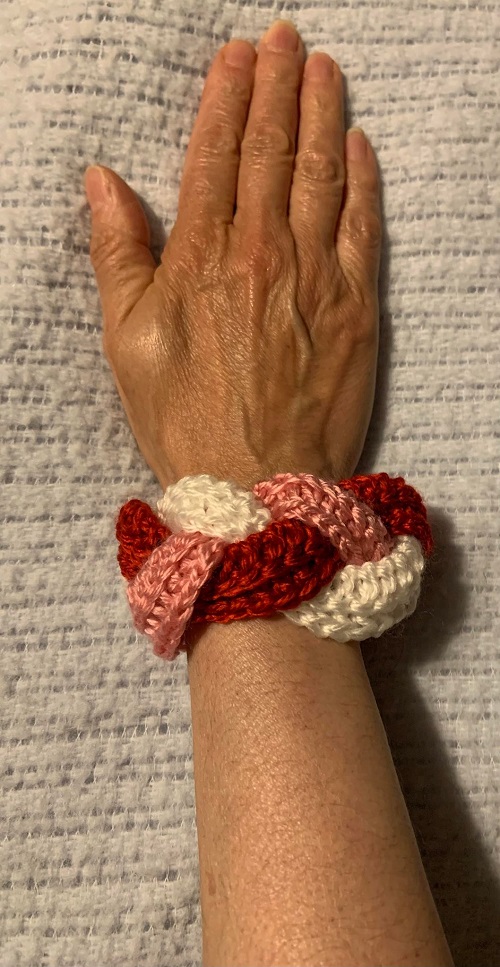
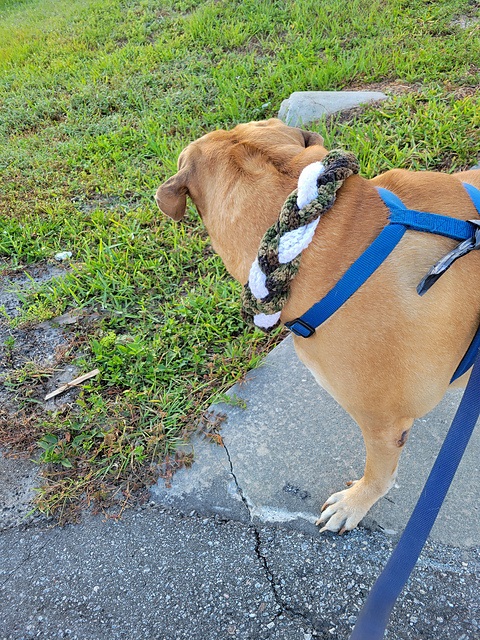
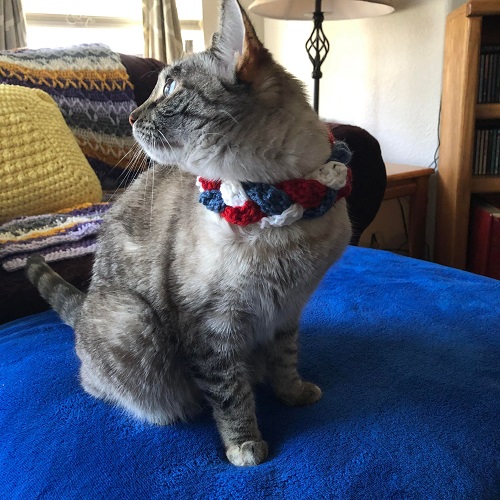
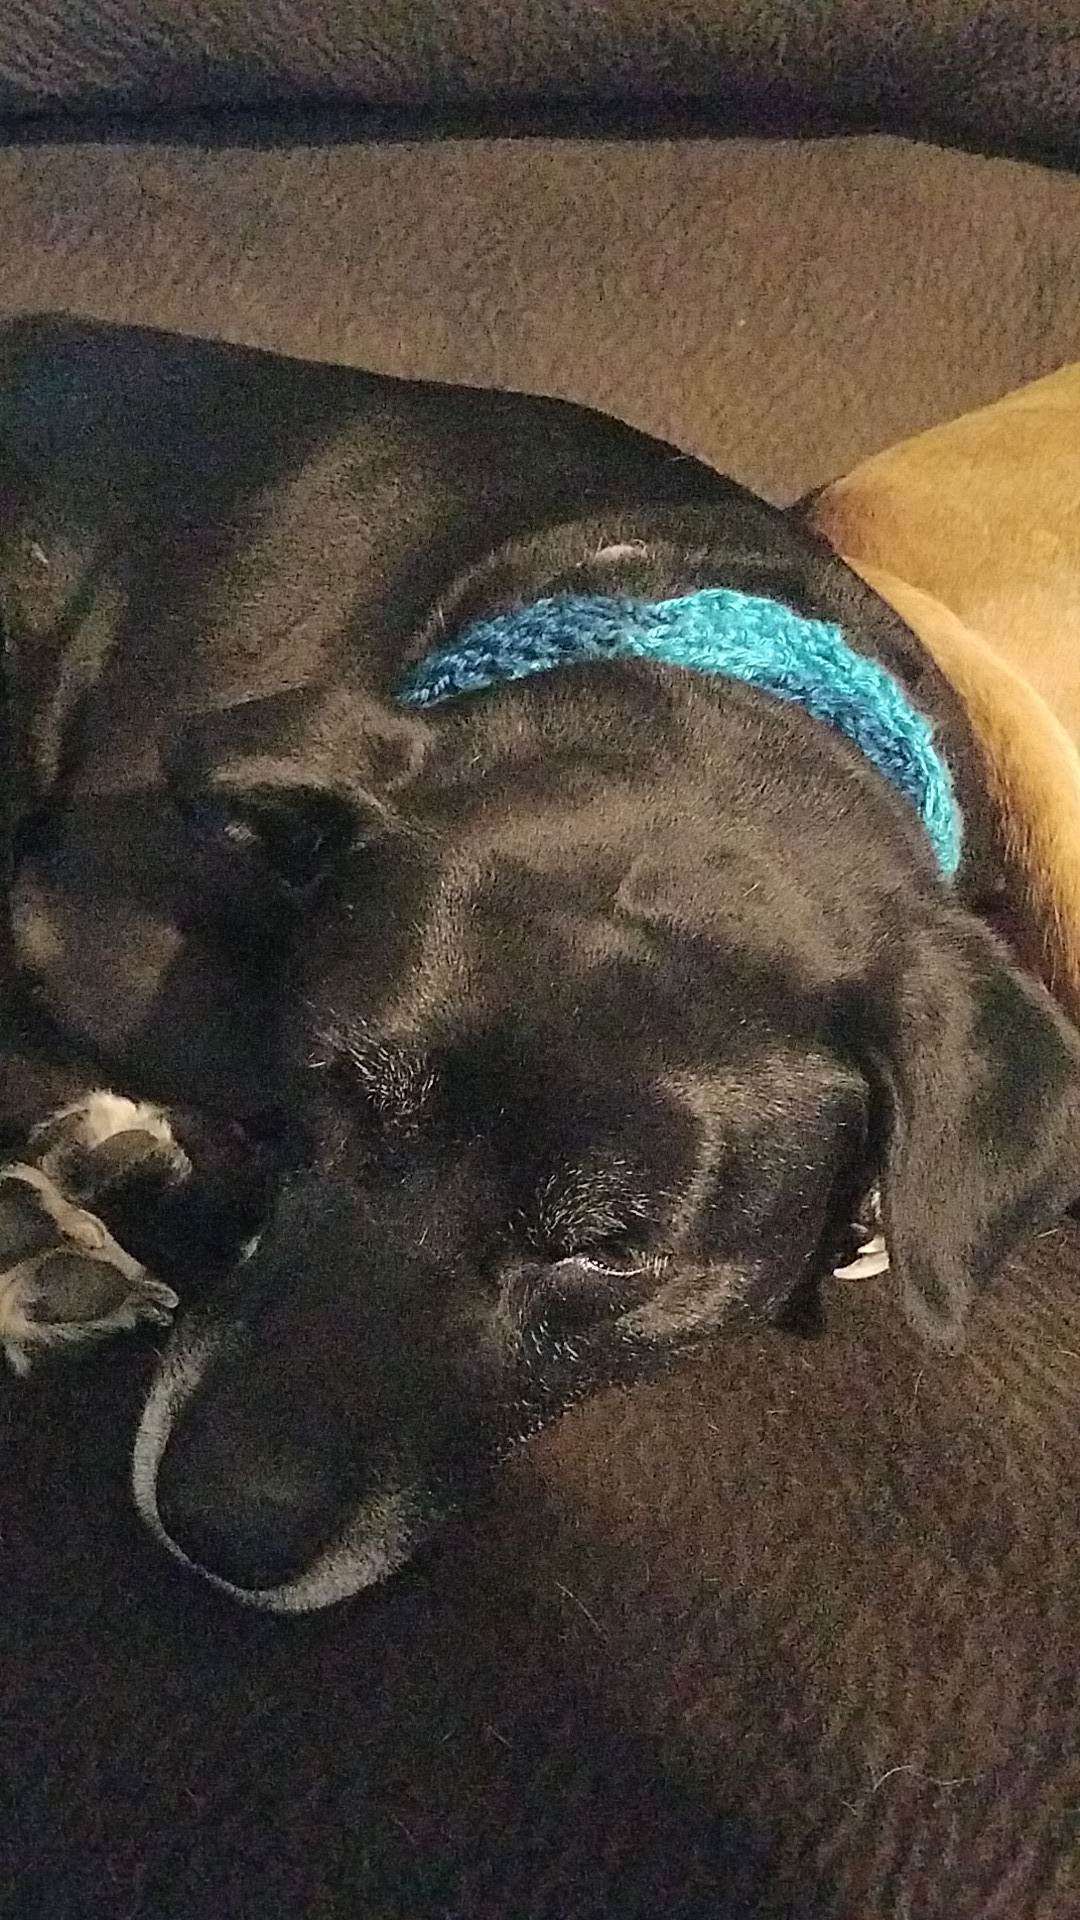
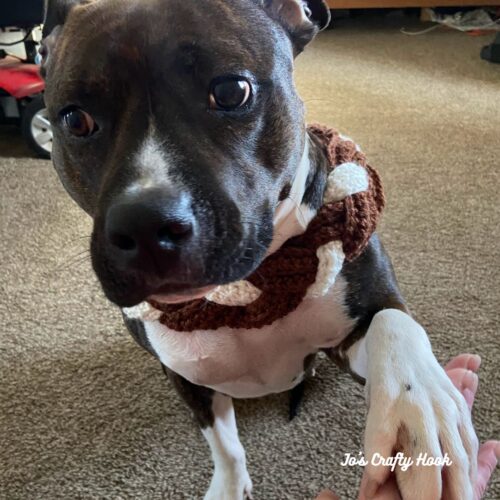
The Freyja Nordic Necklace Crochet Pattern is one of those crochet patterns that you can customize from what it was originally designed for.  A little farther below you will see it how my testers customized theirs using thinner yarn for a person’s necklace; or used for a Hat Band; or used for a Wrist Band; or used for a Cat & Dog Necklace using both DK Weight and Worsted/Aran Weight Yarn.

So, why not even try different thicknesses of yarn to make yourself one!  You will find a free crochet pattern of the Freyja Nordic Necklace below.


The Freyja Nordic Necklace Crochet Pattern came to be because my son loves anything to do with Norse History.  That is why he named his dog Freyja.  Ever since she was a puppy I loved to dress her up.  My son even started asking me to make things for Freyja lol.  So I decided to design something that relates to Nordic History and Freyja’s name.  This is how I came up with this design. 

This post contains affiliate links that help me raise money to allow me to share more information with you. 


Freyja – Gramma’s Grand
Where to find an Ad-Free Version of the Freyja Nordic Necklace Crochet Pattern

Ravelry
LoveCrafts
Etsy

Freyja Nordic Necklace Free Crochet Pattern

Information Needed for Freyja Nordic Necklace Crochet Pattern

Materials:
MC – 15-90 yds of #4 ply Worsted/Aran Weight Yarn
CC – 5-30 yds of #4 ply Worsted/Aran Weight Yarn
US H Crochet Hook or 5 mm
Scissors
Tapestry Needle
Stitch Marker

Stitch/Abbreviations:
st = stitch
sl st = slip stitch
ch = chain
dc = double crochet
alt ch 2 = alternate chain 2
blo = back loop
MC = Main Color
CC = Contrasting Color
RS = Right Side
SM = Stitch Marker

Notes:
the stitch count is a multiple of 2
ch 1 does NOT counts as a stitch
ch 2 does counts as a dc
alt ch 2 counts as a dc
the necklace consist of 3 pieces
you will braid all 3 pieces together

Sizes:
4” 8” 10” 12” 14” 16”
**if you would like to make a larger size, add multiples of 2* 

Gauge:
US H Crochet Hook or 5 mm
12 st x 8 rows = 4”


Multiples Ways to Customize Necklace

My testers used the Freyja Nordic Necklace Crochet Pattern to Customize the crochet pattern and what they would use the design for.  Below you will see it customized using thinner yarn for a person’s necklace; used for a Hat Band; used for a Wrist Band; used for a Cat & Dog Necklace.

The free crochet pattern of the Freyja Nordic Necklace lists different sizes you can make.  Why not even try different thicknesses of yarn to make yourself one!

Thank You:  Dina Sengupta, Lourdes Bernadette, Tammy Alexander, Sally Hayes, Nancy McKain, Christina Anderson, and Judith Huskey Rodriguez for your unique versions of the Freyja Nordic Necklace!


Freyja Nordic Necklace Free Crochet Pattern
My Freyja


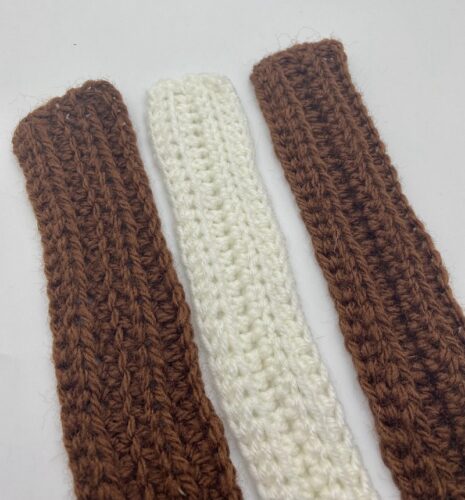
You will make 3 Color Strips:  2 MC and 1 CC.

MC, CC, MC


Smaller Necklace


R1:  fdc 12 (24, 30) turn (12, 24, 30) dc

Optional:  ch 14 (26, 32) dc in 4th ch from hook, dc across.  turn (12, 24, 30) dc

R2(RS):  alt ch 2 or ch 2, dc in blo only across.  turn (12, 24, 30) dc

Fasten off and weave in ends.  Move to Closing the Necklace.


Larger Necklace

R1:  fdc 36 (42, 48)  turn (36, 42, 48) dc

Optional:  ch 38 (44, 50) dc in the 4th ch from hook, dc across.  turn (36, 42, 48) dc

R2(RS):  alt ch 2 or ch 2, dc in blo across. turn  (36, 42, 48) dc

R3-R4:  alt ch 2 or ch 2, dc in blo only across. turn (36, 42, 48) dc

Fasten off and weave in ends.

Connecting the Ends

Connecting the Ends


Step 1:

Line up the 3 pieces as shown below with the RS up, being sure the pieces are all facing the same way.  Lay each piece on top of each other.


MC, CC, MC
Step 1


Step 2:
Attach yarn with a sl st through all 3 pieces.

Step 2


Smaller Pets
R1:  2 sc in the 1st st, sc in the next st, 2 sc in the last st. (4 sc) turn

Larger Pets
R1:  2 sc in the 1st st, sc in the next 2 st, 2 sc in the last st. (6 sc) turn


R1


R2-R4:  ch 1, sc in same st, sc across.  (4, 6 sc) turn

Leave a long tail of yarn for sewing ends of braid together.

Fasten off.

R2-R4


Braiding

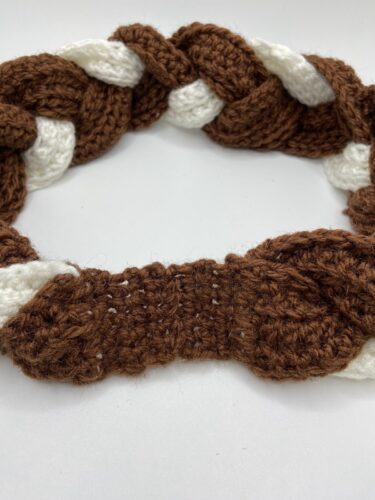
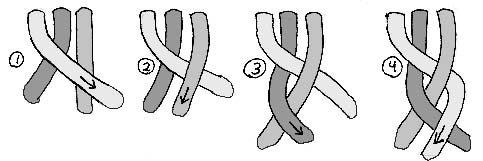
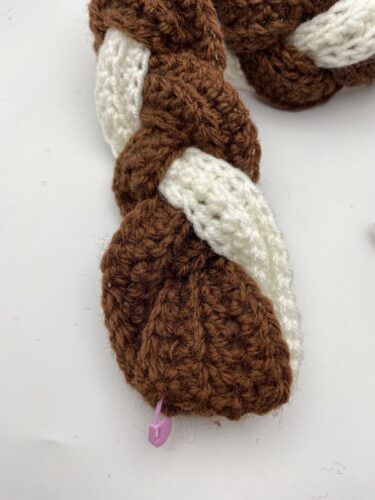
Braid the 3 pieces together, being sure to end the pieces in the same color coordination.  MC, CC, MC.  

Example of Braiding


Step 1:
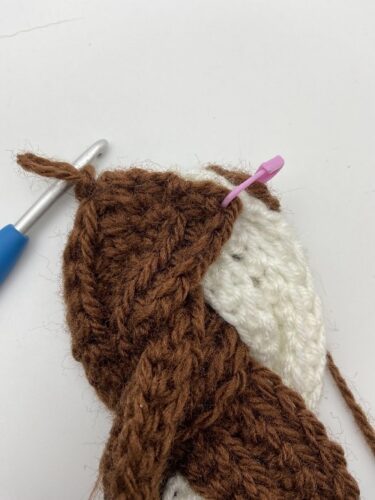
Once you have braided the 3 pieces together, place a SM in 1st and last st, being  sure to go through all 3 pieces.

Step 1


Step 2:
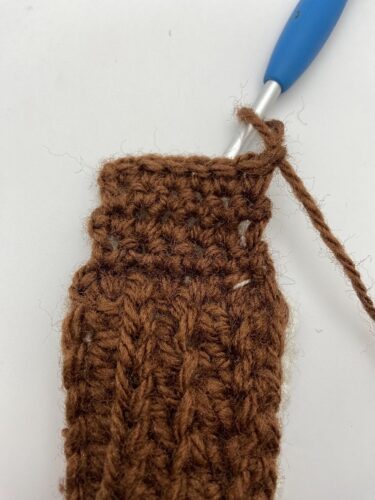
Attach yarn with a sl st in 1st st of all 3 pieces.

Step 2


R1:  ch 1, sc in same sp, sc across.  (2, 4 sc) turn

R1

R2-R4:  ch 1, sc in same st, sc across.  (2, 4 sc) turn

Fasten off and weave in ends.


R2-R4


Closing Necklace


Step 1:
Line up RS of 1st end to the RS of the 2nd end.

Line up RS to RS


Step 2:
Using your long tail of yarn, sew the 2 ends together.

Fasten off and weave in ends.


Finished Necklace
Where to find an Ad-Free Version of the Freyja Nordic Necklace Crochet Pattern

Ravelry
LoveCrafts
Etsy

That’s it!  You have made your own version of the Freyja Nordic Necklace!

I would LOVE to see your finished version!  Share your pics with me at any of my social media sites listed below.  You can find some of my free crochet patterns at my website.

You can also find more of my premium crochet patterns at my Ravelry Store and LoveCrafts.


Find me, Jo of Jo’s Crafty Hook at the places listed below.
Email:  jo@joscraftyhook.com
Linktree

Website

Facebook Group Jo’s Crafty Hookers

Facebook Group Jo’s Crafty Hook Designs

Facebook Page Jo’s Crafty Hook

Facebook Page:  Crochet Designer Community

Ravelry

LoveCrafts

Etsy

Instagram

YouTube

Pinterest

Donations Accepted

Loading

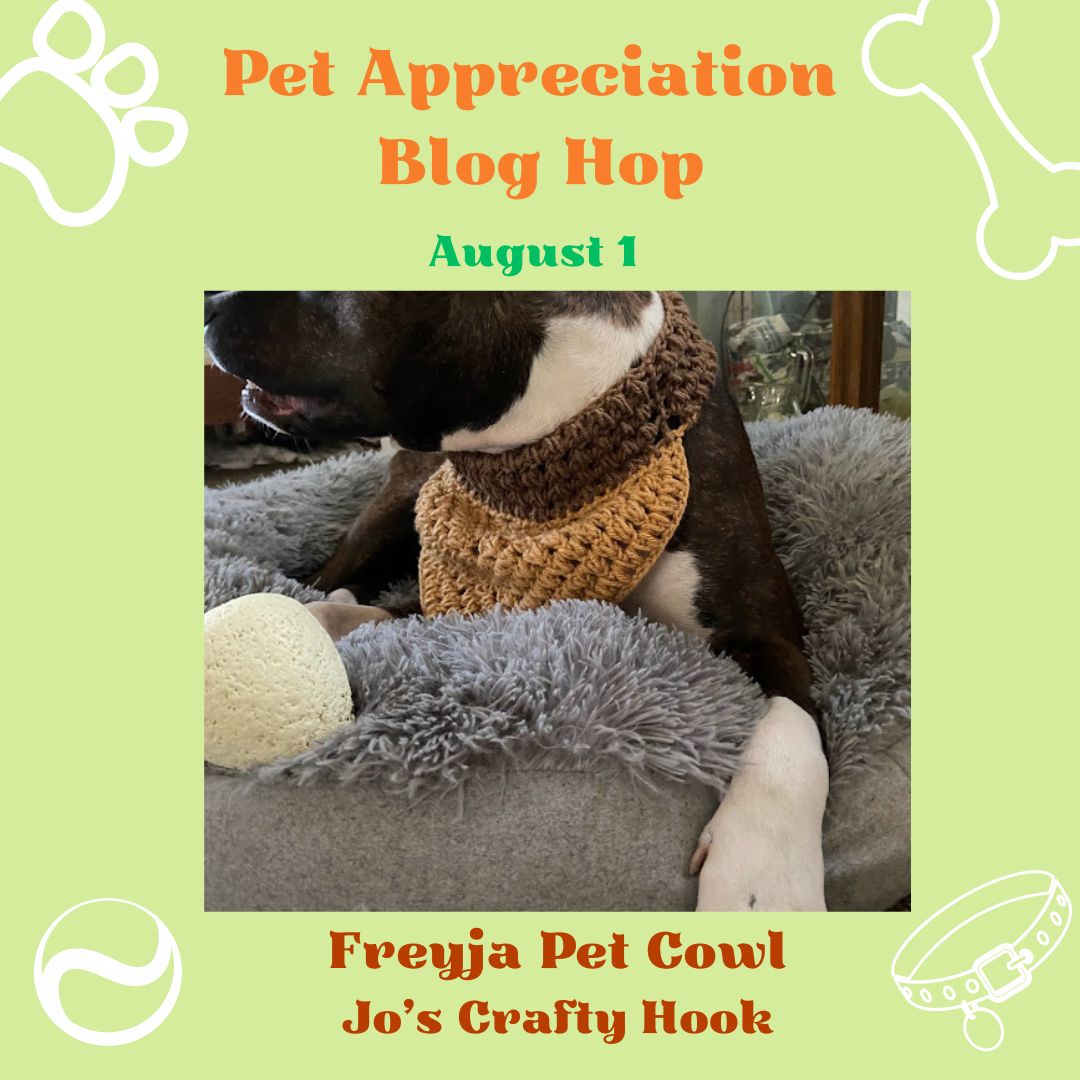
Freyja Pet Cowl Crochet Pattern

Inside the Frejya’s Cowl Crochet Pattern you will find 4 sizes to choose from.  This crochet pattern can be used for any pet, not just a dog.  This pet cowl crochet pattern is mainly based on the size of your pet’s neck and how much you want to customize it. I do have suggested sizes below that you can use to make the cowl. 

I absolutely love my son’s dog Freyja!  She loves to wear accessories!  So I have been designing a lot of crochet patterns to add to her accessories.

Pet Appreciation Blog Hop

You can get a FREE pdf of the Freyja Pet Cowl Crochet Pattern on August 1st, starting at 9a EST as part of my Pet Appreciation Blog Hop!


Visit the Main Page to find the Coupon Code to get a FREE pdf from August 1-2, 2023 from 9a EST to 9a EST.


Once you have the Coupon Code, use the Button below to visit my Ravelry Store and use it at Checkout.


Be sure to visit my Pet Appreciation Blog Hop daily, from August 1st until August 24th, to get a FREE pdf of crochet patterns just for pets!


You will find the Freyja Pet Cowl as a free crochet pattern below.

You can find helpful picture tutorials inside the Ad-Free Crochet Pattern from Ravelry or LoveCrafts for a small fee.
Information Needed

US Terminology

Skill Level: 
Advanced Beginner/ Intermediate

I used Red Heart Super Saver 100% Acrylic Yarn in Magenta, Dark Orchid and Gray (198g / 7oz) (333m / 364yd)

Materials:
US H Crochet Hook or 5 mm
50-150 yds #4 ply Worsted/Aran Weight Yarn
Scissors
Tapestry Needle

Abbreviations/Stitches Used:
ch = chain
st(s) = stitch
dc = double crochet
rep = repeat
sk = skip
YO = Yarn Over
MC = Main Color
CC = Contrasting Color

Notes: |
alt ch 2 counts as a dc.
ch 3 counts as a dc.
ch 4 counts as a dc + ch 1.
The shawl is worked in turning rows.
The cowl is worked in rounds.
The chain-1 sp counts as a st in the Triad Stitch.
There are helpful Picture Tutorials below to help you with the Triad Stitch.

Video Tutorial:
Triad Stitch – Left Handed


Size Chart


Size Miniature Small Medium Large
Width 4” 8” 10” 12”
Height 2” 6’ 8” 10”
Neck Opening 4” 8” 10” 12”


You can find helpful picture tutorials inside the Ad-Free Crochet Pattern from Ravelry or LoveCrafts for a small fee.

Special Stitches:
Beginning Triad Stitch: 
ch 4 (counts as dc+1), YO, insert hook in next st for a total of 3 times (7 loops on hook)
YO, pull through 6 loops on hook
YO, pull through last 2 loops on hook.  ch 1
*YO, insert hook in same st, pull up a loop
YO, insert hook into next st, pull up a loop
YO, draw through 6 loops on hook
YO, draw through 2 loops on hook, ch 1

Triad Stitch:
ch 4 (counts as dc+1), YO, insert hook in next st (ch-1 sp), pull up a loop
YO, insert hook into next st, pull up a loop
YO, insert hook into next ch-1 sp, pull up a loop
YO, draw through 6 loops on hook
YO, draw through 2 loops on hook, ch 1
*YO, insert hook in same sp, pull up a loop
YO, insert hook into next st, pull up a loop
YO, insert hook into next ch-1 sp, pull up a loop
YO, draw through 6 loops on hook
YO, draw through 2 loops on hook, ch 1

Freyja Pet Cowl Crochet Pattern


Special Notes:

  • There are 2 sections to the design.  The Shawl and the Cowl
  • The shawl height may need to be adjusted depending on your pet’s body size.  Too many R4 repeats may cause the shawl part to be too long.
  •  The cowl width may also need to be adjusted depending on your pet’s neck circumference.  
  • There are special instructions for the cowl circumferences below.


Shawl

R1:  ch 2, (3 dc, ch 3, 3 dc) all in 1st ch 1. turn

R2:  (alt ch 2 or ch 3, 2 dc) all in same st.  dc in next 2 sts (3 dc, ch 3, 3 dc) all in ch-3 sp.  dc in next 2 sts, 3 dc in last st.  turn

R3:  (alt ch 2 or ch 3, 2 dc) all in same st.  ch 1 *ts rep until ch- 3 sp (3 dc, ch 3, 3 dc) all in ch-3 sp.  triad st until last st.  3 dc in last st.  turn (6 ts)

R4:  (alt ch 2 or ch 3, 2 dc) all in same st.  *ch 1, ts st over next 3 st, ts into next ch-1 sp of previous row, in next st, and in next ch-1 sp of previous row.  rep from * until last dc before ch-3 sp, sk next st.  (3 dc, ch 3, 3 dc) all in ch-3 sp. ch 1 *ts rep until last dc.  3 dc in last dc. turn (10 ts)

Rep R4 until your shawl measures 2” 6” 8” 10” across the turning rows of shawl or until you reach your desired size.

Each Row will increase by 4 triad stitches

Note:  the shawl measurements below are for ½ the circumference of your pet’s neck.

Fasten off and weave in ends.

Cowl 

Cowl Circumference:
Miniature 4”  Small 6”  Medium 8”  Large 10”
Cowl Height from bottom point of shawl:
4” 6” 8” 10”


  Step 1:
sc evenly across the turning rows of shawl being sure to sc in each st, and side posts of dc.  be sure to end with an even number.

sc evenly across turning rows

Note:  you may need to measure your pet’s neck to reach your desired circumference.  The stitch count below may need to be adjusted.

Step 2:
It might be a good idea to check your chain count before you start R1, you may need to adjust the chain count below to fit the circumference of your pet’s neck.


ch 13 (25, 36, 48).  sl st in 1st st to join.

R1: ch 4, *ts around, being sure to go into the ch as well.  sl st in ch 3 of the ch 4 to join.  do NOT turn

R2: ch 4, *ts around.  sl st in top of ch 3 of the ch-4 sp to join.  do NOT turn

Repeat R2 until you reach the desired height of the cowl.

Fasten off and weave in ends.

That’s it!  You have made your own Freyja Pet Cowl!

I would LOVE to see your finished version!  Share your pics with me at any of my social media sites using the hashtags below.  You can find all of my social media sites listed below.

My Testers did such a FAB-U-LOUS job I had to share their versions!  Find out how you can share your versions as well below.  Thank you Tami Mascho, Browyn Bellwood, Cheryl Cooke, and Lisa Simmons!!

You can find some of my free crochet patterns at my website.

You can also find more of my premium crochet patterns at my Ravelry Store,  LoveCrafts or Etsy.


Loading

Preemie IV Sleeve

Preemie IV Sleeve Crochet Pattern

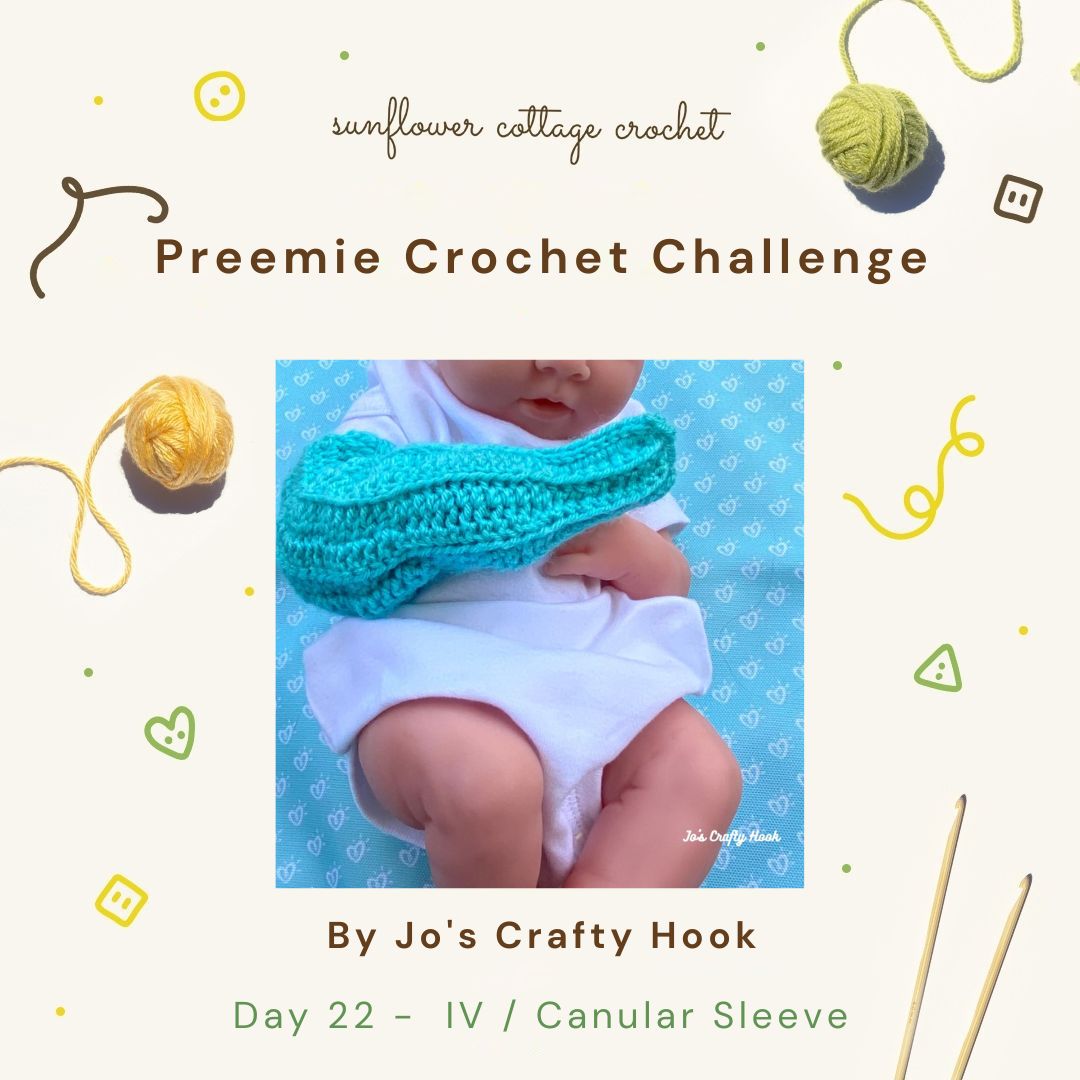
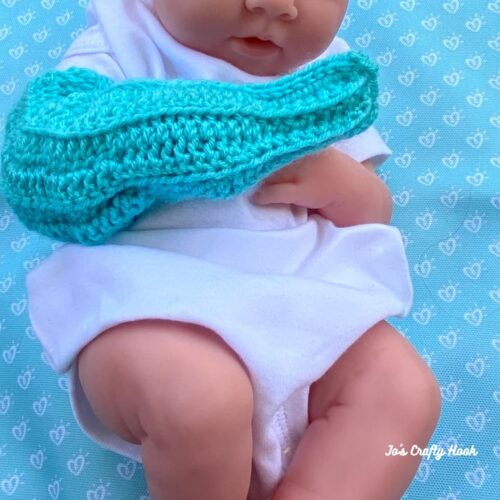
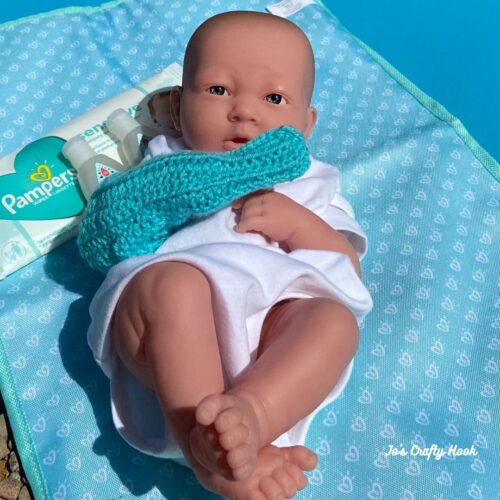
The Preemie IV Sleeve crochet pattern is a design that is good for preemie babies who need special care and may need an IV or Canual line for medication.  The sleeve is a way to protect the baby from scratches and to hold the IV line in place.  This crochet pattern would be great to donate to NICU wards of your local hospital or a donation center.


This post contains affiliate links.  If you make a purchase using these links I may receive compensation (at no added cost to you.)

While you are there be sure to sign up for my Newsletter by clicking on the Subscribe Button in the top right hand corner.  You will receive news about my New Crochet Pattern Releases, Collaborations, and MORE!  For signing up you will also get a FREE crochet pattern!


June 19 until July 16, 2023

Preemie Crochet Challenge 2023 is going on NOW!  This event is hosted by Sunflower Cottage Crochet

The purpose of this event is for you to make a pledge and donate, at least one item from the challenge. Each day you can get a free premium crochet pattern that you can use to donate to your local hospital’s NICU ward or to someone you know who has had a Preemie Baby during Preemie Awareness Month in November.
Visit the Preemie Crochet Challenge 2023 for More Information

My Contribution
Starting July 10-July 17 2023, you can get a FREE premium crochet pattern of the Preemie IV Sleeve as part of the Preemie Crochet Challenge 2023.
Visit the main blog post starting July 10, 2023 to get the Coupon Code needed to get a FREE premium copy of the Preemie IV Sleeve Crochet Pattern.
Once you have the Coupon Code, click on the button below to get the Preemie IV Sleeve Crochet Pattern from my Ravelry Store.  Use the Coupon Code at Check Out to get the pattern for FREE.

Return to the Preemie Crochet Challenge 2023 daily to get more FREE crochet patterns that you can make to donate to your hospital’s NICU ward or to donate to someone you know who has a Preemie Baby.


Sign up for my Newsletter

While you are here be sure to sign up for my Newsletter where you will receive news about my New Crochet Pattern Releases, Collaborations, and MORE!  For signing up you will also get a FREE crochet pattern!

Find more of my Ad-Free Crochet Patterns

You will find some of my Premium crochet patterns , by visiting any of my stores, by clicking on any of the Buttons below.


Custom Orders Welcome

If you would like me to crochet any of my designs for you or others, I do take Custom Orders.  Visit my Ravelry Store or LoveCrafts or my Etsy Shop to see some ideas of what you would like to Custom Order.  You can email me with your order or any other questions at j.o@joscraftyhook.com.

********************************************************

Find me, Jo of Jo’s Crafty Hook at the places listed below.

Email:  j.o@joscraftyhook.com

Website

Facebook Group Jo’s Crafty Hookers

Facebook Group Jo’s Crafty Hook Designs

Facebook Page Jo’s Crafty Hook

Facebook Page:  Crochet Designer Community

Ravelry

LoveCrafts

Etsy

Instagram

YouTube

Pinterest

Donations Accepted

Loading

Granny Viola Square Crochet Pattern

Granny Viola Square Crochet Pattern

Day 2 of the Blooming Flowers Wall Hanging CAL

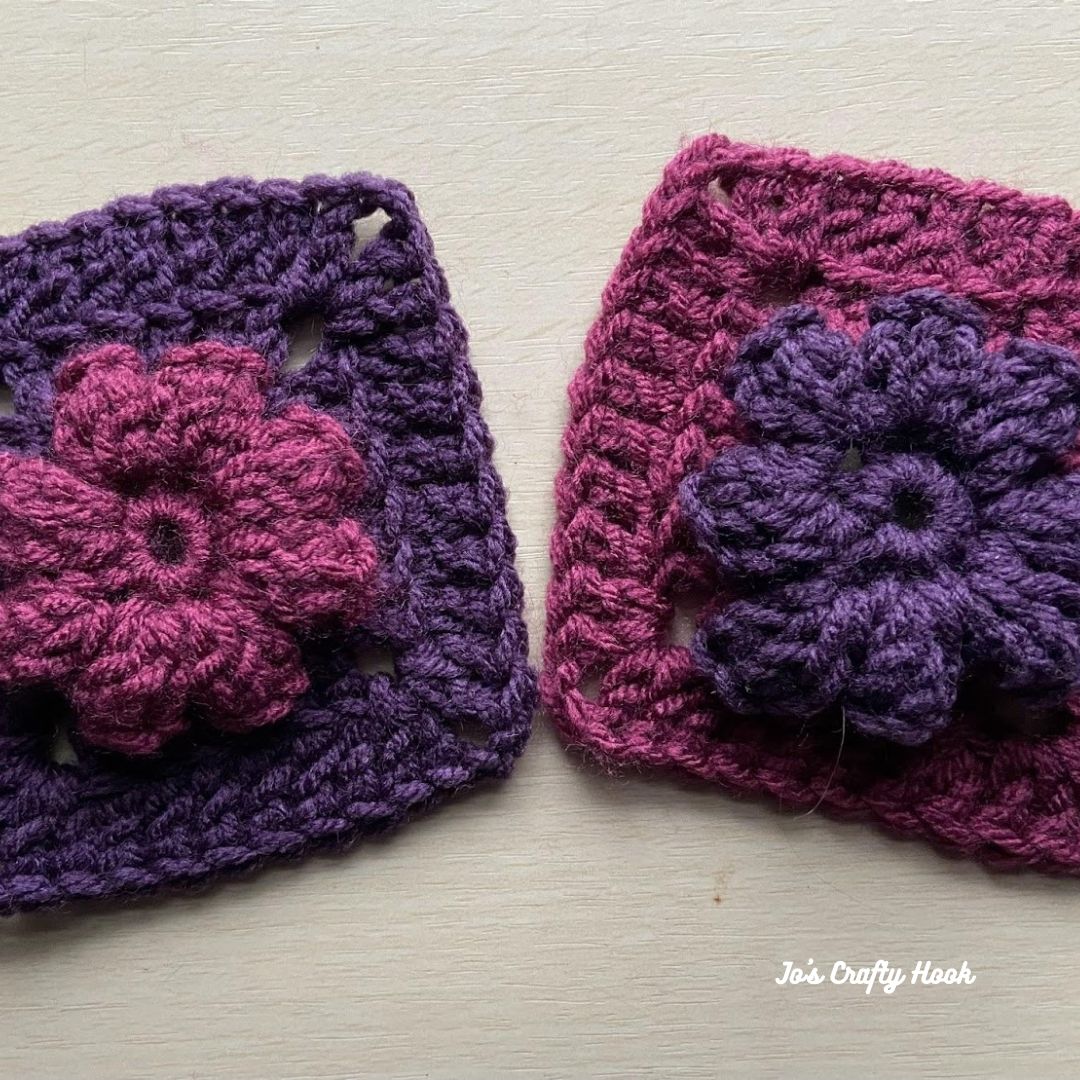
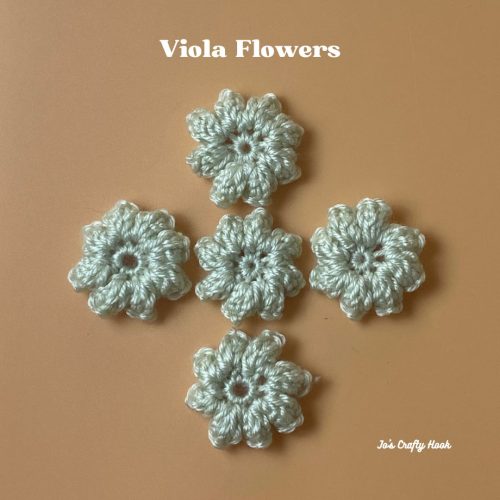
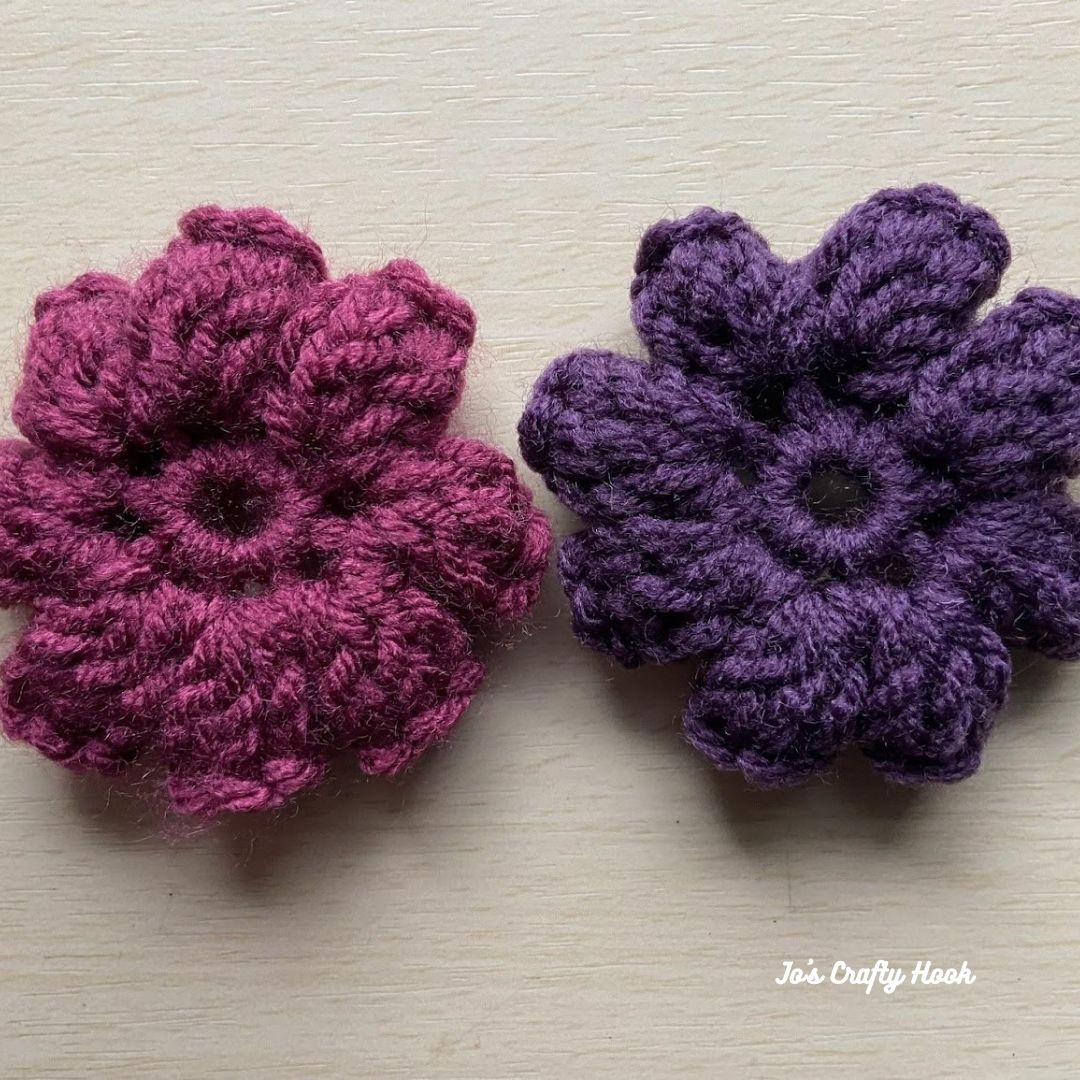
The Viola Flower Crochet Pattern was used as the focal piece of the Granny Viola Square.  The FREE crochet pattern can be found below.

I made 4 of the Viola Flowers to add to my Blooming Flowers Wall Hanging.

You will find the Viola Flower Crochet Pattern in my Blooming Flowers Wall Hanging eBook.  My eBook is on sale for the duration of the Blooming Flowers Wall Hanging CAL.  You can purchase the pattern for $3 at my Ravelry Store and work on the wall hanging at your own pace.

Come join in on the fun and share your WIPs with us inside the Crochet-A-Long with Us FB Group.

Viola Flower

************************************************

In this post you will find a Granny Viola Square Crochet Pattern as a free crochet pattern. You will find a Viola Flower and Granny Square.

This is another crochet pattern my Gram designed.  She designed a flower granny square that I found in more of her stuff I inherited of hers over 25 years.

I decided to take apart her flower granny square to see how she designed it.  I did not know what kind of flower she used, so I looked it up on Google and it is a Viola flower. 

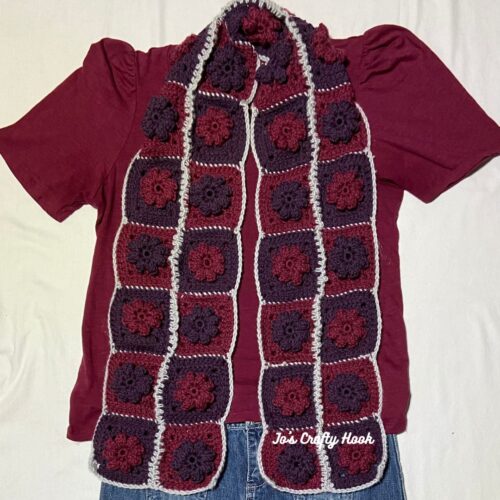
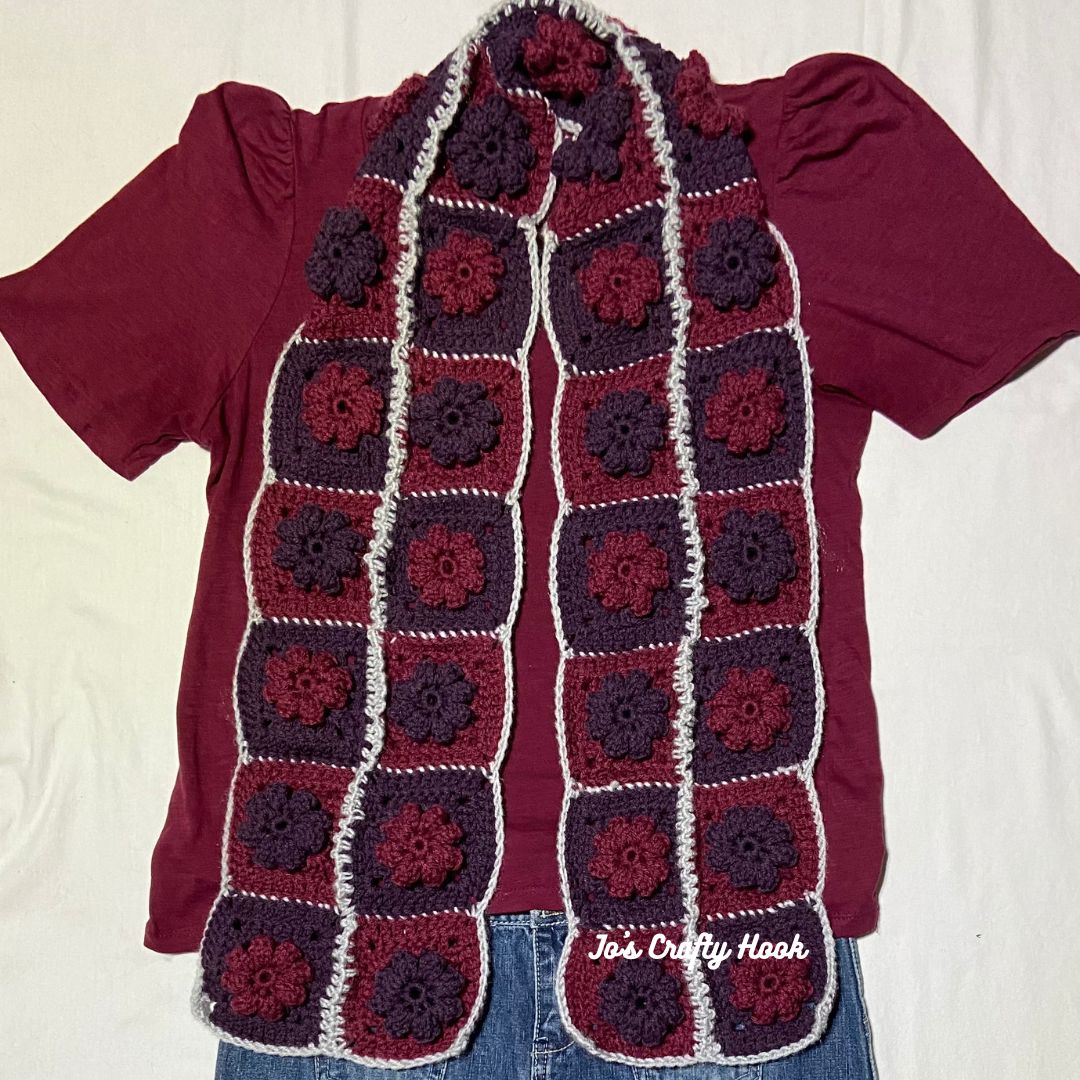
You can get the premium version of the Granny Viola Scarf crochet pattern that has 3 crochet patterns in 1 for a small fee, visit my Ravelry or LoveCrafts or Etsy.


Enjoy the free Granny Viola Square Crochet Pattern below.


This post contains affiliate links.  If you make a purchase using these links I may receive compensation (at no added cost to you.)

While you are there be sure to sign up for my Newsletter by clicking on the Subscribe Button in the top right hand corner.  You will receive news about my New Crochet Pattern Releases, Collaborations, and MORE!  For signing up you will also get a FREE crochet pattern!

Information Needed for the Granny Viola Flower & Square


I used Red Heart Super Saver 100% Acrylic Yarn in Magenta, Dark Orchid and Gray (198g / 7oz) (333m / 364yd)

Materials:
MC – 2-5  yds of #4 ply Worsted/Aran Weight Yarn
CC  – 5-10 yds of #4 ply Worsted/Aran Weight Yarn
US G Crochet Hook or 4.5 mm
Scissors
Tapestry Needle

Stitches/Abbreviations Used:
ch = chain
sc = single crochet
dc = double crochet

sl st = slip stitch
sk = skip
rep = repeat
RS = Right Side
WS = Wrong Side
MC = Main Color
CC = Contrasting Color

Notes:
ch 3 counts as a dc
The flower and square are worked in the round.

Video Tutorial:
Viola Flower – Left Handed

Gauge:
US G or 4.5 mm Crochet Hook
Flower Size: 2″ x 2″
Square Size: 4” x 4”

Viola Flower Crochet Pattern


I have added my Left Handed Video Tutorial on how to crochet the Viola Flower.

Viola Flower – Left Handed


R1:  ch 2, 8 sc in ch 1.  sl st in 1st sc to join.  (8 sc)

R2:  ch 1, *5 dc in same st, turn to WS, sl st in 1st dc, turn to RS, ch 2. rep from * around.  sl st in 1st ch-2 sp to join. (8 flower petals)

Fasten off and weave in ends.

Granny Viola Square Crochet Pattern


I have added a Left Handed  Video Tutorial if you need help to connect the square to the flower.

Granny Viola Square – Left Handed


R1attach yarn with a sl st in any ch-2 sp, (ch 3, dc, ch 2, 2 dc) all in same sp.  *2 dc in next ch-2 sp, (2 dc, ch 2, 2 dc) all in next ch-2 sp.  rep from * around until 1st st.  sl st in top of ch 3 to join.  (20 dc)

R2: ch 3, dc blo in next st, *(2 dc, ch 2, 2 dc)  all in next ch-2 sp, dc blo in next 6 dc, (2 dc, ch 2, 2 dc) all in next ch-2 sp.  rep from * until last 4 st.  dc blo in last 4 st.  sl st in top of ch 3 to join.  (40 dc)

Fasten off and weave in ends.


That’s it!  You made your very own Granny Viola Square!  I would love to see how your version turned out!  You can tag me using any of the hashtags listed below at any of my social media sites listed above.

#grannyviolasquare #joscraftyhook #jo_bear38 #joeyleabaird


You can find some of my free crochet patterns at my website.

You can also find more of my premium crochet patterns at my Ravelry Store and LoveCrafts.

How to find the Granny Viola Scarf Crochet Pattern


Size Chart

Size Length MC Flowers CC Flowers Total Flowers
2-3 years 36” 9 9 18
4-10 years 52” 13 13 26
Teen 60” 15 15 30
Small Adult 68” 17 17 34
Large Adult 76” 19 19 38
Granny Viola Scarf Crochet Pattern

You can get the assembly of the granny square, the connection of the squares, and the border of the scarf inside the premium copy of the Granny Viola Scarf crochet pattern.

Inside you will find step by step picture and video tutorials to help you along the way.

Inside the premium copy you will also find the instructions needed for crocheting the multiple sizes of the scarf.

To get the premium version of the Granny Viola Scarf crochet pattern for a small fee, visit my Ravelry or LoveCrafts Store.


If you would like me to crochet any of my designs for you or others, I do take Custom Orders.  Visit my Ravelry Store or LoveCrafts to see some ideas of what you would like to Custom Order.  You can email me with your order or any other questions at j.o@joscraftyhook.com.

********************************************************

Find me, Jo of Jo’s Crafty Hook at the places listed below.

Email:  j.o@joscraftyhook.com

Website

Facebook Group Jo’s Crafty Hookers

Facebook Group Jo’s Crafty Hook Designs

Facebook Page Jo’s Crafty Hook

Facebook Page:  Crochet Designer Community

Ravelry

LoveCrafts

Etsy

Instagram

YouTube

Pinterest

Donations Accepted

Loading

Sweet Dreams Preemie Blanket

Sweet Dreams Preemie Blanket


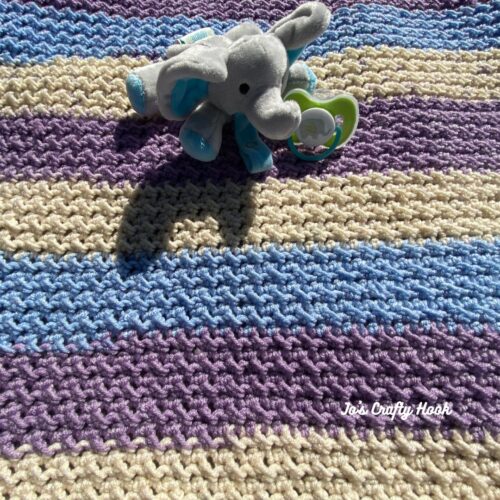
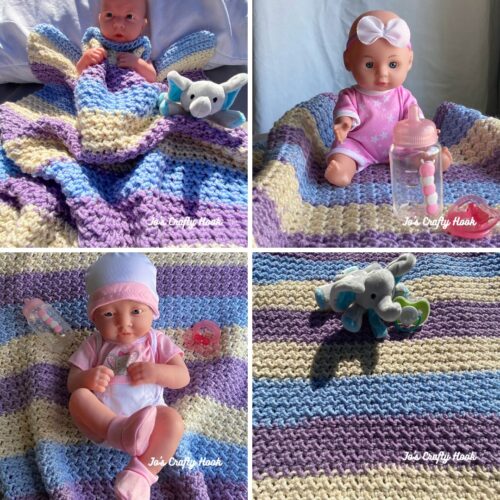
The Sweet Dreams Preemie Blanket Crochet Pattern is not just a preemie blanket crochet pattern.  There are also 3 additional sizes to choose from.  Inside the crochet pattern you will find sizes for a Cradle, a Stroller, and a Receiving blanket.

The Sweet Dreams Preemie Baby Blanket was originally designed for those who have had preemie babies or to make to donate to your local NICU wards in your local hospital.

Don’t forget while you are here to be sure to sign up for my Newsletter where you will receive news about my New Crochet Pattern Releases, My Upcoming Blog Hops, other Collaborations, and MORE!  For signing up you will also get a FREE crochet pattern!

You can find more of my designs for baby items, accessories in all size, just for men and more at my Ravelry Store and LoveCrafts.

Custom Orders Welcome

If you would like to have a Sweet Dreams Baby Blanket of your own, I do accept Custom Orders.  You can email me at j.o@joscraftyhook.com and I will be more than happy to crochet you your own Size of the Sweet Dreams Baby Blanket.


Hey Baby Blog Hop & Bundle Sale

You can “HOP” right over the event and purchase the  Hey Baby Bundle Sale & a Bonus Baby Blankets Galore Book 4 Bundle to find out more about what is inside.  There is also more about these Bundles below.

Hey Baby Blog Hop

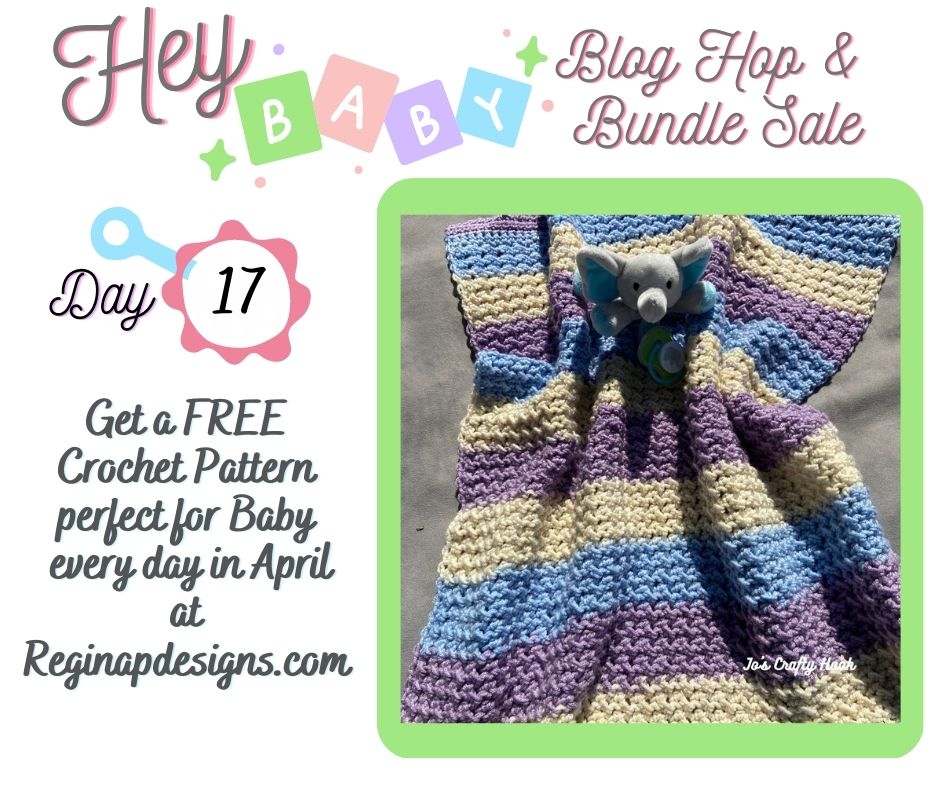
Each day during the month of April, you will find a new FREE premium crochet pattern you can get from some awe-SOME crochet designers!  You can visit the Hey Baby Blog Hop’s Main Page Daily from 9a EST until 8:59a EST to get the day’s FREE crochet pattern!  Visit the main page daily or to find more!

Hey Baby Blog Hop


Hey Baby Bundle Sale & Bonus

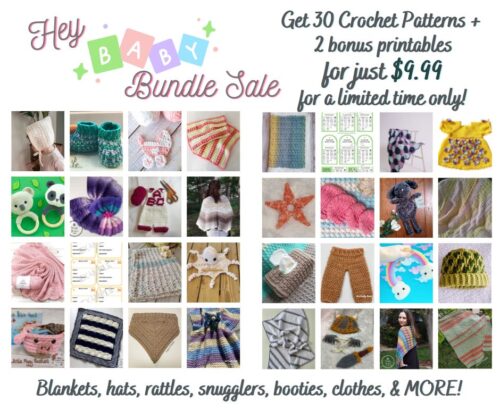
If you would like to “Hop” right over all the Blog Hopping, but would love to have ALL 31 baby crochet pattern ALL in one place, you can purchase the Hey Baby Bundle for $9.99!  Click on the Button below to find out more or to purchase the Hey Baby Bundle.


As an added Bonus you can get the Baby Blankets Galore Book 4. for $11.99. This book contains 7 unique baby blanket patterns with color photos & handy charts.  Click on the image below to purchase the Bonus Buy or for more info.


How to get a FREE premium copy of my Sweet Dreams Preemie Blanket Crochet Pattern on April 15, 2023.


The Sweet Dreams Preemie Blanket Crochet Pattern will be FREE April 17, 2023 starting at 9a EST until April 18, 2023 8:59a EST.  The giving away of a FREE premium copy of the crochet pattern is part of Regina P Designs’ Hey Baby Blog Hop and Bundle Sale.  This event will be going on the whole month of April 2023.  More information about how you can get a FREE copy below.

Visit the Hey Baby Blog Hop Main Page at Regina P Design to get the Coupon Code needed to get my Sweet Dreams Preemie Baby Blanket from my Ravelry Store by Clicking on the Button Below.


Once you have the Coupon Code, you are ready to get your FREE premium copy of the Sweet Dreams Preemie Blanket.  Click on the Button below to visit my Ravelry Store.  Add the crochet pattern your Cart at Ravelry, use the Coupon Code you got from the main post and Checkout.  That’s it!


If you missed my day of the Hey Baby Blog Hop you will find the Preemie Size of the Sweet Dreams Baby Blanket below.  You can also purchase a Premium copy from my Ravelry or LoveCrafts Stores for a small fee.  The premium copy will have ALL 4 size patterns to choose from.


Don’t forget, each day, until the end of April, you can still get some fabulous FREE premium crochet patterns!!  Visit the Hey Baby Blog Hop each day by clicking on the button below.


Also as part of the Hey Baby Blog Hop & Bundle Sale, you can purchase the complete Hey Baby Bundle for $9.99 by clicking on the link below.  Inside the Hey Baby Bundle you will find ALL 31 premium crochet patterns ALL in 1 place!


Custom Orders Welcome

If you would like to have a Sweet Dreams Baby Blanket of your own, I do accept Custom Orders.  You can email me at j.o@joscraftyhook.com and I will be more than happy to crochet you your own Size of the Sweet Dreams Baby Blanket.


Information Needed for you to crochet my Sweet Dreams Preemie Blanket Crochet Pattern


Materials:
US I Hook or 5.5mm
490-550 yards of #4 Worsted Weight Yarn
I used 450 yards of Premier Sweet Roll

Abbreviations/Stitches Used:
ch = chain
st = stitch
sl st = slip stitch
hdc = half double crochet
fsc = foundation single crochet
CS = Crunch Stitch
rep = repeat 

Special Stitches:
Crunch Stitch  

  1. hdc in same stitch as ch 1 
  2. sl st st in the next  
  3. repeat until the end of the row, ch 1 and turn 
  4. NOTE- Each row will always start with a hdc and end with a slip stitch.

Size:
23” x 23”

Notes:
Each row will always start with a hdc and end with a sl st.
Ch 1 does not count as a stitch
Every yarn is different.  If you are having trouble try going up or down a hook size.

Gauge:
US I Hook or 5.5mm
16 st x 8 rows = 4”
7 CS x 8 rows = 4”

Gauge Swatch:
fsc 16 turn (16 fsc)
Optional:  ch 17, sc in 2nd ch from hook, sc across.  (16 sc)
R1:  ch 1, sc in each st across.  ch 1 turn (16 st)
R2:  *hdc  in the same st, sl st in next st*  rep from *  until the end of row. ch 1, turn.  (16 st)
R3-R8:  Repeat R2

Sweet Dreams Preemie Blanket Crochet Pattern


R1
:  fsc 74.  ch 1 and turn  (74 fsc)
Optional:  ch 75, sc in 2nd ch from hook, sc across.  (74 sc)

R2-R5: sc in same st and each st across.  ch 1,  turn.  (74, 80, 84, 92 sc)

R6-R44:  *hdc in same st, sl st in next st.  rep from * until end of the row, ch 1, turn.  (74, 80, 84, 92 hdc)

R45 – R49:  sc in same st, sc in each st across.  ch 1, turn.  (74 sc) 

Fasten off and weave in ends.

You can get 3 others sizes of the Sweet Dreams Preemie Blanket Crochet Pattern at Ravelry or LoveCrafts!

You can find more of my designs for baby items, accessories in all size, just for men and more at my Ravelry Store and LoveCrafts.


Don’t forget while you are here to be sure to sign up for my Newsletter where you will receive news about my New Crochet Pattern Releases, My Upcoming Blog Hops, other Collaborations, and MORE!  For signing up you will also get a FREE crochet pattern!


Find me, Jo of Jo’s Crafty Hook at the places listed below.

Email:  j.o@joscraftyhook.com

Website

Facebook Group Jo’s Crafty Hookers

Facebook Group Jo’s Crafty Hook Designs

Facebook Page Jo’s Crafty Hook

Facebook Page:  Crochet Designer Community

Ravelry

LoveCrafts

Etsy

Instagram

YouTube

Pinterest

Donations Accepted

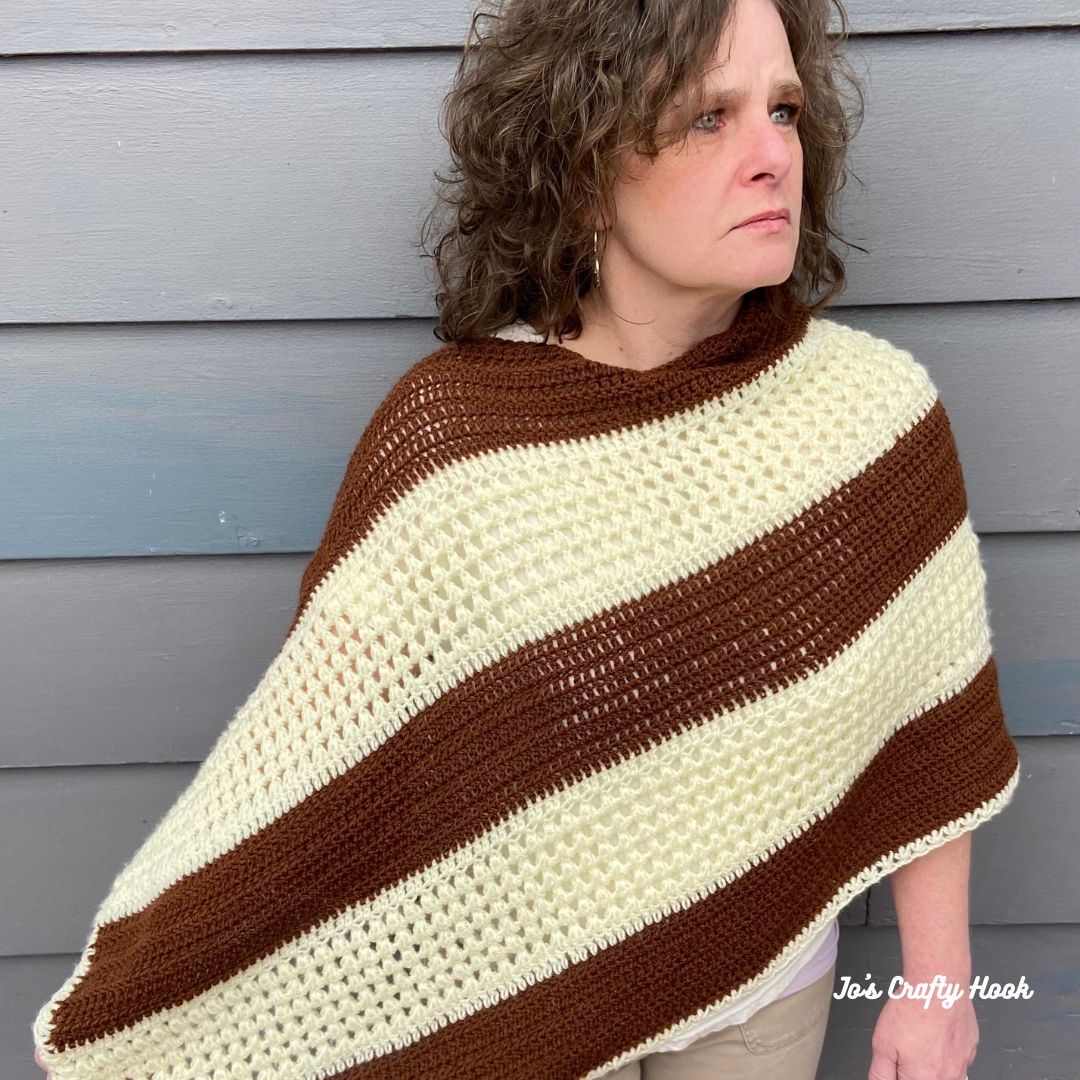
Welsh Poncho Free Crochet Pattern

Welsh Poncho Free Crochet Pattern


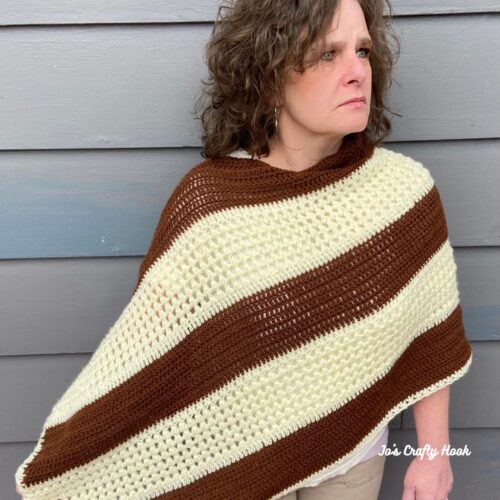
Are you looking to add a little luxury to your wardrobe?  Well, using the Welsh Poncho Free Crochet Pattern will help you achieve just that!

The Welsh Poncho Crochet Pattern uses a crochet stitch that I fell in love with last year, the Triad Stitch.  The Triad Stitch is just like a Puff Stitch, only it is done over 3 stitches.

The Triad Stitch has one meaning that I fell in love with, this is where I came up with it’s name Welsh.  Triad means a Welsh form of literary composition with an arrangement of subjects or statements in groups of three.

If you think about a crochet pattern it is made up of 3 things:

  • using crochet stitches to create the design
  • a composition of writing the crochet pattern
  • taking pictures to showcase the design

I first used the Triad Stitch in my Welsh Braided Cowl Crochet Pattern (see info below)  In the designing of the Welsh Braided Cowl I using another meaning of Triad, the braiding of three things together, this is where the Braided part of the design came in.  You can find out more about this below.

This kind of sounds like an English lesson, doesn’t it?!  lol

Handmade Wardrobe April

Today, April 10, 2023 you can get a premium copy of my Welsh Poncho crochet pattern at a discounted price, $3.50, this is 50% off the retail price as part of the Handmade Wardrobe April Blog Hop hosted by Fosbas Designs.

Click on the Button below to the Coupon Code needed to get the discounted price of my Welsh Poncho Crochet Pattern from my Ravelry Store.


Come back here and use the Coupon Code to use at my Ravelry Store at Checkout to get the Welsh Poncho Crochet Pattern for $3.50 by clicking on the Button below.


Click on the Button below to use your Coupon Code to get the Welsh Poncho Crochet Pattern at Checkout.


Handmade Wardrobe April Bundle

You can skip all the Blog Hopping and get a savings on all 15 crochet patterns for $9.99!  Click on the Button below for more information or to get the Handmade Wardrobe April Bundle for $9.99


If you missed my day as part of the Handmade Wardrobe April Blog Hop, you can purchase a premium copy of the Welsh Poncho Crochet Pattern for a small fee with all of the Picture and Video Tutorials inside.  You will find it at my Ravelry Store or LoveCrafts.

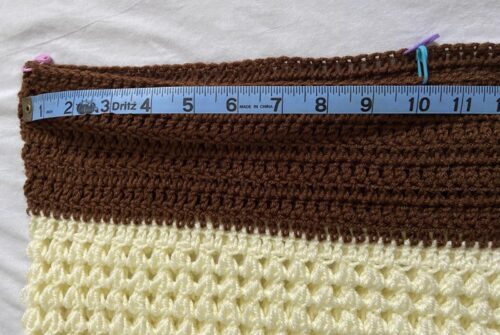
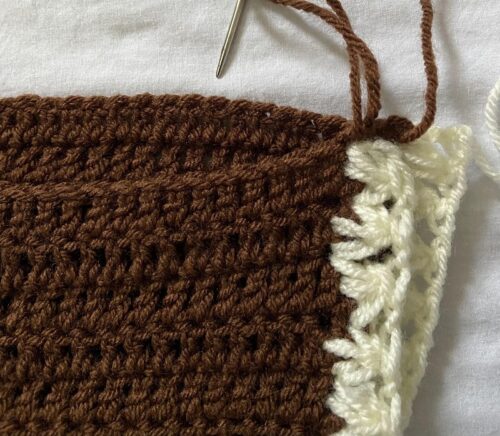
Information about the Welsh Poncho Crochet Pattern

The Welsh Poncho Crochet Pattern has 4 different sizes to choose from to make for Small, Medium, Large and XLarge.  Inside the Welsh Poncho Crochet Pattern you will find a size chart, step-by-step picture tutorials, and my Left Handed Triad Stitch Video Tutorial to help you every step of the way.

US Terminology

Skill Level: 
Advanced Beginner/ Intermediate

I used KnitPIcks Sport Weight Yarn (340 yds/100 g)
I used We Love Yarn Mega Ball (14.1 oz/400 g) 1312 yds/1200 m)

Materials:

US I Crochet Hook or 5.5 mm
MC –  Brown 550-680 yds of #3 ply Light/DK Weight Yarn
CC –   Cream 700-1200 yds of #3 ply Light/DK Weight Yarn
Scissors
Tapestry Needle

Abbreviations/Stitches Used:
ch = chain

st(s) = stitch
dc = double crochet

sk = skip
rep = repeat
YO = Yarn Over
MC = Main Color

CC = Contrasting Color

Notes:
alt ch 2 counts as a dc.
ch 3 counts as a dc.
ch 4 counts as a dc + ch 1.
The chain-1 sp counts as a st in the Triad Stitch.
There are helpful Picture Tutorials below to help you with the Triad Stitch.


Video Tutorial:

Triad Stitch – Left Handed

You can find more of my Left Handed Video Tutorials at my YouTube Channel


You can purchase a premium copy of the Welsh Poncho Crochet Pattern for a small fee with all of the Picture and Video Tutorials inside.  You will find it at my Ravelry Store or LoveCrafts.
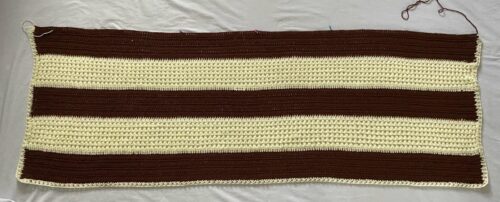
Welsh Poncho Crochet Pattern

Using MC

R1:  fdc 192 turn (192 fdc) 

Optional:  ch 194 (210, 226, 242), dc in 4th ch from hook, dc across.  (192 dc)

R2-R8:  alt ch 2 or ch 3, dc across.  turn  (192 dc)

Fasten off and weave in ends.

Change to CC

R9:  alt ch 2 or ch 3, dc across.  turn  (192, 208, 224, 240) dc

R10:  Beginning Triad Stitch.  (see Special Stitches above).  rep from * across until last st.  dc in last st.  turn (95, 103, 111, 119) Triad Stitch & 2 dc

R11-R15:  Triad Stitch.  (see Special Stitches above).  rep from * across until last st.  dc in last st.  turn (95 Triad Stitch & 2 dc)

R16: alt ch 2 or ch 3, dc in each st across.  turn (192 dc)

Fasten off and weave in ends.

Change to MC

R17-R24:  alt ch 2 or ch 3, dc in each st across.  turn (192 dc)

Fasten off and weave in ends.

Change to CC

R25:  alt ch 2 or ch 3, dc across.  turn  (192 dc)

R26:  Beginning Triad Stitch.  (see Special Stitches above).  rep from * across until last st.  dc in last st.  turn (95 Triad Stitch & 2 dc)

R27-R31:  Triad Stitch.  (see Special Stitches above).  rep from * across until last st.  dc in last st. turn (95 Triad Stitch & 2 dc)

R32:  alt ch 2 or ch 3, dc in each st across.  turn (192 dc)

Fasten off and weave in ends.

Change to MC

R33-40:  alt ch 2 or ch 3, dc in each st across.  turn (192 dc)

Leave a long tail of yarn for sewing Neck Opening closed.


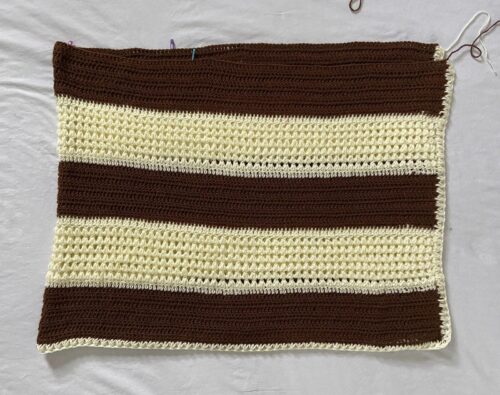
Creating Neck Opening

Step 1:
Lay your long piece with the WS facing up

Step 2:

Fold from the longest side in half with the WS facing the WS. 


Step 3:

Measure 10” 11” 12” 13” or your desired neck opening from the opposite corner from where your long tail of yarn is at.

Step 4:

Count the number of stitches from the corner of each side of the poncho and place SM in each side.

Step 5:

Sew evenly across the top of both poncho pieces, using the Whip Stitch, until you come to your SM.

Fasten off and weave in ends.

@Jo’s Crafty Hook 2023

That’s it!  You have finished crocheting your Welsh Poncho!  

I would LOVE to see your version of the Welsh Poncho!!  You can tag me at any of the Social Media sites listed above using the hashtags:  

@joscraftyhook @jo_bear38 @joeyleabaird #welshponcho #welshponchocrochetpattern #welshponchopattern #joscraftyhook #joscraftyhookdesigns #jo_bear38

If you would like to receive more information about the events happening at Jo’s Crafty Hook and receive a FREE crochet pattern, why not Subscribe to my Newsletter at my website.

You can find some of my free crochet patterns at my website.

You can also find more of my premium crochet patterns at my Ravelry Store and LoveCrafts.


Welsh Braided Cowl Crochet Pattern


My Welsh Braided Cowl Crochet Pattern designed for a special purpose.  Ashley of Through the Loop Yarn Craft showcased me and this design in here Designer Spotlight in part with WeCrochet.

My Welsh Braided Cowl was excepted by WeCrochet and it became my very first published crochet pattern as part of their Independant Designer Partnership!  to sell on their platform.  This was a HUGE step forward for me as a crochet designer!  Needless to say I was and still am Over the Moon about this crochet pattern!  You can find my Welsh Braided Cowl Crochet Pattern here.


Find me, Jo of Jo’s Crafty Hook at the places listed below.

Email:  j.o@joscraftyhook.com

Website

Facebook Group Jo’s Crafty Hookers

Facebook Group Jo’s Crafty Hook Designs

Facebook Page Jo’s Crafty Hook

Facebook Page:  Crochet Designer Community

Ravelry

LoveCrafts

Etsy

Instagram

YouTube

Pinterest

Donations Accepted

Suzy’s Cloths

Suzy’s Cloths – Washcloth and Burp Cloth

The Suzy’s Cloths are the perfect crochet pattern to make and gift to new mother’s at a Baby Shower.

This post contains affiliate links

New mother’s may not realize how much babies get sick during burping or after.  Also, they might not think about putting a cloth or towel on their shoulder or under they baby’s face while burping them.

I don’t know HOW many times I did not do this myself!   It is a great idea to do this, because not only will the parent have to change the baby, but they will have to change themselves.  lol


You will find some of my Premium crochet patterns , by visiting any of my stores, by clicking on any of the Buttons below.


Information Needed for the Suzy’s Cloths Crochet Pattern

The Suzy’s Cloths crochet pattern contains 2 crochet patterns inside.  1 for a Washcloth and 1 for a Burp Cloth.

I used Premier Just Cotton in Cream.  (87 yds/ 50 g) (1.76 oz/ 80 m) 

Materials:
80-200 yds of #4 ply Medium Cotton Yarn
US F Crochet Hook or 3.75 mm
Scissors
Tapestry Needle

Abbreviations/Stitches Used:
ch = chain
sc = single crochet
dc = double crochet
fsc = foundation single crochet
alt ch 2  = alternate ch 2
rep = repeat

Notes:
ch 3 counts as a dc
alt ch 2 counts as a dc
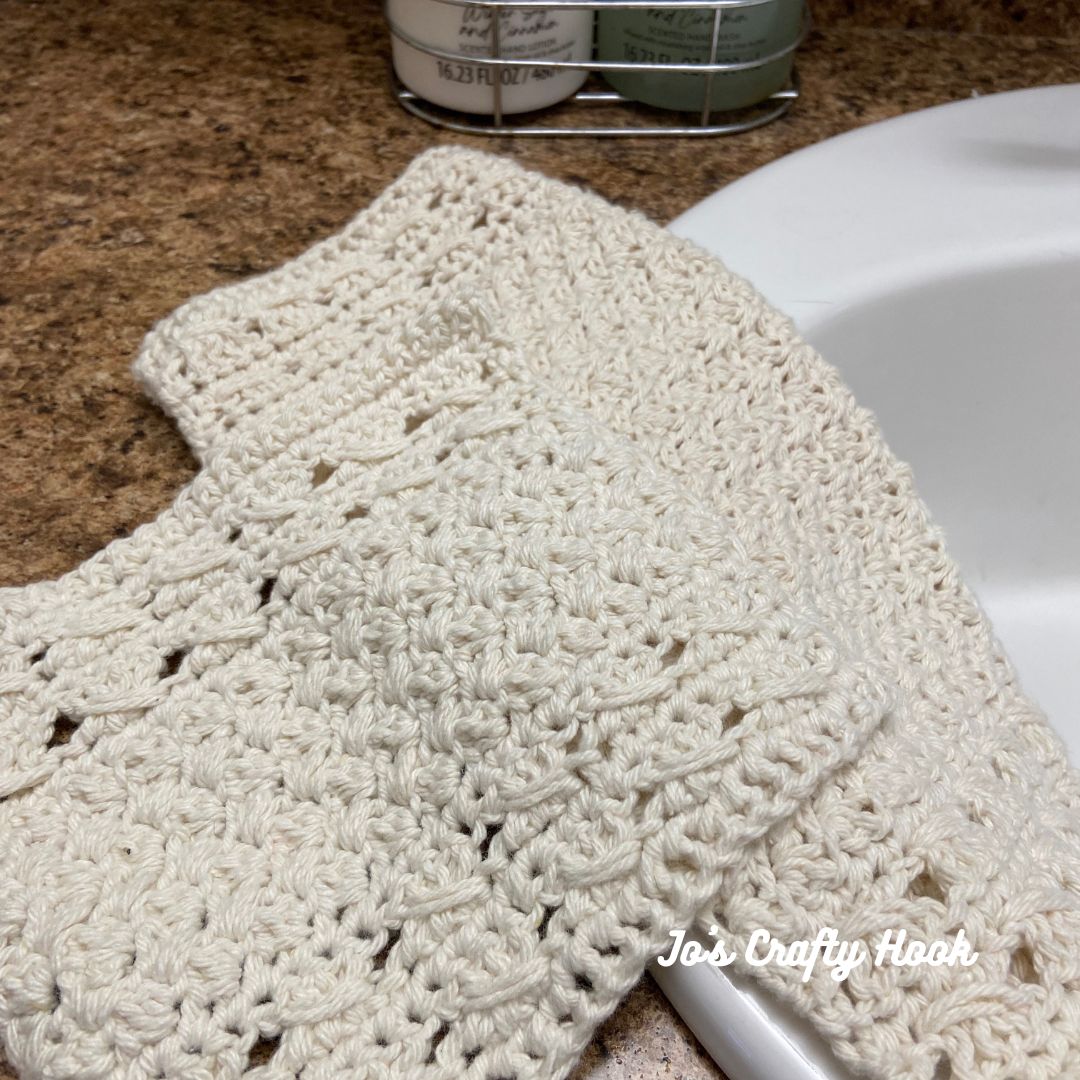
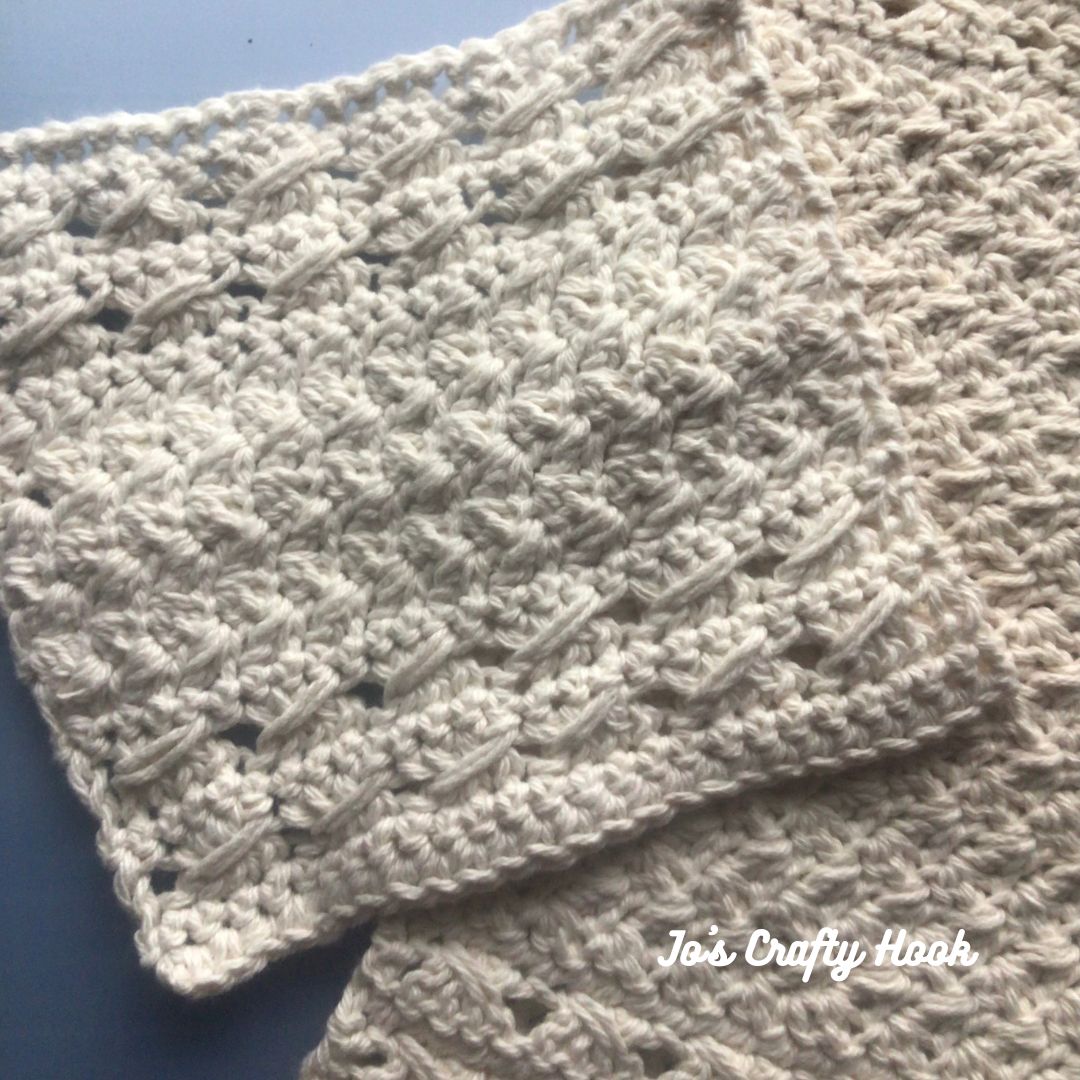
In the crochet pattern there are 2 types of stitches.  The Crossover Stitch & the Suzette Stitch
There are 2 sizes to choose from 8” x 6” (10” x 10”) consecutively.

Size:
Washcloth = 8” x 6”
Burp Cloth = 10” x 10”

Gauge:
US F Crochet Hook or 3.75 m
16 dc x 8 rows = 4”

Gauge Swatch:
R1:  18, sc in 2nd ch from hook, sc across.  16 dc
R2-R8:  ch 3, dc across.  16 dc

Special Stitches:
Crossover Stitch:  dc in stated st, *sk 1 st, dc in next 3 st, dc in sk st. rep until last st, dc in last st.
Suzette Stitch:  (sc, dc) in all in stated st.

Suzy’s Cloths Free Crochet Pattern

Washcloth & Hand Towel Crochet Pattern

R1: fsc 26 or 42. turn (26, 42 sc)
Optional: ch 27 (43) sc in 2nd ch from hook, sc across. turn (26, 42 sc)

R2: ch 1, sc in same st, sc across. turn (26, 42 sc)

R3: alt ch 2 or ch 3 (counts as a dc) *sk next st, dc in next 3 st, dc in sk st. rep from * across until last st. dc in
last st. turn (26, 42 dc)

R4–R5: Rep R2-R3

R6: ch 1, sc in same st, 2 sc in next st, sc across. turn (27, 43 sc)

R7: ch 1, (sc, dc) all in same st, sk next st. *(sc, dc) all in same st, sk next st. rep from * until last st, sc in last
st. turn (27, 43 st)

R8: ch 1, (sc, dc) in 1st sc, sk next st. *(sc, dc) in next sc, sk st. rep from * until last sc. sc in last sc. turn (27,
43 st)

R9-15(23): Repeat R8.

R16(24): ch 1, sc in same st, sk next st, sc across. turn (26, 42 sc)

R17(25): alt ch 2 or ch 3 *sk next st, dc in next 3 st, dc in sk st. rep from * across until last st. dc in last st.
turn (26, 42 dc)

R18(26): ch 1, sc in same st, sc in each st across. turn

R19(27): alt ch 2 or ch 3 *sk next st, dc in next 3 st, dc in sk st. rep from * across until last st. dc in last st.
turn (26, 42 dc)

R20-21(28-R29): ch 1, sc in same st, sc in each st across. turn (26, 42 sc)

Do NOT fasten off..

Edging
sc in each st evenly around the cloth, placing a (sc, ch 1, sc) in the last st of each row.

That’s it! You have completed your own Suzy’s Cloths! I would LOVE to see your version!

You can tag me:
@joscraftyhook on IG
JoeyLeaBaird on FB
Jo’s Crafty Hook FB Group

You will find some of my Premium crochet patterns , by visiting any of my stores, by clicking on any of the Buttons below.


Find me, Jo of Jo’s Crafty Hook at the places listed below.

Email:  jo@joscraftyhook.com
Linktree

Website

Facebook Group Jo’s Crafty Hookers

Facebook Group Jo’s Crafty Hook Designs

Facebook Page Jo’s Crafty Hook

Facebook Page:  Crochet Designer Community

Ravelry

LoveCrafts

Etsy

Instagram

YouTube

Pinterest

Donations Accepted


Loading

Lacey Scarf Crochet Pattern

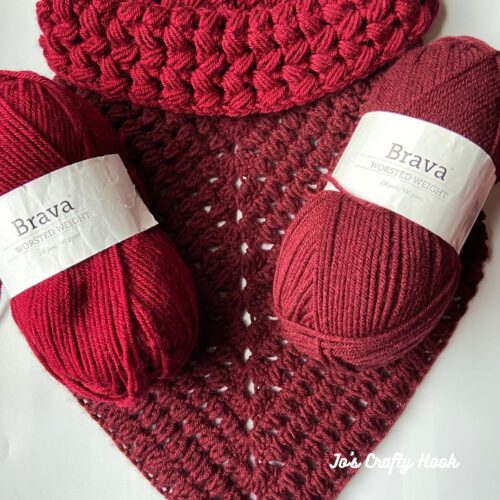
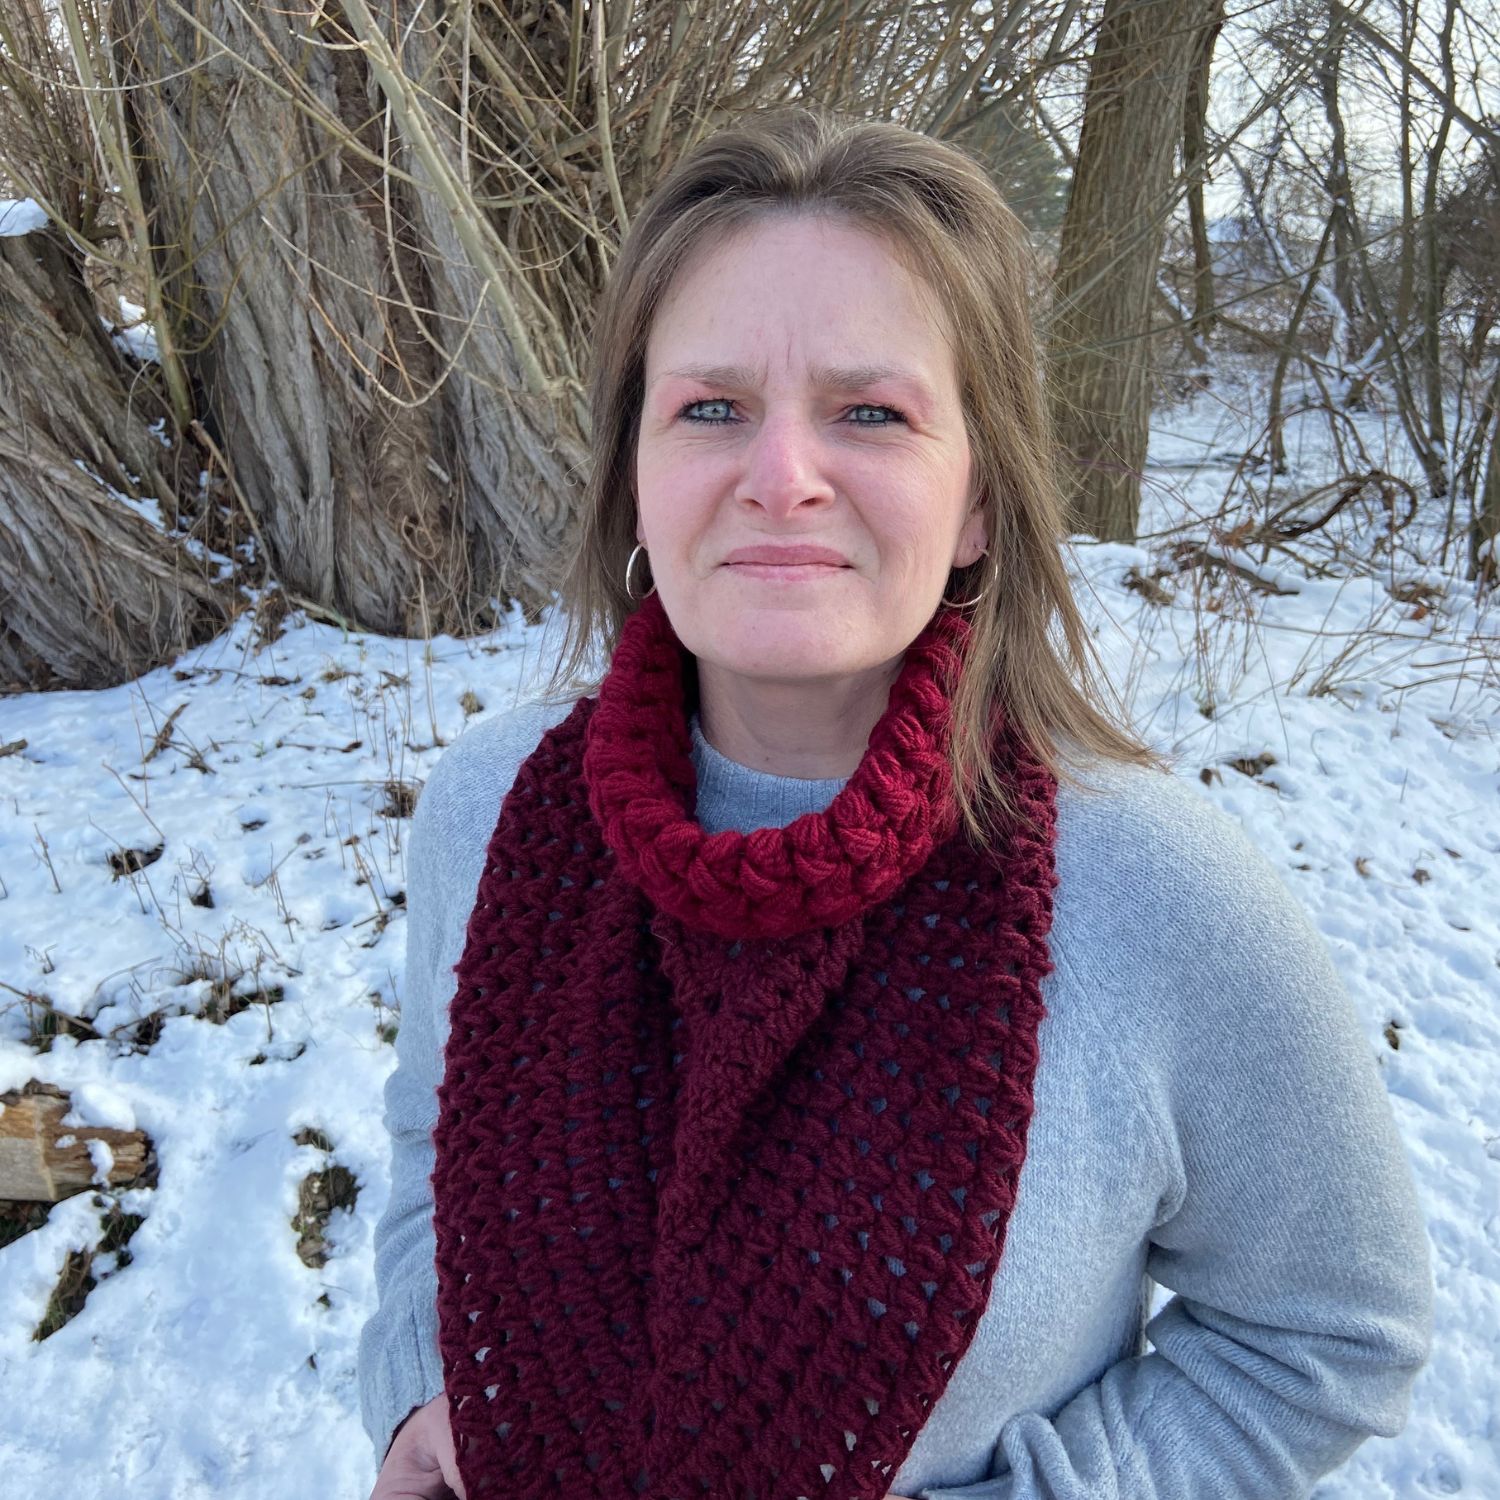
The Lacey Scarf Crochet Pattern is a new crochet pattern design that creates a nice lacy scarf that has a great drape.  It uses Truboo yarn from Lion Brand Yarn that creates a nice soft airy, lacy texture.  I am excited about this crochet design of the Lacey Scarf!

This post contains affiliate links.

March Events

Sign up for my Blooming Flowers Wall Hanging CAL.

Please wait...

Thank you for signing up!


On March 18, 2024 starting at 10a EST until March 19, 2024 10a EST you can get a FREE premium copy Lacey Scarf Crochet Pattern as part of the March Maker Madness Free Pattern 2024 Hop hosted by Carroway Crochet.

If you missed any of the previous free crochet patterns or prefer to skip all the blog hopping, you can get the March Maker Madness Bundle for $9.99 with all of the 25 crochet patterns all in one place.


On March 18, 2024 you can get a FREE premium PDF of my Lacey Scarf Crochet Pattern.  You will need to visit the March Maker Madness to find the Coupon Code needed to use at Checkout for the FREE copy.


From 10a EST to 10a EST March 18-19, 2024 bring the Coupon Code back here to use it during Checkout from my Ravelry Store.  Enjoy the Lacey Scarf Crochet Pattern!


Be sure to visit the March Maker Madness daily to see each designer’s beautiful crochet pattern you can get that day for FREE!


Below you will find out more information about the stitches used in the Lacey Scarf Crochet Pattern and all the information needed to make your own version!

The Lacey Scarf Crochet Pattern uses a crochet stitch that I designed a couple of years ago, the Lilac Cluster Stitch.  The Lilac Cluster Stitch uses the DC6TOG, Double Crochet 6 Together and the DC3TOG, Double Crochet 3 Together.

Because of this stitch is also used in the Lacey Scarf Crochet Pattern I made a Video Tutorial specifically for this design using my DC6TOG, Double Crochet 6 Together.  Therefor the video demonstrates how to do this stitch specifically for the Lacey Scarf.


I also made a Video Tutorial demonstrating the DC3TOG, Double Crochet 3 Together specifically used in the Lacey Scarf Crochet Pattern.


Shop my Stores for the Lacey Scarf

You can find the premium copy of the Lacey Scarf Crochet Pattern from my Ravelry Store or my LoveCrafts Store for a small fee.


This crochet stitch was used in my Lilac Cluster Beanie Crochet Pattern and Lilac Cluster Cowl Crochet Pattern.

You can find the Lilac Cluster Beanie Crochet Pattern at my Ravelry and LoveCrafts Store.  Also you can find the Lilac Cluster Cowl Crochet Pattern at my Ravelry and LoveCrafts Stores.


I also used this stitch in my Oyster Shell Scarf Crochet Pattern.  You can find all of these crochet patterns at my Ravelry and LoveCrafts Stores for a small fee.  You can also find the Oyster Shell Scarf Crochet Pattern free on my website.


Information Needed for the Lacey Scarf Crochet Pattern

I used Lion Brand Truboo Yarn in 100% Rayon Yarn from Bamboo.  (3.5 oz/100 g) (241 yd/220 m)

Materials:
US J or 6 mm Crochet Hook
150 – 300 yds Light Weight Yarn
Scissors
Tapestry Needle


Abbreviations/Stitches Used:
ch = chain
st(s) = stitch(es)
sl st = slip stitch
sc = single crochet
dc = double crochet
dc3tog = double crochet 3 together
dc6tog = double crochet 6 together

Notes:
stitch count is a multiple of 3+2
scarf is worked in turning rows
ch 1 does NOT count as a stitch
ch 3 does NOT counts as a stitch
inside the crochet pattern there are 4 size to choose from.  Child, Teen, Small Adult and Large Adult consecutively

Gauge:
US J or 6 mm Crochet Hook
16 st x 8 rows = 4”

Special Stitches:

Double Crochet 3 Together

  • YO, insert hook into specified st, YO draw through 2 loops
  • YO, insert hook into same st, YO, draw through 2 loops
  • YO, insert hook into same st, YO, draw through 2 loops
  • YO, draw through all loops on hook

Double Crochet 6 Together

  • YO, insert hook into specified st, YO draw through 2 loops
  • YO, insert hook into same st, YO, draw through 2 loops
  • YO, insert hook into same st, YO, draw through 2 loops
  • YO, insert hook into same st, YO draw through 2 loops
  • YO, insert hook into same st, YO, draw through 2 loops
  • YO, insert hook into same st, YO, draw through 2 loops
  • YO, draw through all loops on hook


Shop my Stores for the Lacey Scarf

You can find the premium copy of the Lacey Scarf Crochet Pattern from my Ravelry Store or my LoveCrafts Store for a small fee.


Find me, Jo of Jo’s Crafty Hook at the places listed below.

Email:  jo@joscraftyhook.com

Website

Facebook Group Jo’s Crafty Hookers

Facebook Group Jo’s Crafty Hook Designs

Facebook Page Jo’s Crafty Hook

Facebook Page:  Crochet Designer Community

Ravelry

LoveCrafts

Instagram

YouTube

Pinterest