Men’s Tool Belt Crochet Pattern

Do you make New Year’s resolutions?  Do you make them to help you start organizing things in your house, especially after you received gifts from the Holidays?  Well I am collaborating with Cosy Rosie UK in the New Years Resolutions Blog Hop where you can get a FREE pdf cop of my Men’s Tool Belt Crochet Pattern.

This post contains affiliate links.  If you make a purchase using these links I may receive compensation (at no added cost to you.)

Be sure to sign up to my Newsletter so you can be notified when this happens!  As a new subscriber you will receive a free pdf crochet pattern.  You can find out more about me and the steps you would need to follow for signing up on my Newsletter Incentive page on my website.

[yikes-mailchimp form=”1″]


During the New Years Resolutions Blog Hop you can get a new FREE pdf copy of a new designer each day starting at 8a EST until the next day at 7:59a EST.  The New Years Resolutions Blog Hop runs from January 1 -31, 2022.  Click on the image below to view the Roundup of each day’s FREE pdf copy of each designer’s crochet patterns.


You can get a FREE pdf copy of my Men’s Tool Belt Crochet Pattern on January 24, 2022 from 8a EST until January 25, 2022 at 7:59a EST. This is a great pattern for him to get organized when he works on a project.  He can put certain tools in the pockets that will be needed for his upcoming project.  You can even customize this crochet pattern for women too! I even designed a Kids Tool Belt!


Be sure to visit the Main Page of the New Years Resolutions Blog Hop by clicking of the button below on January 24, 2022 to get the Coupon Code needed to get the FREE pdf copy of the Men’s Tool Belt Crochet Pattern.  


Once you have received your Coupon Code click on the image below where you be directed to my crochet pattern at Ravelry.  During Checkout add your Coupon Code and you will receive the FREE pdf copy of my Men’s Tool Belt crochet pattern.



If you have missed any of the free daily crochet patterns or you don’t want to do all the blog hopping, there is a New Years Resolutions Blog Hop Bundle that you can purchase.  Inside the bundle you get all 31 pdf crochet patterns to help you meet your New Year’s Resolutions.  The bundle can be purchased for $14.95.  Click on the image below to check out or purchase the New Years Resolutions Blog Hop Bundle.


Thank you for stopping by Jo’s Crafty Hook!  I hope you have enjoyed the FREE crochet patterns from the New Year Organizational Roundup, the New Year’s Resolutions Blog Hop and the Scrap Busting Blog Hop during January 2022.

Be sure to come back by in February to check out all the great events that will be happening!  Also, be sure to sign up for my Newsletter so you don’t miss out!

As a new subscriber you will receive a free pdf crochet pattern.  You can find out more about me and the steps you would need to follow for signing up on my Newsletter Incentive page on my website.

[yikes-mailchimp form=”1″]


****************************************************

Men’s Tool Belt Free Crochet Pattern


There are not very many crochet patterns for men out there.  I recently designed an apron for men and it sparked an idea for this men’s tool belt design.  This is a great pattern for him to get organized when he works on a project.  He can put certain tools in the pockets that will be needed for his upcoming project.  You can even customize this crochet pattern for women too! 


You can find a premium copy of the Men’s Tool Belt at my Ravelry Store or LoveCrafts or my Etsy Shop that contain Picture Tutorials and Step-by-Step instructions.

****************************************************

I used Caron One Pound 16 oz/812 yd (1454 g/742 m)

Materials:

US Hook J/ 6 mm
500-600  yds of #4 Worsted Weight Yarn
Scissors
Tapestry Needle
Stitch Marker

Gauge:
 US Hook J/6 mm
 12 hbdc x 8 rows = 4”

Gauge Swatch: 
R1:  ch 14, hdc in 3rd ch from hook, hbdc in each st across.  turn (12 st)
R2:  ch 2, hbdc in each rem st across.  (12 st)
R3-R8:  Repeat R2

Abbreviations/Stitches Used:
ch = chain
sl st = slip stitch
fdc = foundation double crochet
rep = repeat
rem = remaining
SM = stitch marker

Special Stitches:
Herringbone Double Crochet:
1. yarn over, insert hook into the next stitch and pull up a loop (3 loops on hook)
2. pull first loop straight through the second (similar to a slip stitch)
3. yarn over, pull through 1 loop again. (2 loops on hook)
4.  yarn over and pull through both loops.

Notes:
* I used 2 strands of yarn held together to create a thicker tool belt.  
* the stitch count is a multiple of 6 if you want to customize the size of your tool belt.
* there are 2 options to choose from in creating the waist ties.
* ch 1 does not count as a st.
* ch 3 counts as the 1st dc.
* alt ch 2 counts as the 1st dc.
* be sure to count your stitches once and awhile.  

Video Tutorials:

Left Hand FDC here.
Left Hand HBDC here.
Right Hand FDC here.
Right Hand HBDC here.

Adding Waist Tie at the end of the row here.

****************************************************

Customizing:

The tool belt can be crocheted for anyone.  Below you will find the gauge broken down into inches for that perfect fit.

Step 1:
Measure the front side of the waist from 1 hip to the other.  This will be your main tool belt piece.

Step 2:
Using your measurements from Step 1, divide the amount of stitches needed in half, this will give you your waist tie measurements.

**If you would like to make the waist ties longer, be sure to add the amount of stitches needed before you begin crocheting the tool belt**

Step 3:
For the height of the tool belt, measure from the hips down to mid-thigh. This will decide the number of rows you add before the waist ties are added.

Step 4:
Use the gauge below to choose the number of rows needed to meet the tool belt height.

Step 5:
Choose which option of the tool belt you would like to make and move on to the pattern below.  Again, Option 1 adds waist ties right to the tool belt and Option 2 allows you to make them separately.

Gauge:
3 st x 2 rows = 1”
6 st x 4 rows = 2”
9 st x 6 rows = 3”
12 st x 8 rows = 4 “

****************************************************

You can find a premium copy of the Men’s Tool Belt at my Ravelry Store or LoveCrafts or my Etsy Shop that contain Picture Tutorials and Step-by-Step instructions.

Tool Belt Crochet Pattern:
There are 2 options on how to make the tool belt. 
Option 1 has the waist ties attached right to the tool belt. 
Option 2 has instructions for separate waist ties.


Option 1 Tool Belt with Waist Ties:
**Video Tutorial for adding the fdc row at ten end of the row here**

NOTE:  If you would like longer waist ties this is where you would need to do it.  See Customizing above.

fdc 45 and lay aside, leaving a short tail of yarn to attach to the tool belt.  (this is your 2nd waist tie that will be added on at R18). Fasten off.  

Alternative:  ch 45, leaving a small tail of yarn to attach to the tool belt.  Fasten off.


R1:  fdc 60 turn (60 dc)
Alternative:  ch 63, hbdc in the 4th ch from hook and each rem st across.  turn (60 hbdc)


R2:  alt ch 3 (or ch 3), hbdc in the next st and each rem st across.  turn (60 st)

R3-R16:  Repeat R2 do not turn after R16

R17:  ch 2, fdc 2nd ch from hook, fdc 44 more times.  turn (45 fdc)
Alternative:  ch 45.  turn.  (45 ch)


**Video Tutorial for doing fdc row at the end of the row here**

R18:  alt ch 3 (or ch 3), hbdc in each rem st until the end of the row.  attach the fdc you crocheted earlier by hbdc in the 1st st and each rem st across.  (150 st) 

Use the short tail of yarn and attach it to the tool belt.

Alternative:  hbdc in 4th ch from hook and each rem st until the end of the row.  attach the ch you crocheted earlier by hbdc in 1st st and each rem st across.  

Use the short tail of yarn and attach it to the tool belt.

Fasten off and weave in ends.  

****************************************************

 

Option 2 Tool Belt with Waist Ties:

R1:  fdc 60 turn (60 dc)
Alternative:  ch 63, dc in the 4th ch from hook and each rem st across.  turn (60 dc)

R2:  alt ch 3 (or ch 3), hbdc in the next st and each rem st across.  turn (60 st)

R3-R18:  Repeat R2 

Waist Ties:
Make 2
NOTE:  If you would like longer waist ties this is where you would need to do it.  See Customizing above.

Leave a long tail of yarn for attaching the waist tie to the tool belt.

R1:  fdc 45 turn (45 st)
Alternative:  ch 48, dc in the 4th ch from hook and each rem st across. turn  (45 st)

R2:  alt ch 3 (or ch 3) and hbdc in each rem st across.  (45 st)

If you did the alternative waist tie:
R3:  turn, ch 1, sc in same st and each rem st across.  (45 st)

Fasten off and weave in ends.

Repeat R1 & R2 for 2nd waist tie.

Waist Tie Assembly:

Step 1:
Place waist tie and tool belt RS up.

Step 2:
Line up rows 1 & 2 on the side of the tool belt and waist ties to both sides of R1 of the tool belt.

Step 3:
Sew waist tie to tool belt.

Fasten off and weave in ends.

Repeat Steps 1-3 on the other side of the tool belt.

****************************************************

Pocket:

R1:  fdc 42 turn (42 dc)
Alternative:  ch 45, dc in 4th ch from hook and each rem st across.  (42 dc)

R2:  alt ch 3 (or ch 3) and hbdc in each rem st across.  (42 st)

R3-R8:  Repeat R2

Leave a long tail of yarn for attaching 3 sides of the pocket to the tool belt. 

Fasten off and weave in ends.  

****************************************************

Hammer Holder:

Leaving a small tail of yarn for attaching the hammer holder to the tool belt.

R1:  fdc 12 turn (12 dc)
Alternative:  ch 15, dc in 4th ch from hook and each rem st across.  (12 dc)

R2:  alt ch 2 (or ch 3), hbdc in each rem st across.  (12 st)

R3:  Repeat R2

R4:  ch 1, sc in same st and each rem st across.  (12 st)

Leave a small tail of yarn for attaching the hammer holder to the tool belt.

Fasten off and weave in ends.  

****************************************************

Hammer Holder & Pocket Assembly:

Step 1:
Measure 1” from the side of the tool belt and place a SM on one side of the hammer holder.  Rep this for the other side of the hammer holder.

Step 2:
Using your small tail of yarn, attach the 2 sides of the hammer holder to the tool belt.

Fasten off and weave in ends.
****************************************************

Pocket

Step 1:
Measure 2” from the Hammer Holder and place your pocket where you would like to place it.

Step 2:
Place SM on both sides of where you would like to attach the pocket to the tool belt.


Step 3:
Using your long tail of yarn, sew 3 sides of the pocket onto the tool belt, leaving the top of the pocket open.

**Note:  you can sew the middle of the pocket to the tool belt to create 2 pockets instead of 1 big one**

Fasten off and weave in ends.

****************************************************

That’s it!  You have made the Men’s Tool Belt!  I would ❤️ to see your version!  You can tag me at any of my Social Media Sites using the hashtags listed below.

#menstoolbelt #menstoolbeltcrochetpattern #menstoolbeltpattern #joscraftyhook #joscraftyhookdesigns #handmadecrochetedcreations #jo_bear38

You can find another crochet pattern, the Working Mans Apron, just for him at my Ravelry Store or LoveCrafts or Etsy Shop.  This crochet pattern can be customized to fit your little man and any ladies as well.

**********************************************************

Find me, Jo of Jo’s Crafty Hook at the places listed below.

Website
Ravelry
Instagram
LoveCrafts
Etsy Shop
Facebook Group
Jo’s Crafty Hookers

Facebook Page Jo’s Crafty Hook
Facebook Page Jo’s Crafty Hook Designs
Pinterest
Twitter
YouTube
 Donations Accepted

Black Friday and Cyber Monday Sales

Do you like stocking up on crochet patterns during Black Friday and Cyber Monday?  I know I do!  In today’s post you will find 21+ Curated Crochet Designers and their Black Friday and Cyber Monday Sales.  You will find crochet patterns for all levels of crocheters!


Courtney of Creations by Courtney has gathered 21 crochet designers, including myself, and their  Black Friday Deals for Fiber Fans!   You will find things like:


As part of my contributions to Black Friday and Cyber Monday sales, I am offering 50% off of select crochet patterns from my Ravelry Store and Etsy Shop.  Below you will find all of the patterns you can get for 50% off!

Amy Pullover
Acacia Skirt
Autumn Hues Wrap
Child Size Diamond Arches Pocket Shawl
Diamond Arches Pocket Shawl
Diamonds Poncho
Fairland Cardigan
Fairland Sweater
Jaide Sweater Vest
O Holy Night Wrap
Pocket Full of Diamonds
Pocket Full of Diamonds Shawl
Star Lilies Beach Cover Up
Tulip Sweater Vest
Vee Pullover
Working Mens Apron
Wrapped in Diamonds
May be an image of 7 people and text that says 'JO'S CRAFTY HOOK Jo's Crafty Hooh BLACK FRIDAY & CYBER MONDAY SALE November 24-30, 2021'
Thank you for stopping by Jo’s Crafty Hook and for all your support!  I am thankful for YOU!  Happy Thanksgiving!

**********************************************************

Be sure to sign up to Jo’s Crafty Hook’s Newsletter and get this month’s FREE incentive for signing up!   When signing up you will get information about new pattern releases, blog posts, sales, blog hops and more!

[yikes-mailchimp form=”1″]

********************************************************


Check out the new look of the FREE PATTERNS menu here at Jo’s Crafty Hook!  You can now find crochet patterns faster and easier by picking from 1 of the 4 categories of free crochet patterns I have on my website!  The new categories are:  Accessories, Apparel, Fall & Winter Gear, and Stash Busters!  Who doesn’t LOVE a great, fun, and fast project?!!

Ravelry
Lovecraft
Etsy

*******************************************************************************

If you would like to make a donation to help me with the costs of running Jo’s Crafty Hook, any help would be greatly appreciated!  This way I can buy more yarn to make more handmade crochet creations, add more free crochet patterns to my website, pay the companies I use to run my website.


*******************************************************************************

Find me, Jo of Jo’s Crafty Hook, at the places listed below.

Website 

Ravelry

LoveCrafts 

Etsy Shop

Facebook Group:  Jo’s Crafty Hook-ers

Facebook Page Jos Crafty Hook

Facebook Page JosCraftyHookDesigns

Instagram    

Pinterest

Twitter

YouTube  

Donations Accepted

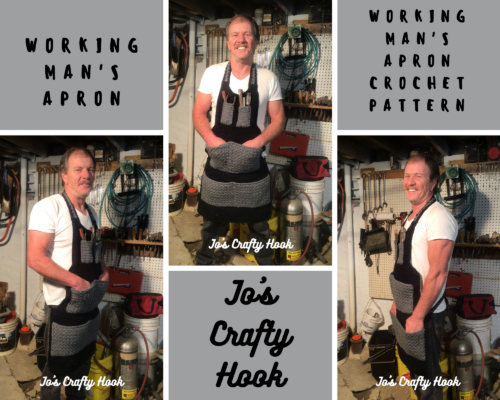
Working Man’s Apron Free Crochet Pattern

Working Man’s Apron Free Crochet Pattern

Thank you for stopping by Jo’s Crafty Hook.  In today’s post I am sharing with you one of my newest crochet designs, the Working Man’s Apron Free Crochet Pattern!

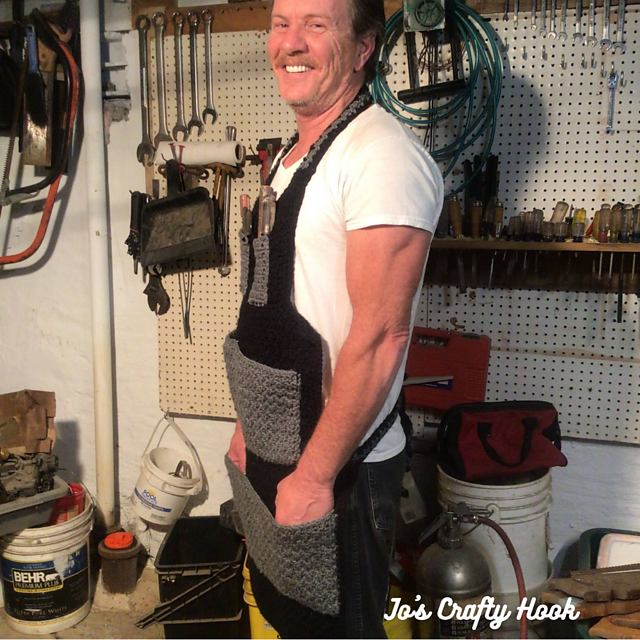
You don’t see a lot of crochet patterns for men.  My husband is always working in his garage and hunting around for his tools, so I thought this Working Man’s Apron would be the perfect thing Just for Him.

This post contains affiliate links.  If you make a purchase using these links I may receive compensation (at no added cost to you.)


While you are here be sure to sign up for my Newsletter where you will receive news about my New Crochet Pattern Releases, Collaborations, and MORE!  For signing up you will also get a FREE crochet pattern!

Information Needed to Crochet the Apron


I used WeCrochet/KnitPicks Brava #7 Bulky Weight.  136 yds/100 gram

Materials:
US Hook K/6.5 mm
340 yds of Cobblestone Heather
816 yds of Black
Scissors
Tapestry Needle
Stitch Markers

Gauge:
Hook US K/6.5 mm
12 st x 8 rows  = 4”

Finished Size:
44” tall
20” wide

The Working Man’s Apron can be very easily customized.  Inside the premium crochet pattern you will find step-by-step picture tutorials.  Also, inside the pattern you will find the inches broken down so you can choose how wide your apron is and how long it is.  Not only can you make this just for him, but it is a totally Unisex pattern.

You can get a PDF copy of the Ad-Free and the Premium crochet pattern that has step-by-step picture tutorials at my Ravelry Store or LoveCrafts Store or at my Etsy Shop.


Abbreviations/Stitches Used:
fsc = foundation single crochet
sc = single crochet
dc = double crochet
rep = repeat
ch = chain
sl st = slip stitch
MC = Main Color
CC = Contrasting Color
RS = Right Side
WS = Wrong Side

Special Stitches:
Foundation Single Crochet:  creates your foundation row at the same time as your first row of single crochet stitches.
Seed Stitch:  alternate sc and dc in the 1st row then you add a dc in the sc and a sc in the dc in the consecutive rows.

Notes:
alt ch 2 and counts as a dc.
ch 2 counts as a dc.
Corners consist of (sc, ch 1, sc) all in the same sp.
The pattern has a lot of pieces.  They are panels, pockets, and straps that will be sewn together.
The pieces may shrink due to the tightness of the stitch.  You may want to block it.
You can steam it or wash it and pin it down.

********************************************************

Customizing:

The apron can easily be customized to fit your working man.  Below I have supplied the gauges in 1” 2” 3” 4” and the rows needed for 1” 2” 3” 4”

1” = 3st x 2 rows
2” = 6 st x 4 rows
3” = 9 st x 6 rows
4” = 12 st x 8 rows

********************************************************

Working Man’s Apron Crochet Pattern:


Chest 10” x 8”

Using MC

fsc 30 turn  (30 sc)
alternative:  ch 31, sc in the 2nd ch from hook and each remaining st across.  (30 sc)

R1: ch 1, sc in the same sp, *dc in the next st, sc in the next st*  rep from * until last st, dc in last st.  turn (30 st)

R2-R16:  Repeat R1 do  not turn after R16

Move to the Border below

********************************************************

Middle 14” x 12”

fsc 42 turn (42 sc)
alternative:  ch 43, sc in the 2nd ch from hook and each remaining chain.  turn (42 sc)

R1: ch 1, sc in the same sp, *dc in the next st, sc in the next st*  rep from * until last st, dc in last st.  (42 st)

R2-R24:  Repeat R1.  Do not turn after R24

Move to Border below

********************************************************

Bottom 18” x 16”

fsc 54 (54 sc) turn
alternative:  ch 55, sc in the 2nd ch from hook and each remaining chain.  (54 sc)

R1:  ch 1, sc in the same sp, *dc in the next st, sc in the next st*  rep from * until last st, dc in last st.  (54 st)

R2-R32:  Repeat R1.  Do not turn after R32

Move to Border below

********************************************************


Chest Pockets 2” x 4”
(make 2)

Note:  For a tighter pocket, use sc only in width and height. 

Using CC

fsc 6 turn ( sc)
alternative:  ch 7, sc in the 2nd ch from hook and each remaining chain.  turn (6 sc)

R1:  ch 1, sc in the same sp, *dc in the next st, sc in the next st*  rep from * until last st, dc in last st.  (6 st)

R2-R8:  Repeat R1.  Do not turn after R8

Move to Border below

********************************************************

Middle Pocket 14” x 10”

fsc 42 turn (42 sc)
alternative:  ch 43, sc in the 2nd ch from hook and each remaining chain.  turn (42 sc)

R1: ch 1, sc in the same sp, *dc in the next st, sc in the next st*  rep from * until last st, dc in last st.  (42 st)

R2-R20:  Repeat R1.  Do not turn after R20

Move to Border below

********************************************************

Bottom Pocket 18” x 16”

fsc 54 turn (54 sc)
alternative:  ch 55, sc in the 2nd ch from hook and each remaining chain.  turn (54 sc)

R1:  ch 1, sc in the same sp, *dc in the next st, sc in the next st*  rep from * until last st, dc in last st.  turn (54 st)

R2-R24:  Repeat R1.  Do not turn after R24

Move to Border below

********************************************************

You can get a PDF copy of the Ad-Free and the Premium crochet pattern that has step-by-step picture tutorials at my Ravelry Store or LoveCrafts Store or at my Etsy Shop.

Border (RS):

Side 1:
ch 1, turn your work to the side and sc evenly down the sides st.  

Corner:
(sc, ch 1, sc) all in the last st.  

Bottom:
turn and sc evenly in the fsc row until the last st.  

Corner:
(sc, ch 1, sc) all in the last st.  

Side 2:
turn and sc evenly up the side of the until the last st.  

Corner:
(sc, ch 1, sc) all in the last st.  

Top:
turn and sc across until the last st.  (sc, ch 1, sc) all in the last st.

Fasten off and weave in ends.

********************************************************

Apron Border

R1:

Step 1:
Starting in any corner of the apron, attach yarn with a sl st in the corner st.

Step 2:

sc in the same sp as the sl st.  sc in each st around the apron until you come to a corner st.  (sc, ch 1, sc) all in the same st. 

Step 3:
Continue step 2 all the way around the apron, being sure to place the (sc, ch 1, sc) all in the corner st.

Step 4:
Repeat Step 3 until you come to the last st.  sc, ch 1 in the last st and sl st in th 1st st to join.

R2:  ch 1, sc in the same sp.  *sc in each st until you come to the corners, (sc, ch 1, sc) all in the ch-1 sp of the corner.  Rep from *around the apron until the last st, sc, ch 1 in the last st.  sl st in 1st st to join.  

********************************************************

Pieces Assembly

Step 1:
Line up the middle of the top piece to the middle of the middle piece.  You want to have the same amount of st on the left side as you do the right side.

Step 2:
Starting where your 2 pieces lined up, sew the RS of the bottom st to the RS of the top st.

Fasten off and weave in ends.

Repeat these steps for sewing the top to the middle piece and the middle to the bottom piece.

********************************************************


Neck Strap 10” x 2”

Neck Strap

When making your slip knot be sure to leave a long tail of yarn for attaching to the top part of your apron.

fsc 30 turn (30 sc)
alternative:  ch 31, sc in the 2nd ch from hook and each remaining st across.  turn  (30 sc)

R1:  ch 1, sc in the same sp, *dc in the next st, sc in the next st*  rep from * until last st, dc in last st.  (30 st)

R2-R3:  Repeat R1.  

R4:  ch 1, sc in the same sp and each st across.  (30 sc)

Fasten off and weave in ends.

For best results for assembling, sc in the end st on both ends of neck straps. 

Leave a long tail on 1 end for attaching to the apron.

********************************************************

Attaching Neck Strap

Step 1:
Line up the bottom corner of your strap piece to the corner of your top piece.

Step 2:
Starting where your 2 pieces lined up, sew the RS of the bottom st to the RS of the top st.

Fasten off and weave in ends.

Repeat Steps 1 & 2 on the other side of your top piece.

********************************************************

Waist Ties 20” x 1”
(make 2)

Waist Straps

fsc 60 turn (60 sc)
alternative:  ch 61, sc in 2nd ch from hook and each remaining st across.  turn  (60 sc)

R1:  ch 1, sc in the same sp, *dc in the next st, sc in the next st*  rep from * until last st, dc in last st.  (60 st)

R2:  Repeat R1.  

R3:  ch 1, sc in the same sp and each st across.  (60 sc)

Fasten off and weave in ends.

For best results for assembling, sc in the end st on both ends of waist ties. 

Leave a long tail on 1 end for attaching to the apron.

************************************************

Attaching Waist Straps

Step 1:
Line up the bottom corner of your strap piece to the corner of your middle piece where the middle and bottom pieces connect.

Step 2:
Starting at the top of your end piece of the strap line up the st evenly.

Step 3:
Sew the RS of your end piece of your strap to RS of the middle piece.  Do NOT fasten off.

Step 4:
Sew the RS of the bottom of your strap to the RS of the top of your bottom piece, being sure to line up your st evenly.

Fasten off and weave in ends.

Repeat Steps 1-4 on the other side of your apron.

********************************************************

Pocket Assembly

Step 1:
Place your pockets where you would like to sew them on, being sure to place the WS of your pockets to the RS of your top piece.

Step 2:
Line up the top, sides, and bottom of your pockets to the corresponding rows of the top piece.

Step 3:
Sew from one of the top corners down to the bottom corner, across the bottom, and up to the next corner. You will leave the top of your pocket open.

Repeat Steps 1-3 for each piece and pockets

Fasten off and weave in ends.

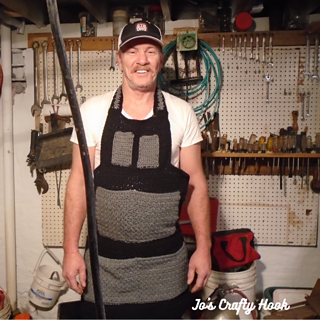
Finished Working Man’s Apron


********************************************************

Again, thank you for stopping by Jo’s Crafty Hook.  I would LOVE to see your version of the Working Man’s Apron!!  You can tag me at any social media links below.

Also be sure to check out my Home Page, it features all the blog hops and events that are happening now or will be coming soon!

While you are there be sure to sign up for my Newsletter where you will receive news about my New Crochet Pattern Releases, Collaborations, and MORE!  For signing up you will also get a FREE crochet pattern!

********************************************************

Find me, Jo of Jo’s Crafty Hook at the places listed below.

Email:  j.o@joscraftyhook.com

Website

Facebook Group Jo’s Crafty Hookers

Facebook Group Jo’s Crafty Hook Designs

Facebook Page Jo’s Crafty Hook

Facebook Page:  Crochet Designer Community

Ravelry

LoveCrafts

Etsy

Instagram

YouTube

Pinterest

Donations Accepted

Tips on How to Spend Your Vacation as a Family During School Breaks

In today’s post Joyce Wilson of Teach Sparks is sharing some tips on how to spend your vacation as a family during school breaks.  With Thanksgiving and Christmas right around the corner these tips really do come in handy especially when dealing with Covid-19.  As someone who crochets, I remember teaching my daughter how to crochet.  When you spend time at home during your child’s school vacations, teaching them how to crochet becomes a skill they can put to use during these times.

Tips on How to Spend Your Vacation as a Family During School Breaks

This post contains affiliate links.  If you make a purchase using these links I may receive compensation (at no added cost to you.)


Photo on Pixabay

With school breaks coming up, you need to figure out the most incredible ways of spending quality time with your family. Whether you choose to stay at home and teach your kids some algebra or take them to a private island abroad, the crucial thing should be to spend time together as a family. While planning a family vacation is one of the easiest ways to get stressed, thanks to the logistics involved, the good thing is that it’s doable. That’s why this article outlines a few tips for amazing family vacations. 

Travel to Your Desired Destination

Traveling for a vacation used to be a to-die-for thing until the pandemic hit. Even so, it is still possible to travel to your desired destination without necessarily jeopardizing the health of your loved ones. When traveling amid the pandemic, consider the following tips: 

  • Choose COVID-19 compliant establishments – Following the directive of the federal government, most hotels are now compliant with the COVID-19 safety measures. This means that by checking in such hotels, your chances of enjoying yourself while keeping safe are high. 
  • Minimize visiting public places – While the essence of traveling for vacation is probably to mingle with other people and see the other side of the world, the pandemic kind of limits that now. However, you can still visit recreational places such as parks and museums with strict adherence to COVID-19 safety measures. 
  • Observe safety measures – Whether your whole family has been vaccinated or not, you still face the risk of contracting and even transmitting the virus to others. To avoid this, ensure you wear masks and observe social distancing in public places. Also, be sure to sanitize your hands always and be on the lookout for possible signs of infection.

Make Your Stay at Home Worthwhile

During these pandemic times, staying at home is, so far, one of the surefire ways to avoid contracting or spreading the virus. This doesn’t mean your holidays have to be boring. There’s a bunch of exciting activities you can engage in as a family and strengthen your bonds. For instance, if you are a large family, you can split into teams and play games such as soccer and tennis. Other fun activities include baking, gardening, playing with cards, making a holiday tree, painting, creating a rainbow using crayons, and playing hide-and-seek.

Outdoor Activities for Holidays 

Outdoor activities are not only enjoyable but also minimize your risk of COVID-19, thanks to the abundance of fresh air. If you decide to spend your vacation at home, outdoor activities such as playing games and building structures should be on your to-do list.

Safety Tips During Holidays

Although outdoor activities are awesome, they also come with risks such as injuries. This means that you should be extra careful to keep your family safe during the school break. Safety tips include: 

  • Warning your loved ones about the possible risks involved in the activities.
  • Putting limits on the extent of exertion when it comes to games such as wrestling.
  • If you’re exploring in nature, a child-friendly smartwatch has safety features like a GPS locator. 
  • Playing outside only when the weather is safe.

In case you’re traveling for vacation, your home may be susceptible to burglary and vandalism, especially if no one is staying behind. To enhance home safety, consider installing a fence around your property. 

Typically, if you want to install a fence, search “fencing company near me” to contact a local contractor who can get the job done. To make a good hire, be sure to check out factors such as online reviews, company credentials, insurance status, the experience of contractors, and the cost of installation. Take note that the cost of fencing your home depends on things such as the type of material used, location, and size of the fence.

Conclusion

If you intend to travel for vacation as a family, use the tips mentioned in this article to have an awesome experience while staying safe from COVID. Family travels are always a great way to create heartwarming memories.

**********************************************************

In the part of the article where Joyce talks about making your stay at home worthwhile, I have a friend who has 5 kids.  Each kids has learned a different skill and they do these things while staying at home during school vacations.  Each child has learned different skills. They have learned crochet, baking, cooking, mechanics, and sewing.

I previously released my free crochet pattern for the Christmas Star Ornaments.  During testing, one of my testers’ daughter wanted to crochet the star as well.  Below you can find pics of my friend’s daughter crocheting her Christmas Star Ornament.

I hope you find Joyce’s tips on how to spend your vacation as a family during school breaks helpful.  Whether it be Thanksgiving or Christmas break these tips are perfect when dealing with Covid-19 or time of the year.  Whether it be crocheting, baking, cooking, mechanics, sewing or whatever things you would like to do as a family.  Remember to be safe in whatever you do together as a family.

Visit Teacher Spark to find more ideas on how to spark your child’s imagination.  You can find ideas like Creativity, Math Motivation, Reading to spark your child’s imagination.

**********************************************************

Find me, Jo of Jo’s Crafty Hook Designs, at the places listed below.

Website 

Ravelry

LoveCrafts 

Etsy Shop

Facebook Group Jo’s Crafty Hookers

Facebook Page Jos Crafty Hook

Facebook Page JosCraftyHookDesigns

Instagram    

Pinterest

Twitter

YouTube  

Donations Accepted
O Holy Night Wrap

O Holy Night Wrap Crochet Pattern

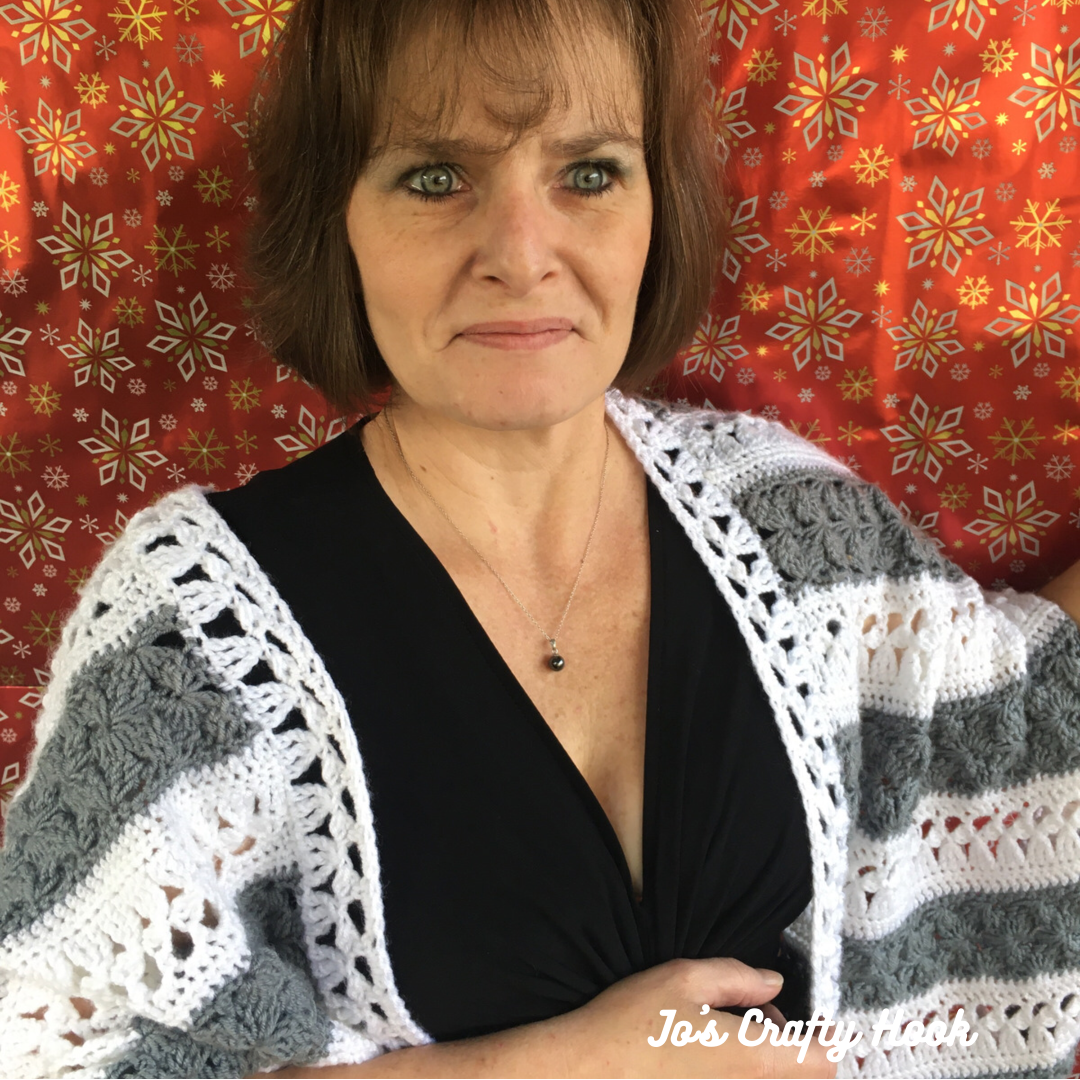
The O Holy Night Wrap Crochet Pattern is the perfect make to crochet for Christmas and the Holidays.  We who like to crochet love to get a head start for those gift giving months.

This post contains affiliate links.  

If you have not signed up for my Newsletter, today would be the perfect time!  When you sign up to my Newsletter you will get a FREE premium crochet pattern from me!

The inspiration behind the design of the wrap is the Christmas Song, O Holy Night.

“O holy night, the stars are brightly shining, It is the night of the dear Saviour’s birth; Long lay the world in sin and error pining, ‘Till he appeared and the soul felt its worth. A thrill of hope the weary world rejoices, For yonder breaks a new and glorious morn; Chorus Fall on your knees, Oh hear the angel voices! O night divine!”

Information about the Pattern

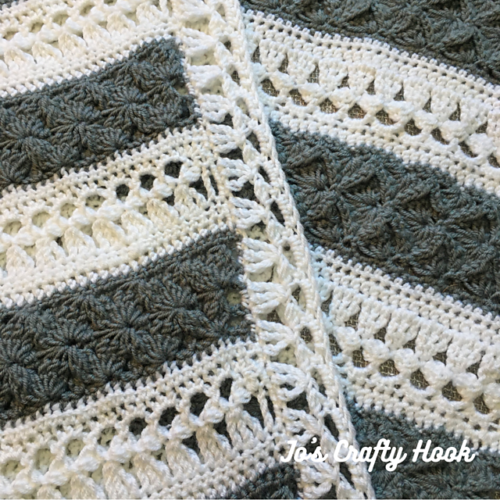
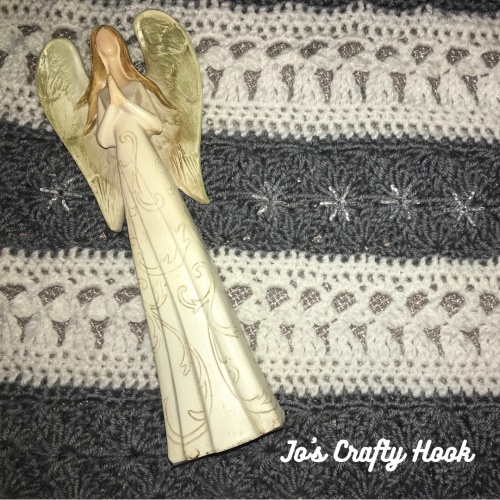
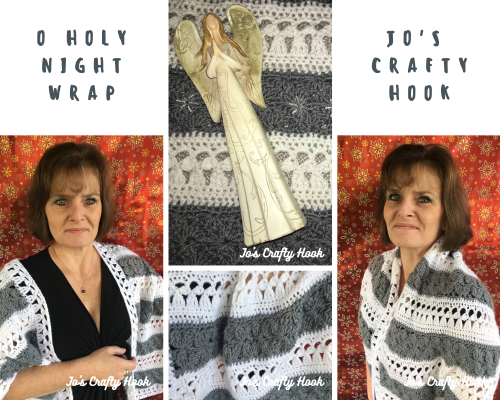
The O Holy Night Wrap uses 2 different types of stitches that create Star and Angel Motifs. The stitches used are my own stitch design, the Lilac Cluster Stitch, and the Pansy Stitch.

Inside the premium crochet pattern you will find my step-by-step picture tutorials and video tutorials to help you every step of the way.

The wrap crochet pattern comes with One Size instructions, but there is information inside that pattern that makes it easily customizable to fit your style, size, and color(s).

I used Knit Picks Brava Sport Weight Yarn in 2 colors, gray and white. I used: 800 yds in White and 560 yds in Gray.

Ad-Free Premium Copy

The O Holy Night Wrap Crochet Pattern can be found at all of my stores, for a small fee, if you would like to get a copy and make one for yourself or family or friends.


Thank you for stopping  by Jo’s Crafty Hook!

**********************************************************

You can find some great FREE Crochet Pattern on my website.  You will find Accessories, Apparel, Hats & Scarves, and Stash Busters.

Also, to help you find out what is on sale, I have created my own Sales Page for you to take advantage of some awesome deals!

You will also find my crochet patterns at my Ravelry Store, LoveCrafts, and my Etsy Shop.

If you would like to see a new type of design; see more tips; more helpful articles; or anything else, please feel free to email me:  joeybaird@aol.com

Find me, Jo of Jo’s Crafty Hook at the places listed below.

Email:  joeybaird@aol.com

Linktree

Website

Facebook Group Jo’s Crafty Hookers

Facebook Group Jo’s Crafty Hook Designs

Facebook Page Jo’s Crafty Hook

Facebook Page:  Crochet Designer Community

Ravelry

LoveCrafts

Etsy

Instagram

YouTube

Pinterest

Donations Accepted

My Voice about Period Poverty

In May I added my voice about period poverty across Africa and the United States in my blog post about Yarn for Menstrual Health  It is a campaign started Morine of Morine’s Shop and the African Girl Foundation.  #YarnForMenstrualHealth is an awareness campaign whose aim is to normalize conversation on menstrual health.  My story as a young girl who knew nothing about menses or how to pay for sanitary napkins hit home when I seen the article that LoveCrafts did last year.

This post contains affiliate links.  If you make a purchase using these links I may receive compensation (at no added cost to you.)

#YarnForMenstrualHealth also raise funds to equip girls in need with reusable sanitary kits. Each kit goes for $10 and consists of 4 reusable pads and washing soap to last every girl an entire year!

Be sure to sign up for my Newsletter while you are here at my website.  As a new subscriber you will receive $3 off to be used at my Ravelry store, news about blog posts, upcoming sales, new free crochet patterns, giveaways and more!


[yikes-mailchimp form=”1″]


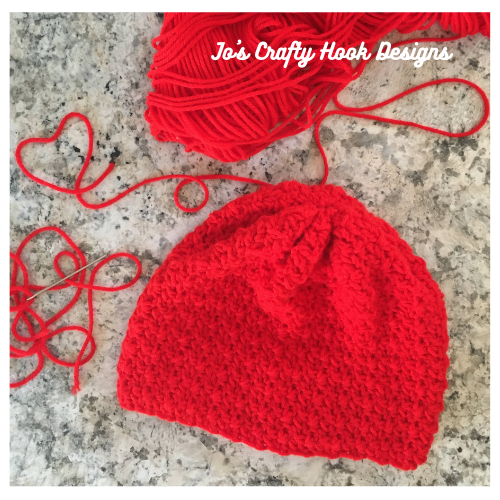
What does this have to do with Crochet, you ask??  Her group would knit and crochet 1000 hats to create awareness regarding the unhygienic circumstances most school girls across Kenya endure during their menses. I decided to raise funds to help this organization by designing a beanie, the Wattle Stitch Beanie, and donation part of the sale proceeds to the #YarnforMenstrualHealth campaign.

Wattle Stitch Beanie


I decided to add my voice about period poverty.   I will be speaking out about what I went through went I first started my period and how periods were never mentioned in a household full of 8 women and young girls.  I never seen any sanitary napkins and my family never taught me about what to expect when I first got my period either.  I want to add my voice about period poverty because I lived in a household of 25 people because we didn’t have the resources as a family of 3 to live by ourselves.  You can read more of my story on my website.


I was approached by Morine last week to add my voice about period poverty, the Voices by AGF event that is running from October 11, 2021 until November 2021.  I will be going live on the African Girls Foundation Instagram page, @africangirlfoundation October 19, 2021 to tell my story and to share more about myself and my crochet business.  I will be going live at 12p EST to talk and then I will stay on their Instagram page to answer any questions and reply to other people’s stories.  You can find me at the African Girls Foundation’s Instagram from 12p – 5p on October 19, 2021.


Again, I will be going live at 12p EST to talk and then I will stay on their Instagram page to answer any questions and reply to other people’s stories.  You can find me at the African Girls Foundation’s Instagram from 12p – 5p on October 19, 2021.  So please be sure to stop by.

**********************************************************

Find me, Jo of Jo’s Crafty Hook Designs, at the places listed below.

Website 

Ravelry

LoveCrafts 

Etsy Shop

Facebook Page Jos Crafty Hook

Facebook Page JosCraftyHookDesigns

Instagram    

Pinterest

Twitter

YouTube  

Donations Accepted
**********************************************************


Sweet Georgia Clutch Free Crochet Pattern

In today’s post I wanted to share with you my Sweet Georgia Clutch Free crochet pattern.  I had some really great yarn left over from a testing I took part in a couple of years ago for Knotions Magazine.  I didn’t want to waste this gorgeous yarn so I held on to it for awhile!  Do you hang on to your scraps of yarn for 2 years or more?? 

This post contains affiliate links.  If you make a purchase using these links I may receive compensation (at no added cost to you.)


I am SO excited to be collaborating with Veronika of Blue Star Crochet and 19 other crochet designers in the 3rd Week of the Last Minute Crochet Gifts Giveaway!  Week 3, the last week, runs from 10/18-24. 2021.  The giveaway starts 10/18/21 at 0:00a in the UK time zone or at 7p on 10/17/21.

I will be giving away a free pdf copy of my Sweet Georgia Clutch crochet pattern.  There are also 20 other crochet ideas that would be perfect for those last minute Christmas or holiday gifts for your family and friends!


Sweet Georgia Clutch – Jo’s Crafty Hook


You can download my free pdf copy of the Sweet Georgia Clutch as part of the Last Minute Crochet Gifts Pattern Giveaway from Ravelry using the button below.  Starting 10/18/21 at 0:00a the UK Time Zone or 10/17/21 at 7p EST, use the Coupon Code: CROCHETGIFTS21


To got back to the Last Minute Crochet Gifts Pattern Giveaway hosted by Blue Star Crochet and get the rest of the free crochet patterns you like click on the button below.


Thank you for stopping by to collect all your last minute crochet gift ideas from ALL the awe-some crochet designers that contributed this year!  I hope you have a Blessed Thanksgiving, a Merry Christmas, and Happy Holiday!

**********************************************************

If you prefer to add the Ad-Free Version, for a small free, of the Sweet Georgia Clutch Crochet Pattern to your Ravelry Library, click on the picture below.


I used 100 yards of Sweet Georgia Superwash SK (100% superwash merino, 256 yds [234m]/4oz [115g]) in the color Mink

Materials:

100 yards of 3 Ply Light or DK Weight Yarn
US G Hook or 4mm
Scissors
Tapestry Needle                                                                 

Size:
Closed: 4” tall x 8” wide
Open: 8” tall x 8” wide

Stitches Used/Abbreviations: 
ch = chain US G Hook or 4 mm
sc = single crochet
dc = double crochet
sp = space
ws = wattle stitch

Gauge:
US G Crochet Hook or 4 mm
21 st x 14 rows = 4″
7 ws x 14 rows = 4:

Notes:
The clutch is worked in the round until the flap, then you will turn your work and work in rows.
Wattle Stitch adds 1 stitch to the stitch count.

Special Stitches:
Wattle Stitch – consists of (sc, ch 1, dc) all in the same stitch.

Gauge Swatch:
Measures 4” x 4”

R1:  ch 20, sc in 2nd chain from hook and each remaining st across.  Turn  (19 sc)

R2:  ch 1, ws in same sp, *sk 2 st, ws in next st*  repeat from * to * until last st.  (7 ws)

R3:  ch 1 and turn.  ws in each ch-1 sp across.  (7 ws)

R4-R14:  Repeat R3

**Be aware that different types of yarn differ in thicknesses, so you may need to go up or down a hook size or change type of yarn being used**

**********************************************************

Clutch Crochet Pattern:

R1:  Chain 37,  sc in 2nd chain from hook, sc in same space.  2 sc in next st, sc in the next 32 sts, 2 sc in next st, 2 sc in the last st.  On the other side of the chain, 2 sc in 1st st, 2 sc in next st, sc in the next 32 sts, 2 sc in the next st, and 2 sc in the last st. (bottom of 1st sc).  sl st in 1st st to join.  (80 sc) total

R2: ch 1 and (sc, ch 1, dc) all in the same st (ws made), *sk 2 st, ws in next st* Repeat from * to * until the last 2 st.  sk 1 st and sl st in 1st sc to join.  (27 ws & 81 st)

**your st count will increase by 1 after R2**

R3:  ch 1, turn, and ws in 1st ch-1 sp.  ws in each ch-1 sp around.  sl st in 1st sc to join.  (27 ws)

R4-R14:  Repeat R3

Continue to the Flap part of the clutch.

**********************************************************

Flap Pattern:

R15-25:  ch 1, turn, and ws in 1st ch-1 sp.  ws in the next 12 ch-1 sp across.  Turn (13 ws)

Fasten off and weave in your ends.

Closure:

There are so many ways you can add something to keep your clutch closed.

A button…a snap…a magnet…sew on a flower…and SO many more!

How will you close yours??  Show me by sharing your version on any of my Social Media Sites listed below!

#sweetgeorgiaclutch #joscraftyhookdesigns #joscraftyhook #handmadecrochetedcreations #jo_bear38

**********************************************************

You can find other crochet patterns for my Handbags and Clutches at my Ravelry Store or Etsy Shop.

Cream Pop Handbag & Clutch


Jo’s Boat Tote

Garden Tote

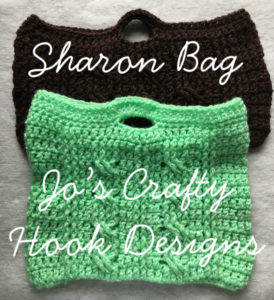
Sharon Bag Crochet Pattern
Sharon Bag

You can find more of my crochet designs at any of the places below:

Ravelry

LoveCrafts 

Etsy Shop

**********************************************************

Find me, Jo of Jo’s Crafty Hook Designs, at the places listed below.

Website 

Ravelry

LoveCrafts 

Etsy Shop

Facebook Page Jos Crafty Hook

Facebook Page JosCraftyHookDesigns

Instagram    

Pinterest

Twitter

YouTube  

Donations Accepted
**********************************************************

Christmas Star Ornaments Free Crochet Pattern

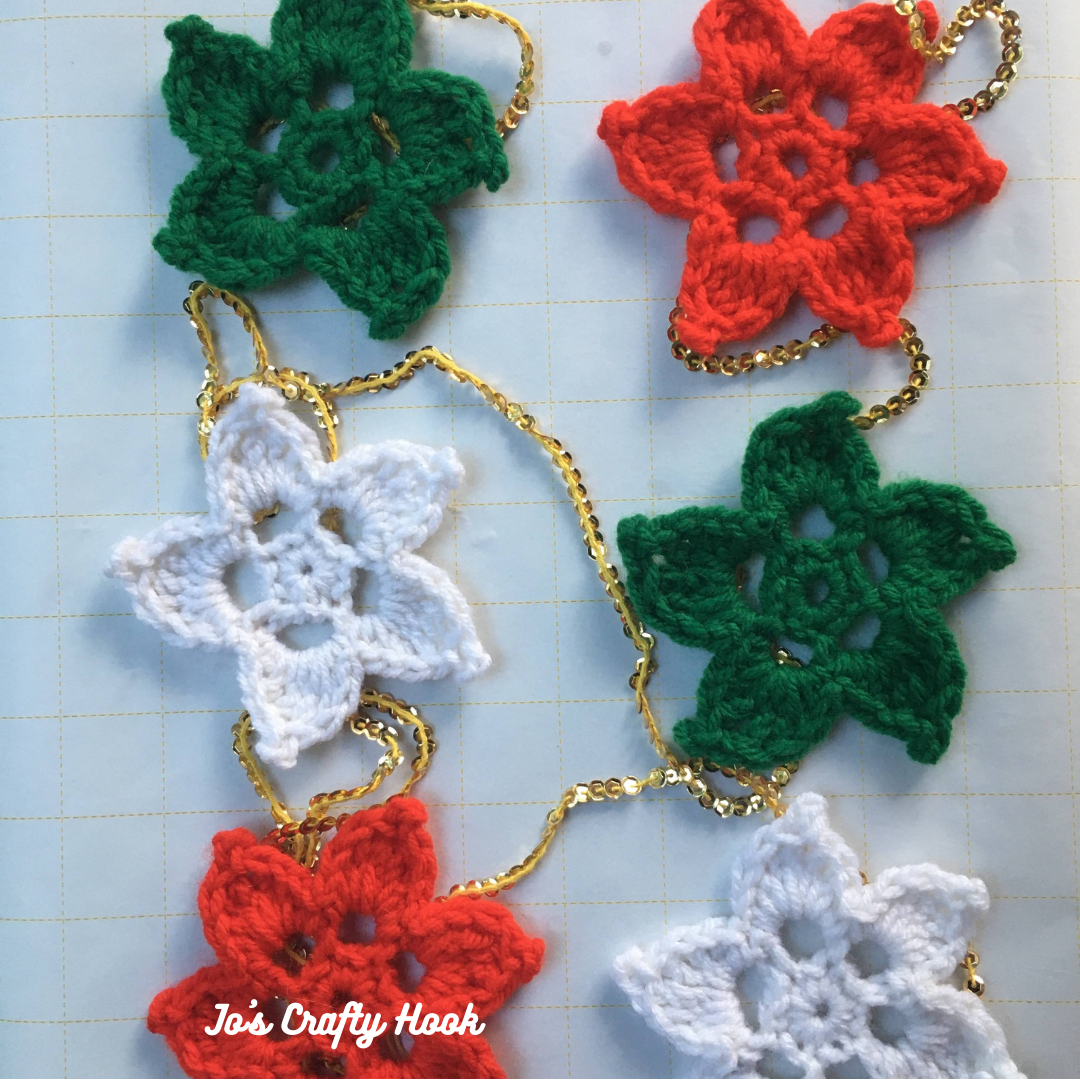
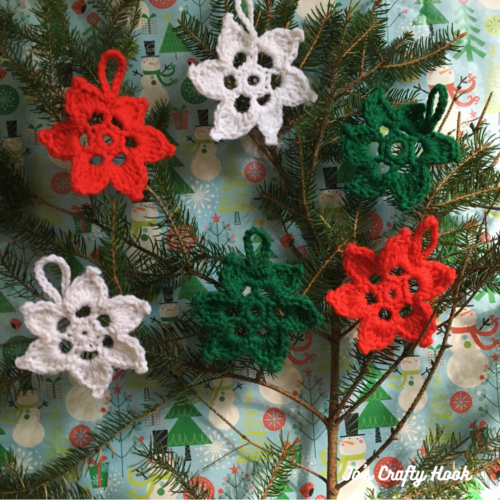
With the holidays right around the corner I want to share with you the Christmas Star Ornaments Free Crochet Pattern.  Some people have started making their Christmas items.  I got to say I am actually ahead of my designing phase!  🙂

This post contains affiliate links.  If you make a purchase using these links I may receive compensation (at no added cost to you.)


Usually I am running behind on my holiday designs.  I have gotten a little bit better about doing my pattern testing before everyone gets started on their Christmas gifts and designs.   But, I am designing Fall and Christmas Circle Table Runners right now.  The Fall one is definitely a lot late, so that will have to wait until next year.  🙂

I designed a baby blanket for the 2nd year of the Preemie Crochet Challenge 2021, hosted by Sunflower Cottage Crochet.  The pattern is called Twinkle Twinkle Little Star Baby Blanket and I used stars in the design. You can find free and paid crochet patterns for the last 2 years of preemie crochet challenges.  I decided to use the star pattern for these cute little Christmas Ornaments.  There is no gauge to follow.  You can use these mini designs for gift giving, gift decorations, stocking stuffers and more!  You can use any type of yarn you like when crocheting these stars.  

If you prefer you can find Step-by-Step picture tutorials and different versions of the stars inside the Ad-Free PDF crochet pattern.  

********************************************************

Christmas Star Ornaments Crochet Pattern:


Skill Level:
Beginner
US Terms

Yarn Used:
I used Red Heart Super Saver in 3 different colors.
Weight: Medium (4)  Contents: 100% acrylic  Skein Weight: 7 oz. / 198 g  Yardage: 364 yd. / 333 m

 Materials:
US Hook H or 5 mm
50-75 yds of 4 ply Worsted or Aran Weight Yarn
Scissors
Tapestry Needle

Abbreviations:
ch = chain
sc = single crochet
dc = double crochet
hdc = half double crochet
trc = triple crochet
sl st = slip stitch
sp = space

  • Notes:
  • You can use any type of yarn you want to crochet the stars.
  • There are 2 patterns, 1 for a 5 point star and 1 for a 6 point star.
  • The stars are worked from the center out.
  • The stars are worked in the round.
  • There are Step-by-Step Picture Tutorial

Special Stitches:
Picot – ch 3, sl st in the 3rd ch from hook.

Gauge:
None needed

********************************************************

5 Pointed Star

R1:  ch 2, 10 sc in the 2nd ch from hook.  sl st in 1st st to join.  (10 sc)

R2:  ch 1 and sc in same st.  *ch 4, sk next st, sc in next st* repeat around.  sl st in 1st st to join.  (5 sc & 5 ch-4 sp)

R3:  sl st in 1st ch-4 sp, *(sc, hdc, dc, 2 trc, ch 3, sl st in top of trc (picot made), trc, dc, hdc, sc) all in the same ch-4 sp* repeat in each ch-4 sp around.  sl st in 1st st to join.  (5 points)

Fasten off and weave in your ends.

********************************************************

Loop for Hanging:

Step 1:
With a piece of yarn, with a long tail attached, ch 15, sl st and fasten off.

Step 2:
Turn the 5 Point Star to the back side and attach 1 side of the yarn then the other through the back stitches.

Step 3:
Make sure the chain is straight before tying the string into a knot.  Tie the chain into a knot.

Fasten off and weave in ends.

********************************************************

How to crochet the 6 point Stars.

6 Pointed Star

R1:  ch 2, 12 sc in the 2nd ch from hook.  sl st in 1st st to join.  (12 sc)

R2:  ch 1 and sc in same st.  *ch 4, sk next st, sc in next st* repeat around.  sl st in 1st st to join.  (6 sc & 6 ch-4 sp)

R3:  sl st in 1st ch-4 sp, *(sc, hdc, dc, 2 trc, ch 3, sl st in top of trc (picot made), trc, dc, hdc, sc) all in the same ch-4 sp* repeat in each ch-4 sp around. Do not join.  (6 points)

********************************************************

Chain for Hanging:

Ch 15 after last sc made, sl st in 1st sc to join.

Fasten off and weave in your ends.

********************************************************


That’s it!  You have made the Christmas Star Ornaments!  You can make more in any color or colors you prefer!  I would ❤️ to see your version!  You can tag me at any of my Social Media Sites listed below.

#christmasstarornaments #christmasstarornamentscrochetpattern #christmasstarcrochetpattern #joscraftyhook #joscraftyhookdesign #handmadecrochetedcreations #jo_bear38


There are SO many ways to embellish the Stars.  You can add beads, make them 2 different colors, add them to gifts, or just hang them in your tree.  You can find the versions my testers have done inside the Ad-Free PDF crochet pattern.  They did an awesome job!

********************************************************

Find me, Jo of Jo’s Crafty Hook & Jo’s Crafty Hook Designs, at the places listed below.

Website 

Ravelry

LoveCrafts 

Etsy Shop

Facebook Page Jos Crafty Hook

Facebook Page JosCraftyHookDesigns

Instagram    

Pinterest

Twitter

YouTube  

Donations Accepted
Sunflower Applique Free Crochet Pattern

Sunflower Applique Free Crochet Pattern

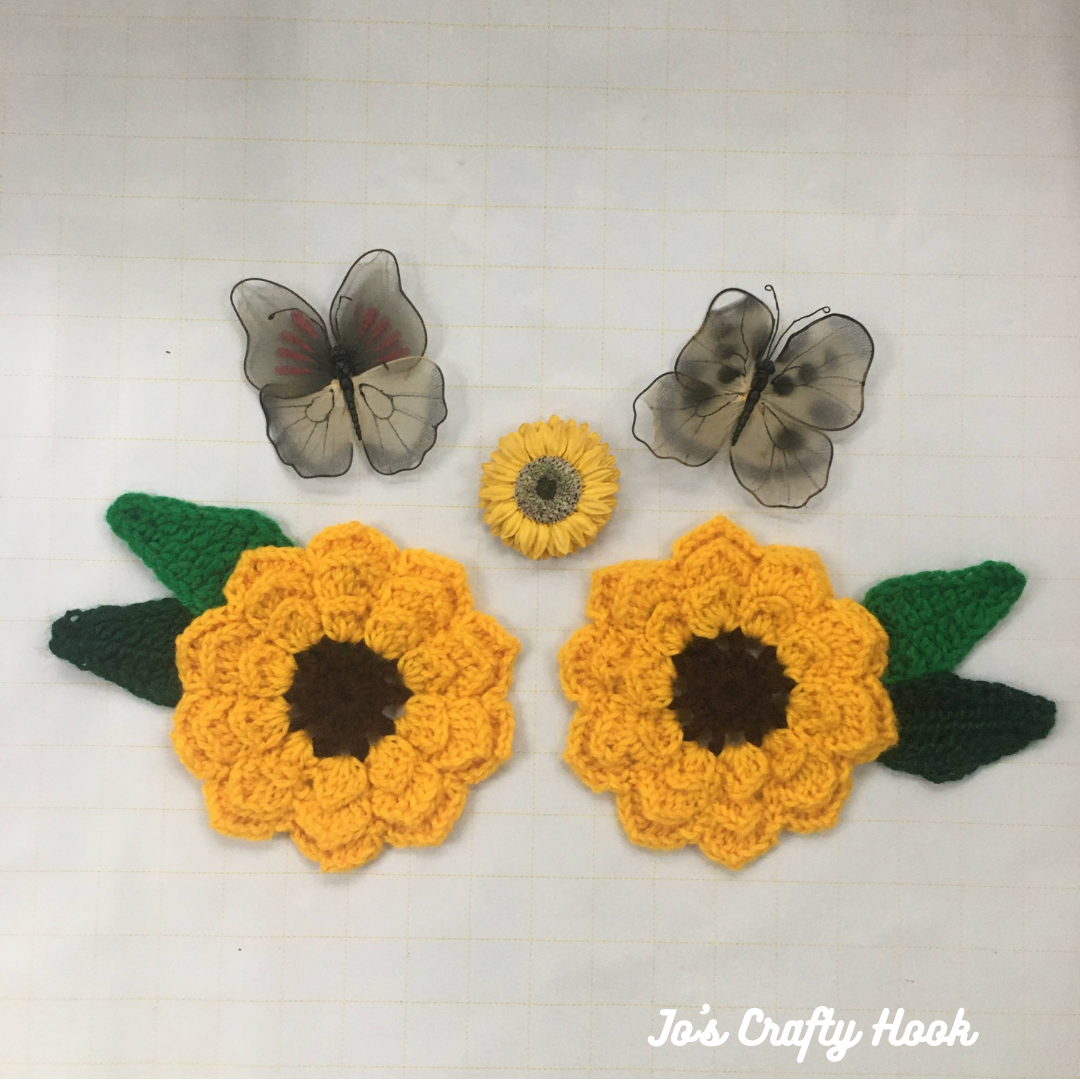
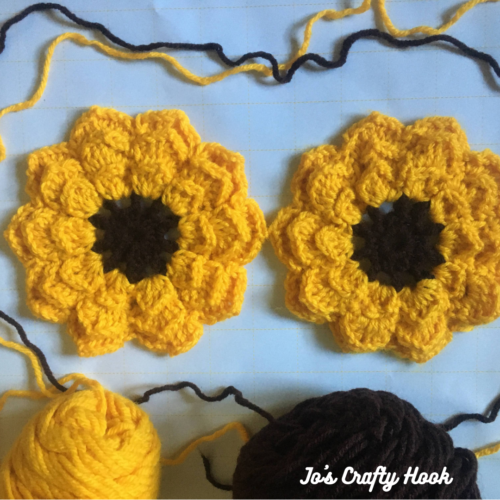
Do you like to add embellishments to liven up your wardrobe, headbands, table decorations, or anything else?  Well I have the perfect FREE crochet pattern for flowers just for you, my Sunflower Appliques Free Crochet Pattern.

This post contains affiliate links.  

The crochet sunflower appliques can be added to any holiday table decorations.  You can add them to designs such as scarves, handbags, place mats, and more.

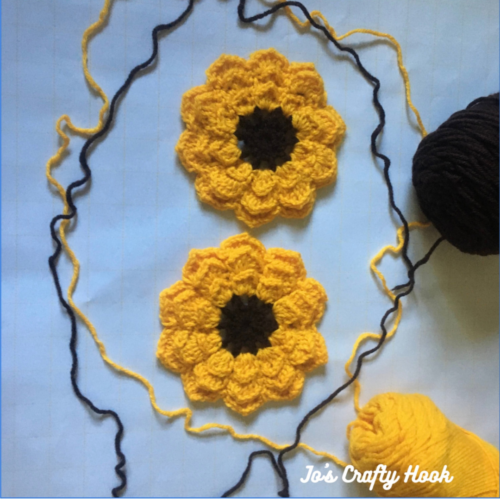
The flower design does not need to be crocheted just for Autumn, they can add flair to anything in any season.  My crochet pattern testers made their appliques in different colors from Autumn and different yarn weights as you can see below.

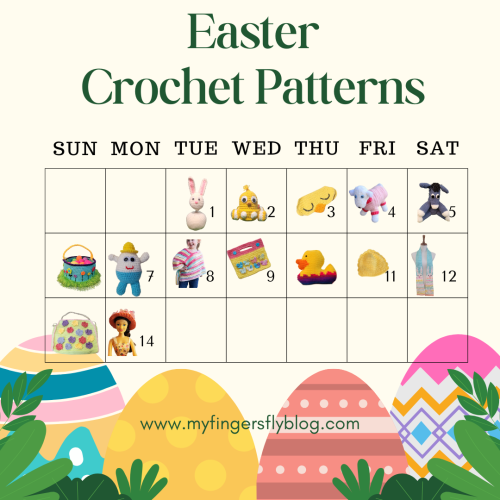
Easter Advent Calendar Event hosted by My Fingers Fly

The Easter Advent Calendar Event runs from April 1-14, 2025 and features free crochet patterns for adorable and cute crochet patterns for Chicks, Easter Basket, Eggs and so much more!

April 13th – Easter Advent FREE Home Decor Crochet Patterns

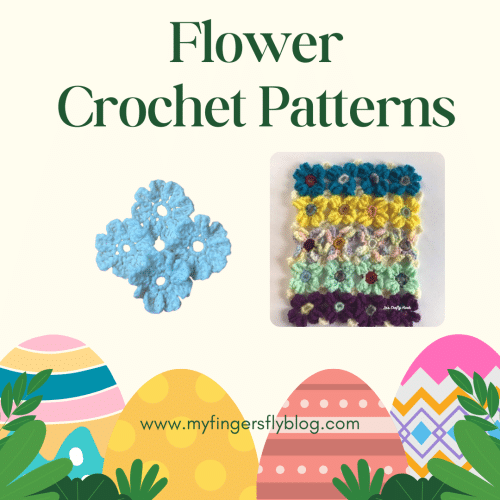
My Mae’s Flowers Crochet Pattern is being featured April 13th as part of the Flowers day and the FREE crochet pattern can be found below.

You will find more FREE Flower crochet patterns:

Peony Flower Free Crochet Pattern – Jo’s Crafty Hook

Mae’s Flowers Free Crochet Pattern – Jo’s Crafty Hook

Mae’s Flower


Spring Flowers Crochet Pattern – ViVaCrochet
Floral Handbag Crochet Pattern – My Fingers Fly
Free Crochet Blossom Flower Pattern – Pocket Yarnlings
Snowdrop Crochet Pattern – Concrete Gems Crochet
Arche de Fleurs Planter Holder Crochet Pattern-Dreams in Yarn
May Flower Coasters Crochet Pattern – Marsha YarnDoodles
Heart Flower Cloth Crochet Pattern – Marsha YarnDoodles

********************************************************

Ad-Free Premium Copy

If you would like to purchase a copy of an Ad-Free pdf of the Sunflower Applique Crochet Pattern with step by step pictures, it can be found for $2 at my Ravelry Store

Sunflower Applique Free Crochet Pattern
Information Needed

Materials:
US J Crochet Hook or 6 mm
MC = 100 yds of Worsted/Aran Weight Yarn
CC = 2 yds of Worsted/Aran Weight Yarn
Scissors
Tapestry Needle

Abbreviations/Stitches Used:
ch = chain
sc = single crochet
sp = space
sl st = slip stitch

Finished Sunflower 6”

Notes:
I used 2 colors for my flower, but you can use 1 or more.
The flower is worked in the round.
The petals are worked in the chain spaces.
You can use any type of yarn to crochet the sunflower.


********************************************************

R1: Make a magic circle, ch 1, 20 sc in the magic circle, pull magic circle closed and sl st in 1st sc to join.  20 sc

R2: ch1, sc in the same stitch, *ch 3, skip the next stitch, sc in the next st*  Repeat from * until you have 10 ch-3 sp, sl st into 1st sc to join.  (10 ch-3 sp) 

Change to Main Color (Optional)

R3: *(sc, 2 dc, ch 2, 2 dc, sc) all in the ch-3 space*  Repeat from * until you have 10 petals.   sl st in 1st sc to join.  (10 Petals)

Second layer of flower

R4:  working behind the petals from the previous round *ch 4 and sl st in sc of next petal* repeat until last petal and ch 4.  sl st in 1st ch-4 sp. (10 ch-4 sp)

R5:  ch 1 and *(sc, 3 dc, ch 2, 3 dc, sc) all in the same sp*  Repeat from * until you have 10 petals. sl st in 1st sc to join.  (10 Petals)

3rd layer of flower

R6:  working behind the petals from the previous round *ch 4 and sl st in sc of next petal* repeat until last petal and ch 4.  sl st in 1st ch-4 sp. (10 ch-4 sp)

R7:  *(sc, 4 dc, ch 2, 4 dc, sc) all in the same sp*  Repeat from * until you have 10 petals. sl st in 1st sc to join.  (10 Petals)

Fasten off and weave in ends.

********************************************************

While you are there be sure to sign up for my Newsletter where you will receive news about my New Crochet Pattern Releases, Collaborations, and MORE!  For signing up you will also get a FREE crochet pattern!


You will find some of my Premium crochet patterns , by visiting any of my stores, by clicking on any of the Buttons below.


Find me, Jo of Jo’s Crafty Hook at the places listed below.

Email:  joeybaird@aol.com

Website

Facebook Group Jo’s Crafty Hookers

Facebook Group Jo’s Crafty Hook Designs

Facebook Page Jo’s Crafty Hook

Facebook Page:  Crochet Designer Community

Ravelry

LoveCrafts

Etsy

Instagram

YouTube

Pinterest

Donations Accepted

 

Child Size Pocket Full of Diamonds

I am happy to introduce to you to a crochet design of mine, the Child Size Pocket Full of Diamonds Shawl! This is the perfect accessory for those cool days and cool nights no matter the weather.  You can crochet this beautiful shawl for your little girl or any little girls in your life! This page contains affiliate links.  You can make a purchase using these links that I provide where I may receive compensation (at no added cost to you.)  Purchases you make will help keep my website, Etsy Shop, and my Ravelry Store going and provide quality designs just for you!
Child Size Pocket Full of Diamonds Shawl
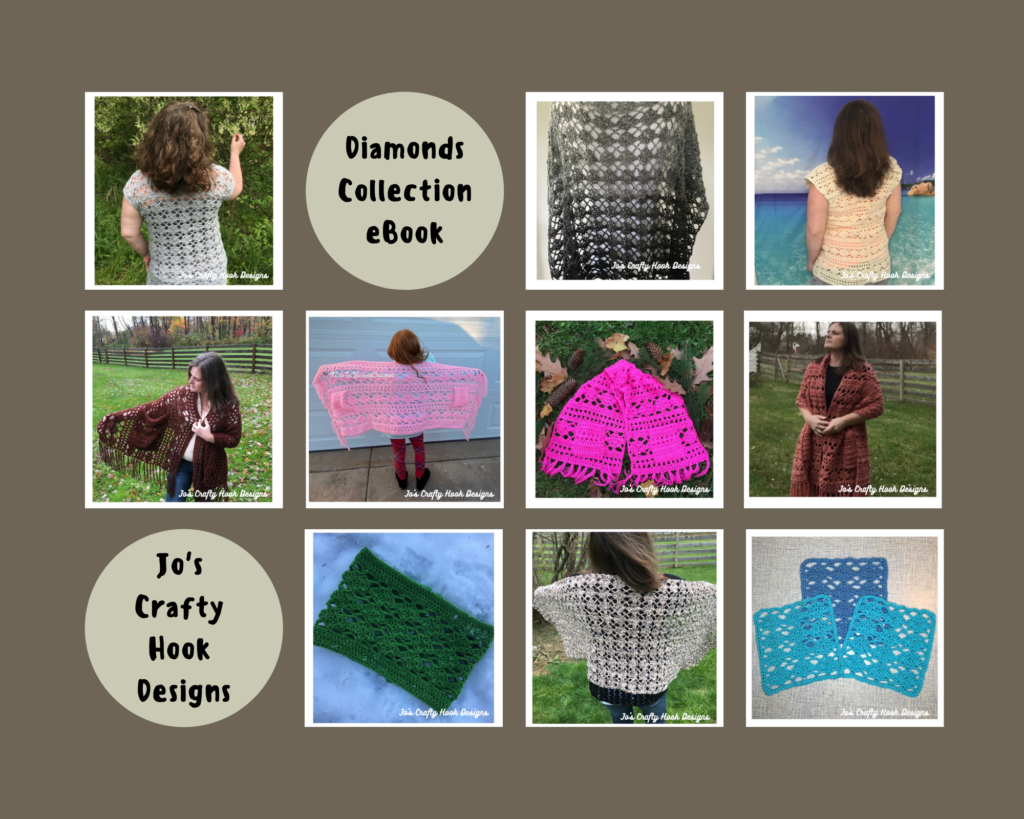
Don’t forget to sign up for my Newsletter.  I have SO many great things scheduled already for 2021!  Giveaways, CALs, new FREE crochet patterns, and more! [yikes-mailchimp form=”1″]     Today I am SO excited to be collaborating with Veronika of Blue Star Crochet and 19 other crochet designers in the 2nd Week of the Last Minute Crochet Gifts Giveaway!  Week 2 runs from 10/11-17. 2021. I will be giving away a free pdf copy of my Child Size Pocket Full of Diamonds Shawl.  There are also 20 other crochet ideas that would be perfect for those Christmas gifts for your family and friends!         You can download my free pdf copy of the Child Size Pocket Full of Diamonds from Ravelry using the button below.  Use the Coupon Code: LSTMINGIFT21 To got back to the Last Minute Crochet Gifts Pattern Giveaway hosted by Blue Star Crochet and get the rest of the free crochet patterns you like click on the button below.     Thank you for stopping by week 2 of the Last Minute Crochet Gift Ideas!  Be sure to check back for week 3!  Week 3 will feature more new crochet patterns that are perfect for gift giving!  Week 3 runs from 10/18-24, 2021 ………………………………………………………………………………………………. The child sizes of the Pocket Full of Diamonds Shawl can  be easily customized using the adult version of the free crochet pattern of the Pocket Full of Diamonds Shawl  found on my website.  You can find all the child sizes of the Pocket Full of Diamonds Shawl crochet pattern at Ravelry, LoveCrafts and Etsy for a small fee. The Child Size Pocket Full of Diamonds uses the Argyle Shell Stitch that you can find in a lot of patterns I designed last year.  All of the crochet patterns that uses the Argyle Shell Stitch can be found individually at my stores or in an eBook at Ravelry.
Diamonds Collection eBook
………………………………………………………………………………………………..

Get a free $10 e-gift coupon on orders of $100 or more, a free $15 e-gift coupon on orders of $150 or more, and FREE SHIPPING on orders of $45 or more! Promo code CFDY. Exclusions apply.   If you don’t crochet or don’t have the time to make the child size shawl for yourself or family or friends, I would be more than happy to crochet one for you! You can fill out the Custom Order Form below or email me at jo@joscraftyhook.com and we can discuss how to make it to fit your style, size, and color(s)!
  ……………………………………………………………………………………………….. Don’t forget to sign up for my Newsletter.  I have SO many great things scheduled already for 2021!  Giveaways, CALs, new FREE crochet patterns, and more! [yikes-mailchimp form=”1″] ……………………………………………………………………………………………….. You can find more of my crochet patterns at these locations listed below. Ravelry Lovecraft Etsy ………………………………………………………………………………………………..   Find me, Jo of Jo’s Crafty Hook Designs at any one of these places listed below! Website:      www.joscraftyhook.com Ravelry:       https://www.ravelry.com/designers/jos-crafty-hook LoveCraft:  https://www.lovecrafts.com/en-gb/user/maker/1bee78ea-a464-4c9b-b781-59cfc74b1a6c Etsy Shop:    www.etsy.com/shop/JosCraftyHook Facebook:     www.facebook.com/JosCraftyHook Facebook:     www.facebook.com/JosCraftyHookDesigns Instagram:    www.instagram.com/joscraftyhook Pinterest:     www.pinterest.com/baird0095 Twitter:         www.twitter.com/joscraftyhook YouTube:  https://www.youtube.com/channel/UCk-6IB36bg4gkvaawn3xfdg