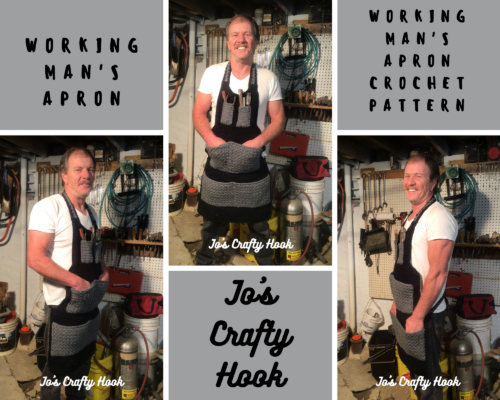
Working Man’s Apron Free Crochet Pattern
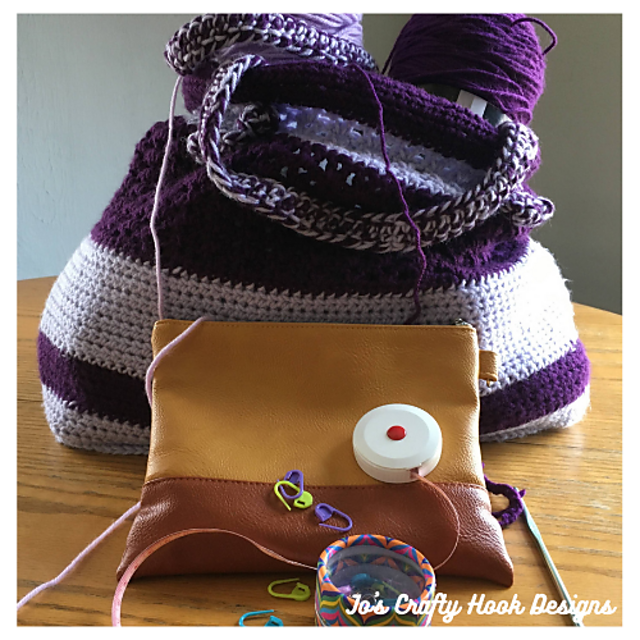
Thank you for stopping by Jo’s Crafty Hook. In today’s post I am sharing with you one of my newest crochet designs, the Working Man’s Apron Free Crochet Pattern!
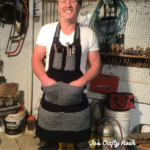
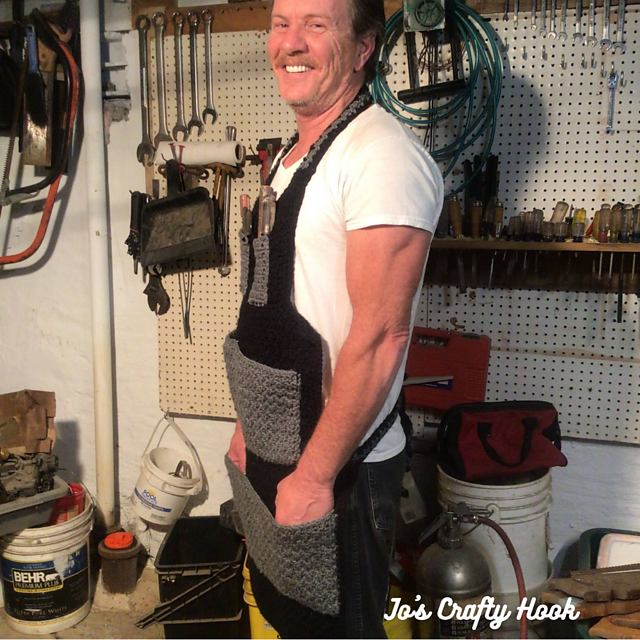
You don’t see a lot of crochet patterns for men. My husband is always working in his garage and hunting around for his tools, so I thought this Working Man’s Apron would be the perfect thing Just for Him.
This post contains affiliate links. If you make a purchase using these links I may receive compensation (at no added cost to you.)
While you are here be sure to sign up for my Newsletter where you will receive news about my New Crochet Pattern Releases, Collaborations, and MORE! For signing up you will also get a FREE crochet pattern!
Information Needed to Crochet the Apron
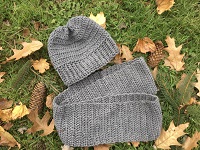
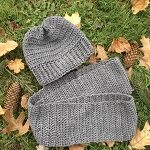
I used WeCrochet/KnitPicks Brava #7 Bulky Weight. 136 yds/100 gram
Materials:
US Hook K/6.5 mm
340 yds of Cobblestone Heather
816 yds of Black
Scissors
Tapestry Needle
Stitch Markers
Gauge:
Hook US K/6.5 mm
12 st x 8 rows = 4”
Finished Size:
44” tall
20” wide
The Working Man’s Apron can be very easily customized. Inside the premium crochet pattern you will find step-by-step picture tutorials. Also, inside the pattern you will find the inches broken down so you can choose how wide your apron is and how long it is. Not only can you make this just for him, but it is a totally Unisex pattern.
You can get a PDF copy of the Ad-Free and the Premium crochet pattern that has step-by-step picture tutorials at my Ravelry Store or LoveCrafts Store or at my Etsy Shop.
Abbreviations/Stitches Used:
fsc = foundation single crochet
sc = single crochet
dc = double crochet
rep = repeat
ch = chain
sl st = slip stitch
MC = Main Color
CC = Contrasting Color
RS = Right Side
WS = Wrong Side
Special Stitches:
Foundation Single Crochet: creates your foundation row at the same time as your first row of single crochet stitches.
Seed Stitch: alternate sc and dc in the 1st row then you add a dc in the sc and a sc in the dc in the consecutive rows.
Notes:
alt ch 2 and counts as a dc.
ch 2 counts as a dc.
Corners consist of (sc, ch 1, sc) all in the same sp.
The pattern has a lot of pieces. They are panels, pockets, and straps that will be sewn together.
The pieces may shrink due to the tightness of the stitch. You may want to block it.
You can steam it or wash it and pin it down.
********************************************************
Customizing:
The apron can easily be customized to fit your working man. Below I have supplied the gauges in 1” 2” 3” 4” and the rows needed for 1” 2” 3” 4”
1” = 3st x 2 rows
2” = 6 st x 4 rows
3” = 9 st x 6 rows
4” = 12 st x 8 rows
********************************************************
Working Man’s Apron Crochet Pattern:

Chest 10” x 8”
Using MC
fsc 30 turn (30 sc)
alternative: ch 31, sc in the 2nd ch from hook and each remaining st across. (30 sc)
R1: ch 1, sc in the same sp, *dc in the next st, sc in the next st* rep from * until last st, dc in last st. turn (30 st)
R2-R16: Repeat R1 do not turn after R16
Move to the Border below
********************************************************
Middle 14” x 12”
fsc 42 turn (42 sc)
alternative: ch 43, sc in the 2nd ch from hook and each remaining chain. turn (42 sc)
R1: ch 1, sc in the same sp, *dc in the next st, sc in the next st* rep from * until last st, dc in last st. (42 st)
R2-R24: Repeat R1. Do not turn after R24
Move to Border below
********************************************************
Bottom 18” x 16”
fsc 54 (54 sc) turn
alternative: ch 55, sc in the 2nd ch from hook and each remaining chain. (54 sc)
R1: ch 1, sc in the same sp, *dc in the next st, sc in the next st* rep from * until last st, dc in last st. (54 st)
R2-R32: Repeat R1. Do not turn after R32
Move to Border below
********************************************************
Chest Pockets 2” x 4”
(make 2)
Note: For a tighter pocket, use sc only in width and height.
Using CC
fsc 6 turn ( sc)
alternative: ch 7, sc in the 2nd ch from hook and each remaining chain. turn (6 sc)
R1: ch 1, sc in the same sp, *dc in the next st, sc in the next st* rep from * until last st, dc in last st. (6 st)
R2-R8: Repeat R1. Do not turn after R8
Move to Border below
********************************************************
Middle Pocket 14” x 10”
fsc 42 turn (42 sc)
alternative: ch 43, sc in the 2nd ch from hook and each remaining chain. turn (42 sc)
R1: ch 1, sc in the same sp, *dc in the next st, sc in the next st* rep from * until last st, dc in last st. (42 st)
R2-R20: Repeat R1. Do not turn after R20
Move to Border below
********************************************************
Bottom Pocket 18” x 16”
fsc 54 turn (54 sc)
alternative: ch 55, sc in the 2nd ch from hook and each remaining chain. turn (54 sc)
R1: ch 1, sc in the same sp, *dc in the next st, sc in the next st* rep from * until last st, dc in last st. turn (54 st)
R2-R24: Repeat R1. Do not turn after R24
Move to Border below
********************************************************
You can get a PDF copy of the Ad-Free and the Premium crochet pattern that has step-by-step picture tutorials at my Ravelry Store or LoveCrafts Store or at my Etsy Shop.
Border (RS):
Side 1:
ch 1, turn your work to the side and sc evenly down the sides st.
Corner:
(sc, ch 1, sc) all in the last st.
Bottom:
turn and sc evenly in the fsc row until the last st.
Corner:
(sc, ch 1, sc) all in the last st.
Side 2:
turn and sc evenly up the side of the until the last st.
Corner:
(sc, ch 1, sc) all in the last st.
Top:
turn and sc across until the last st. (sc, ch 1, sc) all in the last st.
Fasten off and weave in ends.
********************************************************
Apron Border
R1:
Step 1:
Starting in any corner of the apron, attach yarn with a sl st in the corner st.
Step 2:
sc in the same sp as the sl st. sc in each st around the apron until you come to a corner st. (sc, ch 1, sc) all in the same st.
Step 3:
Continue step 2 all the way around the apron, being sure to place the (sc, ch 1, sc) all in the corner st.
Step 4:
Repeat Step 3 until you come to the last st. sc, ch 1 in the last st and sl st in th 1st st to join.
R2: ch 1, sc in the same sp. *sc in each st until you come to the corners, (sc, ch 1, sc) all in the ch-1 sp of the corner. Rep from *around the apron until the last st, sc, ch 1 in the last st. sl st in 1st st to join.
********************************************************
Pieces Assembly
Step 1:
Line up the middle of the top piece to the middle of the middle piece. You want to have the same amount of st on the left side as you do the right side.
Step 2:
Starting where your 2 pieces lined up, sew the RS of the bottom st to the RS of the top st.
Fasten off and weave in ends.
Repeat these steps for sewing the top to the middle piece and the middle to the bottom piece.
********************************************************
Neck Strap 10” x 2”
Neck Strap
When making your slip knot be sure to leave a long tail of yarn for attaching to the top part of your apron.
fsc 30 turn (30 sc)
alternative: ch 31, sc in the 2nd ch from hook and each remaining st across. turn (30 sc)
R1: ch 1, sc in the same sp, *dc in the next st, sc in the next st* rep from * until last st, dc in last st. (30 st)
R2-R3: Repeat R1.
R4: ch 1, sc in the same sp and each st across. (30 sc)
Fasten off and weave in ends.
For best results for assembling, sc in the end st on both ends of neck straps.
Leave a long tail on 1 end for attaching to the apron.
********************************************************
Attaching Neck Strap
Step 1:
Line up the bottom corner of your strap piece to the corner of your top piece.
Step 2:
Starting where your 2 pieces lined up, sew the RS of the bottom st to the RS of the top st.
Fasten off and weave in ends.
Repeat Steps 1 & 2 on the other side of your top piece.
********************************************************
Waist Ties 20” x 1”
(make 2)
Waist Straps
fsc 60 turn (60 sc)
alternative: ch 61, sc in 2nd ch from hook and each remaining st across. turn (60 sc)
R1: ch 1, sc in the same sp, *dc in the next st, sc in the next st* rep from * until last st, dc in last st. (60 st)
R2: Repeat R1.
R3: ch 1, sc in the same sp and each st across. (60 sc)
Fasten off and weave in ends.
For best results for assembling, sc in the end st on both ends of waist ties.
Leave a long tail on 1 end for attaching to the apron.
************************************************
Attaching Waist Straps
Step 1:
Line up the bottom corner of your strap piece to the corner of your middle piece where the middle and bottom pieces connect.
Step 2:
Starting at the top of your end piece of the strap line up the st evenly.
Step 3:
Sew the RS of your end piece of your strap to RS of the middle piece. Do NOT fasten off.
Step 4:
Sew the RS of the bottom of your strap to the RS of the top of your bottom piece, being sure to line up your st evenly.
Fasten off and weave in ends.
Repeat Steps 1-4 on the other side of your apron.
********************************************************
Pocket Assembly
Step 1:
Place your pockets where you would like to sew them on, being sure to place the WS of your pockets to the RS of your top piece.
Step 2:
Line up the top, sides, and bottom of your pockets to the corresponding rows of the top piece.
Step 3:
Sew from one of the top corners down to the bottom corner, across the bottom, and up to the next corner. You will leave the top of your pocket open.
Repeat Steps 1-3 for each piece and pockets
Fasten off and weave in ends.
Finished Working Man’s Apron
********************************************************
Again, thank you for stopping by Jo’s Crafty Hook. I would LOVE to see your version of the Working Man’s Apron!! You can tag me at any social media links below.
Also be sure to check out my Home Page, it features all the blog hops and events that are happening now or will be coming soon!
While you are there be sure to sign up for my Newsletter where you will receive news about my New Crochet Pattern Releases, Collaborations, and MORE! For signing up you will also get a FREE crochet pattern!
********************************************************
Find me, Jo of Jo’s Crafty Hook at the places listed below.
Email: j.o@joscraftyhook.com
Website
Facebook Group Jo’s Crafty Hookers
Facebook Group Jo’s Crafty Hook Designs
Facebook Page Jo’s Crafty Hook
Facebook Page: Crochet Designer Community
Ravelry
LoveCrafts
Etsy
Instagram
YouTube
Pinterest
Donations Accepted