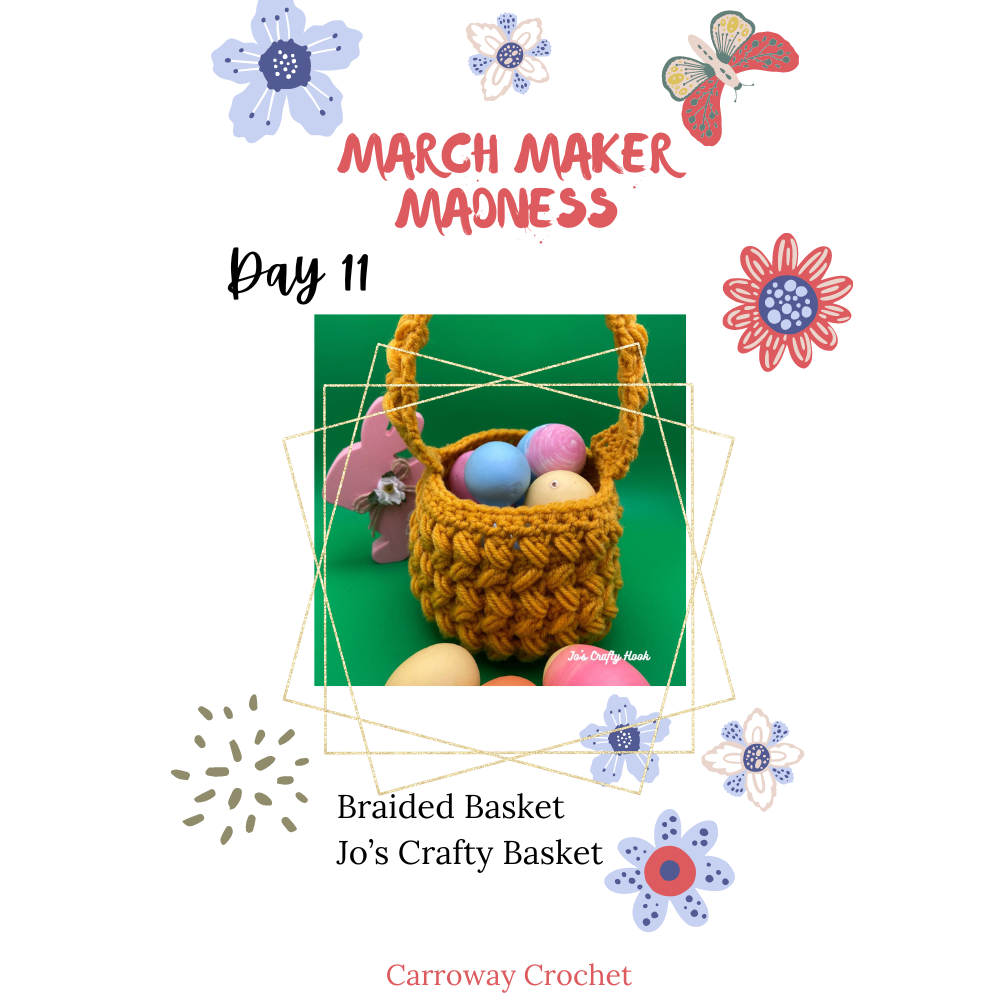
Braided Basket Crochet Pattern

Braided Basket Crochet Pattern

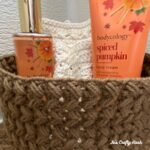
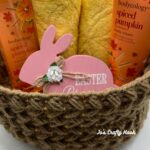
I wanted to design a basket that actually looked like a woven basket so that is how I came up with the Braided Basket Crochet Pattern.  This design came about at the right time, it is almost Easter time!  I am always SO excited about this time of year! This season brings resurrection of Jesus and flowers and birds and oh so much more!

Sign Up to my Newsletter and never miss out on any of my upcoming events.

March Events

Sign up for my Blooming Flowers Wall Hanging CAL.

Please wait...

Thank you for signing up!

When my kids were little I loved filling in for the Easter Bunny by placing an Easter Basket at the end of my kids’ beds!  I loved seeing the excitement on their faces when they woke up in the morning that would be the first thing they seen!
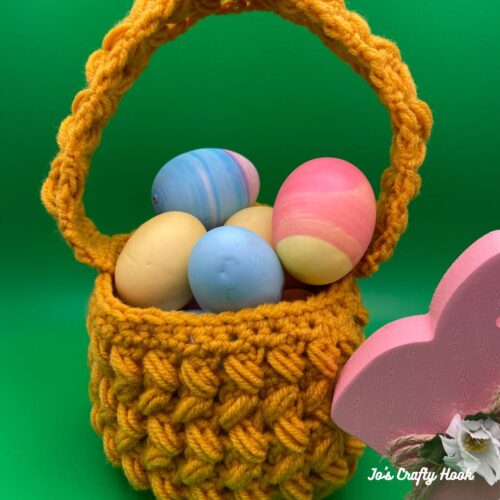
 

Easter Basket


On March 11, 2024 starting at 10a EST until March 12, 2024 10a EST you can get a FREE premium copy Braided  Basket Crochet Pattern as part of the March Maker Madness Free Pattern 2024 Hop hosted by Carroway Crochet.

If you missed any of the previous free crochet patterns or prefer to skip all the blog hopping, you can get the March Maker Madness Bundle for $9.99 with all of the 25 crochet patterns all in one place.
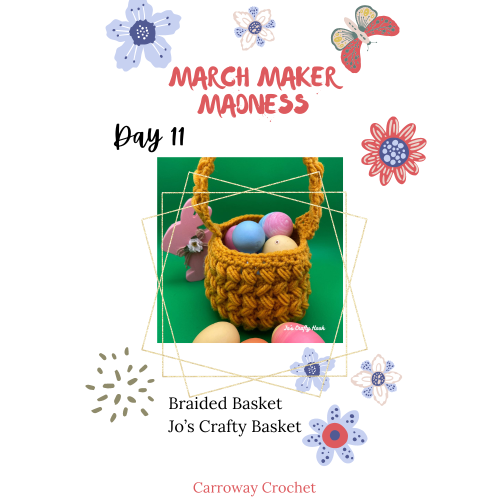
 

On March 11, 2024 you can get a FREE premium PDF of my Braided Basket Crochet Pattern.  You will need to visit the March Maker Madness to find the Coupon Code needed to use at Checkout for the FREE copy.


Once you have the Coupon Code, click on the Button below to get my Braided Basket Crochet Pattern for FREE at Checkout at my Ravelry Store.


Be sure to visit the March Maker Madness daily to see each designer’s beautiful crochet pattern you can get that day for FREE!


If you by chance missed the free pdf copy of my Braided Basket Crochet Pattern, you will find a free version below.  You can also purchase the Premium Copy for a small fee from my Ravelry Store and my Etsy Shop and my LoveCrafts Store.

The free crochet pattern below has all the information you will need to make your own Easter Basket or a customized Braided Basket.

You can also find a premium copy of my Braided Basket Crochet Pattern at my Ravelry and LoveCrafts Stores and my Etsy Shop.  The premium copy of my Braided Basket Crochet Pattern contains step-by-step picture tutorials and video tutorials all in one PDF.


Braided Basket Free Crochet Pattern Below


I used Red Heart Super Saver in Gold.  100 % Acrylic.  198 g/7 oz (364 yards/215 m)

Materials:
100-125 yds of #4 ply Worsted/Aran Weight Yarn
US H Crochet Hook or 5 mm
Scissors
Tapestry Needle
Stitch Marker

Abbreviations/Stitches Used:
st = stitch
sl st = sl stitch
ch = chain
dc = double crochet
ps = puff stitch
rep = repeat
alt ch 2 = alternate chain 2
blo = back loop only
SM = Stitch Marker
RS = Right Side

Finished Size: 4″ x 4″
Handle:  12″ x 1/2″

Special Stitches:

Invisible Join: instead of slip stitching to the top of the first stitch of that row, you’ll instead place a stitch marker and keep on crocheting without joining.

Notes:
The bottom of the basket is worked in the round.
The basket itself is also worked in the round with turning rows.
The handle is worked in rows.
The stitch count is a multiple of 8.
ch 1 counts as a stitch as part of the Puff Stitch.
ch 2 counts as a dc.
alt ch 2 counts as a dc.

Gauge:
US H Crochet Hook or 5 mm
16 dc x 8 rows = 4”

My Left Handed Video Tutorials:

Puff Stitch Example
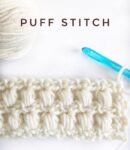
Puff Stitch: YO, insert hook into indicated st. YO, pull up loop. (YO, insert hook into the same st, YO, pull up loop) 2 times. YO, pull through 7 loops on the hook. 


Braided Puff Stitch – Left Handed


Example of Back Loop Only


Back Loop Only – Left Handed


You can get the Premium Braided Basket Crochet Pattern with step-by-step picture tutorials from my Ravelry Store, my Etsy Shop, and LoveCrafts.


Braided Basket Crochet Pattern:

Notes:
Use the Invisible Join at the beginning of each round.  Place a SM in 1st stitch at the beginning of every round.
Every round will increase by 8 stitches.

Bottom of Basket

R1:  MC, 8 sc in magic circle (8 sc)
R2:  2 sc in each sc around.  (16 sc)
R3:  2 sc in 1st, sc in next st. *2 sc in next st, sc in next.  rep from * around.  (24 sc)
R4:  2 sc in 1st, sc in next 2 st. *2 sc in next st, sc in next 2 st.  rep from * around.  (32 sc)
R5:  2 sc in 1st, sc in next 3 st. *2 sc in next st, sc in 3 st next.  rep from * around.  (40 sc)
R6:  2 sc in 1st, sc in next 4 st. *2 sc in next st, sc in 4 next.  rep from * around.  (48 sc)
R7:  sc in each st around.  (48 sc)
R8:  2 dc in 1st st, dc in blo only around.  (49 dc)

Basket
Note:  ch 1 counts as a st for R2-R6

R1alt ch 2 or ch 2, *sk next st, dc in next st, ps in sk st, ch 1.  rep from * around until last st.  dc in last st.  sl st in 1st st to join. turn  (24 dc & 24 ps)
R2-R6:  alt ch 2 or ch 2, *sk next st (ch-1 sp), dc in next dc, ps in sk st, ch 1.  rep from * around until last st.  dc in last st.  sl st in 1st st to join.  turn  (24 dc & 24 ps)

Do NOT turn after R6

R7:  ch 1, sc in same st, *sc in ch-1 sp, sc in next dc.  rep from * around.  sl st in 1st st to join.  turn (48 sc)
R8:  ch 1, sc in same st, sc around.  (48 sc)

Fasten off and weave in ends.

Handle of Basket

12” long x 1 ½” wide

**you can adjust the length to fit your desired size**

Note: ch 1 counts as a st for R5-R23

Leave a long enough tail of yarn to sew the handle to the basket.

R1: fsc 6 turn (6 sc)
Optional:  ch 7, sc in 2nd ch from hook, sc across.  turn (6 sc)
R2:  ch 1, sc in same sp, sc across. turn (6 sc)
R3:  alt ch 2 or ch 2, dc across. turn (6 dc)
R4:  alt ch 2 or ch 2, *sk next st (ch-1 sp), dc in next st, ps in sk st, ch 1.  rep once more.  dc in last st.  turn  (2 dc & 2 ps)
R5-R22:  alt ch 2 or ch 2, *sk next st (ch-1 sp), dc in next st, ps in sk st, ch 1.  rep once more.  dc in last st.  turn  (2 dc & 2 ps)
R23:  alt ch 2 or ch 2, dc in ch-1 sp, dc in dc.  rep once more.  turn (6 dc)
R24-R25:  ch 1, sc in same sp, sc across.  turn (6 sc)

Leave a long enough tail of yarn to sew the handle to the basket.

Fasten off and weave in ends.

Handle Assembly:

Step 1:
Place a SM in same st as closing.  Count over 6 st and place a SM in same st.  Count over 19 st and place a SM in same st.  Count over 6 st and place a SM in same st.

Step 2:
Place RS of 1 end of the handle to RS of the basket at the 1st set of SM.  Using your long tail of yarn, whip stitch the handle to the basket.

Step 3:
Repeat Step 2 to sew the handle to the other side of the basket.

Fasten off and weave in ends.
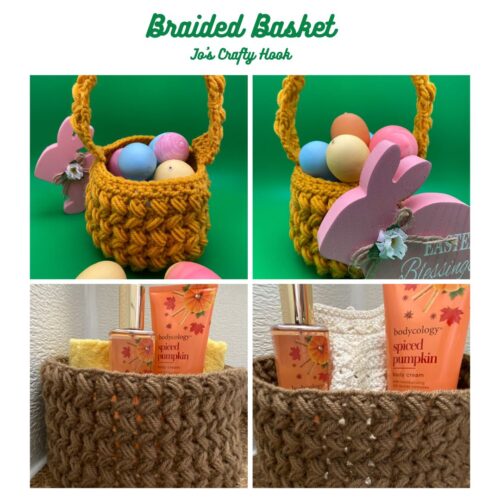


That’s it!  You have completed your own Braided Basket!  I would LOVE to see your version! 


Find me, Jo of Jo’s Crafty Hook at the places listed below.

Email:  jo@joscraftyhook.com

Website

Facebook Group Jo’s Crafty Hookers

Facebook Group Jo’s Crafty Hook Designs

Facebook Page Jo’s Crafty Hook

Facebook Page:  Crochet Designer Community

Ravelry

LoveCrafts

Instagram

YouTube

Pinterest

Donations Accepted


Loading

Floret Mobius Cowl

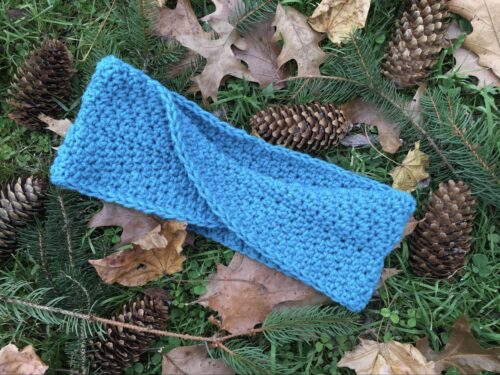
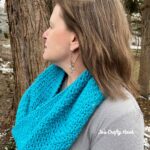
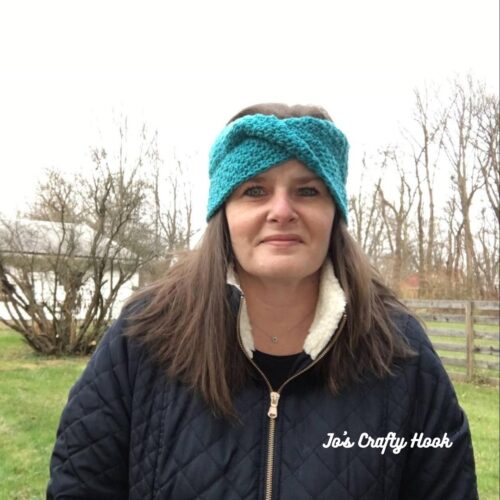
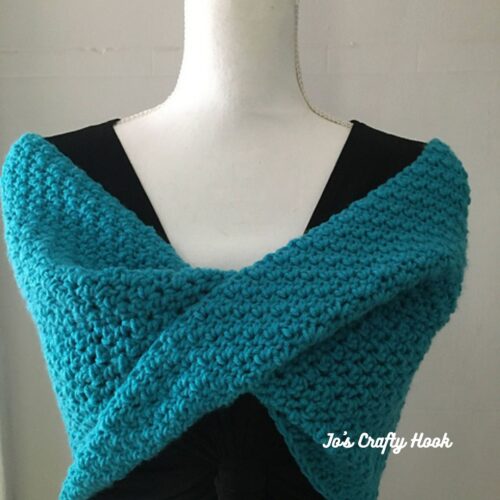
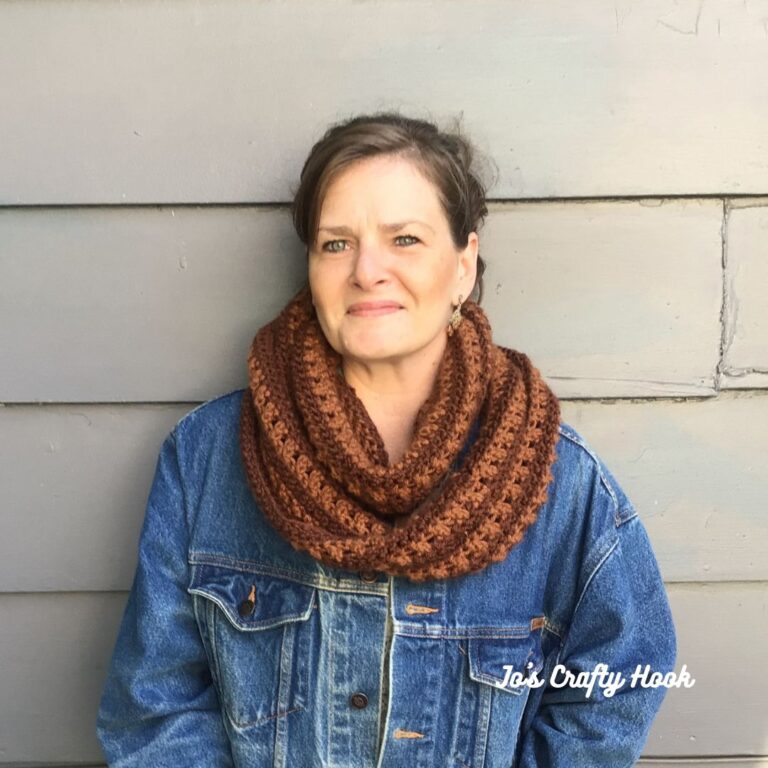
In today’s post you will find the free crochet pattern for my Floret Mobius Cowl.  The pattern is called Floret for the floret stitch used to create the design.  The Mobius part of the crochet pattern means it has only one continuous side that creates a 180° twist that creates a long narrow cowl.


Floret Mobius Cowl, Mobius Cowl, Example of Mobius, Mobius Cowl Crochet Pattern, Floret Crochet Stitch.
Floret Mobius Cowl


**Be sure to Subscribe to my Newsletter by clicking SUBSCRIBE in the upper right hand corner.  You will receive a FREE crochet pattern for signing up!  You will also receive more information about these events, Jo’s Crafty Hook’s News and more by signing up**

You can find a premium copy of the Floret Mobius Cowl crochet pattern with 7 sizes to choose from at my Ravelry and LoveCrafts Store.  

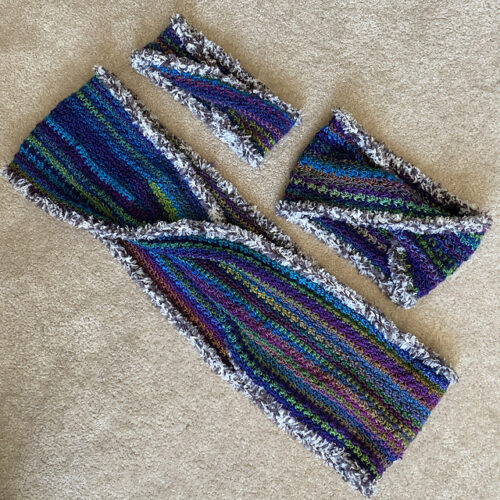
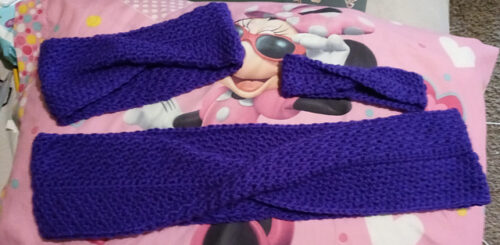
Also, you can find a premium copy of the Floret Mobius Set at my Ravelry Store or LoveCrafts for a small fee.  You can also find each crochet pattern of the Floret Mobius Set sold separately from my Ravelry and LoveCrafts Stores.


My Floret Mobius Cowl Crochet Pattern will be FREE on February 28, 2023.  I am collaborating with Through the Loop Yarn Craft in the Crochet in a Day Blog Hop.

The Crochet in a Day Blog Hop features 28 days of FREE premium crochet patterns from the top crochet designers.  Each crochet pattern will work up so fast you will be finished in a day or less!

Crochet in a Day Blog Hop


You can visit the main blog hop each day to find an awesome free premium crochet pattern by clicking on the image below.


On February 28, 2023 starting at 9a EST until March 1, 2023 8:59 a EST you can get a FREE premium copy of my Floret Mobius Cowl Crochet Pattern.  First you will need to visit the Crochet in a Day Main Roundup to get the Coupon Code needed to use at Checkout at my Ravelry Store.  Use the Button below to visit the main roundup to get my Coupon Code.


Once you have the Coupon Code you will be able to download a FREE premium copy of my Floret Mobius Cowl Crochet Pattern.  Click on the Button below to download your free pattern.  Be sure to use the Coupon Code at checkout.


If you feel you can’t wait to start my Floret Mobius Cowl Crochet Pattern, you will find a free version below.  When you complete your version, be sure to tag me at any of my Social Media Sites listed below the free crochet pattern!  I would LOVE to see it!


The size found in the free crochet pattern of the Floret Mobius Cowl, listed below is for 12 years to Adult.

Information Needed for the Floret Mobius Cowl crochet pattern.

I used Red Heart Super Saver in Turquoise- 7 oz/364 yds (198 g/333 m)

Materials:
650 yds of #4 ply Worsted/Aran Weight Yarn
US H or 5 mm Crochet Hook
Scissors
Tapestry Needle
Stitch Marker

Abbreviations/Stitches Used:
ch = chain
st = stitch
sc = single crochet
dc = double crochet
fs = floret stitch
alt ch 2 = alternate chain 2
sl st = slip stitch
SM = Stitch Marker

Notes:
Stitch count is multiple of 2
Alt ch 2 counts as a double crochet
Size:  12-adult
Beginning stitch count is 92 st
Ending stitch counts after Round 1 is 184 st
The crochet pattern has step-by-step picture tutorials for Round 1.

Special Stitches:
Floret Stitch (fs) = alternating sc and dc then when you go to start the next round you add a dc in the sc and a sc in the dc.

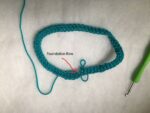
Mobius = causes your cowl to twist as shown in the picture above.  The twist will continue throughout the pattern as you work in a continuous circle.  To achieve the ‘mobius’ effect there are 4 steps to R1

Step 1:  twisting or rotating the chain
Step 2:  crocheting along the bottom (or backside) of the chain
Step 3:  crocheting along the foundation row
Step 4:  working in a continuous circle

Video Tutorials:
Alternate Chain 2 here

Size:
30″ wide
12″ height

Gauge:
US H or 5mm Crochet Hook
12 st x 12 rows = 4″

Gauge Swatch:
R1:  ch 13, sc in 2nd ch from hook, dc in next st, *sc in next st, dc in next st. rep from * across.  turn (12 st)
R2-R12: ch 1, sc in same st, dc in next st, sc in next st.  rep from * across.  turn (12 st)


Floret Mobius Cowl Crochet Pattern

Round 1  

Step 1:

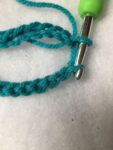
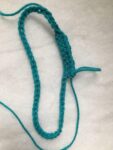
ch 56 (62, 68, 74, 80, 86, 92) twist ch and sl st in the bottom of beginning ch to join.

**most patterns tell you to be careful NOT to twist your chain when you join, but here you want to twist to create the continuous circle of the Mobius.**


Step 2:

ch 1, sc in same st and sc across the bottom of the ch until you come to the 1st sc.  Do NOT join.


Step 3:

then sc across the foundation row of ch until you come to the last st.  Do NOT join.


Step 4:  

Place a stitch marker in 1st sc.  Ending st count 112 (124, 136, 148, 160, 172, 184)


R2:  sc in the 1st st and dc in the next st (floret stitch made).  fs around to the 1st sc where you placed your stitch marker.  Do NOT join.

Repeat R2 eleven more times or until your desired height is reached.

Fasten off and weave in your ends.


You can find a premium copy of the Floret Mobius Cowl crochet pattern with 7 sizes to choose from at my Ravelry and LoveCrafts Stores.  

Also, you can find a premium copy of the Floret Mobius Set at my Ravelry Store or LoveCrafts , which as 7 sizes to choose from, for a small fee.  You can also find each crochet pattern of the Floret Mobius Set sold separately from my Ravelry and LoveCrafts Stores.

Check out the pictures below to see the different ways the Floret Mobius Set can be made.

**Be sure to Subscribe to my Newsletter by clicking SUBSCRIBE in the upper right hand corner.  You will receive a FREE crochet pattern for signing up!  You will also receive more information about these events, Jo’s Crafty Hook’s News and more by signing up**


You will find more of my Premium crochet patterns , by visiting any of my stores, by clicking on any of the Buttons below.  You will also find FREE crochet patterns on my website.


If you would like me to crochet any of my designs for you or others, I do take Custom Orders.  Visit my Ravelry Store or LoveCrafts to see some ideas of what you would like to Custom Order.  You can email me with your order or any other questions at j.o@joscraftyhook.com.


Find me, Jo of Jo’s Crafty Hook at the places listed below.

Email:  j.o@joscraftyhook.com

Website

Facebook Group Jo’s Crafty Hookers

Facebook Group Jo’s Crafty Hook Designs

Facebook Page Jo’s Crafty Hook

Facebook Page:  Crochet Designer Community

Ravelry

LoveCrafts

Instagram

YouTube

Pinterest

Donations Accepted


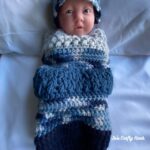
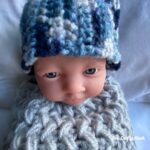
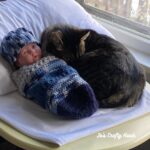
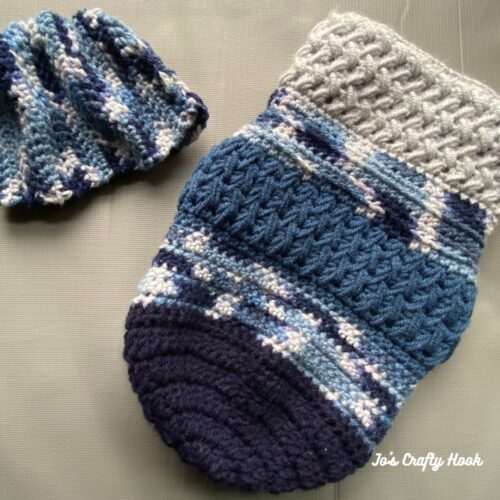
Snuggle Bug Preemie Baby Cocoon and Beanie

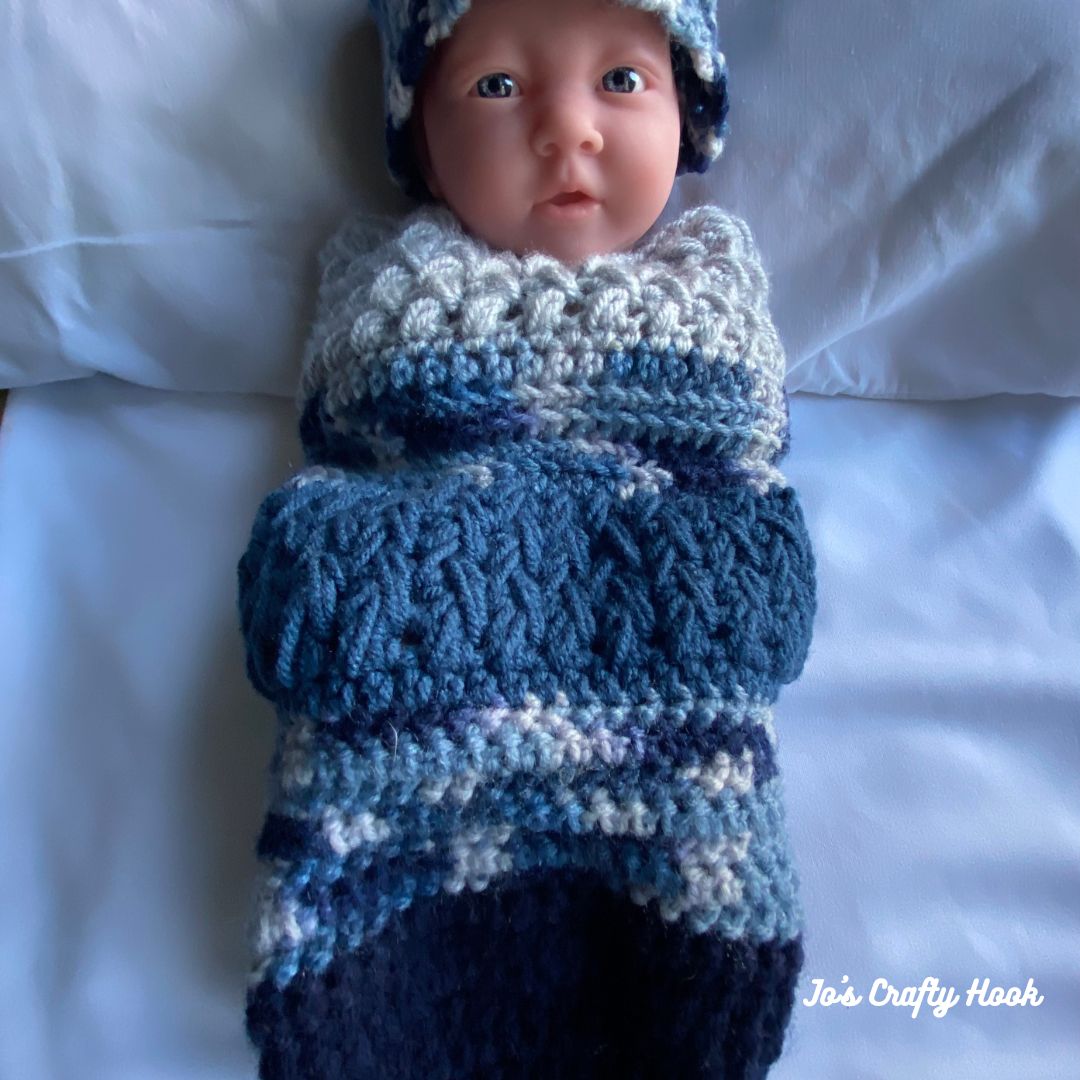
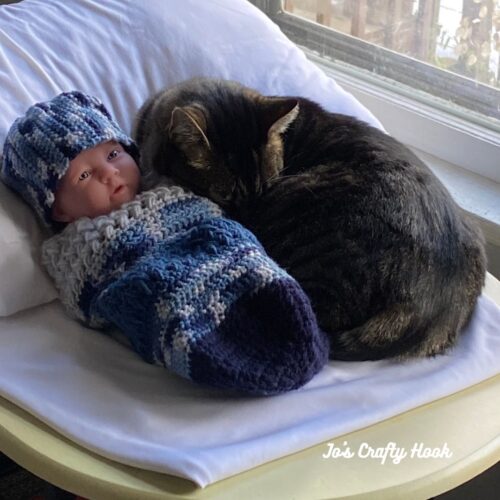
What a GREAT way to start 2023!  My Snuggle Bug Preemie Cocoon and Beanie Crochet Pattern will be a NEW crochet pattern release as part of the Stash Busting Blog Hop hosted by Made by Gootie and Raffamusa Designs.  You can get a copy of the Snuggle Bug Preemie Baby Cocoon with Beanie Crochet Pattern starting January 19, 2023.


My Snuggle Bug Preemie Baby Cocoon with Beanie Crochet Pattern is a new crochet pattern that will be released on January 19, 2023.  The Snuggle Bug Preemie Baby Cocoon with Beanie Crochet Pattern is a collaboration with the Stash Busting Blog Hop January 2nd until January 28, 2023.


If you would like to skip all of the blog hopping for the month of January, you can purchase the Stash Busting eBook for $9.99.  You will get ALL 28 crochet patterns that are featured in the Stash Busting Blog Hop ALL in one place.  Click on the button below to purchase the Stash Busting eBook for $9.99.


Click on the Stash Busting Blog Hop Main Page’s button daily to get the day’s featured crochet pattern for FREE.  Visit the Main Blog Hop Page from 8a EST until 7:59 a EST the next day to get the FREE crochet pattern.


On January 19, 2023 you can get a FREE copy of my Snuggle Bug Preemie Baby Cocoon with Beanie crochet pattern.  Visit the Stash Busting Blog Hop’s Main Page button above to get the Coupon Code to get the premium PDF Snuggle Bug Preemie Cocoon with Beanie Crochet Pattern on January 19, 2023 from 8a EST until 7:59a on January 20, 2023.


On January 19, 2023 starting at 8a EST you can download the FREE crochet pattern.


Cocoon with Beanie Crochet Pattern


Information about Snuggle Bug Preemie Baby Cocoon and Beanie Crochet Pattern below.

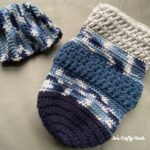
With the cocoon being part of this scrap busting event, I used 5 different crochet stitches for each part.  I used:

Half Double Crochet
Herringbone Half Double Crochet
Feather Stitch Stitch
Half Double Crochet in the Back Loop Only
Braided Puff Stitch

Notes:

The Cocoon is worked in the round.  

Some rounds of the Cocoon will have turning rows.

There will be a color change for each type of stitches used.

Due to different stitches used in each color block the Gauge will be different due to types of stitches used.

Each designer uses a different technique for their Puff Stitches, so the Right Handed Video Tutorial may be different from how the Special Stitch instructions for the Puff Stitch are written.

The Braided Puff Stitches are created using a 2 row repeat using my version of the Puff Stitch.

Placing a SM in 1st st of every round keeps a nice even st and it helps you not lose your place when going into the next round.


There are Left and Right Handed Video Tutorials inside the Snuggle Bug Preemie Baby Cocoon Crochet Pattern.

Size:
8” x 13”

Materials:
300-500 yds of #4 Ply Worsted/Aran Weight Yarn
US H Crochet Hook or 5 mm
Scissors
Tapestry Needle

The baby cocoon can be customized using the Gauge below.

Gauge:
US H Crochet Hook or 5 mm
16 hdc x 8 rows = 4”


You can find the premium copy of the Snuggle Bug Preemie Cocoon with Beanie Crochet Pattern at my Ravelry Store and LoveCrafts starting January 19, 2023.


Cocoon with Beanie Crochet Pattern


Find me, Jo of Jo’s Crafty Hook at the places listed below.

Email:  j.o@joscraftyhook.com

Website

Facebook Group Jo’s Crafty Hookers

Facebook Group Jo’s Crafty Hook Designs

Facebook Page Jo’s Crafty Hook

Facebook Page:  Crochet Designer Community

Ravelry

LoveCrafts

Instagram

YouTube

Pinterest

Donations Accepted


Picot Star Christmas Ornament Free Crochet Pattern

I am so excited to be sharing with you my Picot Star Christmas Ornament with you as part of the CAL-Crochet a Long’s Christmas Ornaments CAL.  You can find out more about their Facebook Group, Facebook Page and their website.

You can find more of the free crochet patterns for this year’s Christmas Ornament CAL here.

The Picot Star Christmas Ornament Crochet Pattern is one of those patterns that are a quick and easy make that you can crochet again and again. 

You can change the colors, make it in one color, use different types of yarn, use it as an embellishment for pillows, cushions, headbands and more. 

Be sure to Subscribe to my Newsletter to receive information on events like these, to get information about new pattern releases, sales, and more.  Click on the Subscribe button in the right hand corner.

Picot Christmas Star Ornament Crochet Pattern

You can get a premium PDF copy of the Picot Star Christmas Ornament at my Ravelry Store or at LoveCrafts

Inside the premium crochet pattern of the Picot Star Christmas Ornament you will find helpful step-by-step picture tutorials for each round.


Information needed for Crochet Pattern.

I used Premier Basic DK in Red and White.  100% Acrylic.  (360 yds/ 280 m) (3.5 oz/100 g)

Materials
US F Crochet Hook or 3.5 mm
3 yds of MC 3 ply Lightweight/DK Weight Yarn
3 yds of CC 3 ply Lightweight/DK Weight Yarn
Scissors
Tapestry Needle

Abbreviations/Stitches Used:
ch = chain
sc = single crochet
dc = double crochet
sl st = slip stitch
rep = repeat
MC = Main Color
CC = Contrasting Color

Size:
5” x 5” 

Notes:
The ornament is worked in the round.
I changed between the MC and the CC each round.
Be sure to sc in each ch, not the ch space.

Special Stitches:
Picot – (sc, ch 5, sl st in 1st ch, sc) all in same sp.

Picot Star Ornament Crochet Pattern.

Using MC

R1:  Magic circle, 25 dc.  sl st in 1st st to join.  (25 dc)

R2:  ch 1, sc in same st, ch 9, *sc next 5 st, ch 9. rep from * until last 4 st.  sc in last 4.  sl st in 1st st to join. (25 sc & 5 ch-9 sp)

Fasten off and weave in ends.

Change to CC

R3:  Attach yarn with a sl st in 1st ch of any ch 9, ch 1, sc in same st, sc in next 3 ch, picot. sc in next 4 ch, sk next sc, sc in next sc, picot in next sc, sc in next sc, sk next sc.  *sc in next 4 ch, picot, sc in next 4 ch, sk next sc, sc in next sc, picot in next sc, sc in next sc, sk next sc. rep from * around.  sl st in 1st st to join. (50 sc & 10 picot)

Fasten off and weave in ends.

Change to MC

R4:  Attach yarn with a sl st in center of any picot, ch 1, sc in same st, ch 7, *sc in center of next picot, ch 7.  rep from * around.  sl st in 1st st to join. (10 sc)

Fasten off and weave in ends.

Change to CC

R5:  attach yarn with a sl st in same st as join, ch 1, picot in same st. sc in next 7 ch *picot in next sc, sc in next 7 ch.  rep from *around.  sl st in 1st st to join. (70 sc & 10 picot)

Do not fasten off if making a loop.

Fasten off and weave in ends if not making a loop.

Loop for Hanging

ch 15 (or desired length).  Sl st in 2nd sc of picot.  sl st in next st to join.

Fasten off and weave in ends.

@Jo’s Crafty Hook 2022


Be sure to Subscribe to my Newsletter to receive information on events like these, to get information about new pattern releases, sales, and more.  Click on the Subscribe button in the right hand corner.

Find me, Jo of Jo’s Crafty Hook at the places listed below.

Email:  j.o@joscraftyhook.com

Website

Facebook Group Jo’s Crafty Hookers

Facebook Group Jo’s Crafty Hook Designs

Facebook Page Jo’s Crafty Hook

Facebook Page:  Crochet Designer Community

Ravelry

LoveCrafts

Instagram

YouTube

Pinterest

Donations Accepted

Oyster Shell Scarf Crochet Pattern

I designed a stitch a couple of years ago that I called the Lilac Cluster Stitch.  I always wanted to use the stitch in a design that works in rows.  The Lilac Cluster  Beanie and Cowl I designed are worked in the round.  I think it turned out pretty good!  lol 


The Lilac Cluster Stitch uses the basic crochet stitches with stitch decreases thrown in.  I used the Double Crochet 3 Together and the Double Crochet 6 Together.

I know this sounds complicated, but once you practice these stitches you will become a master at them.

You can find a Left Handed Video Tutorial on my YouTube Channel that teaches you how to make the Lilac Cluster Beanie using the Lilac Cluster Stitch.  You can also find more of my Left Handed Video Tutorials on my YouTube Channel.

CAL-Crochet A Long’s Design-a-Scarf Challenge

The Oyster Shell Scarf was designed as part of a Design-a-Scarf Challenge Contest hosted by CAL-Crochet A Long.

There were a lot of beautiful scarves designed by a number of crochet designers.  You can find out more information about the Design-a-Scarf Challenge on CAL-Crochet A Long’s website.

There are many CALs going on year round at CAL – Crochet A Long.  You can always find them at their website, their FB Page, and inside their FB Group.

Tester’s Testimonies about the Oyster Shell Scarf Crochet Pattern.

Joke PatrickVandecasteele-Wegsteen 

Very nice pattern with a very clear explanation. By repeating the rows over and over, you will quickly master the stitches. I think it’s a plus that there are step-by-step pic tutorials for left-handed crocheters.


Carol Ann Reddy

The Oyster scarf is a great pattern. Written with clarity and easy comprehension.  I found it very easy to work on and finished it in no time! Working with Joey was a pleasure. This scarf can be tackled even by a beginner and the result is very satisfying. I hope that I can test any of her future patterns as well.


Information Needed for Scarf

Terminology:
US Terms

Skill Level:
Advanced Beginner/Intermediate

I used Vintage Aunt Lydia’s #4 Medium Weight Yarn.  100% Acrylic Yarn (3.5 oz/260 yds) (100 g/237 m)

I used Loops & Threads Impeccable #4 Medium Weight Yarn.  100% Acrylic Yarn (4.5 oz/268 yds) (128 g/245 m)

Materials:
US I Crochet Hook or 5.5 mm
MC – 350 yds #4 Medium Weight Yarn
CC – 20 yds #4 Medium Weight Yarn
Scissors
Tapestry Needle

Abbreviations/Stitches Used:
ch = chain
st(s) = stitch(s)
sl st = slip stitch
R = Row
dc  = double crochet
alt ch 2 = alternate chain 2
rep = repeat
sp(s) = space
sk = skip
fpdc = front post double crochet
fpdc3tog = front post double crochet 3 together
fpdc6tog = front post double crochet 6 together

Special Stitches:

Shell Stitch – when you crochet (3 dc, ch 2, 3 dc) all in the same stitch.

Alternate Chain 2 – is used in place of ch 3, this creates a smoother edge.

Front Post Double Crochet – double crochet going around the front post of the dc from the previous row.

Front Post Double Crochet 3 Together – when you do a front post double crochet 3 decrease together around the next 3 double crochet, decreasing them into one stitch.

Front Post Double Crochet 6 Together – when you do a front post double crochet 6 dc decrease together around the next 6 double crochet, decreasing them into one stitch.

Video Tutorials (Left Hand):

Front Post Double Crochet

Front Post 3 Together

Front Post 6 Together

Notes:
ch 3 counts as a dc
ch 2 counts as a stitch
alt ch 2 counts as a dc
fpdc3tog creates a decrease into 1 st
fpdc6tog creates a decrease into 1 st
scarf is done in a multiple of 3 + 2
for a wider scarf add multiples of 3


Gauge:
US I Crochet Hook or 5.5 mm
12 dc x 8 rows = 4”

Gauge Swatch:
US I Crochet Hook or 5.5 mm
Gauge Swatch only has 5 rows

**If you do not meet gauge, try going up or down a hook size**

R1:  ch 17, dc in 4th ch and each ch across.  turn (15 dc)

R2:  alt ch 2 or ch 3, dc in each st across. turn (15 dc)

R3:  alt ch 2 or ch 3, dc in next st, sk 3 st.  *shell in next st, sk 3.  rep from * once more.  dc in last 2 sts.  turn (4 dc & 2 shells)

R4:  alt ch 2 or ch 3, dc in next st.  fpdc3tog over the 1st 3 dc of shell, ch 2, sc in ch-2 sp of shell, ch 2.  fpdc6tog over the next 6 dc of shells.  ch 2, sc in ch-2 sp of shell, ch 2, fpdc3tog over the last 3 dc of shell.  2 dc in last 2 sts. turn (4 ch-2 sp, 2 sc, 2 fpdc3tog & 1 fpdc6tog)

R5:  alt 2 or ch 3, dc in next st. *shell in sc. rep from * once more, dc in last 2 sts. turn (4 dc & 2 shells)


Oyster Shell Crochet Pattern

**Note:  If you would like a smaller or wider scarf, add or subtract multiples of 3**

Using MC

R1:  ch 25, dc in the 4th ch and each ch across.  turn (23 dc)

R2:  alt ch 2 or ch 3, dc in each st across.  turn (23 dc)

R3:  alt ch 2 or ch 3, dc in next st, sk 3 sts.  *shell in next st, sk 3 sts.  rep from * 3 times, dc in last 2 sts. turn (4 dc & 4 shells)

R4:  alt ch 2 or ch 3, dc in next st.  fpdc3tog over the 1st 3 dc of shell, ch 2, sc in ch-2 sp of shell, ch 2.  *fpdc6tog over the next 6 dc of shells.  ch 2, sc in ch-2 sps, ch 2.  rep from * twice.   fpdc3tog over the last 3 dc of shell.  2 dc in last 2 sts. turn (4 dc, 4 sc, 8 ch-2 sps, 2 fpdc3tog & 3 fpdc6tog)

R5:  alt ch 2 or ch 3, dc in next st. *shell in sc from previous row. rep from * 3 times, dc in last 2 sts. turn (4 dc & 4 shells)

Rep R4 & R5 until your scarf measures  48”, 56”,  64”,  72”,  80”  or until your desired length.  Repeat R4 once more.  Do NOT fasten off.

Before Border:
R1:  alt ch 2 or ch 3, dc in next st, dc in top of fpdc3tog , *dc in ch-2 sp, dc in sc, dc in ch-2 sp, dc in top of fpdc6tog.  rep from * until last fpdc3tog, dc in top of fpdc3tog, dc in last 2 sts.  turn (21 dc,  you lose 2 sts)

R2-R3:  alt ch 2 or ch 3, dc in each st across.  turn (21 dc)

Using CC

Step 1:
Be sure you turn after R3.  sc in each st across. (21 sc)

Step 2:
Turn to work down the side of the scarf.  *sk the side post, ch 2, sc in next sc.  rep from * down the side of the scarf.

Step 3:
Turn to work across the bottom of the scarf.  ch 2, sc in each st across. (23 sc)

Step 4:
Turn to work up the side of the scarf.  *ch 2, sk the side post, sc in next sc.  rep from * up the side of the scarf.  ch 2 and sl st in 1st st to join.

Fasten off and weave in ends.

You can also find more of my Scarf crochet patterns and SO much more at my Ravelry Store and at LoveCrafts.

Find me, Jo of Jo’s Crafty Hook at the places listed below.

Email:  j.o@joscraftyhook.com

Website

Facebook Group Jo’s Crafty Hookers

Facebook Group Jo’s Crafty Hook Designs

Facebook Page Jo’s Crafty Hook

Facebook Page:  Crochet Designer Community

Ravelry

LoveCrafts

Instagram

YouTube

Pinterest

Donations Accepted

Wrapped in Love Set Free Crochet Pattern

The Wrapped In Love Set is being a part of the Warm my Heart Blog Hop being hosted by Fosbas Designs and Frankie Kate.  We are wanting to share free premium crochet patterns that your loved ones can feel love, warmth, and security.

The Warm my Heart  Blog Hop will run from December 1 – 20, 2022.  Each day you will find 2 new free crochet patterns you can take advantage of.

This post contains affiliate links.  If you make a purchase using these links I may receive compensation (at no added cost to you.)

Be sure to Subscribe to my Newsletter to receive information on events like these, to get information about new pattern releases, sales, and more.  Click on the Subscribe button in the right hand corner.

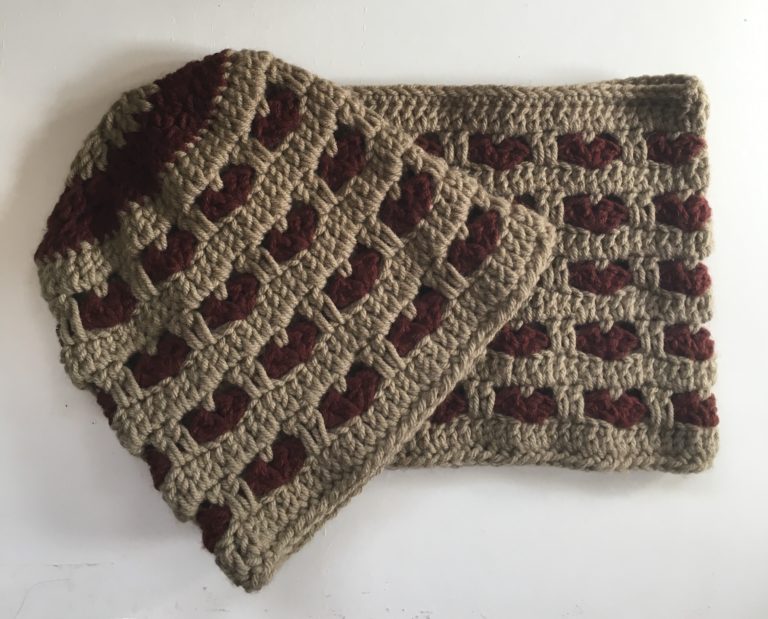
You can get a free PDF copy of the premium crochet pattern for my Wrapped in Love Set on December 20, 2022.  My Wrapped in Love Set contains a Beanie and a Cowl crochet patterns that you can wrap them in love and warmth.  There are 3 sizes to choose from:  Child, Women, and Men.


Inside the premium crochet pattern you will find helpful Video Tutorial for every round/row of the Child Size Hat on my YouTube Channel below.

Wrapped in Love eBook

During the month of December you can take advantage of my Wrapped in Love eBook for $10.  You will get 7 premium crochet patterns that each contain multiple sizes to choose from.  Take advantage of the 50% off discount as part of the Warm my Heart Blog Hop. 

Warm my Heart Blog Hop & Bundle


The Warm my Heart Blog Hop & Bundle is sharing crochet patterns that give you a sense of warmth, security, feeling loved and protected.

During the blog hop you will find accessories such as warm shawls, pocket shawls, socks. You will also find cozy sweaters, blankets and more in that will warm your heart or someone else’s.

Click on the Button below to visit the Warm my Heart Blog Hop to find these daily free crochet patterns.


Also as part of the Warm my Heart Blog Hop we are offering the Warm my Heart Bundle.

We are offering the bundle as an option for those of you who do not want to do the blog hop and an idea for some of you who may have missed some days. You can also get this as last-minute Christmas gift for those in your life who LOVE to crochet (or even yourself lol)

If you would like to purchase the Warm my Heart Bundle for $12.99 and get ALL of the crochet patterns in one place click HERE or on the image below.

You can get a free PDF copy of the premium crochet pattern for my Wrapped in Love Set on December 17, 2022.  My Wrapped in Love Set contains a Beanie and a Cowl crochet patterns that you can wrap them in love and warmth.  There are 3 sizes to choose from:  Child, Women, and Men.


Wrapped in Love Set Crochet Pattern

Wrapped In Love Set Crochet Pattern

Materials:
US Hook H or 5.0 mm
150 yards of MC #4 Worsted Weight Yarn
75 yards of CC #4 Worsted Weight Yarn
Scissors
Tapestry Needle

Gauge Swatch:
Hook U.S. H/5.0 mm
16 DC x 7 Rows = 4”

Size:
Crown = 5″

Width = 7″
Height = 7″
Circumference = 23″

Abbreviations & Stitches Used:
MC = Main Color

CC = Contrasting Color Chain 18. R1: DC in 4th ch from Hook
Ch Sp = Chain Space and in each st across. Turn (16 DC)
St = Stitch R2-R7: Ch 3, dc in each st across. (16 DC)
SC = Single Crochet When you finish the 7 Rows your Swatch
DC = Double Crochet should be 4 inches wide by 4 inches in height.
SS = Slip Stitch
FSC = Foundation Single Crochet (YouTube video here.)
LDC = Long Double Crochet (YouTube has GREAT instructional videos!)
DC2TOG = Double Crochet 2 Together (click on YouTube for instructions)
Beg Shell = Ch 3, DC, ch 1, 2 DC all in the same stitch
Shell = 2 DC, ch 1, 2 DC all in same stitch
***Drop Stitch = DS (YouTube has a video here.)

Notes:
Hat and Cowl are worked in the Round. Slip stitch into the 1st stitch, the chain space or stitch specified.

Ch 3 does count as a DC
Shells made create the Heart
This hat and cowl are Reversible and can be worn either way.
There will be a Gap between Hearts on R3.
*** If you do NOT want them to be Reversible, you can use the Drop Stitch technique

Child Size Hat Crochet Pattern

Hat–Child Size:

When making slip knot leave a 3” tail for sewing FSC row closed.

R1: With MC FSC 63. S s in top of ch 3 to join. (63 FSC)

R2: ch 3, dc in each st around. (63 DC) With a Tapestry Needle sew the FSC row closed.

Change to CC to make Shells/Hearts or Use the Drop Stitch

R3: Attach Hot Pink in top of ch 3. [Ch 3, dc, ch 1, 2 dc all in same stitch. (Beg Shell) made] ch 2, skip 6 st, 2 dc, ch 1. 2 dc all in the same stitch. (Shell made). *Ch 2, skip 6 st, Shell in next st.* Repeat from * to * 7 more times. Ch 2 and ss in top of ch 3 of Beg Shell. (9 Shells)

Change to MC or Use the Drop Stitch

R4: ss in ch 1 sp of Beg Shell, ch 1, sc in same st., *ch 2, skip 2 dc from previous row, 1 ldc in next 2 st of previous Row, ch 2, sc in ch 1 space of next Shell.* Repeat from * to * 7 more times. Ss in sc to join.

R5: ch 3, dc in each st around. (63 DC)

Change to CC to make Shells/Hearts or Use the Drop Stitch

R6-R14: Repeat R3-R5 ending with R4 and Light Pink Yarn.

R15-R17: ch 3, dc2tog around. Ss in top of ch 3 to join.

Fasten off. Leave a long piece of yarn and weave R16 closed. Use Tapestry Needle to weave in ends.

Child Size Cowl Crochet Pattern

Cowl–Child Size

When making slip knot leave a 3” tail for sewing FSC row closed.

R1: With MC and H Hook FSC 84. Ss in top of ch 3 to join. (84 FSC)

R2: ch 3, dc in each st around. (84 DC) With a Tapestry Needle sew the FDC row closed.

Change to CC to make Shells/Hearts or Use the DS

R3: Attach CC in top of ch 3. [Ch 3, dc, ch 1, 2 dc all in same stitch. (Beg Shell) made] ch 2, skip 6 st, 2 dc, ch 1. 2 dc all in the same stitch. (Shell made). *Ch 2, skip 6 st, Shell in next st.* Repeat from * to * 10 more times. Ch 2 and ss in top of ch 3 of Beg Shell. (12 Shells)

Change to MC or Use the DS

R4: ss in ch 1 sp of Beg Shell, ch 1, sc in same st., *ch 2, skip 2 dc from previous row, 1 ldc in next 2 st of previous row, ch 2, sc in ch 1 space of next Shell.* Repeat from * to * 10 more times. Ss in sc to join. (12 Shells)

R5: ch 3, dc in each st around. (84 DC)

Change to CC to make Shells/Hearts or Use the DS

R6-R17: Repeat R3-R5 ending with R5 and MC.

R18: ch 1, sc in same st and each st around, ss in 1st sc to join. (84 sc)

Fasten off.

Use Tapestry Needle to weave in ends.

Find me, Jo of Jo’s Crafty Hook at the places listed below.

Email:  j.o@joscraftyhook.com

Website

Facebook Group Jo’s Crafty Hookers

Facebook Group Jo’s Crafty Hook Designs

Facebook Page Jo’s Crafty Hook

Facebook Page:  Crochet Designer Community

Ravelry

LoveCrafts

Instagram

YouTube

Pinterest

Donations Accepted

Most Wonderful Time of the Year Roundup

As 2022 comes to an end, we all have so many things to be thankful for.

Most of all we are thankful for YOU! You are our friends, our families, those who make all of our hard work designing crochet patterns just right for you.

The crochet designers in the Most Wonderful Time of the Year Roundup want to celebrate their successes of 2022 with you!

Below you will find free and paid crochet patterns that are our most celebrated in 2022!


Most Wonderful Time of the Year Roundup featured the crochet designers listed below.
Be sure to stop by any of their social media sites and let them know what an awesome job they have done in 2022!

Jo’s Crafty Hook
Regina P Designs
Pine Tree Crochet
Crafty Patti
Made by Gootie
My Crochet Space
Straight Hooked
Raffamusa Designs
Golden Lucy Crafts
My Fingers Fly
Marsha Yarn Doodles
Lavender Cup Cottage Mosaic Crochet
Sandra Stitches
Ambassador Crochet
Frankie Kate
Big Momma’s Strings
Willow Crochet
OwensVillaChick Designs
Sunflower Cottage Crochet

Double Cross Mobius Cowl from Jo’s Crafty Hook.

This crochet design was one of my most favorite pattern to design this year.

Me and my husband had so much fun goofing off during the photo shoot.  He got me laughing, making funny faces and smiling just right for that perfect picture.

The Double Cross Mobius Cowl received yarn support from WeCrochet, which is always a plus to work with their gorgeous yarn!

For the whole month of December, you can get my Double Cross Mobius Cowl premium crochet pattern for 50% off using the Coupon Code:  DOUBLECROSS.


The Royal Bag from Regina P Designs.

This amazing bag was the result of multiple failed attempts to create a cute tank top. The top bombed but I managed to create this bag that I am so in love with!

You can find the Royal Bag as a free crochet pattern on Regina P Designs’ website.


Coastal Waves Beanie from Pine Tree Crochet.

I love matching sets and one skein wonders. The Coastal Waves Beanie is my most colorful pattern and best seller.

You can find the Coastal Waves Beanie as a free crochet pattern on Pine Tree Crochet’s website.


Daisy Holstein Cow Potholder from Crafty Patti.

The Daisy Holstein Cow Potholder is my top seller for 2022 and made with my mom.

The Daisy Holstein Cow Potholder crochet pattern can be purchased from Crafty Patti’s Ravelry Store.

.

Bohemian Mosaic Placemat from Made by Gootie.

The Bohemian Mosaic Placemat is my first Mosiac pattern, and my first crochet along event I have hosted. The pattern is great for someone who is new to crochet mosaic technique as the first part of the pattern has a video to help you get going.

The Bohemian Mosaic Placemat crochet pattern can be found free on Made by Gootie’s website.


Mosaic Mug Rug from My Crochet Space.

This mug rug is perfect for those days when you just have an hour crochet time and want to finish your started project in one go! This pattern uses the overlay mosaic technique, which is one of my favourite!

The Mosaic Mug Rug crochet pattern can be purchased at My Crochet Space’s Ravelry Store.


Throwback Throw  Blanket from Straight Hooked.

Remember a simpler time as you create the different hexagons and join them to create a cozy masterpiece!

You can purchase the Throwback Blanket crochet pattern directly from Straight Hooked’s website.


Tutti Frutti Granny Squares from Raffamusa Designs.

The Tutti Frutti Granny Squares have the been the most fun squares I’ve crocheted this year! It’s been a true joy to work on them and to see that everyone loved them too 🙂

The Tutti Fruitti Granny Squares crochet pattern is free on Raffamusa Designs’ website.


Dogwood Flower from Golden Lucy Crafts.

I live in an area where dogwoods are blossoming in April – May and the amazing beauty of these trees inspired me to design this crochet dogwood flower.

You can find the Dogwood Flower crochet pattern free on Golden Lucy Crafts’ website.


Snow Globe Gift Bag from My Fingers Fly.

Everyone loves a snow globe! These snow globes work as gift bags and work up quickly in worsted weight yarn. Because they only use a few yards of each color, they are great stash busters. They are also easy to personalize by using different colors and adding embellishments.

You can find the Snow Globe Gift Bag crochet pattern free on My Fingers Fly’s website.


Mom’s Angel Slippers by MarshaYarnDoodles.

These slippers were designed for my mom while she was in the final stages of cancer. She loved them & they kept her feet toasty warm! You’ll feel like you’re walking on clouds when you wear them.

Marsha Yarn Doodles Angel Slippers crochet pattern can be purchased at her Ravelry Store.


Hannah Tropicana Blanket Mosaic Crochet Pattern from Lavender Cups Cottage Mosaic Crochet.

The Hannah Tropicana Blanket Mosaic Crochet Pattern is the perfect way to add a touch of style and comfort to your home. With this easy-to-follow pattern, you can create a beautiful blanket or bedspread that will keep you warm and snug while you watch your favorite show or use it as a bedspread or blanket on your bed. Yarn amounts and instructions for various sizes included.

The Hanna Tropicana Blanket Mosaic Crochet Pattern can be purchased from Lavender Cup Cottage Mosaic Crochet’s Ravelry Store.


Olive Scarf from Sandra Stitches

This Olive Scarf with pockets is the one you will go to on those winter days out! Easy to follow pattern with lots of texture, adding the fringe and pockets makes it the perfect Scarf for your winter wardrobe.

You can purchase Sandra Stitches’ Olive Scarf crochet pattern from her Raverly Store.


Flagstone Blanket from Ambassador Crochet.

The Flagstone Blanket has beautiful texture and uses super soft yarn. The results are amazing! It quickly became my newest best seller this year and I’m celebrating it with you!

The Flagstone Blanket crochet pattern can be purchased from Ambassador Crochet’s Ravelry Store.


Nova Hooded Triangle Shawl by Frankie Kate.

This hooded triangle shawl warm and cozy shawl is perfect for fall, rainy days and chilly evenings, but irreplaceable during those snowy, winter days to toss over your shoulders while sitting in your favorite crochet chair or on your way out.

The Nova Hooked Triangle Shawl crochet pattern can be purchased at Frankie Kate’s Etsy Shop.


Tunisian Stacked Witch Scarf from Big Momma’s Strings.

This pattern is a perfect addition to your holiday outfit. This pattern is for those crocheters who are comfortable working with more than one color.

You can purchase the Tunisian Stacked Witch Scarf crochet pattern from Big Momma’s Strings’ Etsy Shop.


Tiger Sweater from Willow Crochet.

It was my first ever sweater pattern and I’m so happy with how it turned out and how well it was received by everyone!

You can purchase the Tiger Sweater crochet pattern from Willow Crochet’s website.


Crossroads Dishcloth from OwensVillaChick Designs.

I am celebrating my Crossroads Dishcloth! This pattern was my first published pattern and inspired me to keep designing more crochet patterns! The Crossroads Dishcloth is an advanced beginner pattern that features the link stitch and works up quickly! A photo tutorial of the link stitch is provided in this pattern.

The Crossroads Dishcloth is a free crochet pattern at Owens Villa Chick Designs website.


Nordic Snowflake Blanket from Sunflower Cottage Crochet.

I am able to celebrate the release of this blanket because I have had the idea for in my head for about 18 months and it finally released!

I love Nordic inspired crochet patterns. There is a simple beauty that translates so well into crafts when using only 2 colours in a project. I think that this is what makes the Nordic theme so popular!

The Nordic Snowflake Blanket crochet pattern can be purchased from Sunflower Cottage Crochet’s website.


Unisex Scrappy Scarf from Sunflower Cottage Crochet.

During 2022 I have had a goal to use all of my scraps and work from my stash as much as possible.

What can I say? I have bought maybe 1/4 of the yarn I ordinarily would have during a year. I am also deliberately raiding my scrap buckets before looking for part or full skeins of a particular colour or yarn.

So, I can say so far so good!

You can find the Unisex Scrappy Scarf can be purchased from Sunflower Cottage Crochet’s website.


Kawaii Pumpkin Blanket from Stardust Gold Crochet

The Kawaii Pumpkin C2C  Blanket was part of a Fall Mystery C2C CAL that showed so many beautiful version of this blanket.  The CAL was a great deal of fun!

You purchase the Kawaii Pumpkin Blanket from Stardust Gold Crochet’s website.


We are so appreciative of your support in 2022!  We pray you continue supporting our business’ and all the effort we put into making these designs the best they can be!

Be sure to watch out for more great crochet patterns to come in 2023 and help up us celebrate each and everyone!

Find me, Jo of Jo’s Crafty Hook at the places listed below.

Email:  j.o@joscraftyhook.com

Website

Facebook Group Jo’s Crafty Hookers

Facebook Group Jo’s Crafty Hook Designs

Facebook Page Jo’s Crafty Hook

Facebook Page:  Crochet Designer Community

Ravelry

LoveCrafts

Instagram

YouTube

Pinterest

Donations Accepted

Winter Pine Table Runner

During season changes, in certain areas of the world, you can see all of the beautiful pine trees change colors. 

I live in NE Ohio and I love to watch as my son’s pine trees change to beautiful colors in each season. 

With the Winter Pine Table Runner crochet pattern I want to show off some of the colors of the pine trees I see during the winter seasons.


More information about my Winter Pine Table Runner Crochet Pattern.

I used a filet design to create the pine trees.  I added a white border to create a ‘snow like’ affect.  I think the white border adds a little something extra to the design.

Inside the crochet pattern there are 5 sizes to choose from to fit any size table.  There are 3 panels, showing the different colors of the pine trees.  There is also a gauge inside to help you create the perfect size for your table.

Inside the premium crochet pattern you will find picture tutorials to help you see the pine tree repeats; how to add the edging of each panel; how to connect the panels; and how to add the border.

You can find the premium crochet pattern for a small fee at my Ravelry Store

I used 3 colors of KnitPicks 100% Premium Acrylic Yarn.  #4 Worsted Weight Yarn.  (218 yds / 100 g)

I used Dublin, Avocado, and Green Tea Heather.

You can find these colors and more at KnitPicks.


My Winter Pine Table Runner is being featured in the Winter Wonders 2022 Blog Hop hosted by Itchin’ for Some Stitchin’, Ned & Mimi, and HanJan Crochet. Sponsored by WeCrochet.

On December 12-13, 2022 you can get a FREE premium copy of my Winter Pine Table Runner crochet pattern as part of the Winter Wonders 2022 Blog Hop.

In the mean time you can visit the Winter Wonders 2022 Blog Hop to take advantage of the other free daily fabulous crochet designers from a bunch of fabulous designers!  Click on the image below to visit the main blog hop website.


On December 12-13, 2022, from 12a EST – 11:59p EST, be sure to visit the main roundup to get the Coupon Code needed.  Bring it back here to my website to use at Checkout at my Ravelry Store.


As part of the Winter Wonders 2022 Blog Hop you can purchase a bundle with ALL 43 premium crochet patterns + a chance to win 5 prizes from WeCrochet for $15.99.  How AWE-some is this!  To check out what all is inside the Bundle + Giveaway click on the image below.


When purchasing the Winter Wonders 2022 Bundle, you are automatically entered in the WeCrochet Prize Giveaway

Click on the image below to get your copy of the Winter Wonders 2022 Bundle and be entered for a change to win a prize from WeCrochet!


Stop by my Ravelry Store and get the premium crochet pattern with all of the helpful information inside.  You can get the Winter Pine Table Runner there for a small fee.

Find me, Jo Baird of Jo’s Crafty Hook at any of the places listed below.

Email:  j.o@joscraftyhook.com

Website

Facebook Group Jo’s Crafty Hookers

Facebook Group Jo’s Crafty Hook Designs

Facebook Page Jo’s Crafty Hook

Facebook Page:  Crochet Designer Community

Ravelry

LoveCrafts

Instagram

YouTube

Pinterest

Donations Accepted

Baby’s First Poncho

With the Christmas Season right around the corner the Baby’s First Poncho Crochet Pattern would be perfect to dress up those little ones.

We all love to dress our babies up for those Christmas and Holiday pictures.

I know when I had my little ones the Christmas and Holiday pictures were always my favorite.  The pictures show us how cute they were dressed up in their holiday’s finest.

I have the perfect way to keep a memento of those special holiday pictures with my Baby’s First Poncho crochet pattern.


My Baby’s First Christmas Poncho crochet pattern is being featured in the Baby’s First Christmas Blog Hop hosted by Ambassador Crochet.

As part of the Baby’s First Christmas Blog Hop you can get a FREE premium crochet pattern of the Baby’s First Poncho.


You can get the Baby’s First Poncho crochet pattern by click on the image below to get the Coupon Code needed to get a free copy from my Ravelry Store.


After you visit the main blog hop page and get your Coupon Code bring it back here to get the free PDF by click on the image below. Then you will be able to use the Coupon Code at Checkout.


Information about the Baby’s First Poncho Crochet Pattern.

I used Bernat Softee Baby Yarn 100% Acrylic Yarn (395 yds/361 m)(5 oz/141 g) in Soft Red

I used We Love Yarn Mega Ball 100% Acrylic Yarn (1312 yds/1200 m) (14.1 oz/400 g) in White

Materials:
50-150 yds of #3 Lightweight/DK Weight Yarn as the MC
50-150 yds of #3 Lightweight/DK Weight Yarn as the CC
US G Crochet Hook or 4 mm
Scissors
Stitch Markers
Tapestry Needle

The crochet pattern uses most of the basic crochet stitches but also a couple of the special stitches like the Foundation Double Crochet, Triple Crochet, the Alternate Chain 2, and the Alternate Chain 3.

Inside the crochet pattern there are 4 sizes to choose from.  Baby Doll, 3-6 months, 6-9 months and 12-24 months.

To get a copy of the Baby’s First Poncho premium crochet pattern you can visit my Ravelry Store for a small fee.

[sg_popup id=”10940″ event=”hover”][/sg_popup]

Click on the Subscribe button in the right hand corner of your screen to sign up for my Newsletter where you will be notified about Free Crochet Pattern Releases, Collaborations; and more.

Visit my Landing Page to find out ways you can connect with me at my Facebook Groups and Pages; all my Social Media Sites; and my YouTube Channel.

Rugged Slopes Boot Cuffs

The Rugged Slopes Boot Cuffs crochet pattern uses a stitch I fell in love with a couple of years ago, the Sedge Stitch.

As a crochet designer I try to incorporate new crochet stitches in my newer designs.  But, I recently saw the Sedge Stitch and remembered I used it in a couple of my previous designs.  I used the Sedge Stitch in my Messy Bun and Beanie crochet pattern and my Rugged Slopes Cowl crochet pattern.  

The Sedge Stitch is an easy stitch to do because all it consists of is a single crochet and 2 double crochet all in the same stitch.

Inside this post you will find a free crochet pattern for my Rugged Slopes Boot Cuffs for 9″ wide by 4″ in height.

You can find the premium crochet patterns for my Rugged Slopes Boot Cuffs, Rugged Slopes Messy Bun and Beanie; and Rugged Slopes Cowl at my Ravelry Store.

Inside the Rugged Slopes Boot Cuffs premium crochet pattern, there are 5 different sizes to choose from based on the width of your calf and the height you prefer to do.

There are also step-by-step picture tutorials to help you figure out your width and how the other steps you may need to crochet your boot cuffs.

You can purchase the premium copy of the Rugged Slopes Boot Cuffs to find the right size for you from my Ravelry Store for a small fee.  Click the button below to get a copy of the Rugged Slopes Boot Cuffs.

Information about the Rugged Slopes Boot Cuffs

I used Red Heart Super Saver.  I used 150 yds for the 13” boot cuffs.  Weight: Medium (4)  Contents: 100% acrylic  Skein Weight: 7 oz. / 198 g  Yardage: 364 yd. / 333 m

Materials:
75-300 yds of #4 ply Worsted/Aran Weight Yarn
US H Crochet Hook or 5mm
Tapestry Needle
Scissors

Abbreviations/Stitches Used:
ch = chain
st = stitch
sl st = slip st
sc = single crochet
dc = double crochet
blo = back loop only
rem = remaining

Notes:
ch 1 does not count as a stitch.
The bottom cuff is worked in rows.
The body is worked in the round with turning rows.
The height of the cuff measures 2”
The stitch count is a multiple of 3 + 1

Size:
Widths is 9” 

Heights is 4″  

Special Stitch:
Sedge Stitch: consists of (sc, 2 dc) all in one stitch.

Gauge:
US H Crochet Hook or 5 mm
12 st x 8 rows = 4”
4 Sedge St x 8 rows = 4”

Gauge Swatch Instructions:

Measure where you want the top of your boot cuff to be. 
The stitch counts below the size chart will correspond with your height and width.

You can purchase the premium copy of the Rugged Slopes Boot Cuffs to find the right size for you from my Ravelry Store for a small fee.  Click the button below to get a copy of the Rugged Slopes Boot Cuffs.

Boot Cuff Crochet Pattern

Make 2 

R1: ch 11,  sc into the 2nd ch from hook and in each rem ch. turn  (10 sc)

R2:  sc in 1st st, blo in the next 8 st, sc in last st.  turn  (10 sc)

R3-R28:  rep R2

Join Cuff:  

Hold both ends together without twisting, sl st the last row and foundation row together. 

Do not fasten off.

Boot Cuff Body

Boot Cuff Body


R1:  turn work to go around the sides of the cuff.  ch 1, sc in same st as joining, sc in each rem st around.   (28 sc)

Turn work slightly, ch 1, sc in same st and each st around.

R2:  ch 1, *(sc, 2 dc) all in the 1st  st, skip 2 st.  rep from * around.  sl st in 1st sc to join.  (9 sedge st)

R3:  ch 1 and turn, sk 2 st, sedge st in the 1st sc, skip 2 st. *sedge st in next st, sk 2 st.  rep from * around.  until last sc.  sedge in last sc.  sl st in 1st st to join (this will be your 1st sc)  (9 sedge st)

R4-R8:  rep R3 or until you reach your desired height.

Fasten off and weave in ends.


That’s it!  You have completed your own Rugged Slopes Boot Cuffs!  I would LOVE to see your version of your Rugged Slopes Boot Cuffs!  You can tag me at any of my Social Media Sites listed above using any of the hashtags below.

#ruggedslopesbootcuffs #ruggedslopesbootcuffscrochetpattern #ruggedslopesbootcuffspattern #joeyleabaird #joscraftyhook #joscraftyhookdesigns #jo_bear38

Find me, Jo of Jo’s Crafty Hook at the places listed below.

Email:  j.o@joscraftyhook.com

Website

Facebook Group Jo’s Crafty Hookers

Facebook Group Jo’s Crafty Hook Designs

Facebook Page Jo’s Crafty Hook

Facebook Page:  Crochet Designer Community

Ravelry

LoveCrafts

Instagram

YouTube

Pinterest

Donations Accepted