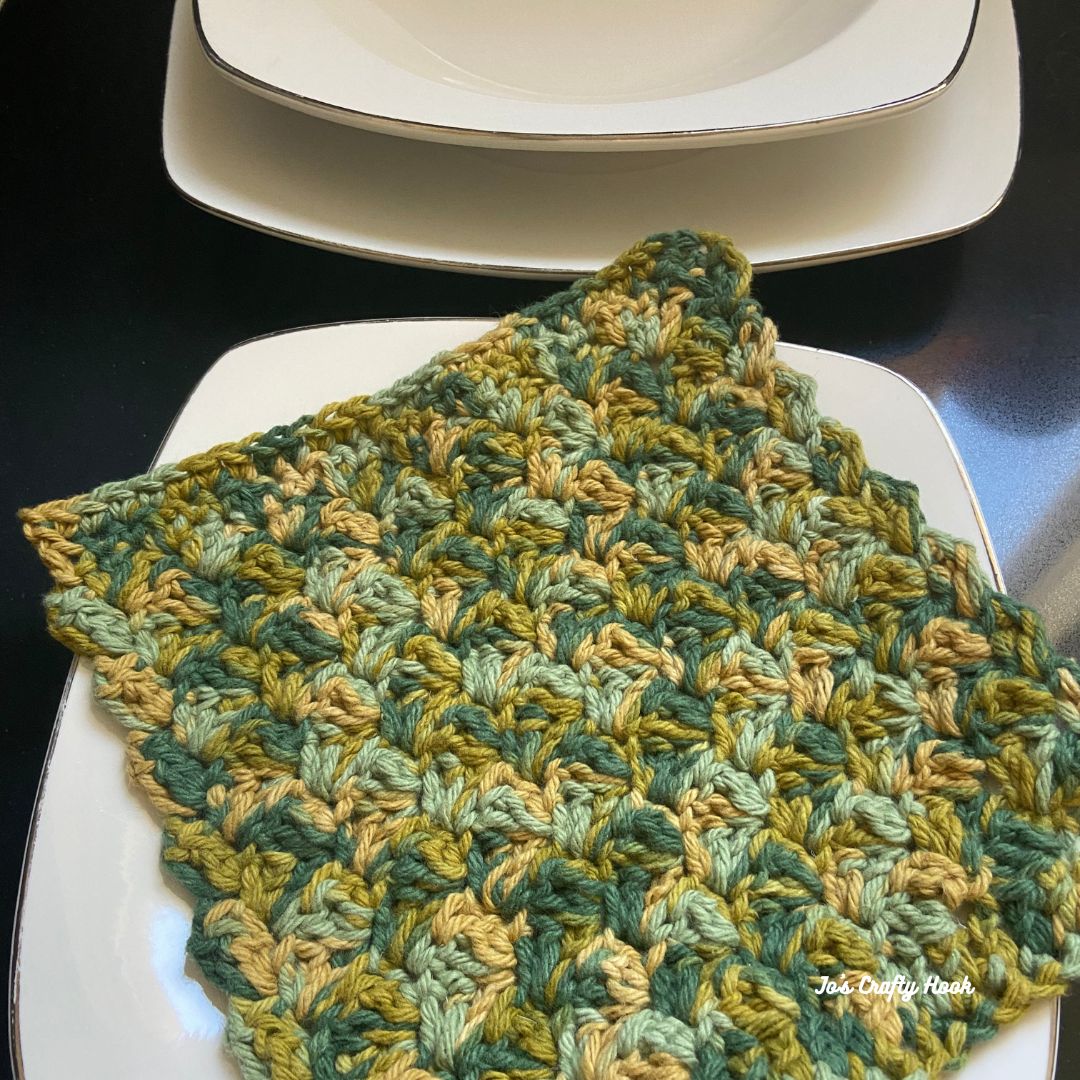
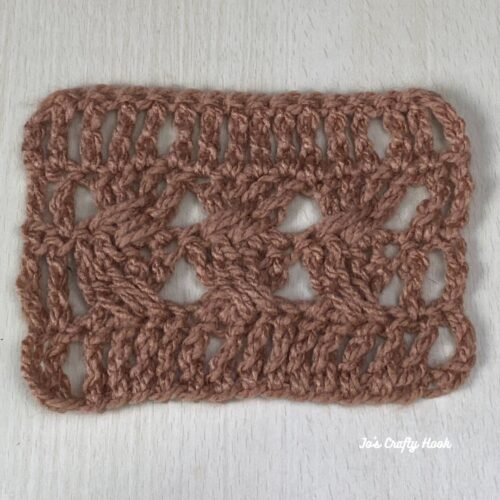
The Wash Up Cloths Crochet Pattern features a crochet stitch some of you may have not tried before, the Sedge Stitch.
The Sedge Stitch inside the Wash Up Cloths Crochet Pattern consist of a single crochet and 2 double crochet all in one stitch. The Sedge Stitch gives the washcloth a nice textured look and feel that is great for cleaning and washing up.
My Wash Up Cloths Crochet Pattern contains 2 cloth crochet patterns inside. The crochet pattern is a quick and easy one and hey work up so fast you can make a lot in one day!
You will find a FREE version of my Wash Up Washcloths below. These would be a perfect make for the guys in your life. My hubby uses them in his garage for when he works on cars or needs to wash up his tools.
This post contains affiliate links that appear at no cost to you.
Wash Up Washcloths Free Crochet Pattern
Info Needed to make the Wash Up Washcloths
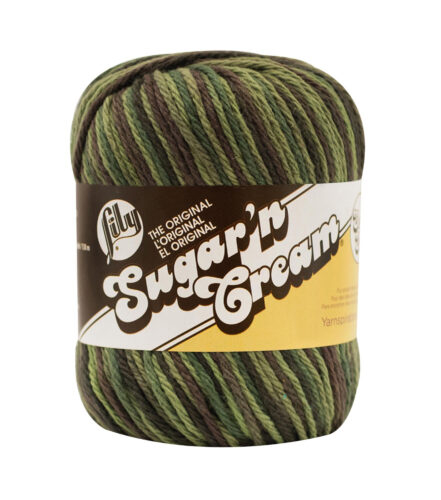
I used Lily Sugar’n Cream 100 % Cotton Yarn in Camouflage. 113g / 4oz, 184m / 200yd
You can find Lily Sugar’n Cream at LoveCrafts in Camouflage or in a Solid Color.
US Terminology
Beginner Friendly
Materials: US H or 5 mm Crochet Hook Washcloth – 50-65 yds #4 Ply Medium Weight Cotton Yarn Dishcloth – 80-100 yds of #4 Ply Medium Weight Cotton Yarn Tapestry Needle Scissors
Abbreviations/Stitch(es) Used: ch = chain sc = single crochet fsc = foundation single crochet sk = skip
Special Stitch: Sedge Stitch: consists of placing (sc, 2 dc) all in the same stitch.
Notes: the stitch count used is a multiple of 3 + 1 the discloth’s stitch count is in parentheses
Gauge: US H or 5 mm Crochet Pattern 12 st x 8 rows = 4”
Finished Sizes: Washcloth: 8” x 8” Dishcloth: 12” x 12”
Optional: ch 26 (38) sc in 2nd ch from hook, sc across. ch 1, turn (25, 37 sc)
R2: sc in 1st st, sc across. (25, 37 sc)
R3: ch 1, turn (sc, 2 dc) all in 1st st *sk 2 st, sedge in next st. rep from * across. (27, 39 st)
R4: ch 1, turn. sk 1st 2 dc, sedge st in next sc. sedge st in each sc across (27, 39 st)
R5-R16(24): rep R4
R17(25): ch 1, turn. sk 1st dc, sc in next dc, dc in next sc. *sc in next 2 dc, dc in next sc. rep from * across. (26, 38 st)
R18(26): ch 1, turn. sc in same st, sc across. (26, 38 sc)
Fasten off and weave in ends.
See! I told you the Wash Up Cloths Crochet Pattern was Quick & Easy! I would love to see your finished version! You can tag me: @joscraftyhook on IG Jo’s Crafty Hook FB Group You can find some of my free crochet patterns at my website.
Find me, Jo of Jo’s Crafty Hook at the places listed below.
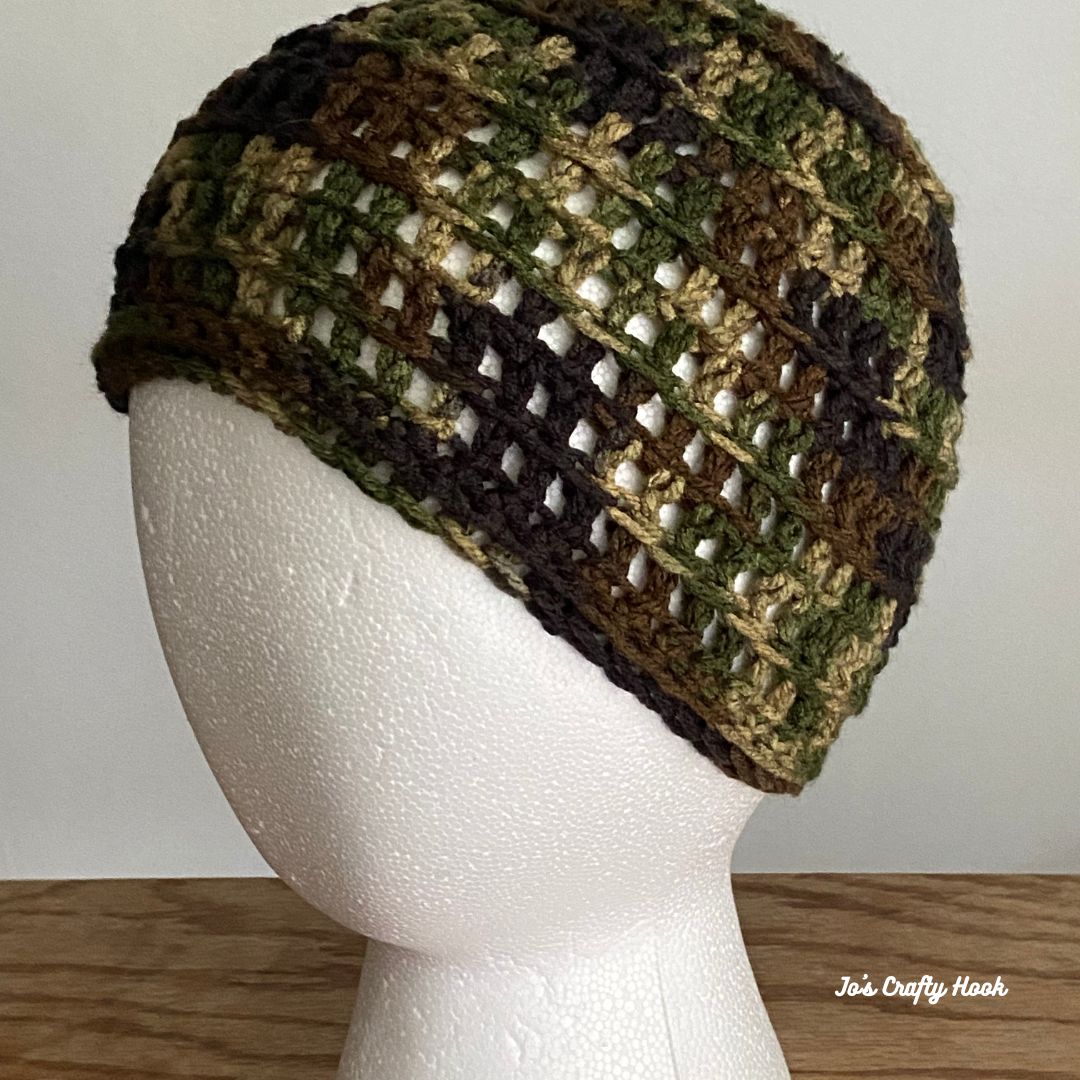
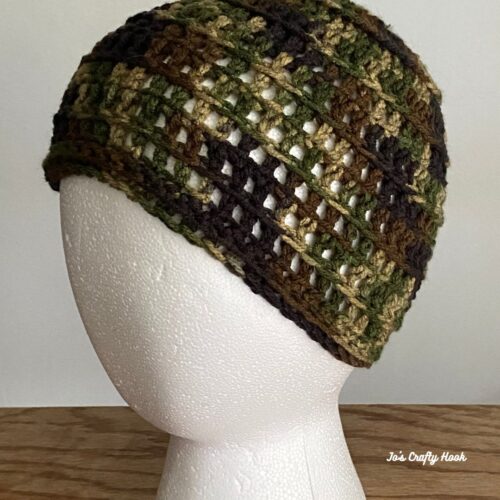
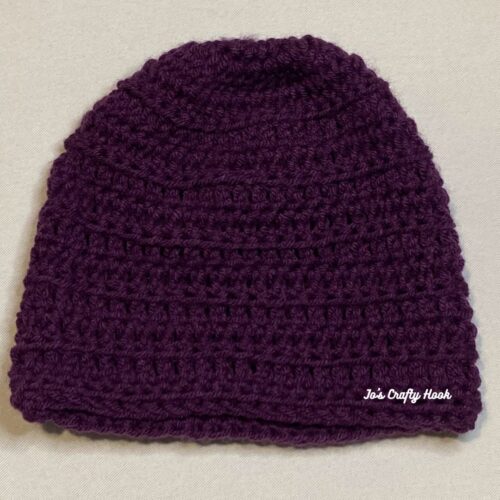
The Barberton Skull Cap is a free crochet pattern for ages 4-10 years of age that can be found in this post. The Barberton Skull Cap is a crochet pattern from the Barberton Beanie Bundle. The Barberton Skull Cap Free Crochet Pattern can be found below.
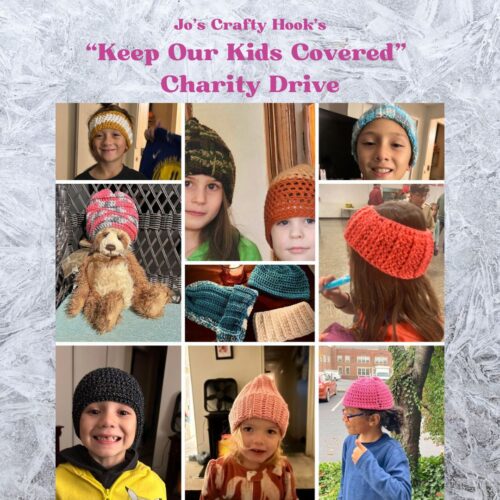
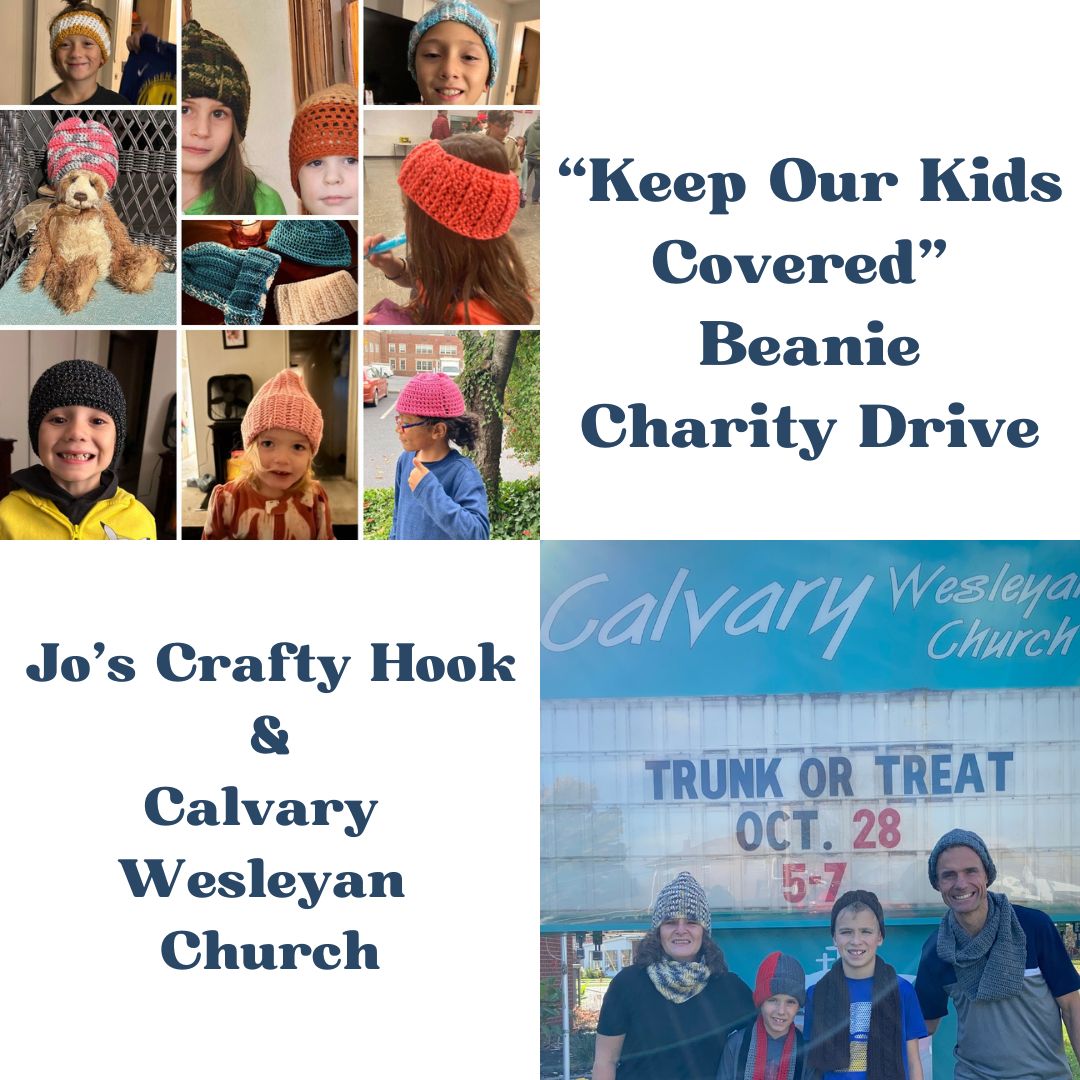
The bundle contains crochet patterns for school age kids. The crochet patterns were designed for my “Keep Our Kids Covered” Charity Drive. You can find out how you can help my charity drive found on my website HERE.
Newsletter
If you would like to receive more information about the events happening at Jo’s Crafty Hook and receive a FREE crochet pattern, why not Subscribe to my Newsletter at my website.
The post contains affiliate links that appear at no cost to you.
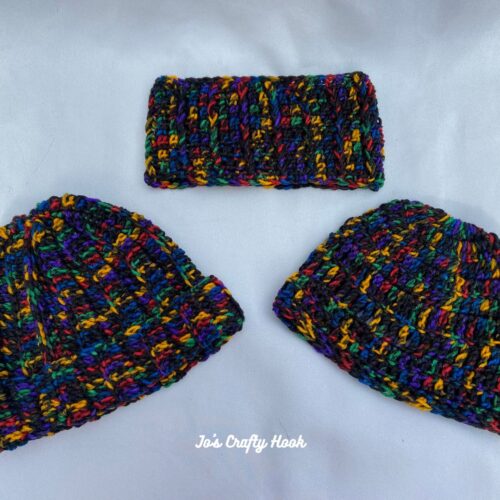
The Barberton Beanie Bundle contains 3 different types of crochet patterns for beanies. Inside you will find a Toque, a Skull Cap, and Ear Warmer. Each beanie has more than 1 size to choose from.
Barberton Beanie Bundle
Find a premium copy the Barberton Beanie Bundle with a 3 beanie crochet patterns with multiple sizes to choose from for $1.50 from my Ravelry Store or LoveCrafts or my Etsy Shop.
Information Needed for Skull Cap
Materials Used: US H or 5 mm Crochet Hook 120-140 yds of #4 ply Worsted Weight Yarn Scissors Tapestry Needle
Abbreviations/Stitches Used: ch = chain sc = single crochet
scblo = single crochet in back loop only
dc = double crochet
dc blo = double crochet in back loop only
sl st = slip stitch
Notes: the crochet pattern below is for ages 4-10 years old
ch 3 counts as a dc
the skull cap is worked in round with turning rows.
Gauge: US H or 5 mm Crochet Hook 16 dc x 8 rows = 4”
Gauge Swatch: Due to different thicknesses of #4 ply Worsted/Aran Weight Yarn, you may need to try going up or down a hook size to meet gauge.
R1: ch 18, dc in 4th ch from hook, dc across. turn (16 dc)
R2-R8: ch 3, dc across. (16 dc)
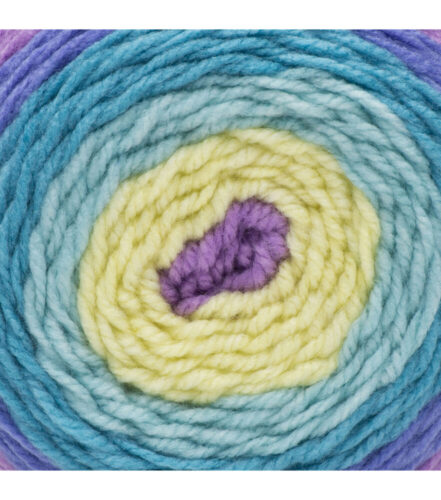
Why not try some Bernat Pop from LoveCrafts to crochet your Barberton Skull Cap?
Barberton Skull Cap Free Crochet Pattern
R1: make a magic circle, ch 2, 15 dc in magic circle. sl st in 1st dc to join. turn (15 dc)
R2: ch 3, 2 dc in each st around until 1st st. dc in 1st st. sl st in top of ch-3 to join. turn (30 dc)
R3: ch 3, dc in same st, dc in next st. *2 dc in next st, dc in next st. rep from * around. sl st in top of ch-3 to join. turn (45 dc)
R4: ch 3, dc in same st, dc in next 2 st *2 dc in next st, dc in next 2 st. rep from * around until 1st st. dc in 1st st. sl st in top of ch-3 to join. turn (60 dc)
R5: ch 3, dc around. sl st in top of ch-3 to join. turn (60 dc)
R6: ch 3, dcblo around. sl st in top of ch-3 to join. turn (60 dc)
R7-R14: rep R5-R6
R15: ch 1, sc in st, sc around. sl st in 1st st to join. (60 sc)
R16: ch 1, sc in same st, scblo around. sl st in 1st st to join. turn (60 sc)
Fasten off and weave in ends.
How you can help
Help “Keep Our Kids Covered” by donating your finished Barberton Skull Cap to an elementary school in your community, or donate them to a homeless shelter, or donate them to my “Keep Our Kids Covered” Charity Drive during this Winter season or throughout the year.
“Keep Our Kids Covered” Charity Drive
Find a premium copy the Barberton Beanie Bundle with a 3 beanie crochet patterns with multiple sizes to choose from for $1.50 from my Ravelry Store or LoveCrafts or my Etsy Shop.
Newsletter
If you would like to receive more information about the events happening at Jo’s Crafty Hook and receive a FREE crochet pattern, why not Subscribe to my Newsletter at my website.
Free Crochet Patterns
Find some of my free crochet patterns at my website.
Premium Crochet Patterns
All of my premium crochet patterns can be found at my Ravelry Store and LoveCrafts or Etsy. If you see something you like and don’t have time to make it yourself, email me and place a Custom Order in your style, size, and color!
The Long Stalks Placemat crochet pattern uses a crochet stitch I designed recently. It is called the triple crochet box stitch.
The Triple Crochet Box Stitch can be called the Triple Crochet X Stitch or the Triple Crochet Crossover Stitch. The design is a take of the Double Crochet X Stitch, it just uses triple crochet instead.
Triple Crochet Box Stitch or Triple Crochet X Stitch
Triple Crochet Box Stitch can be found on my YouTube Channel.
15 Days of December Discounts Blog Hop hosted by Regina P Designs
For the 1st 15 days of December you can find great discounted crochet patterns for $1. These crochet patterns are quick & easy to make for those on your Christmas lists.
Once you have the Coupon Code needed to get the discounted Long Stalks Placemat Crochet Pattern, click on the button below. Use the code and apply it at Checkout at my Ravelry Store. That’s it!
Crochet Patterns using the Triple Crochet Box Stitch.
Long Stalks Placemat
The premium copy of the Long Stalks Placemat crochet pattern has Step-by-Step Picture Tutorials and my Left Handed Video Tutorials for the Triple Crochet Box Stitch and the Alternate Chain 3. You can find the Long Stalks Placemat Crochet Pattern at my Ravelry Store or LoveCrafts.
Boxy Bulky Cowl
I originally created the Triple Crochet Box Stitch for the Boxy Bulky Cowl. I wanted a longer stitch because I was using a #6 ply Bulky Yarn. I wanted to give the cowl a nice textured stitch that would create a drape to the cowl.
Boxy Bulky Cowl FREE Crochet Pattern
Most cowls are designed for a tighter stitch because most of them are worn to keep the chill out. Since I was using a bulkier yarn, I wanted something that wouldn’t cause the wearer to get too hot.
Special Stitches Triple Crochet: YO twice, insert hook into specified space, YO draw through 2 loops on hook. YO, draw through 2 loops on hook, YO, draw through last 2 loops on hook.
How to Crochet the Triple Crochet Box Stitch
1st Step: trc in 1st 2 st, sk 2 st, YO twice, insert hook into next st, YO draw through 2 loops on hook, YO, draw through 2 loops on hook, YO draw through last 2 loops on hook. rep once more.
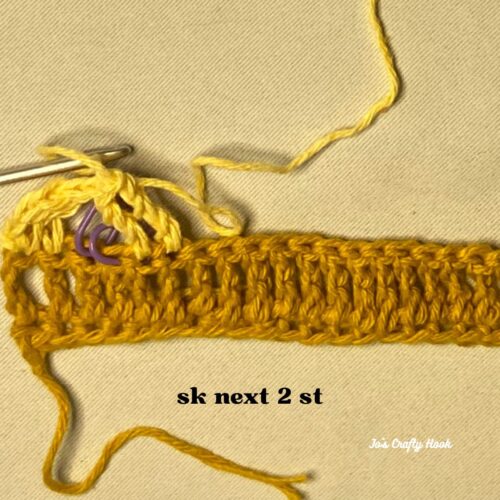
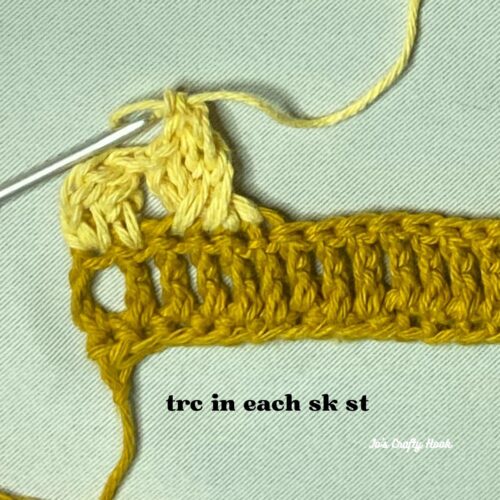
2nd Step: YO twice, insert hook into 1st sk st, YO draw through 2 loops on hook, YO, draw through 2 loops on hook, YO draw through last 2 loops on hook. YO, insert hook into 2nd sk st, YO, draw through 2 loops on hook, YO, draw through 2 loops on hook, YO, draw through last 2 loops on hook.
Newsletter
While you are there be sure to sign up for my Newsletter where you will receive news about my New Crochet Pattern Releases, Collaborations, and MORE! For signing up you will also get a FREE crochet pattern!
Jo’s Crafty Hook’s Crochet Patterns
You will find some of my Premium crochet patterns , by visiting any of my stores, by clicking on any of the Buttons below.
Custom Orders Welcome
If you would like me to crochet any of my designs for you or others, I do take Custom Orders. Visit my Ravelry Store or LoveCrafts to see some ideas of what you would like to Custom Order. You can email me with your order or any other questions at j.o@joscraftyhook.com.
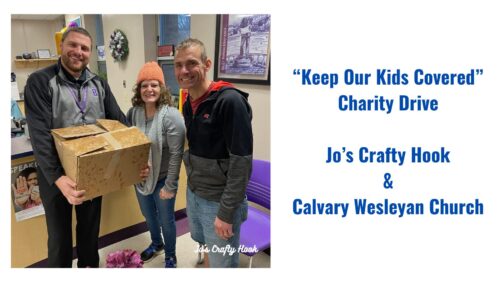
I started a “Keep Our Kids Covered” Charity Drive and I need your help. I have joined with my church, Calvary Wesleyan Church, to help school kids in my community to who need winter wear for the colder months ahead.
If you would like to receive more information about the events happening at Jo’s Crafty Hook and receive a FREE crochet pattern, why not Subscribe to my Newsletter at my website.
I am sure there are kids in your community who need help, so I designed a collection of beanie crochet patterns just for this charity drive called the Barberton Beanie Bundle.
The Barberton Beanie Bundle has 3 crochet patterns inside with 2 sizes that can be made. The 2 sizes inside the bundle are for a Toque, a Skull Cap, and Ear Warmers.
Premium Beanie crochet patterns, with multiple sizes to choose from, can go for $3 each or more.
The purchase of the Barberton Beanie Bundle for $1.50 will go a long way in helping school kids in my community or yours.
Whether the beanies are donated to your community or mine, Keeping Our Kids Covered when it’s cold outside is all that matters.
The Keep Our Kids Covered Campaign has 3 main purposes.
Donations of Beanies to Calvary Wesleyan Church will help keep our kids covered during the colder months.
Keep Our Kids Covered in prayer . We pray for the kids in our community because we don’t always know their home life situations.
The final purpose is with your purchase of the $1.50 Barberton Beanie Bundle all of the proceeds (minus PayPal fees of $.52) will be donated for the Sports Camp Youth Ministry that we offer every year to the kids in our community.
What you can do.
Purchase a copy of the Barberton Beanie Bundle for $1.50 from my Ravelry Store or my Etsy Shop.
Spread the word about the “Keep Our Kids Covered” Charity Drive.
Create a Charity Drive of your own and donate your versions of the Barberton Beanies to my charity drive or create your local schools, homeless shelters, or where you can help the most.
You can mail your finished version and support my charity drive to: Jo Baird c/o Calvary Wesleyan Church 139 31 St SW Barberton, OH 44203
My Show of Appreciation
As a way to show my appreciation for your donation, I would love to gift you a coupon for $3 that can be used at my Ravelry Store.
When you mail your beanie donations and upon receipt, I will send you a Coupon for $3 off to be used at my Ravelry Store.
When you send your donation, please include your name and email address so that I may contact you with your coupon that be used at my Ravelry Store.
If you send your beanies to my charity drive, please include your name and email address so that I may contact you with your coupon that be used at my Ravelry Store.
Below you will find some FREE beanie crochet patterns on my website that you can use to donate to help the kids in your community.
If you would like to receive more information about the events happening at Jo’s Crafty Hook and receive a FREE crochet pattern, why not Subscribe to my Newsletter at my website.
You can find some of my free crochet patterns at my website.
If you would like me to crochet any of my designs for you or others, I do take Custom Orders. Visit my Ravelry Store or LoveCrafts or my Etsy Shop to see some ideas of what you would like to Custom Order. You can email me with your order or any other questions at j.o@joscraftyhook.com.
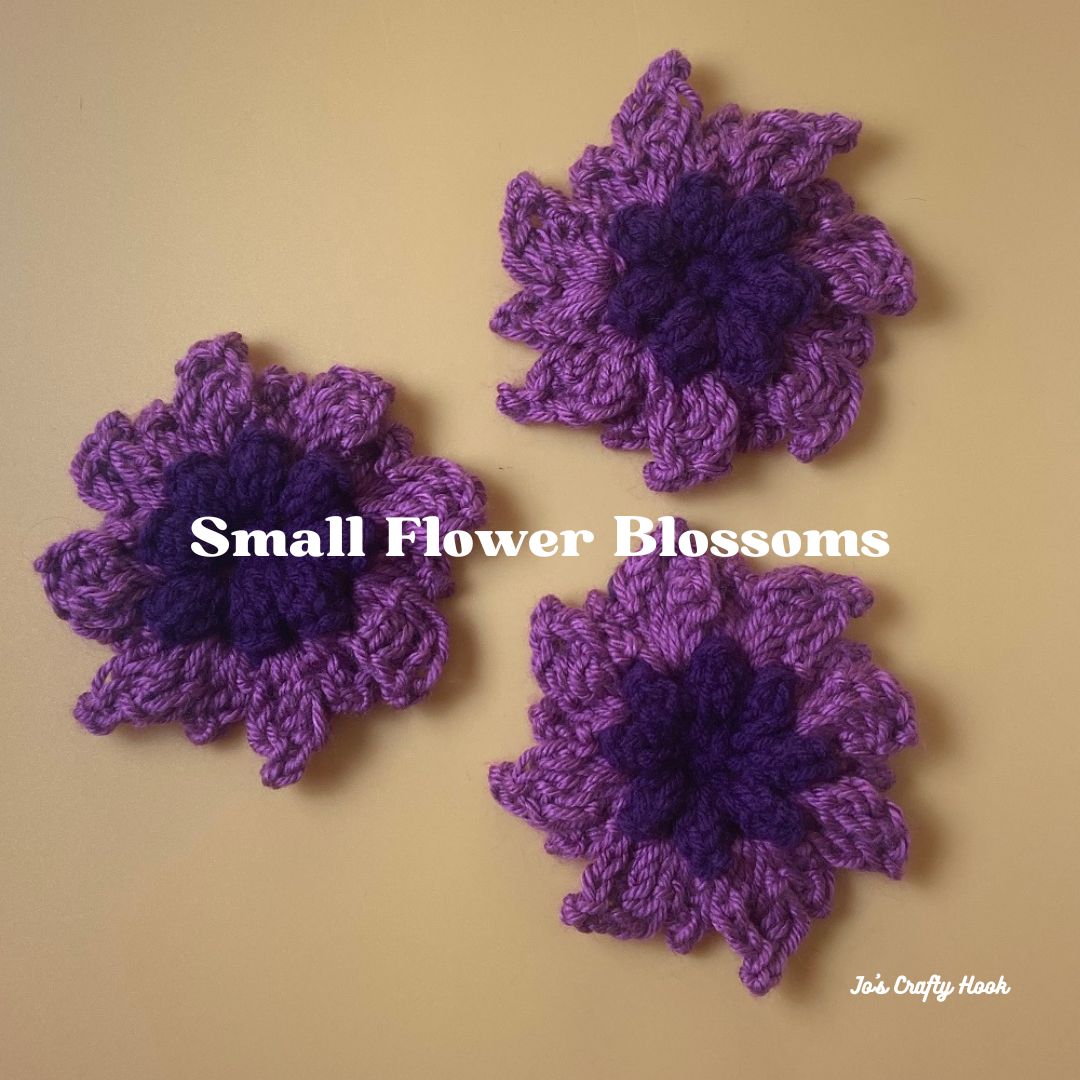
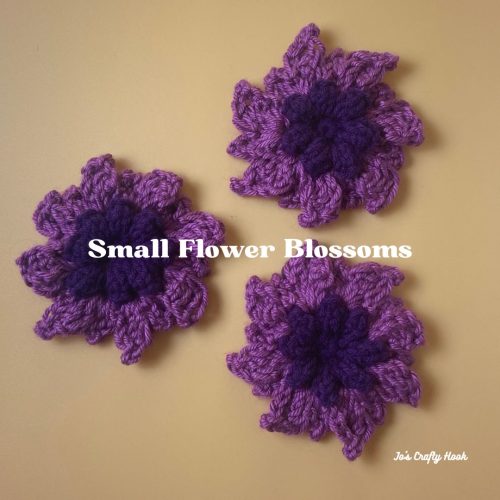
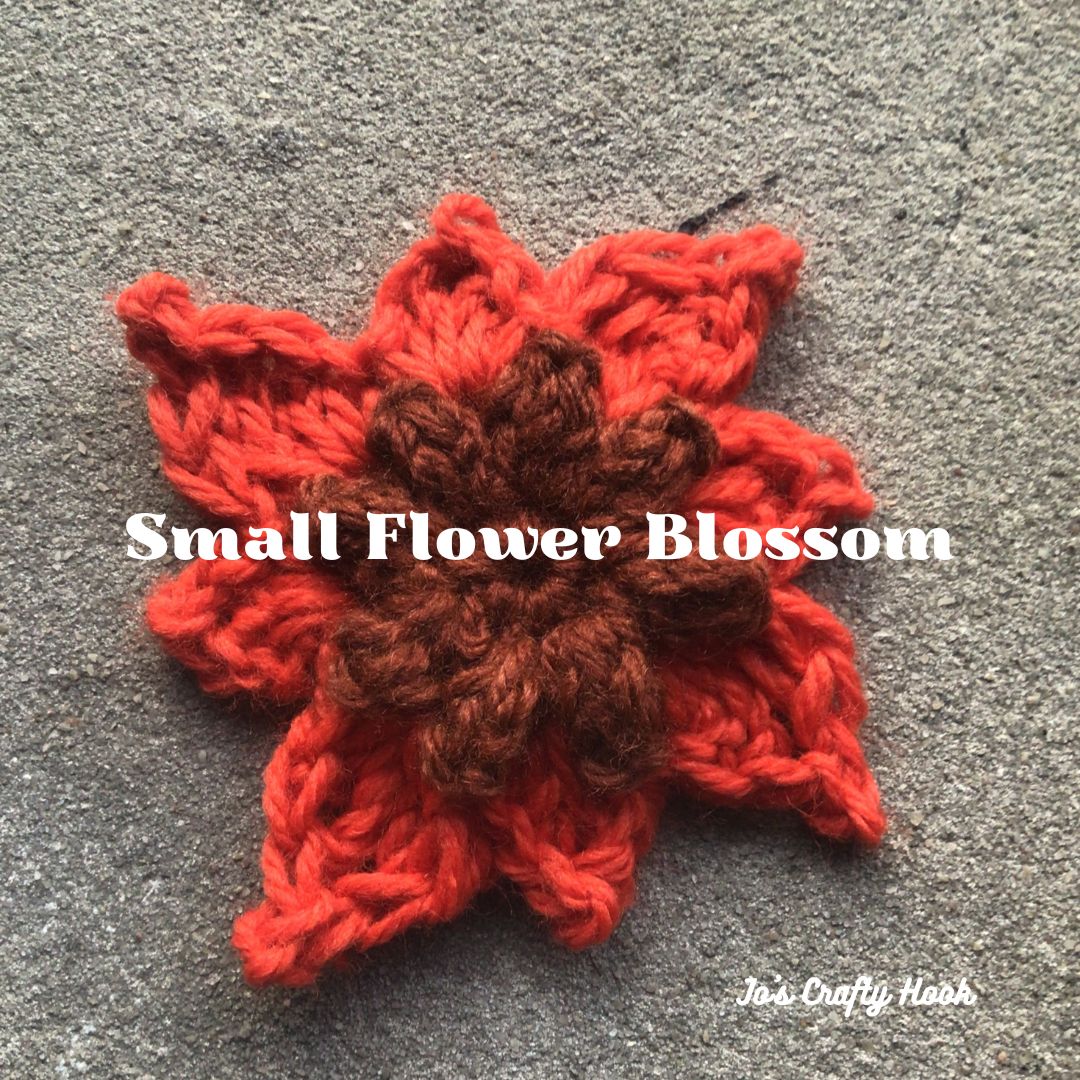
Today we are making the Small Flower Blossoms I used in my version of the Blooming Flowers Wall Hanging.
Yesterday we made the Viola Flower.
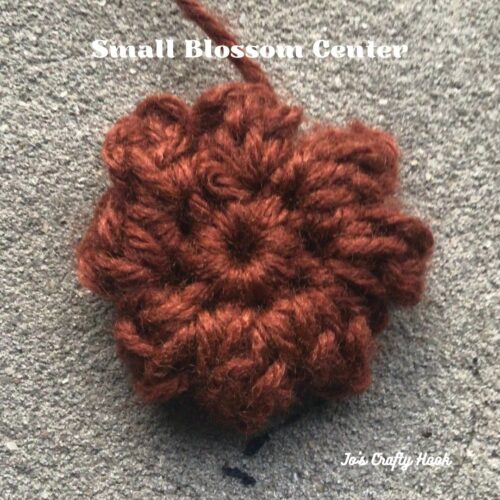
The center of the Small Flower Blossom uses a smaller version of the Viola Flower. The petals are created by using a multiple of stitches in one space around the Viola Flower.
You can find the free version of the Small Blossom Crochet Pattern below.
************************************************
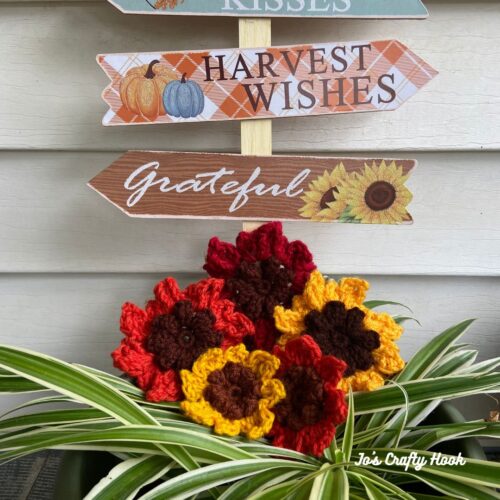
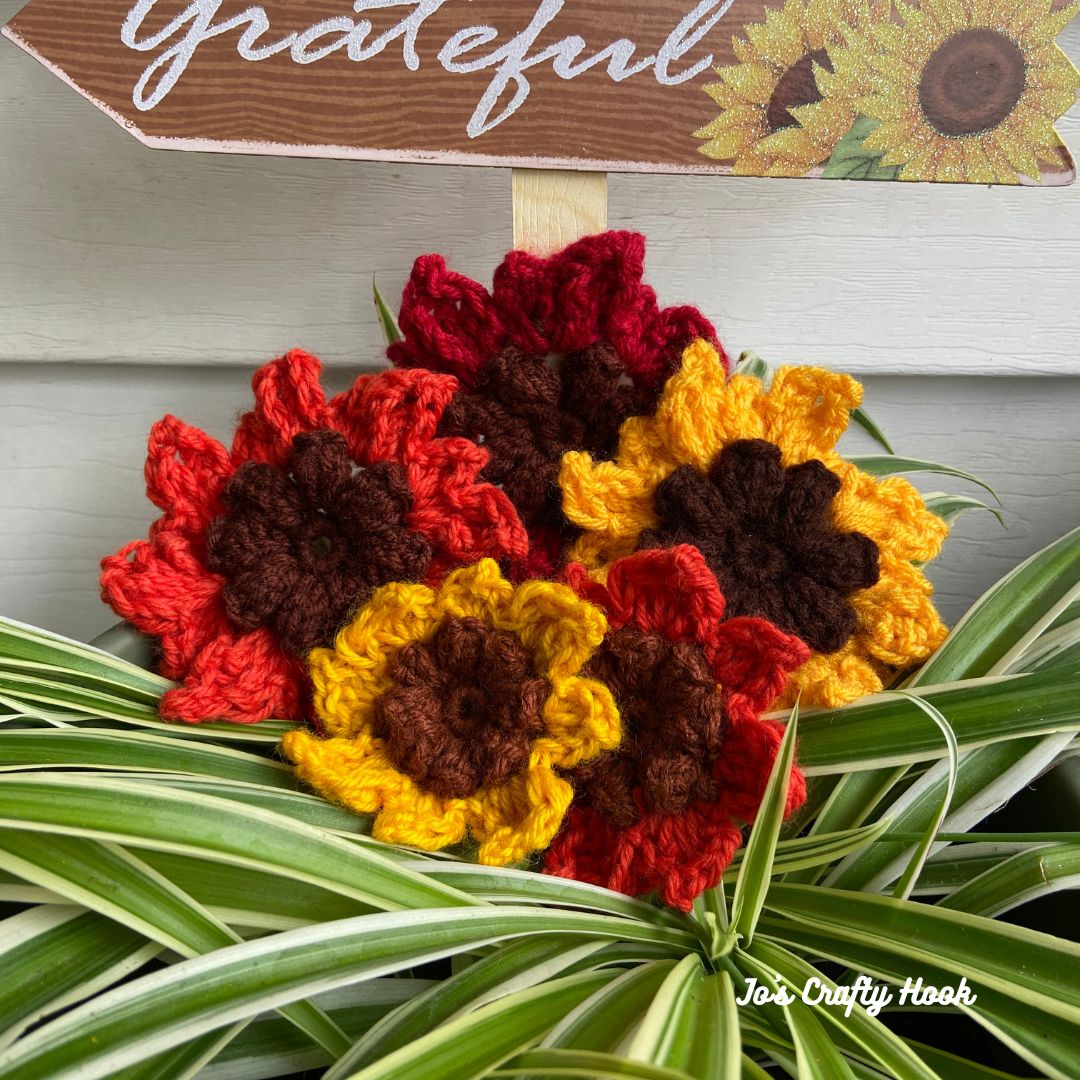
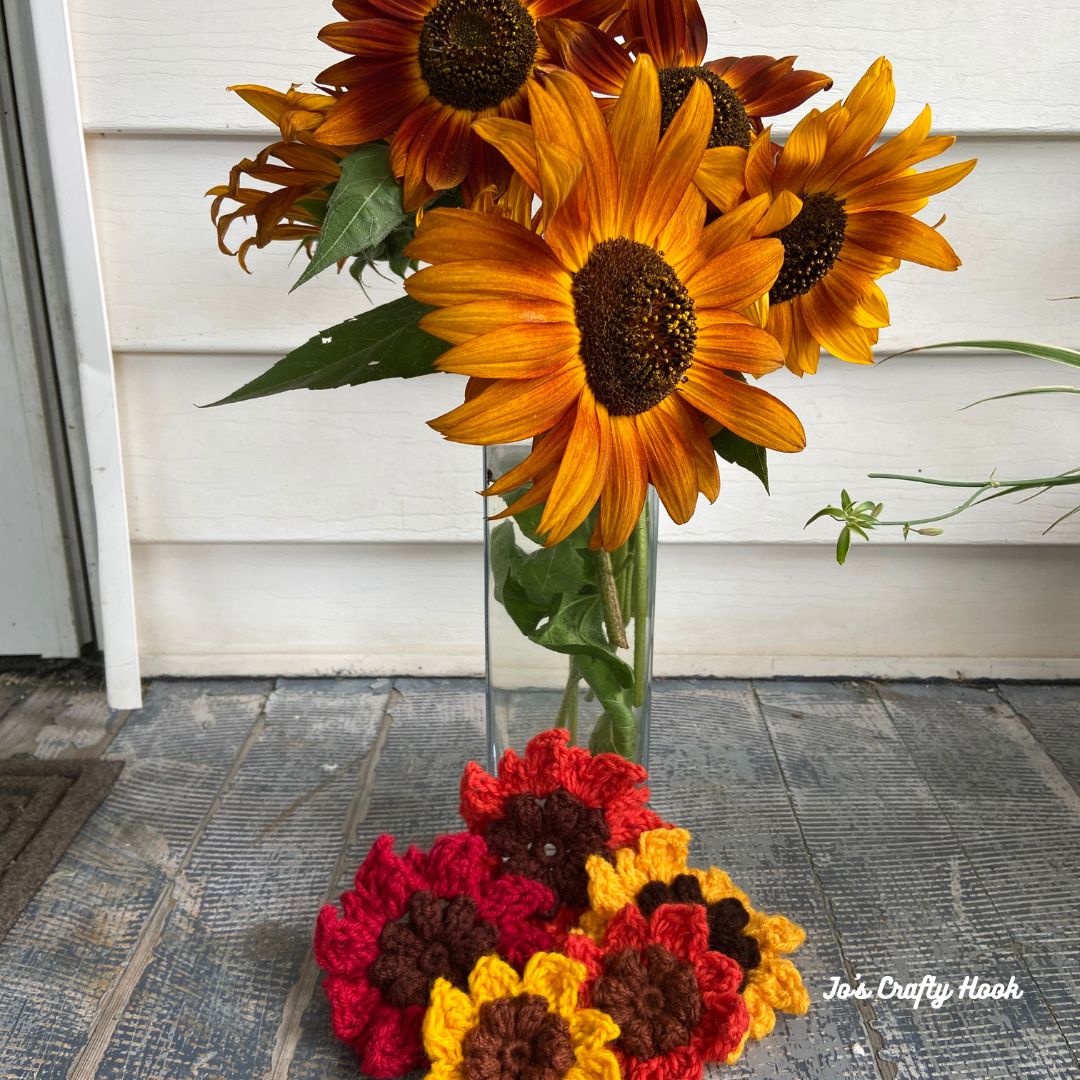
The Small Flower Blossoms Crochet Pattern was a joint effort between me and my Ma when she came for a visit. She was the one who taught me how to crochet over 25 years ago. We were working on a Fall Centerpiece and she wanted flowers to go with it. This crochet design is what we came up with.
The center part of the Small Flower Blossom uses a version my Viola Flower that I used in my Granny Viola Scarf Crochet Pattern. You can find the premium Granny Viola Scarf Crochet Pattern at my Ravelry Store and LoveCrafts.
Small Flower Blossoms Free Crochet Pattern
Below you will find a free crochet pattern of the Small Flower Blossoms Crochet Pattern.
You can purchase the Flower Blossoms Crochet Pattern that has 2 sized blossoms, step-by-step picture tutorials, helpful video tutorial stitches that are used in this design. You can find the premium Flower Blossoms Crochet Pattern at my Ravelry Store or LoveCrafts or my Etsy Shop
Information Needed
I used #4 ply Worsted/Aran Weight Yarn in a wide variety of colors.
I also used #4 ply Medium Weight Yarn for the smaller flowers. (this is optional)
Materials: 5-10 yds of Brown #4 ply Worsted/Aran Weight Yarn 25-50 yds of CC #4 ply Worsted/Aran Weight Yarn US I or 5.5mm Crochet Hook US J or 6 mm Crochet Hook Scissors Tapestry Needle
US Terminology
Skill Level: Beginner
Abbreviations/Stitches Used: ch = chain sc = single crochet hdc = half double crochet dc = double crochet trc = triple (treble) crochet alt ch 2 = alternate chain 2 or alternate starting chain rep = repeat
MC = Main Color CC = Contrasting Color
Notes: the flower is worked in the round ch 1 counts as a stitch (except where indicated) ch 2 counts as a stitch
Gauge is not that important in this design due to the different thicknesses of yarn.
Size: Small Flower = 4” x 4”
Small Flower Blossom Crochet Pattern
Using Brown & US J or 6 mm Crochet Hook
I have a helpful Left Handed Video Tutorial that is for the center of the flower blossoms called the Viola Flower Video Tutorial.
Center of Small Flower Blossom
R1: ch 2, 8 sc in ch 1. sl st in 1st sc to join. (8 sc)
R2: ch 1 (does not counts as a st) *3 dc in same st, turn to WS, sl st in 1st dc, turn to RS, ch 1. rep from * around. sl st in 1st ch-1 sp to join. (8 center parts)
Fasten off and weave in ends.
Flower Blossom Petals Using CC & US I or 5.5 mm Crochet Hook
Step 1: attach yarn with sl st in any ch-1 sp ( hdc, dc, ch 2, sl st in 1st ch of ch 2 just made, dc, hdc, sl st) all in ch-1 sp
Step 2: sc in next ch-1 sp (2 trc, ch 3, sl st in 1st ch of ch 3 just made, 2 trc, sc) all in same ch-1 sp
repeat Step 1-2 around until last ch-1 sp. sl st to join.
Fasten off and weave in ends.
@Jo’s Crafty Hook 2023
That’s it! You have created your own version of the Small Flower Blossoms! I would really LOVE for you to share your version by tagging me on Instagram or in my Facebook Group Jo’s Crafty Hook Designs
@joscraftyhook
I have a GREAT Leaf Appliques crochet pattern that can be used as an embellishment to the blossoms. The Leaf Applique Crochet Pattern contains 2 different leaf designs.
You can find the Leaf Appliques Crochet Pattern at any of my stores listed below.
You can find some of my free crochet patterns at my website.
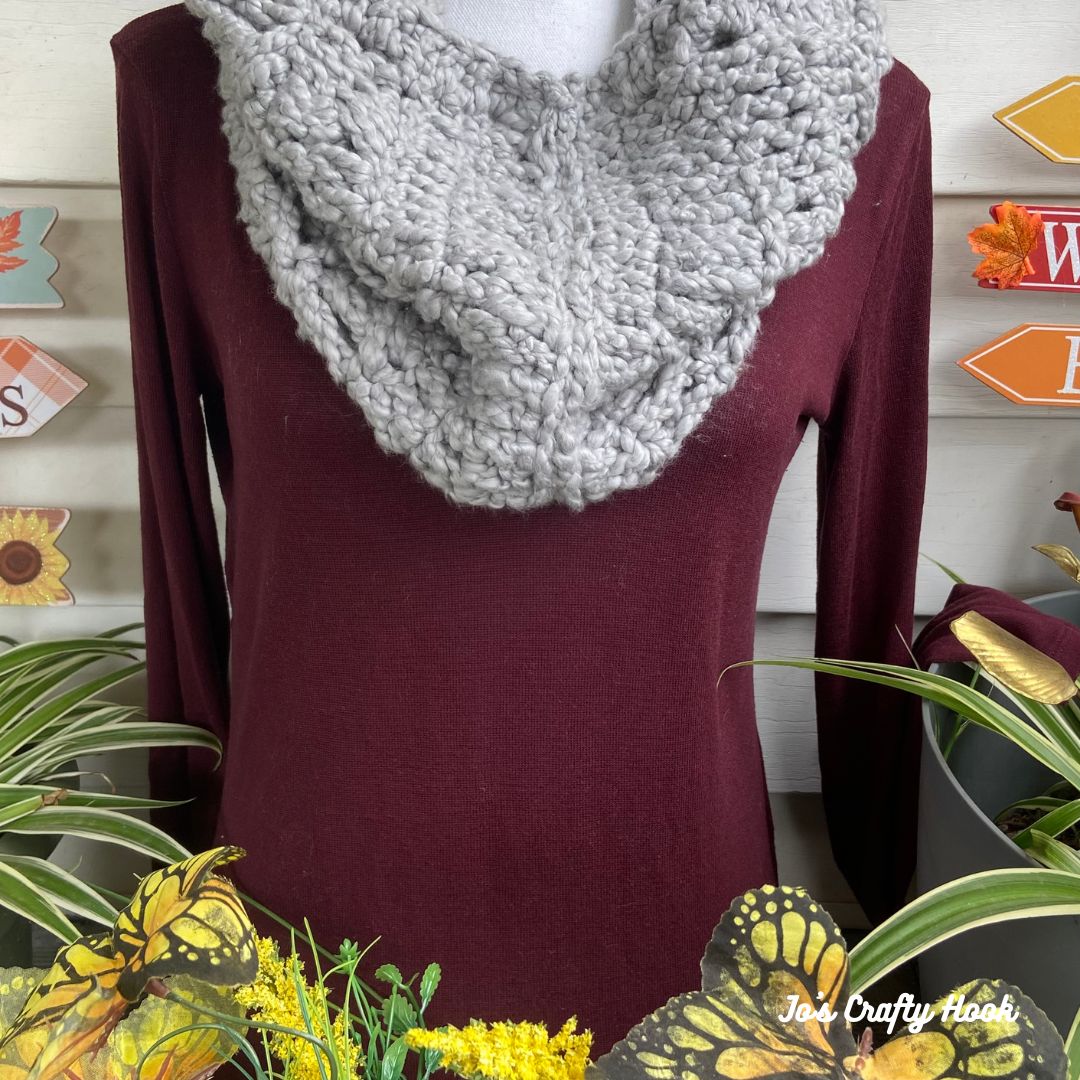
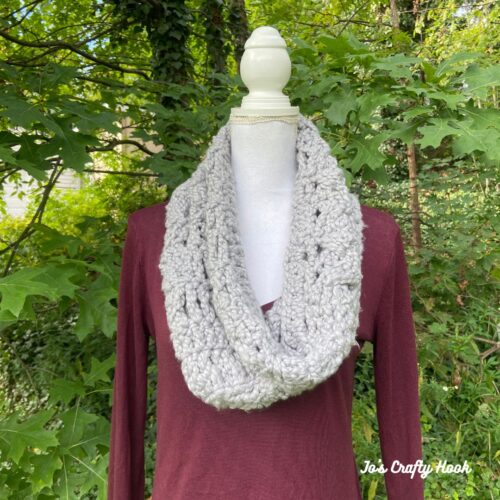
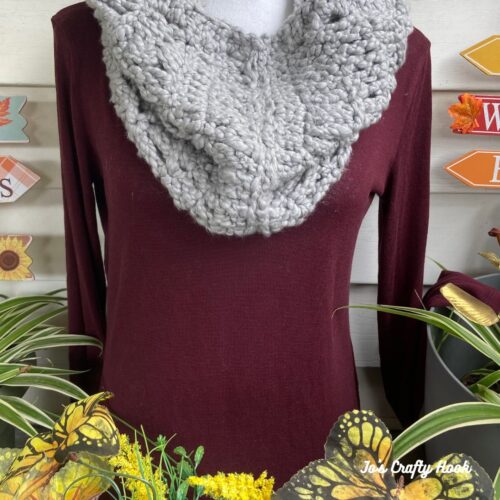
The Boxy Bulky Cowl Crochet Pattern uses a thicker yarn, 6 ply bulky yarn to create a nice thick, heavy cowl to keep you warm during those chilly times of year. It uses a stitch I designed just for this cowl, the triple crochet box stitch. The stitch I designed creates a nice long stitch to create a beautiful texture.
Below you will find a free version of the Boxy Bulky Cowl Crochet Pattern.
Boxy Bulky Cowl FREE Crochet Pattern
Info needed for Boxy Bulky Cowl Crochet Pattern
I used Premier Everyday Bulky Yarn in the color Storm. #6 Ply Super Bulky. 100% Cotton. (3.5oz/100g) (50yds/46m)
Materials Used:
US K or 6.5 mm Crochet Hook 140-160 yds of 6 ply Super Bulky Yarn Scissors Tapestry Needle
Abbreviations/Stitches Used: ch = chain dc = double crochet trc = triple crochet trc b-st = triple crochet box stitch sk = skip rep = repeat RS = Right Side WS = Wrong Side
Finished Size: 16” x 14”
Notes: stitch count is a multiple of 3+2 ch 3 counts as a dc ch 4 counts as a trc the cowl is worked in short rows the ends are sewn together to create the cowl the finished cowl will be worn sideways
Special Stitches:
Triple Crochet:
YO twice, insert hook into specified sp, YO draw through 2 loops on hook. YO, draw through 2 loops on hook, YO, draw through last 2 loops on hook.
Triple Crochet Box Stitch
1st Step sk 2 st, YO twice, insert hook into next st, YO draw through 2 loops on hook, YO, draw through 2 loops on hook, YO draw through last 2 loops on hook. rep once more.
2nd Step YO twice, insert hook into 1st sk st, YO draw through 2 loops on hook, YO, draw through 2 loops on hook, YO draw through last 2 loops on hook. YO, insert hook into 2nd sk st, YO, draw through 2 loops on hook, YO, draw through 2 loops on hook, YO, draw through last 2 loops on hook.
To help you learn my new crochet stitch, the Triple Crochet Box Stitch or Triple Crochet Cross Stitch, I have made a Left Hand Video Tutorial you might help find useful.
Gauge: US K or 6.5 mm Crochet Hook 6 trc x 2 rows = 4”
Gauge Swatch below is an example on how to crochet the trc b-st
R1: fdc 8. turn (8 dc) Alternative: ch 10, dc in 4th ch from hook, dc across. turn (8 dc)
R2: ch 4, turn. trc across. turn (8 trc)
R3: ch 4, turn. trc in next st. sk 2 st, trc in next 2 st, trc in 1st sk st, trc in 2nd sk st. trc in last 2 st. (8 trc)
R4: ch 4, turn. trc in next st. sk 2 st, trc in next 2 st, trc in 1st sk st, trc in 2nd sk st. trc in last 2 st. (8 trc)
Boxy Bulky Cowl Free Crochet Pattern
R1(WS): fdc 20. turn (20 dc) optional: ch 22, dc in 4th ch from hook, dc across. turn (20 dc)
R2(RS): ch 4, trc across. turn (20 trc)
R3: ch 4, trc in next st, *sk 2 st, trc in next 2 st, trc in 1st sk st, trc in the next sk st. trc in next 2 st. rep from * across. turn (20 trc)
R4-R20: rep R3
R21: ch 4, trc across. turn (20 trc)
R22: ch 3, dc across. (20 dc)
Do not turn after R22.
Border:
Step 1:
ch 3, turn slightly to work down side. *2 dc in side post of trc, dc in next st. rep from until last st. (dc, ch 2, dc) all in same st.
Step 2:
turn slightly to work across bottom. dc in each st across until last st. (dc, ch 2, dc) all in same st.
Step 3:
turn slightly to work up the side. dc in side post of same st. *dc in next st, 2 dc in side post of next st. rep from * until last st. (dc, ch 2, dc) all in same st.
Step 4: dc in each st across until last st. ch 2, sl st in 1st st to join. Turn
Leave a long tail of yarn to sew the ends closed, about 8”-12”
Joining
Step 1:
Line up WS to WS.
Step 2:
using the Running Stitch (or whichever method you prefer), sew each end of the rows together.
Fasten off and weave in ends.
@Jo’s Crafty Hook 2023
That’s it! You have made your own version of the Boxy Bulky Cowl! I would LOVE to see your finished version! Share your pics with me at any of my social media sites above using the hashtags below. You can find all of my social media sites at the beginning of the pattern. @joscraftyhook @joeyleabaird @jo_bear38 or at my FB Group Jo’s Crafty Hook Designs If you would like to receive more information about the events happening at Jo’s Crafty Hook and receive a FREE crochet pattern, why not Subscribe to my Newsletter at my website.
You can find some of my free crochet patterns at my website.
The XBox Scarf Crochet Pattern uses the Double Crochet Cross Stitch that creates the ‘X’ in the scarf. This scarf was designed for my Great Nephew. When I was thinking up the name, most kids you hear about who play the games on the XBox are boys. I do know girls play it as well, this is why this would make a great Unisex scarf. The sizes range from 2-4 years to Adult Large. The crochet pattern
You can find the XBox Scarf as a free crochet pattern below.
Today, October 11, 2023 starting at 8a EST until October 12, 2023 you can get a premium copy of my XBox Scarf Crochet Pattern for 50% off, $1.50, as part of the Fireside Comforts Blog Hop hosted by Ambassador Crochet.
Visit the Fireside Comforts Blog Hop or click on the button below to get the Coupon Code needed to get your discounted pdf copy of my XBox Scarf Crochet Pattern for $1.50 from my Ravelry Store.
Once you have the Coupon Code for my XBox Scarf Crochet Pattern from the Fireside Comforts Blog Hop, click on the button below to use at my Ravlery Store and use it at Checkout provided.
If you would like to skip all of the blog hopping, there is a Fireside Comforts Bundle you can purchase for $12 and get all 31 crochet patterns in one place.
I used Premier Sweet Roll Yarn. #4 Medium Weight. 100% Acrylic. (3.5oz/100g) (174yds/160m)
Materials: 170-450 yds of #4 ply Medium Weight Yarn US I or 5.5mm Crochet Hook Scissors Tapestry Needle
US Terminology
Skill Level: Beginner
Abbreviations/Stitches Used: ch = chain sc = single crochet dc = double crochet alt ch 2 = alternate chain 2 or alternate starting chain sk = skip rep = repeat
Notes: ch 3 counts as first dc alt ch 2 counts as first dc
Gauge: US I or 5.5mm Crochet Hook
16 dc x 8 rows = 4”
Gauge Swatch: R1: ch 18, dc in 4th ch from hook, dc across. (16 dc) R2-R8: ch 3, turn, dc across. (16 dc)
R1: fdc 16 turn (16 dc) Alternative: ch 19, dc in 4th ch from hook, dc across. turn (16 dc)
R2: alt ch 2 or ch 3 *sk 1 st, dc in next st, dc in sk st. rep from * until last st. dc in last st. turn (16 dc)2-3 years
Rep R2 until the Scarf measures 36” or until you reach your desired length.
Last Row: alt ch 2 or ch 3, dc across. (16 dc)
Fasten off and weave in ends.
5-10 years
Rep R2 until the Scarf measures 48” or until you reach your desired length.
Last Row: alt ch 2 or ch 3, dc across. (16 dc)
Fasten off and weave in ends.
Teen & Small Adult
R1: fdc 24 turn (24 dc) Alternative: ch , dc in 4th ch from hook, dc across. turn (24 dc)
R2: alt ch 2 or ch 3 *sk 1 st, dc in next st, dc in sk st. rep from * until last st. dc in last st. turn (24 dc)
Teen
Rep R2 until the Scarf measures 60” or until you reach your desired length.
Last Row: alt ch 2 or ch 3, dc across. (24 dc)
Fasten off and weave in ends.
Small Adult
Rep R2 until the Scarf measures 64” or until you reach your desired length.
Last Row: alt ch 2 or ch 3, dc across. (24 dc)
Fasten off and weave in ends.
Medium & Large Adult
R1: fdc 32 turn (32 dc) Alternative: ch 34 , dc in 4th ch from hook, dc across. turn (32 dc)
R2: alt ch 2 or ch 3 *sk 1 st, dc in next st, dc in sk st. rep from * until last st. dc in last st. turn (32 dc)
Medium Adult
Rep R2 until the Scarf measures 66” or until you reach your desired length.
Last Row: alt ch 2 or ch 3, dc across. (32 dc)
Fasten off and weave in ends.
Large Adult
Rep R2 until the Scarf measures 72” or until you reach your desired length.
Last Row: alt ch 2 or ch 3, dc in across. (32 dc)
Fasten off and weave in ends.
@Jo’s Crafty Hook 2023
That’s it! You have completed your XBox Scarf! I would LOVE to see your version of the scarf! Please tag me at any of my Social Media Sites listed below using the hashtags below. #xboxscarf @joscraftyhook @joeyleabaird @joscraftyhookdesigns #joscraftyhook #joscraftyhookdesigns #handmadecrochetedcreations
You can find some of my free crochet patterns at my website.
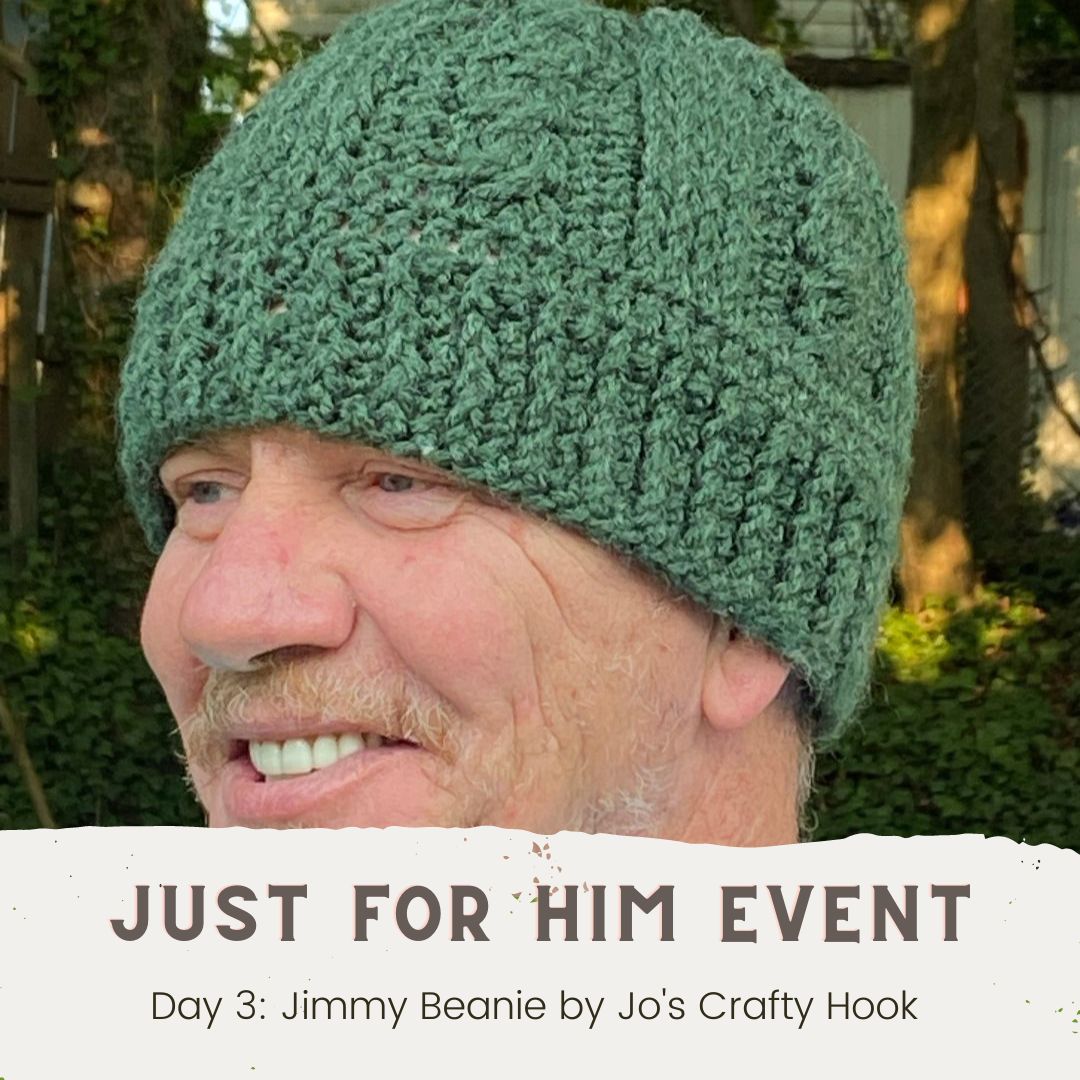
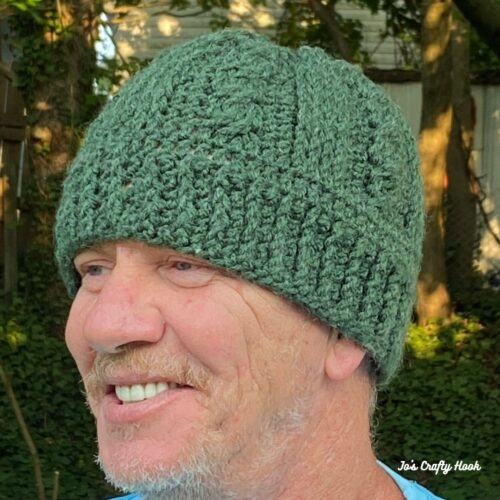
If you love to do the Cable Stitch or you would love to learn how, then my Jimmy Beanie is the perfect crochet pattern for you! This pattern is named after my hubby Jim, but it is also a perfect Unisex Beanie.
This post contains affiliate links that help me raise money to allow me to share more information with you.
**While you are here why not sign up for my Newsletter by using the Subscribe button in the Right Hand Corner**
Just for Him Blog Hop & Bundle
Do you have a hard time finding crochet patterns that are made just for men? Maybe you see a lot of crochet patterns that you think would work, but you are unsure how they would look like on him.
Well, Michelle of Two Brothers Blanket and Helen of Sunflower Cottage Crochet has put together and Blog Hop and Bundle Sale with crochet patterns that are designed especially for Him!
Starting September 1-21, 2023 you can take advantage of daily FREE crochet patterns in the Just for Him Blog Hop using the Button below.
OR
Starting September 1-21, 2023 you can purchase a copy of the Just for Him Crochet Pattern Bundle for $14.99 with 21 premium crochet patterns all in one place! Click on the button below and check it out!
On September 3, 2023 starting at 6a EST until September 4, 2023 6a EST you can get a FREE pdf of the Jimmy Beanie Crochet Pattern.
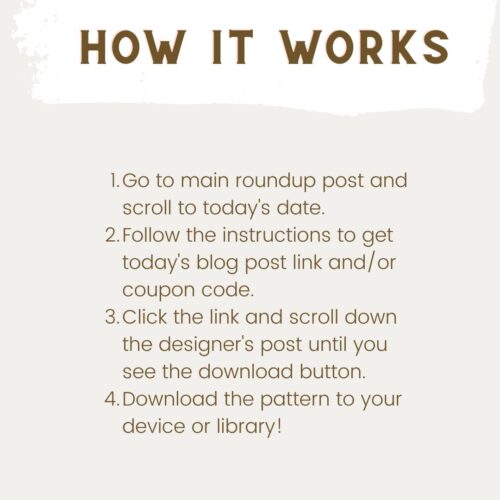
Visit the Just for Him Blog Hop using the Button below to get the Coupon Code needed to download your FREE pdf from my Ravelry Store.
Once you have the Coupon Code, click on the Button below to add it to your Ravelry Cart, use the code, checkout. That’s it!
Be sure to stop back by the Just for Him Blog Hop daily, starting at 6a EST for each day’s FREE crochet pattern!
Information Needed to Crochet the Jimmy Beanie
Materials: US H or 5 mm Crochet Hook
US I or 5.5 mm Crochet Hook 75-200 yds of #4 ply Worsted/Aran Weight Yarn Scissors Tapestry Needle Stitch Marker
Abbreviations/Stitches Used: ch = chain st = stitch(es) sc = single crochet dc = double crochet fpdc = front post double crochet
bpdc = back post double crochet fptrc = front post triple crochet
alt ch 2 = alternate ch 2 or alternate turning chain
dc2tog = double crochet 2 together
sk = skip
rep = repeat
SM = Stitch Marker
Special Stitches:
Double Crochet 2 Together – decreasing 2 dc into 1 dc Alternate Chain 2 – takes the place of a double crochet and creates a nice closed stitch
Front Post Double Crochet – double crochet going around the front post of the dc in the previous row. Back Post Double Crochet – double crochet going around the back post of the dc in the previous row.. Front Post Triple Crochet
* YO twice, Insert hook behind post indicated st
* YO, pull up a loop (4 loops on hook)
* YO, pull through 2 loops (3 loops on hook)
* YO, pull through 2 loops (2 loops on hook)
* YO, pull through last 2 loops on hook
Left Hand Video Tutorials: Right Hand Video Tutorials:
Notes: ch 3 counts as a dc
alt ch 2 counts as a dc
the beanie is worked in the round
the beanie the invisible join in the round
place a SM in 1st st of each round of beanie
Special Notes: st count is a multiple of 12
2-4 yrs, 5-10 yrs, Teen, Sm Adult, Large Adult consecutively
Hat Band Circumference: 16” (17” 19” 20” 21”)
Gauge: US I or 5.5 mm Crochet Hook
16 dc x 8 rows = 4”
Gauge Swatch: R1: ch 18, dc in 4th ch from hook, dc across. (16 dc) R2-R8: ch 3, dc across. (16 dc)
Size Chart
Size
Height
Circumference
Crown Width
2 years – 4 years
6.5” – 6.75”
16” -17”
5” – 5.5”
5 years – 10 years
6.75” – 7.5”
17” – 19”
5.5” – 6”
Teenager
7.5” – 8”
19” – 20”
6” – 6.25”
Small Adult
8” – 8.5”
20” – 21”
6.25” – 6.75”
Large Adult
9” – 9.5”
21” – 22”
6.75” – 7”
Jimmy Beanie Crochet Pattern
Band
2-4 yr, 5-10 yr, Teen, Sm & Large Adult
Using H or 5 mm Hook **Note: be sure to place SM in 1st st of each round**
R1: fdc 60 (60, 60, 72, 84) Do NOT join.
R2: dc in 1st st, fpdc in the next st *dc in the next st, fpdc in the next st* rep from * around. Do NOT join. (60, 60, 60, 72, 84) st
2-4 yrs
R3-R4: dc in each dc and fpdc in each fpdc. (60, 60, 60, 72, 84) st
Remaining Sizes
R3-R5: dc in each dc and fpdc in each fpdc. (60, 60, 60, 72, 84) st
Do not fasten off
Beanie
Switch to I or 5.5 mm Crochet Hook **Note: be sure to place SM in 1st st of each round**
Place a SM in 1st st of each round of beanie.
R1-R2: dc in each st around. (60, 60, 72, 84) dc
R3: fpdc in next 2 st, dc in next 2 st, sk 2 st, fptrc in the next 2 st, fptrc in 2 sk st, dc in next 2 st. *fpdc in next 4 st. dc in next 2 st, skip 2 st, fptrc in the next 2 st, fptrc in 2 sk st. dc in next 2 st. rep from * around until last 2 st. fpdc in last 2 st.. (60, 60, 72, 84) st
R4: fpdc in next 2 st, dc in next 2 st, fpdc in next 4 st, dc in next 2 st. *fpdc in next 4 st, dc in next 2 st. rep from * around until last 2 st. fpdc in last 2 st. (60, 60, 60, 72, 84) st
rep R3-R4 ending with R7 until beanie measures 6.5” 7” 7” 7.5” 8” or until you reach your desired height.
Crown
R1: fpdc in next 2 st, dc2tog, sk 2 st, fptrc in the next 2 st, fptrc in 2 sk st, dc2tog. *fpdc in next 4 st. dc2tog, skip 2 st, fptrc in the next 2 st, fptrc in 2 sk st. dc2tog next 2 st. rep from * around until last 2 st. fpdc in last 2 st.. (48, 48, 48, 60, 72) st
R2: fpdc in next 2 st, dc in next st, fpdc in next 4 st, dc in the next st, fpdc in the next st, dc in next st. rep from * until last 2 st. pdc2tog, rep from * around. (48, 48, 48, 60, 72) st
R3: dc2tog, *dc in the next st, skip 2 st, fptrc in the next 2 st, fptrc in 2 sk st, dc in the next st, dc2tog twice. rep from * around until last 2 st. dc2tog. sl st in 1st st to join. (38, 38, 38, 50, 62) st
Do NOT fasten off.
Leave a long tail, weave the crown closed.
**If you are wanting a Messy Bun Hat instead of a Beanie, do NOT use a long tail to weave in the ends. The beanie can be left open here to make a Messy Bun Hat.**
Fasten off and weave in ends.
Sewing Crown Closed
Step 1: Using your long tail of yarn, weave yarn in each st around the top of the beanie. Step 2:
Once you have come back to where you started, pull the yarn tight to close the crown. Fasten off and weave in ends.
That’s it! You have made your own version of the Jimmy Beanie!
I would LOVE to see your finished version! Share your pics with me at any of my social media sites above using the hashtags below. You can find all of my social media sites at the beginning of the pattern.
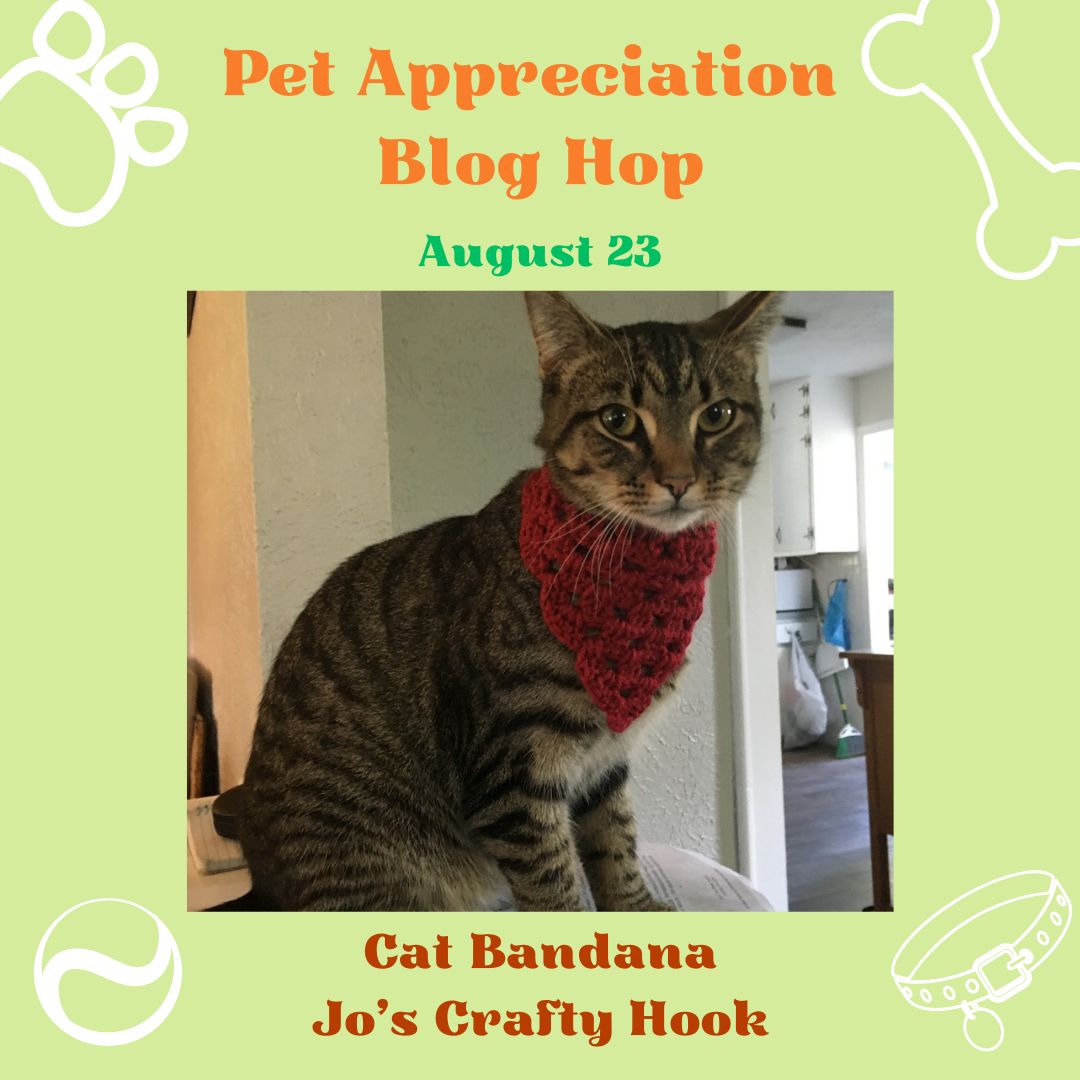
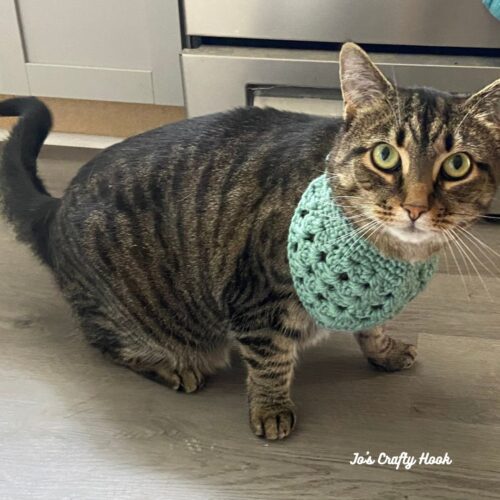
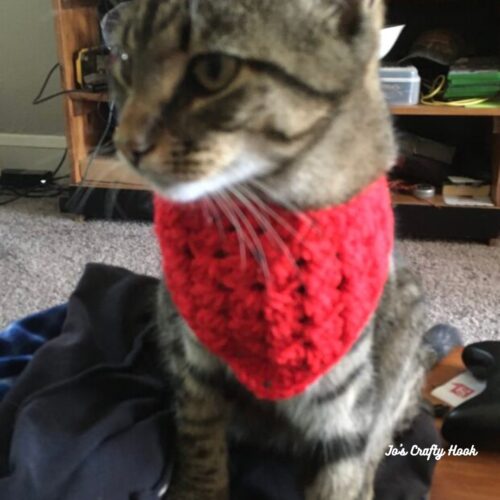
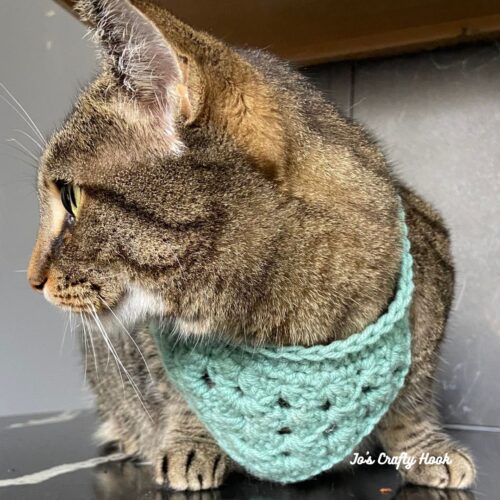
Today I want to share with you the Pet Bandana Free Crochet Pattern. Doesn’t my Maze look beautiful wearing her bandana?
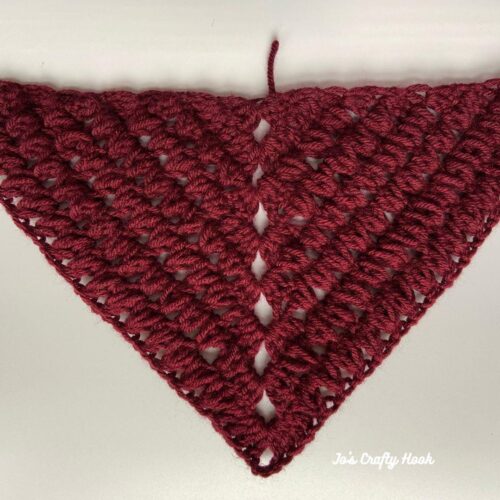
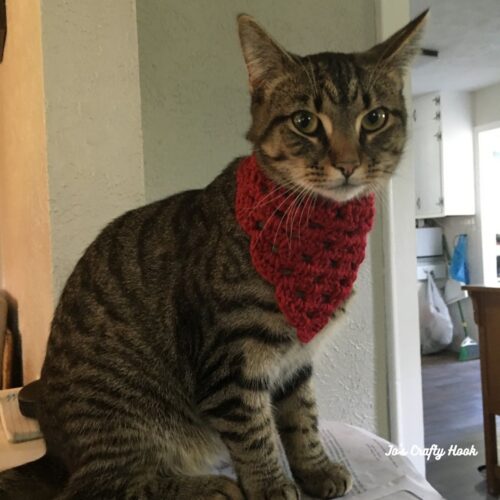
Pets can seem like our babies and part of the family. You add accessories to your outfits and your family’s outfits, so why not accessorize your pet as well with the Pet Bandana. Use your scrap yarn and make these in every color of the rainbow. The pet bandana free crochet pattern has 3 sizes you can choose from.
My beautiful kitty, Maze was a rescue. My son worked in a factory that used heavy machines and equipment. My son knew how much I loved animals, so he called me upset telling me what happened and asked me to take her in because she was starving.
My hubby wasn’t too happy with me at the time, As soon as he seen my son holding her his heart melted and he fell in love with her! Maze is more his cat than mine, but she is loved and appreciated just the same.
My Maze, and I am sure your pet too, brings me so much comfort and joy. She curls up in my lap and as soon as I touch her, my heart just melts. I pray your pets sooth you as they burrow into your hearts as well.
This post contains affiliate links that help me raise money to allow me to share more information with you.
The Pet Bandana Free Crochet Pattern is below. You can also find an Ad-Free Premium copy of the Pet Bandana Crochet Patterns at:
Info needed for the Pet Bandana Free Crochet Pattern
Materials: US I or 5.5 mm Crochet Hook 50-150 yds of #4 ply Worsted/Aran Weight Yarn Scissors Tapestry Needle SM
Abbreviations/Stitches Used: ch = chain sc = single crochet dc = double crochet sl st = slip stitch sp = space alt ch 2 = alternate chain 2 SM = Stitch Marker
Notes: ch 3 counts as a dc alt ch 2 counts as a dc ch 1 does not count as a st sizes range from Small, Medium, Large st count is a multiple of 6 each row will increase by 6 st the collar will be worked in the round
Gauge US I or 5.5 mm Crochet Hook 16 dc x 8 rows = 4”
R2: alt ch 2 or ch 3, 2 dc in same st, ch 1, (3 dc, ch 2, 3 dc) all in ch-2 sp, ch 1, 3 dc in last dc. turn (12 dc)
R3: alt ch 2 or ch 3, 2 dc in same st, ch 1, 3 dc in ch-1 sp, ch 1, (3 dc, ch 2, 3 dc) all in ch-2 sp, ch 1, 3 dc in next ch-1 sp, ch 1, 3 dc in last dc. turn (18 dc)
R4: alt ch 2 or ch 3, 2 dc in same st, ch 1, 3 dc in ch-1 sp, ch 1, 3 dc in ch-1 sp, ch 1, (3 dc, ch 2, 3 dc) in ch-2 sp, ch 1, 3 dc in next ch-1 sp, ch 1, 3 dc in next ch-1 sp, 3 dc in last dc. turn (24 dc)
R5: alt ch 2 or ch 3, 2 dc in same st, ch 1, *3 dc in ch-1 sp, ch 1. rep from * twice more. (3 dc, ch 2, 3 dc) in ch-2 space, ch 1, **3 dc in next ch-1 sp rep from ** to twice more and 3 dc in last dc. turn (30 dc)
Do not fasten off
Move to Collar
Medium
Rep R1-R5
R6: alt ch 2 or ch 3, 2 dc in same st, ch 1, *3 dc in ch-1 sp, ch 1. rep from * 3 more times. (3 dc, ch 2, 3 dc) in ch- 2 sp, ch 1, **3 dc in next ch-1 sp, ch 1. rep from ** 3 more times. 3 dc in last dc. turn (36 dc)
R7: alt ch 2 or ch 3, 2 dc in same st, ch 1, *3 dc in ch-1 sp, ch 1. rep from * 4 more times. (3 dc, ch 2, 3 dc) in ch-2 sp, ch 1. **3 dc in ch-1 sp, ch 1. rep from ** 4 more times. 3 dc in last dc. turn (42 dc)
Do not fasten off
Move to Collar
Large
Rep R1-R7
R8: alt ch 2 or ch 3, 2 dc in same st, ch 1, *3 dc in ch-1 sp. rep from * 5 more times. (3 dc, ch 2, 3 dc) inch-2 sp, ch 1. **3 dc in ch-1 sp. rep from **5 more times and 3 dc in last dc. turn (48 dc)
R9: alt ch 2 or ch 3, 2 dc in same st, ch 1. *3 dc in ch-1 sp. rep from * 6 more times. (3 dc, ch 2, 3 dc) in ch-2 sp, ch 1, **3 dc in ch-1 sp. rep from * 6 more times. 3 dc in last dc. turn (54 dc)
Do not fasten off
Move to Collar
Collar
Collar Circumference:
Small 4” Medium 6” Large 8”
sc evenly across turning rows
Step 1:
sc evenly across the turning rows; being sure to sc in each st, and side posts of dc. be sure to end with an even number.
The Collar is worked in the round. This makes it easier to slip over your pet’s head.
Note: It might be a good idea to measure your pet’s neck to reach your desired circumference. The stitch count below may need to be adjusted for a smaller or larger pet.
place SM in 1st st to create an invisible join.
R1: ch 18 (26, 32) sl st in 1st st, sc in each st around.
R2: sc in 1st st and each st around.
Repeat R2 until your desired height of your collar. sl st in 1st st to join.
Fasten off and weave in ends.
@Jo’s Crafty Hook 2023
You can find an Ad-Free Premium copy of the Pet Bandana Crochet Patterns at:
That’s it! You have made your own Pet Bandana! I would LOVE to see your finished version! Share your pics with me on Instagram on my FB Page or in my FB Group. @joscraftyhook @joscraftyhookdesigns @joeyleabaird @jo_bear38
Find me, Jo of Jo’s Crafty Hook at the places listed below.
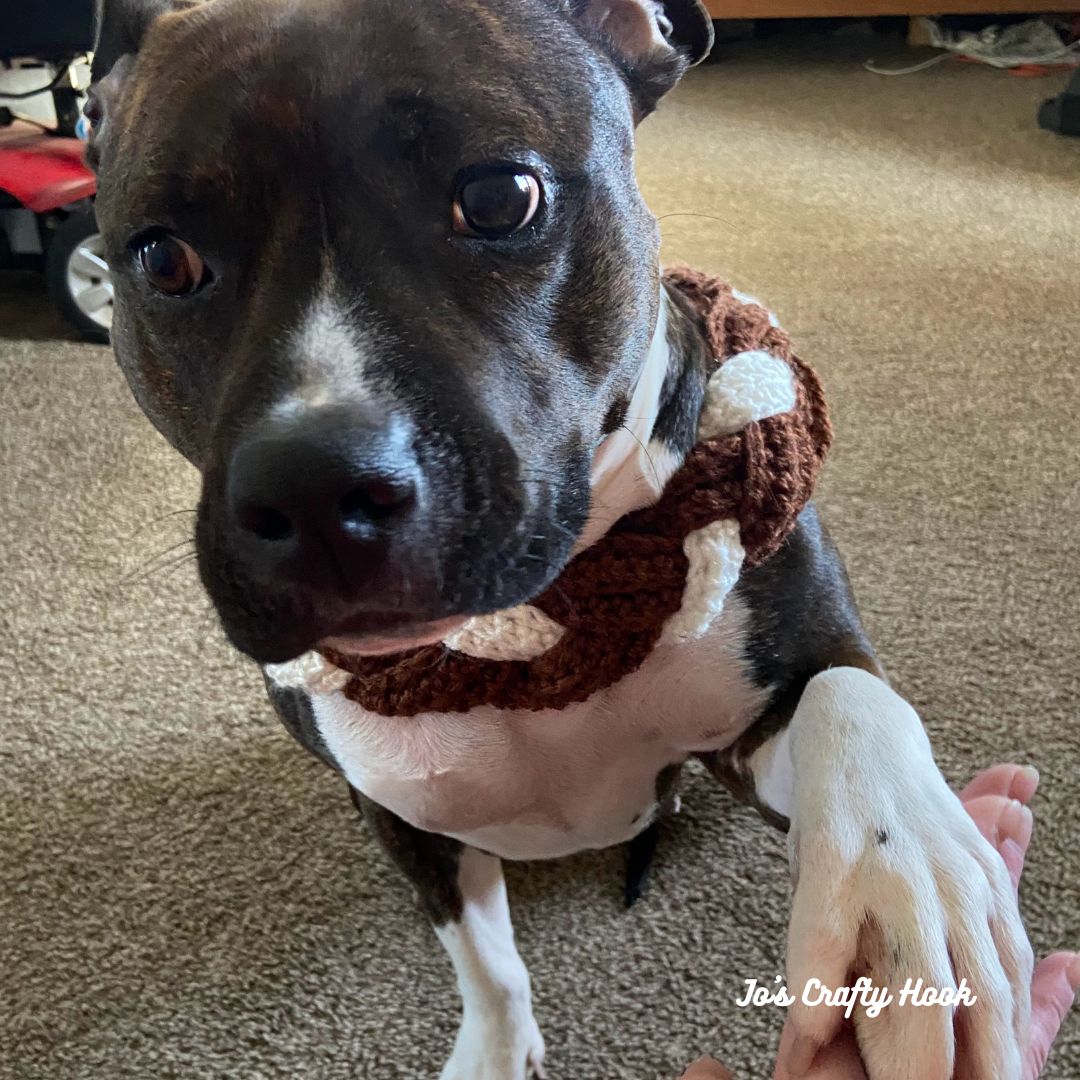
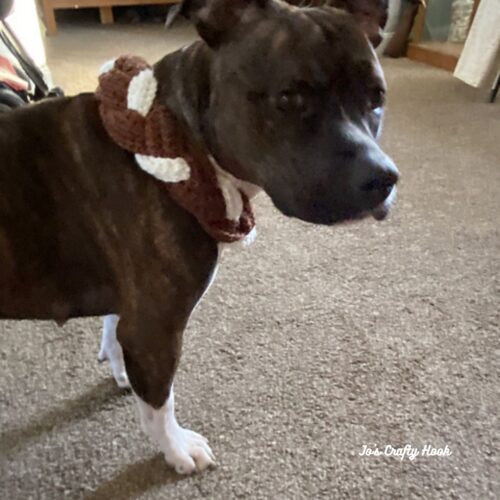
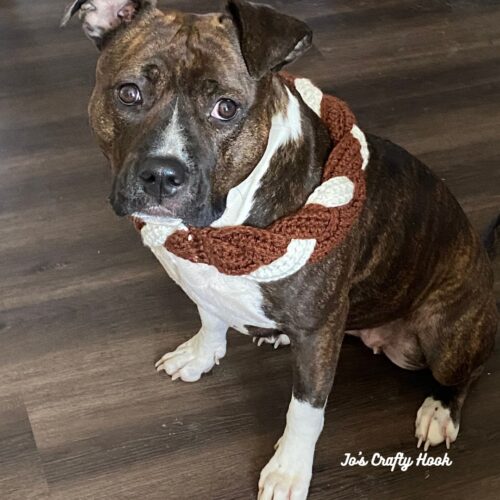
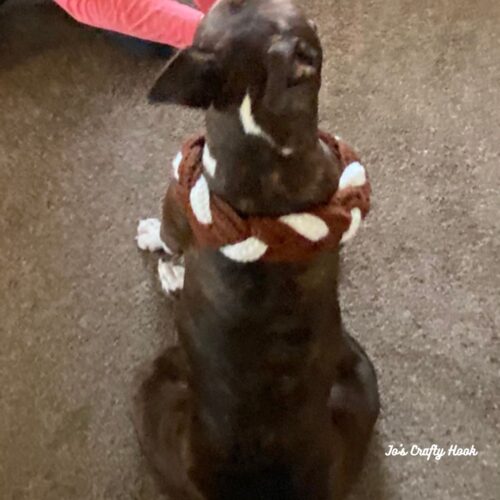
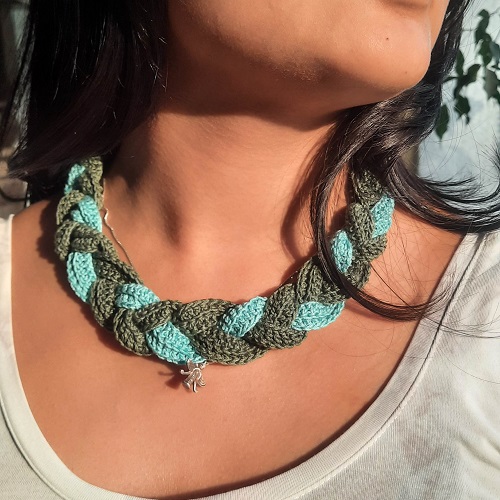
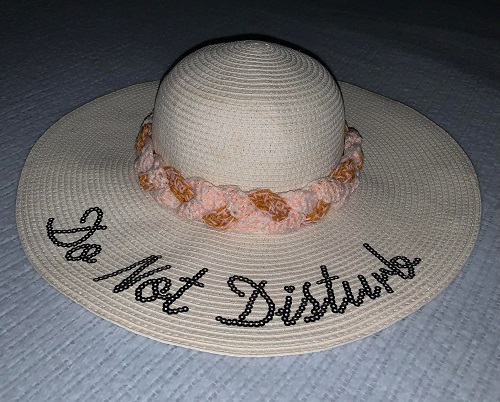
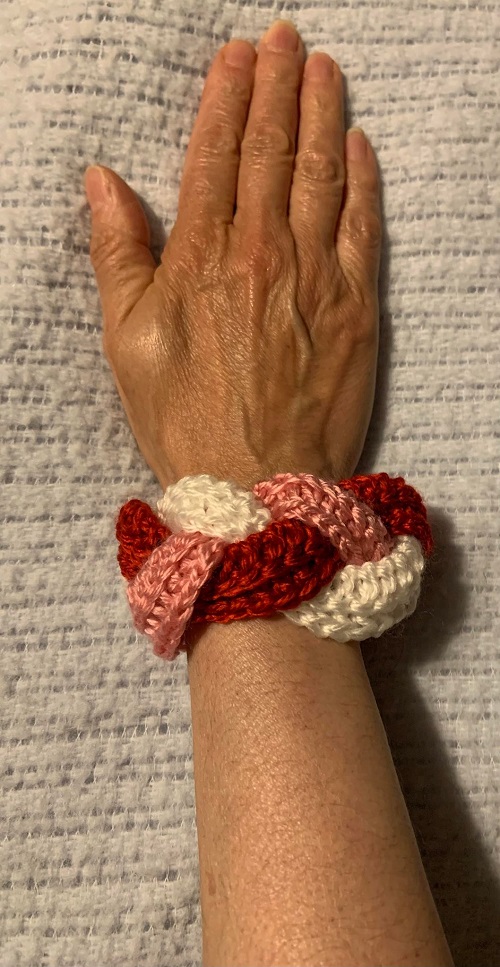
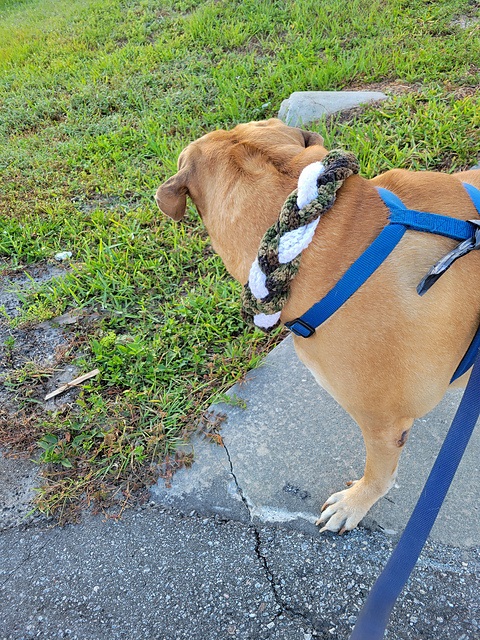
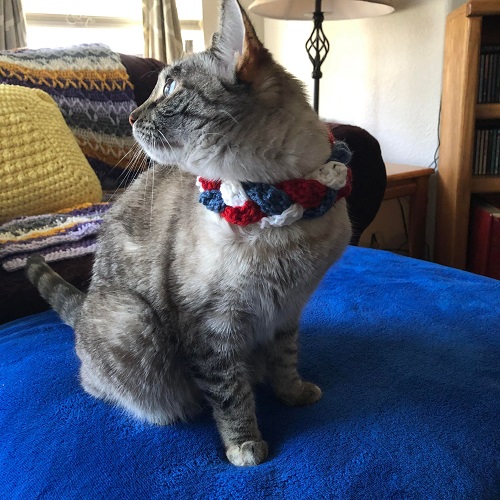
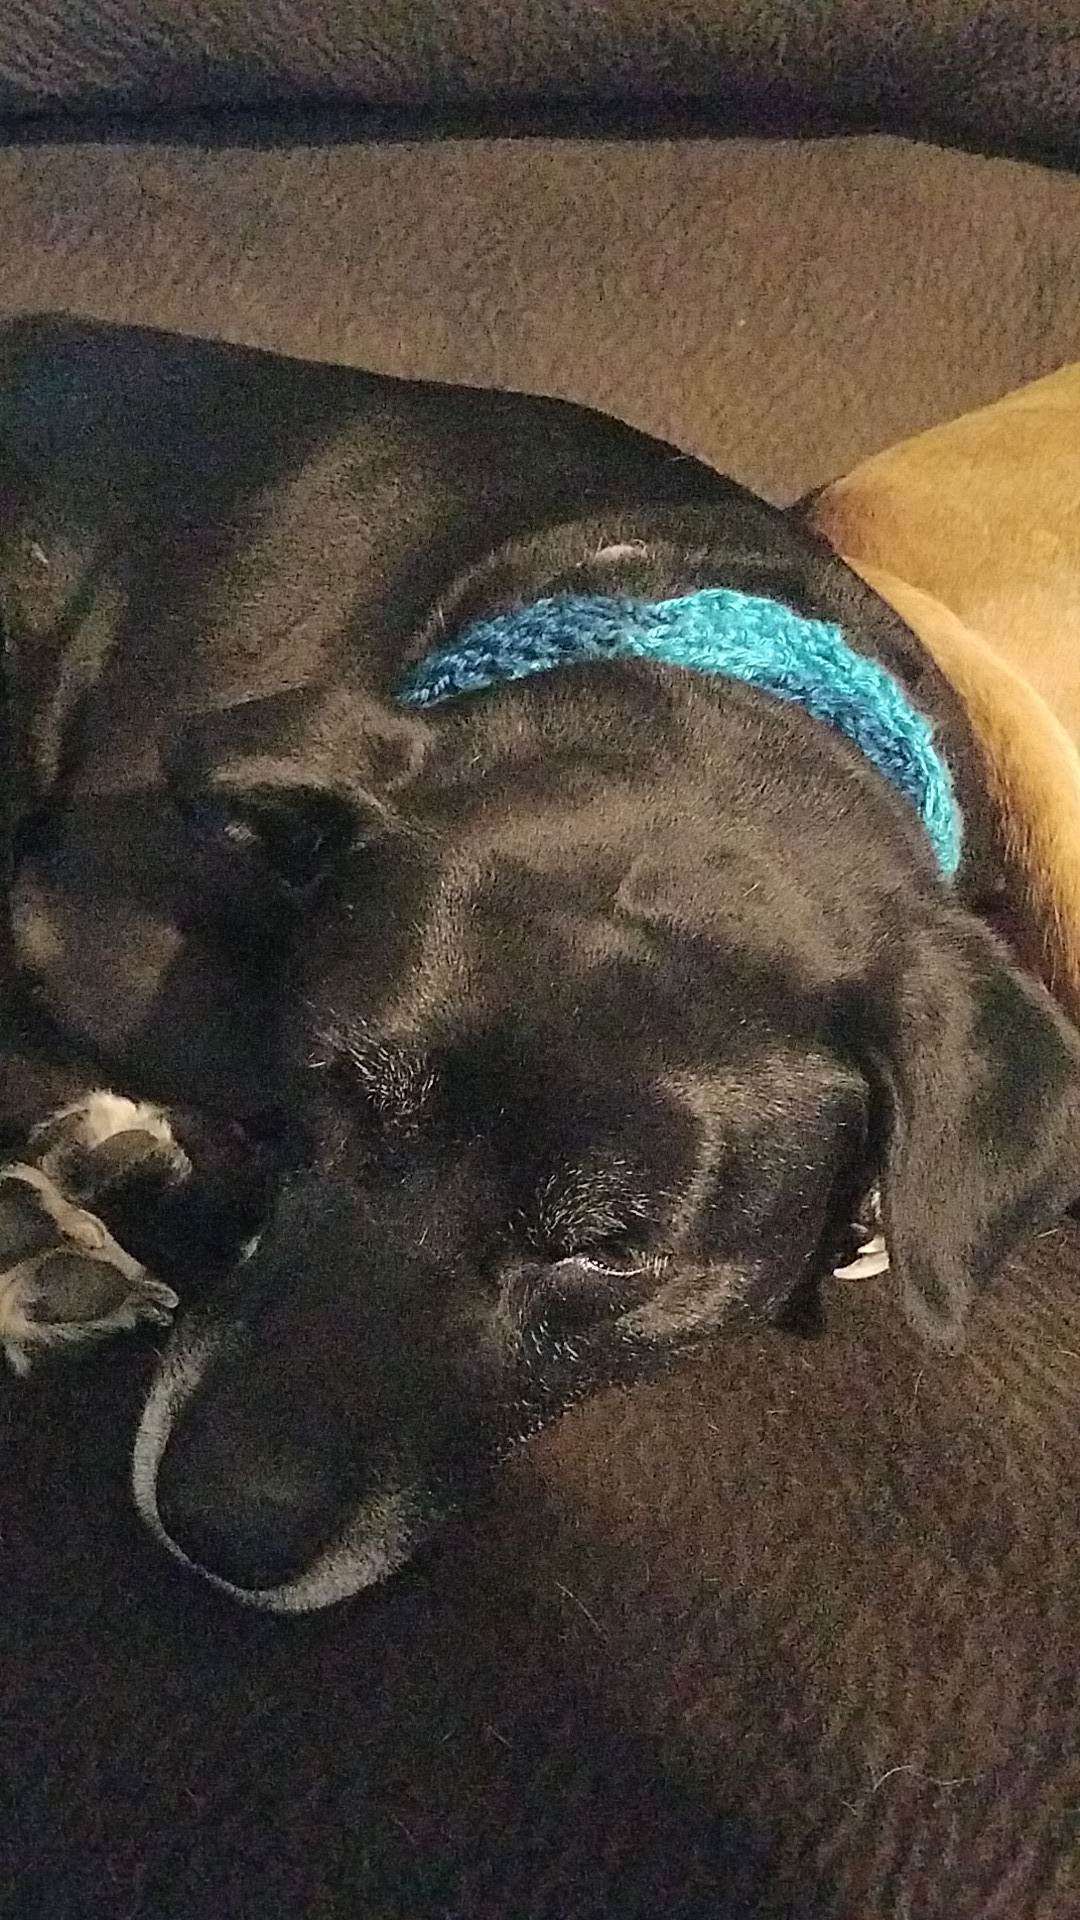
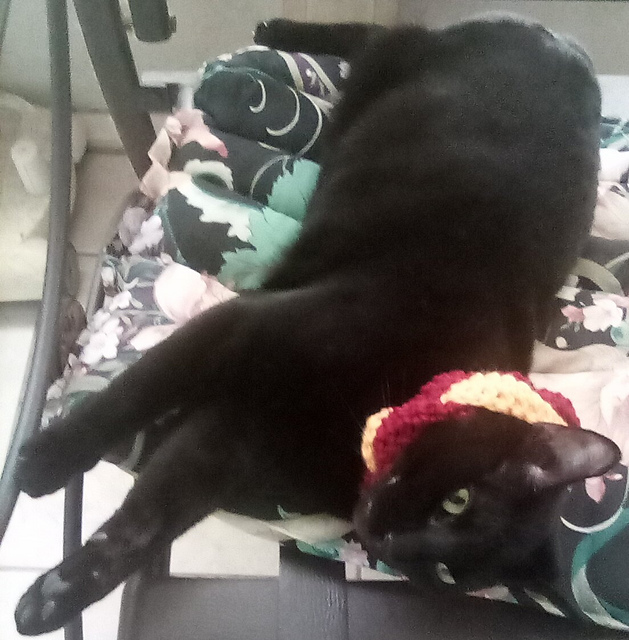
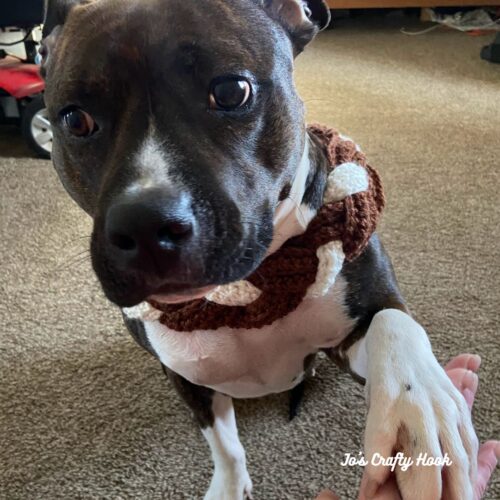
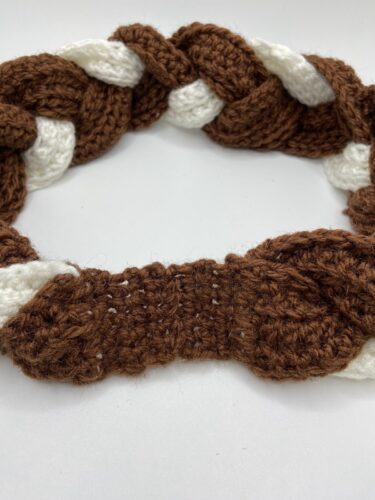
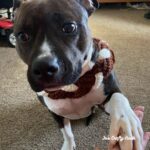
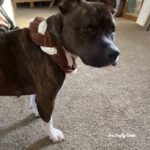
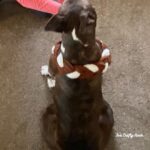
The Freyja Nordic Necklace Crochet Pattern is one of those crochet patterns that you can customize from what it was originally designed for. A little farther below you will see it how my testers customized theirs using thinner yarn for a person’s necklace; or used for a Hat Band; or used for a Wrist Band; or used for a Cat & Dog Necklace using both DK Weight and Worsted/Aran Weight Yarn.
So, why not even try different thicknesses of yarn to make yourself one! You will find a free crochet pattern of the Freyja Nordic Necklace below.
The Freyja Nordic Necklace Crochet Pattern came to be because my son loves anything to do with Norse History. That is why he named his dog Freyja. Ever since she was a puppy I loved to dress her up. My son even started asking me to make things for Freyja lol. So I decided to design something that relates to Nordic History and Freyja’s name. This is how I came up with this design.
This post contains affiliate links that help me raise money to allow me to share more information with you.
Freyja – Gramma’s Grand
Where to find an Ad-Free Version of the Freyja Nordic Necklace Crochet Pattern
Information Needed for Freyja Nordic Necklace Crochet Pattern
Materials: MC – 15-90 yds of #4 ply Worsted/Aran Weight Yarn CC – 5-30 yds of #4 ply Worsted/Aran Weight Yarn US H Crochet Hook or 5 mm Scissors Tapestry Needle Stitch Marker
Stitch/Abbreviations: st = stitch sl st = slip stitch
ch = chain
dc = double crochet
alt ch 2 = alternate chain 2
blo = back loop
MC = Main Color CC = Contrasting Color
RS = Right Side
SM = Stitch Marker
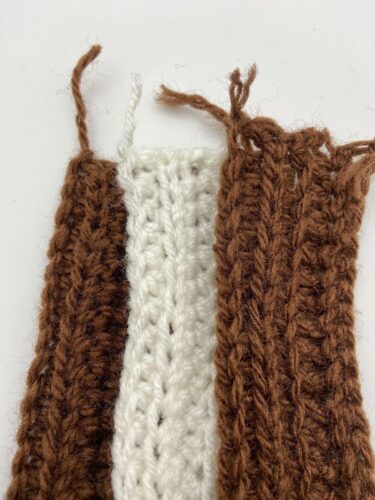
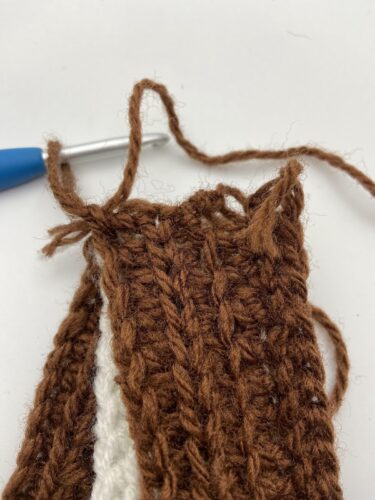
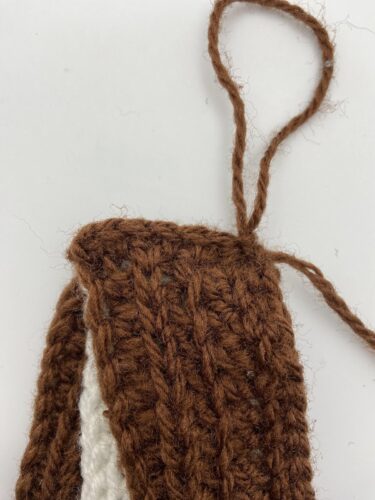
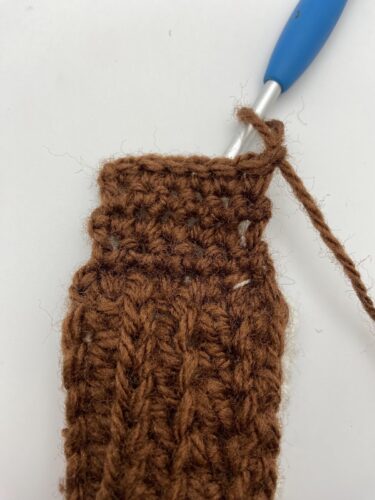
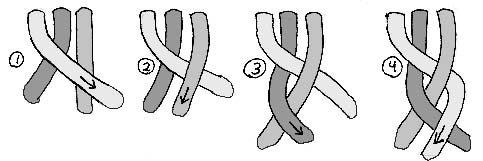
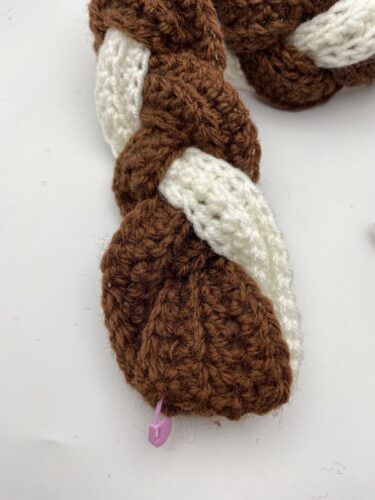
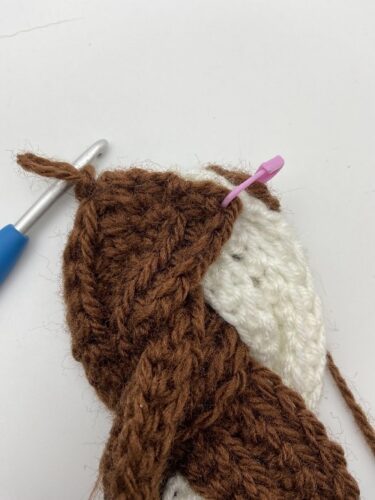
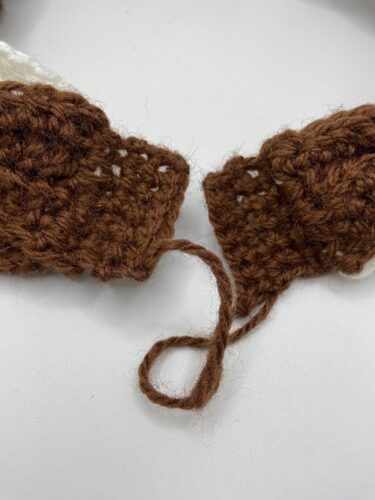
Notes: the stitch count is a multiple of 2 ch 1 does NOT counts as a stitch ch 2 does counts as a dc alt ch 2 counts as a dc the necklace consist of 3 pieces you will braid all 3 pieces together
Sizes: 4” 8” 10” 12” 14” 16” **if you would like to make a larger size, add multiples of 2*
Gauge: US H Crochet Hook or 5 mm 12 st x 8 rows = 4”
Multiples Ways to Customize Necklace
My testers used the Freyja Nordic Necklace Crochet Pattern to Customize the crochet pattern and what they would use the design for. Below you will see it customized using thinner yarn for a person’s necklace; used for a Hat Band; used for a Wrist Band; used for a Cat & Dog Necklace.
The free crochet pattern of the Freyja Nordic Necklace lists different sizes you can make. Why not even try different thicknesses of yarn to make yourself one!
Thank You: Dina Sengupta, Lourdes Bernadette, Tammy Alexander, Sally Hayes, Nancy McKain, Christina Anderson, and Judith Huskey Rodriguez for your unique versions of the Freyja Nordic Necklace!
Dina Sengupta
Lourdes Bernadette
Tammy Alexander
Sally Hayes
Christina Anderson
Judith Huskey Rodriguez
Freyja Nordic Necklace Free Crochet Pattern
My Freyja
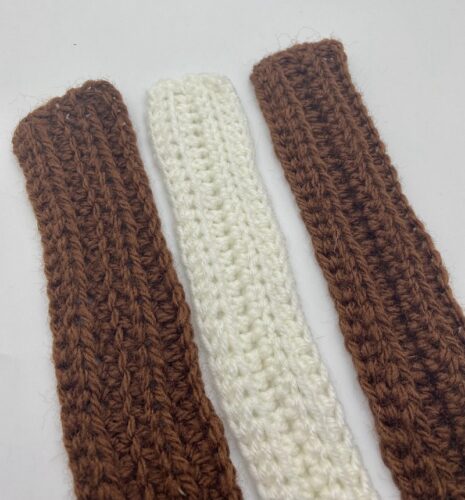
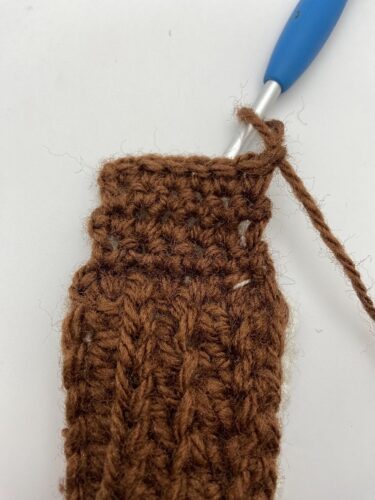
You will make 3 Color Strips: 2 MC and 1 CC.
MC, CC, MC
Smaller Necklace
R1: fdc 12 (24, 30) turn (12, 24, 30) dc
Optional: ch 14 (26, 32) dc in 4th ch from hook, dc across. turn (12, 24, 30) dc
R2(RS): alt ch 2 or ch 2, dc in blo only across. turn (12, 24, 30) dc
That’s it! You have made your own version of the Freyja Nordic Necklace!
I would LOVE to see your finished version! Share your pics with me at any of my social media sites listed below. You can find some of my free crochet patterns at my website.