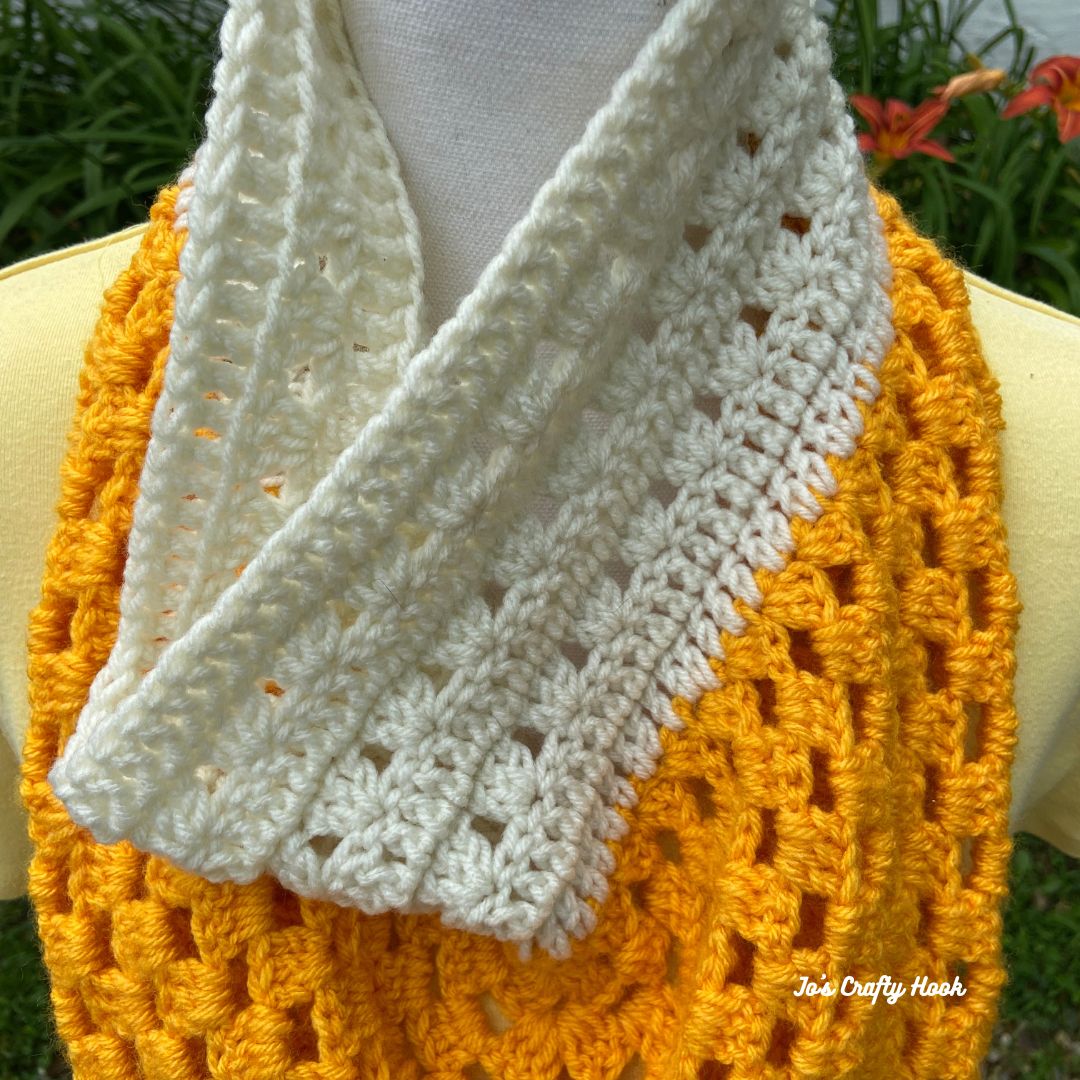
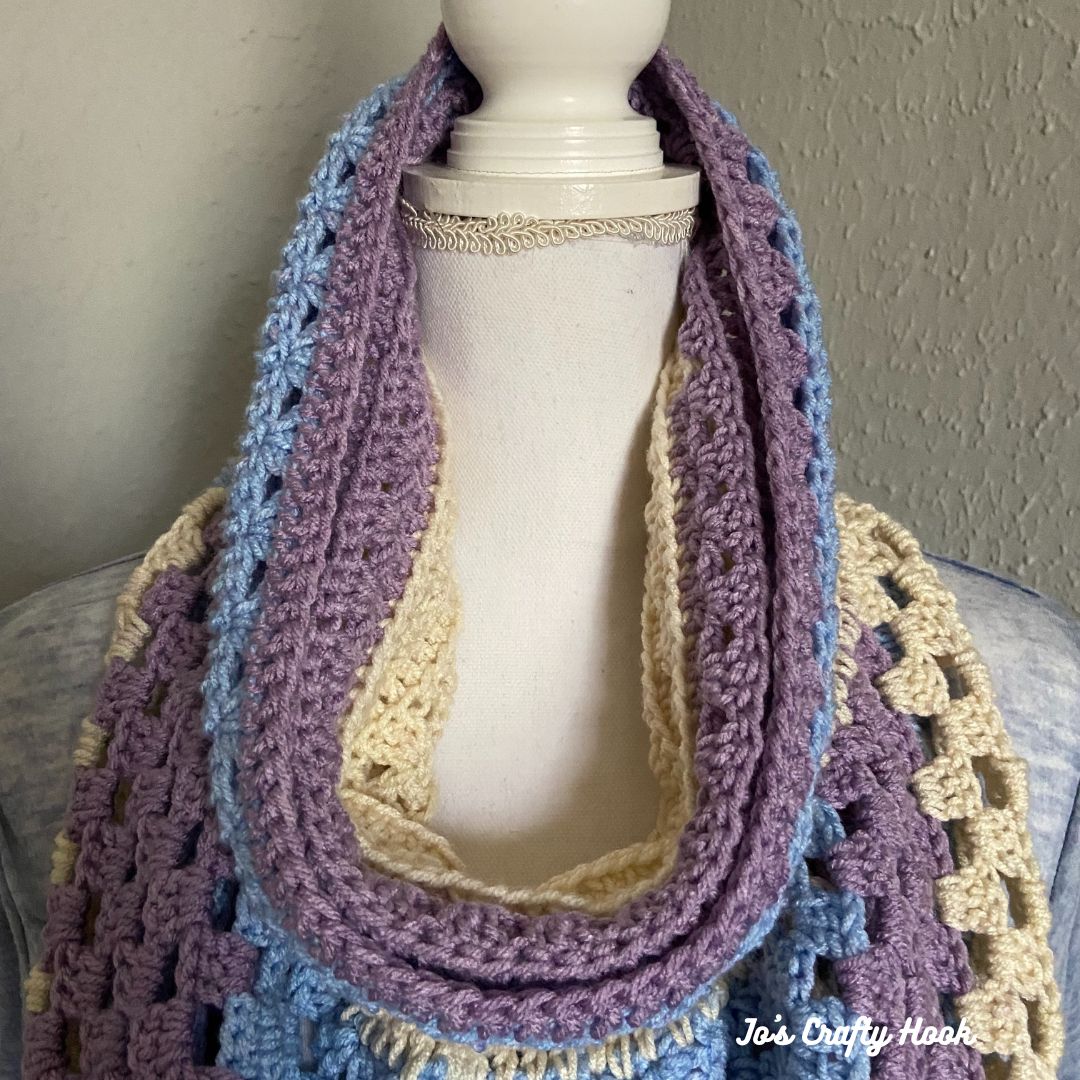
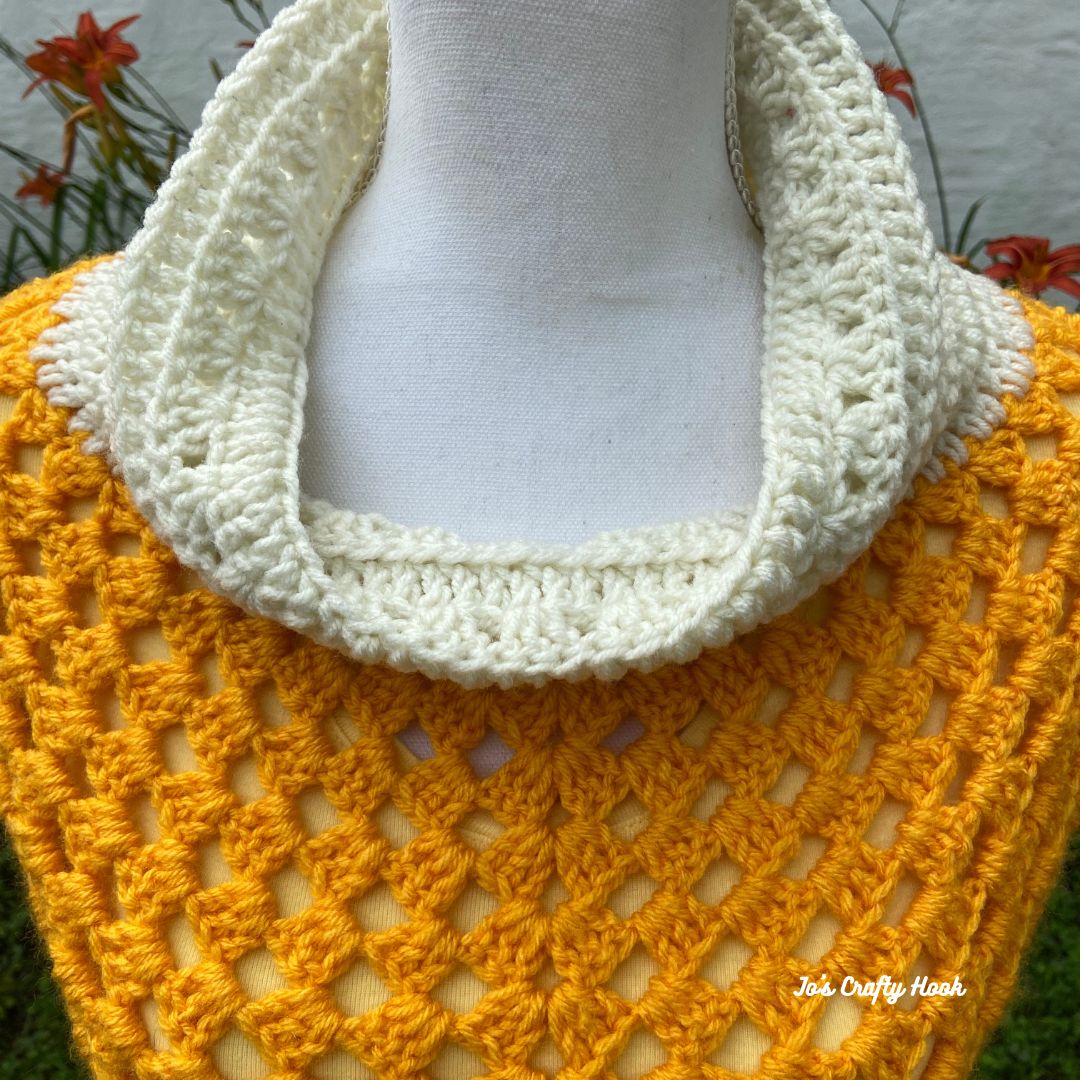
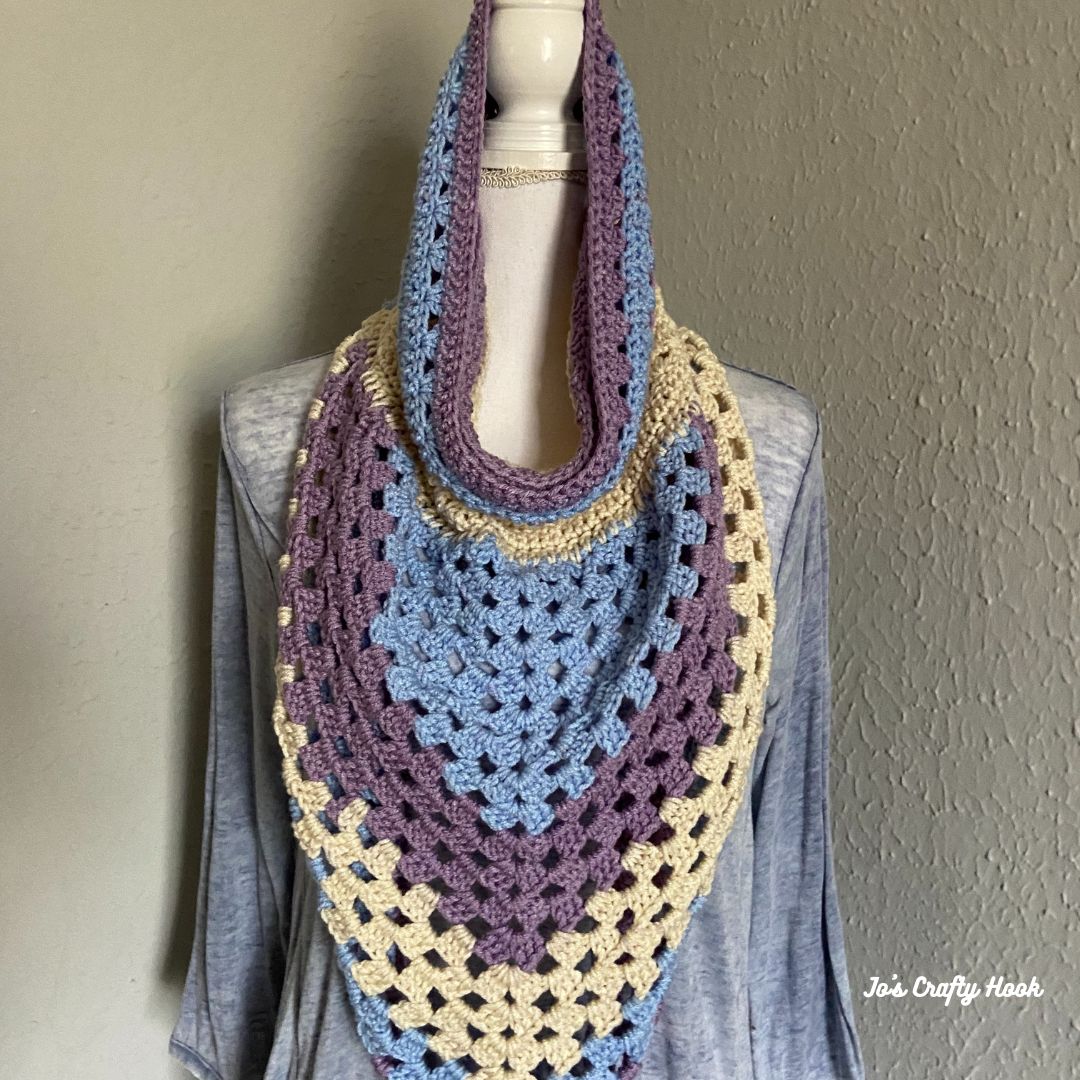
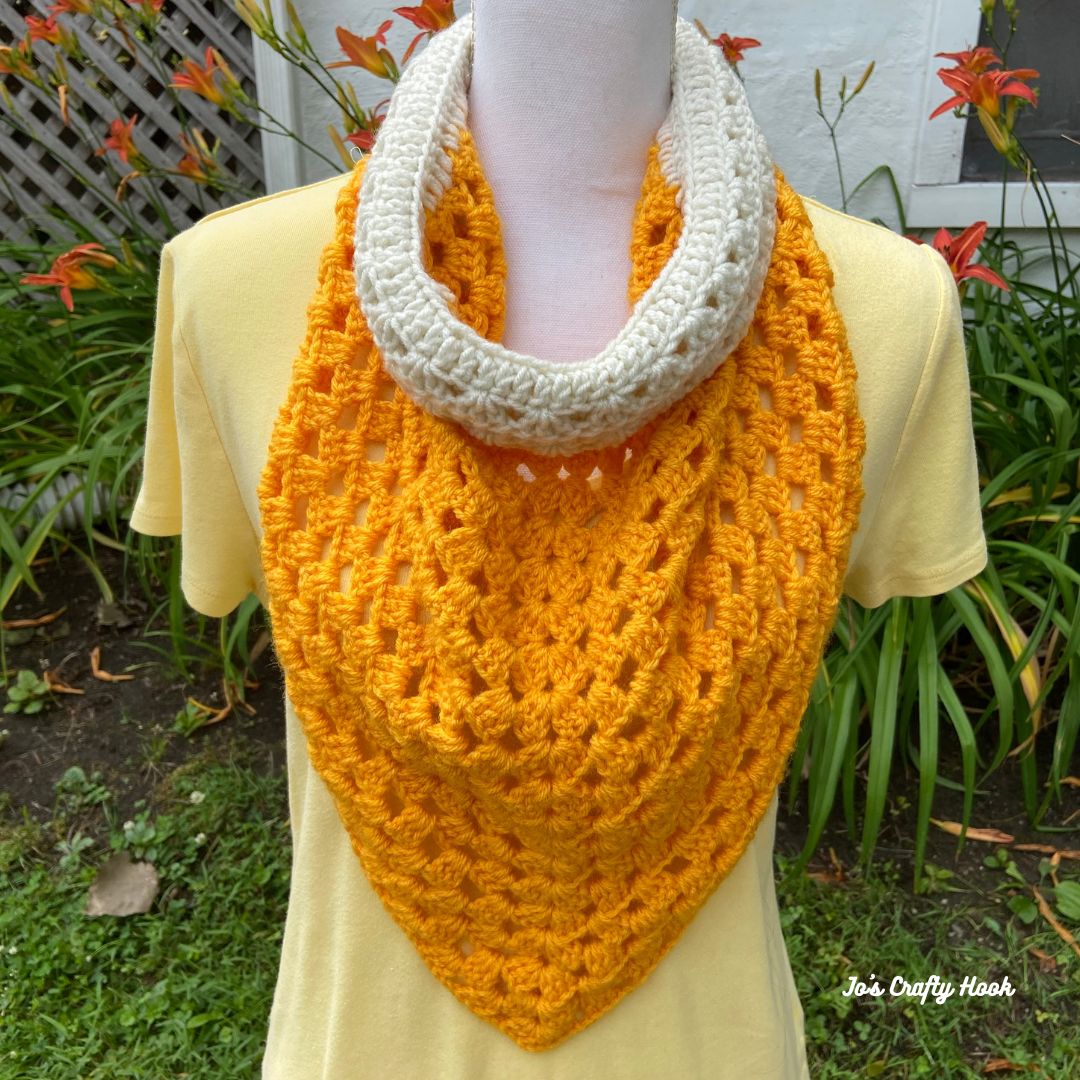
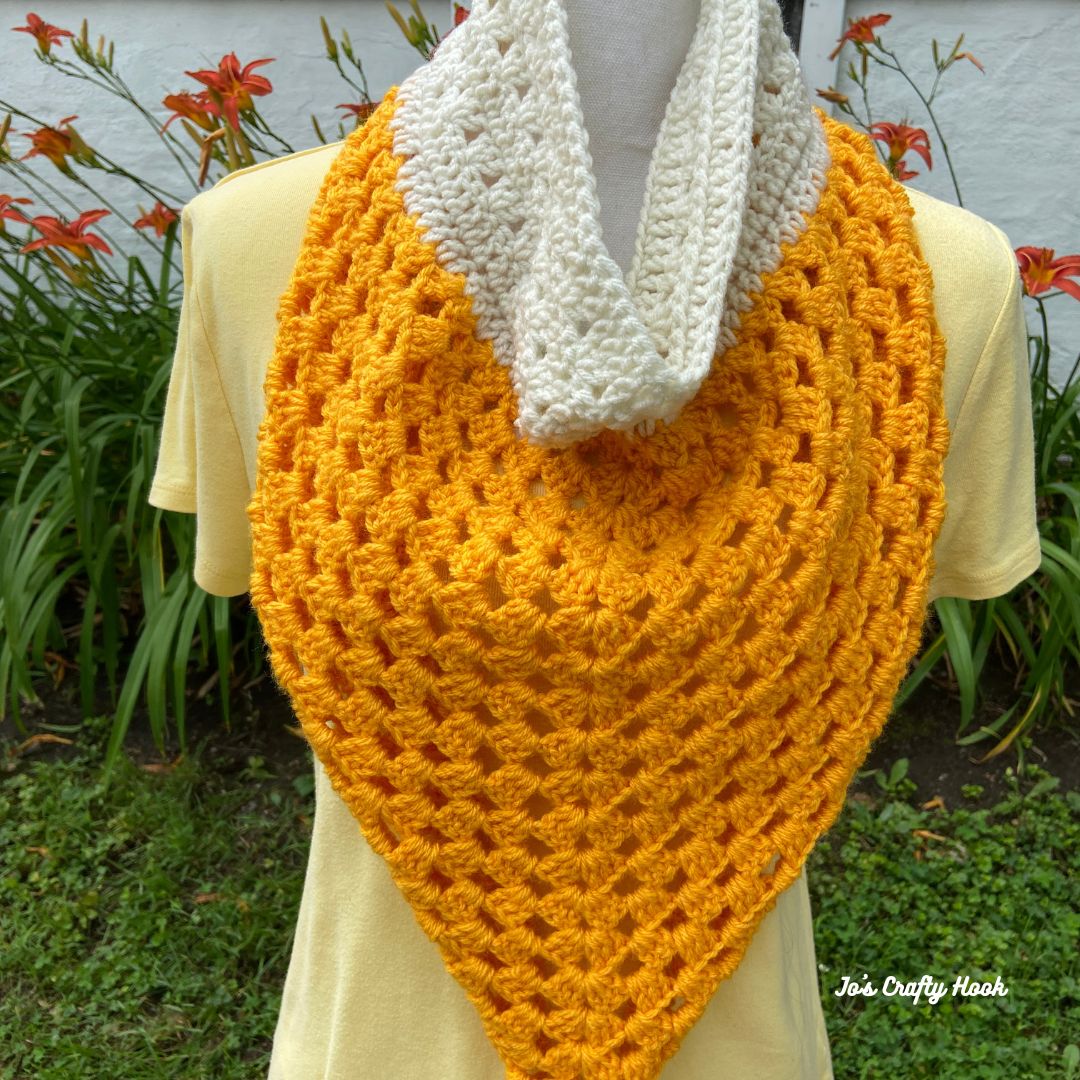
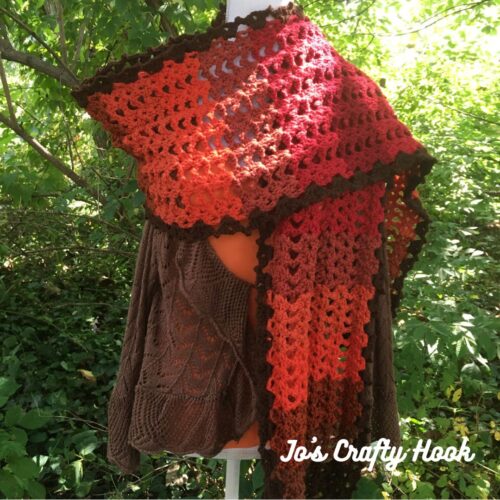
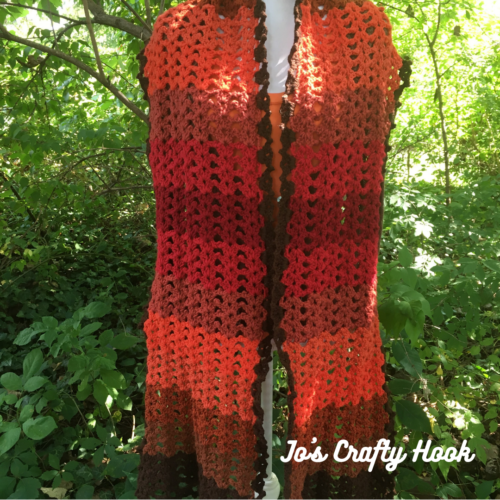
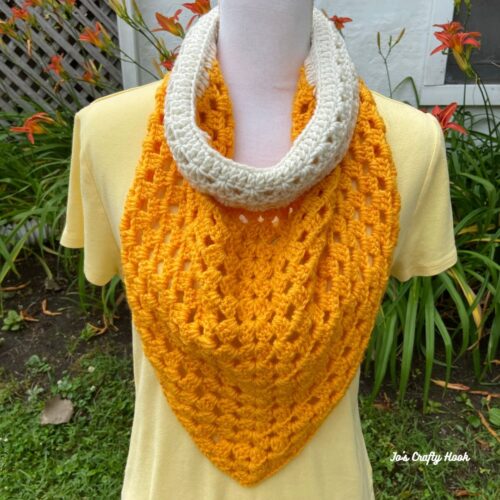
The Great Granny Cowl Crochet Pattern uses a crochet stitch that everyone loves to do, the granny stitch. The granny stitch has been around for as long as I can remember (I won’t say how long lol) I have a granny square afghan that my Ma made over 30 years ago.
The granny stitch is used to create squares, afghans, cowls, scarves, and SO much more! The granny stitch uses a combination of 3 double crochets and a chain. Can you believe that is all it uses to create so many wonderful things?!
Information about the Great Granny Cowl Crochet Pattern
My Great Granny Cowl Crochet Pattern has 2 stages in creating the design. First there is a triangle shawl that covers the chest and then a cowl is created to wrap around the neck.
US Terminology
Beginner Friendly
I used Red Heart Super Saver 100% Acrylic #4 ply Worsted Weight Yarn (198g / 7oz) (333m / 364yd)
Materials:
450-950 yds of #4 ply or Worsted/Aran Weight Yarn
US I or 5.5 mm Crochet Hook
Scissors
Tapestry Needle
Stitches/Abbreviations Used:
ch = chain
dc = double crochet
sp = space
rep = repeat
blo = back loop only
alt ch 2 = alternate chain 2 or alternate turning chain
Beg Shell = Beginning Shell
RS = Right Side
Notes:
ch 3 counts as a dc
alternate chain 2 counts as a dc
the design is worked in 2 parts, a shawl and a cowl
each row of shawl part will increase by 6 st
the shawl is worked in turning rows
the cowl is worked in the round with turning rows
there are 4 sizes to choose from: 4-10 years, Tween, Adult Small & Large consecutively.
Great Granny Cowl Ad-Free Premium Crochet Pattern locations.
Great Granny Cowl Free Crochet Pattern
Note: Due to different types and thicknesses of yarn, you may need to go up or down a hook size to meet Gauge.
Cowl Gauge:
US I or 5.5 mm Crochet Hook
12 dc x 8 rows = 4”
Gauge Swatch:
R1: ch 14, dc in 4th ch from hook, dc across. turn (12 dc)
R2-R8: ch 3, dc across. turn (12 dc)
Special Stitches:
Beg Shell – (alt ch 2 or ch 3, 2dc) all in 1st st.
Shell – (3 dc, ch 2, 3 dc) all in same ch-2 sp.
Cowl Size Chart
Size
Shawl Length
Cowl Circumference
Cowl Height
Yardage Used
4-10 years
16”
32”
6”
450-550
Tween
20”
40”
8”
550-650
Small Adult
24”
48”
10”
650-800
Large Adult
28”
56”
12”
800-950
Part 1: Shawl
Gauge: 4 rows = 4”
R1: Magic Circle. (3 dc, ch 2, 3 dc) all in magic circle. draw magic circle closed. 6 dc & ch-2 Optional: ch 4, (3 dc, ch 2, 3 dc) all in 1st ch. turn 6 dc & ch-2
R2(RS): (alt ch 2 or ch 3, 2 dc) all in 1st st, ch 2, (3 dc, ch 2, 3 dc) all in ch 2-sp (Shell made) ch 2, 3 dc in last st. turn 12 dc & 2 ch-2 sp
R3: (alt ch 2 or ch 3, 2 dc) all in 1st st (Beg Shell made) ch 2, 3 dc in next ch-2 sp, ch 2, (3 dc, ch 2, 3 dc) all in ch 2-sp of Shell. ch 2, 3 dc in next ch-2 sp, ch 2, 3 dc in last st. turn 18 dc & 5 ch-2 sp
R4: Beg Shell, *ch 2, 3 dc in next ch-2 sp. rep from * until ch-2 sp of Shell, Shell **ch 2, 3 dc in next ch-2 sp. rep from ** until the last ch-2 sp. ch 2, 3 dc all in last st. turn 24 dc & 7 ch-2 sp
Rep R4 until you have 16 (20, 24, 28) rows or until you reach desired length, being sure to end on RS.
Do NOT fasten off.
Part 2 – Cowl
Cowl Gauge 12 dc x 8 rows = 4”
You will now be working in the round with turning rows.
with RS facing you, turn slightly to work across the starting row (longest side)
Starting Row
R1: ch 3 in the same st, dc in side post, dc in dc across. sl st in top of ch 3 to join. turn (you should end with an even number of stitches)
R2: ch 3, dc blo in each st around. sl st in top of ch 3 to join. turn
R3: ch 3, sk next st, 3 dc in next st, *sk 2 st, 3 dc in next st. rep from * around until last 2 st. sk last 2 st. sl st in top of ch 3 to join. Turn
R4: ch 3, dc blo in each st around. sl st in top of ch 3 to join. turn
R5: ch 3, sk next st, 3 dc in next st, *sk 2 st, 3 dc in next st. rep from * around until last st. sk last st. sl st in top of ch 3 to join. turn
R6: ch 3, dc blo in each st around. sl st in top of ch 3 to join. turn
Rep R5-R6 until your cowl measures (6” 8” 10” 12”) in height or until you reach your desired height.
Fasten off and weave in ends.
That’s it! You have made your own Great Granny Cowl!
I would LOVE to see your finished version! Share your pics with me at any of my social media sites above using the hashtags below. You can find all of my social media sites listed below.
@joscraftyhook @joeyleabaird
I would LOVE for you to show off your work with us! You can add your finished cowl inside my FB Group Jo’s Crafty Hook Designs. Be sure to join us regularly there where you will find other great crochet designers and their work; collaborations, WIPs from others and SO much more!
If you would like to receive more information about the events happening at Jo’s Crafty Hook and receive a FREE crochet pattern, why not Subscribe to my Newsletter at my website.
You can find some of my free crochet patterns at my website.
The Wrapped In Love Set is being a part of the Warm my Heart Blog Hop being hosted by Fosbas Designs and Frankie Kate. We are wanting to share free premium crochet patterns that your loved ones can feel love, warmth, and security.
The Warm my Heart Blog Hop will run from December 1 – 20, 2022. Each day you will find 2 new free crochet patterns you can take advantage of.
This post contains affiliate links. If you make a purchase using these links I may receive compensation (at no added cost to you.)
Be sure to Subscribe to my Newsletter to receive information on events like these, to get information about new pattern releases, sales, and more. Click on the Subscribe button in the right hand corner.
You can get a free PDF copy of the premium crochet pattern for my Wrapped in Love Set on December 20, 2022. My Wrapped in Love Set contains a Beanie and a Cowl crochet patterns that you can wrap them in love and warmth. There are 3 sizes to choose from: Child, Women, and Men.
Inside the premium crochet pattern you will find helpful Video Tutorial for every round/row of the Child Size Hat on my YouTube Channel below.
During the month of December you can take advantage of my Wrapped in Love eBook for $10. You will get 7 premium crochet patterns that each contain multiple sizes to choose from. Take advantage of the 50% off discount as part of the Warm my Heart Blog Hop.
Warm my Heart Blog Hop & Bundle
The Warm my Heart Blog Hop & Bundle is sharing crochet patterns that give you a sense of warmth, security, feeling loved and protected.
During the blog hop you will find accessories such as warm shawls, pocket shawls, socks. You will also find cozy sweaters, blankets and more in that will warm your heart or someone else’s.
Click on the Button below to visit the Warm my Heart Blog Hop to find these daily free crochet patterns.
Also as part of the Warm my Heart Blog Hop we are offering the Warm my Heart Bundle.
We are offering the bundle as an option for those of you who do not want to do the blog hop and an idea for some of you who may have missed some days. You can also get this as last-minute Christmas gift for those in your life who LOVE to crochet (or even yourself lol)
If you would like to purchase the Warm my Heart Bundle for $12.99 and get ALL of the crochet patterns in one place click HERE or on the image below.
You can get a free PDF copy of the premium crochet pattern for my Wrapped in Love Set on December 17, 2022. My Wrapped in Love Set contains a Beanie and a Cowl crochet patterns that you can wrap them in love and warmth. There are 3 sizes to choose from: Child, Women, and Men.
Wrapped in Love Set Crochet Pattern
Materials: US Hook H or 5.0 mm 150 yards of MC #4 Worsted Weight Yarn 75 yards of CC #4 Worsted Weight Yarn Scissors Tapestry Needle
Gauge Swatch: Hook U.S. H/5.0 mm 16 DC x 7 Rows = 4”
Abbreviations & Stitches Used: MC = Main Color CC = Contrasting Color Chain 18. R1: DC in 4th ch from Hook Ch Sp = Chain Space and in each st across. Turn (16 DC) St = Stitch R2-R7: Ch 3, dc in each st across. (16 DC) SC = Single Crochet When you finish the 7 Rows your Swatch DC = Double Crochet should be 4 inches wide by 4 inches in height. SS = Slip Stitch FSC = Foundation Single Crochet (YouTube video here.) LDC = Long Double Crochet (YouTube has GREAT instructional videos!) DC2TOG = Double Crochet 2 Together (click on YouTube for instructions) Beg Shell = Ch 3, DC, ch 1, 2 DC all in the same stitch Shell = 2 DC, ch 1, 2 DC all in same stitch ***Drop Stitch = DS (YouTube has a video here.)
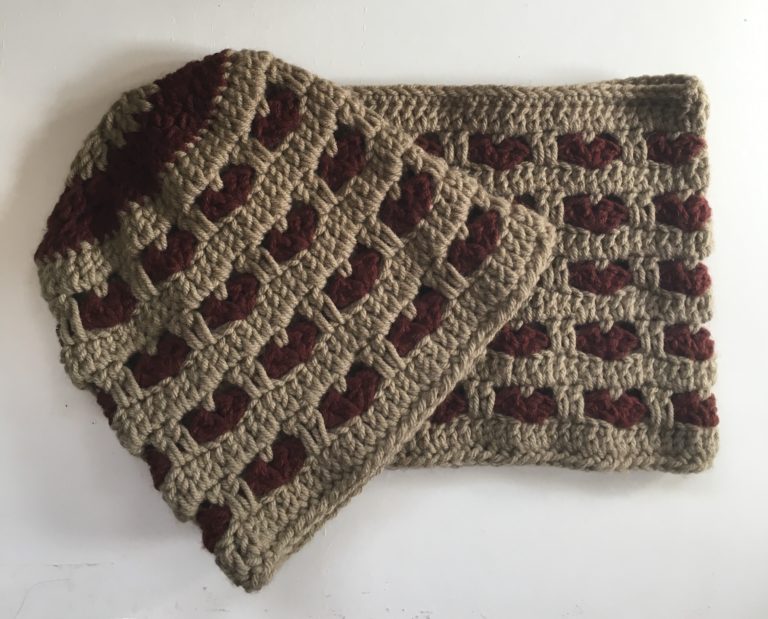
Notes: Hat and Cowl are worked in the Round. Slip stitch into the 1st stitch, the chain space or stitch specified. Ch 3 does count as a DC Shells made create the Heart This hat and cowl are Reversible and can be worn either way. There will be a Gap between Hearts on R3. *** If you do NOT want them to be Reversible, you can use the Drop Stitch technique
Child Size Hat Crochet Pattern
Hat–Child Size:
When making slip knot leave a 3” tail for sewing FSC row closed.
R1: With MC FSC 63. S s in top of ch 3 to join. (63 FSC)
R2: ch 3, dc in each st around. (63 DC) With a Tapestry Needle sew the FSC row closed.
Change to CC to make Shells/Hearts or Use the Drop Stitch
R3: Attach Hot Pink in top of ch 3. [Ch 3, dc, ch 1, 2 dc all in same stitch. (Beg Shell) made] ch 2, skip 6 st, 2 dc, ch 1. 2 dc all in the same stitch. (Shell made). *Ch 2, skip 6 st, Shell in next st.* Repeat from * to * 7 more times. Ch 2 and ss in top of ch 3 of Beg Shell. (9 Shells)
Change to MC or Use the Drop Stitch
R4: ss in ch 1 sp of Beg Shell, ch 1, sc in same st., *ch 2, skip 2 dc from previous row, 1 ldc in next 2 st of previous Row, ch 2, sc in ch 1 space of next Shell.* Repeat from * to * 7 more times. Ss in sc to join.
R5: ch 3, dc in each st around. (63 DC)
Change to CC to make Shells/Hearts or Use the Drop Stitch
R6-R14: Repeat R3-R5 ending with R4 and Light Pink Yarn.
R15-R17: ch 3, dc2tog around. Ss in top of ch 3 to join.
Fasten off. Leave a long piece of yarn and weave R16 closed. Use Tapestry Needle to weave in ends.
Child Size Cowl Crochet Pattern
Cowl–Child Size:
When making slip knot leave a 3” tail for sewing FSC row closed.
R1: With MC and H Hook FSC 84. Ss in top of ch 3 to join. (84 FSC)
R2: ch 3, dc in each st around. (84 DC) With a Tapestry Needle sew the FDC row closed.
Change to CC to make Shells/Hearts or Use the DS
R3: Attach CC in top of ch 3. [Ch 3, dc, ch 1, 2 dc all in same stitch. (Beg Shell) made] ch 2, skip 6 st, 2 dc, ch 1. 2 dc all in the same stitch. (Shell made). *Ch 2, skip 6 st, Shell in next st.* Repeat from * to * 10 more times. Ch 2 and ss in top of ch 3 of Beg Shell. (12 Shells)
Change to MC or Use the DS
R4: ss in ch 1 sp of Beg Shell, ch 1, sc in same st., *ch 2, skip 2 dc from previous row, 1 ldc in next 2 st of previous row, ch 2, sc in ch 1 space of next Shell.* Repeat from * to * 10 more times. Ss in sc to join. (12 Shells)
R5: ch 3, dc in each st around. (84 DC)
Change to CC to make Shells/Hearts or Use the DS
R6-R17: Repeat R3-R5 ending with R5 and MC.
R18: ch 1, sc in same st and each st around, ss in 1st sc to join. (84 sc)
Fasten off.
Use Tapestry Needle to weave in ends.
Find me, Jo of Jo’s Crafty Hook at the places listed below.
September 1-30, 2022 starts the Fall into Autumn Blog Hop. You can take advantage of daily FREE crochet patterns that are perfect for Autumn! This blog hop is being sponsored by #wecrochetofficial #wecrochet #knitpicks There is also a Fall into Autumn Bundle to treat yourself with! More info below.
There will be 32 crochet designers participating and giving away a FREE copy of their newest Autumn designs! The image below tells you how the Fall into Autumn Blog Hop works.
Itchin’ for Some Stitchin’ and Ned & Mimi will be hosting this blog hop. To visit the Fall into Autumn Blog Hop and to find more information, click on the image below to be directed to the blog hop. Each day you can also visit the roundup to get the daily free crochet pattern from another fabulous crochet designer’s newest Autumn design.
On Sept 23, 2022 I will be giving away FREE pdf copies of my newest Autumn design, the Double Cross Mobius Cowl. Be sure to come back here on Sept 23, 2022 to grab a free copy of my Double Cross Mobius Cowl.
There will also be a Giveaway! 1 lucky WINNER will receive the 2022 Fall into Autumn Pattern Bundle and the Premium Winding Station Tool Kit from #wecrochet “WOW!!”
Like I said above, you can skip all the blog hopping and treat yourself to the Fall into Autumn Bundle.
Here are some questions you may have before you decide to treat yourself to one…
What is the Fall into Autumn bundle?
A collection of all 33 patterns in the Fall Into Autumn Blog Hop.
How much does the bundle cost?
The bundle will be offered at $12.99 from August 31 – October 7, 2022, which is over 90% off what one would pay if the patterns were purchased individually. This comes out to about $0.38 per pattern.
How do I treat myself to one?
Click HERE to purchase your own Fall into Autumn Bundle.
**Be sure to Subscribe to my Newsletter below. You will receive a FREE crochet pattern for signing up! You will also receive more information about these events, Jo’s Crafty Hook’s News and more**
[sg_popup id=”10940″ event=”click”][/sg_popup]
You will find some of my Premium crochet patterns , by visiting any of my stores, by clicking on the Buttons below.
If you would like me to crochet any of my designs for you or others, I do take Custom Orders. You can email me with your order or any other questions at j.o@joscraftyhook.com.
Engaging with Entrepreneurship Post COVID….What?? Take a look at this article and see how women can become an entrepreneur now that COVID has left us to pick up the pieces of our lives.
Has COVID created a void in your life? Has it caused your whole life to change? Well, Virginia Cooper of Learn a Living wrote the following article just for women and how they can start “engaging with entrepreneurship Post COVID.”
This post contains affiliate links. If you make a purchase using these links I may receive compensation (at no added cost to you.)
What does that mean you ask…..keep reading this very informative article and find out how it can be beneficial to you.
When I first read this article by Virginia Cooper, I thought to myself…self “man, I could have really used this information when I first stepped out on my crochet business journey!”
There are still so many helpful tips inside that I can use in the future. I kind of started my crocheting business backwards, starting a website and praying everything else would fall into place. Boy, was I wrong. lol
If the way you live and earn a living has changed since COVID or you want to make a change because of the way COVID has changed you, take a look at the article below that has some amazing advise you can follow to become an entrepreneur yourself.
Engaging with Entrepreneurship Post-COVID
They say that the best entrepreneurial opportunities emerge during times of crisis. Women with entrepreneurial minds may have been stalled during COVID-19, as many lost their jobs or had to return home during the pandemic.
But now it’s time to resume pursuing your dreams and engage in the entrepreneurial venture you’ve always wanted. Let’s break down how you can earn money online with your entrepreneurial ideas in detail.
Getting What You Need to Succeed
For starters, consider what you need for your entrepreneurial goals. Come up with a plan and decide whether you want to:
Run a bunch of side hustles to determine your interests
Or something else entirely
Furthermore, set up a home office and buy any supplies you may need for your upcoming entrepreneurial efforts.
Any entrepreneur needs business skills, which is why you might consider going back to school and finishing or acquiring a business degree, marketing degree, or MBA. The right online degree program will give you the tools you need to succeed and run your business profitably for years to come. Plus, an online degree in business will help you develop your business acumen and market smarts: key advantages if you haven’t engaged in entrepreneurship before.
Forming a Business
As you decide on your business idea, be sure to form your business by:
Choosing a unique name that isn’t taken by a company in your state
Registering your new business with your state
Paying any applicable fees
As an entrepreneur, you’ll need to choose the right business structure for your new venture. An LLC or limited liability company is great for minimizing legal liability, enjoying tax advantages, and more. Check your state’s laws regarding LLCs so you file the right paperwork on time and pay the appropriate fees.
The Importance of Marketing
For your entrepreneurial venture to be successful, you’ll also need to market successfully. Marketing is highly important in this day and age, especially in the digital arena.
Effective marketing will involve using:
Google ads for target keywords that are related to your target audience
Social media marketing so you can engage with prospective customers
Other ads, like banner ads, that you can use to draw new traffic to your online store
It may help to hire a graphic designer to design attractive, compelling advertising graphics or a logo for your brand, especially in the earliest days of your business.
Growing Your Entrepreneurial Adventure
As you market your business and sell your products or services, you’ll scale up your company for even greater success. Build a website, secure hosting resources, and keep advertising.
Over time, your brand will gain a great reputation and you’ll acquire new customers more easily. The great thing about entrepreneurship is that success tends to snowball. The longer you stick with it, and the more effort you put into your business, the more lucrative it will become.
COVID-19 might have seemed like a disaster. But it may really be an opportunity for you to stretch your entrepreneurial wings and achieve your dreams. Good luck!
Thanks for reading!
I hope you find some helpful tips here if you are wanting to start your own business. Yes, changing our lives, becoming a business owner can be rough, but if it something you think you can do …… no one can make that decision but you.
Jo written by Virginia Cooper of Learn a Living
If you have any questions about this article, you can contact Virginia at the link above.
You can also find out more helpful tips about learning a trade, going back to school and finishing your education. You can find resources on how to do these things as well.
You can also find out more about me on my website. I design crochet patterns and created my own business in 2018. If you are interested in finding my crochet patterns you can find some free on my website. You will find Accessories, Apparel, Fall & Winter Gear, and Stash Busters.
I do take Custom Orders if you would like me to crochet you your own Handmade Crocheted Creations. You will find my designs at my stores listed below. Contact me at j.o@joscraftyhook.com if you are interested in placing a Custom Order.
Do you like to use your leftover yarn to crochet a project in multiple colors? Well this Seed Stitch Head Scarf Free Crochet Pattern is perfect to use that scrap yarn left over from projects you have been working on all year.
This post contains affiliate links. If you make a purchase using these links I may receive compensation (at no added cost to you.)
The Seed Stitch Head Scarf crochet pattern used the Seed Stitch. The Seed Stitch uses the basic stitches, single crochet and double crochet. Also in the crochet pattern you will find instructions on how you can customize this to meet your style, size, and color. You can customize it to fit babies, toddlers, tweens, teens and all adult sizes.
Materials: US G Hook/4 mm MC 150 yds of #3/DK Weight Yarn CC 150 yds of #3/DK Weight Yarn Tapestry Needle Gauge: US G Hook/4 mm 16 st x 16 rows = 4” Size: 4” wide x 56” long
Abbreviations/Stitches Used: ch = chain sl st = slip stitch sc = single crochet dc = double crochet sp = space CC = Contrasting Color MC = Main Color
You can also find a premium copy of the Seed Head Scarf Crochet Pattern at my Ravelry Store or LoveCrafts or my Etsy Shop that contain Picture Tutorials and Step-by-Step instructions.
Notes: Alt ch 2 counts as a dc You will change colors after every 32 rows or every 8” You can customize how many rows you would like to do before you change colors.
Special Stitches: Foundation Single Crochet: creates your foundation row at the same time as your first row of single crochet stitches. Seed Stitch: alternate sc and dc in the 1st row then you add a dc in the sc and a sc in the dc in the consecutive rows.
R1: fsc 16 turn (16 sc) alternative: ch 17, sc in the 2nd ch from hook and each remaining st across. (16 sc)
R2: ch 1, alt ch 2 in 1st st. *sc in the next st, dc in the next st* rep from * until last st, sc in last st. turn ( 16 st)
R3-R32: alt ch 2 in 1st st. *sc in the next st, dc in the next st* rep from * until last st, sc in last st. turn (16 st) Using CC
R33-64: alt ch 2 in 1st st. *sc in the next st, dc in the next st* rep from * until last st, sc in last st. turn (16 st)
Repeat R1-R64 or until you reach your desired length.
Fasten off and weave in ends.
You can find a premium copy of the Seed Stitch Head Scarf Crochet Pattern at my Ravelry Store or LoveCrafts or my Etsy Shop that contain Picture Tutorials and Step-by-Step instructions.
Be sure to sign up for my Newsletter. I will be sharing my collaborations, Free Crochet Patterns added to my website, Pattern Releases, and more. When you sign up, you will receive a free pdf crochet pattern sent directly to your inbox. You can find more information about the free pattern on my website HERE.
That’s it! You have made the Seed Head Scarf! You can customize it to fit your style, size, and color(s) using your yarn stash! I would ❤️ to see your version! You can tag me at any of my Social Media Sites and using the hashtags listed below.
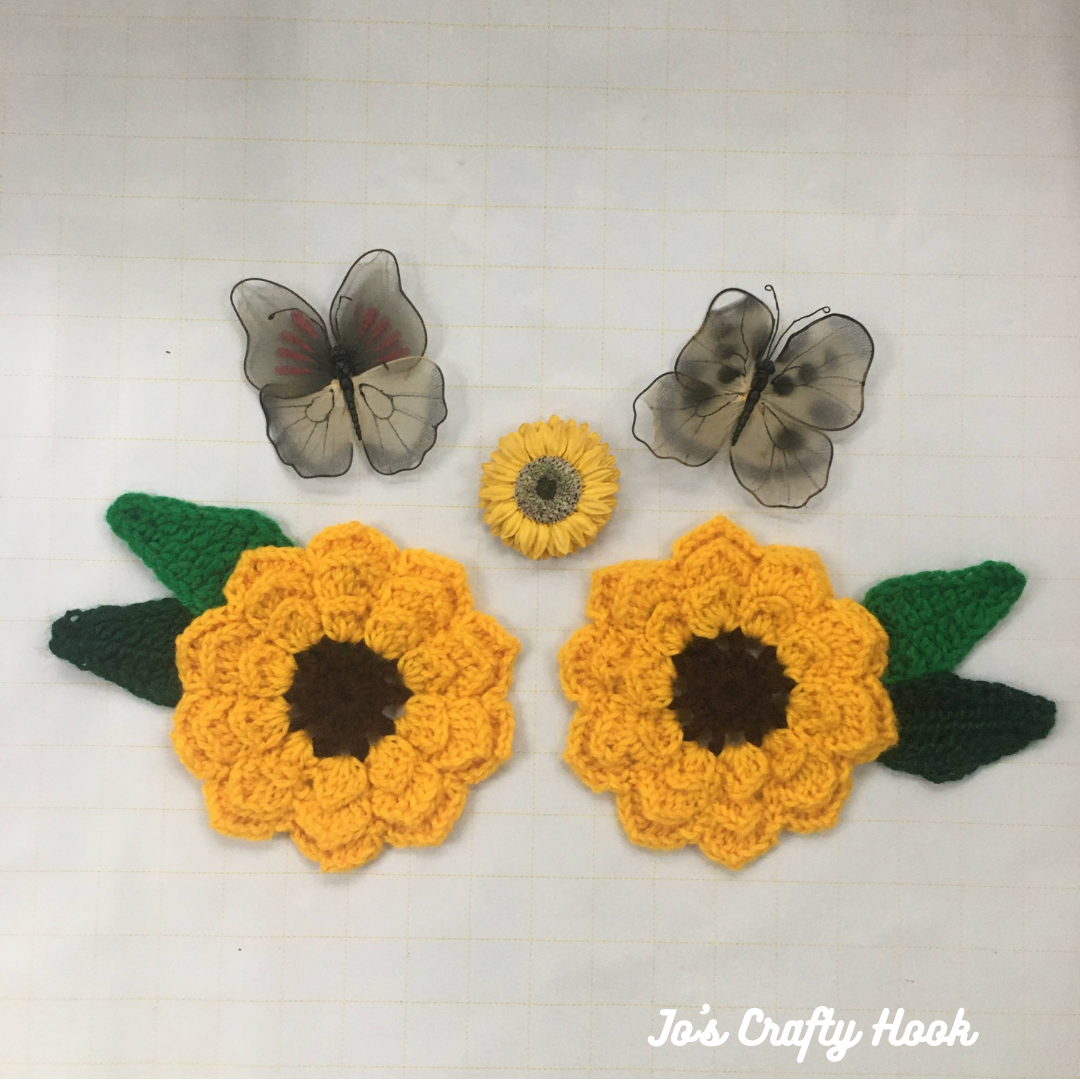
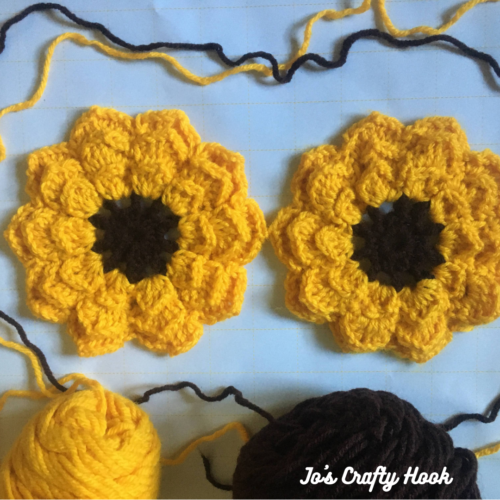
Do you like to add embellishments to liven up your wardrobe, headbands, table decorations, or anything else? Well I have the perfect FREE crochet pattern for flowers just for you, my Sunflower Appliques Free Crochet Pattern.
While you are there be sure to sign up for my Newsletter where you will receive news about my New Crochet Pattern Releases, Collaborations, and MORE! For signing up you will also get a FREE crochet pattern!
This post contains affiliate links. If you make a purchase using these links I may receive compensation (at no added cost to you.)
The crochet sunflower appliques can be added to any holiday table decorations. You can add them to designs such as scarves, handbags, place mats, and more.
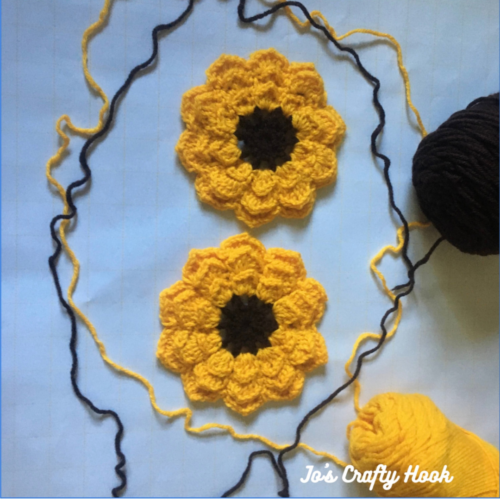
The flower design does not need to be crocheted just for Autumn, they can add flair to anything in any season. My crochet pattern testers made their appliques in different colors from Autumn and different yarn weights as you can see below.
If you would like to purchase a copy of an Ad-Free pdf crochet pattern with step by step pictures, it can be found at my Ravelry Store
Needed information for the Sunflower Applique Free Crochet Pattern
Materials: US J Crochet Hook or 6 mm MC = 100 yds of Worsted/Aran Weight Yarn CC = 2 yds of Worsted/Aran Weight Yarn Scissors Tapestry Needle
Abbreviations/Stitches Used: ch = chain sc = single crochet sp = space sl st = slip stitch
Finished Sunflower 6”
Notes: I used 2 colors for my flower, but you can use 1 or more. The flower is worked in the round. The petals are worked in the chain spaces. You can use any type of yarn to crochet the sunflower.
R1: Make a magic circle, ch 1, 20 sc in the magic circle, pull magic circle closed and sl st in 1st sc to join. 20 sc
R2: ch1, sc in the same stitch, *ch 3, skip the next stitch, sc in the next st* Repeat from * until you have 10 ch-3 sp, sl st into 1st sc to join. (10 ch-3 sp)
Change to Main Color (Optional)
R3: *(sc, 2 dc, ch 2, 2 dc, sc) all in the ch-3 space* Repeat from * until you have 10 petals. sl st in 1st sc to join. (10 Petals)
Second layer of flower
R4: working behind the petals from the previous round *ch 4 and sl st in sc of next petal* repeat until last petal and ch 4. sl st in 1st ch-4 sp. (10 ch-4 sp)
R5: ch 1 and *(sc, 3 dc, ch 2, 3 dc, sc) all in the same sp* Repeat from * until you have 10 petals. sl st in 1st sc to join. (10 Petals)
3rd layer of flower
R6: working behind the petals from the previous round *ch 4 and sl st in sc of next petal* repeat until last petal and ch 4. sl st in 1st ch-4 sp. (10 ch-4 sp)
R7: *(sc, 4 dc, ch 2, 4 dc, sc) all in the same sp* Repeat from * until you have 10 petals. sl st in 1st sc to join. (10 Petals)
That’s it! You have finished making your Sunflower Applique! There are SO many ways you can use this applique! You can add it as an embellishment to handbags, scarves, hats, and so much more!
Thank you so much for completing my design! I would LOVE to see what you do with your version of the flower and how you used them!
You can tag me at any of the Social Media sites listed above. You can also use the hashtags: #sunflowerapplique #sunflowerappliquecrochetpattern #joscraftyhook #jo_bear38 #handmadecrochetedcreations
While you are there be sure to sign up for my Newsletter where you will receive news about my New Crochet Pattern Releases, Collaborations, and MORE! For signing up you will also get a FREE crochet pattern!
You will find some of my Premium crochet patterns , by visiting any of my stores, by clicking on any of the Buttons below.
Custom Orders Welcome
If you would like me to crochet any of my designs for you or others, I do take Custom Orders. Visit my Ravelry Store or LoveCrafts to see some ideas of what you would like to Custom Order. You can email me with your order or any other questions at j.o@joscraftyhook.com.
Find me, Jo of Jo’s Crafty Hook at the places listed below.
I am happy to introduce to you to a crochet design of mine, the Child Size Pocket Full of Diamonds Shawl! This is the perfect accessory for those cool days and cool nights no matter the weather. You can crochet this beautiful shawl for your little girl or any little girls in your life!
This page contains affiliate links. You can make a purchase using these links that I provide where I may receive compensation (at no added cost to you.) Purchases you make will help keep my website, Etsy Shop, and my Ravelry Store going and provide quality designs just for you!
Don’t forget to sign up for my Newsletter. I have SO many great things scheduled already for 2021! Giveaways, CALs, new FREE crochet patterns, and more!
[yikes-mailchimp form=”1″]
Today I am SO excited to be collaborating with Veronika of Blue Star Crochet and 19 other crochet designers in the 2nd Week of the Last Minute Crochet Gifts Giveaway! Week 2 runs from 10/11-17. 2021.
I will be giving away a free pdf copy of my Child Size Pocket Full of Diamonds Shawl. There are also 20 other crochet ideas that would be perfect for those Christmas gifts for your family and friends!
You can download my free pdf copy of the Child Size Pocket Full of Diamonds from Ravelry using the button below. Use the Coupon Code: LSTMINGIFT21
To got back to the Last Minute Crochet Gifts Pattern Giveaway hosted by Blue Star Crochet and get the rest of the free crochet patterns you like click on the button below.
Thank you for stopping by week 2 of the Last Minute Crochet Gift Ideas! Be sure to check back for week 3! Week 3 will feature more new crochet patterns that are perfect for gift giving! Week 3 runs from 10/18-24, 2021
……………………………………………………………………………………………….
The child sizes of the Pocket Full of Diamonds Shawl can be easily customized using the adult version of the free crochet pattern of the Pocket Full of Diamonds Shawl found on my website. You can find all the child sizes of the Pocket Full of Diamonds Shawl crochet pattern at Ravelry, LoveCrafts and Etsy for a small fee.
The Child Size Pocket Full of Diamonds uses the Argyle Shell Stitch that you can find in a lot of patterns I designed last year. All of the crochet patterns that uses the Argyle Shell Stitch can be found individually at my stores or in an eBook at Ravelry.
If you don’t crochet or don’t have the time to make the child size shawl for yourself or family or friends, I would be more than happy to crochet one for you! You can fill out the Custom Order Form below or email me at jo@joscraftyhook.com and we can discuss how to make it to fit your style, size, and color(s)!
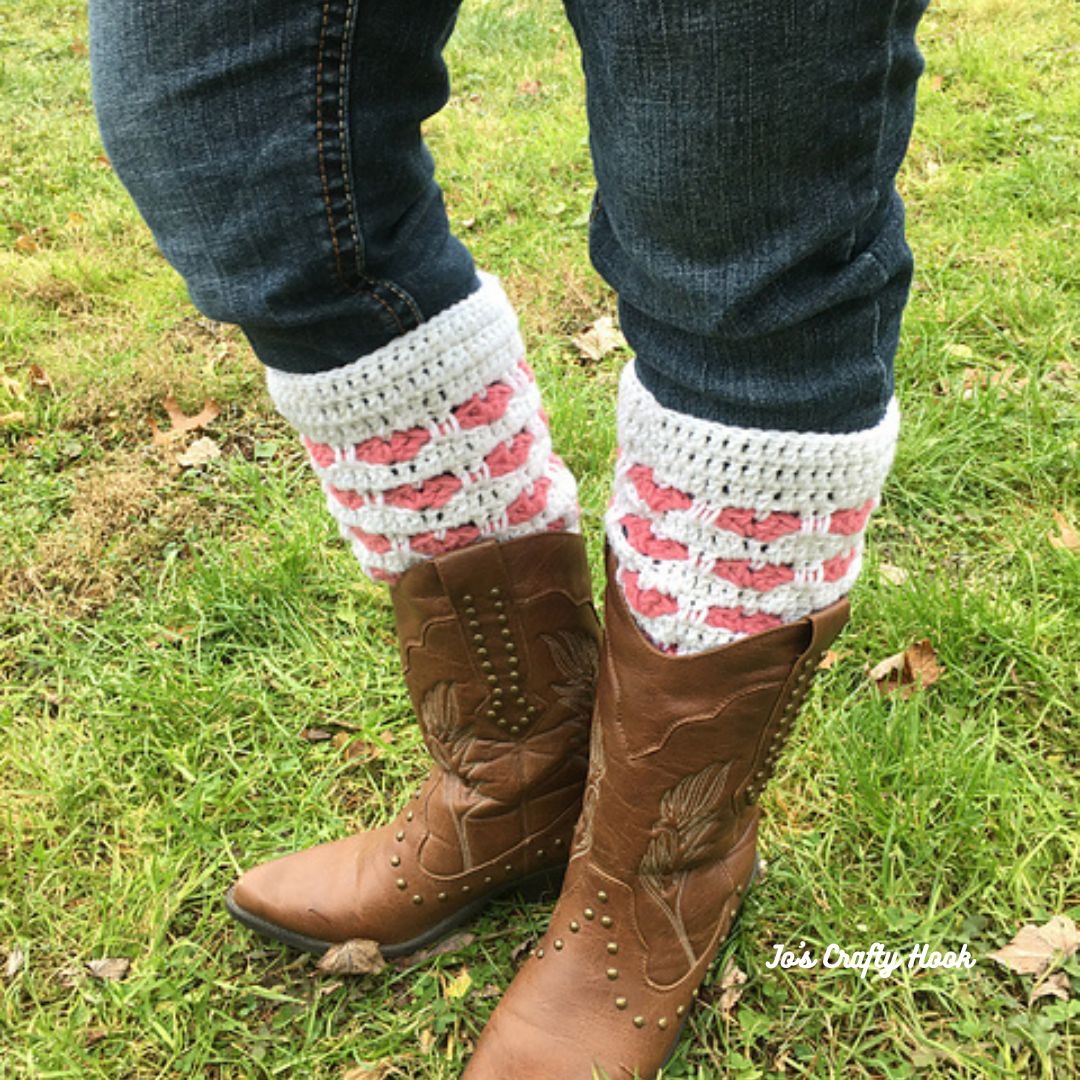
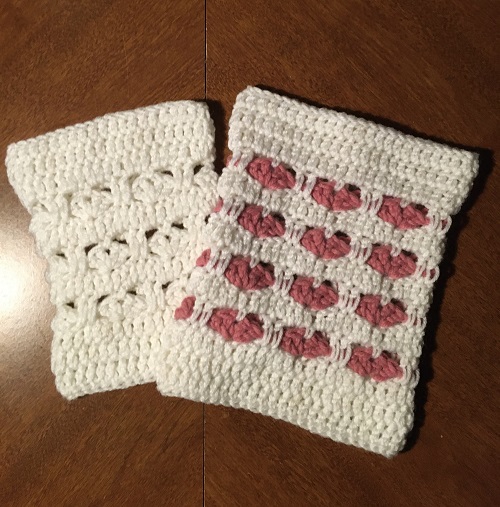
Who doesn’t love ❤️ dressing up their wardrobe? Why not dress up your boots as well? In today’s post you will find a FREE copy the Wrapped in Love Boot Cuffs Crochet Pattern. This is a great crochet pattern to make for Valentine’s Day or any time of the year.
Don’t miss out on what Jo’s Crafty Hook will be doing by signing up for my Newsletter. I have more amazing things still scheduled for 2023 that I know you will LOVE! Sign up by clicking on the Subscribe button in the bottom right corner of your screen.
……………………………………………………………………………………………………………………………
You can get a premium copy of my Wrapped in Love Boot Cuffs crochet pattern for a small fee at my Ravelry Store. Inside the crochet pattern you will find written instructions for 5 sizes and Picture and Video Tutorials all in a PDF you can keep going back to.
Below you will find a free crochet pattern of the Wrapped in Love Boot Cuffs crochet pattern in the Child Size.
Materials: US H Hook or 5 mm MC-200-400 yards of #4 Worsted Weight Yarn CC-10-40 yards of #4 Worsted Weight Yarn Scissors Tapestry Needle
Gauge: US H Hook or 5 mm Hook
8 dc x 4 rows = 2″
Stitches Used: ch = chain ch sp = chain space st = stitch sc = single crochet dc = double crochet sl st = slip stitch alt ch 2 = alternate chain 2 fdc = foundation double crochet ldc = long double crochet beg shell = beginning shell shell = shell MC = Main Color CC = Contrasting Color
Special Stitches:
Beginning Shell = alt ch 2, dc, ch 1, 2 dc all in the same stitch
Shell = 2 dc, ch 1, 2 dc all in the same stitch
beg shell here
shell here Changing Colors here long double crochet here
Notes:
The boot cuffs are worked in the round. Slip stitch into the 1st stitch, the chain space or the stitch specified.
alt ch 2 DOES count as a dc.
Shell rows create the heart.
If you want to change colors for the hearts, you would do it on the shell rows.
There are helpful hints for using the MC and CC below the Adult Size pattern.
Sizes are for child, teen, small adult, medium adult, and large adult. ………………………………………………………………………………………………………………
Be sure to measure you calf before you crochet the cuffs. You also need to take into account that you will be wearing the boot cuffs over you pant legs.
Boot Cuffs:
If you want to do a bigger size or see how to change colors for the hearts, you can purchase a pdf copy of the crochet pattern for $3 from Ravelry.
There are helpful hints for using the MC and CC below the Adult Large size
There are Video Tutorials showing you how to crochet the Repeat Rows on my YouTube Channel
Child Size:
Leave a long tail for sewing the foundation row closed.
R1: fdc 28 sl st in beginning fdc to join. 28 fdc
Optional: ch 30, dc in 4th ch from hook and in each remaining st. sl st in 1st ch to join. 28 dc
Use Tapestry Needle to close FDC.
R2: alt ch 2 and dc around. 28 dc
R3: sl st into 1st dc. [alt ch 2, dc, ch 1, 2 dc all in the same stitch. (beg shell) made] ch 2, skip 6 st, 2 dc, ch 1. 2 dc all in the same stitch. (shell made). *ch 2, skip 6 st, shell in next st.* Repeat from * to * around. ch 2 and sl st in top of alt ch 2 of beg shell. 4 shells
R4: sl st over to ch 1 sp of beg shell, ch 1, sc in same st., *ch 2, skip 2 dc from previous row, 1 ldc in next 2 st, ch 2, sc in ch 1 space of next shell.* Repeat from * to * around. sl st in sc to join.
R5: alt ch 2 in first st and dc in each remaining st. 28 dc
R6-R8: Repeat R3-R5
R9-R10: alt ch 2 in first st and dc in each remaining st around. 28 dc
Fasten off and weave in the ends. ………………………………………………………………………………………………………………
You can find more of my crochet patterns at these locations listed below. If you see something you like that I have designed and would like to have a one of a kind design, I would be more than happy to crochet it for you! You can place a Custom Order by emailing me at j.o@joscraftyhook.com and we can discuss how to customize it to fit your style, size, and color.
Find me, Jo of Jo’s Crafty Hook at the places listed below.
The Autumn Hues Wrap crochet pattern uses basic crochet stitches and can be customizable. You can make a Scarf, Table Runner, Motif Squares and more. You will find the Autumn Hues Wrap as a free crochet pattern below.
This slideshow requires JavaScript.
My Autumn Hues Wrap Crochet Pattern is being featured in the All About Fall Blog Hop hosted by Carroway Crochet on September 6, 2023. You can get a FREE premium copy for 24 hours, starting at 11a EST on September 6-7, 2023.
This post contains affiliate links. If you make a purchase using these links I may receive compensation (at no added cost to you.)
**While you are here why not sign up for my Newsletter by using the Subscribe button in the Right Hand Corner**
From September 1-29, 2023 you will find some great Fall crochet patterns you get can for free for 24 hours. Visit the All About Fall Blog Hop each day to find out how.
If you would like ALL of these premium crochet patterns ALL in one place, you can purchase the All About Fall Bundle for $12.99. This bundle contains ALL 29 premium crochet patterns being offered in the All About Fall Blog Hop.
So on my day, September 6, 2023, visit the Main Post to get the Coupon Code needed for your free copy of my Autumn Hues Wrap Crochet Pattern.
Then from September 6-7, 2023 from 11a EST to 11a EST visit my Ravelry Store to get you a FREE premium copy of the Autumn Hues Wrap Crochet Pattern!
Also, you will find more awesome crochet designs each day at the All About Fall Blog Hop or by purchasing the All About Fall Bundle for $12.99!
Autumn Hues Wrap Free Crochet Pattern
Information Needed to Crochet the Autumn Hues Wrap
Skill Level: Beginner
US Terminology
Yarn Used: I used 8 colors of Worsted or Aran Weight Yarn in a variety of brands.
One Size: 21” x 68”
Materials: US H or 5 mm Crochet Hook 800-1000 yds of 4 ply Worsted or Aran Weight Yarn Scissors Tapestry Needle
Abbreviations/Stitches Used: ch = chain sc = single crochet dc = double crochet sl st = slip stitch sp = space rep = repeat
Notes: ch 3 counts as a double crochet The stitch count is a multiple of 7 + 2 I used the Chirpy Picot Stitch from Crochet ‘n’ Create
Special Stitches: Picot – ch 3, sc in 3rd ch from hook. Shell – (2 dc, ch 2, 2 dc) all in the same space.
Gauge: US H Crochet Hook or 5 mm 16 st x 8 rows = 4”
Autumn Hues Wrap Free Crochet Pattern below
4” x 4” Gauge Swatch: R1: ch 16, shell in 6th ch from hook, * picot (see notes) sk 6 ch, shell in next ch. rep from * until last 3 ch. sk 2 ch, dc in last ch. ch 3 and turn.. R2: shell in next ch 2 sp, *work picot, shell in next ch-2 sp, rep from * until last ch-2 sp of last ch-5 sp. work picot, shell in the ch-2 sp, dc in the top of ch 3. ch 3 and turn R3-R8: shell in the next ch-2 sp, * work picot, shell in next ch-2 sp. rep from * to the last ch-2 sp and ch 3, work picot, shell in ch-2 sp, dc in top of ch 3. turn.
Customizing: Width: To create a wider wrap add multiples of 7. Length: Use your Height plus 4” – 8” to reach your desired length by continuing to repeat R3. After you have reached your desired length, move on to the border.
R1: ch 86, shell in 6th ch from hook, * picot, sk 6 ch, shell in next ch. * rep from * until last ch 3. sk 2 , dc in last ch. ch 3, turn. R2: shell in next ch-2 sp, *work picot, shell in next ch-2 sp. rep from * until last ch-2 sp and the ch-5 sp, work picot, shell in ch-2 sp, dc in top of ch 3. ch 3, turn. R3: shell in the next ch-2 sp. * work picot, shell in next ch-2 sp, rep from * until last ch-2 sp and ch 3, work picot, shell in the ch-2 sp, dc in top of ch 3. ch 3, turn. Repeat R3 until you reach your desired length. Last Row: ch 1, sc in the same st. sc in next st, *ch 6, sk picot, sc in ch-1 sp of shell. rep from * until the last 2 st, sc in the last 2 st. 51 st Do not turn after your final row.
Border: down the side: shell in the last st of final row and turn to the side of wrap, *picot, sk next side post, shell in the next side post. repfrom * until the corner. shell in the corner. bottom: turn to crochet in the starting ch. *picot, shell in the next ch-6 sp. rep from * until the corner. shell in the ch-3 sp of the corner. up the 2nd side: turn to crochet up the 2nd side. *picot, sk side post, shell in the next side post. rep from * until the corner. shell in the corner. top: turn to crochet across the top, *picot, shell in next ch-6 sp. rep from * until the starting corner. sl st in 1st dc of shell to join. Fasten off and weave your ends.
My crochet pattern tester, Nancy McKain, did use the design to make a Table Runner because she lives in Arizona, who would want to wear a wrap in that weather?!? 😀
I would LOVE to see your finished version! Share your pics with me at any of my social media sites above using the hashtags below. You can find all of my social media sites at the beginning of the pattern.
There is a story behind the creation of the BlueBerry Waffle Beanie. I designed a hat 2 years ago for Lion Brand Yarn and their #HatNotHate hat drive called the Blue Seuss Slouchy Hat. To show my support again this year, I designed the 2 versions of the BlueBerry Waffle Beanie. Here is what Lion Brand has to say about #HatNotHate:
“With #HatNotHate Lion Brand Yarn hopes to increase awareness on the impact of bullying has on children, teens and adults by rallying together and crafting blue hats to proudly wear throughout the month of October, National Bullying Prevention Month. With your help we hope to create a new “craftivist” movement to send the message that bullying in unacceptable.”
My daughter experienced Bullying and seen some of the harsh side effects Bullying can cause. This is why I feel SO strongly and have been designing Blue Hats to show my support against this cruel behavior. Because my daughter loves Waffles I decided to design this waffle stitch beanie to show my support. You will find 2 versions of the BlueBerry Waffle Beanie in this post.
This post contains affiliate links. If you make a purchase using these links I may receive compensation (at no added cost to you.)
Be sure to sign up for my Newsletter while you are here at my website. As a new subscriber you will receive news about upcoming sales, new free crochet patterns, giveaways and more!
From August 15, 2021 until September 6, 2021 you can take advantage of my #HatNotHate bundle of crochet patterns for $6! Retail Value is $16, that’s $10 off! No Coupon Code needed!
You will get my:
Blue Seuss Slouchy Hat
BlueBerry Waffle Beanie
Rugged Slopes Messy Bun and Beanie
Slouchy Puffs Beanie
My Blueberry Waffle Beanie and my Rugged Slopes hat can be made 4 ways each, so this is like getting 10 crochet patterns in 1 bundle! Visit my Ravlery Store to take advantage of this awesome discount!
Lion Brand’s #HatNotHate campaign asks for blue hats to be donated for kids to wear against Bullying in October! Find out more about Lion Brand’s #HatNotHate campaign here!
You can find the Ad-Free PDF crochet pattern for the BlueBerry Waffle Beanie at my Ravelry Store.
BlueBerry Waffle Beanie
Version 1
Size
Hat Width (Circumference)
Hat Height
Crown
0-6 months
12.5”
5” – 5.25”
4” – 4.5”
6-12 months
14.5
5.5” – 6.5”
4.5” – 5”
12-24 months
16.5
6.5” – 6.75”
4.5” – 5”
2-4 years
18.5”
6.75” – 7”
5” – 5.5”
5-10 years
20”
6.75” – 7.5”
5.5” – 6”
Tween/Small Adult
21.5”
7.5” – 8”
6” 6.25”
Medium Adult
22”
23.5”
6.25” – 6.75”
Large Adult
22.5”
8.5” -9”
6.5” – 7”
Materials:
US H Crochet Hook/5.0 or 5 mm
US I Crochet Hook/5.5mm 150-400 yards of 4 ply Worsted or Aran Weight Yarn Scissors Tapestry Needle
Gauge: US Hook H/5.0 or 5 mm 8 FPDC/BPDC x 5 Rows = 2 inch
Abbreviations: CH = Chain Sl St = Slip Stitch DC = Double Crochet FDC = Foundation Double Crochet FPDC = Front Post Double Crochet BPDC = Back Post Double Crochet DC2TOG = Double Crochet 2 Together
Notes: Ch 3 does count as a DC
Ch 1 does NOT count as a stitch
Video Tutorials: DC2TOG instructions from YouTube here. FDC instructions on YouTube here.
FPDC instructions on YouTube here.
BPDC instructions here.
Special Stitches: Front Post Double Crochet – Double Crochet going around the Front Post of the DC in the Previous Row. Back Post Double Crochet – Double Crochet going behind the Front Post of the DC in the Previous Row. Double Crochet 2 Together – when you double crochet two together, you are taking what were two double crochet stitches and turning them into just one double crochet stitch. This is also known as a decrease.
Special Notes:
Stitch multiple after the band is 3, so if your band is too tight or too loose try going up or down in hook size instead of adjusting stitch count.
Pattern written for: NB-6mth (6-12 mth, 12-24 mth, 2-4 yrs, 5-10 yrs, Teen/Sm Adult, Med Adult, Lg Adult)
Brim is worked in the round.
Waffle Stitch is worked as rows.
If Height of Hat is NOT met, Repeat R6-R7 until Height is met. Remember you will be adding 1.5”-2.5” for Decreasing.
If Height IS Hat IS met, end with R7 repeat, skip the rest of the Rows and go to Decrease Rows. Remember you will be adding 1.5”-2.5” when decreasing.
If Height of Hat is NOT met after adding all the Rows, you can use more Decrease Rows below.
R2: Ch 3, fpdc in the next st *dc in the next st, fpdc in the next st* Repeat from * to * around. sl st to join. (48, 57, 60, 69, 78, 87, 90) st
R3: Ch 2, fpdc in the same st, *dc in the next st, fpdc in the next st* Repeat from * to * around. sl st to join. (48, 57, 60, 69, 78, 81, 87, 90) st
Waffle Stitch:
R4: Ch 3, dc in same stitch and each stitch around. sl st to join.
R5:Ch 3, turn, dc in the next st. *fpdc around the post of the next stitch, dc in the next two st.* Repeat from * to * around. sl st to join.
R6: Ch 3, turn, dc in the next st. Fpdc around the post of the next st, dc in the next 2 st.* Repeat from * to * around. sl st to join.
Ages 0-6 mth, 6-12 mth, 12-24 mth
R7-R10: Repeat R5-R6 twice then go to Decrease Rows
Ages 2-4 yrs
R7-R12: Repeat R5-R6 three times then go to Decrease Rows
Ages 5-10 yrs
R7-14: Repeat R5-R6 four times then go to Decrease Rows
Tween/Small Adult
R7-14: Repeat R5-R6 four times then go to Decrease Rows
Medium Adult
R7-R16: Repeat R5-R6 five times and go to Decrease Rows
Large Adult
R7-R18: Repeat R5-R6 six times and go to Decrease Rows
Decrease Rows:
R1: Ch 2, fpdc in the next st, *dc2tog in the next 2 dc, (fpdc in the next st, dc in the next 2 st) twice* Repeat from * to * around. sl st to join. turn
R2: Ch 3, *bpdc in the next st, (dc in the next st, bpdc in the next 2 st) twice.* Repeat from * to * around. sl st to join. turn
R3: Ch 2 *fpdc in the next st, dc in the next st, fpdc in the next st, dc2tog, fpdc in the next st, dc in the next 2 st* Repeat from * to * around. sl st to join. turn
R4: Ch 3, bpdc in the next st, dc in the next st, bpdc in the next st, dc in the next st, bpdc in the next 2 st, *(dc in the next st, bpdc in the next st) twice then dc in the next st, bpdc in the next 2 st* Repeat from * to * around. sl st to join.
If you are wanting your Hat to be a Messy Bun do NOT sew the Crown of the Hat closed.**If Height of Hat is NOT met, please see more Decrease Rows below.
Leave a 6-8” tail for sewing the Crown of the Hat closed.
Sew the crown closed being sure to pull your long tail tight once you’ve reached the 1st st.
Fasten off and weave in ends with Tapestry Needle.
You can add a Pom Pom if you would like.
Extra Decrease Rows
Decrease Rows to meet the Hat’s Height.
R1: Ch 3 and turn, *dc2tog in the next 2 dc, fpdc.* Repeat from * to * around. sl st to join.
R2-R4: Ch 3 and turn. *dc in the next st, fpdc in the next st .* Repeat from * to * around. sl st to join.
You can Repeat R2-R4 in continuing to add Height to your Hat.
Leave a 6-8” tail for sewing the Crown of the Hat closed.
Sew the crown of the hat closed being sure to pull long tail tight once you’ve reached the 1st st.
Fasten off and weave in ends with Tapestry Needle.
You can add a Pom Pom if you would like.
You can make a Messy Bun Version. See instructions above.
Thank you for stopping by Jo’s Crafty Hook for another FREE crochet pattern! I hope you show your support for this much needed program by donating the BlueBerry Waffle Beanie to the #hatnothate hat drive.
Be sure to sign up for my Newsletter so you don’t miss out on any news from Jo’s Crafty Hook! When you do you will receive a Special Discount that you can use at my Ravelry Store.
If you would like to make a donation to Jo’s Crafty Hook and help me with the costs of running Jo’s Crafty Hook, any help would be greatly appreciated!