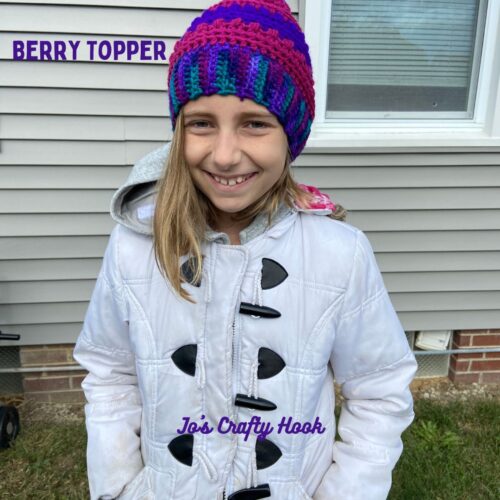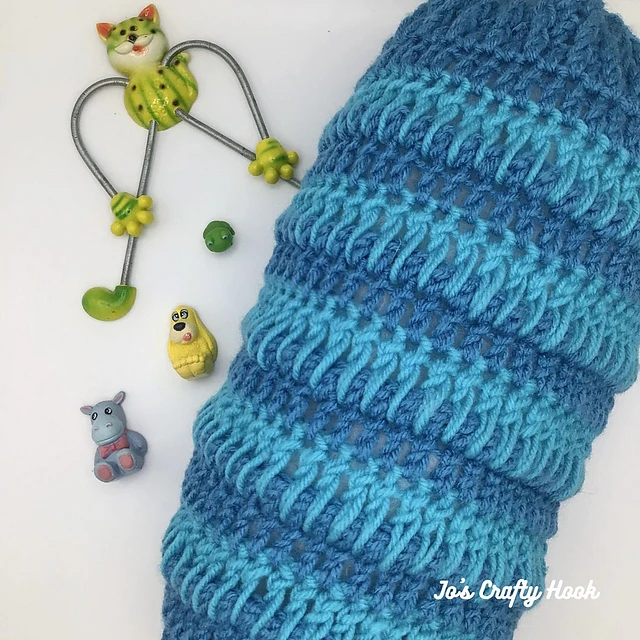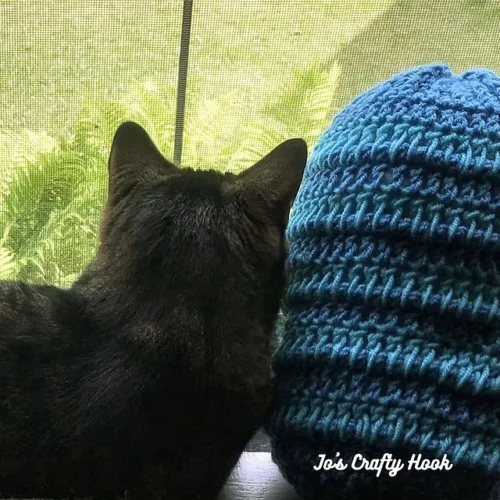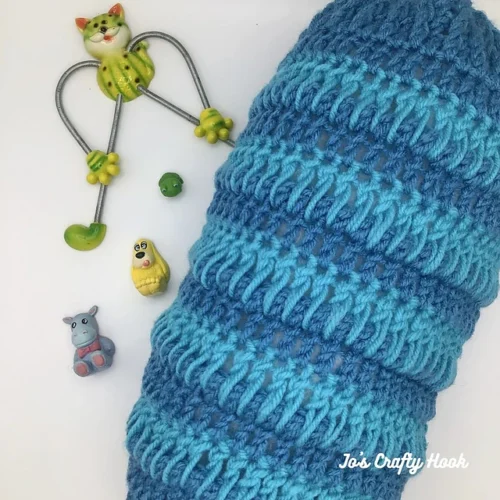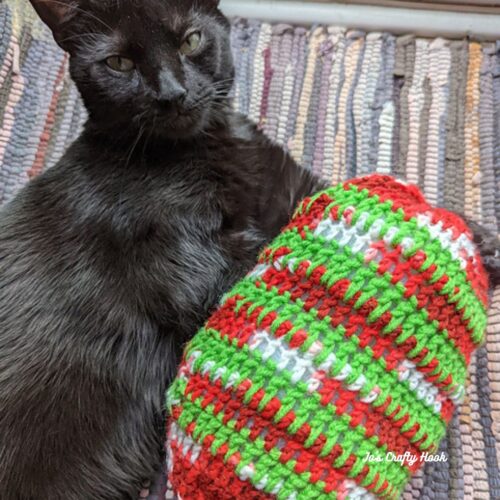
Berry Topper Beanie

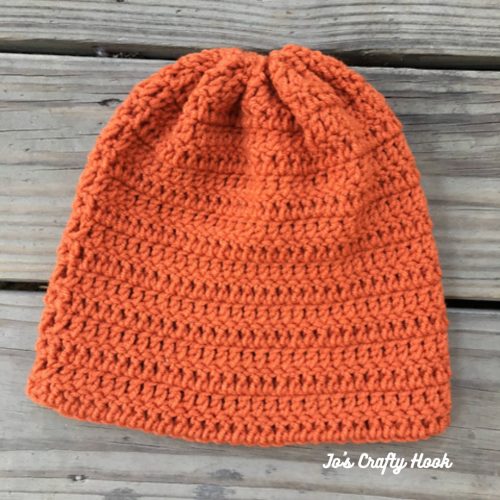
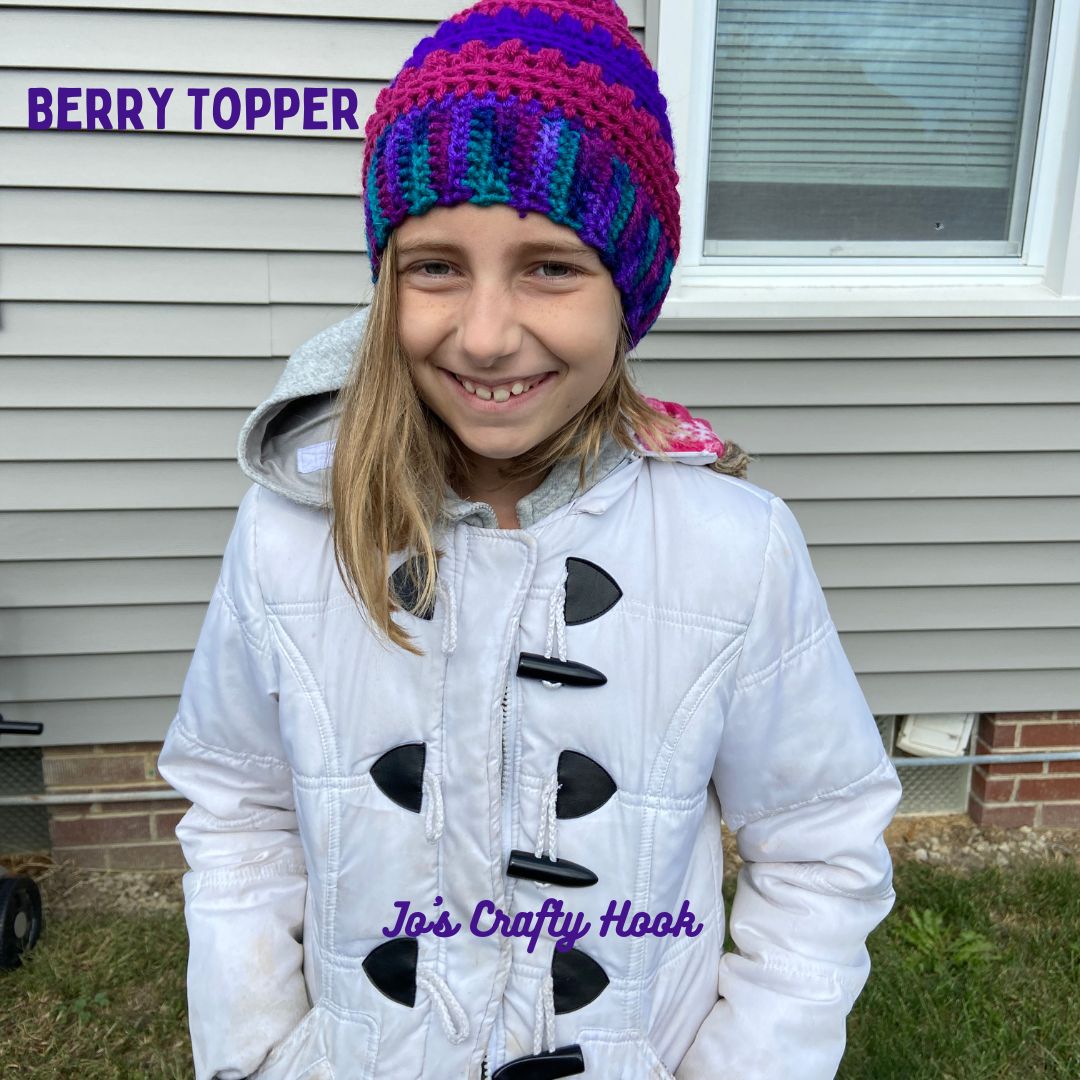
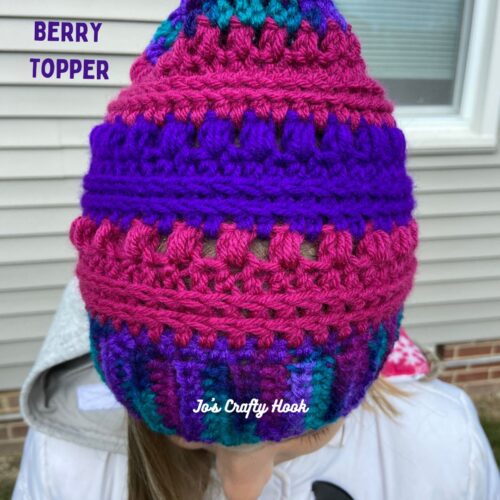
The Berry Topper Beanie is a FREE crochet pattern that is a great pattern for kids.  This design was created for Cancer Awareness. 

Cancer affects babies, kids, and adults alike.  I used multiple colors because there are many forms of cancer that have affected my family in one form or another.  Help me raise awareness by crocheting this hat and donating it to a cancer ward, anyone you know who is fighting cancer or for your family and friends.  You can also donate this to any Cancer Awareness Charity Drive for all ages.

The Berry Topper Beanie crochet pattern uses multiple stitches that you can master by doing the row repeats.  The crochet stitches used are the Back Loop Only, the Half Double Crochet in the 3rd Loop, the Puff Stitch, and the Half Double Crochet 2 Together.  There are Left Handed


Berry Topper Free Crochet Pattern


Materials Needed
  • J 6.0 mm Crochet Hook
  • 200 yds #4 yarn Worsted/Aran Weight
  • Scissors
  • Tapestry Needle

Stitches Used/Abbreviations

hdc – half double crochet
hd2tog – half double crochet 2 together
sl st – slip stitch
ps – puff stitch
ch – chain
blo – back loop only
st(s) –stitch or stitches
dec – decrease
rep – repeat
YO – Yarn Over
hdc 3rd loop – half double crochet in the 3rd loop
RS – Right Side

Pattern Notes

Pattern is written in U.S. Crochet Terms.
I am left handed so Video Tutorials demonstrated Special Stitches
Beginning chain 1 does NOT count as a stitch
chain 1 counts as a stitch in the puff stitch round.
chain 2 does not count as a stitch.
Beanie is worked from the bottom up.
Beanie is worked in the round.

Special Stitches 

HDC in 3rd Loop  – when working in rounds without turning, the front of the previous round is facing you. In this case, the third loop is at the back. You can find it by tilting the work towards you slightly and looking behind the front and back loops.  Video Tutorial here.

Puff Stitch: YO, insert hook into indicated st. YO, pull up loop. (YO, insert hook into the same st, YO, pull up loop) 2 times. YO, pull through 7 loops on the hook.

HDC2TOG:  half double crochet 2 st(s) together.  YO, insert hook in next st, YO, pull up a loop, insert hook in next st, YO, pull up a loop, pull through all 4 loops on hook.

Running Stitch – weave into each stitch around to close.


Left Video Tutorials:

Half Double Crochet in 3rd loop

Puff Stitch

Half Double Crochet 2 Together

Running Stitch

Free Crochet Pattern


BAND:

R1: ch 11, sc into the 2nd ch from your hook, sc next 8 st(s), sc in last st . (10 sc)

R2: ch 1, turn. sc into 1st st, blo next 8 st(s), sc in last st (10 sc)

R3-R56: ch 1, turn. sc in the 1st st, sc in blo in next 8 st(s), sc in the last st.  (10 sc)

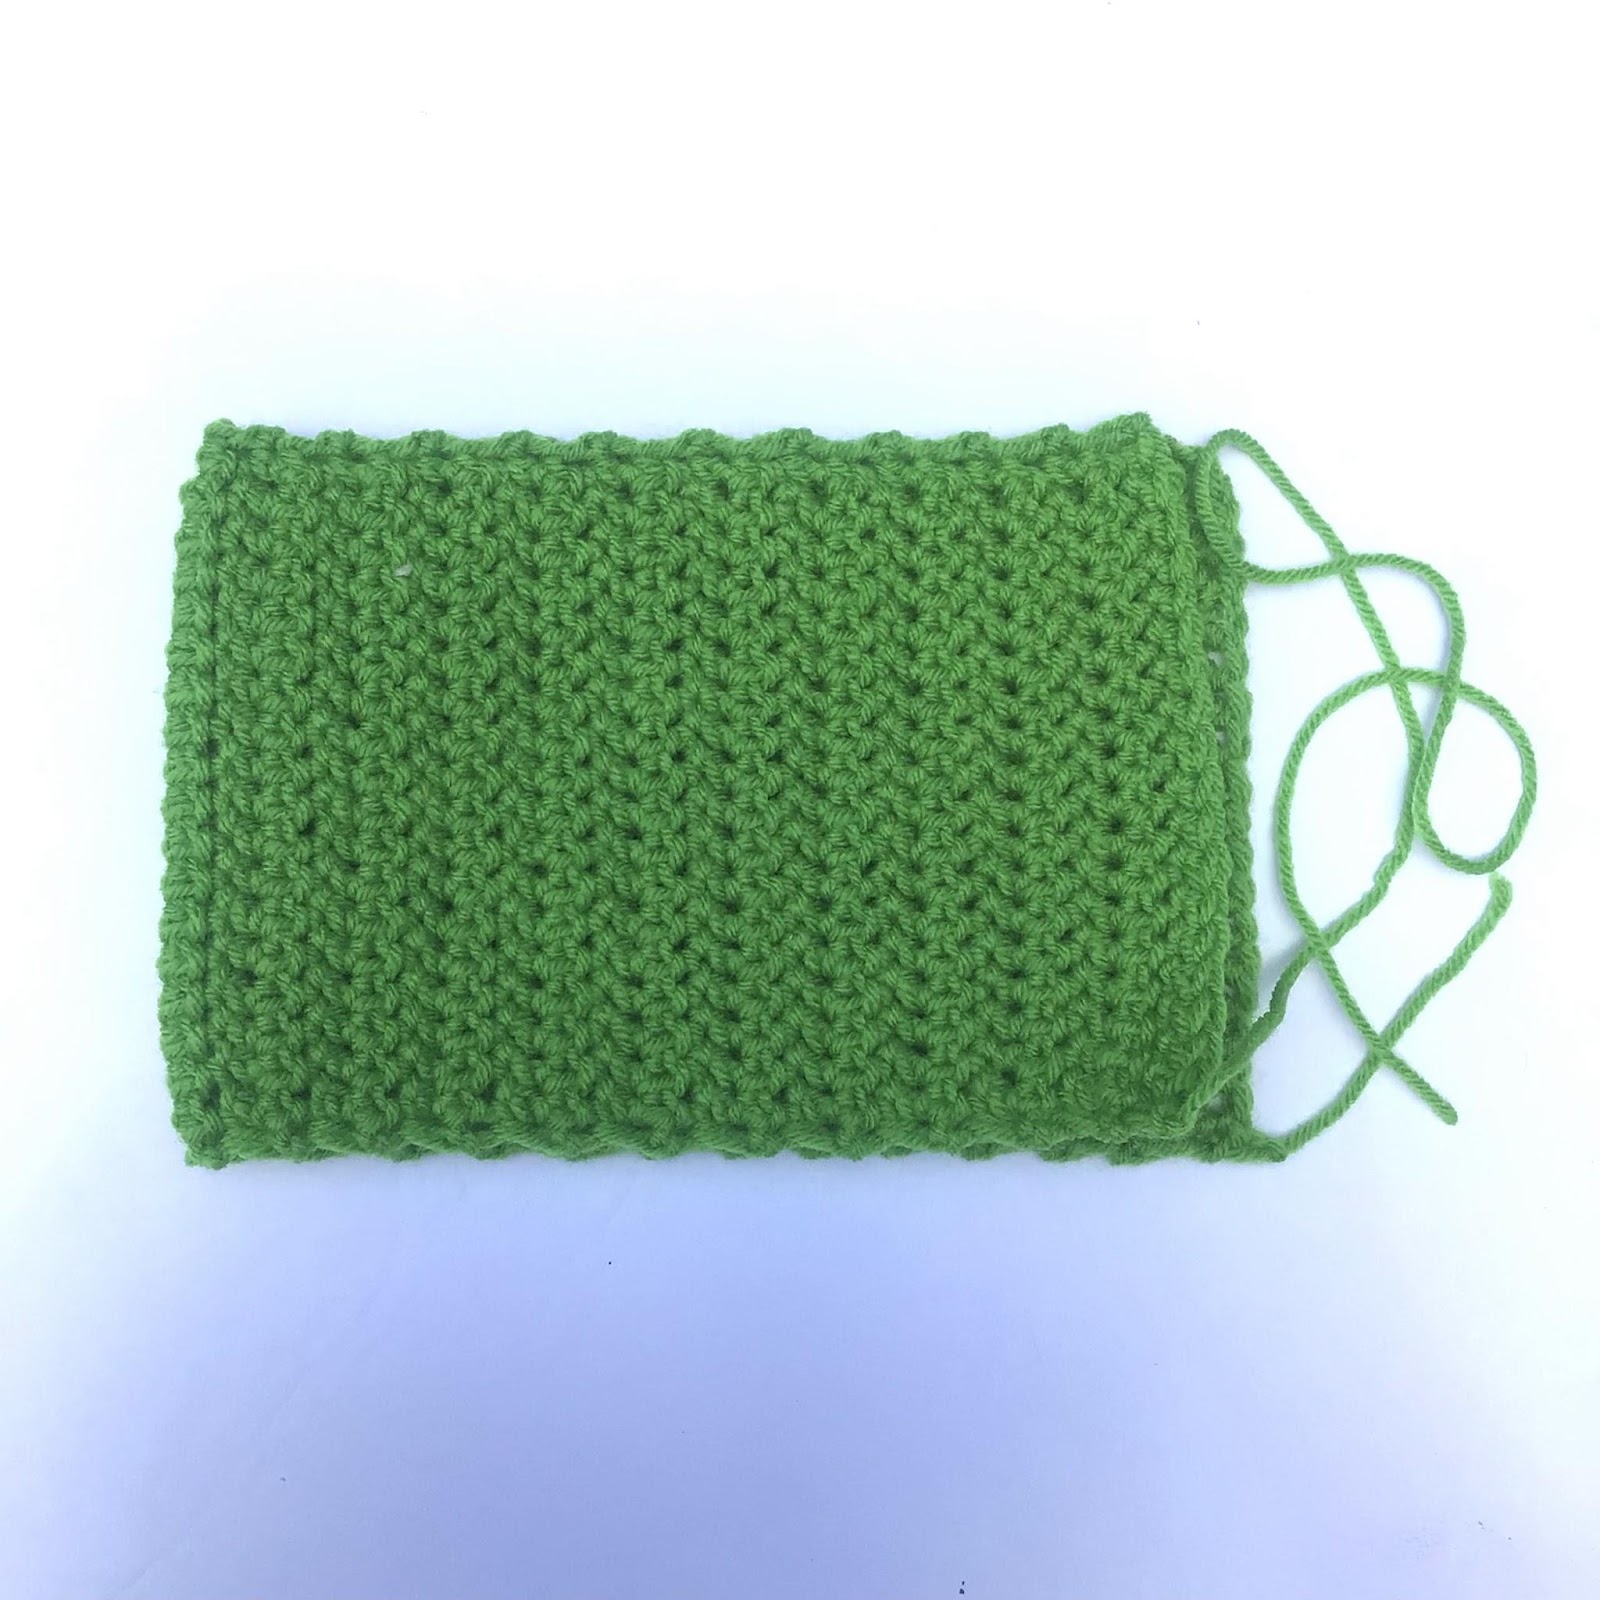
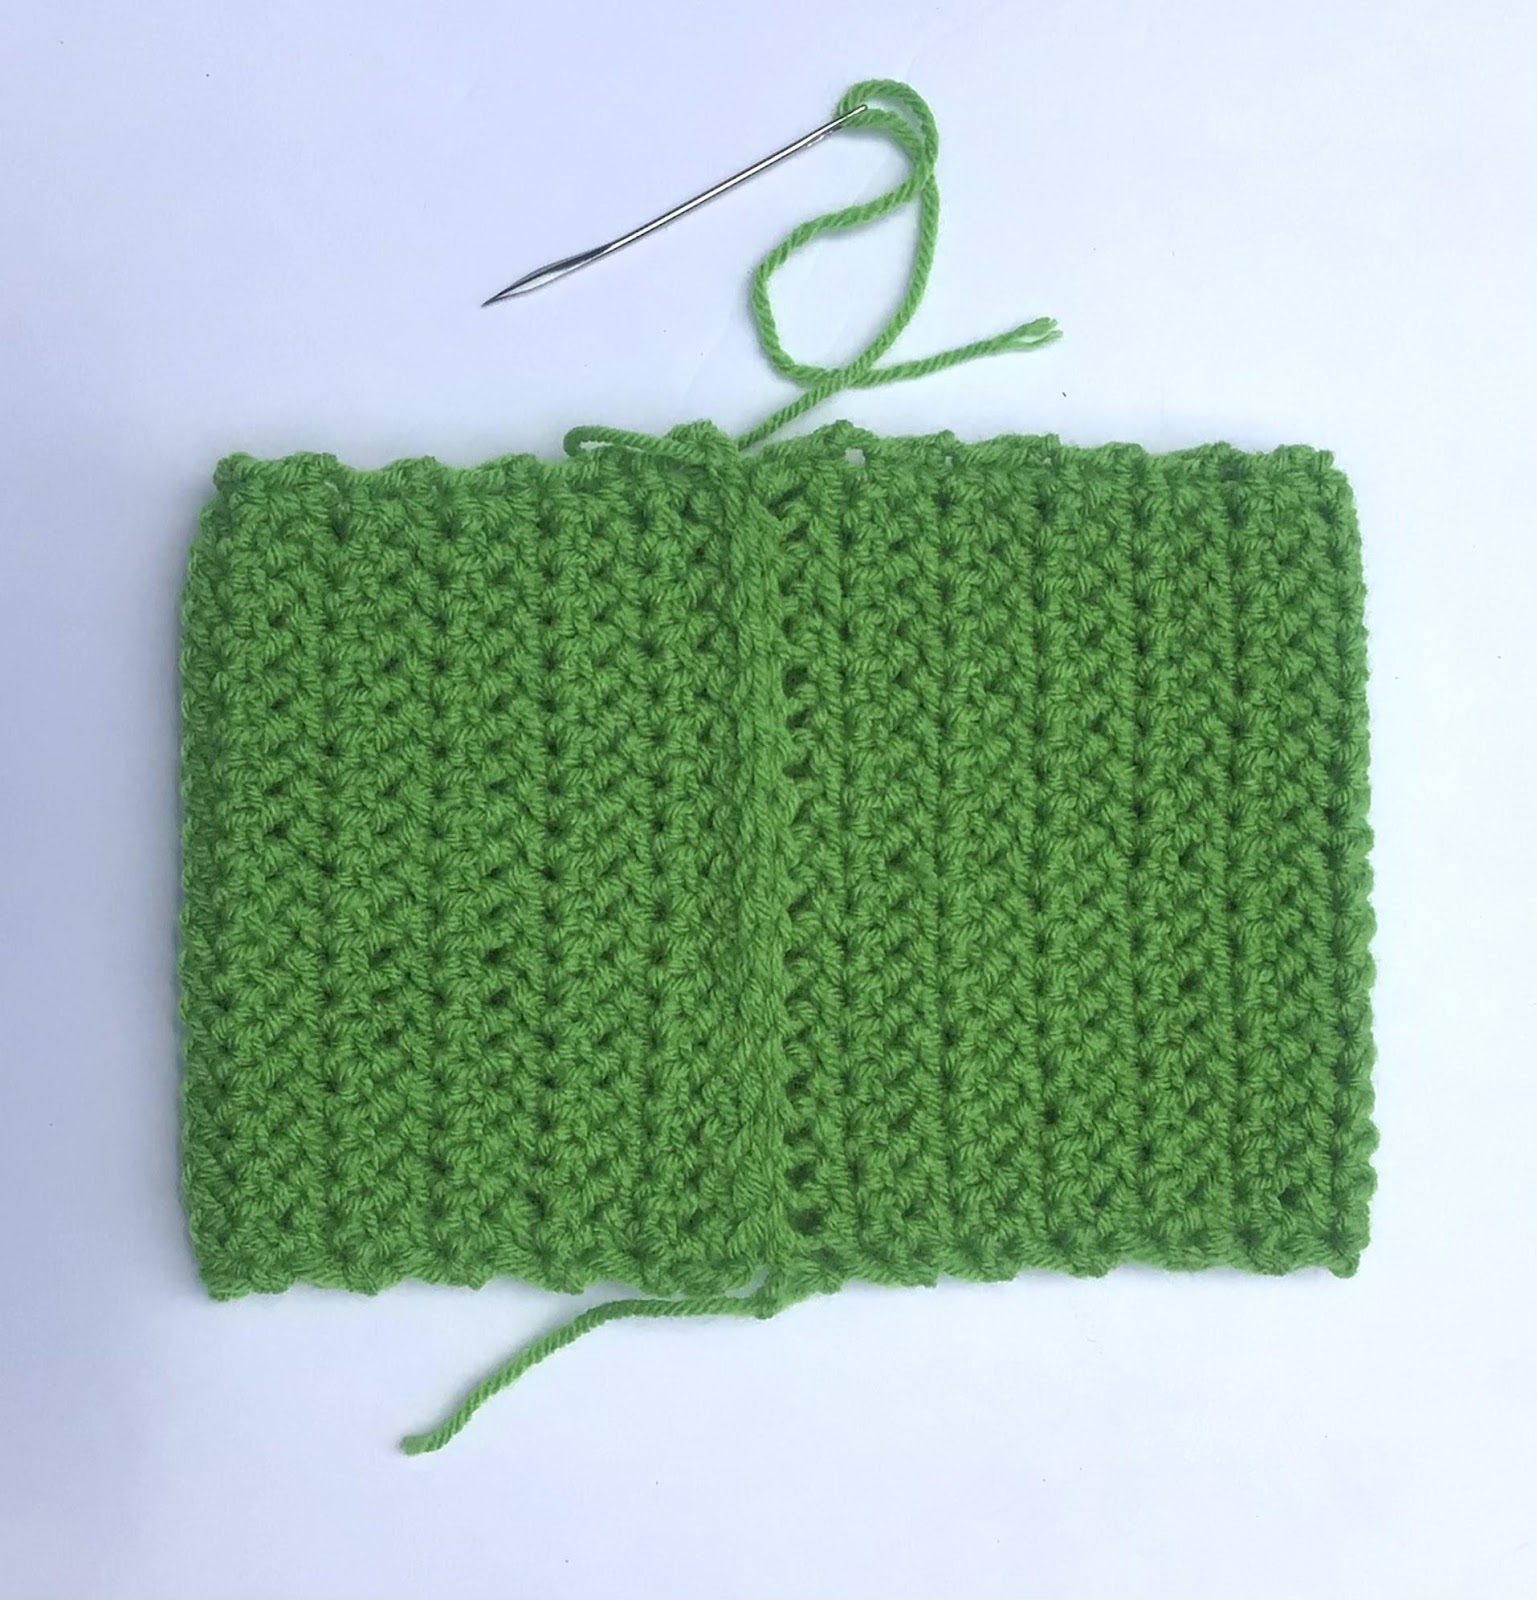
Once you work 56 rows place the RS (last row) together, sl st or sewing the band closed.  band should measure 16”.

Do NOT turn or fasten off.


Hat Body:

R1:  ch 1, sc in same st and each st around.  sl st in 1st st to join.  (56 sc)

R2:  ch 2, hdc in same st and each st around.  sl st in 1st st to join. (56 hdc)

R3-R4:  ch 2, hdc in same st, hdc in 3rd loop around.  sl st in 1st st to join.  (56 hdc)

R5:  ch 2, hdc in same st, *sk the next st, ps in the next st.   rep from * around.  sl st in top of ch 2 to join.  (56 hdc)

Rep R2-R5 three times.


Crown:

R1 (dec):  ch 2, hdc in same st and in next 5 st(st), *hdc2tog, hdc in next 6 st(s).  rep from * around.  sl st in top of ch 2 to join.

R2 (dec):  ch 2,  in same st and in next 4 st(s), *hdc2tog, hdc in next 5 st(s).  rep from * around.  sl st in top of ch 2 to join.

R3 (dec):  ch 2, hdc in same st and in next 3 st(s), *hdc2tog, hdc in next 4 st(st). rep from * around.  sl st in top of ch 2 to join.

R4 (dec):  ch 2, hdc in same st and in next 2 st(s), *hdc2tog, hdc in the next 3 st(s).  sl st in top of ch 2 to join.

R5:  ch 2, hdc in same st.  ps around.  sl st in top of ch 2 to join.

R6:  ch 2, hdc in same st and each st around.  sl st in top of ch 2 to join

leave a long tail of to sew top of crown closed.  I used the running st.  pull yarn tight, sl st in 1st st to close.

asten off and weave in ends.

********************************************************

That’s it!  You have completed your Berry Topper!  I would LOVE to see your version!  Please tag me at any of my Social Media Sites listed below.

Jo’s Crafty Hook on IG
Joey Lea Baird on FB
Jo’s Crafty Hook Designs FB Group

You can find more of my premium crochet patterns at the links below.  You can also find FREE crochet patterns on my website.

Ravelry

LoveCrafts

Etsy Shop

Find me, Jo of Jo’s Crafty Hook at the places listed below.

Email:  j.o@joscraftyhook.com

Website

Facebook Group Jo’s Crafty Hookers

Facebook Group Jo’s Crafty Hook Designs

Facebook Page Jo’s Crafty Hook

Facebook Page:  Crochet Designer Community

Ravelry

LoveCrafts

Etsy

Instagram

YouTube

Pinterest

Donations Accepted

Loading

Turning Leaves Scarf

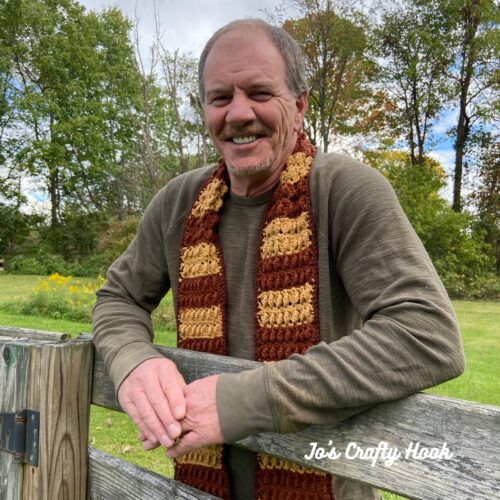
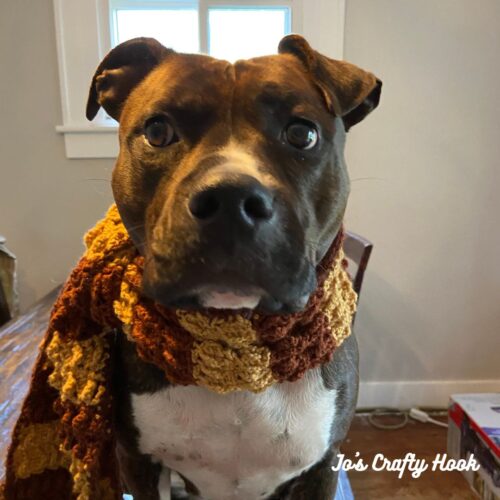
With the weather changing here in NE Ohio I love to see the leaves turning colors and turning towards the middle.  This is how I came up with the design of this crochet pattern.  The Turning Leaves Scarf shows the leaves turning colors and shows them turning towards the middle.

My guys, my hubby and my son and my son’s dog Freyja look great modeling the Turning Leaves Scarf for me.  I even got my son’s dog Freyja modeling the Turning Leaves Scarf.  lol  As you can see this is a great Unisex scarf.


In the Turning Leaves Scarf crochet pattern I used part of the flower making  technique that was originally used in my Mae’s Flowers and my Mae’s Flower Garden Afghan.  I did a CAL in May sharing my Mae’s Flower Garden Afghan crochet patterns.  You can find out the story behind this design and find the free pattern for the flowers and afghan on my website.  You can find the premium version of the Mae’s Flowers Crochet Pattern at my Ravelry Store.


Here is a little video I put together showing what goods sports they all are even when they are being silly.  lol


I hope you find some awesome crochet patterns to use up the scrap yarn you have stashed away, wondering what you were going to do with.  lol


As you can see by the pictures of my fabulous testers’ version, the design creates a nice textured look due to the turning of the leaves.

Thank you Beth Bjerklie, Suzanne Lively Boren, Frances Gonzales, Liz Hasler, and Karen Reinhart for your lovely versions and your great feedback!


You will find the free crochet pattern for the Turning Leaves Scarf Below.

Thank you for your interest in my Turning Leaves Scarf crochet pattern.  Inside the premium version of the Turning Leaves crochet pattern you will find step-by-step picture tutorials for left and right hand crocheters.  These pic tutorials are to help you with the leaf part of the pattern.  You can the a premium copy from my Ravelry Store by clicking on the picture below.


Info about the Turning Leaves Crochet Pattern

I used Red Heart Super Saver in 3 colors.  I used 350 yds for a 66” scarf.  Weight: Medium (4)  Contents: 100% acrylic  Skein Weight: 7 oz. / 198 g  Yardage: 364 yd. / 333 m

Materials:

400-700 yds of #4 ply Worsted/Aran Weight Yarn
US H Crochet Hook or 5mm
Tapestry Needle
Scissors

Abbreviations/Stitches Used:

sc = single crochet
sp = space
dc = double crochet
rep = repeat
ch = chain
sl st = slip stitch
st = stitch
MC = Main Color
CC = Contrasting Color
CC2 = 2nd Contrasting Color
WS = Wrong Side

Notes:
You will find step-by-step pic tutorials for left and right handers inside the premium crochet pattern. (I am a lefty)
The scarf uses a multiple of 3+1
ch 5 counts as a dc + ch 2
each ch counts as a st
The scarf can be customized using the multiples of 3 for width.
You can customize the length by using your height plus 4-6” 

Special Stitch:

Leaf – sl st in the st marked.  ch 4, dc in the 1st ch of ch 4.  ch 4 again, dc in the ch 1 of the ch 4 just made.  sl st in the same st as the beginning of the leaf.


Using MC

R1:  ch 17 (25, 33, 41) sc in 2nd ch from hook and each rem ch across.  turn  (16, 24, 32, 40)

R2:  ch 5, sk 2 st  *(sl in next st, ch 4, dc in ch 1 of ch 4, ch 4, dc in ch 1 of ch 4, sl st in same st) ch 2, sk 2 st  rep from * until last st.  ch 2, dc in last st. turn Small (2 dc, 4 leaves, 5 ch-2) Medium (2 dc, 7 leaves, 5 ch-2) Large (2 dc, 10 leaves, 5 ch-2) XL (2 dc, 13 leaves, 5 ch-2) 

R3:  ch 5, *sc between 2 dc (the leaf) from previous row, ch 2. rep from * until ch-5 sp, dc in top ch-3.  turn 

R4:  ch 5, sk 2 st  *(sl in next sc, ch 4, dc in ch 1 sp, ch 4, dc in ch 1 sp, sl st in same sc) ch 2, sk 2 st.  rep from * until last st.  ch 2, dc in last st. turn

Small (2 dc, 4 leaves, 5 ch-2)
Medium (2 dc, 7 leaves, 5 ch-2)
Large (2 dc, 10 leaves, 5 ch-2)
XL (2 dc, 13 leaves, 5 ch-2) 

Rep R3-R4 until your scarf measures 54” (60” 66” 72” 78”) or until your desired length.  Do NOT fasten off.  turn

**You can use a CC after every 2, 4, etc rows**

Rep R3 once more.

Last Row:  ch 1, sc in same st and each rem st across.  Do NOT fasten off IF using the same color for Border.

Fasten off IF you are changing colors.

Border:

Attach CC2 yarn with a sl st in last st worked.

Step 1:
Turn to work down the side of the scarf.  ch 1, *sc in next st, sc in side post. rep from * until last st.  (sc ch 1, sc) all in last st.

Step 2:
Turn to work across the bottom of the scarf.  sc in each sc until last st.  (sc, ch 1, sc) all in last st.

Step 3:
Turn to work up the side of the scarf.  ch 1, *sc in next st, sc in side post. Rep from * until last st.  (sc ch 1, sc) all in last st.

Step 4:
Turn to work across the top of the scarf.  sc in each st across. sl st in last st to join.

Fasten off and weave in ends.

That’s it!  You have completed your own Turning Leaves Scarf!  I would LOVE to see your version of your Turning Leaves Scarf!  You can tag me at any of my Social Media Sites listed above using any of the hashtags below.

#turningleavesscarf #turningleavesscarfcrochetpattern #turningleavesscarfpattern #joeyleabaird #joscraftyhook #joscraftyhookdesigns #jo_bear38

You can get a premium copy from my Ravelry Store by clicking on the picture below.


Find me, Jo of Jo’s Crafty Hook at the places listed below.

Email:  j.o@joscraftyhook.com

Website

Facebook Group Jo’s Crafty Hookers

Facebook Group Jo’s Crafty Hook Designs

Facebook Page Jo’s Crafty Hook

Facebook Page:  Crochet Designer Community
Ravelry

LoveCrafts

Instagram

YouTube

Pinterest

Donations Accepted

C2C Sun Square

I am SO excited to finally able to share my very 1st C2C crochet pattern, the C2C Sun Square!  I got to tell ya, I was SO freaked out when Helen of Sunflower Cottage Crochet first asked me to design one for the C2C Community Garden CAL!!


The Community Garden C2C Blanket CAL hosted by Sunflower Cottage Crochet that started back in September.  You can find out more about the CAL at the Main Roundup Page.


Community Garden CAL

If you have missed any of the premium crochet patterns that have been a part of the Community Garden CAL, you can get the eBook for $12.99 that has ALL the information you’ll need to make 20 C2C blanket squares.


Community Garden eBook


Today, October 5th is my day to share the FREE premium crochet pattern of my C2C Sun Square.  To get today’s Coupon Code needed to download the free PDF copy of the C2C Sun Square click on the Button below to visit the main blog hop page.


Bring the Coupon Code needed to get your free PDF copy of my Sunshine C2C premium crochet pattern.  Click the Button below to be directed to my Ravelry Store.  Enter the Coupon Code at Checkout.  Then you will receive your free PDF.


**********************************************************

Enjoy the Sun C2C Square Free Crochet Pattern  Below.


Colour Colour you are using No of Sts
Blue (B) 400
Yellow (Y) 225


Written Instructions:


↙ Row 1 [RS]: (B) x 1 (1 square)

↗ Row 2 [WS]: (B) x 2 (2 squares)

↙ Row 3 [RS]: (B) x 3 (3 squares)

↗ Row 4 [WS]: (B) x 4 (4 squares)

↙ Row 5 [RS]: (B) x 2, (Y) x 1, (B) x 2 (5 squares)

↗ Row 6 [WS]: (B) x 2, (Y) x 2, (B) x 2 (6 squares)

↙ Row 7 [RS]: (B) x 3, (Y) x 1, (B) x 3 (7 squares)

↗ Row 8 [WS]: (B) x 3, (Y) x 2, (B) x 3 (8 squares)

↙ Row 9 [RS]: (B) x 4, (Y) x 1, (B) x 4 (9 squares)

↗ Row 10 [WS]: (B) x 4, (Y) x 2, (B) x 4 (10 squares)

↙ Row 11 [RS]: (B) x 5, (Y) x 1, (B) x 5 (11 squares)

↗ Row 12 [WS]: (B) x 5, (Y) x 2, (B) x 5 (12 squares)

↙ Row 13 [RS]: (Y) x 1, (B) x 12 (13 squares)

↗ Row 14 [WS]: (B) x 12, (Y) x 2 (14 squares)

↙ Row 15 [RS]: (B) x 1, (Y) x 2, (B) x 12 (15 squares)

↗ Row 16 [WS]: (B) x 6, (Y) x 5, (B) x 1, (Y) x 2, (B) x 2 (16 squares)

↙ Row 17 [RS]: (B) x 3, (Y) x 1, (B) x 1, (Y) x 7, (B) x 5 (17 squares)

↗ Row 18 [WS]: (B) x 5, (Y) x 8, (B) x 5 (18 squares)

↙ Row 19 [RS]: (B) x 5, (Y) x 9, (B) x 5 (19 squares)

↗ Row 20 [WS]: (B) x 6, (Y) x 9, (B) x 5 (20 squares)

↙ Row 21 [RS]: (B) x 6, (Y) x 9, (B) x 6 (21 squares)

↗ Row 22 [WS]: (B) x 6, (Y) x 10, (B) x 6 (22 squares)

↙ Row 23 [RS]: (B) x 7, (Y) x 9, (B) x 7 (23 squares)

↗ Row 24 [WS]: (B) x 2, (Y) x 4, (B) x 1, (Y) x 10, (B) x 7 (24 squares)

↙ Row 25 [RS]: (B) x 3, (Y) x 4, (B) x 1, (Y) x 9, (B) x 2, (Y) x 4, (B) x 2 (25 squares)

Corner at both sides 

↗ Row 26 [WS]: (B) x 2, (Y) x 4, (B) x 1, (Y) x 10, (B) x 1, (Y) x 4, (B) x 2 (24 squares)

↙ Row 27 [RS]: (B) x 2, (Y) x 4, (B) x 1, (Y) x 9, (B) x 7 (23 squares)

↗ Row 28 [WS]: (B) x 6, (Y) x 10, (B) x 6 (22 squares)

↙ Row 29 [RS]: (B) x 6, (Y) x 9, (B) x 6 (21 squares)

↗ Row 30 [WS]: (B) x 5, (Y) x 9, (B) x 6 (20 squares)

↙ Row 31 [RS]: (B) x 5, (Y) x 9, (B) x 5 (19 squares)

↗ Row 32 [WS]: (B) x 5, (Y) x 8, (B) x 5 (18 squares)

↙ Row 33 [RS]: (B) x 5, (Y) x 7, (B) x 5 (17 squares)

↗ Row 34 [WS]: (B) x 3, (Y) x 1, (B) x 1, (Y) x 5, (B) x 6 (16 squares)

↙ Row 35 [RS]: (B) x 11, (Y) x 2, (B) x 2 (15 squares)

↗ Row 36 [WS]: (B) x 1, (Y) x 2, (B) x 11 (14 squares)

↙ Row 37 [RS]: (B) x 11, (Y) x 2 (13 squares)

↗ Row 38 [WS]: (Y) x 1, (B) x 4, (Y) x 2, (B) x 5 (12 squares)

↙ Row 39 [RS]: (B) x 5, (Y) x 1, (B) x 5 (11 squares)

↗ Row 40 [WS]: (B) x 4, (Y) x 2, (B) x 4 (10 squares)

↙ Row 41 [RS]: (B) x 4, (Y) x 1, (B) x 4 (9 squares)

↗ Row 42 [WS]: (B) x 3, (Y) x 2, (B) x 3 (8 squares)

↙ Row 43 [RS]: (B) x 3, (Y) x 1, (B) x 3 (7 squares)

↗ Row 44 [WS]: (B) x 2, (Y) x 2, (B) x 2 (6 squares)

↙ Row 45 [RS]: (B) x 2, (Y) x 1, (B) x 2 (5 squares)

↗ Row 46 [WS]: (B) x 4 (4 squares)

↙ Row 47 [RS]: (B) x 3 (3 squares)

↗ Row 48 [WS]: (B) x 2 (2 squares)

↙ Row 49 [RS]: (B) x 1 (1 square)

**********************************************************

You will find some of my Premium crochet patterns , by visiting any of my stores, by clicking on any of the Buttons below.


If you would like me to crochet any of my designs for you or others, I do take Custom Orders.  Visit my Ravelry Store or LoveCrafts to see some ideas of what you would like to Custom Order.  You can email me with your order or any other questions at j.o@joscraftyhook.com.

Find me, Jo of Jo’s Crafty Hook at the places listed below.

Email:  j.o@joscraftyhook.com

Website

Facebook Group Jo’s Crafty Hookers

Facebook Group Jo’s Crafty Hook Designs

Facebook Page Jo’s Crafty Hook

Facebook Page:  Crochet Designer Community
Ravelry

LoveCrafts

Instagram

YouTube

Pinterest

Donations Accepted

Maze’s Cat Toy Free Crochet Pattern

Maze’s Cat Toy Free Crochet Pattern

Does your cat like to curl up on your clothes, your current WIP or anything else they can find?  Well, I decided to design a crochet pattern for a cat toy that they can play with or even cuddle up with.  Below you will find the Maze’s Cat Toy Free Crochet Pattern. The cat toy crochet pattern can be customized for any size cat.  You can even make this for your puppy or dog.


This post contains affiliate links that help me raise money to allow me to share more information with you.  

Info Needed for Maze’s Cat Toy


I used Red Heart Super Saver for both colors.  Contents: 100% acrylic  Skein Weight: 7 oz. / 198 g. Yardage: 364 yd. / 333 m

Materials:
US H Crochet Hook or 5 mm Crochet Hook
MC – 120-130 yds #4 Worsted/Aran Weight Yarn
CC – 15-20 yds #4 Worsted/Aran Weight Yarn
Scissors
Tapestry Needle
.4-.6 oz Dacron/Pillow Stuffing

Finished Size:
6” x 12”
Customize to your size

Abbreviations/Stitches Used:
ch = chain
sl st = slip stitch
fdc = foundation double crochet
fpdc = front post double crochet
ldc = long double crochet
rep = repeat

Special Stitches:
Front Post Double Crochet – Double crochet around the front post of the dc from the previous row.
Long Double Crochet –  Yarn over, insert hook in the double crochet 2 rows down, yarn over, pull up a loop to the height of the previous stitch, [yarn over, draw through 2 loops on hook] 2 times.

Special Notes:

  1.  Ch 3 counts as a dc. 
  2. Stitch count is a multiple of 3.
  3. Gauge and Size are not 100% necessary for the cat toy, so size may be different than gauge.
  4. If you would like a bigger or smaller size use a multiple of 3.  You can also add or decrease the rows stated.

Video Tutorials:
You can find all of the Video Tutorials on my YouTube Channel

Front Post Double Crochet – Right Handed

Front Post Double Crochet – Left Handed

Long Double Crochet – Right Handed

Long Double Crochet – Left Handed

Running Stitch


Gauge
:
US G Crochet Hook or 4.5 mm Crochet Hook
16 st x 8 rows = 4”

**Due to different thicknesses in yarn, gauge does not need to be met**

Premium Copy Available

You can find a premium version of my Maze’s Cat Toy crochet pattern at my Ravelry or LoveCrafts or Etsy stores.  The premium pattern has Step-by-Step Pictures and all the Video Tutorials inside.


********************************************************

Maze’s Cat Toy Free Crochet Pattern:


Using MC

Leave a long tail of yarn to sew the top of the toy closed.

R1:  fdc 48 sl st in top of 1st st to join. Sew foundation row closed. 48 fdc
Optional:  ch 48 sl st in 1st st to join, being sure not to twist the chain.  ch 3 and dc around.  sl st in 1st st to join.  48 dc

R2-R4: ch 3, fpdc in the next st *dc in the next st, fpdc in the next st*  rep from * around.  sl st in 1st st to join.  48 st

Using your tapestry needle and the Running Stitch, weave your yarn through each stitch.  Pull yarn tight to close the bottom of the cat toy and fasten off.

Running Stitch

Pull tightly to close.

R5-R6:  ch 3, dc in each st around.  sl st in 1st st to join.  48 dc

Change to CC 

R7:  ch 3, ldc in next st and in each st around.  sl st in 1st st to join.  48 ldc

Change to MC

R8-R9:  ch 3, dc in each st around.  sl st in 1st st to join.  48 dc

Change to CC

R10:  ch 3, ldc in next st and in each st around.  sl st in 1st st to join.  48 dc 

R11-R21:  Rep R8-10

Change to MC

R22-R24:  ch 3, fpdc in the next st *dc in the next st, fpdc in the next st.   rep from * around.  sl st in 1st st to join.  48 st 

R25:  ch 3, dc in next st and in each st around.  sl st in 1st st to join.  48 dc 

Leave a long tail of yarn to sew the pillow closed.

Stuff the cat pillow with as much dacron/pillow as you’d like to have a firm toy.


Adding Dacron

Using your tapestry needle and the Running Stitch, weave your yarn through each stitch.  Pull yarn tight to close the top of the cat toy and fasten off.


Running Stitch

Pull tight to close top of cat toy.

Weave in any loose ends and fasten off.

Premium Copy Available

You can find a premium version of my Maze’s Cat Toy crochet pattern at my Ravelry or LoveCrafts or Etsy stores.  The premium pattern has Step-by-Step Pictures and all the Video Tutorials inside.

********************************************************

You can find my Premium crochet patterns at any of the sites listed below.

Ravelry
LoveCrafts
Etsy


Find me, Jo of Jo’s Crafty Hook at the places listed below.

Email:  jo@joscraftyhook.com
Linktree

Website

Facebook Group Jo’s Crafty Hookers

Facebook Group Jo’s Crafty Hook Designs

Facebook Page Jo’s Crafty Hook

Facebook Page:  Crochet Designer Community
Ravelry

LoveCrafts

Etsy

Instagram

YouTube

Pinterest

Donations Accepted

Loading

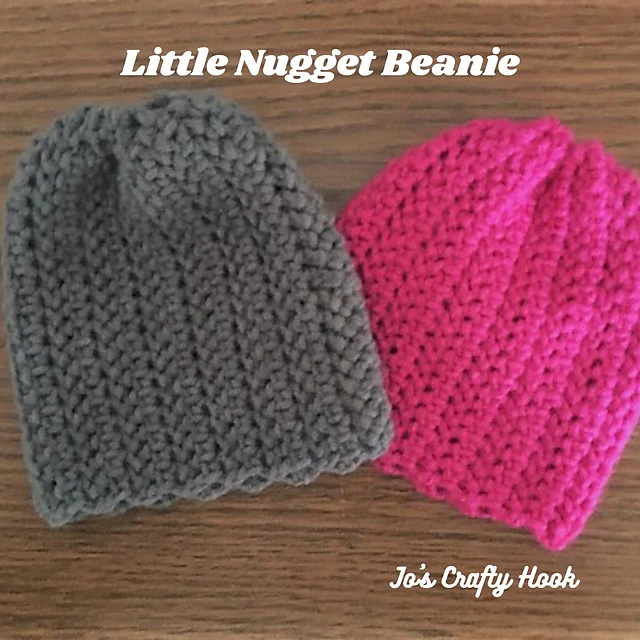
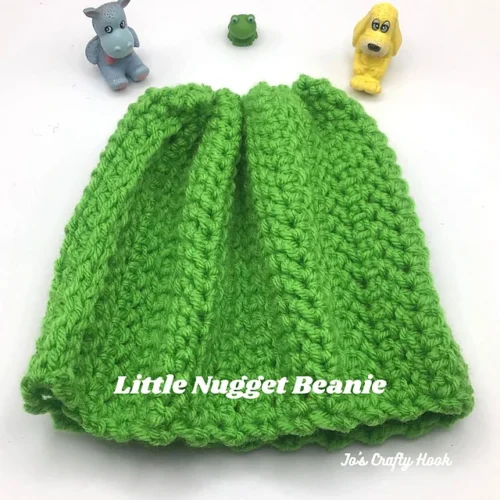
Little Nugget Preemie Beanie

The Little Nugget Beanie is a crochet pattern I designed especially for Preemie Babies.  The Beanies can be donated to your local hospital’s NICU, to the families who have preemie babies,  or any charity that needs beanies because the Little Nugget Beanie crochet pattern can be customized for any size found in the Gauge below.


October is Cancer Awareness Month.  I wanted to share this beanie and bring awareness to Cancer because we recently lost our young niece who fought braving and never lost her love for life.  I have also have had family members who have had cancer in one form or another.  The Little Nugget Beanie is a pattern that can be customized for small babies to young toddlers.  This beanie can also be donated to Cancer Patients, Cancer Wards at your local hospital or donating to any local charity.


The Little Nugget Beanie free crochet pattern is listed below.  You can also be find a premium copy FREE download from my Ravelry Store that has all of the steps listed below.  You can share the link to your family and friends who would love to help spread the word about Cancer Awareness.

Materials Needed


US H Crochet Hook or 5 mm Crochet Hook
50-75 yds #4 Worsted Weight Yarn
Scissors
Tapestry Needle  

Stitches Used/Abbreviations
ch – chain
sc – single crochet
fsc – foundation single crochet
hhdc – herringbone half double crochet
sl st – slip stitch
st – stitch
WS – Wrong Side

Gauge
US H Crochet Hook or 5 mm Crochet Hook
12 st x 12 Rows = 4”

Finished Size:
6” x 8”

Pattern Notes 

  1. Ch 1 does NOT count as a st.
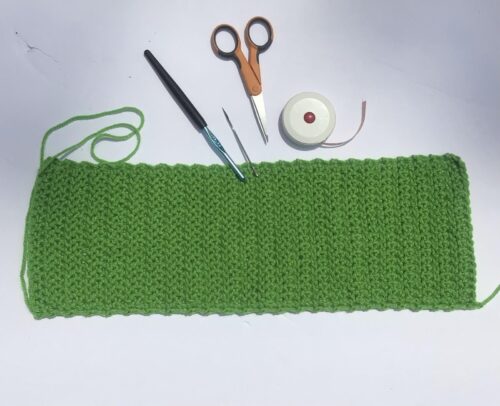
  2. This beanie is worked as a rectangle.  The chain length is the height of the hat, and the length of the rectangle will be the circumference.
  3. To close the top of the hat, you will use a running stitch sewing and weaving the side and the crown closed.


Video Tutorials
Foundation Single Crochet here.
Invisible Stitch here.
Running Stitch here

Herringbone Half Double Crochet Right Handed here

Here is a great left handed video tutorial I made to help you with the Herringbone Half Double Crochet (hhdc)


Special Stitch
Herringbone Half Double Crochet:

1. Yarn over, insert hook into next stitch and pull up a loop (3 loops on hook)
2. Pull first loop straight through the second (similar to a slip stitch)
3. Yarn over, pull through two remaining loops on hook.


Little Nugget Beanie Free Crochet Pattern


6” x 16”  Preemie

R1:  FSC 18 turn
Optional:  ch 19, sc in the 2nd hook and each remaining st.  Turn (18 sc)

R2:  Ch 1, sc in same st, hhdc in the next 16 st, and sc in the last st. Turn (2 sc & 16 hhdc)

R3-R48:  Repeat R2 or until the piece measures 16”

Leave a long tail of yarn about 22” – 24” to sew together the sides of the hat and the crown.


Rectangle for Circumference


Step 1:
Line up the WS of the last row to the WS of the foundation row.


Sew Short Row Closed


Step 2:
With your tapestry needle, use the running stitch to sew the short rows together,  Do not pull the yarn tight or fasten off.

Short Side Closed

Step 3:
Turn your work with the long side facing up.

Step 4:
With your tapestry needle, weave the yarn through each st to sew the long side together.  

Step 5:
Pull your yarn tight to close the crown.

Fasten off and use your tapestry needle weave in any loose ends.


********************************************************

That’s it!  You have completed your Little Nugget Beanie!  I would LOVE to see your version!  Please tag me at any of my Social Media Sites listed below.

Jo’s Crafty Hook on IG
Joey Lea Baird on FB
Jo’s Crafty Hook Designs FB Group

You can find more of my premium crochet patterns at the links below.  You can also find FREE crochet patterns on my website.

Ravelry

LoveCrafts

Etsy Shop

Find me, Jo of Jo’s Crafty Hook at the places listed below.

Email:  j.o@joscraftyhook.com

Website

Facebook Group Jo’s Crafty Hookers

Facebook Group Jo’s Crafty Hook Designs

Facebook Page Jo’s Crafty Hook

Facebook Page:  Crochet Designer Community

Ravelry

LoveCrafts

Etsy

Instagram

YouTube

Pinterest

Donations Accepted


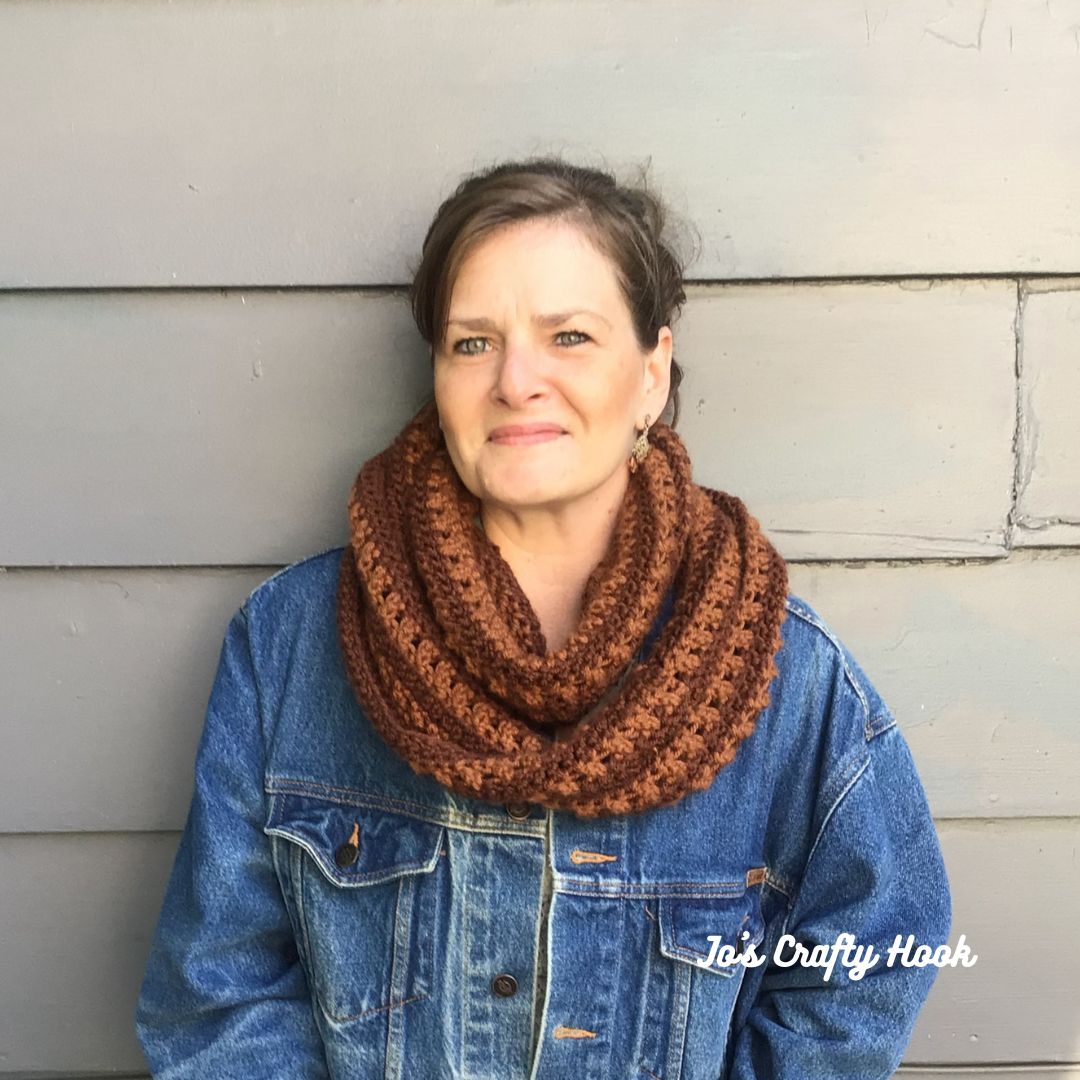
Double Cross Mobius Cowl

The Double Cross Mobius Cowl crochet is an oversized mobius cowl that is to be wrapped around your neck twice.  There are a couple of reasons I named this the Double Cross Mobius Cowl.

The wrapping around your neck twice is how I came up with the first part of it’s name.  The other part of the name I chose comes from the Double Crochet Cross Stitch, but with a different twist.

Because I used a thicker bulky yarn from knitpicks I wanted taller stitches in the cowl.  The extended double crochet and the extended double crochet cross stitch helped create those taller stitches.  


The extended double crochet and extended double crochet cross stitch is an idea that comes from using the Double Crochet Cross Stitch.  If you have never crocheted the Double Crochet Cross Stitch, I recommend trying this first.  To help you master all of these stitches, I have added 3 of my Left Handed Video Tutorials demonstrating how to crochet each stitch.


The Double Crochet Cross Stitch left handed video tutorial below demonstrates how to crochet this stitch.


The 2nd left handed video tutorial demonstrates how to crochet the Extended Double Crochet.


The 3rd left hand video tutorial I demonstrate how to crochet the stitch I created, the Extended Double Crochet Cross Stitch.


Check out more about the Double Cross Mobius Cowl crochet pattern, sponsored by #wecrochetofficial #wecrochet WeCrochet below.


Information about the Double Cross Mobius Cowl Crochet Pattern.

Material I Used:

MC – 270-400 yds of #7 Bulky Weight Yarn
CC – 230-370 yds of #7 Bulky Weight Yarn
US J Crochet Hook or 6 mm
Scissors
Tapestry Needle
Stitch Marker

For the double cross mobius cowl I used  KnitPicks Brava yarn

This yarn is a thicker bulky yarn, #7.  The yarn is 100% acrylic and the yardage per skein is 136 yds or 100 g

I will definitely be using this yarn again because it is so soft and glides through your fingers like butter!

For my Main Color (MC) I used the color Sienna


For my Contrasting Color (CC) or second color I used Brindle


The Double Crochet Mobius Cowl Crochet Pattern has step-by-step picture tutorials and helpful left handed Video Tutorials for the 3 different stitches I used in making the cowl. 

The crochet pattern also has 3 different sizes to choose from; Small, Medium, and Large.  Inside the pattern you will also find out how to customize the cowl to fit your style, size, and colors.

If you are interested in trying to make one for yourself or someone you know, you can purchase a premium copy of my Double Cross Mobius Cowl at my Ravelry Store.


If you would like me to make the Double Crochet Mobius Cowl, I do take Custom Orders.  I can crochet you or someone you know, your  own Handmade Crocheted Creation is your style, size, and color(s)  You can email me at j.o@joscraftyhook.com


Find me, Jo of Jo’s Crafty Hook at the places listed below.

Email:  j.o@joscraftyhook.com

Website

Facebook Group Jo’s Crafty Hookers

Facebook Group Jo’s Crafty Hook Designs

Facebook Page Jo’s Crafty Hook

Facebook Page:  Crochet Designer Community

Ravelry

LoveCrafts

Instagram

YouTube

Pinterest

Donations Accepted


Hobbycraft


Fall into Autumn Blog Hop 2022

September 1-30, 2022 starts the Fall into Autumn Blog Hop.  You can take advantage of daily FREE crochet patterns that are perfect for Autumn!  This blog hop is being sponsored by #wecrochetofficial #wecrochet #knitpicks  There is also a Fall into Autumn Bundle to treat yourself with!  More info below.


There will be 32 crochet designers participating and giving away a FREE copy of their newest Autumn designs!  The image below tells you how the Fall into Autumn Blog Hop works.


Itchin’ for Some Stitchin’ and Ned & Mimi will be hosting this blog hop.  To visit the Fall into Autumn Blog Hop and to find more information, click on the image below to be directed to the blog hop.  Each day you can also visit the roundup to get the daily free crochet pattern from another fabulous crochet designer’s newest Autumn design.


On Sept 23, 2022 I will be giving away FREE pdf copies of my newest Autumn design, the Double Cross Mobius Cowl.  Be sure to come back here on Sept 23, 2022 to grab a free copy of my Double Cross Mobius Cowl.


There will also be a Giveaway!  1 lucky WINNER will receive the 2022 Fall into Autumn Pattern Bundle and the Premium Winding Station Tool Kit from #wecrochet “WOW!!”


Like I said above, you can skip all the blog hopping and treat yourself to the Fall into Autumn Bundle.  


Here are some questions you may have before you decide to treat yourself to one…
What is the Fall into Autumn bundle?
A collection of all 33 patterns in the Fall Into Autumn Blog Hop.
How much does the bundle cost?
The bundle will be offered at $12.99 from August 31 – October 7, 2022, which is over 90% off what one would pay if the patterns were purchased individually. This comes out to about $0.38 per pattern.

How do I treat myself 👏👏 to one?


Click HERE to purchase your own Fall into Autumn Bundle.
*******************************************************


**Be sure to Subscribe to my Newsletter below.  You will receive a FREE crochet pattern for signing up!  You will also receive more information about these events, Jo’s Crafty Hook’s News and more**

[sg_popup id=”10940″ event=”click”][/sg_popup]


You will find some of my Premium crochet patterns , by visiting any of my stores, by clicking on the Buttons below.


********************************************************


If you would like me to crochet any of my designs for you or others, I do take Custom Orders.  You can email me with your order or any other questions at j.o@joscraftyhook.com.


********************************************************


Find me, Jo of Jo’s Crafty Hook at the places listed below.

Email:  j.o@joscraftyhook.com

Website

Facebook Group Jo’s Crafty Hookers

Facebook Group Jo’s Crafty Hook Designs

Facebook Page Jo’s Crafty Hook

Facebook Page:  Crochet Designer Community

Ravelry

LoveCrafts

Instagram

YouTube

Pinterest

Donations Accepted


Simplicity Set Free Crochet Pattern

Simplicity Set FREE Crochet Pattern

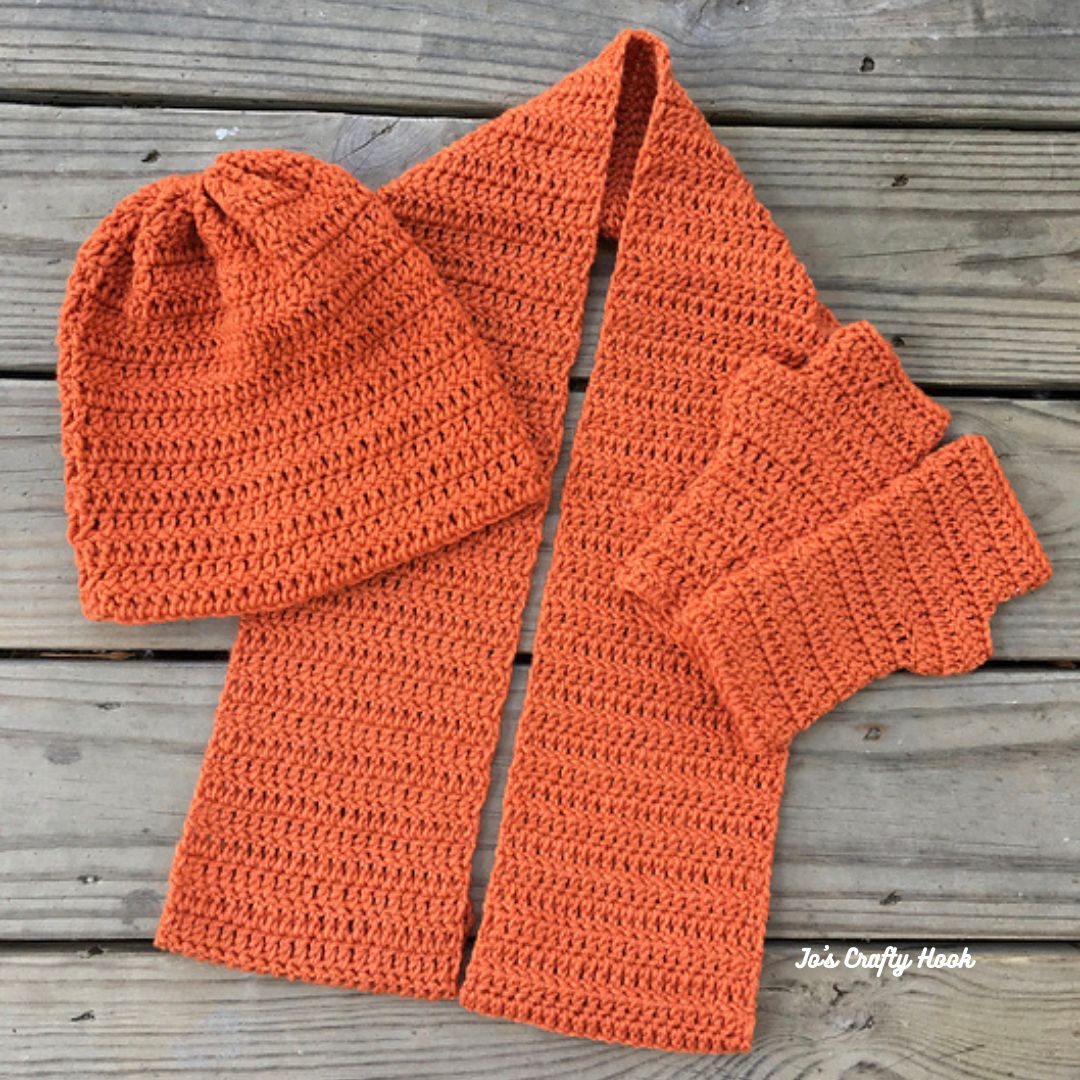
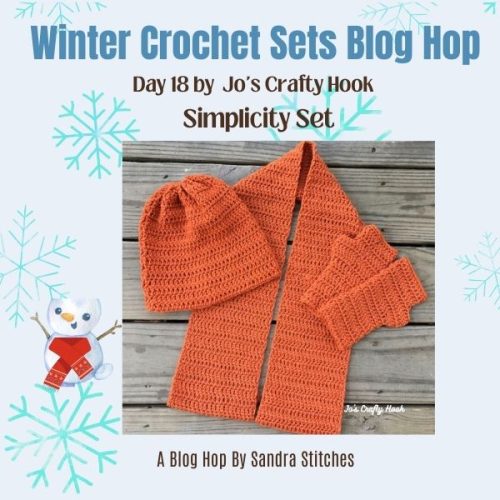
Winter is the perfect time of year to crochet Hats, Scarves and Gloves.  When the cold weather hits, you want to wear something that keeps warm and toasty.  This is why I am sharing with you one of my most popular crochet patterns, the Simplicity Set FREE Crochet Pattern.

The Simplicity Set FREE Crochet Pattern is a great Unisex crochet pattern that can be made for both Men and Women.

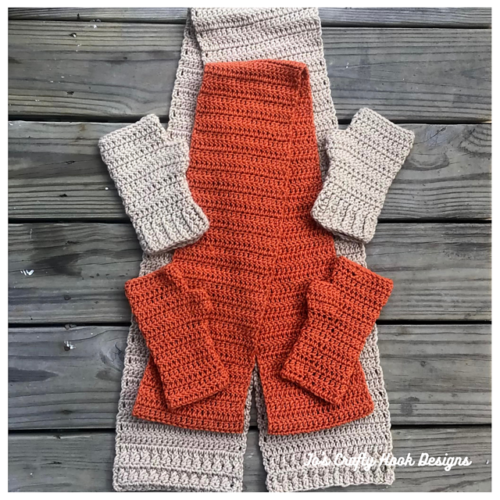
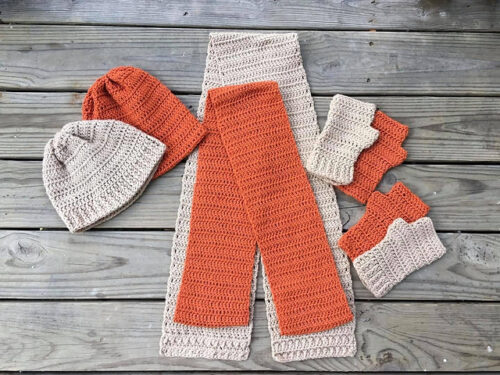
In the Simplicity Set you will find crochet patterns for a matching Hat, Scarf and Fingerless Gloves.  Also inside the Simplicity Set Crochet Pattern you will find sizes for Teens, Small & Large Adults.

This post contains affiliate links
Subscribe

Be sure to sign up for my Newsletter where you will receive messages about New Crochet Pattern Releases; FREE Crochet Patterns; Collaborations and more!  For signing up to my Newsletter you will receive a FREE premium crochet pattern!

Winter Crochet Sets Blog Hop – January 5-22, 2024

Sandra of Sandra’s Stitches is hosting the Winter Crochet Sets Blog Hop and my Simplicity Set of crochet patterns is being featured in it and you can get a FREE copy on January 18-19, 2025!

During the Winter Crochet Sets Blog Hop starting at 7a EST each day you can get a FREE Winter Crochet Set from another fabulous crochet designer.

On January 18th you can get a FREE copy of my Simplicity Set which contains 3 crochet patterns for a Beanie, a Scarf, and Fingerless Gloves.  The set has 3 sizes to choose from.

Visit the main page to the Winter Crochet Sets Blog Hop to get the Coupon Code needed to get a FREE copy on my featured day, January 18-19, 2025.

Once you have the Coupon Code, click on the button below to visit my Ravelry Store. and use it during Checkout.

**********************************************************

Information about the Simplicity Set Crochet Pattern

Materials:
US H or 5 mm Crochet Hook
250-500 yards of #4 Worsted/Aran Weight Yarn
Scissors

Abbreviations:
ch = chain
sl st = slip stitch
sc = single crochet
dc = double crochet
rem = remaining
rep = repeat
sp = space

Notes:
ch 3 does count as a dc
the stitch count is a multiple of 4
Pattern written for: Teen, Small adult, Large adult consecutively

Gauge:
US H or 5 mm Crochet Hook
14 dc x 8 rows = 4″

Ad-Free Premium Copy of Simplicity Set Crochet Pattern

You can purchase an Ad-Free version of the Simplicity Set with all 3 crochet patterns inside, the beanie, scarf, and fingerless gloves from my stores listed below.


**********************************************************

Simplicity Beanie FREE Crochet Pattern 
Simplicity Beanie
Simplicity Beanie FREE Crochet Pattern

R1:  ch 56 (64, 72) oin in the 1st ch, creating a circle, being careful not to twist the chain.  ch 3 and dc in each remaining st around.  56 (64, 72) dc

R2:  ch 3 and dc in each rem st around.  sl st in 1st st to join.  turn 56 (64, 72) dc

R3-R4:  ch 3 and dc in each remaining st around.  sl st in 1st st to join.  Turn 56 (64, 72) dc

R5:  ch 3 and dc in each remaining st around.  sl st in 1st st to join.  Turn 56 (64, 72) dc

Rep R5 until the hat measures 6.5”  ( 7.5”, 8”)   Do NOT fasten off.

Once you have met the inches required for your size, leave a long tail of 4-6 inches and weave the top of the hat closed.

**********************************************************

Simplicity Scarf FREE Crochet Pattern 

R1:  ch 21 (25, 29) Turn

R2:  ch 3 and dc in each remaining st across.  turn 21 (25, 29) dc

rep R2 until the scarf measures 44” (56”, 68”) long  or until your desired length.

Fasten off and weave in your ends.

**********************************************************

Simplicity Fingerless Gloves FREE Crochet Pattern 
Simplicity Fingerless Gloves
First Glove

R1:  ch 20, 24 or 28, join in the 1st ch, creating a circle, being careful not to twist the chain.  alt ch 2 or ch 3 and dc in each remaining st around.  sl st in 1st st to join.  turn 20 (24, 28) 

R2-R8: ch 3 and dc in each rem st around.  sl st in 1st st to join.  turn 20 (24, 28) dc

**If you would like a longer glove body, add more dc rounds here**

Thumb Shaping

R9:  ch 3, 2 dc in next 6 (8, 10) st and dc in each rem st around.  sl st in 1st st to join.  turn 26 (32, 38) st

R10-R11:  ch 3 and dc in each remaining st around.  sl st in 1st st to join.  turn 26 (32, 38) st

Thumb Decrease

R12-R14:  ch 3, dc in the next 15 (19, 23) st, skip the next 7 (8, 9) st, dc in the rem st around.  sl st in 1st st to join. turn 20 (24, 28) st

**If you would like to cover more of your hand, add more dc rounds here**

R15:  ch 1, sc in same sp and each rem st around.  sl st in 1st st to join.  20 (24, 28) sc

Fasten off.  Weave in ends.

**********************************************************

Second Glove

R1:  ch 20 (24 or 28)  sl st 1st ch to join, creating a circle, being careful not to twist the ch.  ch 3 and dc in each rem st around.  sl st in 1st st to join.  turn 20 (24, 28) dc

R2-R8: ch 3, dc in each rem st around.  sl st in 1st st to join.  turn 20 (24, 28) dc

**If you would like a longer glove body, add more dc rounds here**


Thumb Shaping

R9:  ch 3, dc in next 15 (17, 19) st, 2 dc in each rem st around.  sl st in 1st st to join.  turn 26 (32, 38) dc

R10-R11:  ch 3, dc in each rem st around.  sl st in 1st st to join.  turn 26 (32, 38) dc

Thumb Decreases

R12:  ch 3, skip the next 7 (8, 9) st, dc in each rem st around.  sl st in 1st st to join.  turn 20 (24, 28) dc

R13-R14:  ch 3, dc in each rem st around.  sl st in 1st st to join.  turn 20 (24, 28)) dc

R15
:  ch 1, sc in same sp, sc in each rem st around.  sl st in 1st to join.  20 (24, 28) sc

Fasten off.  Weave in ends.

**********************************************************

That’s it!  You have completed the Simplicity Set!  I would LOVE to see your version of my crochet pattern!  I LOVE to see all the different colors and sizes!

You can tag me at @joscraftyhook and in my FB Group Jo’s Crafty Hook Designs

You can find more of my crochet patterns at my Ravelry Store, LoveCrafts, and my Etsy Shop

You can also find many types of crochet patterns that are Free on my website.

Be sure to sign up for my Newsletter and get a FREE premium crochet pattern from me!  You will then start receiving messages about New Crochet Pattern Releases; FREE Crochet Patterns; Collaborations and more!

Find me, Jo of Jo’s Crafty Hook at the places listed below.

Email:  jo@joscraftyhook.com

Linktree

Website

Facebook Group Jo’s Crafty Hookers

Facebook Group Jo’s Crafty Hook Designs

Facebook Page Jo’s Crafty Hook

Facebook Page Jo’s Crafty Hook Designs

Facebook Page:  Crochet Designer Community

Ravelry

LoveCrafts

Etsy

Instagram

Pinterest

YouTube

Donations Accepted


Loading

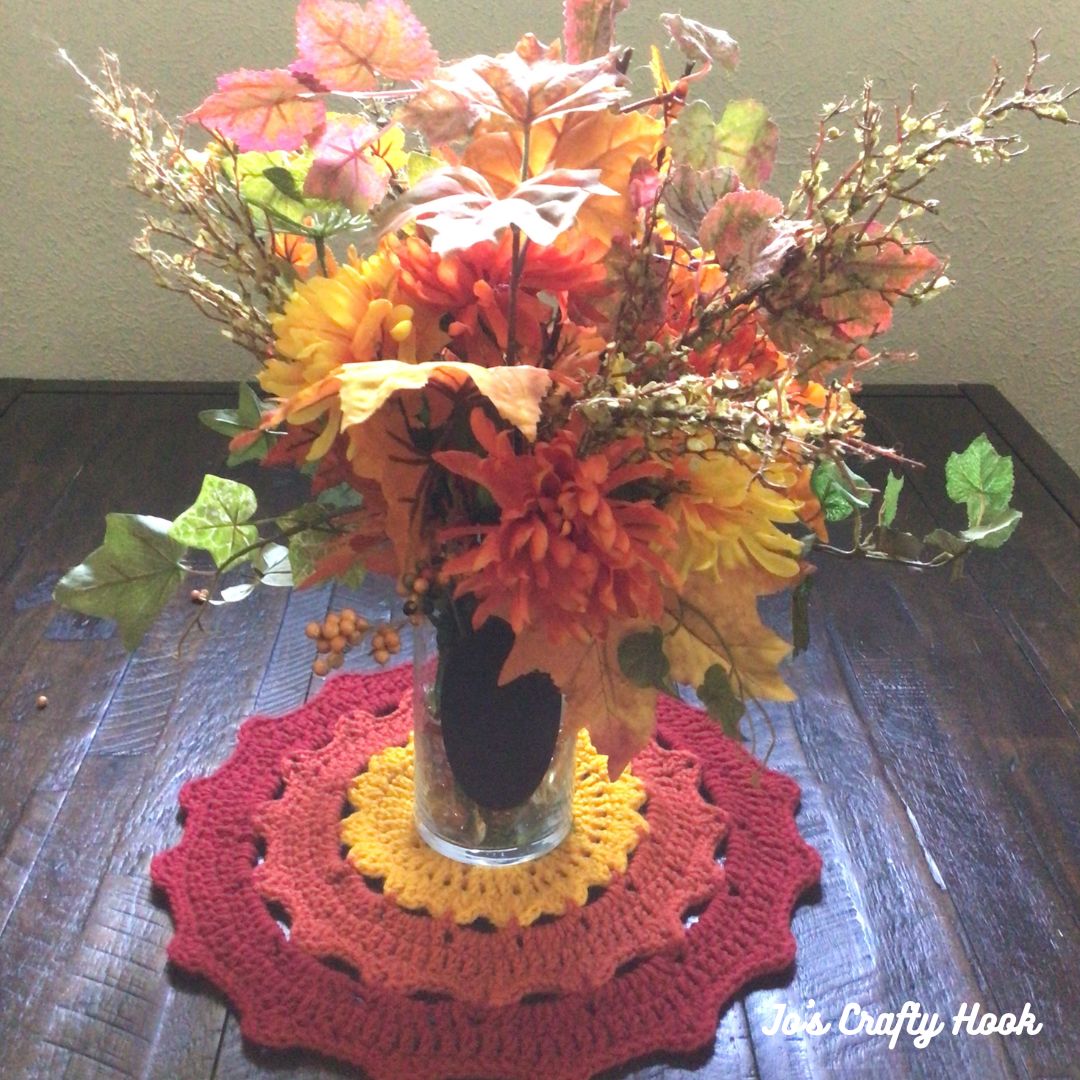
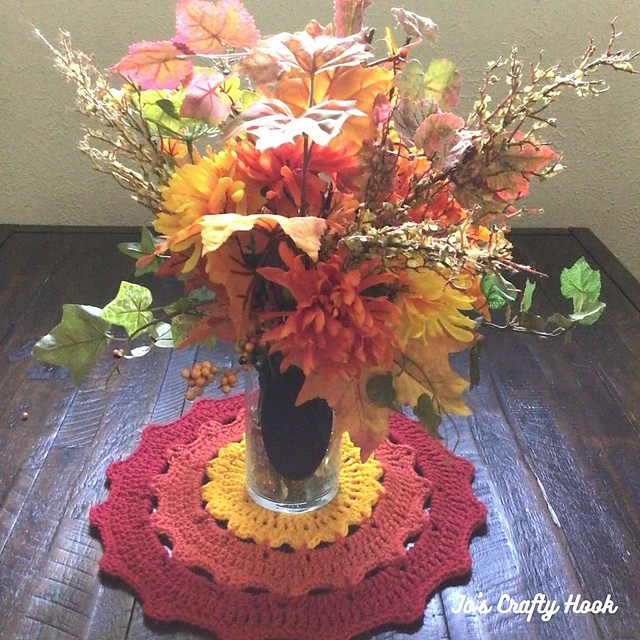
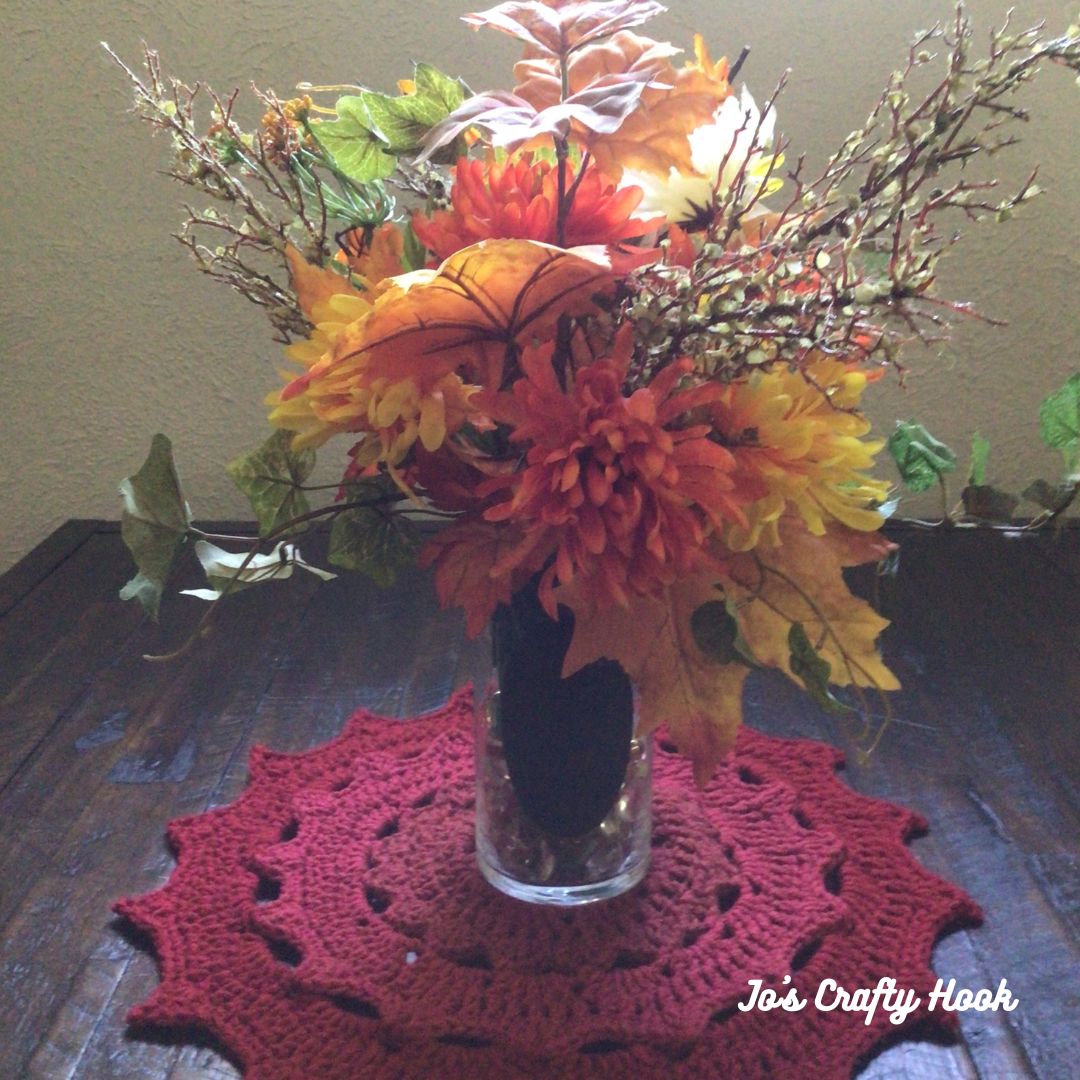
Changing Seasons Centerpiece Free Crochet Pattern

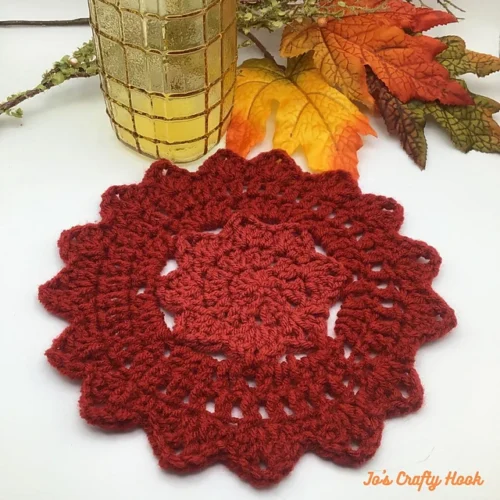
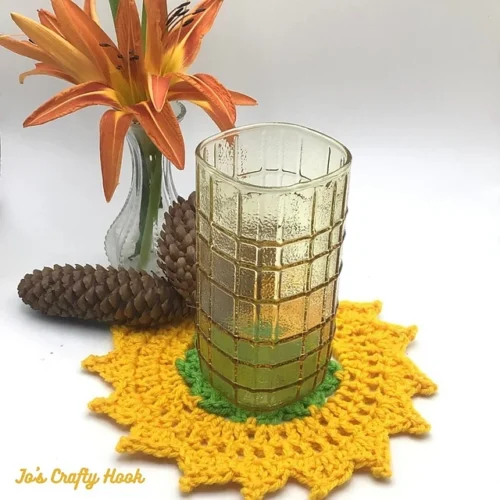
I love to decorate my home for the different seasons.  Fall is my favorite time of year. I love seeing the different flowers in bloom and all tree leaves change colors!  Inside this post you will find the Changing Seasons Centerpiece Free Crochet Pattern, with 2 versions to choose from.

You can decorate your end tables, coffee tables, and use them on your dining room table to add a festive touch!  The centerpiece is a great scrap busting crochet pattern that can be used to decorate your home any time of year! 

Also you can find the matching Changing Coasters Crochet Pattern FREE on my website.

This post contains affiliate links.

While you are there be sure to sign up for my Newsletter.  You will receive news about my New Crochet Pattern Releases, Collaborations, and MORE!  For signing up you will also get a FREE crochet pattern!

2025 Gifts Galore Blog Hop hosted by Carroway Crochet

My Changing Seasons Centerpiece Crochet Pattern is being featured in Carroway Crochet’s 2025 Gifts Galore Blog Hop

My Day is November 25th-November 26th and you can get a FREE premium copy of my Changing Seasons Centerpiece Crochet Pattern!

My Day

From November 25th-26th visit the 2025 Gifts Galore Blog Hop to get the Coupon Code needed to get a FREE premium copy of my Changing Seasons Centerpieces Crochet Pattern.  Once you have the code, click on the button below and use the code at checkout.


In the mean time you will find 24 days of FREE premium crochet patterns in the 2025 Gifts Galore Blog Hop!

Ad-Free Premium Copy

If you can’t wait, you can purchase an Ad-Free premium copy from my Ravelry, LoveCrafts, or Etsy Shop

Below you will find a FREE crochet pattern below with 2 versions to choose from!

Information Needed

I used Lion Brand Basic Stitch #4 Medium Weight Yarn.  (3.5oz, 100g) (185 yds, 170 m)

Materials:
US H Crochet Hook or 5 mm Crochet Hook
200-250  yards of #4 ply Worsted/Aran Weight Yarn
Scissors
Tapestry Needle

Abbreviations/Stitches Used:
ch = chain
st = st
sc = single crochet
sp = space
dc = double crochet
sl st = slip stitch
alt ch 2 = alternate chain 2
beg shell = beginning shell
inc = increase
rep = repeat
rem = remaining

Special Stitches:

alternate chain 2 = takes the place of the ch 3 for a cleaner edge.
beginning shell = (alt ch 2 or ch 2, dc in same st, ch 2,  2 dc) all in the same space.
shell = (2 dc, ch 2, 2 dc) all in the same space.
beginning picot shell = alt ch 2 or ch 2, dc in same st, ch 4, sl st in 1st ch of ch 4, 2 dc) all in the same space.
picot shell = 2 dc, ch 4, sl st in 1st ch of ch 4, 2 dc) all in the same space.

Notes:

  • Table cover is worked in the round.
  • There are 2 versions to choose from.
  • alt ch 2 or ch 2 does count as a half double crochet.
  • alt ch 2 takes the place of a chain 2 or chain 3.
  • I changed colors after a certain amount of rounds, but you don’t have to.
  • Be sure to use the same thickness of yarn.

Finished Size:
20” x 20” Version 1
22” x 22” Version 2

Gauge:
Hook US H Crochet Hook or 5 mm Crochet Hook
Gauge Swatch is worked in the round.
4 shells x 4 rows = 4”

Gauge Swatch:
Swatch is worked in the round.
R1-R3 of Base


Changing Seasons Centerpiece Crochet Pattern -Version 1

Using MC

R1: ch 3 and 8 dc in 1st ch.  sl st in 1st dc to join. (8 dc)
Optional:  Make a Magic Circle adding 8 dc.  sl st in 1st st to join.  (8 dc)
R2 (inc): alt ch 2 (or ch 2), dc in same st and 2 dc in each st around.  sl st in 1st st to join.  (16 dc)
R3:  beg shell, sc in next st, *shell in next st, sc in next st.  rep from * around. sl to join in 1st st to join.  (8 Shells)

Fasten off and weave in ends.

Change Color

R4:  attach yarn with a sl st in ch-2 sp, ch 1 and sc in ch-2 sp *ch 5, sc in next ch-2 sp of shell.  rep from * around.  sl st into 1st st to join.  (8 ch-5 sp)
R5:  alt ch 2 (or ch 2) and 4 dc all in ch-5 sp *5 dc in each ch-5 sp around.   sl st in 1st st to join.  (40 dc)
R6: alt ch 2 (or ch 2) in 1st st, dc in each st around.  sl st in 1st st to join.  (40 dc)
R7:  beg shell, sc in 1st st, shell *sc in next 2 st, shell, sc in next st, shell.  rep from * around until last 2 st.  sc in last 2 st.  sl st in 1st st to join.  (16 shells & 24 sc)

Fasten off and weave in ends.

Change color

R8:  attach yarn with a sl st in ch-2 sp, ch 1 and sc in ch-2 sp *ch 5, sc in next ch-2 sp of shell.  rep from * around.  sl st into 1st st to join.  (16 ch-5 sp)
R9 (inc):  alt ch 2 (or ch 2) and 4 dc all in ch-5 sp *5 dc in each ch-5 sp around.  sl st in 1st st to join.  (80 dc)
R10:  alt ch 2 (or ch 2) in 1st st, dc in each st around.  sl st in 1st st to join.  (80 dc)
R11:  ch 1, sc in same st, next st. shell in next st *sc in next 4 st, shell.  rep from * around until last 2 st. sc in last 2 st.  sl st in 1st st to join.  (16 Shells & 64 sc)

Change color 

R12:  attach yarn with a sl st in ch-2 sp, ch 1 and sc in ch-2 sp *ch 7, sc in next ch-2 sp of shell.  rep from * around.  sl st into 1st st to join.  (16 ch-7 sp)
R13 (inc):  alt ch 2 (or ch 2) and 6 dc all in ch-7 sp *7 dc in next ch-7 sp.  rep from * around.  sl st in 1st st to join.  (112 dc)
R14:  alt ch 2 (or ch 2) in 1st st, dc in each st around.  sl st in 1st st to join.  (112 dc)
R15:  ch 1, sc in same st, sc in next 2 st, shell in next st *sc in next 6 st, shell.  rep from * around until last 3 st.  sc in last 3 st.  sl st in 1st st to join. (16 Shells & 96 sc)

Fasten off and weave in ends.

Make a Matching Set

If you like this crochet pattern, you can find the matching Changing Seasons Centerpiece Free Crochet Patterns HERE on my website or for a small fee, you will find it at Ravelry, LoveCrafts, or Etsy.


Changing Seasons Centerpiece Crochet Pattern – Version 2

Using MC

R1: ch 3 and 8 dc in 1st ch.  sl st in 1st dc to join. (8 dc)
Optional:  Make a Magic Circle adding 8 dc.  sl st in 1st st to join.  (8 dc)
R2 (inc): alt ch 2 (or ch 2), dc in same st and 2 dc in each st around.  sl st in 1st st to join.  (16 dc)
R3:  beg shell, sc in next st, *shell in next st, sc in next st.  rep from * around. sl to join in 1st st to join.  (8 Shells)

Fasten off and weave in ends

Change Color

R4:  attach yarn with a sl st in ch-2 sp, ch 1 and sc in ch-2 sp *ch 5, sc in next ch-2 sp of shell.  rep from * around.  sl st into 1st st to join.  (8 ch-5 sp)
R5:  alt ch 2 (or ch 2) and 4 dc all in ch-5 sp *5 dc in each ch-5 sp around.  sl st in 1st st to join.  (40 dc)
R6: alt ch 2 (or ch 2) in 1st st, dc in each st around.  sl st in 1st st to join.  (40 dc)
R7:  beg shell, sc in 1st st, shell *sc in next 2 st, shell, sc in next st, shell.  rep from * around until last 2 st.  sc in last 2 st.  sl st in 1st st to join.  (16 shells & 24 sc)

Fasten off and weave in ends.

Change color 

R8:  attach yarn with a sl st in ch-2 sp, ch 1 and sc in ch-2 sp *ch 6, sc in next ch-2 sp of shell.  rep from * around.  sl st into 1st st to join.  (16 ch-6 sp)
R9 (inc):  alt ch 2 (or ch 2) and 4 dc all in ch-6 sp *5 dc in each ch-6 sp around.  sl st in 1st st to join.  (80 dc)
R10:  alt ch 2 (or ch 2) in 1st st, dc in each st around.  sl st in 1st st to join.  (80 dc)
R11:  ch 1, sc in same st, next st. shell in next st *sc in next 4 st, shell.  rep from * around until last 2 st. sc in last 2 st.  sl st in st to join.  (16 Shells & 64 sc)

Fasten off and weave in ends.

Change color 

R12:  attach yarn with a sl st in ch-2 sp, ch 1 and sc in ch-2 sp *ch 7, sc in next ch-2 sp of shell.  rep from * around.  sl st into 1st st to join.  (16 ch-7 sp)
R13 (inc):  alt ch 2 (or ch 2) and 6 dc all in ch-7 sp.  *7 dc in each ch-7 sp around.  sl st in 1st st to join.  (112 dc)
R14:  alt ch 2 (or ch 2) in 1st st, dc in each st around.  sl st in 1st st to join.  (112 dc)

Edging

R15:  ch 1 sc in same st, sc in next 2 st.  picot shell *sc in next 6 st, picot shell.  rep from * around until last 3 st.  sc in last 3 st.  sl st in top of beg shell to join.  (16 Picot Shells & 96 sc)

Fasten off and weave in ends.

Make the Matching Coaster Set

If you like this crochet pattern, you can find the matching Changing Seasons Coasters Free Crochet Patterns HERE on my website or for a small fee, you will find it at Ravelry, LoveCrafts, or Etsy.

TESTIMONIAL from Catherine Henderson

Joey Lea Baird of Jo’s Crafty Hook has created another stunning pattern she called ” The Changing Seasons Centerpiece.

She has created this centerpiece using basic stitches with several different finishes.

I was so excited & grateful for being part of her test team!

I worked on my version for a weekend  This amazing centerpiece works up so fast, and changes with every new row.  The pattern works great for either a left or right handed crocheter.  With comprehensive easy to understand instructions and photos for reference.

I had so much fun making it, that I found myself rushing through my housework so I could sit down to work on my creation.  I used Value Ball Kringle Sparkle Yarn 8ply, in fall colors, with a 3.5mm hook. You can find this fantastic pattern!

********************************************************

Find me, Jo of Jo’s Crafty Hook at the places listed below.

Email:  joeybaird@aol.com

Linktree

Website

Facebook Group Jo’s Crafty Hookers

Facebook Group Jo’s Crafty Hook Designs

Facebook Page Jo’s Crafty Hook

Facebook Page:  Crochet Designer Community

Ravelry

LoveCrafts

Etsy

Instagram

YouTube

Pinterest

Donations Accepted

Loading

Changing Seasons Coasters Free Crochet Pattern

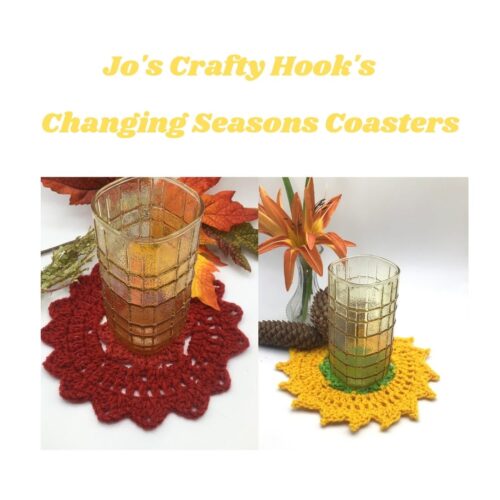
I designed the Changing Seasons Coasters because I love to decorate my home for the different seasons.  Fall is my favorite time of year. I love seeing all tree leaves change colors and the different fall flowers!  You can decorate your end tables, coffee tables, and use them on your dining room table to add a festive touch for any season.  There are 2 versions of the coaster inside this post that you can make again and again for all seasons.  


This post contains affiliate links that help me raise money to allow me to share more information with you.  

While you are there be sure to sign up for my Newsletter by clicking on the Subscribe Button in the top right hand corner.  You will receive news about my New Crochet Pattern Releases, Collaborations, and MORE!  For signing up you will also get a FREE crochet pattern!


************************************************

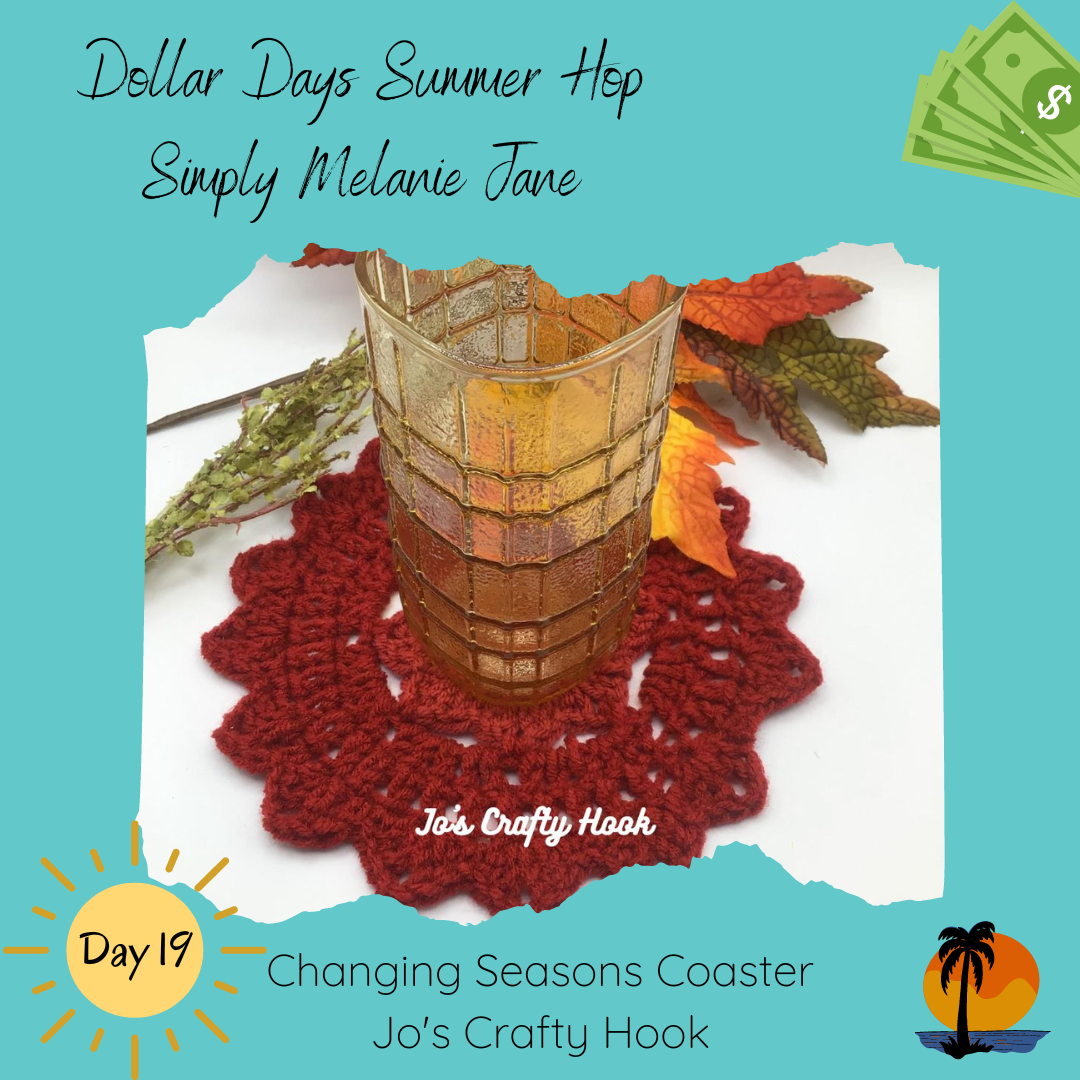
On June 19, 2023 you can get the Changing Season Coasters Premium Crochet Pattern for $1 as part of the Dollar Days Summer Blog Hop!  That’s right, $1!


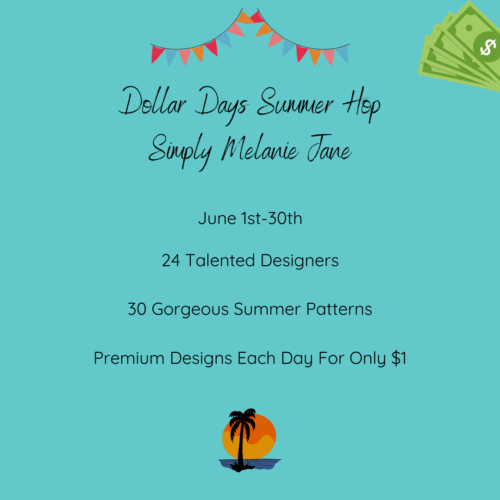
Simply Melanie Jane is hosting the Dollar Days Summer Blog Hop from June 1-30, 2023 where you can get 30 days of different premium crochet patterns for $1 each!


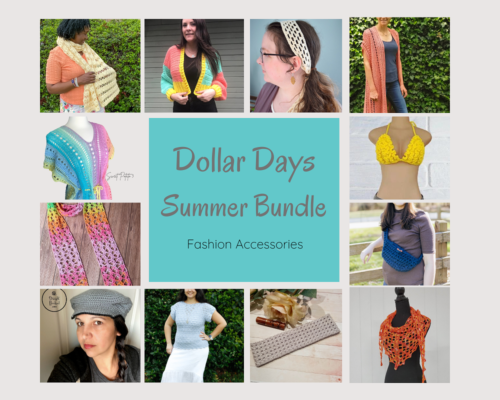
OR you can take advantage of the Dollar Days Summer Bundle where you can get ALL 30 crochet patterns from the blog hop for $12.99!!!  30 premium crochet patterns for $12.99 is an AWE-some deal!


From June 1-30, 2023 each day visit the Dollar Days Summer Blog Hop to take advantage of the $1 day’s deal or get ALL 30 premium crochet patterns in the Dollar Days Summer Bundle for $12.99.


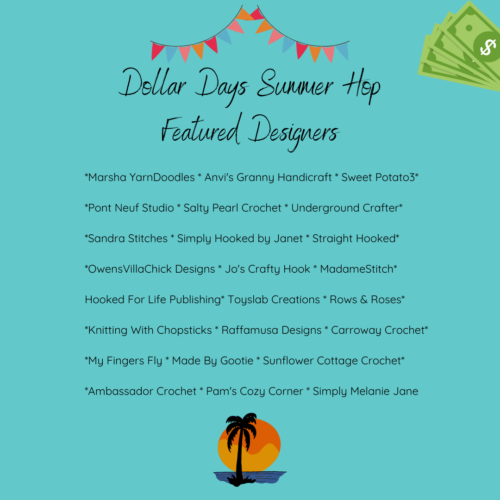
Look at some of the AWE-some crochet designers and their crochet designs that are being featured in this event!


Again, on June 19, 2023 starting at 8a EST until June 20, 2023 7:59a EST you can get my Changing Seasons Coasters Crochet Pattern for $1!  Use the Button below to get my day’s Coupon Code needed to get your premium copy.


Click on the Premium Pattern Ravelry Download Button below and use my Coupon Code at Checkout from my Ravelry Store and get the Changing Seasons Coasters Crochet Pattern for $1!


************************************************

Changing Seasons Coaster Crochet Patterns

Materials:

US H Crochet Hook or 5 mm Crochet Hook
MC – 2 yards of #4 ply Worsted/Aran Weight Yarn
CC – 5 yards of #4 ply Worsted/Aran Weight Yarn
Scissors
Tapestry Needle

Abbreviations/Stitches Used:

ch = chain
st = st
sc = single crochet
sp = space
dc = double crochet
sl st = slip stitch
alt ch 2 = alternate chain 2
beg shell = beginning shell
inc = increase
rep = repeat
MC = Main Color
CC = Contrasting Color


Special Stitches:

alternate chain 2 = takes the place of the ch 3 for a cleaner edge.
shell = (2 dc, ch 2, 2 dc) all in the same space.
beginning shell = (alt ch 2 or ch 2, dc in same st, ch 2,  2 dc) all in the same space.
beginning picot shell = alt ch 2 or ch 2, dc in same st, ch 4, sl st in 1st ch of ch 4, 2 dc) all in the same space.
picot shell = 2 dc, ch 4, sl st in 1st ch of ch 4, 2 dc) all in the same space.


Notes:

  • Coasters worked in the round.  
  • There are 2 versions to choose from.
  • alt ch 2 or ch 2 does count as a half double crochet.
  • alt ch 2 takes the place of a chain 2 or chain 3.
  • I changed colors after a certain amount of rounds, but you don’t have to.
  • Be sure to use the same thickness of yarn.


Finished Size:

6” x 6” Version 1

8” x 8” Version 2

Gauge:

Hook US H Crochet Hook or 5 mm Crochet Hook
4 shells x 4 rows = 4”

Gauge Swatch:
Swatch is worked in the round.
R1-R3 of Base

************************************************Version 1 – Coaster Crochet Pattern


Using MC

R1: ch 3 and 8 dc in 1st ch.  sl st in 1st dc to join. (8 dc)
Optional:  Make a Magic Circle adding 8 dc.  sl st in 1st st to join.  (8 dc)

R2 (inc): alt ch 2 (or ch 2), dc in same st and 2 dc in each st around.  sl st in 1st st to join.  (16 dc)

R3:  beg shell, sc in next st, *shell in next st, sc in next st.  rep from * around. sl to join in 1st st to join.  (8 Shells)

Fasten off and weave in ends.


Using CC

R4:  attach yarn with a sl st in ch-2 sp, ch 1 and sc in ch-2 sp *ch 5, sc in each ch-2 sp of shell around.  sl st into 1st st to join.  (8 ch-5 sp)  

R5:  alt ch 2 (or ch 2) and 4 dc all in ch-5 sp *5 dc in each ch-5 sp around.  sl st in 1st st to join.  (40 dc)

R6: alt ch 2 (or ch 2) in 1st st, dc in each st around.  sl st in 1st st to join.  (40 dc)

R7:  beg shell, sc in 1st st, shell *sc in next 2 st, shell, sc in next st, shell.  rep from * around until last 2 st.  sc in last 2 st.  sl st in top of beg shell to join.  (16 shells & 24 sc)

Fasten off and weave in ends.

Make a Matching Set

If you like this crochet pattern, you can find the matching Changing Seasons Centerpiece Free Crochet Patterns HERE on my website or for a small fee, you will find it at Ravelry, LoveCrafts, or Etsy.


************************************************Version 2 – Coaster Crochet Pattern


Using MC

R1: ch 3 and 8 dc in 1st ch.  sl st in 1st hdc to join. (8 dc)
Optional:  Make a Magic Circle adding 8 dc.  sl st in 1st st to join.  (8 dc)

R2 (inc): alt ch 2 (or ch 2), dc in same st and 2 dc in each st around.  sl st in 1st st to join.  (16 dc)

R3:  beg shell, sc in next st, *shell in next st, sc in next st.  rep from * around. sl st in top of ch 3 to join.  (8 Shells)

Fasten off and weave in ends.


Using CC

R4:  attach yarn with a sl st in ch-2 sp, ch 1 and sc in ch-2 sp *ch 5, sc in next ch-2 sp of shell.  rep from * around.  sl st into 1st st to join.  (8 ch-5 sp)  

R5:  alt ch 2 (or ch 2) and 4 dc all in ch-5 sp *5 dc in each ch-5 sp.  sl st in 1st st to join.  (40 dc)

R6: alt ch 2 (or ch 2) in 1st st, dc in each st around.  sl st in 1st st to join.  (40 dc)

Edging

R7:  beg picot shell, sc in 1st st, picot shell *sc in next 2 st, picot shell, sc in next st, picot shell.  rep from * around until last 2 st.  sc in last 2 st.  sl st in top of beg shell to join.  (16 shells & 24 sc)

Fasten off and weave in ends.

Make a Matching Set

If you like this crochet pattern, you can find the matching Changing Seasons Centerpiece Free Crochet Patterns HERE on my website or for a small fee, you will find it at Ravelry, LoveCrafts, or Etsy.


************************************************


**Would you like to be kept in the loop about what is happening with Jo’s Crafty Hook?  Well, why not sign up to my Newsletter?  As a Special Bonus for signing up, you will receive a FREE crochet pattern designed by me.  Just click on the Subscribe Button in the top Right Hand corner of your screen**


Find me, Jo of Jo’s Crafty Hook at the places listed below.

Email:  j.o@joscraftyhook.com

Website

Facebook Group Jo’s Crafty Hookers

Facebook Group Jo’s Crafty Hook Designs

Facebook Page Jo’s Crafty Hook

Facebook Page:  Crochet Designer Community

Ravelry
LoveCrafts

Etsy

Instagram

Pinterest

Twitter

YouTube

Donations Accepted


Loading