I designed a stitch a couple of years ago that I called the Lilac Cluster Stitch. I always wanted to use the stitch in a design that works in rows. The Lilac Cluster Beanie and Cowl I designed are worked in the round. I think it turned out pretty good! lol

The Lilac Cluster Stitch uses the basic crochet stitches with stitch decreases thrown in. I used the Double Crochet 3 Together and the Double Crochet 6 Together.
I know this sounds complicated, but once you practice these stitches you will become a master at them.
You can find a Left Handed Video Tutorial on my YouTube Channel that teaches you how to make the Lilac Cluster Beanie using the Lilac Cluster Stitch. You can also find more of my Left Handed Video Tutorials on my YouTube Channel.
CAL-Crochet A Long’s Design-a-Scarf Challenge
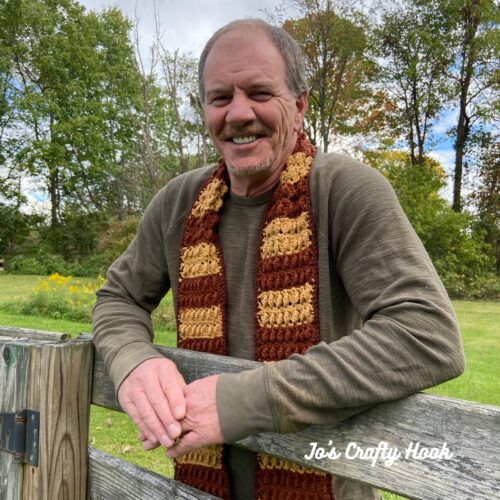
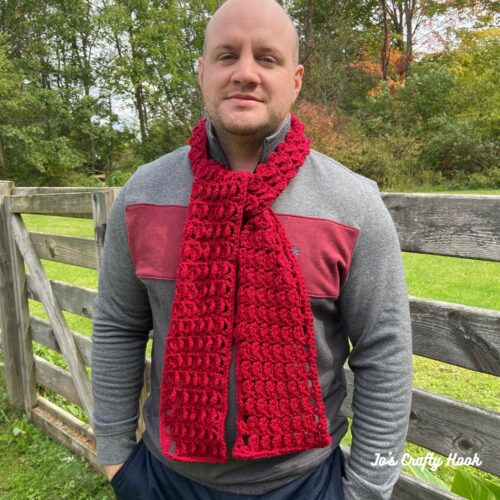
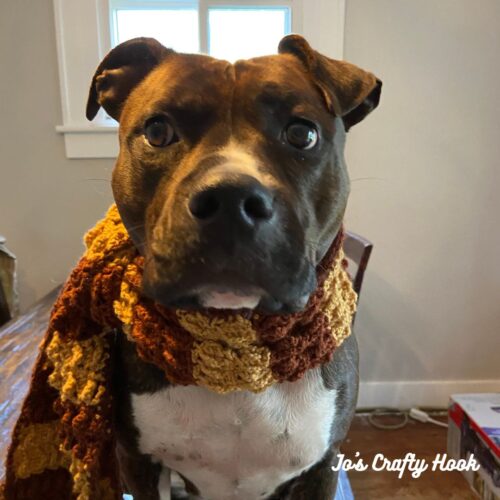
The Oyster Shell Scarf was designed as part of a Design-a-Scarf Challenge Contest hosted by CAL-Crochet A Long.
There were a lot of beautiful scarves designed by a number of crochet designers. You can find out more information about the Design-a-Scarf Challenge on CAL-Crochet A Long’s website.
There are many CALs going on year round at CAL – Crochet A Long. You can always find them at their website, their FB Page, and inside their FB Group.
Tester’s Testimonies about the Oyster Shell Scarf Crochet Pattern.
Joke PatrickVandecasteele-Wegsteen
Very nice pattern with a very clear explanation. By repeating the rows over and over, you will quickly master the stitches. I think it’s a plus that there are step-by-step pic tutorials for left-handed crocheters.


Carol Ann Reddy
The Oyster scarf is a great pattern. Written with clarity and easy comprehension. I found it very easy to work on and finished it in no time! Working with Joey was a pleasure. This scarf can be tackled even by a beginner and the result is very satisfying. I hope that I can test any of her future patterns as well.


Information Needed for Scarf

Terminology:
US Terms
Skill Level:
Advanced Beginner/Intermediate
I used Vintage Aunt Lydia’s #4 Medium Weight Yarn. 100% Acrylic Yarn (3.5 oz/260 yds) (100 g/237 m)
I used Loops & Threads Impeccable #4 Medium Weight Yarn. 100% Acrylic Yarn (4.5 oz/268 yds) (128 g/245 m)
Materials:
US I Crochet Hook or 5.5 mm
MC – 350 yds #4 Medium Weight Yarn
CC – 20 yds #4 Medium Weight Yarn
Scissors
Tapestry Needle
Abbreviations/Stitches Used:
ch = chain
st(s) = stitch(s)
sl st = slip stitch
R = Row
dc = double crochet
alt ch 2 = alternate chain 2
rep = repeat
sp(s) = space
sk = skip
fpdc = front post double crochet
fpdc3tog = front post double crochet 3 together
fpdc6tog = front post double crochet 6 together
Special Stitches:
Shell Stitch – when you crochet (3 dc, ch 2, 3 dc) all in the same stitch.
Alternate Chain 2 – is used in place of ch 3, this creates a smoother edge.
Front Post Double Crochet – double crochet going around the front post of the dc from the previous row.
Front Post Double Crochet 3 Together – when you do a front post double crochet 3 decrease together around the next 3 double crochet, decreasing them into one stitch.
Front Post Double Crochet 6 Together – when you do a front post double crochet 6 dc decrease together around the next 6 double crochet, decreasing them into one stitch.
Video Tutorials (Left Hand):
Notes:
ch 3 counts as a dc
ch 2 counts as a stitch
alt ch 2 counts as a dc
fpdc3tog creates a decrease into 1 st
fpdc6tog creates a decrease into 1 st
scarf is done in a multiple of 3 + 2
for a wider scarf add multiples of 3
Gauge:
US I Crochet Hook or 5.5 mm
12 dc x 8 rows = 4”
Gauge Swatch:
US I Crochet Hook or 5.5 mm
Gauge Swatch only has 5 rows
**If you do not meet gauge, try going up or down a hook size**
R1: ch 17, dc in 4th ch and each ch across. turn (15 dc)
R2: alt ch 2 or ch 3, dc in each st across. turn (15 dc)
R3: alt ch 2 or ch 3, dc in next st, sk 3 st. *shell in next st, sk 3. rep from * once more. dc in last 2 sts. turn (4 dc & 2 shells)
R4: alt ch 2 or ch 3, dc in next st. fpdc3tog over the 1st 3 dc of shell, ch 2, sc in ch-2 sp of shell, ch 2. fpdc6tog over the next 6 dc of shells. ch 2, sc in ch-2 sp of shell, ch 2, fpdc3tog over the last 3 dc of shell. 2 dc in last 2 sts. turn (4 ch-2 sp, 2 sc, 2 fpdc3tog & 1 fpdc6tog)
R5: alt 2 or ch 3, dc in next st. *shell in sc. rep from * once more, dc in last 2 sts. turn (4 dc & 2 shells)
Oyster Shell Crochet Pattern
**Note: If you would like a smaller or wider scarf, add or subtract multiples of 3**
Using MC
R1: ch 25, dc in the 4th ch and each ch across. turn (23 dc)
R2: alt ch 2 or ch 3, dc in each st across. turn (23 dc)
R3: alt ch 2 or ch 3, dc in next st, sk 3 sts. *shell in next st, sk 3 sts. rep from * 3 times, dc in last 2 sts. turn (4 dc & 4 shells)
R4: alt ch 2 or ch 3, dc in next st. fpdc3tog over the 1st 3 dc of shell, ch 2, sc in ch-2 sp of shell, ch 2. *fpdc6tog over the next 6 dc of shells. ch 2, sc in ch-2 sps, ch 2. rep from * twice. fpdc3tog over the last 3 dc of shell. 2 dc in last 2 sts. turn (4 dc, 4 sc, 8 ch-2 sps, 2 fpdc3tog & 3 fpdc6tog)
R5: alt ch 2 or ch 3, dc in next st. *shell in sc from previous row. rep from * 3 times, dc in last 2 sts. turn (4 dc & 4 shells)
Rep R4 & R5 until your scarf measures 48”, 56”, 64”, 72”, 80” or until your desired length. Repeat R4 once more. Do NOT fasten off.
Before Border:
R1: alt ch 2 or ch 3, dc in next st, dc in top of fpdc3tog , *dc in ch-2 sp, dc in sc, dc in ch-2 sp, dc in top of fpdc6tog. rep from * until last fpdc3tog, dc in top of fpdc3tog, dc in last 2 sts. turn (21 dc, you lose 2 sts)
R2-R3: alt ch 2 or ch 3, dc in each st across. turn (21 dc)
Using CC
Step 1:
Be sure you turn after R3. sc in each st across. (21 sc)
Step 2:
Turn to work down the side of the scarf. *sk the side post, ch 2, sc in next sc. rep from * down the side of the scarf.
Step 3:
Turn to work across the bottom of the scarf. ch 2, sc in each st across. (23 sc)
Step 4:
Turn to work up the side of the scarf. *ch 2, sk the side post, sc in next sc. rep from * up the side of the scarf. ch 2 and sl st in 1st st to join.
Fasten off and weave in ends.
You can also find more of my Scarf crochet patterns and SO much more at my Ravelry Store and at LoveCrafts.
Find me, Jo of Jo’s Crafty Hook at the places listed below.
Email: j.o@joscraftyhook.com
Facebook Group Jo’s Crafty Hookers
Facebook Group Jo’s Crafty Hook Designs
Facebook Page Jo’s Crafty Hook
Facebook Page: Crochet Designer Community